

This product can be set up using
any current web browser, i.e.,
Internet Explorer 6.x, Netscape
D-Link Wireless Print
DP-311P
Navigator 7.x.
Before You Begin
You will need an 802.11b wirelessly enabled laptop or desktop computer and a
parallel-port printer that will connect to the DP-311P.
Important: TURN OFF the power to the printer before installing
the DP-311P.
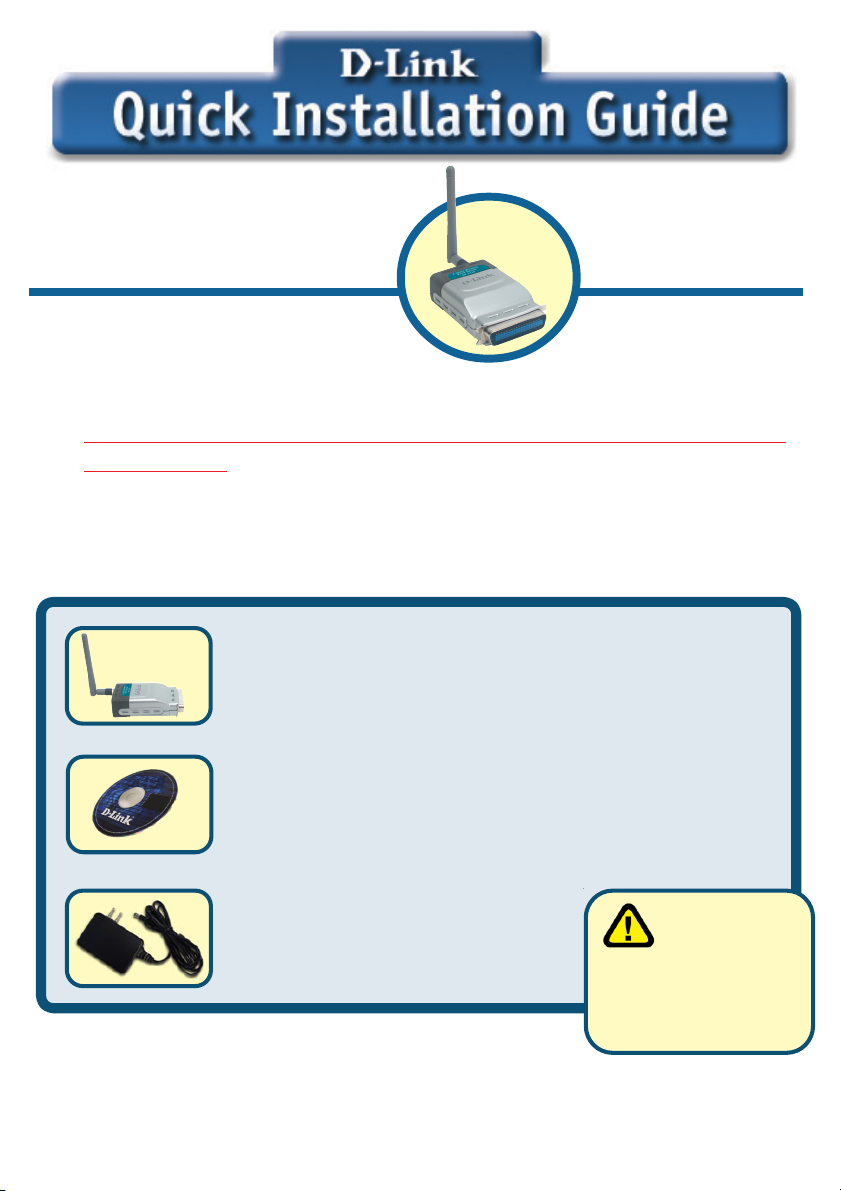
Check Your Package Contents
These are the items included with your DP-311P purchase:
DP-311P Wireless Print Server
Server
CD-ROM (containing Manual and Warranty)
5V DC 2.0A Power Adapter
If any of the above items are missing, please contact your reseller.
©2003 D-Link Systems, Inc. All rights reserved. Trademarks or registered trademarks are the property of their respective holders. Software and specifications
subject to change without notice. DP-311P .07032003
1
Using a power
supply with a
different voltage
rating will damage
this product and void
its warranty.

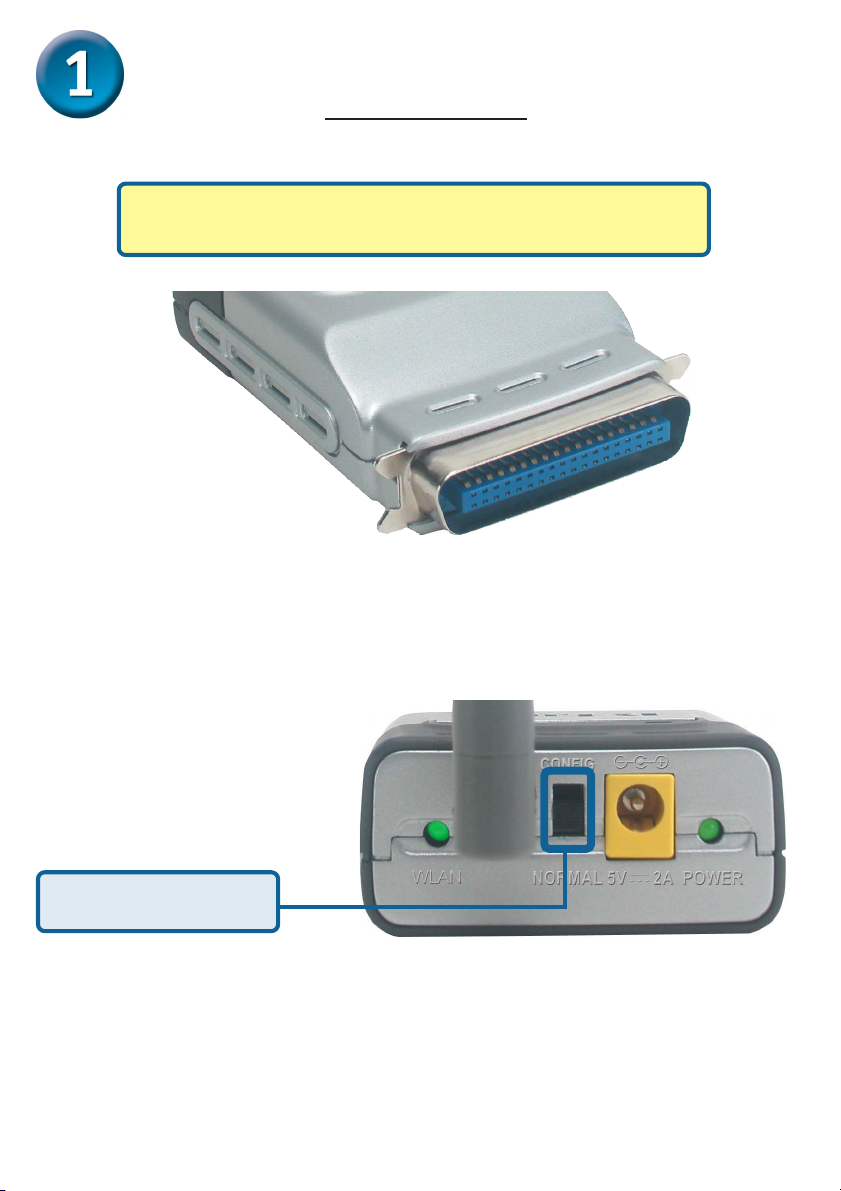
Product Overview
Antenna: - Used to
wirelessly connect to
802.11b compatible
devices.
Parallel Port - Used to
connect to the parallel
port on your printer.
POWER LED – a solid
light indicates a proper
connection to the power
WLAN LED – This LED blinks
during wireless data transmission.
Operation Mode Switch
This switch is used to put the DP-311P into configuration mode or normal mode.
Receptor for
Power Adapter.
supply.
2
Preparing your DP-311P for network
printing in Windows XP
Note: Do not connect the power cord to the DP-311P until
you are advised to do so.
Attach the included antenna to the rear of the DP-311P.
Make sure that the Printer is turned OFF.
Move switch to ‘Config’
position.
Connect the DP-311P to the parallel port of the printer.
Plug one end of the power adapter into the DP-311P (in the DC Power
Input port, shown in the illustration above) and the other end into your
electrical outlet. The DP-311P LED’s will light up to indicate that the
power is connected properly.
Turn ON the printer.
3
Preparing your DP-311P for network
printing in Windows XP (cont.)
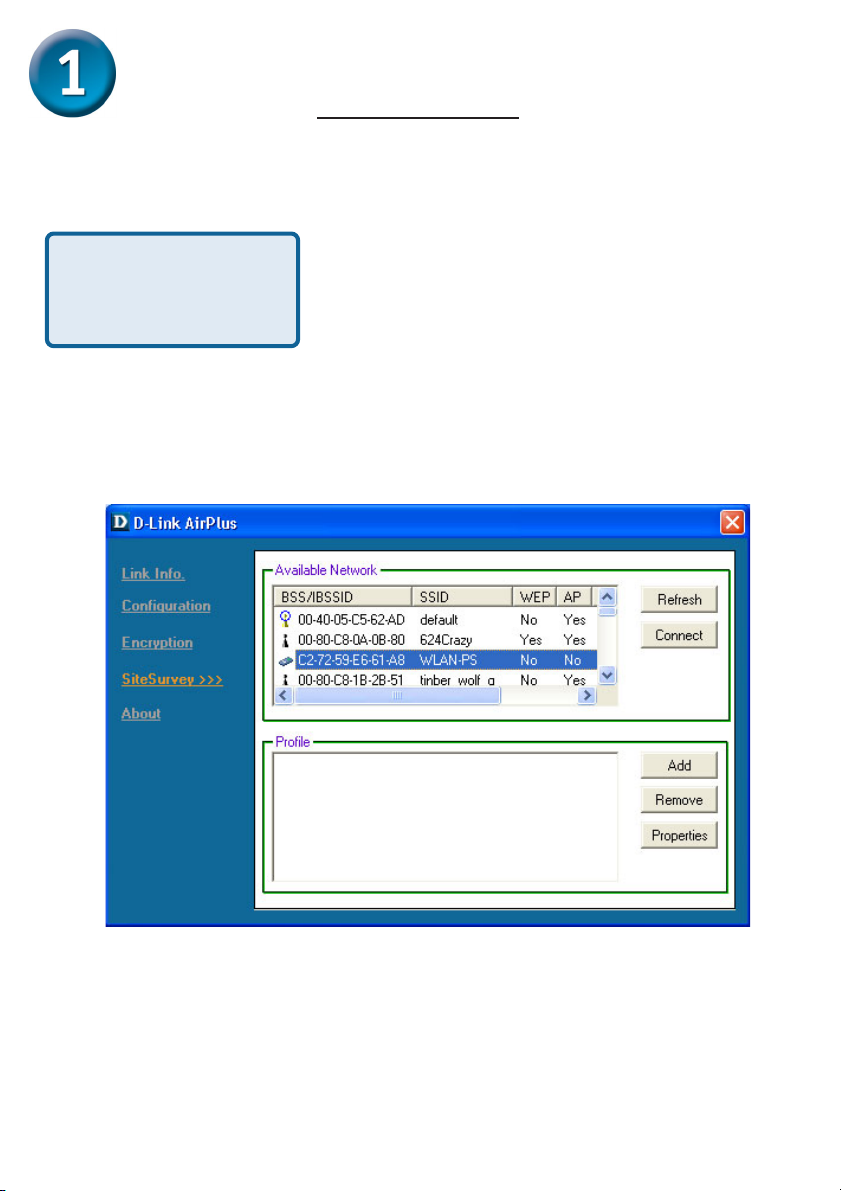
Use an 802.11b wireless client card to connect to the DP-311P wirelessly
using the following settings:
SSID: WLAN-PS
Wireless Mode: Ad-Hoc
Channel: 1
WEP: Disable
For example, with D-Link’s DWL-650+ AirPlus utility, you should see an Available Ad-Hoc
Network by the name of WLAN-PS. Highlight this Network and connect to it.
4
Preparing your DP-311P for network
printing in Windows XP (cont.)
In order to configure the DP-311P, your computer
must be in the same IP range as the Wireless Print
Server. The following steps will walk you through
setting a static IP Address in the same range as the
DP-311P.
Go to Start > right click on
My Network Places >
select Properties > Double-click on
the Network Connection associated
with the Wireless Network Card.
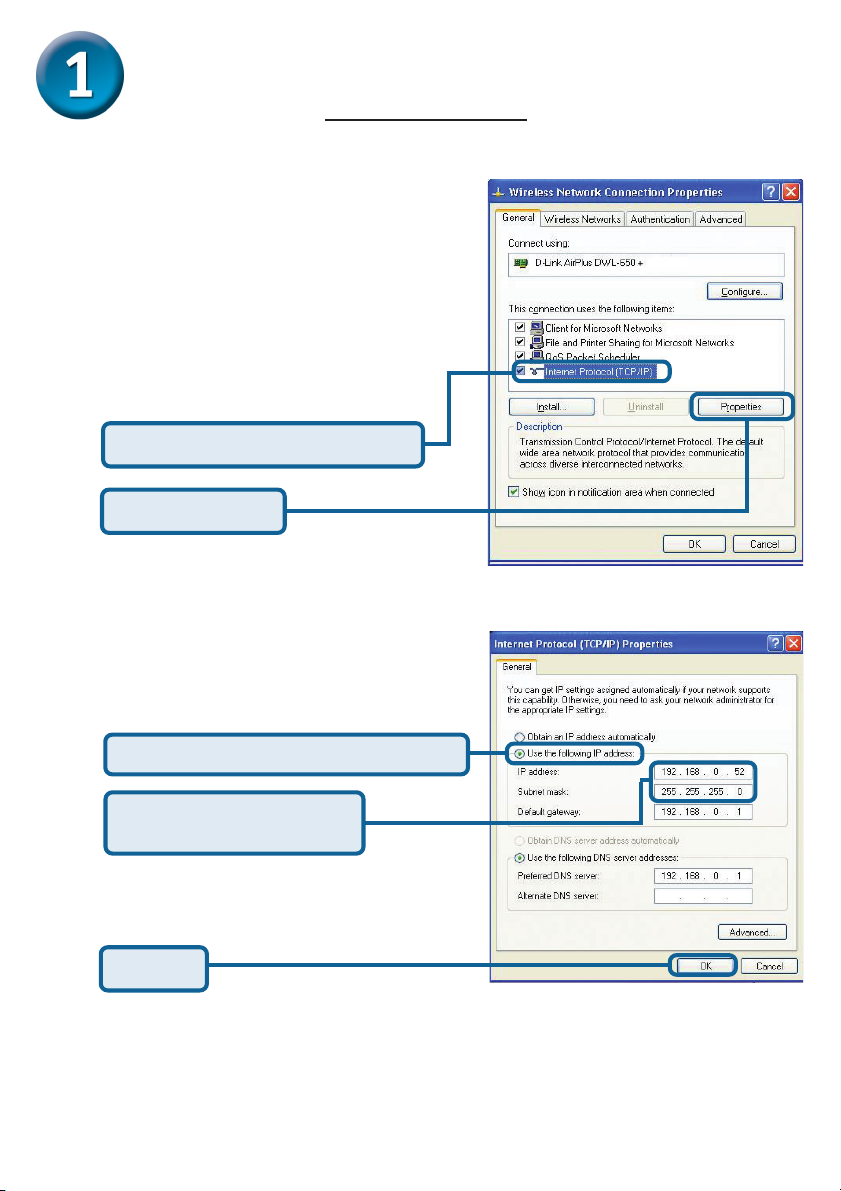
Click Internet Protocol (TCP/IP)
Click Properties
Select Use the following IP address
IP address: 192.168.0.52
Subnet mask: 255.255.255.0
Click OK
5

Preparing your DP-311P for network
printing in Windows XP (cont.)
The factory default IP address of the DP-311P is 192.168.0.10. In order to print
to the your printer through the DP-311P, the DP-311P must have the same IP
network settings as your network. By factory default, the DP-311P is configured to
connect to “ANY” wireless access point.
Follow the steps below to associate the print server to your wireless AP or router.
The SSID of your wireless AP or router should appear in the list as shown below.
Open your Web
browser and type
“http://192.168.0.10”
into the URL address
box. Then press the
Enter or Return key.
Click on Configuration > Wireless.
http://192.168.0.10
Select SSID
Apply Changes
6

Preparing your DP-311P for network
printing in Windows XP (cont.)
Click on Configuration > Network.
Configure your IP Address
here to conform to your
wireless network. It is
recommended that you use
a Static IP Address. By
default, the IP Address of
the DP-311P is
192.168.0.10
Apply Changes
- Move the switch on the back of the DP-311P to “Normal”
mode.
- Remove and re-insert the print servers power plug.
- Associate your wireless laptop or desktop computer with
the same wireless AP or router as your print server.
7

Setting up your DP-311P for network
printing in Windows XP
For additional Windows operating system setup or information
on the web-management interface, refer to the manual located
on the CD-ROM.
For Windows XP:
Go to Start > Printers and Faxes > Add a Printer
Double-click on the
“Add Printer” icon
Click Next
8

Setting up your DP-311P for network
printing in Windows XP (continued)
Select “Local Printer.”
Click Next
Select “Create a new port.”
At the pull-down menu, highlight
“Standard TCP/IP Port.”
Click Next
Click Next
9

Setting up your DP-311P for network
printing in Windows XP (continued)
Type in the IP address of the print
server. (i.e. 192.168.0.10)
The port name will automatically be
filled in.
Click Next
Select “Custom.”
Then click “Settings.”
Click Settings
Select “LPR”
Enter “lp1” for the
Queue Name.
Click OK
10

Setting up your DP-311P for network
printing in Windows XP (continued)
Click Next
Click Finish
In this window, scroll down to find
your printer. (If it is not listed, insert
the driver CD or diskette that came
with your printer.)
Click on “Have Disk.”
Then, scroll down and highlight the
printer.
Click Next
11

Your Setup is Complete!
At this screen, you can input a
name for this printer.
Click Next
Select “Yes” to print a test
page
Click Next
The printer is now ready for printing
with Windows XP, on your network.
Click Finish
Note: MacOS printing is supported for Postscript
printers only.
12

Notes
13

Notes
14

Notes
15

Technical Support
You can find the most recent software and user documentation on the D-Link website.
D-Link provides free technical support for customers within the United States and
within Canada for the duration of the warranty period on this product.
U.S. and Canadian customers can contact D-Link technical support through our
website or by phone.
Tech Support for customers within the United States:
D-Link Technical Support over the Telephone:
(877) 453-5465
24 hours a day, seven days a week
D-Link Technical Support over the Internet:
http://support.dlink.com
email: support@dlink.com
Tech Support for customers within Canada:
D-Link Technical Support over the Telephone:
(800) 361-5265
Monday to Friday 8:30am to 9:00pm EST
D-Link Technical Support over the Internet:
http://support.dlink.ca
email: support@dlink.ca
16
 Loading...