

Page 1

®
CLI Reference Guide
Product Model:
xStack
®
DES-3528/DES-3552 Series
Layer 2 Managed Stackable Fast Ethernet Switch
Release 2.60
Page 2

ii
Table of Contents
INTRODUCTION ......................................................................................................................... 5
USING THE CONSOLE CLI ........................................................................................................ 7
COMMAND SYNTAX ................................................................................................................ 10
BASIC SWITCH COMMANDS .................................................................................................. 12
MODIFY BANNER AND PROMPT COMMANDS ..................................................................... 24
SWITCH PORT COMMANDS ................................................................................................... 27
PORT SECURITY COMMANDS ............................................................................................... 31
STACKING COMMANDS .......................................................................................................... 36
NETWORK MANAGEMENT (SNMP) COMMANDS ................................................................. 40
SWITCH UTILITY COMMANDS ................................................................................................ 57
NETWORK MONITORING COMMANDS .................................................................................. 63
MULTIPLE SPANNING TREE PROTOCOL (MSTP) COMMANDS .......................................... 76
FORWARDING DATABASE COMMANDS ............................................................................... 87
TRAFFIC CONTROL COMMANDS .......................................................................................... 93
QOS COMMANDS .................................................................................................................... 97
PORT MIRRORING COMMANDS ........................................................................................... 107
VLAN COMMANDS ................................................................................................................. 110
VOICE VLAN COMMANDS ..................................................................................................... 124
SUBNET-BASED VLAN COMMANDS ................................................................................... 130
ASYMMETRIC VLAN COMMANDS ........................................................................................ 133
LINK AGGREGATION COMMANDS ...................................................................................... 135
IP–MAC-PO RT BINDING (IMPB) COMMANDS ..................................................................... 139
LIMITED IP MULTICAST ADDRESS ...................................................................................... 155
BASIC IP COMMANDS ........................................................................................................... 160
MULTICAST VLAN COMMANDS ........................................................................................... 165
IGMP / MLD SNOOPING COMMANDS .................................................................................. 179
DHCP RELAY COMMANDS ................................................................................................... 208
802.1X COMMANDS (INCLUDING GUEST VLANS) ............................................................. 221
ACCESS CONTROL LIST (ACL) COMMANDS ..................................................................... 238
SAFEGUARD ENGINE COMMANDS ..................................................................................... 258
FILTER COMMANDS (DHCP SERVER / NETBIO S) .............................................................. 260
LAYER 3 CPU FILTER COMMANDS ..................................................................................... 265
LOOP-BACK DETECTION COMMANDS ............................................................................... 267
Page 3

iii
TRAFFIC SEGMENTATION COMMANDS ............................................................................. 271
SFLOW COMMANDS.............................................................................................................. 273
TIME AND SNTP COMMANDS ............................................................................................... 281
ARP AND GRATUITOUS ARP COMMANDS ......................................................................... 286
ROUTING TABLE COMMANDS ............................................................................................. 292
MAC NOTIFICATION COMMANDS ........................................................................................ 294
ACCESS AUTHENTICATION CONTROL COMMANDS ........................................................ 297
SECURE SHELL (SSH) COMMANDS .................................................................................... 315
SECURE SOCKETS LAYER (SSL) COMMANDS .................................................................. 321
D-LINK SINGLE IP MANAGEMENT COMMANDS ................................................................. 326
JWAC COMMANDS ................................................................................................................ 335
LINK LAYER DISCOVERY PROTOCOL (LLDP) COMMANDS ............................................. 350
Q-IN-Q COMMANDS ............................................................................................................... 363
RSPAN COMMANDS .............................................................................................................. 369
STATIC MAC-BASED V LAN C OMMANDS ............................................................................ 373
SIMPLE RED COMMANDS ..................................................................................................... 375
MAC-BASED ACCESS CONTROL COMMANDS LIST ......................................................... 382
WEB-BASED ACCESS CONTROL COMMANDS .................................................................. 392
POWER OVER ETHERNET (POE) COMMANDS ................................................................... 400
PPPOE CIRCUIT ID INSERTION COMMANDS ...................................................................... 404
DNS RELAY COMMANDS ...................................................................................................... 405
POLICY ROUTE COMMANDS ................................................................................................ 407
BPDU ATTACK PROTECTION COMMANDS ........................................................................ 409
ETHERNET OAM COMMANDS .............................................................................................. 413
DHCP SERVER COMMANDS ................................................................................................. 422
CABLE DIAGNOSTICS COMMANDS .................................................................................... 434
CONNECTIVITY FAULT MANAGEMENT COMMANDS ........................................................ 435
COMMAND HISTORY LIST .................................................................................................... 451
ARP SPOOFING PREVENTION COMMANDS ....................................................................... 453
AUTO-CONFIGURATION COMMANDS ................................................................................. 455
COMPOUND AUTHENTICATION COMMANDS .................................................................... 458
DEBUG SOFTWARE COMMANDS ........................................................................................ 464
DHCPV6 CLIENT COMMANDS .............................................................................................. 469
DHCPV6 RELAY COMMANDS ............................................................................................... 471
Page 4

iv
D-LINK UNIDIRECTIONAL LINK DETECTION (DULD) CO MMANDS................................... 476
ETHERNET RING PROTECTION SWITCHING (ERPS) COMMANDS .................................. 478
IPV6 NEIGHBOR DISCOVER COMMANDS ........................................................................... 487
IPV6 ROUTE COMMANDS ..................................................................................................... 491
LAYER 2 PROTOCOL TUNNELING (L2PT) COMMANDS .................................................... 493
LOCAL ROUTE COMMANDS ................................................................................................. 496
MSTP DEBUG ENHANCEMENT COMMANDS ...................................................................... 498
PING COMMANDS .................................................................................................................. 502
SHOW TECHNICAL SUPPORT COMMANDS ....................................................................... 504
TRACE ROUTE COMMANDS ................................................................................................. 507
VLAN COUNTER COMMANDS .............................................................................................. 509
APPENDIX A - PASSWORD RECOVERY PROCEDURE ...................................................... 512
APPENDIX B - TECHNICAL SPECIFICATIONS .................................................................... 513
APPENDIX C - MITIGATING ARP SPOOFING ATTACKS VIA PACKET CONTENT ACL ... 516
Page 5

xStack® DES-3528/DES-3552 Series Layer 2 Fast Ethernet Managed Switch CLI Reference Guide
5
INTRODUCTION
The Switch can be managed through the Switch’s serial port, Telnet, or the Web-based management agent. The
Command Line Interface (CLI) can be used to configure and manage the Switch via the serial port or Telnet
interfaces.
The DES-3528/DES-3552 Series Layer 2 stackable Fast Et hernet Switch Ser ies are members of the D-Link xStack
®
family. Ranging from 10/100Mbps edge Switches to core gigabit Switches, the xStack Switch family has been futureproof designed to provide a stacking architecture with fault tolerance, flexibility, port density, robust security and
maximum throughput with a user-friendly management interface for the networking professional.
This manual provides a reference for all of the commands contained in the CLI for the xStack
®
DES-3528, DES3528P, DES-3528DC, DE S-3552 and DES-3552P s eries of Switches. Conf iguration and management of the Switch
via the Web-based management agent is discussed in the User’s Guide.
NOTE: For the remainder of this manual, all versions of the DES-3528, DES-3528P, DES-3528DC,
DES-3552 and DES-3552P Switches will be referred to as simply the Switch or the DES-3528/52
Series.
Accessing the Switch via the Serial Por t
The Switch’s serial port’s default settings are as follows:
• 115200 baud
• no parity
• 8 data bits
• 1 stop bit
A computer running a terminal emulation program capable of emulating a VT-100 terminal and a serial port configured
as above are then connected to the Switch’s serial port via an RS-232 DB-9 cable.
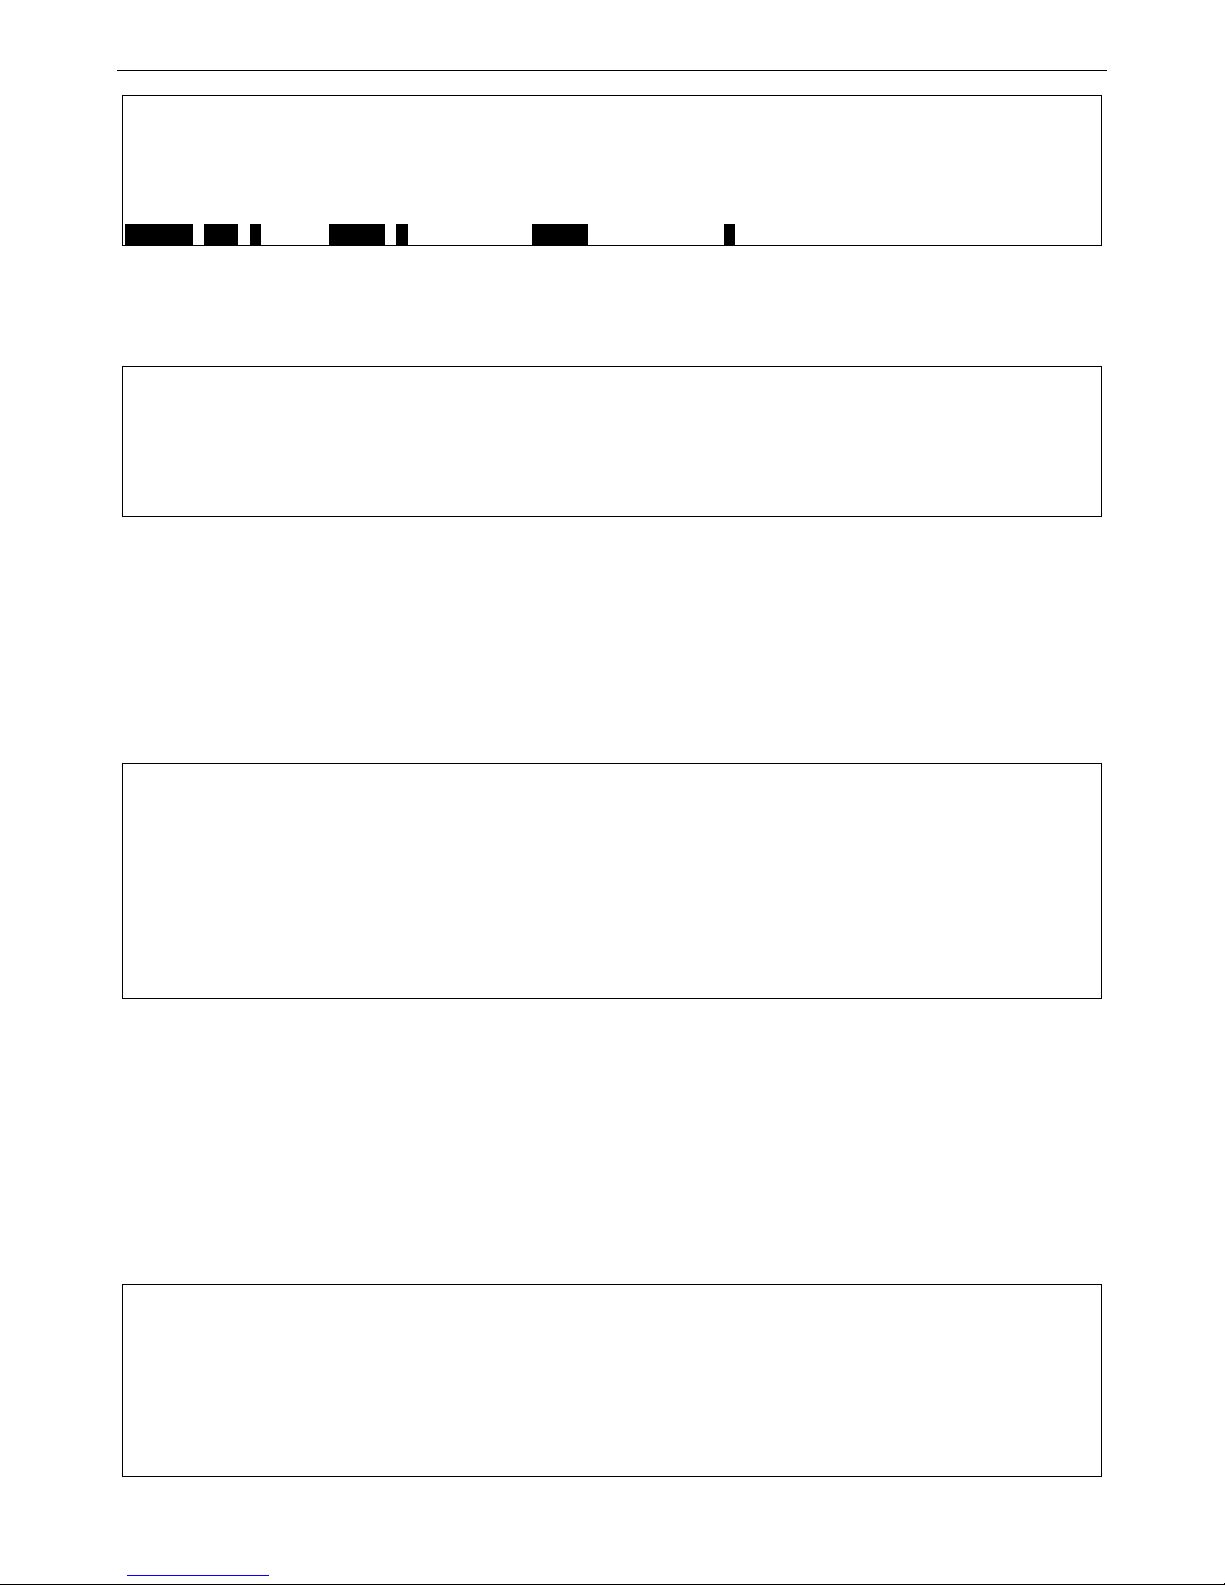
With the serial port properly connected to a management computer, the following screen should be visible. If this
screen does not appear, try pressing Ctrl+r to refresh the console screen.
DES-3528 Fast Ethernet Switch
Command Line Interface
Firmware: Build 2.60.017
Copyright(C) 2010 D-Link Corporation. All rights reserved.
UserName:
Figure 1-1. Initial CLI screen
There is no initial username or password. Just press the Enter key twice to display the CLI input cursor − DES-
3528:admin# . This is the command line where all commands are input.
Setting the Switch’s IP Address
Each Switch must be assigned its own IP Address, which is used for communication with an SNMP network m anager
or other TCP/IP application (for example BOOTP, TFTP). The Switch’s default IP address is 10.90.90.90. Users can
change the default Switch IP address to meet the specification of your networking address scheme.
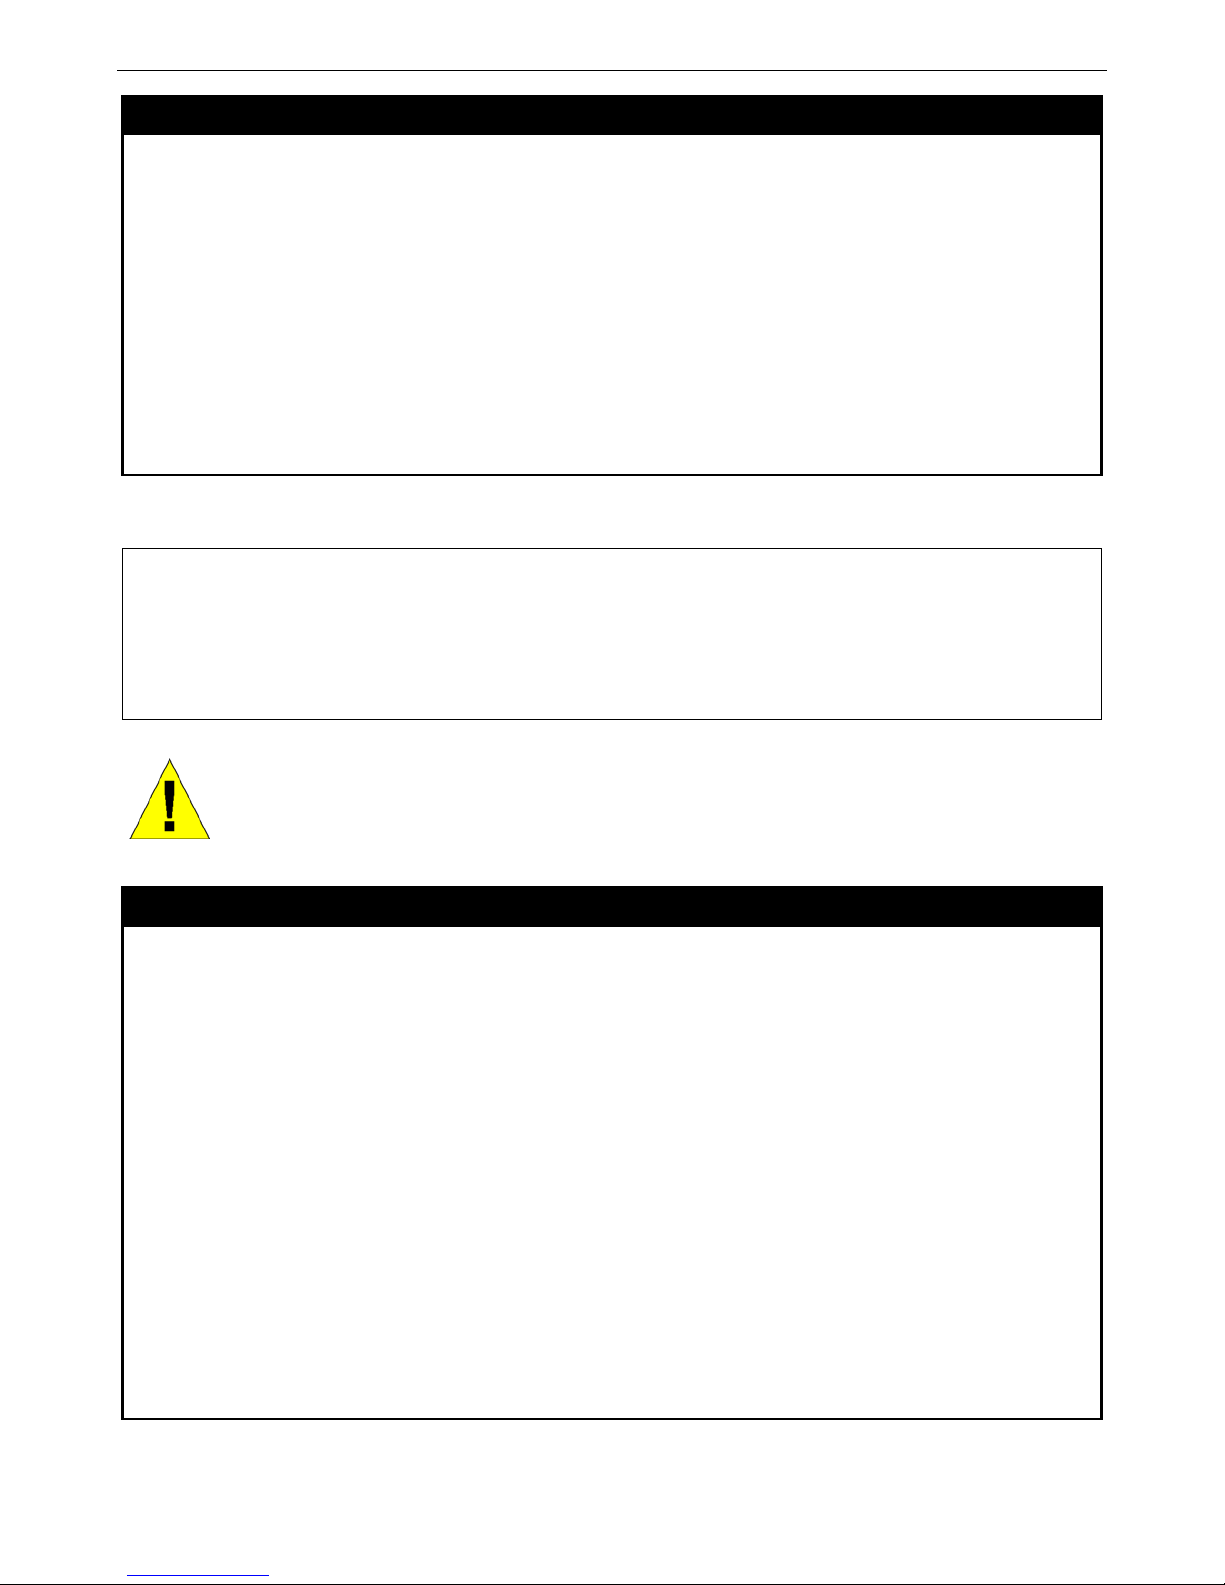
The Switch is also assigned a unique MAC address by the factory. This MAC address cannot be changed, and can be
found on the initial boot console screen – shown below.
Page 6

xStack® DES-3528/DES-3552 Series Layer 2 Fast Ethernet Managed Switch CLI Reference Guide
6
Boot Procedure V1.00.B008
-------------------------------------------------------------------------------
Power On Self Test ........................................ 100 %
MAC Address : 00-22-B0-10-8A-00
H/W Version : A2
Please wait, loading V2.60..017 Runtime image ............. 100 %
UART init ................................................. 100 %
Device Discovery .......................................... 100 %
Configuration init ........................................ |
Figure 1-2. Boot screen
The Switch’s MAC addres s can also be found in the Web management program on the Switch Information (Basic
Settings) window on the Configuration menu.
The IP address for the Switc h must be set before it can be managed with t he Web-based manager. The Switch I P
address can be autom aticall y set using BO OTP or DH CP protoc ols, in whic h case the actual a ddress as signed to th e
Switch must be known.
The IP address may be set using the Command Line Interface (CLI) over the console serial port as follows:
1. Starting at the command line prompt, enter the commands config ipif System ipaddress
xxx.xxx.xxx.xxx/yyy.yyy.yyy.yyy. W her e the x’s r epresent the IP addres s to be assigned to the IP int erface
named System and the y’s represent the corresponding subnet mask.
2. Alternatively, users can enter conf ig ipif System ipa ddress xxx.xxx.x xx.xxx/z. Where the x’s represent the
IP address to be as sig ned t o the IP i nterfac e nam ed System and the z represents the cor respon ding num ber
of subnets in CIDR notation.
The IP interface nam ed System on the Switch can be assigned an IP address and s ubnet mask which can then be
used to connect a management station to the Switch’s Telnet or Web-based management agent.
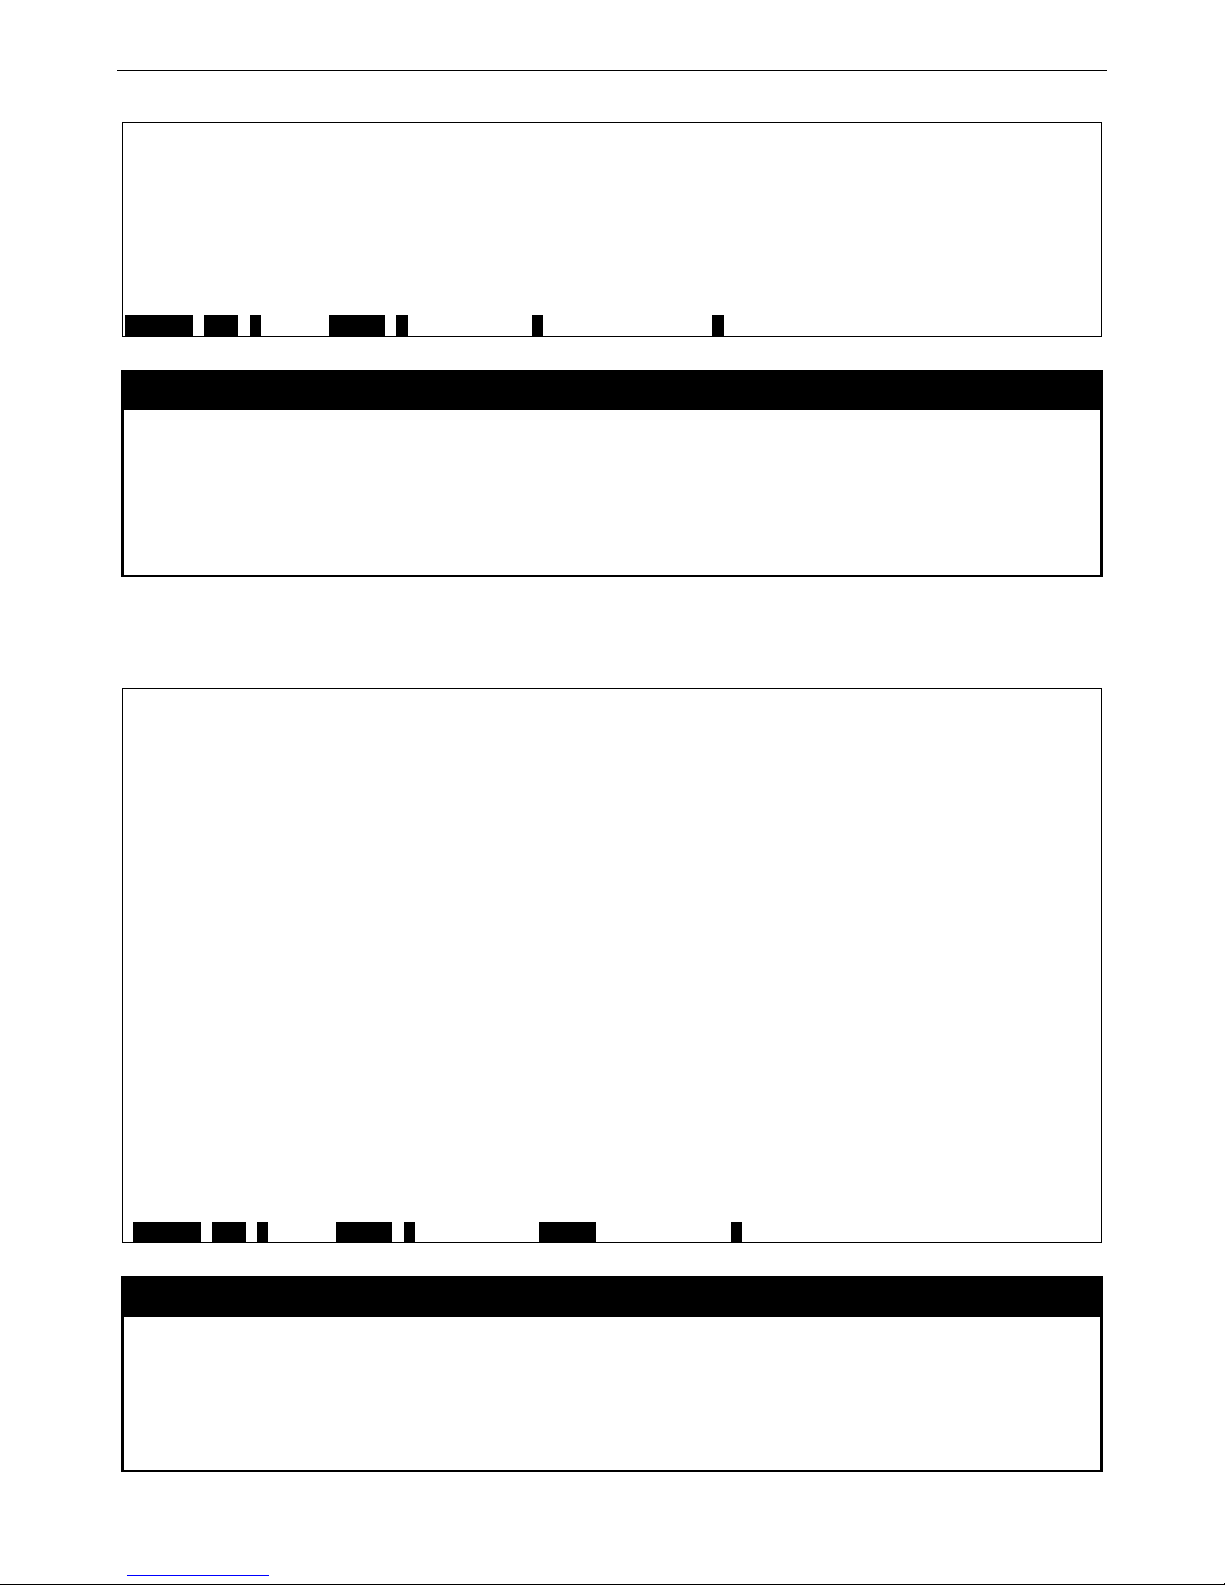
DES-3528:admin# config ipif System ipaddress 10.24.73.21/8
Command: config ipif System ipaddress 10.24.73.21/8
Success.
DES-3528:admin#
Figure 1-3. Assigning an IP Address screen
In the above exam ple, the Switch was assigned an IP address of 10.24. 73.21 with a subnet mask of 255.0. 0.0. The
system message Success indicates that the command was executed successfully. The Switch can now be configured
and managed via Telnet, S NMP MIB browser and the CLI or via the W eb-based management agent using t he above
IP address to connect to the Switch.
Page 7

xStack® DES-3528/DES-3552 Series Layer 2 Fast Ethernet Managed Switch CLI Reference Guide
7
USING THE CONSOLE CLI
The DES-3528/52 Series supports a console management interface that allows the user to connect to the Switch’s
management agent via a serial port and a terminal or a computer running a terminal emulation program. The console
can also be used over the network using the TCP/IP Telnet protocol. The console program can be used to configure
the Switch to use an SNMP-based network management software over the network.
This chapter describes how to use the console interface to access the Switch, change its settings, and monitor its
operation.
NOTE: Switch configuration settings are saved to non-volatile RAM using the save command. The
current configuration will then be retained in the Switch’s NV-RAM, and re loa ded when the S witc h is
rebooted. If the Switch is rebooted without using the save command, the last configuration saved to
NV-RAM will be loaded.
Connecting to the Switch
The console interface is used by connecting the Switc h to a VT100-compatible terminal or a computer runni ng an
ordinary terminal em ulator program (e.g., the HyperTerminal program included with the W indows operating system )
using an RS-232C serial cable. Your terminal parameters will need to be set to:
• VT-100 compatible
• 115200 baud
• 8 data bits
• No parity
• One stop bit
• No flow control
Users can also access the same functions over a Telnet interface. Once users have set an IP address for your Switch,
users can use a Telnet program (in VT-100 compatible terminal mode) to access and control the Switch. All of the
screens are identical, whether accessed from the console port or from a Telnet interface.
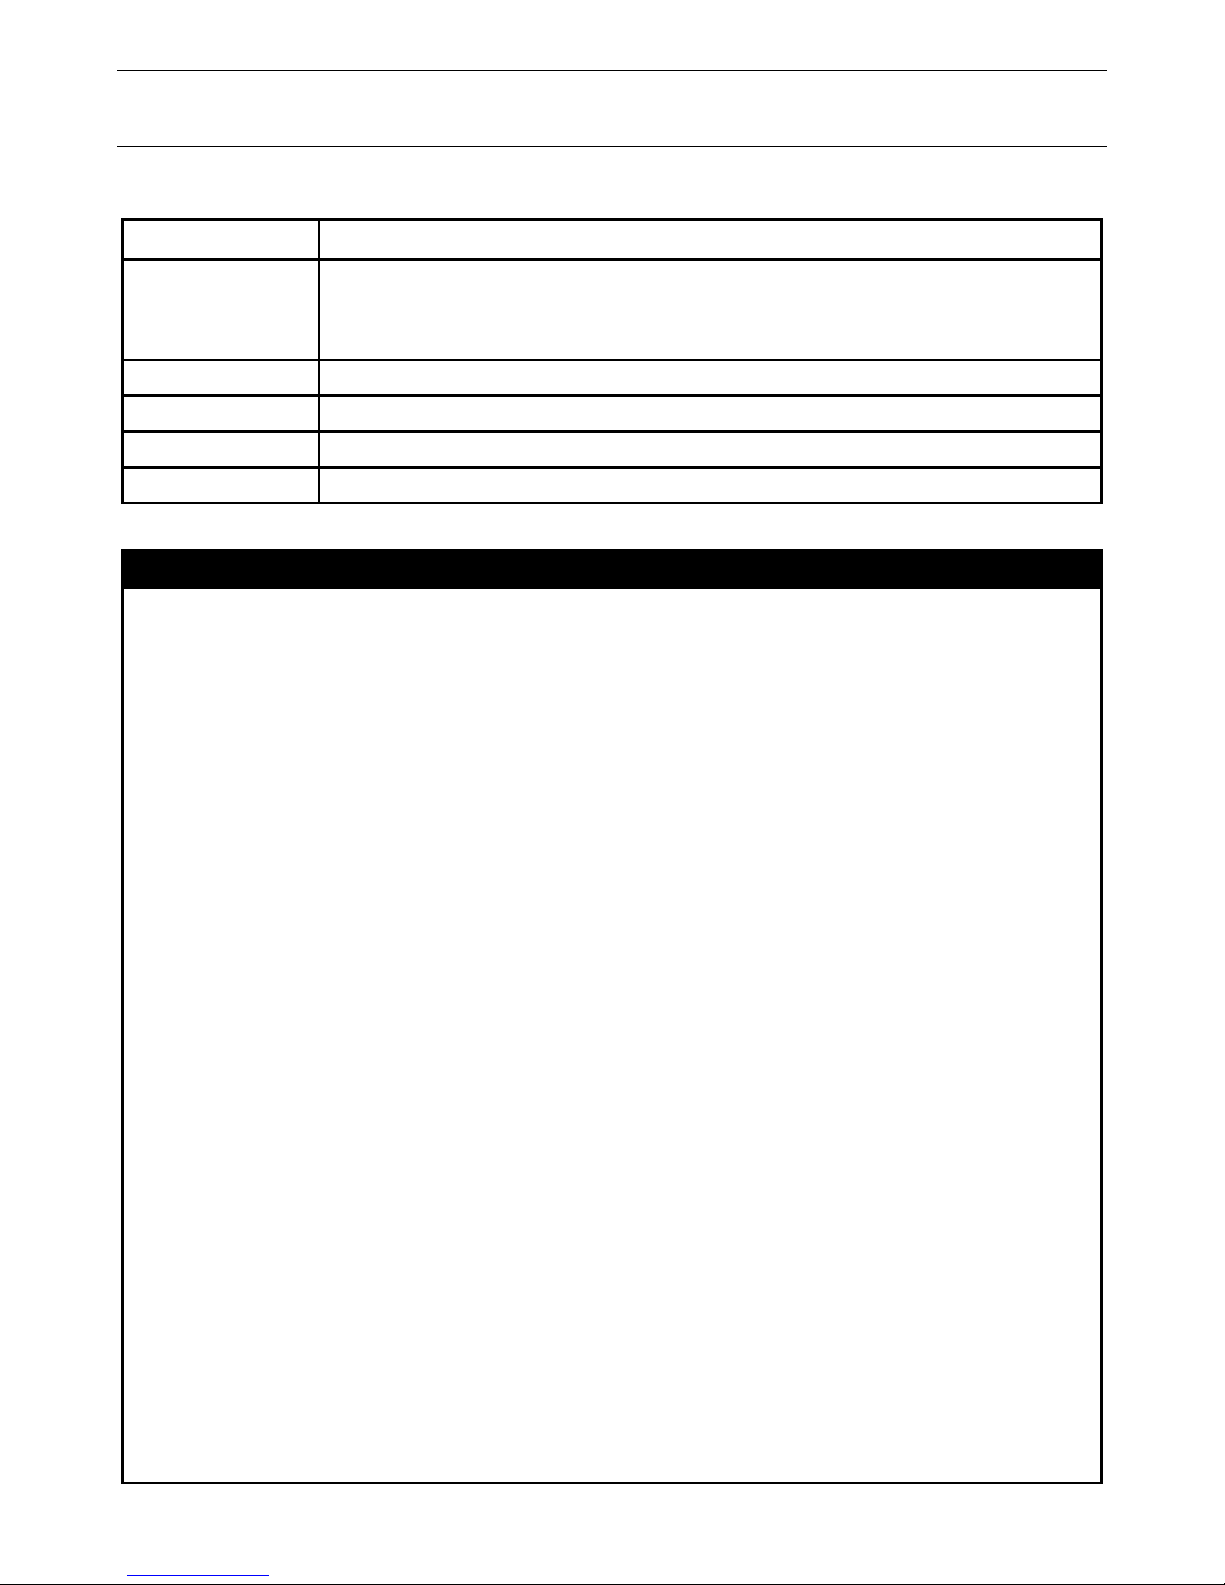
After the Switch reboots and users have logged in, the console looks like this:
DES-3528 Fast Ethernet Switch
Command Line Interface
Firmware: Build 2.60.017
Copyright(C) 2010 D-Link Corporation. All rights reserved.
UserName:
Figure 2-1. Initial Console screen after logging in
Commands are entered at the command prompt, DES-3528:admin# ..
There are a number of helpful features inc lu ded i n t he CLI. E nteri ng the ? command will displa y a list of all of the top-
level commands.
?
cable_diag ports
cfm linktrace
cfm loopback
clear
clear address_binding dhcp_snoop binding_entry ports
clear address_binding nd_snoop binding_entry ports
clear arptable
clear attack_log
clear cfm pkt_cnt
clear counters
clear dhcp binding
clear dhcp conflict_ip
clear ethernet_oam ports
clear fdb
Page 8
xStack® DES-3528/DES-3552 Series Layer 2 Fast Ethernet Managed Switch CLI Reference Guide
8
clear igmp_snooping data_driven_group
clear igmp_snooping statistics counter
clear jwac auth_state
clear log
clear mac_based_access_control auth_state
clear mld_snooping data_driven_group
CTRL+C ESC q Quit SPACE n Next Page ENTER Next Entry a All
Figure 2-2. The ? Command
When users enter a command without its required parameters, the CLI will prompt users with a Next possible
completions: message.
DES-3528:admin# config account
Command: config account
Next possible completions:
<username>
DES-3528:admin#
Figure 2-3. Example Command Parameter Help
In this case, the comm and config account was entered with the parameter <username>. The CLI will then prompt
users to enter the <username> with the m essage, Next possible completions:. Every command in the CLI has this
feature, and complex commands have several layers of parameter prompting.
In addition, after typing an y given comm and plus one space, users can see all of the next possib le sub-c omm ands, in
sequential order, by repeatedly pressing the Tab key.
To re-enter the previous command at the comm and prompt, press the up arro w cursor key. The previou s command
will appear at the command prompt.
DES-3528:admin# config account
Command: config account
Next possible completions:
<username>
DES-3528:admin# config account
Command: config account
Next possible completions:
<username>
DES-3528:admin#
Figure 2-4. Using the Up Arrow to Re-enter a Command
In the above example, the comm and config account was entered without the requ ired parameter <username>, the
CLI returned the Next possible completions: <username> prompt. The up arrow cursor contr ol key was pres sed to
re-enter the previous comm and (config account) at the command prompt. Now the appropriat e username can be
entered and the config account command re-executed.
All commands in the CLI function in this way. In addition, the syntax of the help prompts are the same as presented in
this manual − angle brackets < > indicate a numerical value or character string, braces { } indicate optional parameters
or a choice of parameters, and brackets [ ] indicate required parameters.
If a command is entered that is unrecognized by the CLI, the top-level commands will be displayed under the
Available commands: prompt.
DES-3528:admin#the
Available commands:
.. ? cable_diag cfm
clear config create debug
delete disable download enable
login logout no ping
ping6 reboot reconfig reset
save show telnet traceroute
Page 9

xStack® DES-3528/DES-3552 Series Layer 2 Fast Ethernet Managed Switch CLI Reference Guide
9
traceroute6 upload
DES-3528:admin#
Figure 2-5. The Next Available Commands Prompt
The top-level comm ands consist of commands such as show or config. Most of these com mands require one or
more parameters to narrow the top-level comm and. This is equivalent to show what? or config what? Where the
what? is the next parameter.
For example, if users enter the show command with no addit ional param eters, the CLI will then display all of the
possible next parameters.
DES-3528:admin# show
Command: show
Next possible completions:
802.1p 802.1x access_profile account
accounting acct_client address_binding
arp_spoofing_prevention arpentry asymmetric_vlan
attack_log auth_client auth_diagnostics
auth_session_statistics auth_statistics authen
authen_enable authen_login authen_policy authentication
authorization autoconfig bandwidth_control bpdu_protection
cfm command_history config cpu
cpu_filter current_config device_status dhcp
dhcp_local_relay dhcp_relay dhcp_server dhcpv6_relay
dnsr dot1v_protocol_group dscp
duld erps error ethernet_oam
fdb filter firmware flow_meter
gratuitous_arp greeting_message gvrp hol_prevention
igmp_snooping ipfdb ipif
ipif_ipv6_link_local_auto iproute ipv6
ipv6route jumbo_frame jwac l2protocol_tunnel
lacp_port limited_multicast_addr link_aggregation
lldp local_route log log_save_timing
log_software_module loopdetect
mac_based_access_control mac_based_access_control_local
mac_based_vlan mac_notification max_mcast_group
mcast_filter_profile mef_l2_protocols
mef_vlan_preservation mirror mld_snooping
multicast multicast_fdb packet per_queue
poe policy_route port port_security
port_security_entry port_vlan ports
pppoe pvid qinq radius
rmon router_ports rspan safeguard_engine
scheduling scheduling_mechanism serial_port
session sflow sim snmp
sntp sred ssh ssl
stack_device stack_information stacking_mode stp
subnet_vlan switch syslog system_severity
tech_support terminal time time_range
traffic traffic_segmentation trap
trusted_host utilization vlan vlan_counter
vlan_precedence vlan_translation vlan_trunk voice_vlan
wac
DES-3528:admin#
Figure 2-6. Next possible completions: Sh o w Command
In the above example, all of the possible next parameters for the show command are displayed. At the next command
prompt, the up arrow was used to re-enter the show command, followed by the account parameter. The CLI then
displays the user accounts configured on the S witc h.
Page 10

xStack® DES-3528/DES-3552 Series Layer 2 Fast Ethernet Managed Switch CLI Reference Guide
10
COMMAND SYNTAX
The following symbols are used to describe how command entries are made and values and arguments are specified
in this manual. The online help contained in the CLI and available through the console interface uses the same syntax.
NOTE: All commands are case-sensitive. Be sure to disable Caps Lock or any other unwanted
function that changes text case.
<angle brackets>
Purpose Encloses a variable or value that must be specified.
Syntax
config ipif <ipif_name 12> [{ipaddress <network_address> | vlan <vlan_name 32> |
state [enable | disable}] | bootp | dhcp]
Description In the above syntax example, users must supply an IP interface name in the <ipif_name
12> space, a VLAN name in the <vlan_name 32> space, and the network address in the
<network_address> space. Do not type the angle brackets.
Example Command
config ipif Engineering ipaddress 10.24.22.5/255.0.0.0 vlan Design state enable
[square brackets]
Purpose Encloses a required value or set of required arguments. One value or argument can be
specified.
Syntax
create account [admin | operator | user] <username 15>
Description
In the above syntax example, users must specify either an admin or a user level account
to be created. Do not type the square brackets.
Example Command
create account admin Tommy
| vertical bar
Purpose Separates two or more mutually exclusive items in a list, one of which must be entered.
Syntax
create account [admin | operator | user] <username 15>
Description
In the above syntax example, users must specify either admin, or user. Do not type the
vertical bar.
Example Command
create account admin Tommy
{braces}
Purpose Encloses an optional value or set of optional ar guments.
Syntax
reset {[config | system]} force_agree
Description
In the above syntax example, users have the option to specify config or system. It is not
necessary to specify either optional value, however the effect of the system reset is
dependent on which, if any, value is specified. Therefore, with this example there are three
possible outcomes of performing a system reset. See the following chapter, Basic
Commands for more details about the reset command. Do not type the braces.
Example command
reset config
(parentheses)
Page 11

xStack® DES-3528/DES-3552 Series Layer 2 Fast Ethernet Managed Switch CLI Reference Guide
11
(parentheses)
Purpose Indicates at least one or more of the values or arguments in the preceding syntax
enclosed by braces must be specified.
Syntax
config dhcp_relay {hops <value 1-16> | time <sec 0-65535>}(1)
Description
In the above syntax example, users have the option to specify hops or time or both of
them. The "(1)" following the set of braces indicates at least one argument or val u e within
the braces must be specified. Do not type the parentheses.
Example command
config dhcp_relay hops 3
Line Editing Key Usage
Delete Deletes the character under the cursor and then shifts the remaining characters in the line
to the left.
Backspace Deletes the character to the left of the cursor and then shifts the remaining characters in
the line to the left.
Left Arrow Moves the cursor to the left.
Right Arrow Moves the cursor to the right.
Up Arrow Repeats the previously entered command. Each time the up arrow is pressed, the
command previous to that displayed appears. This way it is possible to review the
command history for the current session. Use the down arrow to progress sequentially
forward through the command history list.
Down Arrow The down arrow will display the next command in the command history entered in the
current session. This displays each command sequentially as it was entered. Use the up
arrow to review previous commands.
Tab Shifts the cursor to the next field to the left.
Multiple Page Display Control Keys
Space Displays the next page.
CTRL+c Stops the display of remaining pages when multiple pages are to be displayed.
ESC Stops the display of remaining pages when multiple pages are to be displayed.
n Displays the next page.
p Displays the previous page.
q Stops the display of remaining pages when multiple pages are to be displayed.
r Refreshes the pages currently displayed.
a Displays the remaining pages without pausing between pages.
Enter Displays the next line or table entry.
Page 12

xStack® DES-3528/DES-3552 Series Layer 2 Fast Ethernet Managed Switch CLI Reference Guide
12
BASIC SWITCH COMMANDS
The basic Switch commands in the Command Line Interface (CLI) are listed (along with the appropriate parameters)
in the following table.
Command Parameters
create account [admin | operator | power_us er | user] <username 15>
config account <username> {encr ypt [plain _tex t | sha_1] <password>}
show account
delete account <username>
enable password
encryption
disable password
encryption
show session
show switch
show device_status
show serial_port
config serial_port {baud_rate [9600 | 19200 | 38400 | 115200] | auto_lo g out [ne ver | 2_m inutes | 5_minutes |
10_minutes | 15_minutes]}(1)
enable clipaging
disable clipaging
telnet <ipaddr> {tcp_port <value 1-65535>}
enable telnet <tcp_port_number 1-65535>
disable telnet
enable web <tcp_port_number 1-65535>
disable web
save {[config <config_id 1-2 > | lo g | all]}
reboot {force_agree}
reset {[config | system]} {force_agree}
login
logout
clear
config terminal width [default | <value 80-200>]
show terminal width
Each command is listed, in detail, in the following sections.
create account
Purpose
Used to create user accounts.
Page 13
xStack® DES-3528/DES-3552 Series Layer 2 Fast Ethernet Managed Switch CLI Reference Guide
13
create account
Syntax create account [admin | operator | power_user | user] <username 15>
Description
This command is used to create user accounts that consist of a username of 1 to 15
characters and a password of 0 to 15 characters. Up to 8 user accounts can be created.
Parameters admin – Specifies that the user acc ount wi ll be set to adm in.
operator – Specifies that the user account will be set to operator.
power_user – Specifies that the user account will be set to power user.
user – Specifies that the user account will be set to user.
<username 15> - Enter the account username here. This name can be up to 15 characters
long.
Restrictions
Only Administrator-level users can issue this command.
Usernames can be between 1 and 15 characters.
Passwords can be between 0 and 15 characters.
Example usage:
To create an administrator-level user account with the username “dlink”.
DES-3528:admin# create account admin dlink
Command: create account admin dlink
Enter a case-sensitive new password:****
Enter the new password again for confirmation:****
Success.
DES-3528:admin#
NOTICE: In case of lost passwords or password corruption, please refer to the D-Link website and
the White Paper entitled “Password Recovery Procedure”, which will guide you through the steps
necessary to resolve this issue.
config account
Purpose
Used to configure user accounts
Syntax config account <username> {encryp t [p lain_text | sha_1] <password>}
Description
When the password information is not specified in the command, the system will prompt the
user to input the password interactively. For this case, the user can only input the plain text
password.
If the password is present in the command, the user can select to input the password in the
plain text form or in the encrypted form. The encryption algorithm is based on SHA-I.
Parameters
<username> − Name of the account. The account must already be defined.
plain_text − Select to specify the password in plain text form.
sha_1 − Select to specify the password in the SHA-I enacrpted form.
password − The password for the user account.
The length for of password in plain-text form and in encrypted form are different. For the
plain-text form, passwords must have a minimum of 0 character and can have a maximum of
15 characters. For the encrypted form password, the length is fixed to 35 bytes long. The
assword is case-sensitive.
Restrictions
Only Administrator-level users can issue this command.
Usernames can be between 1 and 15 characters.
Passwords can be between 0 and 15 characters.
Example usage:
To configure the user password of “dlink” account:
Page 14

xStack® DES-3528/DES-3552 Series Layer 2 Fast Ethernet Managed Switch CLI Reference Guide
14
DES-3528:admin# config account dlink
Command: config account dlink
Enter a old password:****
Enter a case-sensitive new password:****
Enter the new password again for confirmation:****
Success.
DES-3528:admin#
show account
Purpose
Used to display user accounts.
Syntax show account
Description
This command is used to display all user accounts created on the Switch. Up to 8 user
accounts can exist at one time.
Parameters
None.
Restrictions
Only Administrator-level users can issue this command.
Example usage:
To display the accounts that have been created:
DES-3528:admin# show account
Command: show account
Current Accounts:
Username Access Level
--------------- -----------dlink Admin
Total Entries: 1
DES-3528:admin#
delete account
Purpose
Used to delete an existing user account.
Syntax delete account <username>
Description
This command is used to delete an existing entry.
Parameters
<username> − Name of the user who will be deleted.
Restrictions
Only Administrator-level users can issue this command.
Example usage:
To delete the user account “System”:
DES-3528:admin# delete account System
Command: delete account System
Success.
DES-3528:admin#
enable password encryption
Purpose
Used to enable password encryption.
Syntax enable password encryption
Description
The user account configuration information will be stored in the configuration file, and can be
Page 15

xStack® DES-3528/DES-3552 Series Layer 2 Fast Ethernet Managed Switch CLI Reference Guide
15
enable password encryption
applied to the system later.
If the password encryption is enabled, the password will be in encrypted form.
When password encryption is diabled, if the user specifies the password in plain text form,
the password will be in plain text form. However, if the user specifies the password in
encrypted form, or if the password has been converted to encrypted form by the last enable
password encryption command, the password will still be in the encrypted form. It cannot be
reverted to the plaintext.
Parameters
None.
Restrictions
Only Administrator-level users can issue this command.
Example usage:
To enable password encryption:
DES-3528:admin# enable password encryption
Command: enable password encryption
Success.
DES-3528:admin#
disable password encryption
Purpose
Used to disable password encryption.
Syntax disable password encryption
Description
The user account configuration information will be stored in the configuration file, and can be
applied to the system later.
If the password encryption is enabled, the password will be in encrypted form.
When password encryption is disabled, if the user specifies the password in plain text form,
the password will be in plan text form. However, if the user specifies the password in
encrypted form, or if the password has been converted to encrypted form by the last enable
password encryption command, the password will still be in the encrypted form. It cannot be
reverted to the plaintext.
Parameters
None.
Restrictions
Only Administrator-level users can issue this command.
Example usage:
To disable password encryption:
DES-3528:admin# disable password encryption
Command: disable password encryption
Success.
DES-3528:admin#
show session
Purpose
Used to display a list of currently logged-in users.
Syntax show session
Description
This command displays a list of all the users that are logged-in at the time the command is
issued.
Parameters
None.
Restrictions
Only Administrator and Operator-level users can issue this command.
Example usage:
Page 16
xStack® DES-3528/DES-3552 Series Layer 2 Fast Ethernet Managed Switch CLI Reference Guide
16
To display the way that the users logged in:
DES-3528:admin# show session
Command: show session
ID Live Time From Level Name
--- --------- ------------ ----- ------ 8 00:00:16.250 Serial Port 5 Anonymous
Total Entries: 1
CTRL+C ESC q Quit SPACE n Next Page p Previous Page r Refresh
show switch
Purpose
Used to display general information about the Switch.
Syntax show switch
Description
This command displays information about the Switch.
Parameters
None.
Restrictions
None.
Example usage:
To display the Switch’s information:
DES-3528:admin# show switch
Command: show switch
Device Type : DES-3528 Fast Ethernet Switch
MAC Address : 1C-AF-F7-AD-33-20
IP Address : 10.90.90.90 (Manual)
VLAN Name : default
Subnet Mask : 255.0.0.0
Default Gateway : 0.0.0.0
Boot PROM Version : Build 1.00.B008
Firmware Version : Build 2.60.B010
Hardware Version : A4
Serial Number : P1UQ3A4000012
System Name :
System Location :
System Uptime : 0 days, 0 hours, 3 minutes, 58 seconds
System Contact :
Spanning Tree : Disabled
GVRP : Disabled
IGMP Snooping : Disabled
MLD Snooping : Disabled
VLAN Trunk : Disabled
Telnet : Enabled (TCP 23)
Web : Enabled (TCP 80)
SNMP : Disabled
CTRL+C ESC q Quit SPACE n Next Page ENTER Next Entry a All
show device_status
Purpose
Used to display the current Switch’s power and fan status.
Syntax show device_status
Description
This command displays status of both the Switch’s internal and external power and the fan
status.
Parameters
None.
Page 17

xStack® DES-3528/DES-3552 Series Layer 2 Fast Ethernet Managed Switch CLI Reference Guide
17
show device_status
Restrictions
None.
Example usage:
To display the Switch’s device status:
DES-3528:admin# show device_status
Command: show device_status
Internal Power: Active
External Power: Fail
DES-3528:admin#
show serial_port
Purpose
Used to display the current serial port settings.
Syntax show serial_port
Description
This command displays the current serial port settings.
Parameters
None.
Restrictions
None
Example usage:
To display the serial port setting:
DES-3528:admin#show serial_port
Command: show serial_port
Baud Rate : 115200
Data Bits : 8
Parity Bits : None
Stop Bits : 1
Auto-Logout : Never
DES-3528:admin#
config serial_port
Purpose
Used to configure the serial port.
Syntax config serial_port {baud_rate [9600 | 19200 | 38400 | 115200] | auto_logout [never |
2_minutes | 5_minutes | 10_minutes | 15_minutes]}(1)
Description
This command is used to configure the serial port’s baud rate and auto logout settings.
Parameters
baud_rate [9600 | 19200 | 38400 | 115200] − The serial bit rate that will be used to
communicate with the management host. There are four options: 9600, 19200, 38400,
115200. Factory default setting is 115200.
never − No time limit on the length of time the console can be open with no user input.
2_minutes − The console will log out the current user if there is no user input for 2 minutes.
5_minutes − The console will log out the current user if there is no user input for 5 minutes.
10_minutes − The console will log out the current user if there is no user input for 10
minutes.
15_minutes − The console will log out the current user if there is no user input for 15
minutes.
Restrictions
Only Administrator and Operator-level users can issue this command.
Example usage:
To configure baud rate:
Page 18

xStack® DES-3528/DES-3552 Series Layer 2 Fast Ethernet Managed Switch CLI Reference Guide
18
DES-3528:admin# config serial_port baud_rate 115200
Command: config serial_port baud_rate 115200
Success.
DES-3528:admin#
enable clipaging
Purpose
Used to pause the scrolling of the console screen when a command displays more than one
page.
Syntax enable clipaging
Description
This command is used when issuing a command which causes the console screen to rapidly
scroll through several pages. This command will cause the console to pause at the end of
each page. The default setting is enabled.
Parameters
None.
Restrictions
Only Administrator and Operator-level users can issue this command.
Example usage:
To enable pausing of the screen display when the show command output reaches the end of the page:
DES-3528:admin# enable clipaging
Command: enable clipaging
Success.
DES-3528:admin#
disable clipaging
Purpose
Used to disable the pausing of the console screen scrolling at the end of each page when a
command displays more than one screen of information.
Syntax disable clipaging
Description
This command is used to disable the pausing of the console screen at the end of each page
when a command would display more than one screen of information.
Parameters
None.
Restrictions
Only Administrator and Operator-level users can issue this command.
Example usage:
To disable pausing of the screen display when show command output reaches the end of the page:
DES-3528:admin# disable clipaging
Command: disable clipaging
Success.
DES-3528:admin#
telnet
Purpose
Used to login the remote device system through the network.
NOTE: If a user configures the serial port’s baud rate, the baud rate will take effect and save
immediately. Baud rate settings will not change even if the user resets or reboots the Switch. The
Baud rate will only change when the user configures it again. The serial port’s baud rate setting is not
stored in the Switch’s configuration file. Resetting the Switch will not restore the baud rate to the
default setting.
Page 19

xStack® DES-3528/DES-3552 Series Layer 2 Fast Ethernet Managed Switch CLI Reference Guide
19
telnet
Syntax telnet <ipaddr> {tcp_port <value 1-65535>}
Description
This command is used when the manager want to manage the device system which isn’t on
local. So can use this command to login in the remote system which is located on other side.
If connect successful, some actions can be done as local.
Parameters
<ipaddr> − The network ip address. This is the destination which wants to log in.
<value 1-65535> − The TCP port number. TCP ports are numbered between 1 and 65535.
The “well-known” TCP port for the Telnet protocol is 23.
Restrictions
Only Administrator and Operator-level users can issue this command.
Example usage:
Telnet to the remote Switch:
DES-3528:admin# telnet 172.18.168.12 tcp_port 50
Command: telnet 172.18.168.12 tcp_port 50
Connecting to server,please wait....
DES-3528 Gigabit Ethernet Switch
Command Line Interface
Firmware: Build 2.60.B010
Copyright(C) 2009 D-Link Corporation. All rights reserved.
UserName:
PassWord:
enable telnet
Purpose
Used to enable communication with and management of the Switch using the Telnet
protocol.
Syntax enable telnet <tcp_port_number 1-65535>
Description
This command is used to enable the Telnet protocol on the Switch. The user can specify the
TCP or UDP port number the Switch will use to listen for Telnet requests.
Parameters
<tcp_port_number 1-65535> − The TCP port number. TCP ports are numbered between 1
and 65535. The “well-known” TCP port for the Telnet protocol is 23.
Restrictions
Only Administrator and Operator-level users can issue this command.
Example usage:
To enable Telnet and configure port number:
DES-3528:admin# enable telnet 23
Command: enable telnet 23
Success.
DES-3528:admin#
disable telnet
Purpose
Used to disable the Telnet protocol on the Switch.
Syntax disable telnet
Description
This command is used to disable the Telnet protocol on the Switch.
Parameters
None.
Restrictions
Only Administrator and Operator-level users can issue this command.
Example usage:
Page 20

xStack® DES-3528/DES-3552 Series Layer 2 Fast Ethernet Managed Switch CLI Reference Guide
20
To disable the Telnet protocol on the Switch:
DES-3528:admin# disable telnet
Command: disable telnet
Success.
DES-3528:admin#
enable web
Purpose
Used to enable the HTTP-based management software on the Switch.
Syntax enable web <tcp_port_number 1-65535>
Description
This command is used to enable the Web-based management software on the Switch. The
user can specify the TCP port number the Switch will use to listen for Telnet requests.
Parameters
<tcp_port_number 1-65535> − The TCP port number. TCP ports are numbered between 1
and 65535. The “well-known” port for the Web-based management software is 80.
Restrictions
Only Administrator and Operator-level users can issue this command.
Example usage:
To enable HTTP and configure port number:
DES-3528:admin# enable web 80
Command: enable web 80
Success.
DES-3528:admin#
disable web
Purpose
Used to disable the HTTP-based management software on the Switch.
Syntax disable web
Description
This command disables the Web-based management software on the Switch.
Parameters
None.
Restrictions
Only Administrator and Operator-level users can issue this command.
Example usage:
To disable HTTP:
DES-3528:admin# disable web
Command: disable web
Success.
DES-3528:admin#
save
Purpose
Used to save changes in the Switch’s configuration to non-volatile RAM.
Syntax save {[config <config_id 1-2> | log | all]}
Description
This command is used to enter the current Switch configuration into non-volatile RAM. The
saved Switch configuration will be loaded into the Switch’s memory each time the Switch is
restarted.
Parameters config <config_id 1-2> – Specify to save current settings to configuration file 1 or 2.
log – Specify to save current Switch log to NV-RAM.
Page 21

xStack® DES-3528/DES-3552 Series Layer 2 Fast Ethernet Managed Switch CLI Reference Guide
21
save
all – Specify to save all configuration settings. If nothing is specified after “save”, the Switch
will save all.
Restrictions
Only Administrator and Operator-level users can issue this command.
Example usage:
To save the Switch’s current configuration to non-volatile RAM:
DES-3528:admin# save
Command: save
Saving all configurations to NV-RAM... Done.
DES-3528:admin#
reboot
Purpose
Used to restart the Switch.
Syntax Reboot {force_agree}
Description
This command is used to restart the Switch.
Parameters
force_agree − When force_agree is specified, the reboot command will be executed
immediatedly without further confirmation.
Restrictions
Only Administrator-level users can issue this command.
Example usage:
To restart the Switch:
DES-3528:admin# reboot
Command: reboot
Are you sure you want to proceed with the system reboot? (y|n)y
Please wait, the switch is rebooting...
reset
Purpose
Used to reset the Switch to the factory default settings.
Syntax reset {[config | system]} {force_agree}
Description
This command is used to restore the Switch’s configuration to the default settings assigned
from the factory.
Parameters
config − If the keyword ‘config’ is specified, all of the factory default settings are restored on
the Switch including the IP address, user accounts, and the Switch history log. The Switch
will not save or reboot.
system − If the keyword ‘system’ is specified all of the factory default settings are restored on
the Switch. The Switch will save and reboot after the settings are changed to default.
Rebooting will clear all entries in the Forwarding Data Base.
force_agree − When force_agree is specified, the reset command will be executed
immediatedly without further confirmation.
If no parameter is specified, the Switch’s current IP address, user accounts, and the Switch
history log are not changed. All other parameters are restored to the factory default settings.
The Switch will not save or reboot.
NOTE: The serial port baud rate will not be changed by the reset command.
It will not be restored to the factory default setting.
Restrictions
Only Administrator-level users can issue this command.
Example usage:
Page 22

xStack® DES-3528/DES-3552 Series Layer 2 Fast Ethernet Managed Switch CLI Reference Guide
22
To restore all of the Switch’s parameters to their default values:
DES-3528:admin# reset config
Command: reset config
Are users sure to proceed with system reset?(y/n)y
Success.
DES-3528:admin#
login
Purpose
Used to log in a user to the Switch’s console.
Syntax login
Description
This command is used to initiate the login procedure. The user will be prompted for a
Username and Password.
Parameters
None.
Restrictions
None.
Example usage:
To initiate the login procedure:
DES-3528:admin# login
Command: login
UserName:
logout
Purpose
Used to log out a user from the Switch’s console.
Syntax logout
Description
This command terminates the current user’s session on the Switch’s console.
Parameters
None.
Restrictions
None.
Example usage:
To terminate the current user’s console session:
DES-3528:admin# logout
clear
Purpose
The command is used to clear screen.
Syntax clear
Description
The command is used to clear screen.
Parameters
None.
Restrictions
None.
Example usage:
Page 23

xStack® DES-3528/DES-3552 Series Layer 2 Fast Ethernet Managed Switch CLI Reference Guide
23
To clear screen:
DES-3528:admin# clear
Command: clear
DES-3528:admin#
config terminal width
Purpose
The command is used to set current terminal width.
Syntax config terminal width [defaul t | <value 80-200>]
Description
The usage is described as below:
1. Users login and configure the terminal width to 120, this configuration take effect on
this login section. If users implement “save” command, the configuration is saved.
After users log out and log in again, the terminal width is 120.
2. If user did not save the configuration, another user login, the terminal width is default
value.
3. If at the same time, two CLI sessions are running, once section configure to 120
width and save it, the other section will not be effected, unless it log out and then log
in.
Parameters default - The default setting of terminal width. The default value is 80.
<value 80-200> - The terminal width which will be configured. The width is betwee n 80 and
200 characters.
Restrictions
None.
Example usage:
To configure the current terminal width:
DES-3528:admin# config terminal width 120
Command: config terminal width 120
Success.
DES-3528:admin#
show terminal width
Purpose
The command is used to display the configuration of current terminal width.
Syntax show terminal width
Description
The command is used to display the configuration of current terminal width.
Parameters
None.
Restrictions
None.
Example usage:
To display the configuration of current terminal width:
DES-3528:admin#show terminal width
Command: show terminal width
Global terminal width : 80
Current terminal width : 80
DES-3528:admin#
Page 24

xStack® DES-3528/DES-3552 Series Layer 2 Fast Ethernet Managed Switch CLI Reference Guide
24
MODIFY BANNE R AND PROMPT COMMANDS
Administrator level users can modify the login banner (greeting message) and command prompt by using the
commands described below.
Command Parameters
config command_prompt [<string 16> | username | default]
config greeting_message {default}
show greeting_message
The Modify Banner and Pr om pt comm ands in the Com mand Line I nterf ace (CLI) are list ed (al ong wit h the a ppropri ate
parameters) in the following table.
config command prompt
Purpose
Used to configure the command prompt.
Syntax config command_prompt [<string 16> | username | default]
Description
This command is used to change the command prompt.
Parameters string 16 –The command prompt can be changed by entering a new name of no more that 16
characters.
username – The command prompt will be changed to the login username.
default – The command prompt will reset to factory default command prompt.
Restrictions
Only Administrator and Operator-level users can issue this command. Other restrictions
include:
• If the “reset” command is executed, the modified command prompt will remain
modified. However, the “reset config/reset system” command will reset the
command prompt to the original factory banner.
Example usage:
To modify the command prompt to “AtYourService”:
DES-3528:admin#config command_prompt AtYourService
Command: config command_prompt AtYourService
Success.
AtYourService:admin#
config greeting _message
Purpose
Used to configure the login bann er (greet in g m es sage) .
Syntax config greeting _message {de fault}
Description
This command is used to modify the login banner (greeting message).
Parameters default – If the user enters default to the modify banner command, then the banner will be
reset to the original factory banner.
To open the Banner Editor, click enter after typing the config greeting_message command.
Type the information to be displayed on the banner by using the commands described on the
Banner Editor:
Quit without save: Ctrl+C
Save and quit: Ctrl+W
Move cursor: Left/Right/Up/Down
Delete line: Ctrl+D
Page 25

xStack® DES-3528/DES-3552 Series Layer 2 Fast Ethernet Managed Switch CLI Reference Guide
25
config greeting _message
Erase all setting: Ctrl+X
Reload original setting: Ctrl+L
Restrictions
Only Administrator and Operator-level users can issue this command. Other restrictions
include:
• If the “reset” command is executed, the modified banner will remain modified.
However, the “reset config/reset system” command will reset the modified banner
to the original factory banner.
• The capacity of the banner is 6*80. 6 Lines and 80 characters per line.
• Ctrl+W will only save the modified banner in the DRAM. Users need to type the
“save” command to save it into FLASH.
• Only valid in threshold level.
Example usage:
To modify the banner:
DES-3528:admin#config greeting_message
Command: config greeting_message
Greeting Messages Editor
================================================================================
DES-3528 Fast Ethernet Switch
Command Line Interface
Firmware: Build 2.60.017
Copyright(C) 2010 D-Link Corporation. All rights reserved.
================================================================================
<Function Key> <Control Key>
Ctrl+C Quit without save left/right/
Ctrl+W Save and quit up/down Move cursor
Ctrl+D Delete line
Ctrl+X Erase all setting
Ctrl+L Reload original setting
--------------------------------------------------------------------------------
show greeting_message
Purpose
Used to view the currently configured greeting message configured on the Switch.
Syntax show greeting_message
Description
This command is used to view the currently configured greeting message on the Switch.
Parameters
None.
Restrictions
Only Administrator and Operator-level users can issue this command.
Example usage:
To view the currently configured greeting message:
Page 26

xStack® DES-3528/DES-3552 Series Layer 2 Fast Ethernet Managed Switch CLI Reference Guide
26
DES-3528:admin#show greeting_message
Command: show greeting_message
================================================================================
DES-3528 Fast Ethernet Switch
Command Line Interface
Firmware: Build 2.60.017
Copyright(C) 2010 D-Link Corporation. All rights reserved.
================================================================================
DES-3528:admin#
Page 27
xStack® DES-3528/DES-3552 Series Layer 2 Fast Ethernet Managed Switch CLI Reference Guide
27
SWITCH PORT COMMANDS
The Switch port commands in the Command Line Interface (CLI) are listed (along with the appropriate parameters) in
the following table.
Command Parameters
config ports [<portlist> | all] {medium_type [fiber | copper]} {speed [auto | 10_half | 10_full | 100_half |
100_full | 1000_full {[master | slave]}] | flow_control [enable | disable] | learning [enable |
disable ] | state [enable | disable] | mdix [auto | normal | cross] | [description <desc 1-32> |
clear_description]}
show ports {<portlist>} {[description | err_disabled | details | media_type]}
enable jumbo_frame
disable jumbo_frame
show jumbo_frame
Each command is listed, in detail, in the following sections.
config ports
Purpose
Used to configure the Switch’s port settings.
Syntax config ports [<portlist> | all] {medium_type [fiber | copper]} {speed [auto | 10_half |
10_full | 100_half | 100_full | 1000_full {[master | slave]}] | flow_control [enable |
disable] | learning [enable | disab le ] | state [enable | disable] | mdix [auto | normal |
cross] | [description <desc 1-32> | clear_description]}
Description
This command is used to configure the Switch’s Ethernet ports. Only the ports listed in the
<portlist> will be affected.
Parameters
all − Configure all ports on the Switch.
<portlist> − Specifies a port or range of ports to be configured.
speed – Allows the user to adjust the speed for a port or range of ports. The user has a
choice of the following:
auto − Enables auto-negotiation for the specified range of ports.
[10 | 100 | 1000] − Configures the speed in Mbps for the specified range of ports.
Gigabit ports are statically set to 1000. When setting port speed to 1000_full,user should
specify master or slave mode for 1000 base TX interface, and leave the 1000_full
without any master or slave setting for other interfaces.
[half | full] − Configures the specified range of ports as either full-duplex or half-duplex.
flow_control [enable | disable] – Enable or disable flow control for the specified ports.
learning [enable | disable] − Enables or disables the MAC address learning on the specified
range of ports.
medium_type – Specify the medium type while the configured ports are combo ports. It’s an
optional parameter for configuring medium type combo ports. For no combo ports, user does
not need to specify medium_type in the commands.
state [enable | disable] − Enables or disables the specified range of ports.
description − Enter an alphanumeric string of no more than 32 characters to describe a
selected port interface.
clear description – To clear the description.
mdix [auto | normal | cross] – MDIX mode can be specified as auto, normal, or cross. If set to
normal state, the port is in MDIX mode and can be connected to a port on an end node, such
as a server or PC, using a straight-through cable. If set to cross state, the port is in MDI
mode, and can be connected to a port on another Switch or hub that uses MDI-X ports
through a straight-through cable. If set to auto state, the ports can be connected to any
connections by using straight-through or cross-over cable. The ports make the necessary
adjustments to accommodate either cable for correct operation.
Restrictions
Only Administrator and Operator-level users can issue this command.
Page 28

xStack® DES-3528/DES-3552 Series Layer 2 Fast Ethernet Managed Switch CLI Reference Guide
28
Example usage:
To configure the speed of ports 1-3 of unit 1 to be 10 Mbps, full duplex, learning enabled, state enabled and
flow control enabled:
DES-3528:admin# config ports 1-3 speed 10_full learning enable state enable
flow_control enable
Command: config ports 1-3 speed 10_full learning enable state enable flow_control
enable
Success.
DES-3528:admin#
show ports
Purpose
Used to display the current configuration of a range of ports.
Syntax show ports {<portlist>} {[description | err_disabled | details | media_type]}
Description
This command is used to display the current configuration of a range of ports.
Parameters
<portlist> − Specifies a port or range of ports to be displayed.
description – Adding this parameter to the show ports command indicates that a previously
entered port description will be included in the display.
err_disabled – Use this to list disabled ports including connection status and reason for being
disabled.
details – Use this to show the detail information of ports.
media_type – Specifies the media type used.
Restrictions
None.
Example usage:
To display the configuration of all ports on a Switch:
DES-3528:admin# show ports
Command: show ports
Port State/ Settings Connection Address
MDIX Speed/Duplex/FlowCtrl Speed/Duplex/FlowCtrl Learning
------- -------- --------------------- ---------------------- -------- 1 Enabled Auto/Disabled Link Down Enabled
Auto
2 Enabled Auto/Disabled Link Down Enabled
Auto
3 Enabled Auto/Disabled Link Down Enabled
Auto
4 Enabled Auto/Disabled Link Down Enabled
Auto
5 Enabled Auto/Disabled Link Down Enabled
Auto
6 Enabled Auto/Disabled Link Down Enabled
Auto
7 Enabled Auto/Disabled Link Down Enabled
Auto
8 Enabled Auto/Disabled Link Down Enabled
Auto
9 Enabled Auto/Disabled Link Down Enabled
Auto
CTRL+C ESC q Quit SPACE n Next Page p Previous Page r Refresh
Example usage:
To display the configuration of all ports on a standalone Switch, with description:
DES-3528:admin# show ports description
Command: show ports description
Page 29

xStack® DES-3528/DES-3552 Series Layer 2 Fast Ethernet Managed Switch CLI Reference Guide
29
Port State/ Settings Connection Address
MDIX Speed/Duplex/FlowCtrl Speed/Duplex/FlowCtrl Learning
------- -------- --------------------- ---------------------- -------- 1 Enabled Auto/Disabled Link Down Enabled
Auto
Description:
2 Enabled Auto/Disabled Link Down Enabled
Auto
Description:
3 Enabled Auto/Disabled Link Down Enabled
Auto
Description:
4 Enabled Auto/Disabled Link Down Enabled
Auto
Description:
5 Enabled Auto/Disabled Link Down Enabled
Auto
Description:
6 Enabled Auto/Disabled Link Down Enabled
Auto
Description:
CTRL+C ESC q Quit SPACE n Next Page p Previous Page r Refresh
Example usage:
To display disabled ports i n c luding c on nec ti on s tat us and reas on f or be ing d isab le d on a standalone Switch:
DES-3528:admin# show ports err_disabled
Command: show ports err_disabled
Port Port Connection Status Reason
State
----- -------- --------------------- ----------------
DES-3528:admin#
Example usage:
To display detail information of ports on the Switch:
DES-3528:admin# show ports details
Command: show ports details
Port : 1
--------------------
Port Status : Link Down
Description :
HardWare Type : Fast Ethernet
MAC Address : 00-22-B0-10-8A-01
Bandwidth : 100000Kbit
Auto-Negotiation : Enabled
Duplex Mode : Full Duplex
Flow Control : Disabled
MDI : Auto
Address Learning : Enabled
Last Clear of Counter : 0 hours 3 mins ago
BPDU Hardware Filtering Mode: Disabled
Queuing Strategy : FIFO
TX Load : 0/100, 0bits/sec, 0packets/sec
RX Load : 0/100, 0bits/sec, 0packets/sec
CTRL+C ESC q Quit SPACE n Next Page p Previous Page r Refresh
Page 30

xStack® DES-3528/DES-3552 Series Layer 2 Fast Ethernet Managed Switch CLI Reference Guide
30
enable jumbo_frame
Purpose
Used to enable the jumbo frame function on the Switch.
Syntax enable jumbo_frame
Description
This command will allow ethernet frames larger than 1536 bytes to be processed by the
Switch. The maximum size of the jumbo frame may not exceed 9220 Bytes tagged.
Parameters
None.
Restrictions
Only Administrator and Operator-level users can issue this command.
Example usage:
To enabled the jambo frame:
DES-3528:admin# enable jumbo_frame
Command: enable jumbo_frame
The maximum size of jumbo frame is 9216 bytes.
Success.
DES-3528:admin#
disable jumbo_frame
Purpose
Used to disable the jumbo frame function on the Switch.
Syntax
disable jumbo_frame
Description
This command will disable the jumbo frame function on the Switch.
Parameters
None.
Restrictions
Only Administrator and Operator-level users can issue this command.
Example usage:
To disable the jumbo frame:
DES-3528:admin# disable jumbo_frame
Command: disable jumbo_frame
Success.
DES-3528:admin#
show jumbo_frame
Purpose
Used to show the status of the jumbo frame function on the Switch.
Syntax
show jumbo_frame
Description
This command will show the status of the jumbo frame function on the Switch.
Parameters
None.
Restrictions
None.
Example usage:
To show the jumbo frame status currently configured on the Switch:
DES-3528:admin# show jumbo_frame
Command: show jumbo_frame
Jumbo Frame State : Disabled
Maximum Frame Size : 1536 Bytes
DES-3528:admin#
Page 31

xStack® DES-3528/DES-3552 Series Layer 2 Fast Ethernet Managed Switch CLI Reference Guide
31
PORT SECURITY COMMANDS
The Switch’s port security commands in the Command Line Interface (CLI) are listed (along with the appropriate
parameters) in the following table.
Command Parameters
config port_security ports [<portlist> | all] [{admin_state [enable | disable] | max_learning_addr
<max_lock_no 0-1638 4> | lock_address_mode [permanent | delete ont imeout |
deleteonreset]} |{vlan [<vlan_name 32> | vlanid <vidlist>] max_learning_addr
[<max_lock_no 0-163 84 > | no_limit]}]
delete port_security_entry [vlan <vlan_name 32> | vlanid <vlanid 1-4094>] mac_address <macaddr>
clear port_security_entry {ports [<portlist> | all] {[vlan <vlan_n ame 32> | vlanid <vidlist>]}}
show port_security {ports [<por tl ist> | all] {[ vlan <vlan_n ame 32> | vlanid <vidlist>]}}
enable port_security trap_log
disable port_security trap_l og
config port_security system
max_learning_addr
[<max_lock_no 1-163 84 > | no_limit]
config port_security vlan [<vlan_name 32> | vlanid <vidlist>] max_learning_addr [<max_lock_no 0-16384>
| no_limit]
Each command is listed, in detail, in the following sections.
config port_security ports
Purpose
Used to configure port security settings.
Syntax config port_security ports [<portlist> | all] [{admin_state [enable | disable] |
max_learning_addr <max _lo ck_no 0-16384> | lock_address_mode [permanent |
deleteontimeout | deleteonreset]} |{vlan [<vlan_name 32> | vlanid <vidlist>]
max_learning_addr [<max_lock_no 0-16384> | no_limit]}]
Description
This command allows for the configuration of the port security feature. Only the ports listed
in the <portlist> are affected.
Parameters
portlist − Specifies a port or range of ports to be configured.
all − Configure port security for all ports on the Switch.
admin_state [enable | disable] – Enable or disable port security for the listed ports.
max_learning_addr <max_lock_no 0-16384> − Use this to limit the number of MAC
addresses dynamically listed in the FDB for the ports.
lock_address_mode [permanent | deleteontimout | deleteonreset] – Indicates the method of
locking addresses. The user has three choices:
permanent – The locked addresses will not age out after the aging timer expires.
deleteontimeout – The locked addresses will age out after the aging timer expires.
deleteonreset – The locked addresses will not age out until the Switch has been
reset.
vlan – Specifies the VLAN name used.
vlanid – Specifies the VLAN ID used.
max_learning_addr – Specifies the maximum learning address value. To specify this value to
have no limit, select the ‘no_limit’ option.
Restrictions
Only Administrator and Operator-level users can issue this command.
Example usage:
To configure the port security:
DES-3528:admin# config port_security ports 1-5 admin_state enable max_learning_addr 5
lock_address_mode deleteonreset
Page 32

xStack® DES-3528/DES-3552 Series Layer 2 Fast Ethernet Managed Switch CLI Reference Guide
32
Command: config port_security ports 1-5 admin_state enable max_learning_addr 5
lock_address_mode deleteonreset
Success.
DES-3528:admin#
delete port_security_entry
Purpose
Used to delete a port security entry by MAC address, port number and VLAN ID.
Syntax delete port_security_entry [vlan <vlan_name 32> | vlanid <vlanid 1-4094>]
mac_address <macaddr>
Description
This command is used to delete a single, previously learned port security entry by port,
VLAN name, and MAC address.
Parameters
vlan name − Enter the corresponding VLAN name of the port to delete.
vlanid – Specifies the VLAN ID used.
mac_address <macaddr> − Enter the corresponding MAC address, previously learned by the
port, to delete.
Restrictions
Only Administrator and Operator-level users can issue this command.
Example usage:
To delete a port security entry:
DES-3528:admin# delete port_security_entry vlan default mac_address 00-01-30-10-2C-
C7
Command: delete port_security_entry vlan default mac_address 00-01-30-10-2C-C7
Success.
DES-3528:admin#
clear port_security_entry
Purpose
Used to clear MAC address entries learned from a specified port for the port security
function.
Syntax clear port_security_e n try {ports [<portlist> | all] {[vlan <vlan_name 32> | vlanid
<vidlist>]}}
Description
This command is used to clear MAC address entries which were learned by the Switch by a
specified port. This command only relates to the port security function.
Parameters
ports − Specifies a port or port range to clear.
vlan – Specifies the VLAN name used.
vlanid – Specifies the VLAN ID used.
Restrictions
Only Administrator and Operator-level users can issue this command.
Example usage:
To clear a port security entry by port:
DES-3528:admin#clear port_security_entry ports all
Command: clear port_security_entry ports all
Success.
DES-3528:admin#
show port_security
Purpose
Used to display the current port security configuration.
Page 33

xStack® DES-3528/DES-3552 Series Layer 2 Fast Ethernet Managed Switch CLI Reference Guide
33
show port_security
Syntax show port_security {ports [<po rtlist> | all] {[vlan <vlan_name 32> | vlanid <vidlist>]}}
Description
This command is used to display port security information of the Switch’s ports. The
information displayed includes port security trap/log state, admin state, maximum number of
learning address and lock mode.
Parameters
ports − Specifies a port or range of ports to be viewed.
vlan – Specifies the VLAN name used.
vlanid – Specifies the VLAN ID used.
Restrictions
None.
Example usage:
To display the port security configuration:
DES-3528:admin#show port_security
Command: show port_security
Port Security Trap/Log : Enabled
System Maximum Address : no_limit
VLAN Configuration (Only VLANs with limitation are displayed):
VID VLAN Name Max. Learning Addr.
---- -------------------------------- ----------------- 1 default 2
DES-3528:admin#
enable port_security trap_log
Purpose
Used to enable the trap log for port security.
Syntax enable port_security trap_log
Description This command, along with the disable port_security trap_log, will enable and disable the
sending of log messages to the Switch’s log and SNMP agent when the port security of the
Switch has been triggered.
Parameters
None.
Restrictions
Only Administrator and Operator-level users can issue this command.
Example usage:
To enable the port security trap log setting:
DES-3528:admin# enable port_security trap_log
Command: enable port_security trap_log
Success.
DES-3528:admin#
disable port_security trap_log
Purpose
Used to disable the trap log for port security.
Syntax disable port_security trap_log
Description This command, along with the enable port_security trap_log, will enable and disable the
sending of log messages to the Switch’s log and SNMP agent when the port security of the
Switch has been triggered.
Parameters
None.
Page 34

xStack® DES-3528/DES-3552 Series Layer 2 Fast Ethernet Managed Switch CLI Reference Guide
34
disable port_security trap_log
Restrictions
Only Administrator and Operator-level users can issue this command.
Example usage:
To disable the port security trap log setting:
DES-3528:admin# disable port_security trap_log
Command: disable port_security trap_log
Success.
DES-3528:admin#
config port_security system max_learning_addr
Purpose
This command sets the maximum number of port security entries that can be authorized
system wide.
Syntax config port_security system max_learning_addr [<max_lock_no 1-16384> | no_limit]
Description
There are four levels of limitations on the learned entry number; for the entire system, for a
port, for a VLAN, and for a specific VLAN on a port. If any limitation is exceeded, the new
entry will be discarded.
The setting for system level maximum learned users must be greater than the total of
maximum learned users allowed on all ports.
Parameters max_learning_addr - Specifies the maximum number of port security entries that can be
learned by the system. If the setting is smaller than the number of current learned entries on
all enabled ports, the command will be rejected.
<max_lock_no 1-16384> - Enter the maximum learning address value here. This value must
be between 1 and 16384.
no_limit - No limitation on the number of port security entries that can be learned by the
system. By default, the number is set to no_limit.
Restrictions
Only Administrator and Operator-level users can issue this command.
Example usage:
To configure the maximum number of port security entries on the Switch to be 256:
DES-3528:admin# config port_security system max_learning_addr 256
Command: config port_security system max_learning_addr 256
Success.
DES-3528:admin#
config port_security vlan
Purpose
This command sets the maximum number of port security entries that can be learned on a
specific VLAN.
Syntax config port_security vlan [<vlan_name 32> | vlanid <vidlist>] max_learning_addr
[<max_lock_no 0-16384> | no_limit]
Description
There are four levels that limit the number of learned entries; the entire system, a port, a
VLAN, and a specific VLAN on a port. If any limitation is exceeded, the new entry will be
discarded.
Parameters vlan - Specifies the VLAN by name.
<vlan_name 32> - Enter the VLAN name here. This name can be up to 32 characters long.
vlanid - Specifies a list of VLANs by VLAN ID.
<vidlist> - Enter the VLAN ID list here.
max_learning_addr - Specifies the maximum number of port security entries that can be
Page 35

xStack® DES-3528/DES-3552 Series Layer 2 Fast Ethernet Managed Switch CLI Reference Guide
35
config port_security vlan
learned by this VLAN. If this parameter is set to 0, it means that no user can be authorized
on this VLAN. If the setting is lower than the number of current learned entries on the VLAN,
the command will be rejected. The default value is “no_limit”
<max_lock_no 0-16384> - Enter the maximum number of port security entries that can be
learned here. This value must be between 0 and n.
no_limit - No limitation on the number of port security entries that can be learned by a
specific VLAN.
Restrictions
Only Administrator and Operator-level users can issue this command.
Example usage:
To configure the maximum number of VLAN-based port security entries on VLAN 1 to be 64:
DES-3528:admin# config port_security vlan vlanid 1 max_learning_addr 64
Command: config port_security vlan vlanid 1 max_learning_addr 64
Success.
DES-3528:admin#
Page 36

xStack® DES-3528/DES-3552 Series Layer 2 Fast Ethernet Managed Switch CLI Reference Guide
36
STACKING COMMANDS
The stacking configuration commands in the Command Line Interface (CLI) are listed (along with the appropriate
parameters) in the following table.
Command Parameters
config box_priority current_box_id <value 1-8> priority <value 1-63>
config box_id current_box_id <value 1-8> new_box_id [auto | <value 1-8>]
show stack_information
config stacking_mode [disable(0) | enable(1)]
show stacking_mode
show stack_device
config stacking force_master_role state [enable | disable]
Each command is listed, in detail, in the following sections.
config box_priority
Purpose Used to configure box priority so as to determine which box (Switch) becomes the
master. A lower number denotes a higher priority.
Syntax
config box_priority current_box_id <value 1-8> priority <value 1-63>
Description This command is used to configure the box (Switch) priority.
Parameters
current_box_id <value 1–8> – Identifies the Switch being configured. Range is 1 to 8.
priority <value 1–63> – Assigns a priority value to the box. A Lower number denotes a
higher priority. The valid priority range is 1 to 63.
Restrictions Only Administrator and Operator and Power-User-level users can issue this command.
Usage example:
To configure box priority:
DES-3528:admin# config box_priority current_box_id 1 priority 1
Command: config box_priority current_box_id 1 priority 1
Success.
DES-3528:admin#
config box_id
Purpose Used to configure box ID. Users can use this command to reassign box IDs.
Syntax
config box_id current_box_id <value 1-8> new_box_id <value 1-8> new_box_id
[auto | <value 1-8>]
Description This command is used to assign box IDs to Switches in a stack.
Parameters
current_box_id – Identifies the Switch being configured. Range is 1 to 8.
new_box_id – The new ID being assigned to the Switch (box). Range is 1 to 8.
• auto – Allows the box ID to be assigned automatically.
Restrictions Only Administrator and Operator and Power-User-level users can issue this command.
Usage example:
To change a box ID:
DES-3528:admin# config box_id current_box_id 1 new_box_id 2
Command: config box_id current_box_id 1 new_box_id 2
Success.
Page 37

xStack® DES-3528/DES-3552 Series Layer 2 Fast Ethernet Managed Switch CLI Reference Guide
37
DES-3528:admin#
show stack_information
Purpose Used to display the stack information table.
Syntax
show stack_information
Description This command display stack information.
Parameters None.
Restrictions Only Administrator and Operator and Power-User-level users can issue this command.
Usage example:
To display stack information:
DES-3528:admin# show stack_information
Command: show stack_information
Topology :Duplex_Chain
My Box ID :1
Master ID :1
Box Count :1
Force Master Role: Disabled
Box User Prio- Prom Runtime H/W
ID Set Type Exist rity MAC version version version
--- ---- ------------- ----- ---- ----------------- --------- --------- --------
1 Auto DES-3528 Exist 32 00-22-B0-10-8A-00 1.00.B008 2.60.017 A2
2 - NOT_EXIST No
3 - NOT_EXIST No
4 - NOT_EXIST No
5 - NOT_EXIST No
6 - NOT_EXIST No
7 - NOT_EXIST No
8 - NOT_EXIST No
DES-3528:admin#
config stacking_mode
Purpose Used to configure the stacking mode.
Syntax
config stacking_mode [disable(0 ) | e n able(1)]
Description This command will enable or disable the stacking mode for the Switch. When enabled,
the last two ports on the rear of the Switch will be enabled for stacking.
Parameters
enable | disable – Use these parameters to enable or disable the stacking mode for the
Switch. Once this command is executed, it will cause the Switch to reboot. Before
configuring the stacking mode of a Switch to disable status, the Switch must be
physically removed from the stacking swtitches.
Restrictions Only Administrator-level users can issue this command.
Usage example:
To disable the stacking mode:
DES-3528:admin# config stacking mode disable
Command: config stacking mode disable
Change Box bootmode may cause devices work restart, still continue? (y/n)y
Page 38

xStack® DES-3528/DES-3552 Series Layer 2 Fast Ethernet Managed Switch CLI Reference Guide
38
show stacking_mode
Purpose Used to view the current stacking mode.
Syntax
show stacking_mode
Description This command will display whether the current stacking mode is enabled or disabled.
Parameters None.
Restrictions Only Administrator and Operator and Power-User-level users can issue this command.
Usage example:
To view the current stacking mode:
DES-3528:admin# show stacking mode
Command: show stacking mode
Stacking mode : Enabled
DES-3528:admin#
show stack_device
Purpose Used to display the information for devices in the stack.
Syntax
show stack_device
Description Used to display the information for devices in the stack.
Parameters None.
Restrictions None.
Usage example:
To display the stack information:
DES-3528:admin# show stack_device
Command: show stack_device
Box ID Box Type H/W Version Serial Number
------- --------------- ------------ --------------- 1 DES-XXXXS 0A1 1234567890123
3 DES-XXXXS 0A1 2345678901234
DES-3528:admin#
config stacking force_master_role
Purpose This command is used to enable or disable the force master role.
Syntax
config stacking force_master_role state [enable | disable]
Description If state is enabled, when device is in election state, it still uses old priority setting and
MAC to compare device priority. After stacking is stable, master’s priority will become
zero. If stacking topology change again, Master will use priority zero and MAC address to
determine who new primary master is.
Parameters
force_master_role - Enable or disable the Switch’s Stacking Force Master Role state.
Default setting is disabled.
enable - Specifies that Switch's stacking force master role will be enabled.
disable - Specifies that Switch's stacking force master role will be disabled.
Restrictions Only Administrator and Operator and Power-User-level users can issue this command.
Usage example:
To enable stacking force master role state:
Page 39

xStack® DES-3528/DES-3552 Series Layer 2 Fast Ethernet Managed Switch CLI Reference Guide
39
DES-3528:admin# config stacking force_master_role state enable
Command: config stacking force_master_role state enable
Success.
DES-3528:admin#
Page 40

xStack® DES-3528/DES-3552 Series Layer 2 Fast Ethernet Managed Switch CLI Reference Guide
40
NETWORK MANAGEMENT (SNMP) COMMANDS
The Switch supports the Simple Network Management Protocol (SNMP) versions 1, 2c, and 3. Users can specify
which version of the SNMP users want to use to monitor and control the Switch. The three versions of SNMP vary in
the level of security provided between the management station and the network device. The following table lists the
security features of the three SNMP versions:
SNMP
Version
Authentication Method Description
v1 Community String
Community String is used for authentication − NoAuthNoPriv
v2c Community String
Community String is used for authentication − NoAuthNoPriv
v3 Username
Username is used for authentication − NoAuthNoPriv, AuthNoPriv or
AuthPriv
v3 MD5 or SHA
Authentication is based on the HMAC-MD5 or HMAC-SHA algorithms −
AuthNoPriv
v3 MD5 DES or SHA DES
Authentication is based on the HMAC-MD5 or HMAC-SHA algorithms −
AuthPriv.
DES 56-bit encryption is added based on the CBC-DES (DES-56)
standard
The network management commands in the Command Line Interface (CLI) are listed (along with the appropriate
parameters) in the following table.
Command Parameters
create snmp user < user_name 32> <groupname 32> {encrypted [by_password auth [md5
<auth_password 8-16 > | sha <auth_p ass wor d 8-2 0>] priv [no ne | des
<priv_password 8-16>] | by_key auth [md5 <auth_key 32-32> | sha
<auth_key 40-40>] priv [none | des <priv_key 32-32>]]}
delete snmp user <user_name 32>
show snmp user
create snmp view <view_name 32> <oid> view_type [included | excluded]
delete snmp view <view_name 32> [all | oid]
show snmp view {<view_name 32>}
create snmp community <community_string 32> view <view_name 32> [read_only | read_write]
delete snmp community <community_string 32>
show snmp community {<community_string 32>}
config snmp engineID <snmp_engineID 10-64>
show snmp engineID
create snmp group <groupname 32> [v1 | v2c | v3 [noauth_nopriv | auth_nopriv | auth_priv]]
{read_view <view_name 32> | write_ vie w <vie w _name 32> | notify_view
<view_name 32>}(1)
delete snmp group <groupname 32>
show snmp groups
create snmp host [<ipaddr> | v6host <ipv6addr>] [v1 | v2c | v3 [noauth_nopri v | auth_no pr iv |
auth_priv]] <auth_string 32>
delete snmp host [<ipaddr> | v6hos t <ipv6 ad dr >]
show snmp host {<ipaddr>}
show snmp v6host {<ipv6addr>}
Page 41

xStack® DES-3528/DES-3552 Series Layer 2 Fast Ethernet Managed Switch CLI Reference Guide
41
Command Parameters
create trusted_host [<ipaddr> | <ipv6addr> | network <network _addr es s> | ipv6 _pr ef ix
<ipv6networkaddr>] {snmp | telnet | ssh | http | https | ping}
config trusted_host [<ipaddr> | <ipv6ad dr> | netw ork <network_address> | ipv6_prefix
<ipv6networkaddr>] [add | delete] {snmp | telnet | ssh | http | https | ping | all}
delete trusted_host [ipaddr <ipaddr> | ipv6address <ipv6addr> | network <network_address> |
ipv6_prefix <ipv6networkaddr> | all]
show trusted_host
enable snmp traps
enable snmp authenticate_traps
show snmp traps {linkchange_traps {ports <portlist>}}
disable snmp traps
disable snmp authenticate_traps
config snmp system_contact <sw_contact>
config snmp system_location <sw_location>
config snmp system_name <sw_name>
enable snmp
disable snmp
Each command is listed, in detail, in the following sections.
create snmp user
Purpose
Used to create a new SNMP user and adds the user to an SNMP group that is also created
by this command.
Syntax create snmp user <user_name 32> <groupname 32> {encrypted [by_password auth
[md5 <auth_password 8-16> | sha <auth_password 8-20>] priv [none | des
<priv_password 8-16>] | by_key auth [md5 <auth_key 32-32> | sha <auth_key 40-40>]
priv [none | des <priv_key 32-32> ]]}
Description
This command creates a new SNMP user and adds the user to an SNMP group that is also
created by this command. SNMP ensures:
Message integrity − Ensures that packets have not been tampered with during transit.
Authentication − Determines if an SNMP message is from a valid source.
Encryption − Scrambles the contents of messages to prevent it from being viewed by an
unauthorized source.
Parameters
<user_name 32> − An alphanumeric name of up to 32 characters that will identify the new
SNMP user.
<groupname 32> − An alphanumeric name of up to 32 characters that will identify the SNMP
group the new SNMP user will be associated wit h.
encrypted – Allows the user to choose a type of authorization for authentication using SNMP.
The user may choose:
by_password – Requires the SNMP user to enter a password for authentication and
privacy. The password is defined by specifying the auth_password below. This
method is recommended.
by_key – Requires the SNMP user to enter a encryption key for authentication and
privacy. The key is defined by specifying the key in hex form below. This method is
not recommended.
auth − The user may also choose the type of authentication algorithms used to authenticate
the snmp user. The choices are:
md5 − Specifies that the HMAC-MD5-96 authentication level will be used. md5 may be
utilized by entering one of the following:
Page 42

xStack® DES-3528/DES-3552 Series Layer 2 Fast Ethernet Managed Switch CLI Reference Guide
42
create snmp user
• <auth password 8-16> - An alphanumeric string of between 8 and 16 characters that
will be used to authorize the agent to receive packets for the host.
• <auth_key 32-32> - Enter an alphanumeric string of exactly 32 characters, in hex
form, to define the key that will be used to authorize the agent to receive packets for
the host.
sha − Specifies that the HMAC-SHA-96 authentication level will be used.
• <auth password 8-20> - An alphanumeric string of between 8 and 20 characters that
will be used to authorize the agent to receive packets for the host.
• <auth_key 40-40> - Enter an alphanumeric string of exactly 40 characters, in hex
form, to define the key that will be used to authorize the agent to receive packets for
the host.
priv – Adding the priv (privacy) parameter will allow for encryption in addition to the
authentication algorithm for higher security. The user may choose:
des – Adding this parameter will allow for a 56-bit encryption to be added using the DES-56
standard using:
• <priv_password 8-16> - An alphanumeric string of between 8 and 16 characters that
will be used to encrypt the contents of messages the host sends to the agent.
• <priv_key 32-32> - Enter an alphanumeric key string of exactly 32 characters, in hex
form, that will be used to encrypt the contents of messages the host sends to the
agent.
none – Adding this parameter will add no encryption.
Restrictions
Only Administrator-level users can issue this command.
Example usage:
To create an SNMP user on the Switch:
DES-3528:admin# create snmp user dlink default encrypted by_password auth md5 canadian
priv none
Command: create snmp user dlink default encrypted by_password auth md5 canadian priv
none
Success.
DES-3528:admin#
delete snmp user
Purpose
Used to remove an SNMP user from an SNMP group.
Syntax delete snmp user <user_name 32>
Description
This command removes an SNMP user from its SNMP group.
Parameters
<user_name 32> − An alphanumeric string of up to 32 characters that identifies the SNMP
user that will be deleted.
Restrictions
Only Administrator-level users can issue this command.
Example usage:
To delete a previously entered SNMP user on the Switch:
DES-3528:admin# delete snmp user dlink
Command: delete snmp user dlink
Success.
DES-3528:admin#
show snmp user
Page 43

xStack® DES-3528/DES-3552 Series Layer 2 Fast Ethernet Managed Switch CLI Reference Guide
43
show snmp user
Purpose
Used to display information about each SNMP username in the SNMP group username
table.
Syntax show snmp user
Description
This command displays information about each SNMP username in the SNMP group
username table.
Parameters
None.
Restrictions
None.
Example usage:
To display the SNMP users currently configured on the Switch:
DES-3528:admin# show snmp user
Command: show snmp user
Username Group Name VerAuthPriv
-------- ------------- ----------initial initial V3 NoneNone
Total Entries: 1
DES-3528:admin#
create snmp view
Purpose Used to assign views to community strings to limit which MIB objects and SNMP manager
can access.
Syntax create snmp view <view_name 32> <oid> view_type [included | excluded]
Description This command assigns views to community strings to limit which MIB objects an SNMP
manager can access.
Parameters <view_name 32> − An alphanumeric string of up to 32 characters that identifies the SNMP
view that will be created.
<oid> − The object ID that identifies an object tree (MIB tree) that will be included or
excluded from access by an SNMP manager.
view type – Sets the view type to be:
• included − Include this object in the list of objects that an SNMP manager can
access.
• excluded − Exclude this object from the list of objects that an SNMP manager can
access.
Restrictions Only Administrator-level users can issue this command.
Example usage:
To create an SNMP view:
DES-3528:admin# create snmp view dlinkview 1.3.6 view_type included
Command: create snmp view dlinkview 1.3.6 view_type included
Success.
DES-3528:admin#
delete snmp view
Purpose
Used to remove an SNMP view entry previously created on the Switch.
Syntax delete snmp view <view_name 32> [all | <oid>]
Page 44

xStack® DES-3528/DES-3552 Series Layer 2 Fast Ethernet Managed Switch CLI Reference Guide
44
delete snmp view
Description
This command is used to remove an SNMP view previously created on the Switch.
Parameters
<view_name 32> − An alphanumeric string of up to 32 characters that identifies the SNMP
view to be deleted.
all − Specifies that all of the SNMP views on the Switch will be deleted.
<oid> − The object ID that identifies an object tree (MIB tree) that will be deleted from the
Switch.
Restrictions
Only Administrator-level users can issue this command.
Example usage:
To delete a previously configured SNMP view from the Switch:
DES-3528:admin# delete snmp view dlinkview all
Command: delete snmp view dlinkview all
Success.
DES-3528:admin#
show snmp view
Purpose
Used to display an SNMP view previously created on the Switch.
Syntax show snmp view {<view_name 32>}
Description
This command displays an SNMP view previously created on the Switch.
Parameters
<view_name 32> − An alphanumeric string of up to 32 characters that identifies the SNMP
view that will be displayed.
Restrictions
None.
Example usage:
To display SNMP view configuration:
DES-3528:admin# show snmp view
Command: show snmp view
Vacm View Table Settings
View Name Subtree View Type
--------- ---------- --------- ReadView 1 Included
WriteView 1 Included
NotifyView 1.3.6 Included
restricted 1.3.6.1.2.1.1 Included
restricted 1.3.6.1.2.1.11 Included
restricted 1.3.6.1.6.3.10.2.1 Included
restricted 1.3.6.1.6.3.11.2.1 Included
restricted 1.3.6.1.6.3.15.1.1 Included
CommunityView 1 Included
CommunityView 1.3.6.1.6.3 Excluded
CommunityView 1.3.6.1.6.3.1 Included
Total Entries: 11
DES-3528:admin#
create snmp community
Purpose
Used to create an SNMP community string to define the relationship between the SNMP
manager and an agent. The community string acts like a password to permit access to the
agent on the Switch. One or more of the following characteristics can be associated with the
Page 45

xStack® DES-3528/DES-3552 Series Layer 2 Fast Ethernet Managed Switch CLI Reference Guide
45
create snmp community
community string:
An Access List of IP addresses of SNMP managers that are permitted to use the community
string to gain access to the Switch’s SNMP agent.
An MIB view that defines the subset of all MIB objects that will be accessible to the SNMP
community.
read_write or read_only level permission for the MIB objects accessible to the SNMP
community.
Syntax create snmp community <community_string 32> view <view_name 32> [read_only |
read_write]
Description
This command is used to create an SNMP community string and to assign access-limiting
characteristics to this community string.
Parameters
<community_string 32> − An alphanumeric string of up to 32 characters that is used to
identify members of an SNMP community. This string is used like a password to give remote
SNMP managers access to MIB objects in the Switch’s SNMP agent.
view <view_name 32> − An alphanumeric string of up to 32 characters that is used to identify
the group of MIB objects that a remote SNMP manager is allowed to access on the Switch.
read_only − Specifies that SNMP community members using the community string created
with this command can only read the contents of the MIBs on the Switch.
read_write − Specifies that SNMP community members using the community string created
with this command can read from and write to the contents of the MIBs on the Switch.
Restrictions
Only Administrator-level users can issue this command.
Example usage:
To create the SNMP community string “dlink:”
DES-3528:admin# create snmp community dlink view ReadView read_write
Command: create snmp community dlink view ReadView read_write
Success.
DES-3528:admin#
delete snmp community
Purpose
Used to remove a specific SNMP community string from the Switch.
Syntax delete snmp community <community_string 32>
Description
This command is used to remove a previously defined SNMP community string from the
Switch.
Parameters
<community_string 32> − An alphanumeric string of up to 32 characters that is used to
identify members of an SNMP community. This string is used like a password to give remote
SNMP managers access to MIB objects in the Switch’s SNMP agent.
Restrictions
Only Administrator-level users can issue this command.
Example usage:
To delete the SNMP community string “dlink”:
DES-3528:admin# delete snmp community dlink
Command: delete snmp community dlink
Success.
DES-3528:admin#
show snmp community
Page 46

xStack® DES-3528/DES-3552 Series Layer 2 Fast Ethernet Managed Switch CLI Reference Guide
46
show snmp community
Purpose
Used to display SNMP community strings configured on the Switch.
Syntax show snmp community {<community_string 32>}
Description
This command is used to display SNMP community strings that are configured on the Switch.
Parameters
<community_string 32> − An alphanumeric string of up to 32 characters that is used to
identify members of an SNMP community. This string is used like a password to give remote
SNMP managers access to MIB objects in the Switch’s SNMP agent.
Restrictions
None.
Example usage:
To display the currently entered SNMP community strings:
DES-3528:admin# show snmp community
Command: show snmp community
SNMP Community Table
Community Name View Name Access Right
-------------- ----------- -----------dlink ReadView read_write
private CommunityView read_write
public CommunityView read_only
Total Entries: 3
DES-3528:admin#
config snmp engineID
Purpose
Used to configure a name for the SNMP engine on the Switch.
Syntax config snmp engineID <snmp_engineID 10-64>
Description
This command configures a name for the SNMP engine on the Switch.
Parameters
<snmp_engineID 10-64> − An alphanumeric string that will be used to identify the SNMP
engine on the Switch.
Restrictions
Only Administrator-level users can issue this command.
Example usage:
To give the SNMP agent on the Switch the name “0035636666”:
DES-3528:admin# config snmp engineID 0035636666
Command: config snmp engineID 0035636666
Success.
DES-3528:admin#
show snmp engineID
Purpose
Used to display the identification of the SNMP engine on the Switch.
Syntax show snmp engineID
Description
This command displays the identification of the SNMP engine on the Switch.
Parameters
None.
Restrictions
None.
Example usage:
Page 47

xStack® DES-3528/DES-3552 Series Layer 2 Fast Ethernet Managed Switch CLI Reference Guide
47
To display the current name of the SNMP engine on the Switch:
DES-3528:admin# show snmp engineID
Command: show snmp engineID
SNMP Engine ID : 0035636666
DES-3528:admin#
create snmp group
Purpose
Used to create a new SNMP group, or a table that maps SNMP users to SNMP views.
Syntax create snmp group <groupname 32> [v1 | v2c | v3 [noauth_nopriv | auth_nopriv |
auth_priv]] {read_view <view_name 32> | write_view <view_name 32> | notify_view
<view_name 32>}(1)
Description
This command creates a new SNMP group, or a table that maps SNMP users to SNMP
views.
Parameters
<groupname 32> − An alphanumeric name of up to 32 characters that will identify the SNMP
group the new SNMP user will be associated wit h.
v1 – Specifies that SNMP version 1 will be used. The Simple Network Management Protocol
(SNMP), version 1, is a network management protocol that provides a means to monitor and
control network devices.
v2c – Specifies that SNMP version 2c will be used. The SNMP v2c supports both centralized
and distributed network management strategies. It includes improvements in the Structure of
Management Information (SMI) and adds some security features.
v3 – Specifies that the SNMP version 3 will be used. SNMP v3 prov ides secure access to
devices through a combination of authentication and encrypting packets over the network.
SNMP v3 adds:
• Message integrity − Ensures that packets have not been tampered with during
transit.
• Authentication − Determines if an SNMP message is from a valid source.
• Encryption − Scrambles the contents of messages to prevent it being viewed by an
unauthorized source.
noauth_nopriv − Specifies that there will be no authorization and no encryption of packets
sent between the Switch and a remote SNMP manager.
auth_nopriv − Specifies that authorization will be required, but there will be no encryption of
packets sent between the Switch and a remote SNMP manager.
auth_priv − Specifies that authorization will be required, and that packets sent between the
Switch and a remote SNMP manger will be encrypted.
read_view – Specifies that the SNMP group being created can request SNMP messages.
write_view – Specifies that t he SNM P group bei ng cre ated has writ e priv ileges .
notify_view − Specifies that the SNMP group being created can receive SNMP trap
messages generated by the Switch’s SNMP agent.
<view_name 32> − An alphanumeric string of up to 32 characters that is used to identify the
group of MIB objects that a remote SNMP manager is allowed to access on the Switch.
Restrictions
Only Administrator-level users can issue this command.
Example usage:
To create an SNMP group nam ed “sg1”:
DES-3528:admin# create snmp group sg1 v3 noauth_nopriv read_view v1 write_view v1
notify_view v1
Command: create snmp group sg1 v3 noauth_nopriv read_view v1 write_view v1 notify_view
v1
Success.
DES-3528:admin#
Page 48

xStack® DES-3528/DES-3552 Series Layer 2 Fast Ethernet Managed Switch CLI Reference Guide
48
delete snmp group
Purpose
Used to remove an SNMP group from the Switch.
Syntax delete snmp group <groupname 32>
Description
This command is used to remove an SNMP group from the Switch.
Parameters
<groupname 32> − An alphanumeric name of up to 32 characters that will identify the SNMP
group the new SNMP user will be associated wit h.
Restrictions
Only Administrator-level users can issue this command.
Example usage:
To delete the SNMP group named “sg1”:
DES-3528:admin# delete snmp group sg1
Command: delete snmp group sg1
Success.
DES-3528:admin#
show snmp groups
Purpose
Used to display the group-names of SNMP groups currently configured on the Switch. The
security model, level, and status of each group are also displayed.
Syntax show snmp groups
Description
This command displays the group-names of SNMP groups currently configured on the
Switch. The security model, level, and status of each group are also displayed.
Parameters
None.
Restrictions
None.
Example usage:
To display the currently configured SNMP groups on the Switch:
DES-3528:admin# show snmp groups
Command: show snmp groups
Vacm Access Table Settings
Group Name : public
ReadView Name : CommunityView
WriteView Name :
Notify View Name : CommunityView
Securiy Model : SNMPv1
Securiy Level : NoAuthNoPriv
Group Name : public
ReadView Name : CommunityView
WriteView Name :
Notify View Name : CommunityView
Securiy Model : SNMPv2
Securiy Level : NoAuthNoPriv
Group Name : initial
ReadView Name : restricted
WriteView Name :
Notify View Name : restricted
Securiy Model : SNMPv3
Securiy Level : NoAuthNoPriv
CTRL+C ESC q Quit SPACE n Next Page ENTER Next Entry a All
Page 49

xStack® DES-3528/DES-3552 Series Layer 2 Fast Ethernet Managed Switch CLI Reference Guide
49
create snmp host
Purpose
Used to create a recipient of SNMP traps generated by the Switch’s SNMP agent.
Syntax create snmp host [<ipaddr> | v6host <ipv6addr>] [v1 | v2c | v3 [noauth_nopriv |
auth_nopriv | auth_priv]] <auth_string 32>
Description
This command creates a recipient of SNMP traps generated by the Switch’s SNMP agent.
Parameters
<ipaddr> − The IP address of the remote management station that will serve as the SNMP
host for the Switch.
<ipv6addr> − The IPv6 address of the remote management station that will serve as the
SNMP host for the Switch.
v1 – Specifies that SNMP version 1 will be used. The Simple Network Management Protocol
(SNMP), version 1, is a network management protocol that provides a means to monitor and
control network devices.
v2c – Specifies that SNMP version 2c will be used. The SNMP v2c supports both centralized
and distributed network management strategies. It includes improvements in the Structure of
Management Information (SMI) and adds some security features.
v3 – Specifies that the SNMP version 3 will be used. SNMP v3 prov ides secure access to
devices through a combination of authentication and encrypting packets over the network.
SNMP v3 adds:
• Mes sage int egr ity − ensures that packets have not been tampered with during
transit.
• Authentication − determines if an SNMP message is from a valid source.
• Encryption − scrambles the contents of messages to prevent it being viewed by an
unauthorized source.
noauth_nopriv
−
Specifies that there will be no authorization and no encryption of packets
sent between the Switch and a remote SNMP manager.
auth_nopriv − Specifies that authorization will be required, but there will be no encryption of
packets sent between the Switch and a remote SNMP manager.
auth_priv − Specifies that authorization will be required, and that packets sent between the
Switch and a remote SNMP manger will be encrypted.
<auth_string 32> − An alphanumeric string used to authorize a remote SNMP manager to
access the Switch’s SNMP agent.
Restrictions
Only Administrator-level users can issue this command.
Example usage:
To create an SNMP host to receive SNMP messages:
DES-3528:admin# create snmp host 10.48.74.100 v3 auth_priv public
Command: create snmp host 10.48.74.100 v3 auth_priv public
Success.
DES-3528:admin#
delete snmp host
Purpose
Used to remove a recipient of SNMP traps generated by the Switch’s SNMP agent.
Syntax delete snmp host [<ipaddr> | v6host <ipv6addr>]
Description
This command deletes a recipient of SNMP traps generated by the Switch’s SNMP agent.
Parameters
<ipaddr> − The IP address of a remote SNMP manager that will receive SNMP traps
generated by the Switch’s SNMP agent.
<ipv6addr> − The IPv6 address of a remote SNMP manager that will receive SNMP traps
generated by the Switch’s SNMP agent.
Restrictions
Only Administrator-level users can issue this command.
Page 50

xStack® DES-3528/DES-3552 Series Layer 2 Fast Ethernet Managed Switch CLI Reference Guide
50
Example usage:
To delete an SNMP host entry:
DES-3528:admin# delete snmp host 10.48.74.100
Command: delete snmp host 10.48.74.100
Success.
DES-3528:admin#
show snmp host
Purpose
Used to display the recipient of SNMP traps generated by the Switch’s SNMP agent.
Syntax show snmp host {<ipaddr>}
Description
This command is used to display the IP addresses and configuration information of remote
SNMP managers that are designated as recipients of SNMP traps that are generated by the
Switch’s SNMP agent.
Parameters
<ipaddr> − The IP address of a remote SNMP manager that will receive SNMP traps
generated by the Switch’s SNMP agent.
Restrictions
None.
Example usage:
To display the currently configured SNMP hosts on the Switch:
DES-3528:admin# show snmp host
Command: show snmp host
SNMP Host Table
Host IP Address SNMP Version Community Name/SNMPv3 User Name
--------------- ------------ ------------------------------
10.48.76.23 V2c private
10.48.74.100 V3 authpriv public
Total Entries: 2
DES-3528:admin#
show snmp v6host
Purpose
This command is used to display the recipient for which the traps are targeted.
Syntax show snmp v6host {<ipv6addr>}
Description
This command is used to display the recipient for which the traps are targeted.
Parameters v6host - (Optional) Specifies the IPv6 host address.
<ipv6addr> - Enter the IPv6 address used for the configuration here.
If no parameter specified, all SNMP hosts will be displayed.
Restrictions
None.
Example usage:
To show SNMP host:
Page 51

xStack® DES-3528/DES-3552 Series Layer 2 Fast Ethernet Managed Switch CLI Reference Guide
51
DES-3528:admin# show snmp v6host
Command: show snmp v6host
SNMP Host Table
-----------------------------------------------------------------Host IPv6 Address : 3FFE::3
SNMP Version : V3 na/np
Community Name/SNMPv3 User Name : initial
Host IPv6 Address : 3FFE::2
SNMP Version : V2c
Community Name/SNMPv3 User Name : private
Host IPv6 Address : 3FFE::1
SNMP Version : V1
Community Name/SNMPv3 User Name : public
Host IPv6 Address : 3FFE::3
SNMP Version : V3 a/np
Community Name/SNMPv3 User Name : user123
Host IPv6 Address : 3FFE::3
SNMP Version : V3 a/ p
Community Name/SNMPv3 User Name : user234
Total Entries: 5
DES-3528:admin#
create trusted_host
Purpose
Used to create the trust ed hos t.
Syntax create trusted_host [<i p addr> | <ipv6addr> | network <network_address> | ipv6_prefix
<ipv6networkaddr>] {snmp | telnet | ssh | http | https | ping}
Description
This command creates the trusted host. The Switch allows users to specify up to four IP
addresses that are allowed to manage the Switch via in-band SNMP or TELNET based
management software. These IP addresses must be members of the Management VLAN. If
no IP addresses are specified, then there is nothing to prevent any IP address from
accessing the Switch, provided the user knows the Username and Password.
Parameters
<ipaddr> − The IP address of the trusted host to be created.
<network_address> − IP address and netmask of the trusted host to be created.
Restrictions
Only Administrator and Operator-level users can issue this command.
Example usage:
To create the trusted host:
DES-3528:admin# create trusted_host 10.62.32.1
Command: create trusted_host 10.62.32.1
Success.
config trusted_host
Purpose
Used to configure the access interfaces for the trusted host.
Syntax config trusted_host [<ipaddr> | <ipv6addr> | network <network_address> | ipv6_prefix
<ipv6networkaddr>] [add | delete] {snmp | telnet | ssh | http | https | ping | all}
Description
Used to configure the access interfaces for the trusted host.
Parameters <ipaddr> - The IP address of the trusted host.
<ipv6addr> - The IPv6 address of the trusted host.
Page 52

xStack® DES-3528/DES-3552 Series Layer 2 Fast Ethernet Managed Switch CLI Reference Guide
52
config trusted_host
network - The network address of the trusted network. The form of network address is
xxx.xxx.xxx.xxx/y.
<network_address> - Enter the network address used here.
ipv6_prefix - The IPv6 subnet prefix of the trusted network.
<ipv6networkaddr> - Enter the IPv6 subnet prefix here.
add - Add interfaces for that trusted host.
delete - Delete interfaces for that trusted host.
snmp - (Optional) Specifies trusted host for SNMP.
telnet - (Optional) Specifies trusted host for TELENT.
ssh - (Optional) Specifies trusted host for SSH.
http - (Optional) Specifies trusted host for HTTP.
https - (Optional) Specifies trusted host for HTTPs.
ping - (Optional) Specifies trusted host for PING.
Restrictions
Only Administrator and Operator-level users can issue this command.
Example usage:
To configure the trusted host:
DES-3528:admin# config trusted_host 10.48.74.121 add ssh telnet
Command: config trusted_host 10.48.74.121 add ssh telnet
Success.
DES-3528:admin#
show trusted_host
Purpose Used to display a list of trusted hosts entered on the Switch using the create trusted_host
command above.
Syntax show trusted_host
Description This command a list of trusted hosts entered on the Switch using the create trusted_host
command above.
Parameters
None.
Restrictions
None.
Example Usage:
To display the list of trust hosts:
DES-3528:admin# show trusted_host
Command: show trusted_host
Management Stations
IP Address Access Interface
----------------------------------------------------------------
10.62.32.1/32
10.62.32.1/16
Total Entries: 2
DES-3528:admin#
delete trusted_host
Purpose
Used to delete a trusted host entry made using the create trusted_host command above.
Page 53

xStack® DES-3528/DES-3552 Series Layer 2 Fast Ethernet Managed Switch CLI Reference Guide
53
delete trusted_host
Syntax delete trusted_host [ipa ddr <ipaddr> | ipv6address <ipv6addr> | network
<network_address> | ipv6_pref ix <ipv 6net workaddr> | all]
Description
Used to delete a trusted host entry made using the create trusted_host command above.
Parameters ipaddr - The IP address of the trusted host.
<ipaddr> - Enter the IP address used for this configuration here.
ipv6addr - The IPv6 address of the trusted host.
<ipv6addr> - Enter the IPv6 address used for this configuration here.
network - The network address of the trusted network.
<network_address> - Enter the network address used for this configuration here.
ipv6_prefix - The IPv6 subnet prefix address of the trusted network
<ipv6networkaddr> - Enter the IPv6 subnet profix address here.
all - All trusted hosts will be deleted.
Restrictions
Only Administrator and Operator-level users can issue this command.
Example usage:
To delete a trusted host with an IP address 10.62.32.1:
DES-3528:admin# delete trusted_host ipaddr 10.62.32.1
Command: delete trusted_host ipaddr 10.62.32.1
Success.
enable snmp traps
Purpose
Used to enable SNMP trap support.
Syntax enable snmp traps
Description
This command is used to enable SNMP trap support on the Switch.
Parameters
None.
Restrictions
Only Administrator and Operator-level users can issue this command.
Example usage:
To enable SNMP trap support on the Switch:
DES-3528:admin# enable snmp traps
Command: enable snmp traps
Success.
DES-3528:admin#
enable snmp authenticat e_t r ap s
Purpose
Used to enable SNMP authentication trap support.
Syntax enable snmp authenticate_traps
Description
This command is used to enable SNMP authentication trap support on the Switch.
Parameters
None.
Restrictions
Only Administrator and Operator-level users can issue this command.
Example Usage:
To turn on SNMP authentication trap support:
DES-3528:admin# enable snmp authenticate_traps
Command: enable snmp authenticate_traps
Page 54

xStack® DES-3528/DES-3552 Series Layer 2 Fast Ethernet Managed Switch CLI Reference Guide
54
Success.
DES-3528:admin#
show snmp traps
Purpose
Used to show SNMP traps support on the Switch .
Syntax show snmp traps {linkchange_traps {ports <portlist>}}
Description
This command is used to view the SNMP traps support status currently configured on the
Switch.
Parameters linkchange_traps – Specifies to display the SNMP Linkchange Traps.
ports – Specifies the list of ports to be displayed.
Restrictions
None.
Example usage:
To view the current SNMP traps support:
DES-3528:admin#show snmp traps
Command: show snmp traps
SNMP Traps : Enabled
Authenticate Trap : Enabled
Linkchange Traps : Enabled
Coldstart Traps : Enabled
Warmstart Traps : Enabled
DES-3528:admin#
disable snmp traps
Purpose
Used to disable SNMP trap support on the Switch.
Syntax disable snmp traps
Description
This command is used to disable SNMP trap support on the Switch.
Parameters
None.
Restrictions
Only Administrator and Operator-level users can issue this command.
Example usage:
To prevent SNMP traps from being sent from the Switch:
DES-3528:admin# disable snmp traps
Command: disable snmp traps
Success.
DES-3528:admin#
disable snmp authenticate_traps
Purpose
Used to disable SNMP authentication trap support.
Syntax disable snmp authenticate_traps
Description
This command is used to disable SNMP authentication support on the Switch.
Parameters
None.
Restrictions
Only Administrator and Operator-level users can issue this command.
Example usage:
Page 55

xStack® DES-3528/DES-3552 Series Layer 2 Fast Ethernet Managed Switch CLI Reference Guide
55
To disable the SNMP authentication trap support:
config snmp system_contact
Purpose
Used to enter the name of a contact person who is responsible for the Switch.
Syntax config snmp system_contact <sw_contact>
Description
This command is used to enter the name and/or other information to identify a contact
person who is responsible for the Switch. A maximum of 255 character can be used.
Parameters
<sw_contact> − A maximum of 255 characters is allowed. A NULL string is accepted if there
is no contact.
Restrictions
Only Administrator and Operator-level users can issue this command.
Example usage:
To configure the Switch contact to “MIS Department II”:
DES-3528:admin# config snmp system_contact MIS Department II
Command: config snmp system_contact MIS Department II
Success.
DES-3528:admin#
config snmp system_location
Purpose
Used to enter a description of the location of the Switch.
Syntax config snmp system_location <sw_location>
Description
This command is used to enter a description of the location of the Switch. A maximum of 255
characters can be used.
Parameters
<sw_location> − A maximum of 255 characters is allowed. A NULL string is accepted if there
is no location desired.
Restrictions
Only Administrator and Operator-level users can issue this command.
Example usage:
To configure the Switch location for “HQ 5F”:
DES-3528:admin# config snmp system_location HQ 5F
Command: config snmp system_location HQ 5F
Success.
DES-3528:admin#
config snmp system_name
Purpose
Used to configure the name for the Switch.
Syntax config snmp system_name <sw_name>
Description
This command configures the name of the Switch.
Parameters
<sw_name> − A maximum of 255 characters is allowed. A NULL string is accepted if no
name is desired.
DES-3528:admin# disable snmp authenticate_traps
Command: disable snmp authenticate_traps
Success.
DES-3528:admin#
Page 56

xStack® DES-3528/DES-3552 Series Layer 2 Fast Ethernet Managed Switch CLI Reference Guide
56
config snmp system_name
Restrictions
Only Administrator and Operator-level users can issue this command.
Example usage:
To configure the Switch name for “DES-3526 Switch”:
DES-3528:admin# config snmp system_name DES-3526 Switch
Command: config snmp system_name DES-3526 Switch
Success.
DES-3528:admin#
enable snmp
Purpose
Used to enable the SNMP interface access function.
Syntax
enable snmp
Description
This command is used to enable the SNMP function.
Parameters
None
Restrictions
Only Administrator and Operator-level users can issue this command.
Example usage:
To enable snmp on the Switch
:
DES-3528:admin# enable snmp
Command: enable snmp
Success.
DES-3528:admin#
disable snmp
Purpose
Used to disable the SNMP interface access function.
Syntax
disable snmp
Description
This command is used to disable the SNMP function. When the SNMP function is disabled,
the network manager will not be able to access SNMP MIB objects. The device will not send
traps or notifications to the network manager either.
Parameters
None
Restrictions
Only Administrator and Operator-level users can issue this command.
Example usage:
To disable SNMP on the Switch
:
DES-3528:admin# disable snmp
Command: disable snmp
Success.
DES-3528:admin#
Page 57

xStack® DES-3528/DES-3552 Series Layer 2 Fast Ethernet Managed Switch CLI Reference Guide
57
SWITCH UTILITY COMMANDS
The Switch utility commands in the Command Line Interface (CLI) are listed (along with the appropriate parameters) in
the following table.
Command Parameters
download [firmware_fromTFTP [<ipaddr> | <ipv6addr>] src_file <path_filename 64> {image_id
<int 1-2>} {unit [all | <unitid 1-8>]} | cfg_fromTFTP <ipaddr> <path_filename 64>
{[<config_id 1-2> | increment]} ]
config firmware {unit <unit_id 1-8>} image_id <int 1-2> [delete | boot_up]
show firmware_information
show config [[effective | modified | current_config | config_in_nvram <config_id 1-2>] {[include |
exclude | begin] <filter_string 80> {<filter_string 80> {<filter_string 80>}} {[include |
exclude | begin] <filter_string 80> {<filter_string 80> {<filter_string 80>}} {[include |
exclude | begin] <filter_string 80> {<filter_string 80> {<filter_string 80>}}}}} |
information]
upload [cfg_toTFTP [<ipaddr> | <ipv6addr>] dest_file <path_filename 64> {<config_id 1-2>}
{[include | exclude | begin] <filter_string 80 > {<fi lter_s tring 80> {<filter_string 80>}}
{[include | exclude | begin] <filter_string 80 > {<fi lter_s tring 80> {<filter_string 80>}}
{[include | exclude | begin] <filter_string 80 > {<fi lter_s tring 80> {<filter_string
80>}}}}} | log_toTFTP [<ipaddr>| <ipv6 ad dr >] dest_file <path_filename 64> |
attack_log_toTFTP [<ipaddr> | <ipv6addr>] dest_file <path_filename 64>]
config configuration <config_id 1-2>[boot_up | delete | active]
Each command is listed, in detail, in the following sections.
download
Purpose
Used to download and install new firmware or a Switch configuration file from a TFTP server.
Syntax download [ firmware_fromTFTP [<ipaddr> | <ipv6addr>] src_file <path_filename 64>
{image_id <int 1-2>} {unit [all | <uni tid 1-8>]} | cfg_fromTFTP <ipaddr> <path_filename
64> {[<config_id 1-2> | increment]} ]
Description
This command is used to download a new firmware or a Switch configuration file from a
TFTP server.
Parameters
firmware_fromTFTP − Download and install new firmware on the Switch from a TFTP server.
cfg_fromTFTP − Download a Switch configuration file from a TFTP server.
<ipaddr> − The IP address of the TFTP server.
<ipv6addr> - Enter the IPv6 address used here.
src_file – Specifies the source file name used.
<path_filename> − The DOS path and filename of the firmware or Switch configuration file on
the TFTP server. For example, C:\3528.had.
image_id <int 1-2> − Specify the working section ID. The Switch can hold two firmware
versions for the user to select from, which are specified by section ID.
unit - Specifies which unit(s) on the stacking system can download and install new firmware
from a TFTP server. If it is not specified, it refers to all the units. For example, unit 1-3.
config_id - Specifies configuration ID in the system; If it is not specified, it refers to the boot
up configuration ID.
increment − Allows the download of a partial Switch configuration file. This allows a file to be
downloaded that will change only the Switch parameters explicitly stated in the configuration
file. All other Switch param eter s will rem ain uncha nged.
Restrictions
The TFTP server must be on the same IP subnet as the Switch. Only Administrator-level
users can issue this command.
Example usage:
Page 58

xStack® DES-3528/DES-3552 Series Layer 2 Fast Ethernet Managed Switch CLI Reference Guide
58
To download a configuration file:
DES-3528:admin# download cfg_fromTFTP 10.48.74.121 c:\cfg\setting.txt
Command: download cfg_fromTFTP 10.48.74.121 c:\cfg\setting.txt
Connecting to server................... Done.
Download configuration................. Done.
DES-3528:admin#
DES-3528:admin# #------------------------------------------------------------------DES-3528:admin# # DES-3528 Configuration
DES-3528:admin# #
DES-3528:admin# # Firmware: Build 2.60.B010
DES-3528:admin# # Copyright(C) 2009 D-Link Corporation. All rights reserved.
DES-3528:admin# #------------------------------------------------------------------DES-3528:admin#
DES-3528:admin#
DES-3528:admin# # BASIC
DES-3528:admin#
DES-3528:admin# config serial_port baud_rate 115200 auto_logout 10_minutes
Command: config serial_port baud_rate 115200 auto_logout 10_minutes
The download configuration command will initiate the loading of the various settings in the order listed in the
configuration file. When the file has been successfully loaded the message “End of configuration file for DES-3528”
appears followed by the command prompt.
DES-3528:admin# disable authen_policy
Command: disable authen_policy
Success.
DES-3528:admin#
DES-3528:admin# #------------------------------------------------------DES-3528:admin# # End of configuration file for DES-3528
DES-3528:admin# #-------------------------------------------------------
DES-3528:admin#
config firmware
Purpose
Used to configure the firmware section as a boot up section, or to delete the firmware section
Syntax config firmware {unit <unit_id 1-8>} image_id <int 1-2> [delete | boot_up]
Description
This command is used to configure the firmware section. The user may choose to remove
the firmware section or use it as a boot up section.
Parameters unit – Specifies the unit on the stacking system. If it is not specified, it refers to the master
unit.
image_id – Specifies the working section. The Switch can hold two firmware versions for the
user to select from, which are specified by image ID.
delete – Entering this parameter will delete the specified firmware section.
boot_up – Entering this parameter will specify the firmware image ID as a boot up section.
Restrictions
Only Administrator-level users can issue this command.
Example usage:
To configure firmware image 1 as a boot up section:
DES-3528:admin# config firmware image_id 1 boot_up
Command: config firmware image_id 1 boot_up
Success.
DES-3528:admin#
Page 59

xStack® DES-3528/DES-3552 Series Layer 2 Fast Ethernet Managed Switch CLI Reference Guide
59
show firmware information
Purpose
Used to display the firmware section information.
Syntax show firmware information
Description
This command is used to display the firmware section information.
Parameters
None.
Restrictions
None
Example usage:
To display the current firmware information on the Switch:
DES-3528:admin# show firmware information
Command: show firmware information
Image ID : 1
Version : 2.01.B042
Size : 4262112 Bytes
Update Time: 0 days 00:00:00
From : Serial Port(Prom)
User : Serial Port(Prom)
Image ID : 2(Boot up firmware)
Version : 2.60.B010
Size : 4652268 Bytes
Update Time: 2010/05/29 14:36:20
From : 192.168.69.200
User : Guest(WEB)
DES-3528:admin#
show config
Purpose
Used to display the current or saved version of the configuration settings of the Switch.
Syntax show config [[effective | modified | current_config | config_in_nvram <config_id 1-2>]
{[include | exclude | begin] <filter_string 80> {<filter_string 80> {<filter_string 80>}}
{[include | exclude | begin] <filter_string 80> {<filter_string 80> {<filter_string 80>}}
{[include | exclude | begin] <filter_string 80> {<filter_string 80> {<filter_string 80>}}}}} |
information]
Description
This command is used to display all the configuration settings that are saved to NV RAM or
display the configuration settings as they are currently configured. Use the keyboard to list
settings one line at a time (Enter), one page at a time (Space) or view all (a).
The configuration settings are listed by category in the following order:
Page 60

xStack® DES-3528/DES-3552 Series Layer 2 Fast Ethernet Managed Switch CLI Reference Guide
60
show config
1. Basic (serial port, Telnet and web
management status)
2. storm control
3. loop detect
4. SIM
5. syslog
6. QoS
7. port mirroring
8. traffic segmentation
9. SSL
10. port
11. SFLOW
12. OAM
13. port lock
14. SNMPv3
15. management (SNMP traps RMON)
16. vlan
17. Q-in-Q
18. RSPAN
19. 802.1x
20. ACL
21. POE
22. FDB (forwarding data base)
23. address binding
24. net bios
25. dhcp server screening
26. sRED
27. ARP spoofing prevention
28. PPPoE
29. MAC address table notification
30. STP
31. BPDU protection
32. safeguard
33. SSH
34. SNTP
35. LACP
36. IP
37. WAC
38. CFM
39. JWAC
40. LLDP
41. IGMP snooping
42. MBA
43. MLD vl an
44. multicast
45. multicast authentication
46. igmp snooping
47. mld snooping
48. access authentication control
(TACACS etc.)
49. ARP
50. route
51. dns relay
52. dhcp server
53. dhcp relay
Parameters effective - Show only commands which affects the behavior of the device. For example, if
STP is disabled, then for STP configuration, only “STP is disabled” is displayed. All other
lower level setting regarding STP is not displayed. The lower level setting will only be
displayed when the higher level setting is enabled.
Note: This parameter is only for the current configuration.
modified - Show only the commands which are not from the ‘reset’ default setting.
Note:This parameter is only for the current configuration.
current_config - Specifies the current configuration.
unit - (Optional) Specifies which unit on the stacking system. If it is not specified, it refers to
the master unit.
<unitid 1-2> - Enter the unit ID here. This value must be between 1 and 2.
config_id - (Optional) Specifies the configuration file ID.
<filter_string 80> - (Optional) A filter string is enclosed by symbol ". Thus, the filter string
itself cannot contain the “character. The filter string is case sensitive. This value can be up to
80 characters long.
include - Includes lines that contain the specified filter string.
exclude - Excludes lines that contain the specified filter string
begin - The first line that contains the specified filter string will be the first line of the output.
Restrictions
Only Administrator-level users can issue this command.
Example usage:
To view the current configuration settings:
Page 61

xStack® DES-3528/DES-3552 Series Layer 2 Fast Ethernet Managed Switch CLI Reference Guide
61
DES-3528:admin# show config current_config
Command: show config current_config
#-------------------------------------------------------------------------------
# DES-3528 Fast Ethernet Switch
# Configuration
#
# Firmware: Build 2.60.B010
# Copyright(C) 2010 D-Link Corporation. All rights reserved.
#-------------------------------------------------------------------------------
# STACK
config stacking force_master_role state disable
# BASIC
# ACCOUNT LIST
# ACCOUNT END
# PASSWORD ENCRYPTION
disable password encryption
CTRL+C ESC q Quit SPACE n Next Page ENTER Next Entry a All
upload
Purpose
Used to upload the current Switch settings or the Switch history log to a TFTP.
Syntax upload [cfg_toTFTP [<ipaddr> | <ipv6addr>] dest_file <path_filename 64> {<config_id
1-2>} {[include | exclude | begin] <filter_string 80> {<filter_string 80> {<filter_string
80>}} {[include | exclude | begin] <fi lter_string 80> {<filter_string 80> {<filter_string
80>}} {[include | exclude | begin] <filter_string 80> {<filter_string 80> {<filter_string
80>}}}}} | log_toTFTP [<ipaddr>| <ipv6addr>] dest_file <path_filename 64> |
attack_log_toTFTP [<ipaddr> | <ipv6addr>] dest_file <path_filename 64>]
Description
This command is used to upload either the Switch’s current settings or the Switch’s history
log to a TFTP server.
Parameters
cfg_toTFTP − Specifies that the Switch’s current settings will be uploaded to the TFTP
server.
<ipaddr> − The IP address of the TFTP server. The TFTP server must be on the same IP
subnet as the Switch.
<ipv6addr> - Enter the IPv6 address used here.
dest_file - The pathname specifies the DOS pathname on the TFTP server. It can be a
relative pathname or an absolute pathname.
<path_filename 64> - Enter the destination file pathname here. This name can be up to 64
characters long.
config_id - Specifies configuration ID in the system; If it is not specified, it refers to the boot
up configuration ID.
unit - Specifies whic h Switch unit’s attac k log will be uploaded, if it is not specified, it refers to
the master unit.
<path_filename 64> − Specifies the location of the Switch configuration file on the TFTP
server. This file will be replaced by the uploaded file from the Switch.
log_toTFTP − Specifies that the Switch history log will be uploaded to the TFTP server.
attack_log_toTFTP – Specifies that the Switch attack log will be uploaded to the TFTP
server.
<filter_string 80> - (Optional) A filter string is enclosed by symbol ". Thus, the filter string
itself cannot contain the “character. The filter string is case sensitive. This value can be up to
80 characters long.
include - Includes lines that contain the specified filter string.
Page 62

xStack® DES-3528/DES-3552 Series Layer 2 Fast Ethernet Managed Switch CLI Reference Guide
62
upload
exclude - Excludes lines that contain the specified filter string
begin - The first line that contains the specified filter string will be the first line of the output.
Restrictions
The TFTP server must be on the same IP subnet as the Switch. Only Administrator and
Operator-level users can issue this command.
Example usage:
To upload a configuration file:
DES-3528:admin# upload cfg_toTFTP 10.48.74.121 c:\cfg\log.txt
Command: upload cfg_toTFTP 10.48.74.121 c:\cfg\log.txt
Connecting to server................... Done.
Upload configuration...................Done.
DES-3528:admin#
config configuration
Purpose
Used to delete the specific firmware or configure the specific firmware as boot up image.
Syntax config configuration <config_id 1-2> [boot_up | delete | active]
Description
This command is used to delete the specific firmware or configure the specific firmware as
boot up image.
Parameters
<config_id 1-2> − Specifies the serial number of the indicated configuration.
boot_up − Specifies the config is boot_up config.
delete − Delete the configuration.
active − Active specifies the configuration .
Restrictions
You must have Administrator-level privileges.
Example usage:
To configure the specific configuration as boot up image:
DES-3528:admin# config configuration 2 boot_up
Command: config configuration 2 boot_up
Success.
DES-3528:4#
Page 63

xStack® DES-3528/DES-3552 Series Layer 2 Fast Ethernet Managed Switch CLI Reference Guide
63
NETWORK MONITORING COMMANDS
The network monitoring commands in the Command Line Interface (CLI) are listed (along with the appropriate
parameters) in the following table.
Command Parameters
show packet ports <portlist>
show error ports <portlist>
show utilization [ports | cpu]
show utilization dram {unit <unit_id>}
show utilization flash {unit <unit_id>}
clear counters {ports <portlist>}
clear log
show log {[index <value_list> |severit y {m odule <m odule _l is t>} {emergency | alert | critical |
error | warning | notice | informational | debug | <level_ list 0-7>} | module
<module_list>]}
enable syslog
disable syslog
show syslog
create syslog host <index 1-4> ipaddress [<ipaddr> | <ipv6addr> ] {sev erit y [em ergency | alert | critical |
error | warning | notice | informational | debug | <level 0-7>] | facility [local0 | local1 |
local2 | local3 | local4 | local5 | local6 | local7] | udp_port <udp_por t_n umber> |
state [enable | disable]}
config syslog host [<index> | all] {se ver it y [emergency | alert | critical | error | warning | notice |
informational | debug | <level 0-7>] | facility [local0 | local1 | local2 | local 3 | local4 |
local5 | local6 | local7] | udp_port <udp_port_n umber> | ipaddress [<ipaddr>
|<ipv6addr>] | state [enable | disable]}
delete syslog host [<index 1-4> | all]
show syslog host {<index 1-4>}
config log_save_timing [time_interval <min 1-65535> | on_demand | log_trigger]
show log_save_timing
show attack_log {unit <unit_id 1-8>} {index <value_list>}
clear attack_log {[unit <unit_id 1-8> | all]}
config system_severity [trap | log | all] [em ergency | alert | critical | error | warning | notice | information |
debug | <level 0-7>]
show system_severity
Each command is listed, in detail, in the following sections.
show packet ports
Purpose
Used to display statistics about the packets sent and received by the Switch.
Syntax show packet ports <portlist>
Description
This command is used to display statistics about packets sent and received by ports
specified in the <portlist>.
Parameters
<portlist> − Specifies a port or range of ports to be displayed.
Restrictions
None.
Page 64

xStack® DES-3528/DES-3552 Series Layer 2 Fast Ethernet Managed Switch CLI Reference Guide
64
Example usage:
To display the packets analysis for port 2
DES-3528:admin# show packet port 2
Command: show packet port 2
Port Number : 2
===============================================================
Frame Size/Type Frame Counts Frames/sec
--------------- ------------ ---------- 64 0 0
65-127 0 0
128-255 0 0
256-511 0 0
512-1023 0 0
1024-1518 0 0
Unicast RX 0 0
Multicast RX 0 0
Broadcast RX 0 0
Frame Type Total Total/sec
--------------- ------------ ---------- RX Bytes 0 0
RX Frames 0 0
TX Bytes 0 0
TX Frames 0 0
CTRL+C ESC q Quit SPACE n Next Page p Previous Page r Refresh
show error ports
Purpose
Used to display the error statistics for a range of ports.
Syntax show error ports <portlist>
Description
This command will display all of the packet error statistics collected and logged by the Switch
for a given port list.
Parameters
<portlist> − Spec if ies a port or range of ports to be displayed.
Restrictions
None.
Example usage:
To display the errors of the port 3:
DES-3528:admin# show error ports 3
Command: show error ports 3
Port Number : 3
RX Frames TX Frames
--------- -------- CRC Error 0 Excessive Deferral 0
Undersize 0 CRC Error 0
Oversize 0 Late Collision 0
Fragment 0 Excessive Collision 0
Jabber 0 Single Collision 0
Drop Pkts 0 Collision 0
Symbol Error 0
CTRL+C ESC q Quit SPACE n Next Page p Previous Page r Refresh
Page 65

xStack® DES-3528/DES-3552 Series Layer 2 Fast Ethernet Managed Switch CLI Reference Guide
65
show utilization
Purpose
Used to display real-time port and CPU utilization statistics.
Syntax show utilization [ports | cpu]
Description
This command will display the real-time port and CPU utilization statistics for the Switch.
Parameters cpu - Specifies to display information regarding the CPU.
ports - Specifies a range of ports to be displayed.
Restrictions
None.
Example usage:
To display the port utilization statistics:
DES-3528:admin# show utilization ports
Command: show utilization ports
Port TX/sec RX/sec Util Port TX/sec RX/sec Util
----- ------- ------ ---- ----- ------ ------ ---1 0 0 0 21 0 0 0
2 0 0 0 22 0 0 0
3 0 0 0 23 0 0 0
4 0 0 0 24 0 0 0
5 0 0 0 25 0 0 0
6 0 0 0 26 0 0 0
7 0 0 0 27 0 0 0
8 0 0 0 28 0 0 0
9 19 0 1
10 0 0 0
11 0 0 0
12 0 0 0
13 0 0 0
14 0 0 0
15 1 19 1
16 0 0 0
17 0 0 0
18 0 0 0
19 0 0 0
20 0 0 0
CTRL+C ESC q Quit SPACE n Next Page p Previous Page r Refresh
To display the current CPU utilization:
DES-3528:admin# show utilization cpu
Command: show utilization cpu
CPU Utilization
------------------------------------------------------------------------------Five seconds - 6 % One minute - 7 % Five minutes - 7 %
CTRL+C ESC q Quit SPACE n Next Page p Previous Page r Refresh
show utilization dram
Purpose
This command is used to display the DRAM utilization.
Syntax show utilization dram
Description
This command is used to display the DRAM utilization.
Parameters
None.
Restrictions
None.
Page 66

xStack® DES-3528/DES-3552 Series Layer 2 Fast Ethernet Managed Switch CLI Reference Guide
66
Example usage:
To display the DRAM utilization:
DES-3528:admin# show utilization dram
Command: show utilization dram
Unit 1 DRAM utilization :
Total DRAM : 131072 KB
Used DRAM : 124596 KB
Utilization : 95 %
CTRL+C ESC q Quit SPACE n Next Page p Previous Page r Refresh
show utilization flash
Purpose
This command is used to display the flash utilization.
Syntax show utilization flash
Description
This command is used to display the flash utilization.
Parameters
None.
Restrictions
None.
Example usage:
To display the flash utilization:
DES-3528:admin# show utilization flash
Command: show utilization flash
Unit 1 Flash Memory Utilization :
Total Flash : 16384 KB
Used Flash : 7662 KB
Utilization : 46 %
CTRL+C ESC q Quit SPACE n Next Page p Previous Page r Refresh
clear counters
Purpose
Used to clear the Switch’s statistics counters.
Syntax clear counters {ports <portl ist>}
Description
This command will clear the counters used by the Switch to compile statistics.
Parameters
<portlist> − Specifies a port or range of ports to be cleared.
Restrictions
Only Administrator and Operator-level users can issue this command.
Example usage:
To clear the counters:
DES-3528:admin# clear counters ports 2-9
Command: clear counters ports 2-9
Success.
DES-3528:admin#
Page 67

xStack® DES-3528/DES-3552 Series Layer 2 Fast Ethernet Managed Switch CLI Reference Guide
67
clear log
Purpose
Used to clear the Switch’s history log.
Syntax clear log
Description
This command will clear the Switch’s history log.
Parameters
None.
Restrictions
Only Administrator and Operator-level users can issue this command.
Example usage:
To clear the log information:
DES-3528:admin# clear log
Command: clear log
Success.
DES-3528:admin#
show log
Purpose
Used to display the Switch’s history log.
Syntax show log {[index <value_list> | severity {module <module_list>} {emergency | alert |
critical | error | warning | notice | info rmational | debug | <level_list 0-7>} | module
<module_list>]}
Description
This command will display the contents of the Switch’s history log.
Parameters
index <value_list>
−
This parameter specifies the range of log index to show. For example,
show log index 1-5 will display the history log from 1 to 5.
severity - Specifies the severity level indicator.
module - Specifies the module list used.
<module_list> - Enter the module list used here.
emergency - Specifies that the severity will be set to emergency.
alert - Specifies that the severity will be set to alert.
critical - Specifies that the severity will be set to critical.
error - Specifies that the severity will be set to error.
warning - Specifies that the severity will be set to warning.
notice - Specifies that the severity will be set to notice.
informational - Specifies that the severity will be set to informational.
debug - Specifies that the severity will be set to debug.
<level_list 0-7> - Enter the level list value here. This value must be between 0 and 7.
module - Specifies the module list used.
<module_list> - Enter the module list used here.
Restrictions
None.
Example usage:
To display the Switch’s history log:
DES-3528:admin# show log index 1-5
Command: show log index 1-5
Index Time Log Text
----- ------------------- ----------------------------------
5 00000 days 00:01:09 Successful login through Console (Username: Anonymous)
4 00000 days 00:00:14 System started up
3 00000 days 00:00:06 Port 1 link up, 100Mbps FULL duplex
2 00000 days 00:00:01 Spanning Tree Protocol is disabled
Page 68

xStack® DES-3528/DES-3552 Series Layer 2 Fast Ethernet Managed Switch CLI Reference Guide
68
1 00000 days 00:06:31 Configuration saved to flash (Username: Anonymous)
DES-3528:admin#
NOTE: For detailed information regarding Log entries that will appear in this window,
please refer to Appendix C at the back of the xStack DES-3528 Layer 2 Stackable
Fast Ethernet Managed Switch User Manu al.
enable syslog
Purpose
Used to enable the syslog sending messages.
Syntax enable syslog
Description
This command enables the system log to be sent to a remote host.
Parameters
None.
Restrictions
Only Administrator and Operator-level users can issue this command.
Example usage:
To the Syslog function on the Switch:
DES-3528:admin# enable syslog
Command: enable syslog
Success.
DES-3528:admin#
disable syslog
Purpose
Used to disable the syslog sending messages.
Syntax disable syslog
Description
This command disables the system log to be sent to a remote host.
Parameters
None.
Restrictions
Only Administrator and Operator-level users can issue this command.
Example usage:
To disable the syslog function on the Switch:
DES-3528:admin# disable syslog
Command: disable syslog
Success.
DES-3528:admin#
show syslog
Purpose
Used to display the syslog protocol status as enabled or disabled.
Syntax show syslog
Description
This command displays the syslog status as enabled or disabled.
Parameters
None.
Restrictions
None.
Example usage:
To display the current status of the syslog function:
Page 69

xStack® DES-3528/DES-3552 Series Layer 2 Fast Ethernet Managed Switch CLI Reference Guide
69
DES-3528:admin# show syslog
Command: show syslog
Syslog Global State: Enabled
DES-3528:admin#
create syslog host
Purpose
Used to create a new syslog host.
Syntax create syslog host <index 1-4> ipaddress [<ipaddr> | <ipv6addr>] {severity
[emergency | alert | critical | error | warning | notice | informational | debug | <level 07>] | facility [local0 | local1 | local2 | local3 | local4 | local5 | local6 | local7] | udp_port
<udp_port_number> | state [enable | disable]}
Description
This command is used to create a new syslog host.
Parameters
<index 1-4> − Specifies that the command will be applied to an index of hosts. There are four
available indexes, numbered 1 through 4.
ipaddress <ipaddr> − Specifies the IP address of the remote host where syslog messages
will be sent.
<ipv6addr> - Specifies the IPv6 address used.
udp_port <udp_port_numb er> - Specifies the UDP port number used.
state [enable | disable] – Specifies the state of the Syslog host.
severity − Severity level indicator. These are described in the following:
Bold font indicates that the cor res pondi ng severity level is currently supported on the Switch.
Numerical Severity
Code
0 Emergency: system is unusable
1 Alert: action must be taken immediately
2 Critical: critical conditions
3 Error: error conditions
4 Warning: warning conditions
5 Notice: normal but significant condition
6 Informational: informational messages
7 Debug: debug-level messages
facility − Some of the operating system daemons and processes have been assigned Facility
values. Processes and daemons that have not been explic itl y assigned a Facility may use
any of the "local use" facilities or they may use the "user-level" Facility. Those Facilities that
have been designated are shown in the follo wing : Bold font indicates the facility values the
Switch currently supports.
Numerical Facility Numerical Facility
Code Code
0 kernel messages
1 user-level messages
2 mail system
3 system daemons
4 security/authorization messages
5 messages generated internally by
syslog
6 line printer subsystem
7 network news subsystem
8 UUCP subsystem
9 clock daemon
10 security/authorization messages
11 FTP daemon
12 NTP subsystem
13 log audit
14 log alert
15 clock daemon
16 local use 0 (local0)
17 local use 1 (local1)
18 local use 2 (local2)
19 local use 3 (local3)
20 local use 4 (local4)
21 local use 5 (local5)
22 local use 6 (local6)
23 local use 7 (local7)
Page 70

xStack® DES-3528/DES-3552 Series Layer 2 Fast Ethernet Managed Switch CLI Reference Guide
70
create syslog host
local0 − Specifies that local use 0 messages will be sent to the remote host. This
corresponds to number 16 from the list above.
local1 − Specifies that local use 1 messages will be sent to the remote host. This
corresponds to number 17 from the list above.
local2 − Specifies that local use 2 messages will be sent to the remote host. This
corresponds to number 18 from the list above.
local3 − Specifies that local use 3 messages will be sent to the remote host. This
corresponds to number 19 from the list above.
local4 − Specifies that local use 4 messages will be sent to the remote host. This
corresponds to number 20 from the list above.
local5 − Specifies that local use 5 messages will be sent to the remote host. This
corresponds to number 21 from the list above.
local6 − Specifies that local use 6 messages will be sent to the remote host. This
corresponds to number 22 from the list above.
local7 − Specifies that local use 7 messages will be sent to the remote host. This
corresponds to number 23 from the list above.
udp_port <udp_port_numb er > − Specifies the UDP port number that the syslog protocol will
use to send messages to the remote host.
state [enable | disable] − Allows the sending of syslog messages to the remote host,
specified above, to be enabled and disabled.
Restrictions
Only Administrator and Operator-level users can issue this command.
Example usage:
To create a Syslog host:
DES-3528:admin#create syslog host 1 ipaddress 192.168.69.123 state enable
Command: create syslog host 1 ipaddress 192.168.69.123 state enable
Success.
DES-3528:admin#
config syslog host
Purpose
Used to configure the syslog protocol to send system log data to a remote host.
Syntax config syslog host [<index> | all] { severity [emergency | alert | critical | error | warning
| notice | informational | debug | <level 0-7>] | facility [local0 | local1 | local2 | local3 |
local4 | local5 | local6 | local7] | udp_port <udp_port_number> | ipaddress [<ipaddr> |
<ipv6addr>] | state [enable | disable]}
Description
This command is used to configure the syslog protocol to send system log information to a
remote host.
Parameters
<index 1-4> − Specifies that the command will be applied to an index of hosts. There are four
available indexes, numbered 1 through 4.
All – Specifies that all the ports will be used in this configuration.
ipaddress <ipaddr> − Specifies the IP address of the remote host where syslog messages
will be sent.
<ipv6addr> - Specifies the IPv6 address of the remote host where syslog messages will be
sent.
udp_port <udp_port_numb er > - Specifies the UDP port number used.
state [enable | disable] – Specifies the Syslog’s state.
severity − Severity level indicator. These are described in the following:
Bold font indicates that the corresponding severity level is currently supported on the Switch.
Numerical Severity
Code
Page 71

xStack® DES-3528/DES-3552 Series Layer 2 Fast Ethernet Managed Switch CLI Reference Guide
71
config syslog host
0 Emergency: system is unusable
1 Alert: action must be taken immediately
2 Critical: critical conditions
3 Error: error conditions
4 Warning: warning conditions
5 Notice: normal but significant condition
6 Informational: informational messages
7 Debug: debug-level messages
facility − Some of the operating system daemons and processes have been assigned Facility
values. Processes and daemons that have not been explicitly assigned a Facility may use
any of the "local use" facilities or they may use the "user-level" Facility. Those Facilities that
have been designated are shown in the follo wing : Bold font indicates the facility values the
Switch currently supports.
Numerical Facility Numerical Facility
Code Code
0 kernel messages
1 user-level messages
2 mail system
3 system daemons
4 security/authorization messages
5 messages generated internally by
syslog
6 line printer subsystem
7 network news subsystem
8 UUCP subsystem
9 clock daemon
10 security/authorization messages
11 FTP daemon
12 NTP subsystem
13 log audit
14 log alert
15 clock daemon
16 local use 0 (local0)
17 local use 1 (local1)
18 local use 2 (local2)
19 local use 3 (local3)
20 local use 4 (local4)
21 local use 5 (local5)
22 local use 6 (local6)
23 local use 7 (local7)
local0 − Specifies that local use 0 messages will be sent to the remote host. This
corresponds to number 16 from the list above.
local1 − Specifies that local use 1 messages will be sent to the remote host. This
corresponds to number 17 from the list above.
local2 − Specifies that local use 2 messages will be sent to the remote host. This
corresponds to number 18 from the list above.
local3 − Specifies that local use 3 messages will be sent to the remote host. This
corresponds to number 19 from the list above.
local4 − Specifies that local use 4 messages will be sent to the remote host. This
corresponds to number 20 from the list above.
local5 − Specifies that local use 5 messages will be sent to the remote host. This
corresponds to number 21 from the list above.
local6 − Specifies that local use 6 messages will be sent to the remote host. This
corresponds to number 22 from the list above.
local7 − Specifies that local use 7 messages will be sent to the remote host. This
corresponds to number 23 from the list above.
udp_port <udp_port_numb er > − Specifies the UDP port number that the syslog protocol will
use to send messages to the remote host.
state [enable | disable] − Allows the sending of syslog messages to the remote host,
specified above, to be enabled and disabled.
Restrictions
Only Administrator and Operator-level users can issue this command.
Example usage:
Page 72

xStack® DES-3528/DES-3552 Series Layer 2 Fast Ethernet Managed Switch CLI Reference Guide
72
To configure a Syslog hos t:
DES-3528:admin#config syslog host 1 severity alert
Command: config syslog host 1 severity alert
Success.
DES-3528:admin#
Example usage:
To configure a syslog host for all hosts:
DES-3528:admin#config syslog host all severity critical
Command: config syslog host all severity critical
Success.
DES-3528:admin#
delete syslog host
Purpose
This command is used to delete the specific syslog host.
Syntax delete syslog host [<index 1-4> | all]
Description
This command is used to remove a syslog host that has been previously configured from the
Switch.
Parameters
<index 1-4> − Specifies that the command will be applied to an index of hosts. There are four
available indexes, numbered 1 through 4.
all − Specifies that the command will be applied to all hosts.
Restrictions
Only Administrator and Operator-level users can issue this command.
Example usage:
To delete a previously configured syslog host:
DES-3528:admin# delete syslog host 4
Command: delete syslog host 4
Success.
DES-3528:admin#
show syslog host
Purpose
This command is used to show syslog the host information.
Syntax show syslog host {<index 1-4>}
Description
This command is used to display the syslog hosts that are currently configured on the
Switch.
Parameters
<index 1-4> − Specifies that the command will be applied to an index of hosts. There are four
available indexes, numbered 1 through 4.
Restrictions
None.
Example usage:
To show Syslog host information:
DES-3528:admin#show syslog host
Command: show syslog host
Syslog Global State: Disabled
Host 1
Page 73

xStack® DES-3528/DES-3552 Series Layer 2 Fast Ethernet Managed Switch CLI Reference Guide
73
IP Address : 192.168.69.123
Severity : Critical(2)
Facility : Local0
UDP Port : 514
Status : Enabled
Total Entries : 1
DES-3528:admin#
config log_save_timing
Purpose
Used to configure the method to save log.
Syntax config log_save_timing [time_interval <min 1-65535> | on_demand | log_trigger]
Description
This command is used to set the method to save log.
Parameters
time_interval − save log to flash every xxx minutes. (if no log happen in this period, don't
save)
on_demand − save log to flash whenever user type "save log" or "save all" This is also the
default.
log_trigger − save log to flash whenever log arrives
Restrictions
Only Administrator and Operator-level users can issue this command.
Example usage:
To configure log_save_timing:
DES-3528:admin# config log_save_timing on_demand
Command: config log_save_timing on_demand
Success.
DES-3528:admin#
show log_save_timing
Purpose
Used to show the timing method to save log.
Syntax show log_save_timing
Description
This command is used to show method to save log.
Parameters
None.
Restrictions
None.
Example usage:
To show log_save_timing:
DES-3528:admin# show log_save_timing
Command: show log_save_timing
Saving Log Method: On_demand
DES-3528:admin#
show attack_log
Purpose
Used to show dangerous log messages.
Syntax show attack_log {unit <unit_id 1-8>} {index <value_list>}
Description
This command is used to show content of dangerous log messages.
Parameters unit – Specifies the unit of which the attack_log will be show. if it is not specified, it refers to
the master unit.
Page 74

xStack® DES-3528/DES-3552 Series Layer 2 Fast Ethernet Managed Switch CLI Reference Guide
74
show attack_log
value_list X-Y − The show log command will display the dangerous log messages between
the log number of X and Y. For example, show dangerous log index 1-5 will display th e
dangerous log messages from 1 to 5.
If no parameter specified, all dangerous log entries will be displayed.
Restrictions
None.
Example usage:
To show dangerous messages on master:
DES-3528:admin# show attack_log
Command: show attack_log
Index Time Log Text
---- --------------- ----------------------2 00000 days 01:25:43 Possible spoofing attack from 000d01002301 port 6:3
1 00000 days 01:25:43 Possible spoofing attack from 000d01002301 port 6:3
DES-3528:admin#
clear attack_log
Purpose
Used to clear the Switch’s dangerous log.
Syntax clear attack_log {unit <unit_id 1-8>}
Description
This command clears the Switch’s dangerous log.
Parameters unit - Specifies the unit of which the attack_log will be cleared. if it is not specified, it refers to
the master unit.
Restrictions
Only Administrator and Operator-level users can issue this command.
Example usage:
To clear the master’s dangerous log:
DES-3528:admin# clear attack_log
Command: clear attack_log
Success.
DES-3528:admin#
config system_severity
Purposez
Used to configure system_severity level of an alert required for log entry or trap message.
Syntax config system_severity [tr ap | log | all] [emergency | alert | critical | error | warning |
notice | information | debug | <level 0-7>]
Description
This command is used to configure the system_severity levels on the Switch. When an event
occurs on the Switch, a message will be sent to the SNMP agent (trap), the Switch’s log or
both. Events occurring on the Switch are separated into eight main categories, these
categories are NOT precisely the same as the parameters of the same name (see below).
Severity Level
Emergency
Description
0 System is unusable.
Alert 1 Action must be taken immediately.
Critical 2 Critical conditions.
Error 3 Error conditions.
Warning 4 Warning conditions.
Notice 5 Normal but significant condition.
Information 6 Information messages.
Debug 7 Debug-level messages.
Parameters trap - Specifies the severity level control for traps.
Page 75

xStack® DES-3528/DES-3552 Series Layer 2 Fast Ethernet Managed Switch CLI Reference Guide
75
config system_severity
log - Specifies the severity level control for the log.
all - Specifies the severity level control for traps and the log.
emergency - Sever it y le ve l 0.
alert - Severity level 1.
critical - Severity level 2 .
error - Severity level 3.
warning - Severity level 4.
notice - Severity level 5.
information - Sever ity level 6.
debug - Severity level 7.
<level 0-7> - Enter the severity level here. This value must be between 0 and 7.
Restrictions
Only Administrator and Operator-level users can issue this command.
Example usage:
To configure the system severity settings:
DES-3528:admin# config system_severity trap critical
Command: config system_severity trap critical
Success.
DES-3528:admin#
show system_severity
Purpose
Used to display system_severity level of an alert required for log entry or trap message.
Syntax show system_severity
Description
This command is used to display system_severity level of an alert required for log entry or
trap message.
Parameters
None.
Restrictions
None.
Example usage:
To display the system severity settings for critical traps and log:
DES-3528:admin# show system_severity
Command: show system_severity
System Severity Trap : information
System Severity Log : information
DES-3528:admin#
Page 76

xStack® DES-3528/DES-3552 Series Layer 2 Fast Ethernet Managed Switch CLI Reference Guide
76
MULTIPLE SPANNING TREE PROTOCOL (MSTP) COMMANDS
This Switch supports three versions of the Spanning Tree Protocol: 802.1D STP, 802.1w Rapid STP and 802.1s
MSTP. Multiple Spann ing Tree Protocol, or MSTP, is a st andard defined b y the IEEE comm unity that allows m ultiple
VLANs to be m apped to a single spanning tre e instance, which will prov ide multiple pathways acros s the network.
Therefore, these MSTP c onfigurations will balance the traf fic load, preventing wide scale disrupti ons when a single
spanning tree instanc e fails. This will al low for faster c onvergences of ne w topologies f or the failed instanc e. Frames
designated for these VLANs will be processed quickly and completely throughout interconnected bridges utilizing
either of the three spanning tree protocols (STP, RSTP or MSTP). This protocol will also tag BDPU packets so
receiving devices can distinguish spanning tree instances, spanning tree regions and the VLANs associated with
them. These instances will be c lass if ie d by an instance_id. MST P wil l con nec t multiple spanning trees w ith a Com mon
and Internal Spann ing Tree (CIST ). The CIST will automatic ally determine each MSTP re gion, its max imum possible
extent and will appear as one virtual bridge that runs a single spanning tree. Consequentiall y, fram es assigned to
different VLANs will fol low different data ro utes within adm inistratively establish ed regions on the n etwork, continui ng
to allow simple and full processing of frames, regardless of administrative errors in defining VLANs and their
respective spanning trees. Each Switch utilizing the MSTP on a network will have a single MSTP configuration that will
have the following three attributes:
a) A configuration name defined by an alphanum eric string of up to 32 characters (def ined in the config stp
mst_config_id command as name <string>).
b) A configuration revision number (named here as a revision_level) and;
c) A 4096 element table (def ined here as a vid_range) which will associate eac h of the possible 4096 VLANs
supported by the Switch for a given instance.
To utilize the MSTP function on the Switch, three steps need to be taken:
a) The Switch must be set to the MSTP setting (config stp version)
b) The correct spanning tree priority for the MSTP instance must be entered (config stp priority).
c) VLANs that will be shared must be added to the MSTP Instance ID (config stp instance_id).
The Multiple Spanning Tree Protocol commands in the Command Line Interface (CLI) are listed (along with the
appropriate parameters) in the following table.
Command Parameters
enable stp
disable stp
config stp version [mstp | rstp | stp]
config stp {maxage <value 6-40> | maxhops <value 6-40> | hellotime <value 1-2> |
forwarddelay <value 4-30> | txholdcount <value 1-10> | fbpdu [enable | disable]
| nni_bpdu_addr [dot1d | dot1ad]}(1)
config stp ports <portlist> { externalCost [ auto | <value 1-200000000> ] | hellotime <value 1-2> |
migrate [yes | no ] | edge [ true | false | auto ] | p2p [ true | false | auto ] | state
[enable | disable ] | restricted_role [true | false] | restric t ed_tc n [tr ue | false ] |
fbpdu [enable | disable ] }(1)
create stp instance_id <value 1-15>
config stp instance_id <value 1-15> [add_vlan | remove_vlan] <vidlist>
delete stp instance_id <value 1-15>
config stp priority <value 0-61440> instance_id <value 0-15>
config stp mst_config_id {revision_level <int 0-65535> | name <string>}(1)
config stp mst_ports <portlist> instance_id <value 0-15> {internalCost [auto | <value 1-200000000>]
priority <value 0-240>}(1)
show stp
show stp ports {<portlist>}
show stp instance {<value 0-15>}
Page 77

xStack® DES-3528/DES-3552 Series Layer 2 Fast Ethernet Managed Switch CLI Reference Guide
77
Command Parameters
config stp nni_bpdu_addr [dot1d | dot1ad]
show stp mst_config_id
Each command is listed, in detail, in the following sections.
enable stp
Purpose
Used to globally enable STP on the Switch.
Syntax enable stp
Description
This command allows the Spanning Tree Protocol to be globally enabled on the Switch.
Parameters
None.
Restrictions
Only Administrator and Operator and Power-User-level users can issue this command.
Example usage:
To enable STP, globally, on the Switch:
DES-3528:admin# enable stp
Command: enable stp
Success.
DES-3528:admin#
disable stp
Purpose
Used to globally disable STP on the Switch.
Syntax disable stp
Description
This command allows the Spanning Tree Protocol to be globally disabled on the Switch.
Parameters
None.
Restrictions
Only Administrator and Operator and Power-User-level users can issue this command.
Example usage:
To disable STP on the Switch:
DES-3528:admin# disable stp
Command: disable stp
Success.
DES-3528:admin#
config stp version
Purpose
Used to globally set the version of STP on the Switch.
Syntax config stp version [mstp | rs tp | stp]
Description
This command allows the user to choose the version of the spanning tree to be implemented
on the Switch.
Parameters mstp – Selecting this parameter will set the Multiple Spanning Tree Protocol (MSTP) globally
on the Switch.
rstp − Selecting this parameter will set the Rapid Spanning Tree Protocol (RSTP) globally on
the Switch.
stp − Selecting this parameter will set the Spanning Tree Protocol (STP) globally on the
Switch.
Restrictions
Only Administrator and Operator and Power-User-level users can issue this command.
Page 78

xStack® DES-3528/DES-3552 Series Layer 2 Fast Ethernet Managed Switch CLI Reference Guide
78
Example usage:
To set the Switch globally for the Multiple Spanning Tree Protocol (MSTP):
DES-3528:admin# config stp version mstp
Command: config stp version mstp
Success
DES-3528:admin#
config stp
Purpose
Used to setup STP, RSTP and MSTP on the Switch.
Syntax config stp {maxage <value 6-40> | maxhops <value 6-40> | hellotime <value 1-2> |
forwarddelay <value 4-30> | txholdcount <val u e 1-10> | fbpdu [enable | disable] |
nni_bpdu_addr [dot1d | dot1ad]}(1)
Description
This command is used to setup the Spanning Tree Protocol (STP) for the entire Switch. All
commands here will be implemented for the STP version that is currently set on the Switch.
Parameters
maxage <value 6-40> − This value may be set to ensure that old information does not
endlessly circulate through redundant paths in the network, preventing the effective
propagation of the new information. Set by the Root Bridge, this value will aid in deter mining
that the Switch has spanning tree configuration values consistent with other devices on the
bridged LAN. If the value ages out and a BPDU has still not been received from the Root
Bridge, the Switch will start sending its own BPDU to all other Switches for permission to
become the Root Bridge. If it turns out that your Switch has the lowest Bridge Identifier, it will
become the Root Bridge. The user may choose a time between 6 and 40 seconds. The
default value is 20.
maxhops <value 6-40> − The number of hops between devices in a spanning tree region
before the BPDU (bridge protocol data unit) packet sent by the Switch will be discarded.
Each Switch on the hop count will reduce the hop count by one until the value reaches zero.
The Switch will then discard the BDPU packet and the information held for the port will age
out. The user may set a hop count from 6 to 40. The default is 20.
hellotime <value 1-2> − The user may set the time interval between transmission of
configuration messages by the root device, thus stating that the Switch is still functioning. A
time between 1 and 2 seconds may be chosen, with a default setting of 2 seconds.
forwarddelay <value 4-30> − The maximum amount of time (in seconds) that the root device
will wait before changing states. The user may choose a time between 4 and 30 seconds.
The default is 15 seconds.
txholdcount <value 1-10> − The maximum number of BPDU Hello packets transmitted per
interval. Default value is 6.
fbpdu [enable | disable] − Allows the forwarding of STP BPDU packets from other network
devices when STP is disabled on the Switch. The default is disabled.
NOTE:
In MSTP, the spanning tree is configured by port and therefore, the
hellotime must be set using the configure stp ports command for Switches
utilizing the Multiple Spanning Tree Protocol.
Restrictions
Only A dministrator and Operator and Power-User-level users can issue this command.
Example usage:
To configure STP with maxage 18 and maxhops of 15:
DES-3528:admin# config stp maxage 18 maxhops 15
Command: config stp maxage 18 maxhops 15
Success.
DES-3528:admin#
Page 79

xStack® DES-3528/DES-3552 Series Layer 2 Fast Ethernet Managed Switch CLI Reference Guide
79
config stp ports
Purpose
Used to setup STP on the port level.
Syntax config stp ports <portlis t> { externalCost [ auto | <value 1-200000000> ] | hellotime
<value 1-2> | migrate [yes | no ] | edge [ true | false | auto ] | p2p [ true | false | auto ] |
state [enable | disable ] | restricted_role [true | false] | restricted_tcn [true | false ] |
fbpdu [enable | disable ] }(1)
Description
This command is used to create and configure STP for a group of ports.
Parameters
<portlist> − Specifies a range of ports to be configured.
externalCost − This defines a metric that indicates the relative cost of forwarding packets to
the specified port list. Port cost can be set automatically or as a metric value. The default
value is auto.
auto – Setting this parameter for the external cost will automatically set the speed for
forwarding packets to the specified port(s) in the list for optimal efficiency. Default port
cost: 100Mbps port = 200000. Gigabit port = 20000.
<value 1-200000000> − Define a value between 1 and 200000000 to determine the
external cost. The lower the number, the greater the probability the port will be chosen
to forward packets.
hellotime <value 1-2> − The time interval between transmission of configuration messages
by the designated port, to other devices on the bridged LAN, thus stating that the Switch is
still functioning. The user may choose a time between 1 and 2 seconds. The default is 2
seconds.
migrate [yes | no] – Setting this parameter as “yes” will set the ports to send out BDPU
packets to other bridges, requesting information on their STP setting If the Switch is
configured for RSTP, the port will be capable to migrate from 802.1D STP to 802.1w RSTP.
If the Switch is configured for MSTP, the port is capable of migrating from 802.1D STP to
802.1s MSTP. RSTP and MSTP can coexist with standard STP, however the benefits of
RSTP and MSTP are not realized on a port where an 802.1D network connects to an 802.1w
or 802.1s enabled network. Migration should be set as yes on ports connected to network
stations or segments that are capable of being upgraded to 802.1w RSTP or 802.1s MSTP
on all or some portion of the segment.
edge [true | false | auto] – true designates the port as an edge port. Edge ports cannot create
loops, however an edge port can lose edge port status if a topology change creates a
potential for a loop. An edge port normally should not receive BPDU packets. If a BPDU
packet is received it automatically loses edge port status. false indicates that the port does
not have edge port status.
auto – Indicates that the port will be able to automatically enable the edge port status if this
port links to an end station or a device that does not support the STP function. The default
setting for this parameter is false.
restricted_role [true | false] – If true causes the Port not to be selected as Root Port for the
CIST or any MSTI, even it has the best spanning tree priority vector. Such a Port will be
selected as an Alternate Port after the Root Port has been selected. This parameter should
be false by default. If set, it can cause lack of spanning tree connectivity. It is set by a
network administrator to prevent bridges external to a core region of the network influencing
the spanning tree active topology, possibly because those bridges are not under the full
control of the administrator. The default setting for this parameter is false.
restricted_tcn [true | false] – If true causes the Port not to propagate received topology
change notifications and topology changes to other Ports. This parameter should be false by
default. If set it can cause temporary loss of connectivity after changes in a spanning trees
active topology as a result of persistent incorr ectly learned station location inform ation. It is
set by a network administrator to prevent bridges external to a core region of the network,
causing address flushing in that region, pos sib l y becau s e those bridges are not under the full
control of the administrator or MAC_Operational for the attached LANs transitions frequently.
The default setting for this parameter is false.
p2p [true | false | auto] – true indicates a point-to-point (P2P) shared link. P2P ports are
similar to edge ports however they are restricted in that a P2P port must operate in fullduplex. Like edge ports, P2P ports transition to a forwarding state rapidly thus benefiting
from RSTP. A p2p value of false indicates that the port cannot have p2p status. Auto allows
the port to have p2p status whenever possible and operate as if the p2p status were true. If
Page 80

xStack® DES-3528/DES-3552 Series Layer 2 Fast Ethernet Managed Switch CLI Reference Guide
80
config stp ports
the port cannot maintain this status (for example if the port is forced to half-duplex operation)
the p2p status changes to operate as if the p2p value were false. The default setting for this
parameter is auto.
state [enable | disable] − Allows STP to be enabled or disabled for the ports specified in the
port list. The default is enable.
Restrictions
Only Administrator and Operator and Power-User-level users can issue this command
Example usage:
To configure STP with path cost 19, hellotime set to 2 seconds, migration enabled, and state enabled for ports
1-5 of module 1.
DES-3528:admin# config stp ports 1-5 externalCost 19 hellotime 2 migrate yes state
enable
Command: config stp ports 1-5 externalCost 19 hellotime 2 migrate yes state enable
Success.
DES-3528:admin#
create stp instance_id
Purpose
Used to create a STP instance ID for MSTP.
Syntax create stp instance_id <value 1-15>
Description
This command allows the user to create a STP instance ID for the Multiple Spanning Tree
Protocol. There are 16 STP instances on the Switch (one internal CIST, unchangeable) and
the user may create up to 15 instance IDs for the Switch.
Parameters
<value 1-15> − Enter a value between 1 and 15 to identify the Spanning Tree instance on the
Switch.
Restrictions
Only A dministrator and Operator and Power-User-level users can issue this command
Example usage:
To create a spanning tree instance 2:
DES-3528:admin# create stp instance_id 2
Command: create stp instance_id 2
Warning:There is no VLAN mapping to this instance_id!
Success.
DES-3528:admin#
config stp instance_id
Purpose
Used to add or delete VID to/from an STP instance.
Syntax config stp instance_id <value 1-15> [add_vlan | remove_vlan] <vidlist>
Description
This command is used to map VIDs (VLAN IDs) to previously configured STP instances on
the Switch by creating an instance_id. A STP instance may have multiple members with the
same MSTP configuration. There is no limit to the number of STP regions in a network but
each region only supports a maximum of 16 spanning tree instances (one unchangeable
default entry). VIDs can belong to only one spanning tree instance at a time.
NOTE:
Switches in the same spanning tree region having the same STP
instance_id must be mapped identically, and have the same configuration
revision_level number and the same name.
Parameters
<value 1-15> − Enter a number between 1 and 15 to define the instance_id. The Switch
Page 81

xStack® DES-3528/DES-3552 Series Layer 2 Fast Ethernet Managed Switch CLI Reference Guide
81
config stp instance_id
supports 16 STP instances with one unchangeable default instance ID set as 0.
add_vlan – Along with the vid_range <vidlist> parameter, this command will add VIDs to the
previously configured STP instance_id.
remove_vlan − Along with the vid_range <vidlist> parameter, this command will remove VIDs
to the previously configured STP instance_id.
<vidlist> − Specify the VID range from configured VLANs set on the Switch. Supported VIDs
on the Switch range from ID number 1 to 4094.
Restrictions
Only Administrator and Operator and Power-User-level users can issue this command
Example usage:
To configure instance ID 2 to add VID 10:
DES-3528:admin# config stp instance_id 2 add_vlan 10
Command : config stp instance_id 2 add_vlan 10
Success.
DES-3528:admin#
Example usage:
To remove VID 10 from instance ID 2:
DES-3528:admin# config stp instance_id 2 remove_vlan 10
Command : config stp instance_id 2 remove_vlan 10
Success.
DES-3528:admin#
delete stp instance_id
Purpose
Used to delete a STP instance ID from the Switch.
Syntax delete stp instance_id <value 1-15>
Description
This command allows the user to delete a previously configured STP instance ID from the
Switch.
Parameters
<value 1-15> − Enter a value between 1 and 15 to identify the Spanning Tree instance on the
Switch.
Restrictions
Only Administrator and Operator and Power-User-level users can issue this command
Example usage:
To delete STP instance ID 2 from the Switch.
DES-3528:admin# delete stp instance_id 2
Command: delete stp instance_id 2
Success.
DES-3528:admin#
config stp priority
Purpose
Used to configure the bridge priority.
Syntax config stp priority <valu e 0-61440> instance_id <value 0-15>
Description
This command is used to update the STP instance configuration settings on the Switch. The
MSTP will utilize the priority in selecting the root bridge, root port and designated port.
Assigning higher priorities to STP regions will instruct the Switch to give precedence to the
selected instance_id for forwarding packets. The lower the priority value set, the higher the
priority.
Page 82

xStack® DES-3528/DES-3552 Series Layer 2 Fast Ethernet Managed Switch CLI Reference Guide
82
config stp priority
Parameters
priority <value 0-61440> − Select a value between 0 and 61440 to specify the priority for a
specified instance ID for forwarding packets. The lower the value, the higher the priority. This
value must be divisible by 4096.
instance_id <value 0-15> − Enter the value corresponding to the previously configured
instance ID of which the user wishes to set the priority value. An instance id of 0 denotes the
default instance_id (CIST) internally set on the Switch.
Restrictions
Only Administrator and Operator and Power-User-level users can issue this command
Example usage:
To set the priority value for instance_id 2 as 4096.
DES-3528:admin# config stp priority 4096 instance_id 2
Command : config stp priority 4096 instance_id 2
Success.
DES-3528:admin#
config stp mst_config_id
Purpose
Used to update the MSTP configuration id ent if icatio n.
Syntax config stp mst_config_i d {revision_level <int 0-65535> | name <string>}(1)
Description
This command will uniquely identify the MSTP configuration currently configured on the
Switch. Information entered here will be attached to BPDU packets as an identifier for the
MSTP region to which it belongs. Switches hav ing the same revision_level and name will be
considered as part of the same MSTP region.
Parameters revision_level <int 0-65535>– Enter a number between 0 and 65535 to identify the MSTP
region. This value, along with the name will identify the MSTP region configured on the
Switch. The default setting is 0.
name <string> − Enter an alphanumeric string of up to 32 characters to uniquely identify the
MSTP region on the Switch. This name, along with the revision_level value will ide ntify the
MSTP region configured on the Switch. If no name is entered, the default name will be the
MAC address of the device.
Restrictions
Only Administrator and Operator and Power-User-level users can issue this command
Example usage:
To configure the MSTP region of the Switch with revision_level 10 and the name “Trinity”:
DES-3528:admin# config stp mst_config_id revision_level 10 name Trinity
Command : config stp mst_config_id revision_level 10 name Trinity
Success.
DES-3528:admin#
config stp mst_ports
Purpose
Used to update the port configuration for a MSTP instance.
Syntax config stp mst_ports <portlist> instance_id <value 0-15> {i n ter n alCost [auto | <value 1-
200000000>] priority <value 0-240>}(1)
Description This command will update the por t configuration f or a STP instance_id. If a loop occurs, the
MSTP function will use the port priorit y to selec t an int erface to p ut into th e for warding state .
Set a higher priority value for interfaces to be selected f or for warding f ir st. I n insta nc es where
the priority value is ident ical, the MSTP f unction will implem ent the lowest MAC addr ess into
the forwarding state and other interfaces will be blocked. Remember that lower priority
values mean higher priorities for forwarding packets.
Parameters
<portlist> − Specifies a port or range of ports to be configured.
Page 83

xStack® DES-3528/DES-3552 Series Layer 2 Fast Ethernet Managed Switch CLI Reference Guide
83
config stp mst_ports
instance_id <value 0-15> − Enter a numerical value between 0 and 15 to identify the
instance_id previously configured on the Switch. An entry of 0 will denote the CIST (Common
and Internal Spanning Tree.
internalCost – This parameter is set to represent the relative cost of forwarding packets to
specified ports when an interface is selected within a STP instance. The default setting is
auto. There are two options:
auto – Selecting this parameter for the internalCost will set quickest route automatically and
optimally for an interface. The default value is derived from the media speed of the
interface.
value 1-200000000 – Selecting this parameter with a value in the range of 1-200000000
will set the quickest route when a loop occurs. A lower internalCost represents a
quicker transmission.
priority <value 0-240> − Enter a value between 0 and 240 to set the priority for the port
interface. A higher priority will designate the interface to forward packets first. A lower
number denotes a higher priority. This value must be divisible by 16.
Restrictions
Only Administrator and Operator and Power-User-level users can issue this command
Example usage:
To designate ports 1 through 5, with instance id 2, to have an auto internalCost and a priority of 16:
DES-3528:admin# config stp mst_ports 1-5 instance_id 2 internalCost auto priority 16
Command : config stp mst_ports 1-5 instance_id 2 internalCost auto priority 16
Success.
DES-3528:admin#
show stp
Purpose
Used to display the Switch’s current STP configuration.
Syntax show stp
Description
This command displays the Switch’s current STP configuration.
Parameters
None.
Restrictions
None.
Example usage:
To display the status of STP on the Switch:
Status 1: STP enabled with STP compatible version
DES-3528:admin# show stp
Command: show stp
STP Bridge Global Settings
---------------------------
STP Status : Enabled
STP Version : STP Compatible
Max Age : 20
Hello Time : 2
Forward Delay : 15
Max Hops : 20
TX Hold Count : 6
Forwarding BPDU : Disabled
NNI BPDU Address : dot1ad
DES-3528:admin#
Status 2 : STP enabled for RSTP
DES-3528:admin# show stp
Command: show stp
Page 84

xStack® DES-3528/DES-3552 Series Layer 2 Fast Ethernet Managed Switch CLI Reference Guide
84
STP Bridge Global Settings
--------------------------STP Status : Enabled
STP Version : RSTP
Max Age : 20
Hello Time : 2
Forward Delay : 15
Max Hops : 20
TX Hold Count : 6
Forwarding BPDU : Disabled
NNI BPDU Address : dot1ad
DES-3528:admin#
Status 3 : STP enabled for MSTP
DES-3528:admin# show stp
Command: show stp
STP Bridge Global Settings
---------------------------
STP Status : Enabled
STP Version : MSTP
Max Age : 20
Forward Delay : 15
Max Hops : 20
TX Hold Count : 6
Forwarding BPDU : Disabled
NNI BPDU Address : dot1ad
DES-3528:admin#
show stp ports
Purpose
Used to display the Switch’s current STP ports configuration.
Syntax show stp ports <portlist>
Description
This command displays the STP ports settings for a specified port or group of ports (one port
at a time).
Parameters
<portlist> − Specifies a port or range of ports to be viewed. Information for a single port is
displayed. If no ports are specified the STP information for port 1 will be displayed. Users
may use the Space bar, p and n keys to view information for the remaining ports.
Restrictions
None.
Example usage:
To show STP ports information for port 1 (STP enabled on Switch):
DES-3528:admin# show stp ports
Command: show stp ports
MSTP Port Information
--------------------- Port Index : 1 , Hello Time: 2 /2 , Port STP : Enabled ,
External PathCost : Auto/200000 , Edge Port : False/No , P2P : Auto /Yes
Port RestrictedRole : False, Port RestrictedTCN : False
Port Forward BPDU : Disabled
MSTI Designated Bridge Internal PathCost Prio Status Role
----- ------------------ ----------------- ---- ---------- --------- 0 N/A 200000 128 Disabled Disabled
CTRL+C ESC q Quit SPACE n Next Page p Previous Page r Refresh
Page 85

xStack® DES-3528/DES-3552 Series Layer 2 Fast Ethernet Managed Switch CLI Reference Guide
85
show stp instance
Purpose
Used to display the Switch’s STP instance configuration
Syntax show stp instance <value 0-15>
Description
This command displays the Switch’s current STP Instance Settings and the STP Instance
Operational Status.
Parameters
<value 0-15> − Enter a value defining the previously configured instance_id on the Switch.
An entry of 0 will display the STP configuration for the CIST internally set on the Switch.
Restrictions
None.
Example usage:
To display the STP instance configuration for instance 0 (the internal CIST) on the Switch:
DES-3528:admin# show stp instance 0
Command: show stp instance 0
STP Instance Settings
-------------------------- Instance Type : CIST
Instance Status : Enabled
Instance Priority : 32768(bridge priority : 32768, sys ID ext : 0 )
STP Instance Operational Status
------------------------------- Designated Root Bridge : 32766/00-90-27-39-78-E2
External Root Cost : 200012
Regional Root Bridge : 32768/00-53-13-1A-33-24
Internal Root Cost : 0
Designated Bridge : 32768/00-50-BA-71-20-D6
Root Port : 1
Max Age : 20
Forward Delay : 15
Last Topology Change : 856
Topology Changes Count : 2987
CTRL+C ESC q Quit SPACE n Next Page p Previous Page r Refresh
config stp nni_bpdu_addr
Purpose
Used to configure BPDU destination address as dot1d or dot1ad.
Syntax config stp nni_bpdu_addr [dot1d | dot1ad]
Description
This command is to configure the NNI-port-sent BPDU destination address to 802.1ad
address (0180c200000D) or 802.1d address (0180c2000021). When the Q-in-Q is enabled.,
NNI-port-sent BPDU destination address will set to dot1ad. The user can configure the NNI
port send BPDU destination address to dot1d. The default is dot1d.
Parameters
None.
Restrictions
Only Administrator and Operator and Power-User-level users can issue this command
Example usage:
To configure the STP BPDU destination address as dot1 ad on the Switch:
DES-3528:admin# config stp nni_bpdu_addr dot1ad
Command: config stp nni_bpdu_addr dot1ad
Success.
DES-3528:admin#
Page 86

xStack® DES-3528/DES-3552 Series Layer 2 Fast Ethernet Managed Switch CLI Reference Guide
86
show stp mst_config_id
Purpose
Used to display the MSTP configuration identification.
Syntax show stp mst_config_id
Description
This command displays the Switch’s current MSTP configuration identification.
Parameters
None.
Restrictions
None.
Example usage:
To show the MSTP configuration identification currently set on the Switch:
DES-3528:admin#show stp mst_config_id
Command: show stp mst_config_id
Current MST Configuration Identification
----------------------------------------
Configuration Name : 00:22:B0:10:8A:00 Revision Level :0
MSTI ID VID List
------- ------------------------------------------------------------ CIST 1-4094
DES-3528:admin#
Page 87

xStack® DES-3528/DES-3552 Series Layer 2 Fast Ethernet Managed Switch CLI Reference Guide
87
FORWARDING DATABASE COMMANDS
The layer 2 forwarding database commands in the Command Line Interface (CLI) are listed (along with the
appropriate parameters) in the following table.
Command Parameters
create fdb <vlan_name 32> <macaddr> [port <port> | drop]
create fdb vlanid <vidlist > <m ac addr > [port <port> | drop]
create multicast_fdb <vlan_name 32> <macaddr>
config multicast_fdb <vlan_name 32> <macaddr> [add | delete] <portlist>
config fdb aging_time <sec 10-1000000>
delete fdb <vlan_name 32> <macaddr>
clear fdb [vlan <vlan_nam e 32> | port <port> | all]
show multicast_fdb {[vlan <vlan_name 32> | vlanid <vidlist>] | m ac_addr ess <macaddr>}
show fdb {[port <port> | vlan <vlan_name 32> |vlanid <vidlist> | mac_address <mac addr > | static |
aging_time | security]}
config multicast
vlan_filtering_mode
[vlanid <vidlist> | vlan <vlan_name 32> | all ] [forward_all_groups |
forward_unregistered_groups | filter_unregistered_groups]
show multicast
vlan_filtering_mode
{[vlanid <vidlist> | vlan <vlan_name 32>]}
Each command is listed, in detail, in the following sections.
create fdb
Purpose
Used to create a static entry to the unicast MAC address forwarding table (database).
Syntax create fdb <vlan_name 32> <macaddr> [port <port> | drop]
Description
This command will make an entry into the Switch’s unicast MAC address forwarding
database.
Parameters
<vlan_name 32> − The name of the VLAN on which the MAC address resides.
<macaddr> − The MAC address that will be added to the forwarding table.
port <port> − The port number corresponding to the MAC destination address. The Switch
will always forward traffic to the specified device through this port.
drop - Specifies that all the ports specified will drop the packet of the previously configured
MAC
Restrictions
Only Administrator and Operator and Power-User-level users can issue this command
Example usage:
To create a unicast MAC FDB entry:
DES-3528:admin# create fdb default 00-00-00-00-01-02 port 5
Command: create fdb default 00-00-00-00-01-02 port 5
Success.
DES-3528:admin#
create fdb vlanid
Purpose
Used to create a static entry to the unicast MAC address forwarding table (database).
Syntax create fdb vlanid <vidlist> <macaddr> [port <port> | drop]
Page 88

xStack® DES-3528/DES-3552 Series Layer 2 Fast Ethernet Managed Switch CLI Reference Guide
88
create fdb vlanid
Description
This command will make an entry into the Switch’s unicast MAC address forwarding
database.
Parameters
<vlanid_list> − Specifies a range of VLANs to be configured.
<macaddr> − The MAC address that will be added to the forwarding table.
port <port> − The port number corresponding to the MAC destination address. The Switch
will always forward traffic to the specified device through this port.
drop - Specifies that all the ports specified will drop the packet of the previously configured
MAC
Restrictions
Only Administrator and Operator and Power-User-level users can issue this command
Example usage:
To filter an unicast MAC:
DES-3528:admin# create fdb default 00-00-00-33-01-02 drop
Command: create fdb default 00-00-00-33-01-02 drop
Success.
DES-3528:admin#
create multicast_fdb
Purpose
Used to create a static entry to the multicast MAC address forwarding table (database)
Syntax create multicast_fdb <vlan_name 32> <macaddr>
Description
This command will make an entry into the Switch’s multicast MAC address forwarding
database.
Parameters
<vlan_name 32> − The name of the VLAN on which the MAC address resides.
<macaddr> − The MAC address that will be added to the forwarding table.
Restrictions
Only Administrator and Operator and Power-User-level users can issue this command
Example usage:
To create multicast MAC forwarding:
DES-3528:admin# create multicast_fdb default 01-00-00-00-00-01
Command: create multicast_fdb default 01-00-00-00-00-01
Success.
DES-3528:admin#
config multicast_fdb
Purpose
Used to configure the Switch’s multicast MAC address forwarding database.
Syntax config multicast_fdb <vlan_nam e 32> <macaddr> [add | delete] <portlist>
Description
This command configures the multicast MAC address forwarding table.
Parameters
<vlan_name 32> − The name of the VLAN on which the MAC address resides.
<macaddr> − The MAC address that will be added to the multicast forwarding table.
[add | delete] − add will add ports to the forwarding table. delete will remove ports from the
multicast forwarding table.
<portlist> − Specifies a port or range of ports to be configured.
Restrictions
Only Administrator and Operator and Power-User-level users can issue this command
Example usage:
Page 89

xStack® DES-3528/DES-3552 Series Layer 2 Fast Ethernet Managed Switch CLI Reference Guide
89
To add multicast MAC forwarding:
DES-3528:admin# config multicast_fdb default 01-00-00-00-00-01 add 1-5
Command: config multicast_fdb default 01-00-00-00-00-01 add 1-5
Success.
DES-3528:admin#
config fdb aging_time
Purpose
Used to set the aging time of the forwarding database.
Syntax config fdb aging_time <sec 10-1000000>
Description
The aging time affects the learning process of the Switch. Dynamic forwarding table entries,
which are made up of the source MAC addresses and their associated port numbers, are
deleted from the table if they are not accessed within the aging time. The aging time can be
from 10 to 1000000 seconds with a default value of 300 seconds. A very long aging time can
result in dynamic forwarding table entries that are out-of-date or no longer exist. This may
cause incorrect packet forwarding decisions by the Switch. If the aging time is too short
however, many entries may be aged out too soon. This will result in a high percentage of
received packets whose source addresses cannot be found in the forwarding table, in which
case the Switch will broadcast the packet to all ports, negating many of the benefits of having
a Switch.
Parameters
<sec 10-1000000> − The aging time for the MAC address forwarding database value. The
value in seconds may be between 10 and 1000000 seconds.
Restrictions
Only Administrator and Operator and Power-User-level users can issue this command
Example usage:
To set the FDB aging time:
DES-3528:admin# config fdb aging_time 300
Command: config fdb aging_time 300
Success.
DES-3528:admin#
delete fdb
Purpose
Used to delete an entry to the Switch’s forwarding database.
Syntax delete fdb <vlan_name 32> <macaddr>
Description
This command is used to delete a previous entry to the Switch’s MAC address forwarding
database.
Parameters
<vlan_name 32> − The name of the VLAN on which the MAC address resides.
<macaddr> − The MAC address that have been added to the forwarding table.
Restrictions
Only Administrator and Operator and Power-User-level users can issue this command
Example usage:
To delete a permanent FDB entry:
DES-3528:admin# delete fdb default 00-00-00-00-01-02
Command: delete fdb default 00-00-00-00-01-02
Success.
DES-3528:admin#
Page 90

xStack® DES-3528/DES-3552 Series Layer 2 Fast Ethernet Managed Switch CLI Reference Guide
90
clear fdb
Purpose
Used to clear the Switch’s forwarding database of all dynamically learned MAC addresses.
Syntax clear fdb [vlan <vlan_name 32> | port <port> | all]
Description
This command is used to clear dynamically learned entries to the Switch’s forwarding
database.
Parameters
<vlan_name 32> − The name of the VLAN on which the MAC address resides.
port <port> − The port number corresponding to the MAC destination address.
all − Clears all dynamic entries to the Switch’s forwarding database.
Restrictions
Only Administrator and Operator and Power-User-level users can issue this command
Example usage:
To clear all FDB dynamic entries:
DES-3528:admin# clear fdb all
Command: clear fdb all
Success.
DES-3528:admin#
show multicast_fdb
Purpose
Used to display the contents of the Switch’s multicast forwarding database.
Syntax show multicast_fdb {[vlan <vlan_name 32> | vlanid <vidlist>] | mac_address
<macaddr>}
Description
This command is used to display the current contents of the Switch’s multicast MAC address
forwarding database.
Parameters
<vlan_name 32> − The name of the VLAN on which the MAC address resides.
<vidlist> - Enter the VLAN ID used here.
<macaddr> − The MAC address that is present in the forwarding database table.
Restrictions
None.
Example usage:
To display multicast MAC address table:
DES-3528:admin# show multicast_fdb vlan default
Command: show multicast_fdb vlan default
VLAN Name : default
MAC Address : 01-00-5E-00-00-00
Egress Ports : 1-5
Mode : Static
Total Entries : 1
DES-3528:admin#
show fdb
Purpose
Used to display the current unicast MAC address forwarding database.
Syntax show fdb {[port <port> | vlan <vlan_name 32> |vlanid <vidlist> | mac_address
<macaddr> | static | aging_time | security]}
Description
This command will display the current contents of the Switch’s forwarding database.
Page 91

xStack® DES-3528/DES-3552 Series Layer 2 Fast Ethernet Managed Switch CLI Reference Guide
91
show fdb
Parameters
port <port> − The port number corresponding to the MAC destination address.
<vlan_name 32> − The name of the VLAN on which the MAC address resides.
vlanid <vidlist> - The list of VLANs by VLAN ID.
<macaddr> − The MAC address that is present in the forwarding database table.
static − Displays the static MAC address entries.
aging_time − Displays the aging time for the MAC address forwarding database.
security – Displays the security for the MAC address forwarding database.
Restrictions
None.
Example usage:
To display unicast MAC address table:
DES-3528:admin# show fdb
Command: show fdb
Unicast MAC Address Aging Time = 300
VID VLAN Name MAC Address Port Type
---- ---------- --------------------- ----- ---------
1 default 00-00-5E-00-01-5F 15 Dynamic
1 default 00-00-81-00-00-01 15 Dynamic
1 default 00-00-81-9A-F2-F4 15 Dynamic
1 default 00-00-E2-2F-44-EC 15 Dynamic
1 default 00-01-23-55-1A-28 15 Dynamic
1 default 00-01-6C-CE-62-E0 15 Dynamic
1 default 00-02-A5-FD-66-97 15 Dynamic
1 default 00-03-09-18-10-01 15 Dynamic
1 default 00-03-9D-73-32-F0 15 Dynamic
1 default 00-03-B3-00-09-E9 15 Dynamic
1 default 00-04-00-00-00-00 15 Dynamic
1 default 00-05-5D-04-D6-A4 15 Dynamic
1 default 00-05-5D-25-45-61 15 Dynamic
1 default 00-05-5D-6A-A5-2C 15 Dynamic
1 default 00-05-5D-9A-FE-6D 15 Dynamic
1 default 00-05-5D-DB-BA-7C 15 Dynamic
1 default 00-05-5D-ED-84-52 15 Dynamic
1 default 00-05-5D-ED-84-7B 15 Dynamic
CTRL+C ESC q Quit SPACE n Next Page ENTER Next Entry a All
config multicast vlan_filtering_mode
Purpose
Used to configure the the multicast packet filtering mode for VLANs.
Syntax config multicast vlan_filtering_mode [vlanid <vidlist> | vlan <vlan_name 32> | all ]
[forward_all_groups | forward_unregistered_groups | filter_unregistered_groups]
Description
The command configures the multicast packet filtering mode for VLANs.
Parameters
vlanid_list − Specifies a range of VLANs to be configured.
The filtering mode can be any of the following:
forward_all_groups - A ll m ulticast gr oups wil l be forwar ded based on VL AN.
forward_unregistered_groups - The registered group will be forwarded based on the register
table.The unregister group will be forwarded based on VLAN.
filter_unregistered_groups - The registered group will be forwarded based on the register
table.The unregister group will be filtered.
Restrictions
Only A dministrator and Operator and Power-User-level users can issue this command
Example usage:
To configure the multicast packet filtering mode for vlans:
Page 92

xStack® DES-3528/DES-3552 Series Layer 2 Fast Ethernet Managed Switch CLI Reference Guide
92
DES-3528:admin# config multicast vlan_filtering_mode vlan 200-300
forward_all_groups
Command: config multicast vlan_filtering_mode vlan 200-300 forward_all_groups
Success.
DES-3528:admin#
show multicast vlan_filtering_mode
Purpose
Used to show the multicast packet filtering mode for VLANs.
Syntax show multicast vlan_fil tering_mode {[vlanid <vidlist> | vlan <vlan_name 32>]}
Description
The command displays the multicast packet filtering mode for VLAN.
Parameters
vlanid_list − Specifies a range of vlans to be configured.
If no parameter specified , the deivce will show all multicast filtering settings in the device.
Restrictions
None.
Example usage:
To display multicast VLAN filtering mode for VLANs:
DES-3528:admin# show multicast vlan_filtering_mode
Command: show multicast vlan_filtering_mode
VLAN ID/VLAN Name Multicase Filter Mode
----------------------- ----------------------------100 /Sales forward_all_groups
200 /PM forward_all_groups
600 /Customer filter unregistered groups
Total Entries : 3
DES-3528:admin#
Page 93

xStack® DES-3528/DES-3552 Series Layer 2 Fast Ethernet Managed Switch CLI Reference Guide
93
TRAFFIC CONTROL COMMANDS
On a computer networ k, packets such as Multic ast packets and Broadcas t packets continuall y flood the network as
normal procedure. At tim es, this traffic m ay increase do to a malicio us endstation on the network or a m alfunctioning
device, such as a fault y net wor k card. Thus, Switch throughput pr oblem s will aris e and cons eque ntl y affec t the overal l
performance of the Switch network. To help rectify this packet storm, the Switch will monitor and control the situation.
The packet storm is m onitored t o det er mine if too many packets are f loodin g the n et work, based on the threshold leve l
provided by the user. Once a packet storm has been detected, the S witch will drop over flow packets coming into the
Switch until the storm has subsided. This method can be utilized by selecting the Drop option of the Action field in the
window bel ow.
The Switch will also scan and monitor p ackets coming into th e Switch by monitoring the Switch’s chip c ounter. This
method is only viable for Broadcast and Multicast s torms because the ch ip only has counters f or these two types of
packets. Once a storm has been detected (that is, once the packet threshold set below has been exceeded), the
Switch will shutdown the port to all incoming traffic with the exception of STP BPDU packets, for a time period
specified using the countdown field. If the p acket s torm dis continues b efore th e countd own tim er expires, the por t will
again allow all incoming traffic. If this field times out and the packet storm continues, the port will be placed in a
Shutdown Forever mode which will produce a w arning message to be s ent to the Trap Receiver, if we have set the
trap field. Once in Shutdow n Forever m ode, the port will be reco vered autom aticall y, when the auto-recover time has
expired. (If the value was set to “0”, the port will not be auto recover ed), or the user manual ly resets the p ort us ing the
config ports enable command, mentioned previously in this manual.
The broadcast storm control commands in the Command Line Interface (CL I) are listed (along wit h the appropriate
parameters) in the following table.
Command Parameters
config traffic control [<portlist> | all] {broadcast [enable | disable] | multicast [enable | disable] | unicas t [ena ble |
disable] | action [drop | shutdown] | threshold <va lue 0-255000> | countdown [<min 0> |
<min 3-30> | disable] | time_interval <sec 5-600>}
config traffic control
log state
[enable | disable]
config traffic control
auto_recover_time
[<min 0> | <min 1-65535>]
show traffic control {[<portlist>]}
config traffic trap [none | storm_occurred | storm_cleared | both]
Each command is listed, in detail, in the following sections.
config traffic control
Purpose
Used to configure broadcast/multicast/unicast packet storm control. The software mechanism
is provided to monitor the traffic rate in addition to the hardware storm control mechanism
previously provided.
Syntax config traffic control [<portlist> | all] {broadcast [enable | disable] | multicast [enable |
disable] | unicast [enable | disable] | action [drop | shutdown] | threshold <value 0255000> | countdown [<min 0> | <min 3-30> | disable] | time_interval <sec 5-600>}
Description
This command is used to configure broadcast/multicast/unicast storm control. By adding the
new software traffic control mechanism, the user can now use both a hardware and software
mechanism, the latter of which will now provide shutdown, recovery and trap notification
functions for the Switch.
Parameters
<portlist> − Used to specify a group list of ports to be configured for traffic control, as defined
below:
all − Specifies all portlists are to be configured for traffic control on the Switch.
broadcast [enable | disable] − Enables or disables broadcast storm control.
multicast [enable | disable] − Enables or disables multicast storm control.
unicast [enable | disable] − Enables or disables unicast traffic control.
action – Used to configure the action taken when a storm control has been detected on the
Page 94

xStack® DES-3528/DES-3552 Series Layer 2 Fast Ethernet Managed Switch CLI Reference Guide
94
config traffic control
Switch. The user has two options:
• drop − Utilizes the hardware Traffic Control mechanism, which means the Switch’s
hardware will determine the Packet Storm based on the Threshold value stated
and drop packets until the issue is resolved.
• shutdown − Utilizes the Switch’s software Traffic Control mechanism to determine
the Packet Storm occurring. Once detected, the port will deny all incoming traffic to
the port except STP BPDU packets, which are essential in keeping the Spanning
Tree operational on the Switch. If the countdown timer has expired and yet the
Packet Storm continues, the port will be placed in Shutdown Forever mode. The
port will be recovered automatically, when the auto-recover time has expired. (If the
value was set to “0”, the port will not be auto recovered), or the user manually
resets the port using the config ports enable command. Choosing this option
obligates the user to configure the time_interval field as well, wh ic h wil l provide
packet count samplings from the Switch’s chip to determine if a Packet Storm is
occurring.
threshold <value 0-255000> − The upper threshold at which the specified traffic control is
Switched on. The <value> is the number of broadcast/multicast/unicast packets, in packets
per second (pps), received by the Switch that will trigger the storm traffic control measures.
The default setting is 131072.
time_interval − The Interval will set the time between Multicast and Broadcast packet counts
sent from the Switch’s chip to the Traffic Control function. These packet counts are the
determining factor in deciding when incoming packets exceed the Threshold value.
<sec 5-600> − The Interval may be set between 5 and 600 seconds with the default setting
of 5 seconds.
countdown − The countdown timer is set to determine the amount of time, in minutes, that
the Switch will wait before shutting down the port that is experiencing a traffic storm. The
Switch will shutdown the port only if the traffic level exceeds the previously configured
threshold all the time during this countdown period. This parameter is only useful for ports
configured as shutdown in the action field of this command and therefore will not operate
for Hardware based Traffic Control implementations.
• <min 0> - is the default setting for this field and 0 will denote that the port will never
enter shutdown forever mode.
• <min 3-30> – Select a time from 3 to 30 minutes that the Switch will wait before
shutting down. Once this time expires and the port is still experiencing packet
storms, the port will be placed in shutdown forever mode and the port will be
recovered automaticall y, when auto-recover time has expired, or be manually
recovered using the config ports command mentioned previously in this manual.
•
disable – Specifies that the port will enter shutdown forever at once.
Restrictions
Only Administrator and Operator and Power-User-level users can issue this command.
Example usage:
To configure traffic control and enable broadcast storm control for ports 1-12:
DES-3528:admin# config traffic control 1-12 broadcast enable action shutdown threshold
1 countdown 10 time_interval 10
Command: config traffic control 1-12 broadcast enable action shutdown threshold 1
countdown 10 time_interval 10
Success.
DES-3528:admin#
config traffic control log state
Purpose
This command is used to configure the traffic control log state.
Syntax config traffic control log state [enable | disable]
Description
When the log state is enabled, traffic control states are logged when a storm occurs and
when a storm is cleared. If the log state is disabled, traffic control events are not logged.
Page 95

xStack® DES-3528/DES-3552 Series Layer 2 Fast Ethernet Managed Switch CLI Reference Guide
95
config traffic control log state
Note: The log state is only applicable for shutdown mode. Since shutdown mode only
support broadcast and multicast storm control, doesn’t support unicast storm control. The log
only generate for broadcast and multicast storm control.
Parameters enable - Both occurred and cleared are logged.
disable - Neither occurred nor cleared is logged.
Restrictions
Only Administrator and Operator and Power-User-level users can issue this command.
Example usage:
To configure the traffic log state on the Switch:
DES-3528:admin# config traffic control log state enable
Command: config traffic control log state enable
Success.
DES-3528:admin#
config traffic control auto_recover_time
Purpose
This command is used to configure the traffic auto recover time that allowed for a port to
recover from shutdown forever status.
Syntax config traffic control auto_recover_time [<min 0> | <min 1-65535>]
Description
This command is used to configure the traffic auto recover time that allowed for a port to
recover from shutdown forever status.
Parameters auto_recover_time - The time allowed for auto recovery from shutdown for a port. The default
value is 0, so no auto recovery is possible; the port remains in shutdown forever mode. This
requires manual entry of the CLI command “config ports [ <portlist> | all ] state enable" to
return the port to a forwarding state. The default value is 0, which means disable auto
recover mode, shutdown forever.
<min 0> - Specifies that the auto recovery time will be disabled.
<min 1-65535> - Enter the auto recovery time value here. This value must be between 1 and
65535.
Restrictions
Only Administrator and Operator and Power-User-level users can issue this command.
Example usage:
To configure the auto recover time to 5 minutes:
DES-3528:admin# config traffic control auto_recover_time 5
Command: config traffic control auto_recover_time 5
Success.
DES-3528:admin#
show traffic control
Purpose
Used to display current traffic control settings.
Syntax show traffic control { <portlist> }
Description
This command displays the current storm traffic control configuration on the Switch.
Parameters
<portlist> − Used to specify port or list of ports for which to display traffic control settings.
The beginning and end of the port list range are separated by a dash.
Restrictions
None.
Example usage:
To display traffic control settings:
DES-3528:admin# show traffic control
Page 96

xStack® DES-3528/DES-3552 Series Layer 2 Fast Ethernet Managed Switch CLI Reference Guide
96
Command: show traffic control
Traffic Control Trap : [None]
Traffic Control Log : Enabled
Traffic Control Auto Recover Time: 0 Minutes
Port Thres Broadcast Multicast Unicast Action Count Time Shutdown
hold Storm Storm Storm down Interval Forever
---- ------ --------- --------- -------- -------- -------- -------- -------1 131072 Disabled Disabled Disabled drop 0 5
2 131072 Disabled Disabled Disabled drop 0 5
3 131072 Disabled Disabled Disabled drop 0 5
4 131072 Disabled Disabled Disabled drop 0 5
5 131072 Disabled Disabled Disabled drop 0 5
6 131072 Disabled Disabled Disabled drop 0 5
7 131072 Disabled Disabled Disabled drop 0 5
8 131072 Disabled Disabled Disabled drop 0 5
9 131072 Disabled Disabled Disabled drop 0 5
10 131072 Disabled Disabled Disabled drop 0 5
11 131072 Disabled Disabled Disabled drop 0 5
12 131072 Disabled Disabled Disabled drop 0 5
13 131072 Disabled Disabled Disabled drop 0 5
14 131072 Disabled Disabled Disabled drop 0 5
CTRL+C ESC q Quit SPACE n Next Page ENTER Next Entry a All
config traffic trap
Purpose
Used to configure the trap settings for the packet storm control mechanism.
Syntax config traffic trap [none | storm_occurred | storm_cleared | both]
Description
This command is used to configure how packet storm control trap messages will be used
when a packet storm is detected by the Switch. This function can only be used for the
software traffic storm control mechanism (when the action field in the config traffic
storm_control command is set as shutdown).
Parameters none – No notification will be generated or sent when a packet storm control is occurred or
cleared.
storm _occurred – A not ification will be generated and sent when a packet storm has been
detected by the Switch.
storm_cleared − A notification will be generated and sent when a packet storm has been
cleared by the Switch.
both − A notification will be generated and sent when a packet storm has been detected and
cleared by the Switch.
Restrictions
Only Administrator and Operator and Power-User-level users can issue this command.
Example usage:
To configure notifications to be sent when a packet storm control has been detected and clear ed b y the
Switch.
DES-3528:admin# config traffic trap both
Command: config traffic trap both
Success.
DES-3528:admin#
Page 97

xStack® DES-3528/DES-3552 Series Layer 2 Fast Ethernet Managed Switch CLI Reference Guide
97
QOS COMMANDS
The Switch supports 802.1p priority queuing. The Switch has 8 priority queues, but it has 7 priority queues available .
Q7 is reserved for stacking function. These priority queues are numbered from 6 (Class 6) — the highest priority
queue — to 0 (Class 0) — the lowest priority queue. The eight priority tags specified in IEEE 802.1p (p0 to p7) are
mapped to the Switch’s priority queues as follows:
• Priority 0 is assigned to the Switch’s Q2 queue.
• Priority 1 is assigned to the Switch’s Q0 queue.
• Priority 2 is assigned to the Switch’s Q1 queue.
• Priority 3 is assigned to the Switch’s Q3 queue.
• Priority 4 is assigned to the Switch’s Q4 queue.
• Priority 5 is assigned to the Switch’s Q5 queue.
• Priority 6 is assigned to the Switch’s Q6 queue.
• Priority 7 is assigned to the Switch’s Q6 queue.
• Q7 is reserved for stacking function.
Priority scheduling is implemented by the priority queues stated above. The Switch will empty the seven hardware
priority queues in order, beginning with the highest priority queue, 6, to the lowest priority queue, 0. Each hardware
queue will transmit all of the packets in its buffer before permitting the next lower priority to transmit its packets. When
the lowest hardware priority queue has finished transmitting all of its packets, the highest hardware priority queue will
begin transmitting any packets it may have received.
The commands in the Command Line Interface (CLI) are listed (along with the appropriate parameters) in the
following table.
Command Parameters
config bandwidth_control [<portlist> | all] {rx_rate [no_limit | <value 64-1024000>] | tx_rate [no_limit
| <value 64-1024000>]}(1)
show bandwidth_control {<portlist>}
config per_queue bandwidth_control {ports [<portlist> | all]} <cos_id_list 0-6> {{min_rate [no_lim it | <value 64-
1024000>]} max_rate [no_limit | <value 64-1024000>]}
show per_queue bandwidth_control {<portlist>}
config scheduling {ports [<portlist> | all ]} <class_id 0-6> [strict | weight <value 1-127>]
config scheduling_mechanism {ports [<portlist> | all ]} [strict | wrr]
show scheduling {<portlist>}
show scheduling_mechanism {<portlist>}
config 802.1p user_priority {ports [<portlist> | all ]} <priority 0-7> <class_id 0-6>
show 802.1p user_priority {<portlist>}
config 802.1p default_priority [<portlist> | all] <priority 0-7>
show 802.1p default_priority <portlist>
enable hol_prevention
disable hol_prevention
show hol_prevention
Each command is listed, in detail, in the following sections.
config bandwidth_control
Purpose
Used to configure bandwidth control on a port by-port basis.
Syntax config bandwidth_control [<portlist> | all] {rx_rate [no_limit | <value 64-1024000>] |
tx_rate [no_limit | <value 64-1024000>]}(1)
Page 98

xStack® DES-3528/DES-3552 Series Layer 2 Fast Ethernet Managed Switch CLI Reference Guide
98
config bandwidth_control
Description
This command is used to configure bandwidth on a port-by-port basis.
Parameters
<portlist> − Specifies a port or range of ports to be configured.
rx_rate − Specifies that one of the parameters below (no_limit or <value 64-1024000>) wil l
be applied to the rate at which the above specified ports will be allowed to receive packets
no_limit − Specifies that there will be no limit on the rate of packets received by the
above specified ports.
<value 64-1024000> − Specifies the packet limit, in Kbps, that the above ports will
be allowed to receive.
tx_rate − Specifies that one of the parameters below (no_limit or <value 64-1024000>) will be
applied to the rate at which the above specified ports will be allowed to transmit packets.
no_limit − Specifies that there will be no limit on the rate of packets transmitted by
the above specified ports.
<value 64-1024000> − Specifies the packet limit, in Kbps, that the above ports will
be allowed to transmit.
Restrictions
Only Administrator and Operator and Power-User-level users can issue this command.
Example usage:
To configure bandwidth control:
DES-3528:admin# config bandwidth_control 1-10 tx_rate 64
Command: config bandwidth_control 1-10 tx_rate 64
Success.
DES-3528:admin#
show bandwidth_control
Purpose
Used to display the bandwidth control table.
Syntax show bandwidth_control {<portlist>}
Description
This command displays the current bandwidth control configuration on the Switch, on a portby-port basis.
Parameters
<portlist> − Specifies a port or range of ports to be viewed.
Restrictions
None.
Example usage:
To display port bandwidth control table:
DES-3528:admin# show bandwidth_control 1-10
Command: show bandwidth_control 1-10
Bandwidth Control Table
Port RX Rate TX Rate Effective RX Effective TX
(Kbit/sec) (Kbit/sec) (Kbit/sec) (Kbit/sec)
----- ---------- ---------- ---------------- --------------- 1 No Limit No Limit No Limit No Limit
2 No Limit No Limit No Limit No Limit
3 No Limit No Limit No Limit No Limit
4 No Limit No Limit No Limit No Limit
5 No Limit No Limit No Limit No Limit
6 No Limit No Limit No Limit No Limit
7 No Limit No Limit No Limit No Limit
8 No Limit No Limit No Limit No Limit
9 No Limit No Limit No Limit No Limit
10 No Limit No Limit No Limit No Limit
Page 99

xStack® DES-3528/DES-3552 Series Layer 2 Fast Ethernet Managed Switch CLI Reference Guide
99
DES-3528:admin#
config per_queue bandwidth_control
Purpose
Used to configure per port or flow bandwidth control. For per flow bandwidth control, it can be
based on the assigned CoS queue.
Syntax config per_queue bandwidth_control {ports [<portlist> | all ]} <cos_id_list 0-6>
{min_rate [no_limit | <value 64-1024000>] max_rate [no_limit | <value 64-1024000>]}(1)
Description
This command is used to set per port or flow bandwidth control. For per flow bandwidth
control, it can be based on the assigned CoS queue.
Mini-rate specifies the minimal quaranteed bandwidth. Specify no limit for the mini-rate
means no quaranteed bandwidth.
Max-rate speficies the max-rate limitatoin. When it is specified, packet transmitted from the
queue will not exceed the specified max-rate limitation even though there is still available
bandwidth.
The specification of mini-rate and max-rate are effective regardless whether the queue is
operated in the strict mode or in the wrr mode.
Parameters
<portlist> − Specifies a port or range of ports to be configured.
<cos_id_list 0-6> − Specifies a priority queue or range of priority queues to be configured.
min_rate - Specifies one of the parameters below (no_limit or <value 64-1024000>) that will
be applied to the minimum rate at which the above specified class will be allowed to receive
packets.
no_limit − Specifies that there will be no limit on the rate of packets received by the
above specified class.
<value 64-1024000> − Specifies the packet limit, in Kbps, that the above ports will
be transmit at least.
max_rate − Specifies one of the parameters below (no_limit or <value 64-1024000>) that will
be applied to the maximum rate at which the above specified class will be allowed to transmit
packets.
no_limit − Specifies that there will be no limit on the rate of packets transmit by the
above specified class.
<value 64-1024000> − Specifies the packet limit, in Kbps, that the above ports will
be transmit at most.
Restrictions
Only Administrator and Operator-level users can issue this command.
Example usage:
To configure per-queue bandwidth control:
DES-3528:admin# config per_queue bandwidth_control ports 1-10 1 min_rate 100 max_rate
200
Command: config per_queue bandwidth_control ports 1-10 1 min_rate 100 max_rate 200
Granularity: TX: 64. Actual Rate: MIN: 64, MAX: 192.
Success.
DES-3528:admin#
show per_queue bandwidth_control
Purpose
Used to display the per port per CoS queue bandwidth control setting.
Syntax show per_queue bandwidth_control {<portlist>}
Description
This command is used to display the per port per CoS queue bandwidth control setting.
Parameters
<portlist> − Specifies a port or range of ports to be viewed.
Page 100

xStack® DES-3528/DES-3552 Series Layer 2 Fast Ethernet Managed Switch CLI Reference Guide
100
show per_queue bandwidth_control
Restrictions
None.
Example usage:
To display port per CoS bandwidth control table:
DES-3528:admin#show per_queue bandwidth_control 10
Command: show per_queue bandwidth_control 10
Queue Bandwidth Control Table On Port: 10
Queue Min Rate(Kbit/sec) Max Rate(Kbit/sec)
0 No Limit No Limit
1 64 192
2 No Limit No Limit
3 No Limit No Limit
4 No Limit No Limit
5 No Limit No Limit
6 No Limit No Limit
DES-3528:admin#
config scheduling
Purpose
Used to configure the traffic scheduling mechanism for each CoS queue.
Syntax config scheduling {ports [<portlist> | all ]} <class_id 0-6> [strict | weight <value 1-
127>]
Description
The Switch contains seven hardware priority queues available. Incoming packets must be
mapped to one of these seven queues. This command is used to specify the rotation
mechanism regarding how packets in these seven hardware priotiry queues are being
handled and emptied.
The Switch’s default (if the config scheduling command is not used, or if the config
scheduling command is entered with weight parameters set to 0) is to empty the 7 hardware
priority queues in order − from the highest priority queue (hardware queue 6) to the lowest
priority queue (hardware queue 0). Each hardware queue will transmit all of the packets in its
buffer before allowing the next lower priority queue to transmit its packets. When the lowest
hardware priority queue has finished transmitting all of its packets, the highest hardware
priority queue can again transmit any packets it may have received.
The weight parameter allows the user to specify the maximum number of packets a given
hardware priority queue can transmit before allowing the next lower hardware priority queue
to begin transmitting its packets. A value between 0 and 127 can be specified. For example,
if a value of 3 is specified, then the highest hardware priority queue (number 6) will be
allowed to transmit 3 packets − then the next lower hardware priority queue (number 5) will
be allowed to transmit 3 packets, and so on, until all of the queues have transmitted 3
packets. The process will then repeat.
Parameters
<class_id 0-6> − Specifies which of the seven hardware priority queues that the config
scheduling command will apply to. The seven hardware priority queues are identified by
number, from 0 to 6, with the queue 0 being the lowest priority.
[<portlist> | all] − Specifes a range of ports to be configured.
strict – Specifies this queue is always working in strict mode.
weight <value 1-127> − Us i ng weighted fair algorithm to handle packets in priority queues.
Each queue will operate based on its setting of weight values.
Restrictions
Only Administrator and Operator and Power-User-level users can issue this command.
Example usage:
To configure the traffic scheduling for each CoS queue:
 Loading...