

Page 1
This product can be set up
using Internet Explorer 5.x
or later
Wireless Home Security
Internet Camera
DCS-2100+
Before Y ou Begin
Y ou must have at least the following:
• Windows XP/2000/ME/98SE
• Wired or Wireless Ethernet Adapter
• CD-ROM Drive
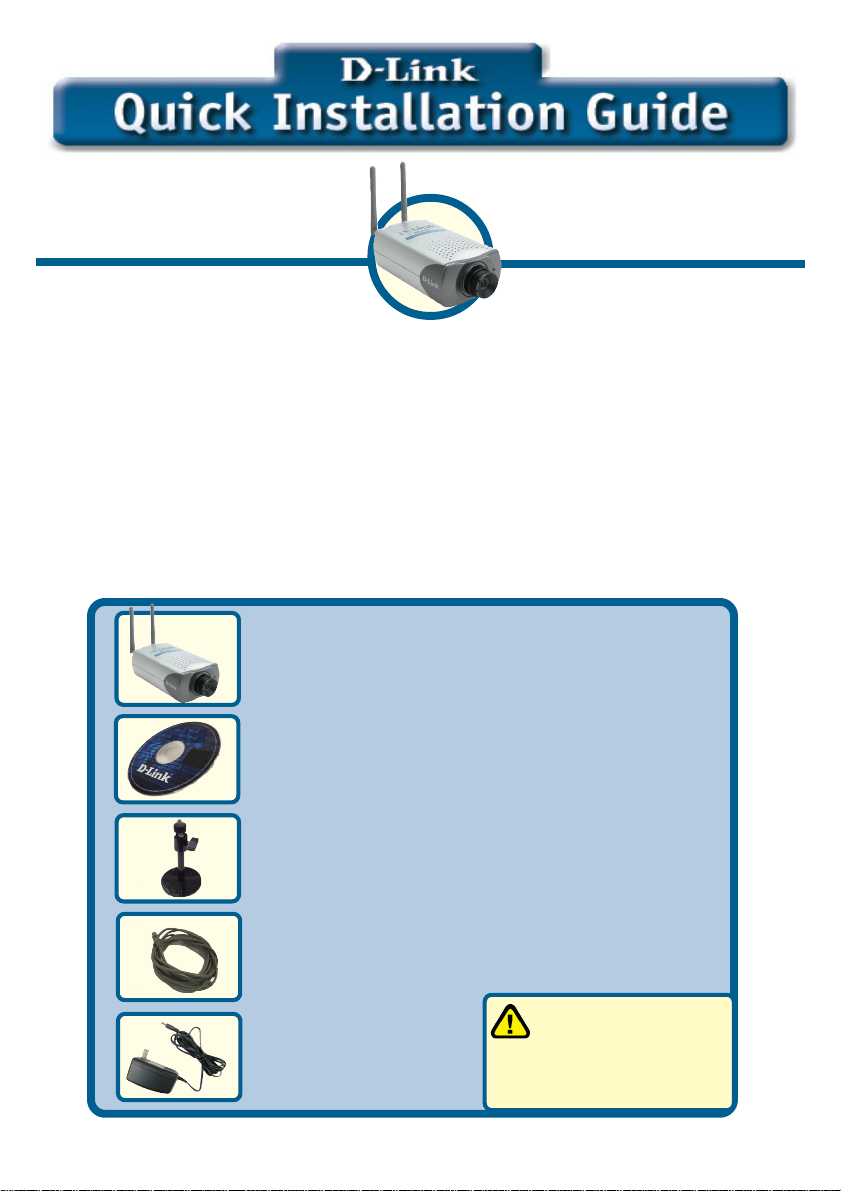
Check Your Package Contents
These are the items included with your purchase:
If any of the below items are missing, please contact your reseller.
DCS-2100+ Wireless Internet Camera
includes 2 detachable antennas
One Installation CD (containing Drivers,
Software, Quick Installation Guide and
Manual)
One Camera St and and Bracket
One Category 5 Ethernet Cable
Using a power supply
One AC Power
Adapter
©2003 D-Link Systems, Inc. All rights reserved. Trademarks or registered trademarks are the property of their
respective holders. Software and specifications subject to change without notice. DCS-2100+.07102003
with a different voltage
rating will damage this
product and void the warranty.
Page 2
System Requirements
• Internet Explorer 5.x or above
• CPU: Pentium III, 500 MHz or above (Required for use with IP Surveillance software)
• Memory Size: 64 MB (128 MB recommended)
• VGA card resolution: 800x600 or above
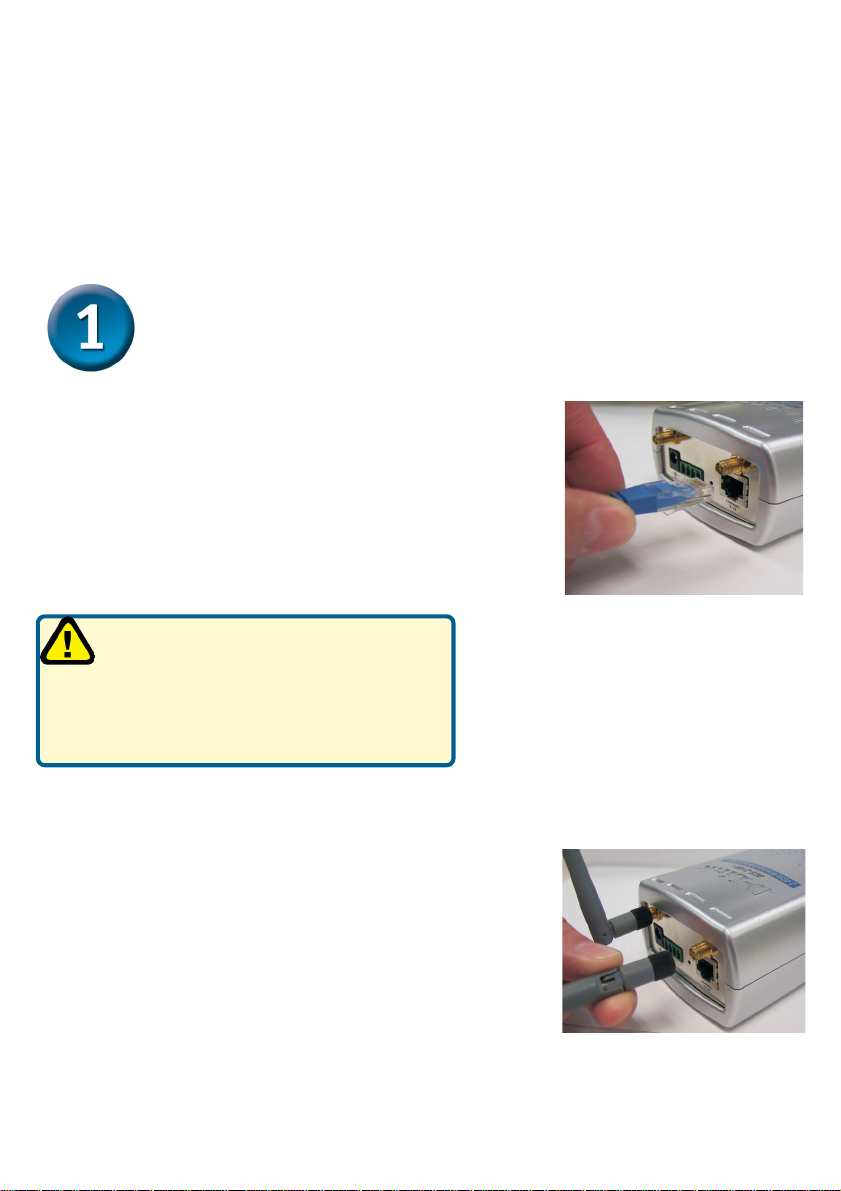
Hardware Installation
Connect the Ethernet Cable
If you will be using the DCS-2100+ in a wired network,
connect an Ethernet cable to the network cable connector
located on the Internet Camera’s back panel and attach it to
the network.
If you connect this camera
directly to a PC, you will need a
cross-over Ethernet cable. If you plug the
camera into a hub or router, you will be able to
use the cable included with your camera.
Attach the antennas to the camera
If you will be using the DCS-2100+ in a wireless network,
attach the antennas to the back of the camera by turning
the antennas in the clockwise direction until snug, do not
over tighten.
2
Page 3
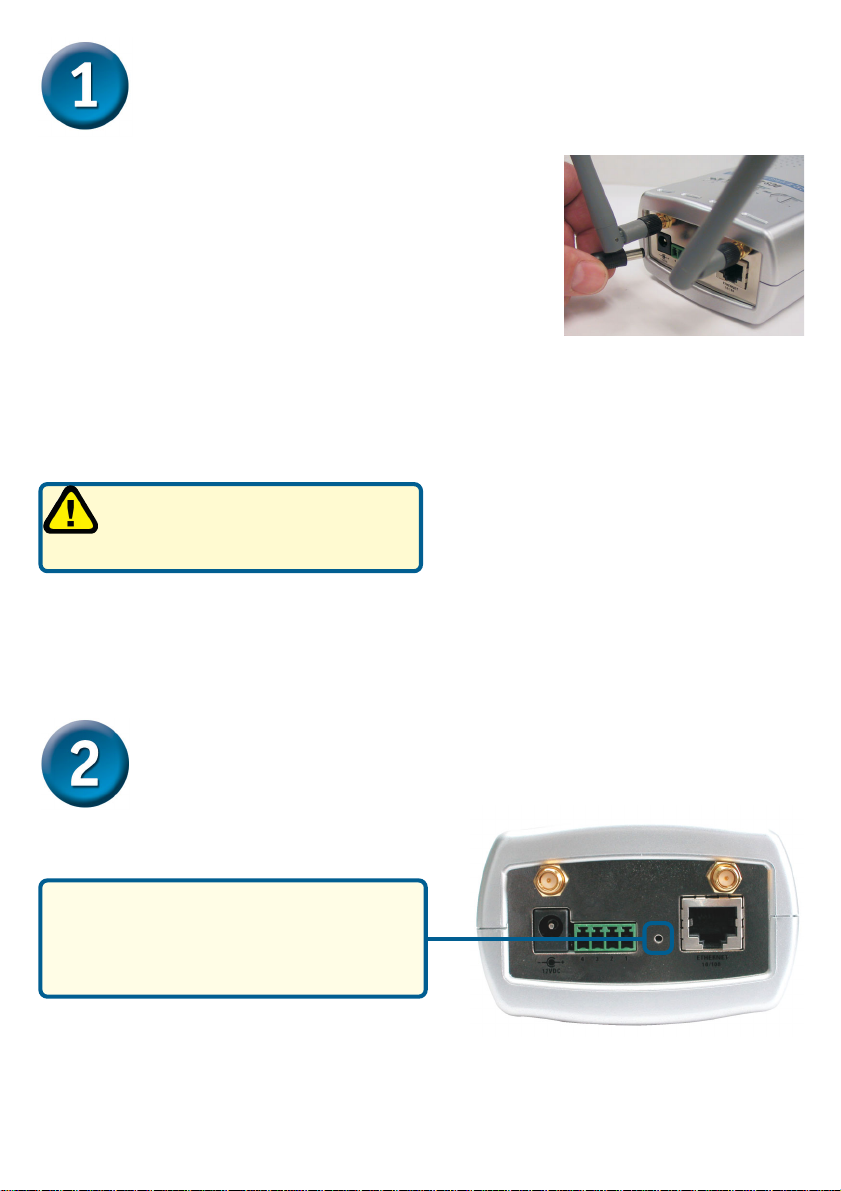
Hardware Installation (continued)
Attach the External Power Supply
Attach the external power supply to the DC power input
connector located on the Internet Camera’s back panel
(labeled DC 12V) and connect it to an AC power outlet.
When you have a proper connection, the LED (Light Emitting Diode) on the front of the
camera will turn from red to green. The light may blink on and off and your computer may
show an intermittant loss of connectivity, this is normal until you have configured your
camera.
Power source is confirmed when
the LED Power Indicator on the
Internet Camera is illuminated.
Configuring your camera with IP
Installer
In the back of the camera, there is a hole for
reset. Lightly insert a paper clip into the
reset hole until the light starts to cycle (a
series of blinks) twice, then let go.
3
Page 4
Configuring your camera with IP
Installer (continued)
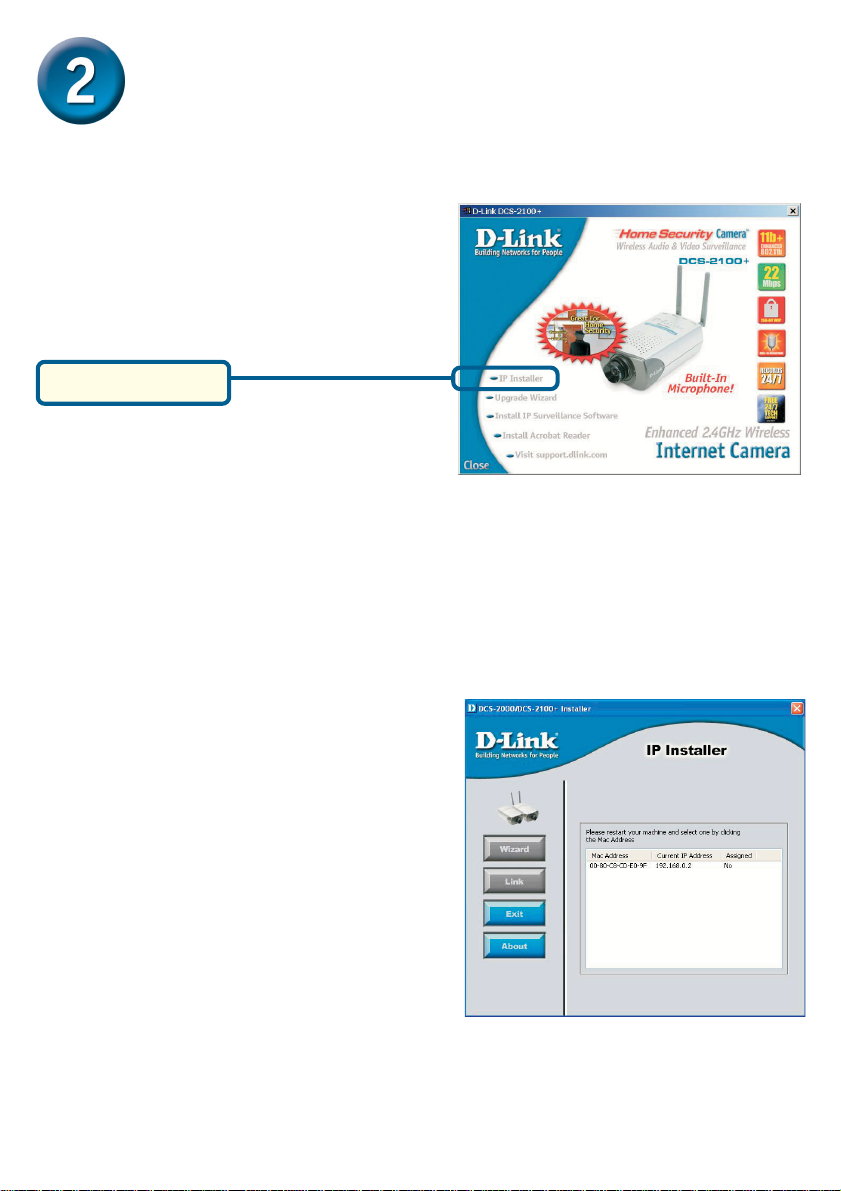
Insert the DCS-2100+ CD into the
CD-ROM drive.
Click on IP Installer
This is the first screen that will appear.
4
Page 5

Configuring your camera with IP
Installer (continued)
The IP Installer will now show a MAC
address of the DCS-2100+ and an
IP Address (which may or may not be
correct depending on what you have
your DCS-2100+ connected to.)
If you have a DHCP* server on your
network, there will be a valid IP Address
displayed here.
A DHCP server is a device that
supplies IP Addresses to its
clients that are on the same network
Highlight the MAC address
Click on the Wizard button
5
Page 6

Configuring your camera with IP
Installer (continued)
Click Next
If you have a DHCP server on your
network, you will already have a valid
IP Address in these fields.
If you do not have a DHCP server on
your network fill out your IP Address,
Subnet mask, Gateway and at least
1 DNS IP Address respectively on
this page. If you do not know what to
put in these fields, please contact
your System Administrator or your
Internet Service Provider.
Click Next
Leave the box titled This camera can be found by installer whenever it
starts up unchecked to avoid running this install application each time you
boot up the DCS-2100+. Check this box if you need to change IP address the
next time the DCS-2100+ boots up.
6
Page 7

Configuring your camera with IP
Installer (continued)
Setting up your wireless configuration for the DCS-2100+
The DCS-2100+is shipped with the ability to connect to any D-Link wireless routers and
adapters by default. If the settings are changed on the other devices, then the DCS-2100+
will need to be configured to match those settings also.
Type in your SSID and Connection type
consistent with your network. (If you are
unsure, please contact your network
administrator).
Choose the channel that is the same as your
other wireless devices that you would like to
connect to.
Y ou can choose dif ferent transmission rates to
apply if you need to restrict the camera’s
bandwidth.
Preamble Type- select Short or Long
Preamble. The Preamble T ype defines the length
of the CRC (Cyclic Redundancy Check) block
for communication between the DCS-2100+ and
roaming wireless adapters. Please see the
manual for details.
You can enable encryption here (up to
256-bit).
Click Next
7
Page 8

Configuring your camera with IP
Installer (continued)
If you need to change your
network settings at this point
click Back. To accept the
settings, click Restart.
Click OK
The DCS-2100+ will reboot to accept the settings.
8
Page 9

Viewing Your Internet Camera
This page will now show the IP Address
assigned to the MAC address of the
DCS-2100+
Click Link
After you click on the Link button,
IP Installer will automatically open
your Internet browser to the IP
Address of the DCS-2100+, in this
example it is: http://192.168.0.146
Your DCS-2100+ may have a
different IP Address.
9
Page 10

Viewing Your Internet Camera
At this point we highly recommend that you click on Tools and then Administrator and
put in a password for security purposes.
Enter the administrative
password. Click Save then “X”
at the top right-hand corner of
your browser to close the page.
The installation and configuration of the
DCS-2100+ Internet Camera is now complete.
Page 11

NOTES:
Page 12

Technical Support
Y ou can find software updates and user document ation on the D-Link website.
D-Link provides free technical support for customers within the United States and
within Canada for the duration of the warranty period on this product.
U.S. and Canadian customers can contact D-Link Technical Support through our
website, or by phone.
Tech Support for customers within the United States:
D-Link Technical Support over the T elephone:
(877) 453-5465
24 hours a day , seven days a week.
D-Link Technical Support over the Internet:
http://support.dlink.com
email:support@dlink.com
Tech Support for customers within Canada:
D-Link Technical Support over the T elephone:
(800) 361-5265
Monday to Friday 8:30am to 9:00pm EST
D-Link Technical Support over the Internet:
http://support.dlink.ca
email:support@dlink.ca
 Loading...