


Get it fixed, at your home or ours!
Your Home
For repair – in your home – of all major brand appliances, lawn and garden equipment, or heating and cooling systems, no matter who made it, no matter who sold it!
For the replacement parts, accessories and owner’s manuals that you need to do-it-yourself.
For Sears professional installation of home appliances and items like garage door openers and water heaters.
1-800-4-MY-HOME® |
Anytime, day or night |
(1-800-469-4663) |
(U.S.A. and Canada) |
www.sears.com |
www.sears.ca |
|
|
Our Home
For repair of carry-in products like vacuums, lawn equipment, and electronics, call or go on-line for the nearest
Sears Parts and Repair Center. 1-800-488-1222 Anytime, day or night (U.S.A. only) www.sears.com
To purchase a protection agreement (U.S.A.)
or maintenance agreement (Canada) on a product serviced by Sears:
1-800-827-6655 (U.S.A.) |
1-800-361-6665 (Canada) |
|
|
Para pedir servicio de reparación a domicilio, y para ordenar piezas:
1-888-SU-HOGAR®
(1-888-784-6427)
© Sears Brands, LLC
Au Canada pour service en français:
1-800-LE-FOYERMC
(1-800-533-6937) www.sears.ca
|
® Registered Trademark / TM Trademark / SM Service Mark of Sears Brands, LLC |
|
® Marca Registrada / TM Marca de Fábrica / SM Marca de Servicio de Sears Brands, LLC |
|
MC Marque de commerce / MD Marque déposée de Sears Brands, LLC |
06.02.11 AP |
Printed in the U.S.A. |
Operator's Manual
LAWN TRACTOR
21.0 HP,* 42" Mower Electric Start Automatic Transmission
Model No.
917.28851
• Español, p. 33
This product has a low emission engine which operates differently from previously built engines. Before you start the engine, read and understand this Owner’s Manual.
IMPORTANT: |
For answers to your questions |
|
Read and follow all Safety |
about this product, Call: |
|
1-800-659-5917 |
||
Rules and Instructions before |
||
operating this equipment. |
SEARS Craftsman Help Line |
|
5 am - 5 pm, Mon - Sat |
Gasoline containing up to 10% ethanol (E10) is acceptable for use in this machine. The use of any gasoline exceeding 10% ethanol (E10) will void the product warranty.
Esta máquina puede utilizar gasolina con un contenido de hasta el 10% de etanol (E10). El uso de una gasolina que supere el 10% de etanol (E10) anulará la garantía del producto.
Sears Brands Management Corporation, Hoffman Estates, IL 60179 U.S.A.
Visit our Craftsman website:www.sears.com/craftsman |
*As rated by the engine manufacturer |
441296 Rev. 4

TABLE OF CONTENTS
Warranty .................................................. |
2 |
Maintenance.......................................... |
16 |
Safety Rules ............................................ |
3 |
Service and Adjustments....................... |
21 |
Product Specifications............................. |
6 |
Storage.................................................. |
27 |
Assembly/Pre-Operation ......................... |
7 |
Troubleshooting ..................................... |
28 |
Operation................................................. |
9 |
Sears Service ......................... |
Back Cover |
Maintenance Schedule.......................... |
16 |
|
|
WARRANTY
Craftsman Riding Equipment Warranty CRAFTSMAN FULL WARRANTY
FOR TWO YEARS from the date of purchase, all non-expendable parts of this riding equipment are warranted against any defects in material or workmanship. A defective non-expendable part will receive free in-home repair or replacement if repair is impossible.
FOR FIVE YEARS from the date of purchase, the frame and front axle of this riding equipment are warranted against any defects in material or workmanship. A defective frame or front axle will receive free in-home repair or replacement if repair is impossible.
FOR 90 DAYS from the date of purchase, the battery (an expendable part) of this riding equipment is warranted against any defects in material or workmanship (our testing proves that it will not hold a charge). A defective battery will receive free in-home replacement.
ADDITIONAL LIFETIME LIMITED WARRANTY on CAST IRON FRONT AXLE (if equipped)
FOR AS LONG AS IT IS USED by the original owner after the fifth year from the date of purchase, the cast iron front axle (if equipped) of this riding equipment is warranted against any defects in material or workmanship. With proof of purchase, a defective cast front axle will receive free in-home replacement.
WARRANTY SERVICE
For warranty coverage details to obtain free repair or replacement, call 1-800-659-5917 or visit the web site: www.craftsman.com
In all cases above, if part repair or replacement is impossible, the riding equipment will be replaced free of charge with the same or an equivalent model.
All of the above warranty coverage is void if this riding equipment is ever used while providing commercial services or if rented to another person.
This warranty covers ONLY defects in material and workmanship. Warranty coverage does NOT include:
•Expendable parts (except battery) that can wear out from normal use within the warranty period, including but not limited to blades, spark plugs, air cleaners, belts, and oil filters.
•Standard maintenance servicing, oil changes, or tune-ups.
•Tire replacement or repair caused by punctures from outside objects, such as nails, thorns, stumps, or glass.
•Tire or wheel replacement or repair resulting from normal wear, accident, or improper operation or maintenance.
•Repairs necessary because of operator abuse, including but not limited to damage caused by towing objects beyond the capability of the riding equipment, impacting objects that bend the frame, axle assembly or crankshaft, or over-speeding the engine.
•Repairs necessary because of operator negligence, including but not limited to, electrical and mechanical damage caused by improper storage, failure to use the proper grade and amount of engine oil, failure to keep the deck clear of flammable debris, or failure to maintain the riding equipment according to the instructions contained in the operator’s manual.
•Engine (fuel system) cleaning or repairs caused by fuel determined to be contaminated or oxidized (stale). In general, fuel should be used within 30 days of its purchase date.
•Normal deterioration and wear of the exterior finishes, or product label replacement.
This warranty gives you specific legal rights, and you may also have other rights which vary from state to state.
Sears Brands Management Corporation, Hoffman Estates, IL 60179
4. |
3. |
2. |
1. |
Compararel ángulodel plieguecon pendientela delterreno . |
Mirar paralelo travésa al plieguedel troncodel en árbol dirección uotra de estructura pendientela vertical . quese quiere |
Tenerla páginaante desí mismosde modoque suborde izquierdo |
Plegaresta páginaa largolo dela líneapunteada arribaindicada . |
|
medir. |
seavertical |
|
arriba tractor su funcionar haga graves, daños evitar Para ADVERTENCIA: las a respecto con transversalmente nunca pendientes, las de abajo y los Haga .grados 15 de mayores pendientes cortar No .pendientes .control de pérdida la o volcarse evitar para gradualmente virajes .pendientes las en dirección de cambie cuando cuidado mucho Tenga |
.MAX GRADOS 15 |
EL ATRAVIESE NO Y ABAJO CUESTA |
ARRIBA CUESTA ANDE SOLAMENTE |
CERRO |
O |
|
|
|
|
ESTA |
PLEGAR |
|
|
|
|
ES |
A |
|
|
PENDIENTE |
UNA |
LARGO |
LO |
|
|
LA |
|
||
|
|
DE |
|
||
|
|
|
|
|
|
|
DE |
LÍNEA |
|
|
|
GRADOS |
15 |
|
|
|
|
PUNTEADA |
|
|
|
|
UNA PARA VISTA LA CON PENDIENTES LAS MEDIR PARA SUGERIDA GUÍA SEGURA OPERACIÓN
2 |
63 |

NOTES/AVISO |
|
SAFETY RULES |
|
|
|
|
|
DANGER: This cutting machine is capable of amputating hands and feet and |
|
|
throwing objects. Failure to observe the following safety instructions could result |
|
|
in serious injury or death. |
 WARNING: In order to prevent accidental starting when setting up, transporting, adjusting or making repairs, always disconnect spark plug wire and place wire where it cannot contact spark plug.
 WARNING: Do not coast down a hill in neutral, you may lose control of the tractor.
 WARNING: Tow only the attachments that are recommended by and comply with specifications of the manufacturer of your tractor. Use common sense when towing. Operate only at the lowest possible speed when on a slope. Too heavy of a load, while on a slope, is dangerous. Tires can lose traction with the ground and cause you to lose control of your tractor.
 WARNING: Engine exhaust, some of its constituents, and certain vehicle components contain or emit chemicals known to the State of California to cause cancer and birth defects or other reproductive harm.
 WARNING: Battery posts, terminals and related accessories contain lead and lead compounds, chemicals known to the State of California to cause cancer and birth defects or other reproductive harm. Wash hands after handling.
I. GENERAL OPERATION
•Read, understand, and follow all instructions on the machine and in the manual before starting.
•Do not put hands or feet near rotating parts or under the machine. Keep clear of the discharge opening at all times.
•Only allow responsible adults, who are familiar with the instructions, to operate the machine.
•Clear the area of objects such as rocks, toys, wire, etc., which could be picked up and thrown by the blades.
•Ensure the area is clear of bystanders before operating. Stopmachineif anyone enters the area.
•Never carry passengers.
•Do not mow in reverse unless absolutely necessary. Always look down and behind before and while backing.
3
•Never direct discharged material toward anyone. Avoid discharging material against a wall or obstruction. Material may ricochet back toward the operator. Stop the blades when crossing gravel surfaces.
•Do not operate machine without the entire grass catcher, discharge chute, or other safety devices in place and working.
•Slow down before turning.
•Never leave a running machine unattended. Always turn off blades, set parking brake, stop engine, and remove keys before dismounting.
•Disengage blades when not mowing. Shut off engine and wait for all parts to come to a complete stop before cleaning the machine, removing the grass catcher, or unclogging the discharge chute.
•Operate machine only in daylight or good artificial light.
•Do not operate the machine while under the influence of alcohol or drugs.
•Watch for traffic when operating near or crossing roadways.
•Use extra care when loading or unloading the machine into a trailer or truck.
•Always wear eye protection when operating machine.
•Data indicates that operators, age 60 years and above, are involved in a large percentage of riding mower-related injuries. These operators should evaluate their ability to operate the riding mower safely enough to protect themselves and others from serious injury.
•Follow the manufacturer’s recommendation for wheel weights or counterweights.
•Keep machine free of grass , leaves or other debris build-up which can touch hot exhaust / engine parts and burn. Do not allow the mower to plow leaves or other debris which can cause build-up to occur. Clean any oil or fuel spillage before operating or storing the machine. Allow machine to cool before storage.

SAFETY RULES
II. SLOPE OPERATION
Slopes are a major factor related to loss of control and tip-over accidents, which can result in severe injury or death. Operation on all slopes requires extra caution. If you cannot back up the slope or if you feel uneasy on it, do not mow it.
•Mow up and down slopes, not across.
•Watch for holes, ruts, bumps, rocks, or other hidden objects. Uneven terrain could overturn the machine. Tall grass can hide obstacles.
•Choose a low ground speed so that you will not have to stop or shift while on the slope.
•Do not mow on wet grass. Tires may lose traction.
Always keep the machine in gear when going down slopes. Do not shift to neutral and coast downhill.
•Avoid starting, stopping, or turning on a slope. If the tires lose traction, disengage the blades and proceed slowly straight down the slope.
•Keep all movement on the slopes slow and gradual. Do not make sudden changes in speed or direction, which could cause the machine to roll over.
•Use extra care while operating machine with grass catchers or other attachments; they can affect the stability of the machine. Do no use on steep slopes.
•Do not try to stabilize the machine by putting your foot on the ground.
•Do not mow near drop-offs, ditches, or embankments. The machine could suddenly roll over if a wheel is over the edge or if the edge caves in.
III. CHILDREN
Tragic accidents can occur if the operator is not alert to the presence of children. Children are often attracted to the machine and the mowing activity. Never assume that children will remain where you last saw them.
•Keep children out of the mowing area and in the watchful care of a responsible adult other than the operator.
•Be alert and turn machine off if a child enters the area.
•Before and while backing, look behind and down for small children.
•Never carry children, even with the blades shut off. They may fall off and be seriously injured or interfere with safe machine operation. Children who have been given rides in the past may suddenly appear in the mowing area for another ride and be run over or backed over by the machine.
•Never allow children to operate the machine.
•Use extra care when approaching blind corners, shrubs, trees, or other objects that may block your view of a child.
IV. TOWING
•Tow only with a machine that has a hitch designed for towing. Do not attach towed equipment except at the hitch point.
•Follow the manufacturer’s recommendation for weight limits for towed equipment and towing on slopes.
•Never allow children or others in or on towed equipment.
•On slopes, the weight of the towed equipment may cause loss of traction and loss of control.
•Travel slowly and allow extra distance to stop.
V. SERVICE
SAFE HANDLING OF GASOLINE
To avoid personal injury or property damage, use extreme care in handling gasoline. Gasoline is extremely flammable and the vapors are explosive.
•Extinguish all cigarettes, cigars, pipes, and other sources of ignition.
•Use only approved gasoline container.
•Never remove gas cap or add fuel with the engine running. Allow engine to cool before refueling.
•Never fuel the machine indoors.
•Never store the machine or fuel container where there is an open flame, spark, or pilot light such as on a water heater or other appliances.
•Never fill containers inside a vehicle or on a truck or trailer bed with plastic liner. Always place containers on the ground away from your vehicle when filling.
•Remove gas-powered equipment from the truck or trailer and refuel it on the ground. If this is not possible, then refuel such equipment with a portable container, rather than from a gasoline dispenser nozzle.
IDENTIFICACIÓN DE PROBLEMAS:
Vea la sección apropiada en el manual a menos que esté dirigido a un centro de servicio Sears.
PROBLEMA |
|
CAUSA |
|
CORRECCIÓN |
|
|
|
|
|
|
|
Las luz (ces) |
1. |
El interruptor está “APAGADO”(OFF). |
1. |
“ENCIENDA” (ON) el interruptor. |
|
de lantera(s) |
2. |
Bombilla(s) o lámpara(s) quemada(s). |
2. |
Cambie la bombilla(s) o lámpara(s). |
|
no funciona- |
|||||
|
|
|
|
||
ndo |
3. |
Interruptor de la luz fallado. |
3. |
Revise/cambie el interruptor de la luz. |
|
|
4. |
Alambrado suelto o dañado. |
4. |
Revise el alambrado y las conexiones. |
|
|
5. |
Fusible quemado. |
5. |
Cambie el fusible. |
|
La batería |
1. |
Elemento(s) de la batería malo(s). |
1. |
Cambie la batería. |
|
no carga |
2. |
Malas conexiones de cables. |
2. |
Revise/limpie todas las cables. |
|
|
3. |
Regulador fallado (si equipado). |
3. |
Cambie el regulador. |
|
|
4. |
Alternador fallado. |
4. |
Cambie el alternador. |
|
Pérdida de |
1. |
El control de rueda libre está enla posición |
1. |
Ponga el control de rueda libre enla |
|
impulsión |
|
“DESENGANCHADO” (disengaged). |
|
posición “ENGANCHADO”(disengaged). |
|
2. |
Residuos es en de la placa de dirección |
2. |
Vea “LIMPIEZA” en la sección de Manteni- |
||
|
|||||
|
|
(Si los tiene). |
|
mento de este manual. |
|
|
3. |
La correa de impulsión de impulsión de |
3. |
Reemplace la correa de movimien-to esta |
|
|
|
movimiento. |
|
gastada, dañada o rota. |
|
|
4. |
Aire atrapado en la transporte o el servicio. |
4. |
Purgue la transmisión. |
|
|
5. |
Llave cuadrada de eje es ausente. |
5. |
Vea “PARA REMOVER LAS RUEDAS” |
|
|
|
|
|
en la sección de Servicio y Ajustes de |
|
|
|
|
|
este manual. |
|
|
|
|
|
|
|
El motor tien |
1. |
El control de la aceleración del motor no fue |
1. |
Mueva el control de la aceleración a la |
|
“contraex- |
|
ajustado en la posición de velocidad media |
|
posición de velocidad media y máxima |
|
plosiones” |
|
y máxima (rápida) antes de para el motor. |
|
(rápida) antes de para el motor. |
|
cuando se |
|
|
|
|
|
“APAGA” |
|
|
|
|
|
|
|
|
|
|
|
El tractor se |
1. |
El sistema de funcionamiento atrás (ROS) |
1. |
Girar el ROS en la posición "ON".Vea la |
|
ponen mar- |
|
no está "ON", cuando enganche la sega- |
|
sección de operación. |
|
cha atrás |
|
dora o otro accesorio. |
|
|
|
|
|
|
|
|
4 |
61 |

IDENTIFICACIÓN DE PROBLEMAS:
Vea la sección apropiada en el manual a menos que esté dirigido a un centro de servicio Sears.
PROBLEMA |
|
CAUSA |
|
CORRECCIÓN |
|
|
|
|
|
|
|
Pérdida de |
9. |
Agua en el combustible. |
9. |
Vaciarelestanquedecombustibleyelcarbu- |
|
fuerza |
|
|
|
rador, vuelva a llenar el estanque con gaso- |
|
(sigue) |
|
|
|
lina nueva y cambie el filtro de combustible. |
|
10. |
Alambrado de la bujía suelto. |
10. |
Conecte y apriete el alambre de la bujía. |
||
|
|||||
|
11. |
Rejilla/aletas de aire del motor sucias. |
11. |
Limpie las rejilla/aletas de aire del motor. |
|
|
12. |
Silenciador sucio/taponado. |
12. |
Limpie/cambie el silenciador. |
|
|
13. |
Alambrado suelto o dañado. |
13. |
Revise todo el alambrado. |
|
|
14. |
Carburador desajustado. |
14. |
Vea “PARA AJUSTAR EL CARBURADOR” |
|
|
|
|
|
en la sección de Servicio y Ajustes. |
|
|
15. |
Válvulas del motor desajustadas. |
15. |
Pongase en contacto con un centro de |
|
|
|
|
|
servicio cualificado "SEARS". |
|
|
|
|
|
|
|
Vibración |
1. |
Cuchilla desgastada, doblada o suelta. |
1. |
Cambie la cuchilla. Apriete el perno de |
|
excesiva |
|
|
|
la cuchilla. |
|
2. |
Mandril de la cuchilla doblado. |
2. |
Cambie la mandril de la cuchilla. |
||
|
|||||
|
3. |
Parte(s) suelta(s)/dañada(s). |
3. |
Apriete la(s) parte(s). Cambie las partes |
|
|
|
|
|
dañadas. |
|
|
|
|
|
|
|
El motor conti- |
1. |
Sistema de control que exige la presencia |
1. |
Revise el alambrado, los interruptores |
|
núa funcionando |
|||||
cuando el op- |
|
del operador –seguridad fallado. |
|
y la conexiones.Si no están correctas, |
|
erador se baja |
|
|
|
Pongase en contacto con un centro de |
|
del asiento con |
|
|
|
servicio cualificado "SEARS". |
|
el embrague |
|
|
|
||
|
|
|
|
||
del accesorio |
|
|
|
|
|
enganchado |
|
|
|
|
|
|
|
|
|
|
|
El corte |
1. |
Cuchilla desgastada, doblada o suelta. |
1. |
Cambie la cuchilla. Apriete el perno de |
|
disparejo |
|
|
|
la cuchilla. |
|
|
2. |
El conjunto segador no estánivelado. |
2. |
Nivele el conjunto segador. |
|
|
3. |
Acumulación de césped, hojas y basura |
3. |
Limpie la parte inferior de la cajade la |
|
|
|
debajo de la segadora. |
|
segadora. |
|
|
4. |
Mandril de la cuchilla doblado. |
4. |
Cambie la mandril de la cuchilla. |
|
|
5. |
Los agujeros de ventilación del conjunto |
5. |
Limpie alrededor de los mandriles para |
|
|
|
segador taponadosdebido a la acumu- |
|
abrir los de ventilación. |
|
|
|
lación decé-sped, hojas y basura alred- |
|
|
|
|
|
edorde los mandriles. |
|
|
|
|
|
|
|
|
|
Las cuchil- |
1. |
Obstrucciónenelmecanismodelembrague. |
1. |
Remueva la obstrucción. |
|
las segado- |
2. |
La correa de impulsión de la segadora está |
2. |
Cambie la correa de impulsión de la |
|
ras no rotan |
|
desgastada/dañada. |
|
segadora. |
|
|
3. |
Polea de guía atascada. |
3. |
Cambie la polea de guía. |
|
|
4. |
Mandril de la cuchilla atascado. |
4. |
Cambie la mandril de la cuchilla. |
|
|
|
|
|
|
|
Mala des- |
1. |
Velocidad del motor muy lenta. |
1. |
Ponga el control de la aceleración en la |
|
carga del |
|
|
|
posición de “RÁPIDO” (fast). |
|
césped |
2. |
Velocidad de recorrido demasiado rápida. |
2. |
Cambie a una velocidad más lenta. |
|
|
3. |
Césped mojado. |
3. |
Permita que se seque el céspedantes |
|
|
|
|
|
de segar. |
|
|
4. |
El conjunto segador no estánivelado. |
4. |
Nivele el conjunto segador. |
|
|
5. |
Presión de aire de las llantas baja o |
5. |
Revise las llantas para verificarque tienen |
|
|
|
dispareja. |
|
la presión de aire. |
|
|
6. |
Cuchilla desgastada, doblada o suelta. |
6. |
Cambie/afile la cuchilla. Apriete el perno |
|
|
|
|
|
de la cuchilla. |
|
|
7. |
Acumulación de césped, hojas y basura |
7. |
Limpie la parte inferior de la cajade la |
|
|
|
debajo de la segadora. |
|
segadora. |
|
|
8. |
La correa de impulsión de la segadora está |
8. |
Cambie/ajuste la correa de impulsión de |
|
|
|
desgastada o desajustada. |
|
la segadora. |
|
|
9. |
Las cuchillas están mal coninstaladas. |
9. |
Vuelva a instalar las cuchillas elborde afilado |
|
|
|
|
|
hacia abajo. |
|
|
10. |
Cuchillas inadecuadas en uso. |
10. |
Cambie por las cuchillas enumeradas en |
|
|
|
|
|
este manual. |
|
|
11. |
Los agujeros de ventilación del conjunto |
11. |
Limpie alrededor de los mandriles para |
|
|
|
agujeros segador taponados debido a la |
|
abrir los de ventilación. |
|
|
|
acumulación de césped, hojas y basura |
|
|
|
|
|
alrededor de los mandriles. |
|
|
SAFETY RULES
•Keep the nozzle in contact with the rim of the fuel tank or container opening at all times until fueling is complete. Do not use a nozzle lock-open device.
•If fuel is spilled on clothing, change clothing immediately.
•Never overfill fuel tank. Replace gas cap and tighten securely.
GENERAL SERVICE
•Never operate machine in a closed area.
•Keep all nuts and bolts tight to Ensure the equipment is in safe working condition.
•Never tamper with safety devices. Check their proper operation regularly.
•Keep machine free of grass, leaves, or other debris build-up. Clean oil or fuel spillage and remove any fuel-soaked debris. Allowmachinetocoolbeforestoring.
•If you strike a foreign object, stop and inspect the machine. Repair, if necessary, before restarting.
•Never make any adjustments or repairs with the engine running.
•Checkgrasscatchercomponentsandthe discharge chute frequently and replace withmanufacturer’s recommendedparts, when necessary.
•Mower blades are sharp. Wrap the blade or wear gloves, and use extra caution when servicing them.
•Check brake operation frequently. Adjust and service as required.
•Maintain or replace safety and instruction labels, as necessary.
•Ensure the area is clear of bystanders before operating. Stopmachineif anyone enters the area.
•Never carry passengers.
•Do not mow in reverse unless absolutely necessary. Always look down and behind before and while backing.
•Never carry children, even with the blades shut off. They may fall off and be seriously injured or interfere with safe machine operation. Children who have been given rides in the past may suddenly appear in the mowing area for another ride and be run over or backed over by the machine.
•Keep children out of the mowing area and in the watchful care of a responsible adult other than the operator.
•Be alert and turn machine off if a child enters the area.
•Before and while backing, look behind and down for small children.
•Mow up and down slopes (15° Max), not across.
•Choose a low ground speed so that you will not have to stop or shift while on the slope.
•Avoid starting, stopping, or turning on a slope. If the tires lose traction, disengage the blades and proceed slowly straight down the slope.
•If machine stops while going uphill, disengage blades, shift into reverse and back down slowly.
•Do not turn on slopes unless necessary, and then, turn slowly and gradually downhill, if possible.
60 |
5 |

PRODUCT SPECIFICATIONS
Gasoline Capacity |
2.5 Gallons |
|
and Type: |
Unleaded Regular |
|
Oil Type |
SAE 30 (above 32°F) |
|
(API-SG-SL): |
SAE 5W30 (below 32°F) |
|
|
|
|
Oil Capacity: |
W/ Filter: |
56 oz. |
|
W/O Filter: |
48 oz. |
|
|
|
Spark Plug: |
Champion RC12YC |
|
|
(Gap: .030") |
|
|
|
|
Ground Speed |
Forward: |
0 - 5.2 |
|
Reverse: |
0 - 2.9 |
|
|
|
Charging System: |
3 Amps Battery |
|
|
5 Amps Headlights |
|
|
|
|
Battery: |
Amp/Hr: |
28 |
|
Min. CCA: |
230 |
|
Case size: |
U1R |
Blade Bolt Torque: 45-55 Ft. Lbs.
CONGRATULATIONS on your purchase of a new tractor. It has been designed, engineered and manufactured to give you the best possible dependability and performance.
Should you experience any problem you cannot easily remedy, please contact a Sears or other qualified service center. We have competent, well-trained representatives and thepropertoolstoserviceorrepairthistractor.
Please read and retain this manual. The instructions will enable you to assemble and maintain your tractor properly. Always observe the “SAFETY RULES”.
CUSTOMER RESPONSIBILITIES
•Read and observe the safety rules.
•Follow a regular schedule in maintaining, caring for and using your tractor.
•Follow the instructions under “Maintenance” and “Storage” sections of this owner’s manual.
 WARNING: This tractor is equipped with an internal combustionengineand should not be used on or near any unimproved forestcovered, brush-covered or grass-covered land unless the engine’s exhaust system is equipped with a spark arrester meeting ap-
plicable local or state laws (if any). If a spark arrester is used, it should be maintained in effective working order by the operator.
In the state of California the above is required by law (Section 4442 of the California Public Resources Code). Other states may have similar laws. Federal laws apply on federal lands. A spark arrester for the muffler is available through your nearest Sears service
center (See REPAIR PARTS manual).
REPAIR PROTECTION AGREEMENTS
Congratulationsonmakingasmartpurchase. Your new Craftsman® product is designed and manufactured for years of dependable operation. But like all products, it may require repair from time to time. That’s when having a Repair Protection Agreement can save you money and aggravation.
Purchase a Repair Protection Agreement now and protect yourself from unexpected hassle and expense.
Here’s what’s included in the Agreement:
•Expert service by our 12,000 professional repair specialists.
•Unlimited service and no charge for parts and labor on all covered repairs.
•Product replacement if your covered product can’t be fixed.
•Discount of 10% from regular price of service and service-related parts not covered by the agreement; also, 10% off regular price of preventive maintenance check.
•Fast help by phone – phone support from a Sears representative on products requiring in-home repair, plus convenient repair scheduling.
Once you purchase the Agreement, a simple phone call is all that it takes for you to schedule service. You can call anytime day or night, or schedule a service appointment online.
Sears has over 12,000 professional repair specialists, who have access to over 4.5 million quality parts and accessories. That’s the kind of professionalism you can count on to help prolong the life of your new purchase for years to come. Purchase your Repair Protection Agreement today!
Some limitations and exclusions apply. For prices and additional information call 1-800-827-6655.
SEARS INSTALLATION SERVICE
For Sears professional installation of home appliances, garage door openers, water heaters, and other major home items, in the U.S.A. call 1-800-4-MY-HOME®
IDENTIFICACIÓN DE PROBLEMAS:
Vea la sección apropiada en el manual a menos que esté dirigido a un centro de servicio Sears.
PROBLEMA |
|
CAUSA |
|
CORRECCIÓN |
|
|
|
|
|
|
|
No arranca |
1. |
Sin combustible. |
1. |
Llene el estanque de combustible. |
|
|
2. |
Motor sin la “ESTRANGULACIÓN” |
2. |
Vea “PARA HACER ARRANCAR EL MO- |
|
|
|
(CHOKE) adecuada. |
|
TOR” en la sección de operación. |
|
|
3. |
Motor ahogado. |
3. |
Espere varios minutos antes detratar de |
|
|
|
|
|
arrancar. |
|
|
4. |
Bujía mala. |
4. |
Cambie la bujía. |
|
|
5. |
Filtro de aire sucio. |
5. |
Limpie/cambie el filtro de aire. |
|
|
6. |
Filtro de combustible sucio. |
6. |
Cambie el filtro de combustible. |
|
|
7. |
Agua en el combustible. |
7. |
Vaciar el estanque de combustible y el |
|
|
|
|
|
carburador, vuelva a llenar el estanque |
|
|
|
|
|
con gasolina nueva cambie el filtro de |
|
|
|
|
|
combustible. |
|
|
8. |
Alambrado suelto o dañado. |
8. |
Revise todo el alambrado. |
|
|
9. |
Carburador desajustado. |
9. |
Vea “PARA AJUSTAR EL CARBURADOR” |
|
|
|
|
|
en la sección de Servicio y Ajustes. |
|
|
10. |
Válvulas del motor desajustadas. |
10. |
Pongase en contacto con un centro de |
|
|
|
|
|
servicio cualificado "SEARS". |
|
|
|
|
|
|
|
Difícil de |
1. |
Filtro de aire sucio. |
1. |
Limpie/cambie el filtro de aire. |
|
arrancar |
2. |
Bujía mala. |
2. |
Cambie la bujía. |
|
|
|||||
|
3. |
Batería baja o descargada. |
3. |
Vuelva a cargar o cambie la batería. |
|
|
4. |
Filtro de combustible sucio. |
4. |
Cambie el filtro de combustible. |
|
|
5. |
Combustible rancio o sucio. |
5. |
Vaciar el estanque de combustible y vuelva |
|
|
|
|
|
a llenarlo con gasolina nueva. |
|
|
6. |
Alambrado suelto o dañado. |
6. |
Revise todo el alambrado. |
|
|
7. |
Carburador desajustado. |
7. |
Vea “PARA AJUSTAR EL CARBURADOR” |
|
|
|
|
|
en la sección de Servicio y Ajustes. |
|
|
8. |
Válvulas del motor desajustadas. |
8. |
Pongase en contacto con un centro de |
|
|
|
|
|
servicio cualificado "SEARS". |
|
|
|
|
|
|
|
El motor no |
1. |
Pedal del freno no presionado. |
1. |
Presione el pedal del freno. |
|
la vuelta |
2. |
Elembraguedelaccesorioestáenganchado. |
2. |
Desenganche el embrague del accesorio. |
|
|
|||||
|
3. |
Batería baja o descargada. |
3. |
Vuelva a cargar o cambie la batería. |
|
|
4. |
Fusible quemado. |
4. |
Cambie el fusible. |
|
|
5. |
Terminales de la batería corroídos. |
5. |
Limpie los terminales de la batería. |
|
|
6. |
Alambrado suelto o dañado. |
6. |
Revise todo el alambrado. |
|
|
7. |
Interruptor de la ignición fallado. |
7. |
Revise/cambie el interruptor de la ignición. |
|
|
8. |
Solenoide o arrancador fallados. |
8. |
Revise/cambie el solenoide o arrancador. |
|
|
9. |
Interruptor(es) que exige(n) la presencia |
9. |
Pongase en contacto con un centro de |
|
|
|
del operador fallado. |
|
servicio cualificado "SEARS". |
|
El motor |
1. |
Batería baja o descargada |
1. |
Vuelva a cargar o cambie la batería. |
|
suena pero |
2. |
Terminales de la batería corroídos. |
2. |
Limpie los terminales de la batería. |
|
no arranca |
|||||
3. |
Alambrado suelto o dañado. |
3. |
Revise todo el alambrado. |
||
|
|||||
|
4. |
Solenoide o arrancador fallados. |
4. |
Revise/cambie el solenoide o arrancador. |
|
Pérdida de |
1. |
Corta mucho césped, muy rápido. |
1. |
Elevelaalturadecorte/reduzcalavelocidád |
|
fuerza |
2. |
Aceleración en la posición de “ESTRAN- |
2. |
Ajuste el control de la aceleración. |
|
|
|
GULACIÓN” (CHOKE). |
|
|
|
|
3. |
Acumulación de césped, hojas y basura |
3. |
Limpie la parte inferior de la cajade la |
|
|
|
debajo de la segadora. |
|
segadora. |
|
|
4. |
Filtro de aire sucio. |
4. |
Limpie/cambie el filtro de aire. |
|
|
5. |
Nivel de aceite bajo/aceite sucio. |
5. |
Revise el nivel de aceite/cambie el aceite. |
|
|
6. |
Bujía fallada. |
6. |
Limpie y vuelva a ajustar la abertura o |
|
|
|
|
|
cambie la bujía. |
|
|
7. |
Filtro de combustible sucio. |
7. |
Cambie el filtro de combustible. |
|
|
8. |
Combustible rancio o sucio. |
8. |
Vaciar el estanque de combustible y vuelva |
|
|
|
|
|
a llenarlo con gasolina nueva. |
|
|
|
|
|
|
6 |
59 |
ALMACENAMIENTO
Inmediatamente prepare su tractor para el almacenamiento al final de la temporada o si el tractor no se va a usar por 30 días o más.
 ADVERTENCIA: Nunca almacene el tractor con gasolina en el estanque dentro de un edificio en donde los gases pueden alcanzar una llama expuesta o una chispa. Permita que el motor se enfríe antes de almacenarlo en cualquier recinto privado.
TRACTOR
Cuando el tractor se va a almacenar por cierto período de tiempo, límpiela cuidadosamente, quite toda la mugre, la grasa, las hojas, etc. Guárdela en una área limpia y seca.
1.Limpie todo el tractor (vea “LIMPIEZA” en la sección de Mantenimiento en este manual).
2.Inspeccione y cambie las correas, si es necesario (vea las instrucciones para el cambio de las correas en la sección de Servicio y Ajustes de este manual).
3.Lubríquelo, según se muestra en la sección de Mantenimiento de este manual.
4.Asegúrese que todas las tuercas, los pernos y los tornillos estén sujetados en forma segura. Inspeccione las partes movibles para verificar si hay daño, rotura o desgaste. Cámbielas si es necesario.
5.Retoque todas superficies pintadas oxidadas o picadas; aplique lija antes de pintar.
BATERÍA
•Cargue la batería completamente antes de guardarla.
•Después de cierto período de tiempo en almacenamiento, la batería puede necesitar volver a cargarse.
•Para ayudar a evitar la corrosión y las fugas de potencia durante largos períodos de almacenamiento, se deben desconectar los cables de la batería y se debe limpiar cuidadosamente (vea “PARA LIMPIAR LA BATERÍA Y LOS TERMINALES” en la sección de Mantenimientode este manual).
•Después de limpiarla, deje los cables desconectados y póngalos en donde no puedan entrar en contacto con los terminales de la batería.
•Si se remueve la batería del tractor para el almacenamiento, no la guarde directamente sobre concreto o sobre superficies húmedas.
MOTOR
SISTEMA DE COMBUSTIBLE
IMPORTANTE: Es important evitar que se forman depositos de goma en partes fundamentales del sistema de combus-tible tales como el carburador, el filtro del combustible, la manguera del combustibles mezclados con alcohol (conocido como gasohol o que tienen etanol o metanol) pueden atraer humedad, lo que conduce a la separación y a la formación de acudos durante elalmacenamiento. La gasolina acidica puede dañar el sistema de combustible de un motor durante el periodo de almacenamiento.
•Vaciar el depósito del carburante poniendo en marcha el motor y dejándolo funcionar hasta que el carburante termine el carburador esté vacío.
•Nunca use los productos para limpieza del carburador o del motor en el estanque de combustible pues se pueden producir daños permanentes.
•Use combustible nuevo la próxima temporada.
AVISO: El estabilizador de combustible es una alternativa aceptable para reducir a un mínimo la formación de depósitos de goma en el combustible durante el período de almacenamiento. Agregue estabilizador a la gasolina en el estanque de combustible o en el envase para el almacenamiento. Siempre siga la proporción de mezcla que se encuentra en el envase del estabilizador. Haga funcionar el motor por lo menos 10 minutos después de agregar el estabilizador, para permitir que éste llegue al carburador. No vaciar la gasolina del estanque de gasolina y el carburador si se está usando estabilizador de combustible.
ACEITE DEL MOTOR
Drene el aceite (con el motor caliente) y cámbielo con aceite de motor limpio. (Vea “MOTOR” en la sección de Mantenimiento” de este manual.)
CILINDRO(S)
1.Remueva la(s) bujía(s).
2.Vacíe una onza de aceite a través del agujero(s) de la bujía en el cilindro(s).
3.Gire la llave de ignición a la posición de “Arranque” (Start), por unos cuantos segundos para distribuir el aceite.
4.Cambie por bujía(s) nueva(s).
OTROS
•No guarde la gasolina de una temporada a la otra.
•Cambie el envase de la gasolina si se empieza a oxidar. La oxidación y/o la mugre en su gasolina producirán problemas.
•Si es posible, guarde su unidad en un recinto cerrado y cúbrala para protegerla contra el polvo y la mugre.
•Cubra su unidad con un forro protector adecuado que no retenga la humedad. No use plástico. El plástico no puede respirar, lo que permite la formación de condensación, lo que producirá la oxidación de su unidad.
IMPORTANTE: Nunca cubra el tractor mientras el motor y las areas de escape todavia estan calientes.
58
UNASSEMBLED PARTS
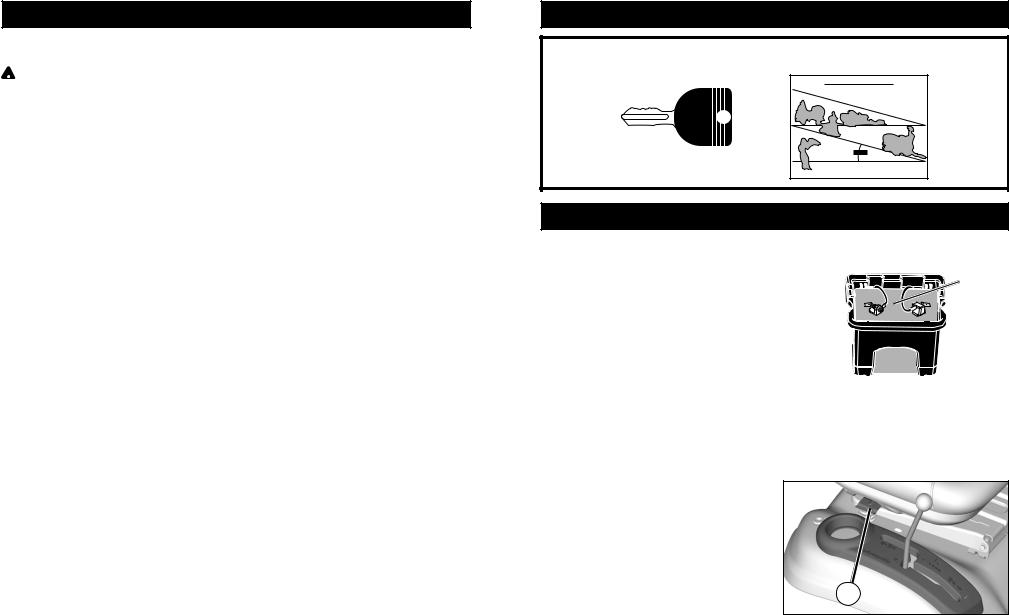
Slope Sheet
Keys
(2) Keys
ASSEMBLY/PRE-OPERATION
Your new tractor has been assembled at the factory with exception of those parts left unassembled for shipping purposes.
TOOLS REQUIRED FOR ASSEMBLY |
Label |
||
A socket wrench set will make assembly |
|
||
easier. Standard wrench sizes are listed. |
|
||
(1) |
1/2" wrench |
Tire pressure gauge |
|
(2) |
7/16" wrenches |
Utility knife |
|
Pliers
When right or left hand is mentioned in this manual,itmeanswhenyouareintheoperating position (seated behind the steering wheel).
TO REMOVE TRACTOR FROM CARTON
UNPACK CARTON
•Remove all accessible loose parts and parts cartons from carton .
•Cut along dotted lines on all four panels of carton. Remove end panels and lay side panels flat.
•Check for any additional loose parts or cartons and remove.
BEFORE REMOVING TRACTOR FROM SKID
TO CHECK BATTERY
1. Lift seat to raised position.
NOTE: If this battery is put into service after month and year indicated on label (label is located between terminals) charge battery for minimum of one hour at 6-10 amps. (See "BATTERY" in Maintenance section of this manual for charging instructions).
•For battery and battery cable installation see "REPLACING BATTERY" in the "Service and Adjustments" section in this manual.
TO ADJUST SEAT
•Sit in seat.
•Lift up adjustment lever (A) and slide seat until a comfortable position is reached which allows you to press clutch/brake pedal all the way down.
•Release lever to lock seat in position.
A
NOTE: You may now roll your tractor off the skid. Follow the appropriate instruction below to remove the tractor from the skid.
 WARNING: Before starting, read, understand and follow all instructions in the Operation section of this manual. Ensure tractor is in a well-ventilated area. Ensure the area in front of tractor is clear of other people and objects.
7

TO ROLL TRACTOR OFF SKID (See Operation section for location and function of controls)
1.Raise attachment lift lever to its highest position.
2.Release parking brake by depressing clutch/brake pedal.
3.Place freewheel control in "transmission disengaged position" (See “TO TRANSPORT”inOperationsectionofthismanual).
4.Roll tractor forward off skid.
5.Remove banding holding the deflector
shield up against tractor.
Continue with the instructions that follow.
CHECK TIRE PRESSURE
The tires on your tractor were overinflated at the factory for shipping purposes. Correct tire pressure is important for best cutting performance.
•Reduce tire pressure to PSI shown on tires.
CHECK DECK LEVELNESS
For best cutting results, mower housing should be properly leveled. See “TO LEVEL MOWER” in the Service and Adjustments section of this manual.
CHECK FOR PROPER POSITION OF ALL BELTS
See the figures that are shown for replacing motion and mower blade drive belts in the Service and Adjustments section of this manual. Verify that the belts are routed correctly.
CHECK BRAKE SYSTEM
After you learn how to operate your tractor, check to see that the brake is operating properly. See “TO CHECK BRAKE” in the Service and Adjustments section of this manual.
8
CHECKLIST
Before you operate your new tractor, we wish to assure that you receive the best performance and satisfaction from this Quality Product.
Please review the following checklist:
All assembly instructions have been completed.
No remaining loose parts in carton.
Battery is properly prepared and charged.
Seat is adjusted comfortably and tightened securely.
All tires are properly inflated. (For shipping purposes, the tires were overinflated at the factory).
Be sure mower deck is properly leveled side-to-side/front-to-rear for best cutting results. (Tires must be properly inflated for leveling).
Check mower and drive belts. Be sure they are routed properly around pulleys and inside all belt keepers.
Check wiring. See that all connections are still secure and wires are properly clamped.
Before driving tractor, be sure freewheel control is in “transmission engaged” position (see “TO TRANSPORT” in the Operation section of this manual).
Whilelearninghowtouseyourtractor,payextra attention to the following important items:
Engine oil is at proper level.
Fuel tank is filled with fresh, clean, regular unleaded gasoline.
Become familiar with all controls, their location and function. Operate them before you start the engine.
Be sure brake system is in safe operating condition.
Be sure Operator Presence System and Reverse Operation System (ROS) are working properly (See the Operation and Maintenance sections in this manual).
It is important to purge the transmission before operating your tractor for the first time. Follow proper starting and transmission purging instructions (See “TO START ENGINE” and “PURGE TRANSMISSION” in the Operation section of this manual).
REEMPLAZAR LA BATERIA
 ADVERTENCIA: No haga cortocircuito con los terminales de la batería al permitir que una llave de tuerca o cualquier otro objeto entre en contacto con ambos terminales a la misma vez. Antes de instalar la batería remueva las pulseras de metal, los relojes de pulsera de metal, los anillos, etc. El terminal positivo tiene que conectarse primero para evitar las chispas debido a la conexión a tierra por accidente.
1.Levante el asiento a la posición elevada.
2.Remueve la protección de los terminales.
3.Desconecte el cable de la batería NEGRO primero y luego el cable de la batería ROJO y remueva la batería del tractor.
4.Instale la nueva batería con los términos en misma posición como la batería vieja.
5.Reemplazamos cubierta terminal.
6.Primero, conecte el cable de la batería ROJO con el terminal positivo (+) con el perno hexagonal y la tuerca según se muestra. Apriételos en forma segura.
7.Conecte el cable de conexión a tierra NEGRO al terminal negativo (-) con el perno hexagonal y la tuerca que queden. Apriételos en forma segura.
8.Cerramos la asiento.
Base 
Del Asiento
ENTRECIERRE Y RELÉS
El alambrado suelto o dañado puede producir el mal funcionamiento de su tractor, o que deje de funcionar, o le impida el arrancar.
• Revise el alambrado.
PARAREMOVERELCONJUNTODELCAPOTA Y DEL ENREJADO
1.Levante el capota.
2.Desabroche el conector del alambre de las luces delanteras.
3.Párese delante del tractor. Agarre el capota en los lados, inclínelo un poco hacia el motor y sáquelo del tractor.
4.Para volver a instalar el capota, asegúrese de volver a conectar el conector del alambre de las luces.
Capota
Conector del alambre de las Luces Delanteras
04031
TRANSMISIÓN
Cubierta |
Tuerca |
Terminal |
Perno |
Cable Negro |
|
(negativo) |
|
REMOCIÓN/REEMPLAZO DE LA
TRANSMISIÓN
Si por acaso su transmisión debe ser removida para servicio o reemplazo, debe ser purgada después de la reinstalación y antes de operar el tractor. Vea “PURGAR LA TRANSMISIÓN” en la sección de la Operación de este manual.
MOTOR
Cable Rojo
(positivo) 02603
PARA CAMBIAR LA BOMBILLA DE LA LUZ DELANTERA
1.Levante el capota.
2.Tire el sujetador de la bombilla fuera del agujero en la parte trasera del enrejado.
3.Cambie la bombilla en el sujetador y empuje el sujetador de la bombilla, en forma segura, hacia atrás en el agujero en la parte trasera del enrejado.
4.Cierre el capota.
PARA CAMBIAR EL FUSIBLE
Cámbielo por un fusible tipo enchufable de 30 amps, tipo automotriz. El sujetador del fusible está ubicado detrás del tablero.
PARA AJUSTAR EL CABLE DE CONTROL DE LA ACELERACIÓN
El control de la aceleración ha sido preajustado en la fábrica y no debería necesitar ajustes. Revise los ajustes que se describen a continuación, antes de soltar el cable. Si el ajuste es necesario, vea de manual de motor.
PARA AJUSTAR EL CONTROL DE ESTRANGULACIÓN
El control de la estrangulación ha sido preajustado en la fábrica y no debería necesitar ajustes.
PARA AJUSTAR EL CARBURADOR
El carburador ha sido preajustado en la fábrica y no debería necesitar ajustes. Sin embargo, se pueden necesitar ajustes de menor importancia para compensar por las diferencias en el combustible, temperatura, altura o carga. Si el carburador
57necesita ajustes, vea de manual de motor.

PARA REMOVER LAS RUEDAS
1.Bloquee el eje en forma segura.
2.Remueva la cubierta del eje, el anillo de retención y las arandelas para permitir la remoción de las ruedas (la rueda trasera contiene una llave cuadrada - no la pierda).
3.Repare la llanta y vuélvala a montar. AVISO: En las ruedas traseras solamente: alinee las ranuras en el cubo de la rueda trasera en el eje. Inserte la llave cuadrada.
4.Vuelva a colocar las arandelas e inserte el anillo de retención en forma segura en la ranura del eje.
5.Vuelva a colocar la cubierta del eje.
AVISO: Para arreglar las llantas perforadas y péra prevenir que tenga llantas pinchadas a causa de pequeñas fugas, comprar de su commerciante Sears y utilizar el sello para llantas. Elsello previene que las llantas se sequen y también la corrosión.
Arandelas |
|
Anillo de |
|
Retención |
|
Cubierta |
|
del eje |
|
Llave Cuadrada (rueda |
3 |
|
0066 |
trasera solamente) |
|
IMPRESIÓN / INCLINACIÓN DE LAS RUEDAS
DELANTERAS
La impresión e inclinación de las ruedas delanteras de su nuevo tractor vienen así de fábrica y son normales. La impresión y la inclinación de las ruedas delanteras no son regulables. En caso que se produzca algún daño que afecte la impresión o la inclinación de las ruedas delanteras tal como vinieron de fábrica, póngase en contacto con un centro de servicios Sears u otro centro de servicios autorizado.
REGULACIÓN DE LA PALANCA DE CONTROL DEL MOVIMIENTO NEUTRO DEL CAMBIO
MECÁNICO
La palanca de control del movimiento del cambio mecánico ya viene predefinida por la Casa constructora y por lo tanto no requiere ulteriores regulaciones.
1.Aflojar ligeramente el perno de regulación en la parte anterior de la rueda posterior derecha;
2.Poner en marcha el motor y mover la palanca de control del movimiento del cambio mecánico hasta llevarla en una posición en la que no se pueda mover ni adelante ni atrás;
3.Mantener la palanca de control del movimiento del cambio mecánico en esta posición y apagar el motor;
4.Manteniendo la palanca en la posición arriba indicada, aflojar el perno de regulación;
5.Mover la palanca de control del movimiento en posición neutro (cierre metálico);
6.Enroscar bien el perno de regulación.
Palanca de control |
Neutro Cierre |
de Movimiento |
Metálico |
|
Perno de |
02239 |
Velocidades |
AVISO: Desplazar el plano de trabajo de la segadora hasta la posición más baja para aumentar el juego al fin de acceder al perno de regulación. Si el tractor sigue deslizándose adelante y atrás, después de esta regulación y con la palanca en posición neutro, efectuar las operaciones indicadas de seguida.
1.Aflojar el perno de regulación.
2.Mover la palanca de control del movimiento de 1/4o1/2pulgarenladireccióndedeslizamiento.
3.Enroscar bien el perno de regulación.
4.Poner en marcha el motor y probarlo.
5.Si el tractor sigue deslizando, repetir las operaciones arriba indicadas hasta alcanzar los resultados deseados.
PARA HACER ARRANCAR EL MOTOR CON UNA BATERÍA BAJA
 ADVERTENCIA: Las baterías de ácido-plomo generan gases explosivos. Mantenga las chispas, las llamas y los materiales para fumar alejados de las baterías. Siempre use una protección para los ojos alrededor de las baterías.Si su batería está demasiado baja como para hacer arrancar el motor tiene que volverse a cargar. (Vea “Batería” en la sección de Mantenimiento de este manual).
Si se usan “cables de empalme” para un arranque
de emergencia, siga este procedimiento: IMPORTANTE: Su tractor esta equipado con un sistema de 12 volts. El otro vehículo también tiene que tener un sistema de 12 volts. No use la batería de su tractor para hacer arrancar a otros vehículos.
PARA ADJUNTAR LOS CABLES DE EMPALME –
1.Conecte cada extremo del cable ROJO con el terminal (A-B) POSITIVO (+) de cada batería, preocupándose de no hacer cortocircuito en el chasis.
2.Conecte un extremo del cable NEGRO con el terminal (C) NEGATIVO (-) de una batería completamente cargada.
3.Conecte el otro extremo del cable (D) NEGRO con un buena CONEXIÓN A TIERRA DEL CHASIS, alejado del estanque de combustible y de la batería.
PARA REMOVER LOS CABLES, INVIERTA EL
ORDEN
1.El cable NEGRO primero del chasis y luego de la batería completamente cargada.
2.El cable ROJO al último de ambas baterías.
Batería |
Batería |
Débil o |
Completa- |
Descargada |
mente |
|
Cargada |
OPERATION
These symbols may appear on your tractor or in literature supplied with the product. Learn and understand their meaning.
REVERSE |
NEUTRAL |
HIGH |
|
LOW |
|
CHOKE |
FAST |
SLOW |
IGNITION SWITCH |
|
|
|
|
|
|
|
|
|
|
|
|
ENGINE OFF |
REVERSE |
ENGINE ON |
ENGINE START |
PARKING BRAKE MOWER HEIGHT |
MOWER LIFT |
|||||
|
OPERATION |
|
|
|
|
|
|
|
|
|
|
SYSTEM (ROS) |
|
|
|
|
|
|
|
|
|
LIGHTS ON |
FUEL |
BATTERY |
REVERSE |
FORWARD |
CRUISE CONTROL |
|
CLUTCH/BRAKE |
|||
|
PEDAL |
|||||||||
|
|
|
|
|
|
|
|
|
|
|
|
|
|
|
|
|
|
|
|
15 |
15 |
|
|
|
|
|
|
|
|
|
|
|
ATTACHMENT |
ATTACHMENT |
|
DANGER, KEEP HANDS |
KEEP AREA CLEAR |
SLOPE HAZARDS |
|||||
CLUTCH DISENGAGED |
CLUTCH ENGAGED |
AND FEET AWAY |
||||||||
(SEE SAFETY RULES SECTION)
FREE WHEEL (Automatic Models only)
DANGER indicates a hazard which, if not avoided, will result in death or serious injury.
WARNING indicates a hazard which, if not avoided, could result in death or serious injury.
CAUTION indicates a hazard which, if not avoided, might result in minor or moderate injury.
CAUTION when used without the alert symbol, indicates a situation that could result in damage to the tractor and/or engine.
Failure to follow instructions could result in serious injury or death. The safety alert symbol is used to identify safety information about hazards which can result in death, serious injury and/or property damage.
HOT SURFACES indicates a hazard which,
if not avoided, could result in death, serious injury and/or property damage.
FIRE indicates a hazard which, if not avoided, could result in death, serious injury and/or property damage.
56 |
9 |

KNOW YOUR TRACTOR
READ THIS OWNER'S MANUAL AND SAFETY RULES BEFORE OPERATING YOUR TRACTOR
Compare the illustrations with your tractor to familiarize yourself with the locations of various controls and adjustments. Save this manual for future reference.
D
 H E
H E
B
C G
F
J
A
M
Our tractors conform to the applicable safety standards of the
American National Standards Institute.
(A)ATTACHMENT LIFT LEVER - Used to raise and lower the mower or other attachments mounted to your tractor.
(B)CLUTCH/BRAKE PEDAL - Used for declutching and braking the tractor and starting the engine.
(C)PARKING BRAKE - Locks clutch/brake pedal into the brake position.
(D)THROTTLE/CHOKECONTROL- Used for starting and controlling engine speed.
(E)ATTACHMENTCLUTCHLEVER-Used to engage the mower blades, or other attachments mounted to your tractor.
(F)IGNITION SWITCH - Used for starting and stopping the engine.
(G)REVERSE OPERATION SYSTEM (ROS) "ON" POSITION - Allows operation of mower or other powered attachment while in reverse.
(H)LIGHT SWITCH - Turns the headlights on and off.
(J) MOTION CONTROL LEVER - Selects the speed and direction of tractor.
(M) FREEWHEELCONTROL- Disengages transmission for pushing or slowly towing the tractor with the engine off.
PARA CAMBIAR LA CORREA DE IMPULSIÓN
DE LA CUCHILLA SEGADORA
La correa de impulsión de la cuchilla segadora se puede cambiar sin herramientas. Estacione el tractor en una superficie nivelada. Enganche el freno de estacionamiento.
REMOCIÓN DE LA CORREA –
1.Remueva la segadora del tractor (Vea “PARA REMOVER LA SEGADORA” de esta sección de este manual).
2.Haga salir la correa de las poleas del mandril y de las poleas de guía.
3.Tire la correa alejándola de la segadora.
INSTALACIÓN DE LA CORREA
1.Haga rodar la correa alredeor de ambas poleas del mandrin y de las poleas-guías.
2.Asegúrese las correas esten en todas las ranuras de las peleas y al interior todas las guías de la correa.
3.Instale la segadora (véa “ PARA INSTALAR LA SEGADORA “ en esta sección de este manual).
Poleas de
Guía
Polea del Mandril
Polea del Mandril
PARA REEMPLAZAR LA CORREA DE TRANS-
MISIÓN
Estacione el tractor en una superficie nivelada. Ponga el freno de mano. Si necesita asistencia, del lado de abajo del apoyapiés hay una guía práctica para el montaje de la correa.
DESMONTAJE DE LA CORREA
1.Desmonte la cortadora (Ver “PARA DESMONTAR LA CORTADORA” en este capítulo del manual).
NOTE: Observe toda la correa de transmisión y la posición de todas las guías y guardacorreas.
2.Retire la correa del piñón estacionario (A) y del piñón de embrague (B).
3.Retire la correa del piñón central (C).
6.Jale el cable de la correa hacia la parte de atrás del tractor. Con mucho cuidado, retire la correa de la polea de entrada de la transmisión, moviéndola hacia arriba y pasándola por encima de las paletas del ventilador (D).
4.Retire la correa de la polea del motor moviéndola hacia abajo (E).
5.Deslice la correa hacia la parte de atrás del tractor, retírela de la placa de dirección (F) y quítela del tractor.
MONTAJE DE LA CORREA
1.Instale la correa nueva de la parte de atrás a la parte de adelante del tractor, pasándola por encima de la placa de dirección (F) y del vástago del pedal del embrague / freno (G).
2.Jale la correa hacia la parte de adelante del tractor y páselo por sobre la polea del motor (E).
3.Jale la correa hacia la parte de atrás del tractor. Con mucho cuidado, mueva la correa hacia abajo y pásela alrededor del ventilador de transmisión y por encima de la polea de entrada (D). Cerciórese de que la correa esté calzada dentro del guardacorrea.
4.Coloque la correa sobre el piñón central (C).
5.Pase la correa a través del piñón estacionario
(A) y del piñón del embrague (B).
6.Asegúrese de que la correa calce en todas las ranuras de las poleas y dentro de todas las guías y guardacorreas..
5.Instale la SEGADORA (Ver “PARA MONTAR LA SEGADORA” en este capítulo del manual).
|
E |
|
F |
A |
|
B |
|
C |
G |
|
D


CONTROLAR Y AJUSTAR EL FRENO
Si el tractor exige más de cinco (5) pies para pararse a una velocidad más alta en el cambio más alto en una superficie nivelada de hormigón seco o pavimentada, entonces se debe controlar y ajustar el freno.
CONTROL DEL FRENO
1.Aparcar el tractor en una superficie nivelada de hormigón seco o pavimentada, presionar el pedal del freno hasta el fondo y accionar el freno de estacionamiento.
2.Desembragar la transmisión colocando el mando de la rueda libre en la posición “transmisión desembragada”. Tirar el mando de la rueda libre fuera y dentro la ranura y soltar así se coloca en la posición desembragada.
Las ruedas traseras tiene que bloquearse y patinar cuando se intenta empujar hacia adelante el tractor manualmente. Sustituir las zapatas del freno o contactar con Sears o con un otro centro de servicio cualificado.
10 |
55 |
 Loading...