

Page 1
USER GUIDE
Page 2

Corel PHOTO-PAINT® 11 User Guide
The contents of this user guide and the associated Corel PHOTO-PAINT software
are the property of Corel Corporation and its respective licensors, and are protected by
copyright. For more complete copyright information, please refer to the About Corel
PHOTO-PAINT 11 section in the Help menu (Windows) or Corel PHOTO-PAINT
11 menu (Mac OS) of the software.
© 2002 Corel Corporation. All rights reserved.
Corel, the Corel logo, Corel PHOTO-PAINT, CorelDRAW, CorelTUTOR, procreate,
deepwhite, Docker, and Scrapbook are trademarks or registered trademarks of Corel
Corporation and/or its subsidiaries in Canada, the U.S. and/or other countries.
Microsoft and Windows are trademarks or registered trademarks of Microsoft
Corporation in the United States and/or other countries. iPhoto, Macintosh, Mac, and
Sherlock are trademarks of Apple Computer, Inc., registered in the U.S. and other
countries. QuickTime is a trademark used under license. QuickTime is registered in
the U.S. and other countries. Adobe, Acrobat, Photoshop, PostScript, and Reader are
registered trademarks of Adobe Systems Incorporated in the United States and/or
other countries. PANTONE is a registered trademark of Pantone, Inc. TRUMATCH
is a registered trademark of TRUMATCH, Inc. JavaScript is a trademark of Sun
Microsystems, Inc. Other product, font, and company names and logos may be
trademarks or registered trademarks of their respective companies.
005222
Page 3

Page 4

Table of Contents
Welcome to Corel PHOTO-PAINT
Documentation conventions ................1
Installing and uninstalling applications ............2
Starting and quitting Corel PHOTO-PAINT ...........3
What’s new in Corel PHOTO-PAINT 11 ............4
About Corel Corporation .................4
Registering Corel products ................5
Corel support, services, and contact .............5
Other resources ....................7
Getting help
User guide and quick reference card .............9
Help available through the application window..........9
Using CorelTUTOR ..................11
World Wide Web resources ................11
Corel PHOTO-PAINT workspace tour
Corel PHOTO-PAINT terms ...............13
Exploring the application window ..............14
Toolbars ......................16
Toolbox ......................18
Property bar .....................22
Docker windows/palettes .................22
Status bar ......................23
Table of contents i
Page 5

Viewing images and obtaining image information
Viewing images ....................25
Zooming ......................28
Obtaining image information ...............28
Using the guidelines, grid, and rulers
Setting up guidelines ..................31
Setting up the grid ...................34
Setting up the rulers ..................36
Working with color
Choosing colors ....................39
Creating custom color palettes ...............44
Changing color modes
Changing the color mode of images .............47
Changing images to the paletted color mode ..........49
Undoing, redoing, repeating, and fading
Undoing and redoing actions ...............53
Reverting to an earlier image state .............55
Repeating and fading actions ...............56
Bringing images into Corel PHOTO-PAINT
Opening images ....................59
Finding and inserting image content .............60
Importing files ....................62
ii Table of contents
Page 6

Scanning images....................63
Loading photos from a digital camera ............64
Starting new images ..................67
Working with vector graphics ...............68
Cropping, stitching and changing orientation
Cropping images ...................71
Stitching images together.................73
Changing image orientation ................75
Adjusting color and tone
Adjusting image color and tone ..............79
Changing image dimensions, resolution, and paper size
Changing image dimensions ................87
Changing image resolution ................89
Changing the paper size .................91
Retouching
Improving scanned images ................93
Removing red-eye ...................94
Removing dust and scratch marks..............95
Cloning image areas ..................97
Sharpening images ...................99
Erasing image areas ..................101
Smearing, smudging, and blending colors...........102
Table of contents iii
Page 7

Working with lenses
Creating lenses ....................105
Editing lenses ....................107
Combining lenses with the image background .........109
Masking
Distinguishing protected and editable areas ..........111
Defining editable areas .................113
Defining editable areas using color information .........117
Expanding and contracting editable areas ...........121
Inverting and removing masks ..............125
Cutting out image areas .................126
Applying special effects
Working with special effects ...............131
Applying preset styles .................133
Applying color and tone effects ..............134
Painting
Drawing shapes and lines ................151
Applying brush strokes .................154
Spraying images ...................158
Using a pressure-sensitive pen ..............160
Filling images
Applying uniform fills .................163
Applying fountain fills .................165
iv Table of contents
Page 8

Applying bitmap fills..................168
Applying texture fills..................171
Applying gradient fills .................173
Working with text
Adding and editing text .................177
Fitting text to a path ..................180
Working with objects
Creating objects ...................183
Selecting objects ...................186
Moving, copying, and deleting objects ............190
Grouping and combining objects..............192
Modifying objects
Transforming objects ..................195
Changing the edges of objects...............201
Adding drop shadows to objects ..............203
Working with object transparency .............206
Creating images for the Web
Exporting and optimizing images for the Web .........211
Creating images with transparent backgrounds .........214
Creating image maps ..................216
Slicing images ....................219
Creating and editing rollovers ...............224
Table of contents v
Page 9

Creating and editing movies
Opening and playing movies ...............231
Creating movies ...................233
Modifying frame sequence and frame display time in a movie ....236
Saving movies ....................240
Saving and closing
Saving images ....................245
Saving images to different file formats ............247
Closing images ....................248
Managing color for display, input, and output
Working with color profiles ...............251
Publishing to PDF
Saving documents as PDF files ..............255
Reducing PDF file size .................257
Printing
Printing your work ..................259
Laying out print jobs..................260
Previewing print jobs .................261
vi Table of contents
Page 10

Welcome to Corel PHOTO-PAINT 1
Corel PHOTO-PAINT® is a complete image-editing application that lets you
retouch and enhance photos. Whether you’re correcting red-eye or exposure
problems, cutting out image areas , or creating and publishing images for the Web,
Corel PHOTO-PAINT gives you powerful tools that are fast and easy to use.
In this section, you’ll learn about
documentation conventions
installing and uninstalling applications
starting and quitting Corel PHOTO-PAINT
what’s new in Corel PHOTO-PAINT 11
Corel Corporation
registering Corel products
Corel support, services, and contact
other resources
Documentation conventions
The table below describes important conventions used in the user guide and Help.
Convention Description Examples
Menu } Menu command
list box
Control + click (Mac®
OS)
Welcome to Corel PHOTO-PAINT 1
Click the menu item
followed by the menu
command.
A list of options that drops
down, like a pop-up menu,
when a user clicks the down
arrow button.
Hold down the Control key
and click the mouse button.
Click File } Open.
Choose a brush from the
Brush type list box on the
property bar.
You can also delete an
object by Control +
clicking an object and
clicking Clear.
Page 11

Convention Description Examples
A note contains information
that is important to the
preceding steps. It can
describe conditions under
which the procedure can be
performed
A tip contains suggestions
for performing the
preceding steps. It can
present alternatives to the
steps and other benefits and
uses of the procedure.
If you click the Equal
margins button, you must
specify values in the
Top/left margin boxes.
You can also launch Help
by pressing F1.
Installing and uninstalling applications
The application’s installer makes it easy to install Corel applications and components.
It lets you
install any Corel applications included in your software package
add components to a currently installed application
refresh files and configurations of currently installed applications
To install applications (Windows)
1 Close all applications.
2 Insert Disc 1 of the application into the CD drive.
If the Corel Installation wizard does not start up automatically, click Start on the
Windows® taskbar, and click Run. Type D:\Setup, where D is the letter that
corresponds to the CD drive.
3 Follow the instructions in the Installation wizard and select one of the following
options:
Typical — to install the default applications and components
Compact — to install the minimum components for the application to operate
Custom — to choose applications and components
4 Follow the instructions for installing and registering the application.
2 Corel PHOTO-PAINT User Guide
Page 12

To install applications (Mac OS)
1 Close all applications.
2 Insert Disc 1 of the application into the CD drive.
3 Double-click the CD icon on your desktop and double-click the Installer.
4 Select one of the following options:
Easy install — to install the default applications and components
Custom install — to choose applications and components
5 Follow the instructions for installing and registering the application.
To uninstall applications (Windows)
1 On the Windows taskbar, click Start } Control Panel.
If your operating system is Windows 2000 or earlier, click Start } Settings }
Control Panel.
2 Double-click Add/Remove Programs.
3 Choose the Corel application from the list, click the Change/Remove button, and
enable Remove All in the dialog box.
If your operating system is Windows 2000 or earlier, click the Remove button.
4 Follow the InstallShield® wizard instructions.
To uninstall applications (Mac OS)
1 Drag the Corel application folder to the Trash.
2 Open the Users:username:Library folder where you have Mac OS X installed.
(username is your Mac OS X username: for example, jsmith)
If you do not have a user profile, open Users:Corel:Library.
3 Drag the Preferences:Corel application Preferences folder to the Trash.
(application is the name of the installed Corel application)
Starting and quitting Corel PHOTO-PAINT
You can start Corel PHOTO-PAINT from the Windows taskbar (Windows) or from
the Corel Graphics 11 folder (Mac OS), and end a Corel PHOTO-PAINT session
from the application window.
Welcome to Corel PHOTO-PAINT 3
Page 13

To start and quit Corel PHOTO-PAINT (Windows)
To Do the following
Start Corel PHOTO-PAINT
Quit Corel PHOTO-PAINT
From the Windows taskbar, click Start }
Programs } Corel Graphics Suite 11 }
Corel PHOTO-PAINT 11.
Click File } Exit.
To start and quit Corel PHOTO-PAINT (Mac OS)
To Do the following
Start Corel PHOTO-PAINT
Quit Corel PHOTO-PAINT
In the Corel Graphics 11 folder,
double-click the Corel PHOTO-PAINT
11 icon.
Click Corel PHOTO-PAINT 11 } Quit.
You can also start Corel PHOTO-PAINT from the Dock. To add the Corel
PHOTO-PAINT icon to the Dock, drag the icon from the application folder
or the desktop to the left of the line in the Dock.
What’s new in Corel PHOTO-PAINT 11
Corel PHOTO-PAINT 11 provides users with exciting new features to enhance
image editing and create images for the Web. For a full description of new features see
“What’s new in Corel PHOTO-PAINT 11" in the Help.
About Corel Corporation
Founded in 1985, Corel Corporation is a leading technology company that offers
software for home and small business users, creative professionals, and enterprise
customers. With its headquarters in Ottawa, Canada, Corel’s common stock trades on
the Nasdaq Stock Market under the symbol CORL and on the Toronto Stock
Exchange under the symbol COR.
For more information about Corel Corporation, visit its Web site www.corel.com.
4 Corel PHOTO-PAINT User Guide
Page 14

Registering Corel products
Registering Corel products is important. Registration provides you with timely access
to the latest product updates, valuable information about product releases, and access
to free downloads, articles, tips and tricks, and special offers. Also, when you register
a product, you are eligible for 30 days of free technical support.
You can register when you install or choose to register at a later date.
You can register using the following methods:
online — you can launch online registration if you are connected to the Internet
when you install the Corel graphics application. If no Internet connection is
detected, a list of options displays in a dialog box.
FTP— you can complete the registration form and it will be sent automatically
when an Internet connection is detected
by phone — you can call the Corel Customer Service Center nearest you
For more information about registering a Corel product, visit
www.corel.com/support/register.
Corel support, services, and contact
Corel Support Services can provide you with prompt and accurate information about
Corel product features, specifications, pricing, availability, services, and technical
support.
World Wide Web
For information about Corel technical support and customer service support, visit
www.corel.com/support.
Web service Description
Support newsgroups Let you exchange information, tips and
techniques with other users of Corel
products
Corel® Knowledge Base Lets you read, print, and download
documents that contain answers to many
technical questions or problems.
FAQs Answers common user questions.
Welcome to Corel PHOTO-PAINT 5
Page 15

Web service Description
File Transfer Protocol (FTP) Lets you download printer drivers, patches,
plug-ins, updates, or other files.
Telephone
You can telephone Corel Support Services with your questions. For information about
the levels of service that Corel provides, visit www.corel.com/support.
North America — you can call Corel Support Services by calling our
1-800-772-6735 toll-free line. The hours of operation are 8:30 a.m. to 7:30 p.m.,
Monday to Friday, Eastern Standard Time (EST).
Outside North America — you can call a local authorized Corel Support Services
partner from a toll line at +353-1-213-3912.
Mail, fax, and email
You can send specific customer-service questions to Corel Support Services
representatives by mail, fax, and email.
Corel Corporation
Support Services
1600 Carling Avenue
Ottawa, Ontario
Canada K1Z 8R7
fax: 1-613-761-9176
email: custserv@corel.com
Corel wants your feedback
If you have any comments or suggestions about the enclosed user guides, Help, and
tutorials, you can send them by email to drawdoc@corel.com or by regular mail to
the address below. You can check the product Web site for the latest news, tips and
tricks, and product upgrade information. Go to www.corel.com and follow the links
to the product site.
Creative Products Documentation Manager
Corel Corporation
1600 Carling Avenue
Ottawa, Ontario, Canada
K1Z 8R7
6 Corel PHOTO-PAINT User Guide
Page 16

Other resources
Corel has training partnerships with other firms and provides professional services for
its software products.
Training
Corel training events
Maximize your skills and attend a Corel® Training Camp — special intensive
training events held throughout North America on various Corel products. All
training camps are delivered by a Corel training specialist, with hands-on
instruction, exercises and practical real-world projects. To look at the training
schedule or to register for a course, please visit:
www.corel.com/trainingschedule.
Corel customized training
Once you have Corel applications running on your computers, our team of expert
Corel training specialists can help you make the most of them with customized
training, tailored to the specific needs of your work environment. We will help you
develop a custom curriculum which is practical and relevant to the needs of your
organization. For more information about Corel customized training, please visit
www.corel.com/customizedtraining.
Corel® Training Partner (CTP)
CTP’s are independent, officially accredited local organizations that provide
training on Corel products and are located worldwide for your convenience. To find
a partner near you, please visit www.corel.com/trainingpartners.
Corel Corporate Services
Corel is committed to getting you up and running quickly with time and
money-saving workflow solutions. To simplify the process of deploying Corel
PHOTO-PAINT across your organization, our Corporate Services department offers a
comprehensive range of cost-effective services to meet your technology needs. This
group brings together highly skilled experts from across the company who are
dedicated to providing top-notch solutions. Our knowledgeable team is ready to offer
assistance through all stages of your project, from application development and
support to software systems integration and training.
For more information on Corel Corporate Services, please contact
proservices@corel.com.
Welcome to Corel PHOTO-PAINT 7
Page 17

Page 18

Getting help 2
Corel PHOTO-PAINT offers you a variety of ways to help you learn the application.
user guide and quick reference card
help available through the application window
CorelTUTOR™
World Wide Web resources
For information about technical support, including newsgroups and FAQs, see “Corel
support, services, and contact”on page 5.
User guide and quick reference card
The user guide is designed to get you started with Corel PHOTO-PAINT by
explaining basic concepts and features, as well as providing procedures for performing
common tasks. Chapters ending with From here tables contain keywords that direct
you to additional topics in the Help available through the application window. For
information about the conventions used in this guide, see “Documentation
conventions” on page 1.
Corel PHOTO-PAINT also includes a quick reference card that contains basic
information about tools, commands, and shortcut keys.
Help available through the application window
You can access electronic help for Corel PHOTO-PAINT through the application
window. The list below indicates the type of help available:
Help — lets you find topics using the table of contents, index, and word/phrase
search tool. You can also view topics related to your current task.
ToolTips — let you access names or functions of icons and buttons
To use Help (Windows)
1 Click Help } Help topics.
2 Click one of the following tabs:
Contents — lets you browse through the table of contents
Getting help 9
Page 19
Index — lets you use the index to find a topic
Search — lets you search the full text of the Help for a particular word. This
option is effective if you want to search for specific tools or commands.
You can also
View Help topics related to a dialog box
View Help topics related to a tool
Print a specific Help topic
Click Help in a dialog box.
Click the Active tool help button on
the property bar. The button changes to
display the active tool’s icon and a question
mark.
Open a Help topic, and click Print.
For information about the conventions used in the Help, see “Documentation
conventions” on page 1.
You can also launch Help by pressing F1.
To use Help (Mac OS)
1 Click Help } Help topics.
2 Choose a section title from the contents list.
3 Click a topic title.
You can also
Search for a topic by keyword
Type a keyword, and click Ask.
Print a specific Help topic
View Help for a dialog box
Click File } Print. Select a printer and
printer options, then click Print.
Click the Help button .
The Help button returns you to the Mac OS Help Center.
To return to the contents page from a procedure or overview topic, click
Table of contents at the bottom of the page.
10 Corel PHOTO-PAINT User Guide
Page 20
To view a ToolTip
Position the cursor over an icon, button, or other application control.
Using CorelTUTOR
CorelTUTOR provides a series of project-based tutorials that introduce you to basic
and advanced features of Corel PHOTO-PAINT. These tutorials are designed to show
practical applications of the powerful photo editing and bitmap creation tools of Corel
PHOTO-PAINT.
To access CorelTUTOR
Click Help } CorelTUTOR.
The default browser launches with the CorelTUTOR start page.
World Wide Web resources
The following sites include product information, articles, tips, and additional
tutorials, as well as graphics resources such as photos, clipart, and font subscriptions:
www.corel.com
www.Designer.com
www.MyFonts.com
Getting help 11
Page 21

Page 22

Corel PHOTO-PAINT workspace tour 3
Becoming familiar with the terminology and workspace of Corel PHOTO-PAINT
helps you follow the concepts and procedures found in the user guide and the help
that is available through the application window.
In this section, you’ll learn about
Corel PHOTO-PAINT terms
application window
toolbars
toolbox
property bar
Docker™ windows and palettes
status bar
Corel PHOTO-PAINT terms
Before you get started in Corel PHOTO-PAINT, you should be familiar with the
following terms.
Term Description
Channel An 8-bit grayscale image that stores color
or mask information for another image.
Editable area An editable area of a mask allows paint and
effects to be applied to a selected area of an
image.
Image A file you open or create in Corel
PHOTO-PAINT.
Lens An object layer that protects part or all of
an image when you perform color and
tonal corrections.
Mask A mask can be applied to an image during
image editing to define protected areas and
editable areas.
Corel PHOTO-PAINT workspace tour 13
Page 23

Term Description
Object An independent bitmap that is layered
above the background image.
Path A series of line and curve segments
connected by adjustable endpoints called
nodes.
Thumbnails A miniature, low-resolution version of an
image.
For more terms and definitions, see the glossary in the Help.
Exploring the application window
The Corel PHOTO-PAINT application window contains elements that help you
access the tools and commands you need to view and edit images. Application
commands are accessible through the menu bar, toolbox, property bar, toolbars, or
Docker windows/palettes.
You can customize many of the elements in the application window to suit your
workflow. For information about customizing Corel PHOTO-PAINT, see
“Customizing your application” in the Help.
The application window contains the following main parts:
14 Corel PHOTO-PAINT User Guide
Page 24
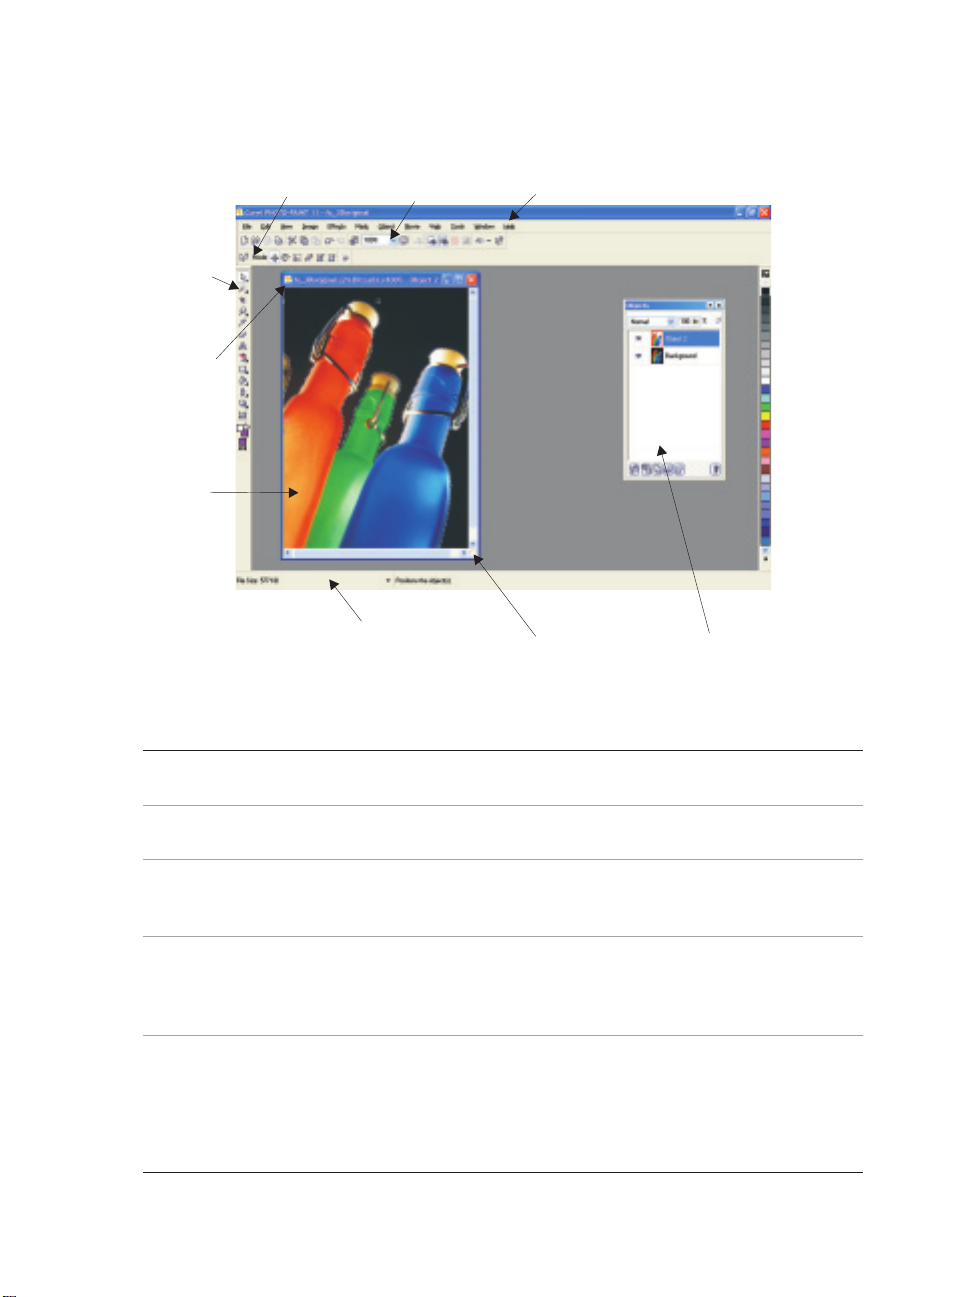
Toolbox
Title bar
Image
window
Menu barToolbarProperty bar
Status bar
Navigator
Docker
window/palette
Part Description
Menu bar The area containing drop-down menus
with commands grouped by category
Property bar A detachable bar containing commands
that change according to the active tool
Toolbar (standard) A bar that contains shortcuts to some
menus and other basic commands, such as
opening, saving, and printing
Toolbox A bar that contains tools for editing,
creating, and viewing images. The toolbox
also contains the color control area which
lets you select colors and fills.
Corel PHOTO-PAINT workspace tour 15
Page 25

Part Description
Image window The area in which the image displays.
Although more than one image window
can be open at the same time, you can
apply commands to the active image
window only.
Title bar The area on the image window displaying
the title of the image
Navigator A button that lets you view a thumbnail of
the entire image so you can focus the
image window on a specific area. The
Navigator is only available if you have
areas that exceed the image window.
Docker window/palette A window that provides access to
additional commands and image
information. Some Docker
windows/palettes provide a visual display
area. The Object Docker window/palette is
displayed by default.
Status bar An area that displays image information,
system information, and tips
Toolbars
Toolbars consist of buttons that are shortcuts to menu commands. The standard
toolbar consists of commonly used commands. The table below outlines the buttons
on the standard toolbar.
Press this button To
Start a new image
Open an image
Save an image
Print an image
Cut selected objects to the Clipboard
16 Corel PHOTO-PAINT User Guide
Page 26
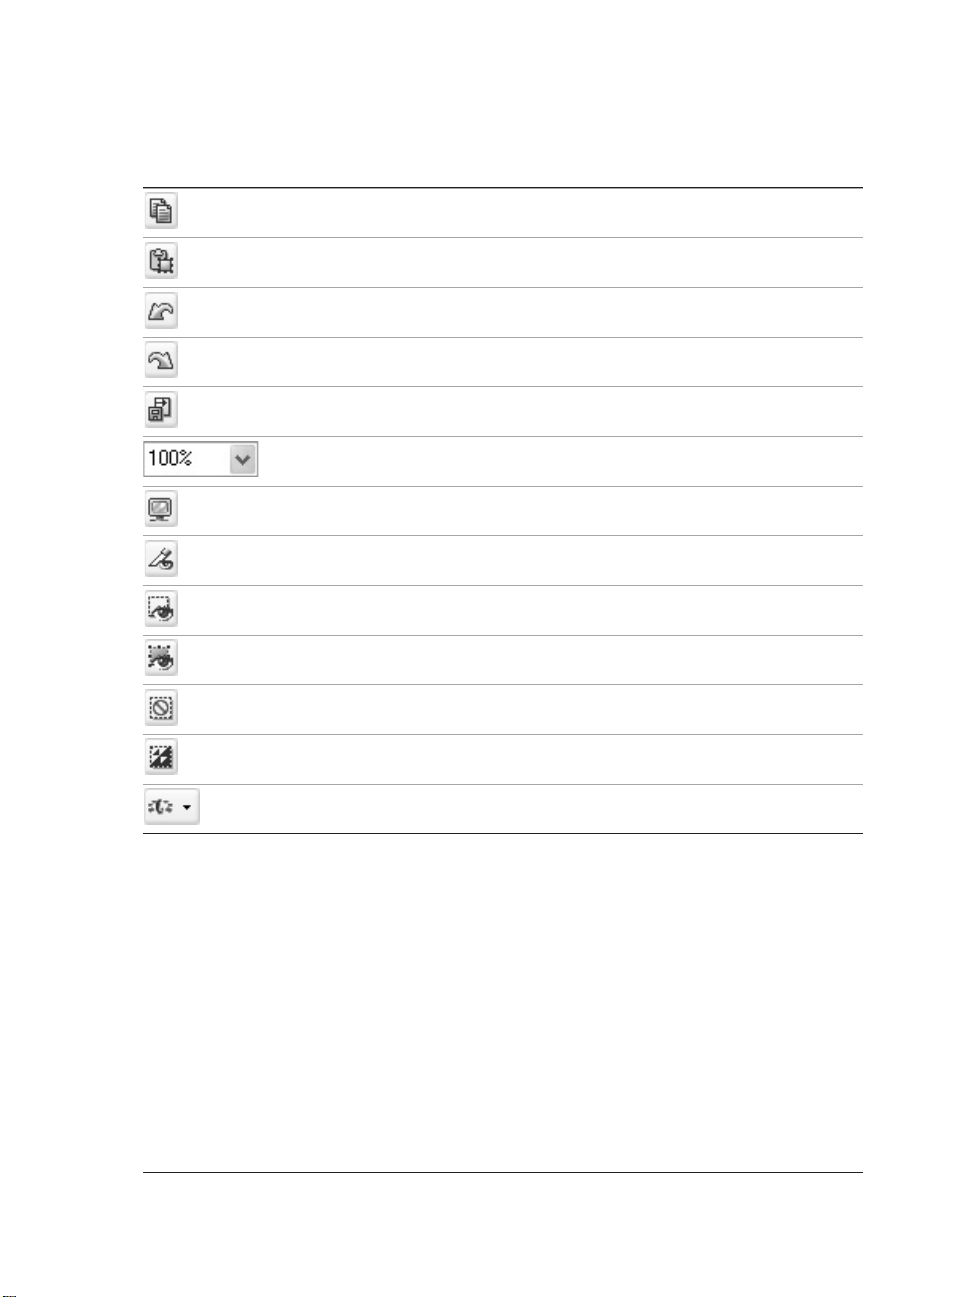
Press this button To
Copy selected objects to the Clipboard
Paste the Clipboard contents into an image
Undo the last action
Redo the last action
Import an image
Change the zoom level
Display a full-screen preview.
Show or hide the image slicing grid
Show or hide the mask marquee
Show or hide the object marquee
Clear a mask
Invert a mask
Launch another Corel application
In addition to the standard toolbar, Corel PHOTO-PAINT has toolbars for specific
kinds of tasks. For example, if you frequently work with masks , you can display the
Mask/object toolbar. Unlike the property bar, the contents of a toolbar remain the
same.
For information about moving and re-sizing toolbars, and changing which toolbars
display by default, see “To customize toolbar position and display” in the Help. You
can also create a custom toolbar to include the tools and commands you use most
often. For information about creating custom toolbars, see “Customizing toolbars” in
the Help.
Corel PHOTO-PAINT workspace tour 17
Page 27
To hide or display a toolbar
Click Window } Toolbars, and click a toolbar.
A check mark next to a toolbar name indicates that the toolbar is displayed in the
image window.
Toolbox
The toolbox contains tools for editing, creating, and viewing images. Some of the
tools are visible by default, while others are grouped in flyouts. Flyouts open to
display a set of related tools. A small arrow in the bottom-right corner of a toolbox
button indicates a flyout. The last tool used in a flyout displays in the toolbox. For
example, in the Brush flyout, the Paint tool displays by default, but if you use
another tool in the flyout, such as the Image Sprayer tool, the Image Sprayer tool
displays in the toolbox with the flyout arrow. Flyouts function like toolbars when you
drag them away from the toolbox. This lets you view all the related tools while you
work.
In addition to the tools, the color control area displays in the toolbox. The color
control area lets you choose colors and fills.
The following tables provide descriptions of the flyouts, tools, and the color control
area in the Corel PHOTO-PAINT toolbox.
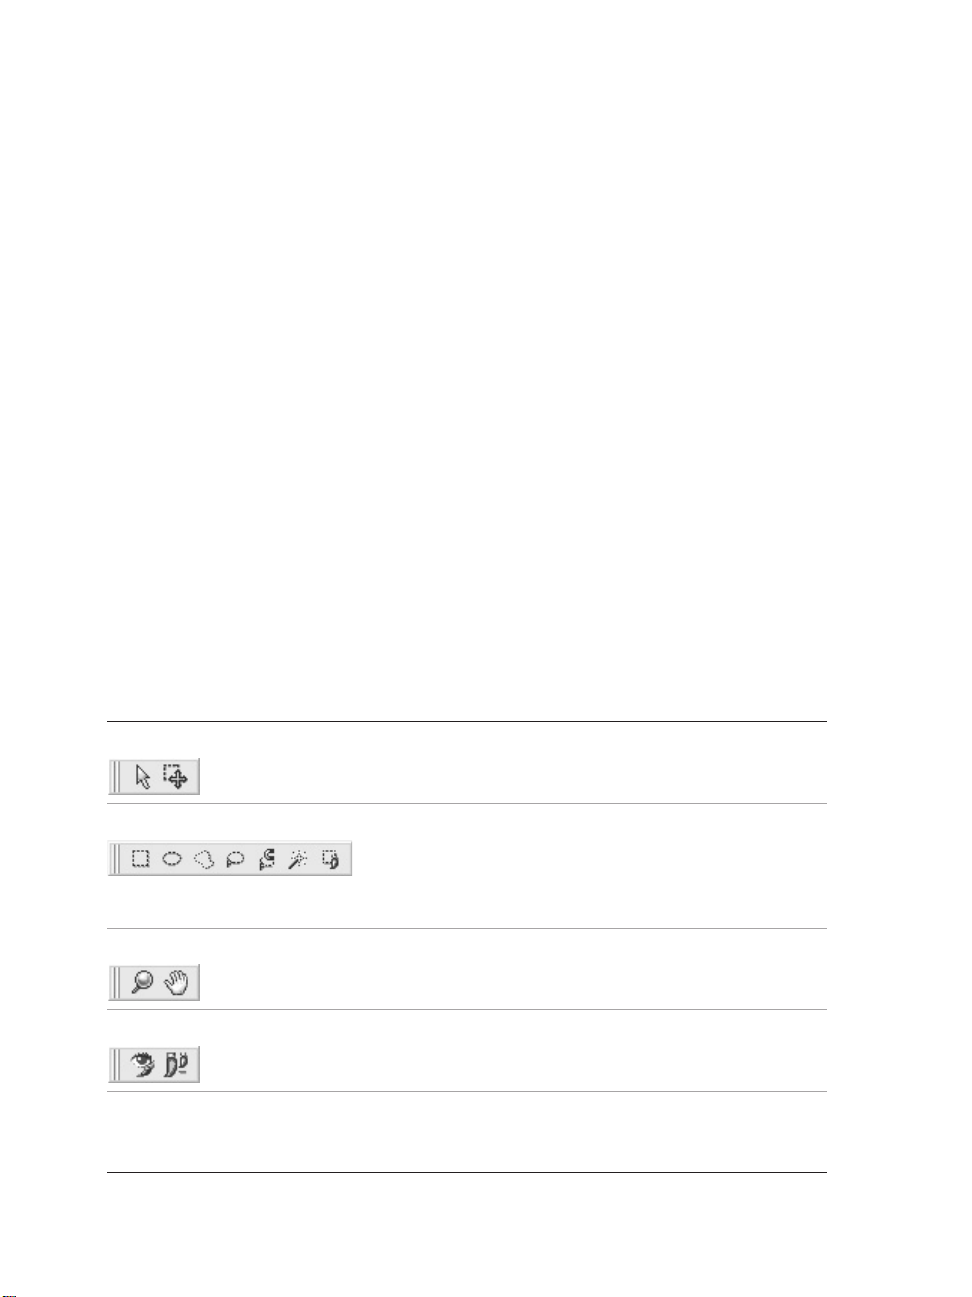
Flyout Description
Pick flyout (Windows) Lets you access the Object pick tool and
the Mask transform tool
Mask flyout Lets you access the Rectangular mask
tool, the Ellipse mask tool, the Freehand
mask tool, the Lasso mask tool, the
Magnetic mask tool, the Magic wand
mask tool, and the Brush mask tool
Zoom flyout Lets you access the Zoom tool and the Pan
tool
Touch-up flyout Lets you access the Red-eye removal tool
and the Clone tool
18 Corel PHOTO-PAINT User Guide
Page 28
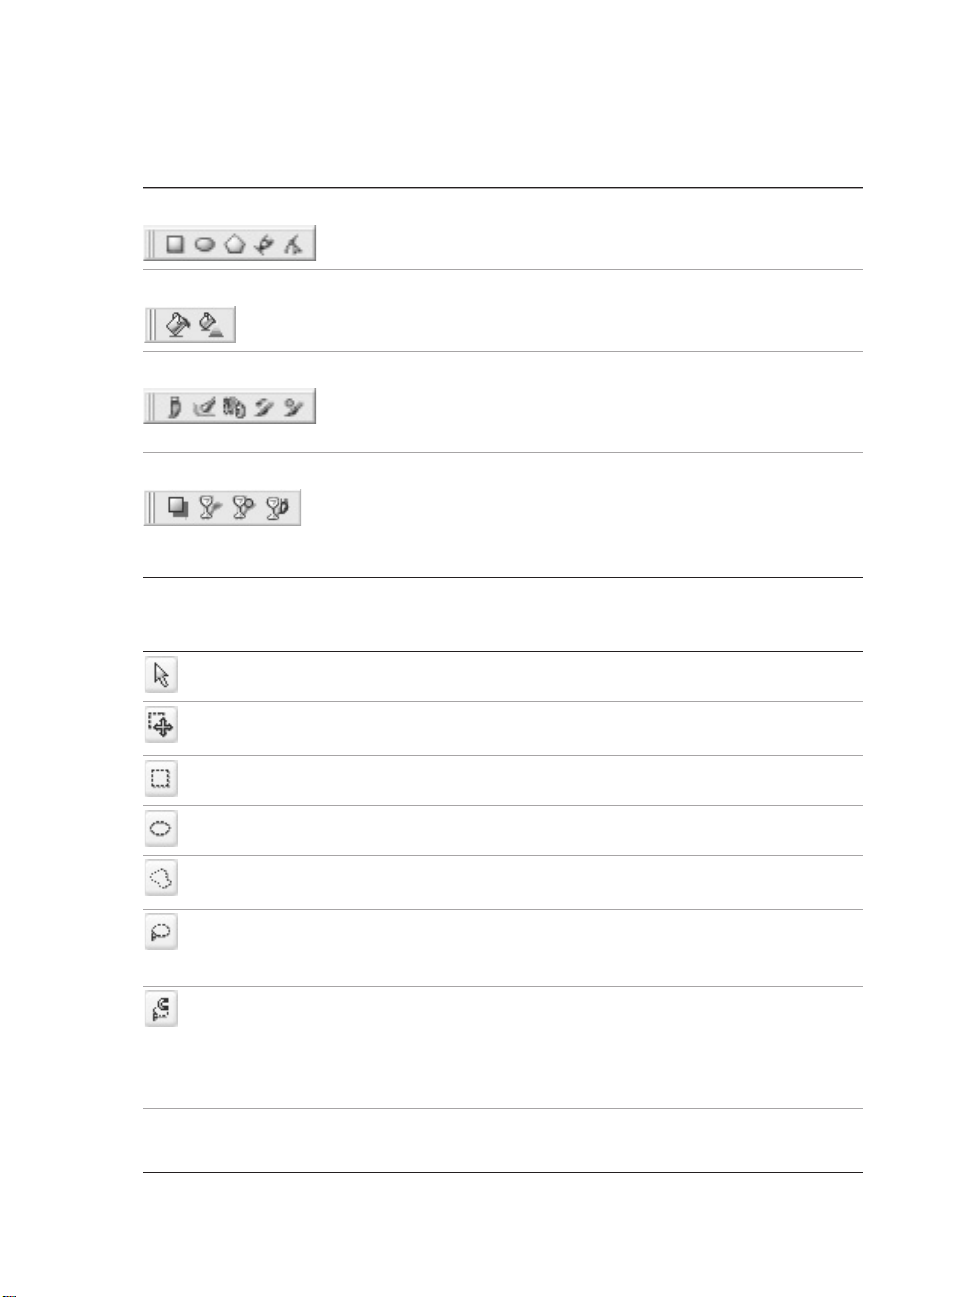
Flyout Description
Shape flyout Lets you access the Rectangle tool, the
Ellipse tool, the Polygon tool, the Line
tool, and the Path tool
Fill flyout Lets you access the Fill tool and the
Interactive fill tool
Brush flyout Lets you access the Paint tool, the Effect
tool, the Image sprayer tool, the Undo
brush tool, and the Replace color brush
tool
Interactive/Transparency flyout Lets you access the Interactive
dropshadow tool, the Interactive object
transparency tool, the Color
transparency tool, and the Object
transparency brush tool
Tool Description
Lets you select an object
Object pick
Lets you change the appearance of editable
Mask transform
areas
Lets you define rectangular editable areas
Rectangle mask
Lets you define elliptical editable areas
Ellipse mask
Lets you define irregularly shaped or
Freehand mask
polygonal editable areas
Lets you define editable areas that are
Lasso mask
irregular in shape and surrounded by pixels
of similar colors
Lets you detect edges of elements in your
Magnetic mask
image, that is, the outline of areas that are
in contrasting color to their surroundings,
and place the mask marquee along that
edge
Corel PHOTO-PAINT workspace tour 19
Page 29
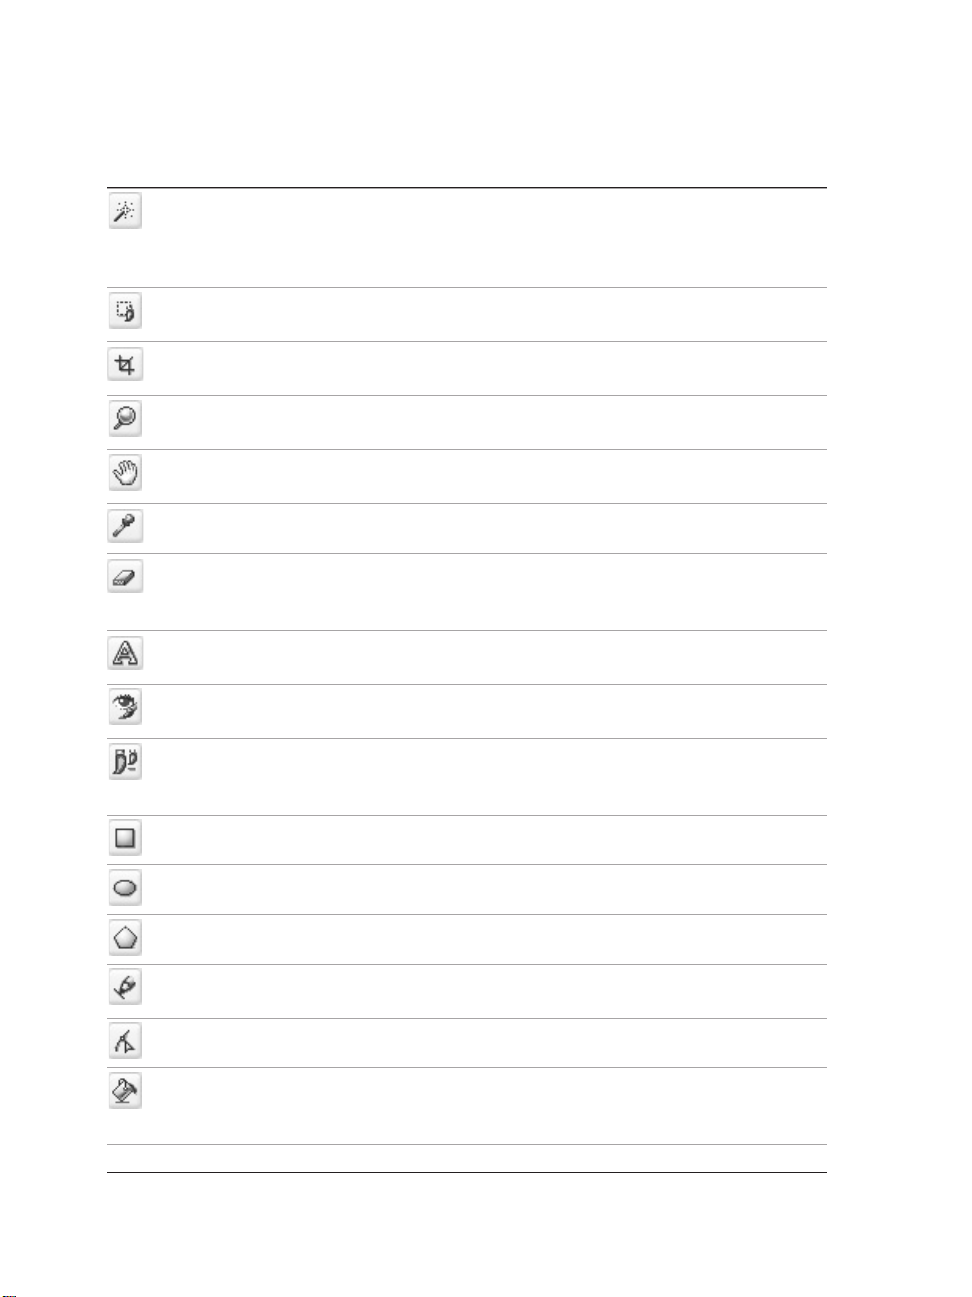
Tool Description
Magic wand mask
Brush mask
Crop
Zoom
Pan
Eyedropper
Eraser
Text
Red-eye removal
Clone
Rectangle
Ellipse
Polygon
Line
Path
Fill
Lets you define irregularly shaped editable
areas that include all adjacent pixels that
are similar in color to the pixel you first
select
Lets you define an editable area by
brushing an area as if you were painting
Lets you remove unwanted areas and
straighten crooked images
Lets you change the magnification level in
the image window
Lets you drag areas of an image into view
when the image is larger than its window
Lets you choose colors from an image
Lets you erase image areas or object areas
to reveal the object or background
underneath
Lets you add text to your image and edit
existing text
Lets you remove the red-eye effect from the
eyes of subjects in photos.
Lets you duplicate part of an image and
apply it to another part of the same image
or to another image
Lets you draw square or rectangular shapes
Lets you draw circular or elliptical shapes
Lets you draw polygons
Lets you draw single or joined straight line
segments using the foreground color
Lets you create and edit paths
Lets you fill areas with one of four fill
types: uniform, fountain, bitmap, and
texture
20 Corel PHOTO-PAINT User Guide
Page 30
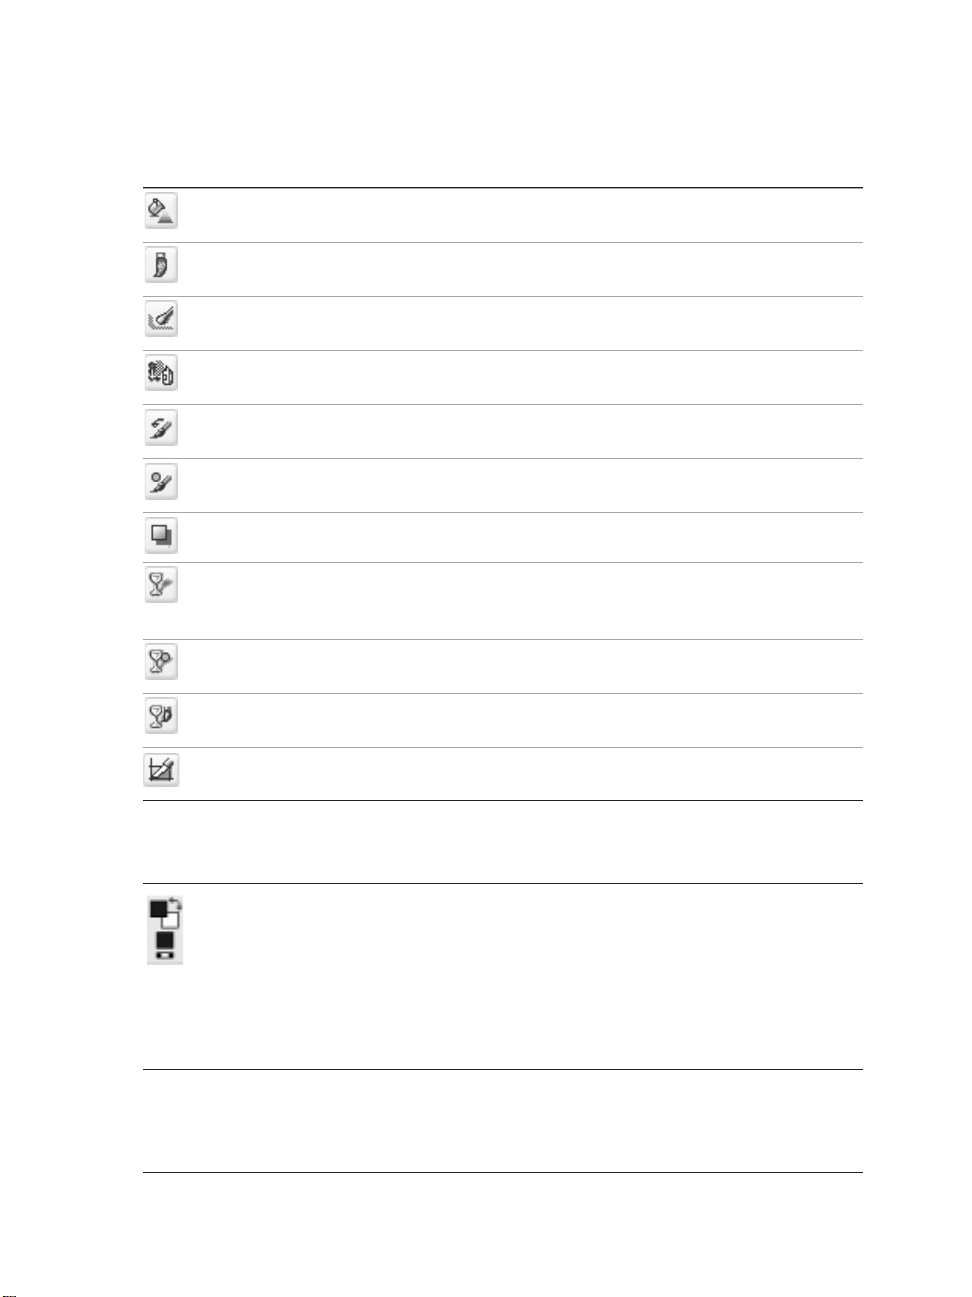
Tool Description
Interactive fill
Paint
Effect
Image sprayer
Undo brush
Replace color brush
Interactive dropshadow
Interactive object transparency
Color transparency
Object transparency brush
Image slicing
Lets you apply a gradient fill to the entire
image, object, or selection
Lets you paint on an image using the
foreground color
Lets you perform local color and tonal
corrections on the image
Lets you load one or more images and
paint them on your image
Lets you restore image areas to how they
looked before your last brush stroke
Lets you replace the foreground color in
your image with the background color
Lets you add shadows to objects
Lets you make the colors of an object fade
gradually towards the image background
color
Lets you make pixels with a specific color
value in an object transparent
Lets you brush areas on an object to make
them more transparent
Lets you cut a large image into smaller
sections that can be modified for the Web
Color control area
Lets you choose colors and fills.
Consists of three swatches: a Foreground
color swatch, a Background color swatch,
and a Fill color swatch. The arrow lets you
swap the foreground color and background
color, and the Reset color icon lets you
return to the default colors.
Corel PHOTO-PAINT workspace tour 21
Page 31

Property bar
The property bar displays commonly used commands that are relevant to the active
tool. Unlike toolbars, the contents of the property bar change depending on which
tool is active. For example, when you use the Text tool, the contents of the property
bar change to display text-related settings such as font type, font size, and alignment.
More advanced options for the active tool can be accessed on the extended property
bar. A button with a double arrow at the end of the property bar lets you open or
close the extended property bar.
To open or close the extended property bar
To Do the following
Open the extended property bar
Close the extended property bar
Click the Open advanced options button
.
Click the Close advanced options button
.
Docker windows/palettes
Docker windows/palettes display controls, such as command buttons, options, and list
boxes. Some Docker windows/palettes also include additional visual information
about the tools or image elements. You can keep Docker windows/palettes open while
you work on an image.
In Windows, you can attach, or dock, Docker windows to either side of the
application window, or you can float, or undock, them so you can move them as you
work in the application window. You can also minimize Docker windows to save
valuable screen space. If you open more than one Docker window at a time, the
windows stack on top of each other and tabs display so you can quickly access the
Docker window you want.
In the Mac OS, you can move palettes as you work in the application window. If you
open more than one palette at a time, you can stack the palettes on top of each other
and combine them to save valuable screen space. Tabs let you access each of the
palettes in the stack.
An example of a Docker window/palette is the Objects Docker window/palette. The
Objects Docker window/palette displays thumbnails of the image background and
each object layer, as well as command buttons and options related to objects.
22 Corel PHOTO-PAINT User Guide
Page 32

To open a Docker window/palette
Click Window } Dockers / Palettes, and click a Docker window/palette.
To move a Docker window/palette
Drag the title bar of the Docker window/palette to a new location.
(Windows) Dragging a Docker window away from the side undocks it, whereas
dragging a floating Docker window toward the side docks it.
(Windows) As you drag, an outline of the Docker window displays. The
outline changes shape as you drag to the side of the application window to
indicate that the Docker window is docked.
To minimize a Docker window (Windows)
To minimize Do the following
A floating Docker window Click the roll-down arrow on the title bar of
the Docker window.
A docked Docker window Click the double-arrow on the title bar of
the Docker window. A tab displays along
the right side of the application window.
Status bar
The status bar displays information about the image, system memory, and the active
tool. You can change the type of information that displays to help you with your
current task. For example, if you are working with images that have different
dimensions, you can display the dimension of the current image.
You can also customize the status bar by adding command buttons. For information
about customizing the status bar, see “Customizing the status bar” in the Help.
To change the type of information displayed on the status bar
Click the arrow on the status bar, and click one of the following:
File size
Current tool
Corel PHOTO-PAINT workspace tour 23
Page 33

Document dimension
Color mode
Memory
24 Corel PHOTO-PAINT User Guide
Page 34

Viewing images and obtaining image information
You can change the appearance of windows and the magnification level of an image.
Changing the magnification level allows you to view specific image areas and makes
image editing easier. You can also obtain relevant image information, such as color
model information, as you edit an image.
In this section, you’ll learn about
viewing images
zooming
obtaining image information
4
Viewing images
Images can be viewed in a number of different ways. You can hide windows, the
toolbox and the toolbars, leaving only the menu bar and the image windows visible.
You can view a large representation of an image in a full-screen preview. The image is
editable when the windows are hidden, but you cannot change the image while using
the full-screen preview. In Windows, you can also maximize or restore the work area.
You can view image areas that fall outside the image window. For example, when you
are working at a high magnification level or with large images, you can pan or jump
to a different image area without having to adjust the magnification level.
Viewing images and obtaining image information 25
Page 35

You can select the image area to be displayed in the image window using
the Navigator pop-up.
To hide windows, the toolbox, and toolbars
Click Window } Hide windows.
(Windows) If you want to return to normal view, right-click in the workspace,
and click Show windows.
(Mac OS) If you want to return to normal view, click Window } Show
windows.
(Mac OS) You can also switch between hiding and showing windows by
holding down Shift, and pressing Delete.
To maximize or restore the work area (Windows)
Click Window } Maximize work area.
To restore the work area, click Window } Maximize work area again.
To view a full-screen preview of an image
Click View } Full-screen preview.
If you want to return to normal view, press any key or click the screen.
26 Corel PHOTO-PAINT User Guide
Page 36

To view an image area that falls outside the image window
To Do the following
Pan to another area of the image
Jump to another area of the image
You can pan around an image by clicking the Pan tool and pressing the
Arrow keys.
You can also pan around an image using the scroll bars in the image
window.
Open the Zoom flyout , and click
the Pan tool . Drag the image until the
area you want to view displays in the image
window.
Click the Navigator pop-up at the
lower-right (Windows) or lower-left (Mac
OS) corner of the image window. Drag the
rectangle to the area of the image you want
to view.
Image areas that fall outside the image window can be dragged into view
using the Pa n tool. This photo has been dragged from its original position
in the first image toward the right in the second image. The inset below
shows the entire image.
Viewing images and obtaining image information 27
Page 37

Zooming
By default, images are displayed at 100% magnification; however, you can zoom in to
get a closer look at image detail or zoom out to view a larger portion of the image.
You can also specify the magnification level at which images open.
To zoom
Open the Zoom flyout , and click the Zoom tool .
To Do the following
Zoom in Click the image where you want to magnify
it.
Zoom in to a specific area Drag across the area you want to magnify.
Zoom out
Switch between the current and previous
zoom levels
Zoom in or out by a preset level Choose a magnification level from the
Right-click (Windows) or Option + click
(Mac OS) in the image window.
Click the Zoom to previous button on
the extended property bar.
Zoom level list box on the property bar.
Obtaining image information
You can view image properties, such as name, file format, and file size. If an image is
loaded from a digital camera, you can also view EXIF information about the image,
such as the date and time the photo was taken, the exposure, and flash settings. For
more information about viewing digital camera image information, see “To view EXIF
information for digital camera photos” on page 67.
You can view information about image areas, such as pointer coordinates, as you
work. You can view the changes in the x-coordinate (X) or the y-coordinate (Y) as you
move the pointer in the image window. You can also make note of the angle (A) and
distance (D) that the pointer moves in the image window as you draw a shape or
define an editable area. In addition, you can obtain statistics related to the x- and
y-coordinates of the center position (C) and the radius (R) when you create or select a
circular editable area or shape.
You can also view color information for an image area that corresponds to the pointer
position. By default, the RGB, Hex, and CMYK values are displayed. You can choose
28 Corel PHOTO-PAINT User Guide
Page 38

to display color information in two color models at once. For example, you can view
both the grayscale and RGB values of a particular image area. For information about
color modes and color models, see “Changing color modes” on page 47 and “Working
with color” on page 39.
To view image information
Click File } Document properties.
To view information about image areas
Click Window } Dockers / Palettes } Info.
You can also
Choose a new color model Click the top flyout arrow , choose a
color level, and click a color model.
Change the units of measure used to display
image information
Click the bottom flyout arrow, and click a
unit of measure.
By default, the Image info palette lists the RGB, Hex, and CMYK values
from top to bottom.
You can also view color mode information by clicking the Eyedropper tool
, and pointing to an image area.
From here
For more information about (Windows) In the Help index, see...
(Mac OS) In the Help Viewer, type...
Setting the magnification level at which
images are opened
magnification level, customizing
Viewing images and obtaining image information 29
Page 39

Page 40

Using the guidelines, grid, and rulers
The guidelines, grid, and rulers let you position and size images, objects, and editable
areas.
In this section, you’ll learn about
setting up guidelines
setting up the grid
setting up the rulers
5
Setting up guidelines
Guidelines are vertical or horizontal lines that you can add anywhere in the image
window to help you measure, align, and position image components. The guidelines
use the same units of measure as the rulers. When you save an image in the Corel
PHOTO-PAINT application, the guidelines are saved too.
You can display or hide the guidelines. You can also add, remove, move, and lock
guidelines in the image window.
You can have objects and editable areas snap to guidelines, so that when you move an
object or editable area to a guideline, the object or editable area automatically aligns
to that guideline. You can set the sensitivity of this feature so that the object or
editable area snaps when you move within a specific number of pixels of a guideline.
You can change the color of the guidelines to make them stand out against the image
background. By default, when you select a guideline, it turns red. When you deselect
a guideline, it turns blue.
To display or hide the guidelines
Click View } Guidelines.
A check mark beside the menu command indicates that the guidelines are
displayed.
Using the guidelines, grid, and rulers 31
Page 41

Guidelines displayed.
To add a guideline
1 Click View } Setup } Guidelines.
2 In the Guidelines list of categories, click one of the following:
Horizontal
Vertical
3 Choose a unit of measure from the list box.
4 Type a value that corresponds to a location in the image window.
5 Click Add.
You can also add a guideline by dragging from the horizontal or vertical ruler
to the image window.
To remove a guideline
1 Click View } Setup } Guidelines.
2 In the list of categories, click one of the following:
Horizontal
Vertical
3 Choose a guideline from the list.
4 Click Delete.
32 Corel PHOTO-PAINT User Guide
Page 42

You can also remove all horizontal or vertical guidelines in the list by
clicking Clear.
You can also remove individual guidelines by dragging them off the image
window.
To move a guideline
1 Do one of the following:
(Windows) Open the Pick flyout , and click the Object pick tool .
(Mac OS) Click the Object pick tool .
2 Drag a guideline to a new position in the image window.
You can also move a guideline by nudging it.
To lock or unlock the guidelines
Click View } Lock guidelines.
A check mark displays beside the menu command to indicate the guideline is
locked.
To have objects and editable areas snap to the guidelines
Click View } Snap to } Guidelines.
To set the snap sensitivity of the guidelines
1 Do one of the following:
(Windows) Click Tools } Options.
(Mac OS) Click Corel PHOTO-PAINT 11 } Preferences.
2 In the Workspace list of categories, click Display.
3 Type a value in the Guideline snap tolerance (pixels) box.
To change the color of the guidelines
1 Do one of the following:
(Windows) Click Tools } Options.
(Mac OS) Click Corel PHOTO-PAINT 11 } Preferences.
Using the guidelines, grid, and rulers 33
Page 43

2 In the Workspace list of categories, click Display.
3 Open the Guideline color picker, and click a color.
Setting up the grid
The grid is a series of intersecting lines that are superimposed on an image to help
you align and position objects accurately. You can display or hide the grid at any time.
You can have objects and editable areas align automatically with the gridlines. You
can set up the grid by specifying values for the frequency, which is the number of
gridlines per unit of horizontal and vertical distance, or the spacing, which is the
distance between the grid lines. The color and style of the grid can also be changed.
For more precise pixel editing at maximum zoom level, you can display a grid around
each pixel.
To display or hide the grid
Click View } Grid.
A check mark beside the menu command indicates that the grid is displayed.
The grid displayed.
To have objects and editable areas snap to the grid
Click View } Snap to } Grid.
34 Corel PHOTO-PAINT User Guide
Page 44

To set the frequency and spacing of the gridlines
1 Click View } Setup } Grid & ruler.
2 Enable one of the following options:
Frequency
Spacing
3 Type values in the following boxes:
Horizontal
Vertical
To change the color and style of the grid
1 Do one of the following:
(Windows) Click Tools } Options.
(Mac OS) Click Corel PHOTO-PAINT 11 } Preferences.
2 In the Workspace list of categories, click Display.
3 Open the Grid color picker, and click a color.
4 Click one of the following Grid style buttons:
Solid line
Dashed line
Dots
You can also create a custom grid color by clicking Other in the Grid
color picker.
To display a pixel grid at the maximum zoom level
1 Do one of the following:
(Windows) Click Tools } Options.
(Mac OS) Click Corel PHOTO-PAINT 11 } Preferences.
2 In the Workspace list of categories, click General.
3 Enable the Show pixel grid at maximum zoom check box.
Using the guidelines, grid, and rulers 35
Page 45

Setting up the rulers
The on-screen rulers provide a visual reference to help you size and position images,
objects, and editable areas. You can display or hide the rulers at any time. As you
move the pointer in the image window, marks on the rulers indicate its position. You
can also customize the rulers’ zero mark position and specify a unit of measure for the
current document.
You can move the rulers anywhere in the image window; however, by default they
display along the top and left sides of the image window. Calibrating the rulers
ensures the distances on the screen match real-world distances.
To display or hide the rulers
Click View } Rulers.
A check mark beside the menu command indicates that the rulers are displayed.
The rulers displayed.
To customize the rulers
1 Do one of the following:
Click Tools } Options.
Click Corel PHOTO-PAINT 11 } Preferences.
2 In the Document list of categories, click Ruler.
3 In the Units area, choose a unit of measure from the following list boxes:
Horizontal
36 Corel PHOTO-PAINT User Guide
Page 46

Vertical
If you want to use the same unit of measure for both the horizontal and vertical
rulers, enable the Same units for horizontal and vertical rulers check box.
4 In the Origin area, type values in the following boxes:
Horizontal
Vertical
The origin value indicates the distance, in the units of measure you specify,
between the zero mark of the ruler and the point of origin of the ruler. For
example, an origin value of 4 for the horizontal ruler moves the zero mark of that
ruler four units away from the origin — the point where the ruler begins.
5 Type a value in the Tick divisions box.
If you want to display fractions on the rulers, enable the Show fractions check
box.
To move a ruler
Hold down Shift, and drag a ruler to a new position.
You can also
Return the rulers to their original positions
Move both rulers at the same time
Hold down Shift, and double-click a ruler.
Hold down Shift, and drag the intersection
point of the two rulers.
From here
For more information about (Windows) In the Help index, see...
(Mac OS) In the Help Viewer, type...
Calibrating the rulers rulers, calibrating
Using the guidelines, grid, and rulers 37
Page 47

Page 48

Working with color 6
Corel PHOTO-PAINT lets you choose and create colors using a wide variety of
industry-standard palettes, color mixers, and color models. You can create and edit
custom color palettes to store frequently used colors for future use. To choose a single
color, you can use the color control area or sample colors directly from images.
You can also customize how color palettes display on your screen by changing the size
of swatches, the number of rows in palettes, and other properties.
In this section, you’ll learn about
choosing colors
creating custom color palettes
Choosing colors
You can choose background, foreground, and fill colors using the color control area,
color palettes, sampling, color viewers, color harmonies, or color blends.
For information about applying the colors you choose, see “Applying uniform fills” on
page 163, “Painting” on page 151, and “Working with objects” on page 183.
Choosing a color using the color control area
In the color control area, you can view the selected foreground, background, and fill
colors, and you can choose new colors. The foreground color applies to all of the paint
tools, and to the color of text when you first type it. The background color applies to
the background of the image window, while the fill color swatch indicates the selected
fill type and color.
Choosing a color using the default color palette
A color palette is a collection of color swatches. You can choose foreground,
background, and fill colors using the default color palette, which contains 99 colors
from the RGB color model.
Working with color 39
Page 49

Choosing a color using fixed or custom color palettes
Fixed color palettes are provided by third-party manufacturers. Some examples of
these are HKS Colors, Focoltone, PANTONE®, and TRUMATCH®. It may be
useful to have on hand a manufacturer’s swatch book, which is a collection of color
samples that shows exactly what each color looks like when printed.
Some fixed color palettes — PANTONE, HKS Colors, TOYO, DIC, Focoltone, and
SpectraMaster — are collections of spot colors. If you want to use these colors, but
you don’t want to use spot colors, convert the spot colors to process colors when you
print. For more information, see “Printing color separations” in the Help.
Custom color palettes can include colors from any color model or fixed color palette.
You can save a custom color palette for future use. For more information about
working with custom color palettes, see “Creating custom color palettes” on page 44
and “Opening and editing custom color palettes” on page 45.
Sampling colors
When you want to use a color that already exists in an object or image, you can
sample the color to achieve an exact match. By default, you sample a single pixel from
the image window.
When you sample a color from a photo, what looks to be a solid-colored area may
actually be subtly shaded or dithered. In this case, it is useful to average the colors of
pixels in a larger sample area. You can set the sample area to 3 x 3 pixels, or to 5 x 5
pixels for high-resolution images. You can also sample pixels in a selected area.
If you want to sample and use numerous colors from the image window, you can store
them in a custom color palette. For more information on custom color palettes, see
“Creating custom color palettes” on page 44 and “Opening and editing custom color
palettes” in the Help.
Choosing a color using color viewers
Color viewers give a representation of a range of colors using either one-dimensional
or three-dimensional shapes. The default color viewer is based on the HSB color
model, but you can use this viewer to choose CMY, or RGB colors. For information
about color models, see “Understanding color models” in the Help.
Choosing a color using color harmonies
Color harmonies work by superimposing a shape, such as a rectangle or a triangle,
over a color wheel. Each vertical row in the color grid begins with the color located at
one of the points on the superimposed shape.
40 Corel PHOTO-PAINT User Guide
Page 50

The colors at each corner of the shape are always complementary, contrasting, or
harmonious, depending on the shape you choose. The color harmonies allow you to
choose the color model you prefer to use and are most useful when you’re choosing
several colors for a project.
Choosing a color using color blends
When you choose a color using color blends, you combine base colors to get the color
you want. The color blender displays a grid of colors that it creates from the four base
colors you choose.
To choose a color using the color control area
1 In the color control area of the toolbox, double-click one of the following:
Foreground color swatch
Background color swatch
2 Move the color slider to set the range of colors displayed in the color selection area.
3 Click in the color selection area to choose a color.
You can also
Choose a fill color
Return color swatches to their default colors
Switch the foreground and background
colors
Double-click the Fill color swatch in
the color control area, click the Uniform
fill button in the Select fill dialog box,
and click Edit.
Click the Reset color icon . The
foreground and fill colors return to black,
and the background color returns to white.
Click the arrow in the top, right corner
of the color control area.
You can also choose foreground, background, and fill colors using the
Color Docker window/palette by clicking Window } Dockers / Palettes
} Color.
Working with color 41
Page 51

To choose a color using the default color palette
To Do the following
Choose a foreground color Click a color swatch.
Choose a background color
Choose a fill color
Choose from different shades of a color Click and hold a color swatch to display a
View more colors in the default color palette Click the scroll arrows at the top and
Hold down Ctrl (Windows) or Command
(Mac OS), and click a color swatch.
Right-click (Windows) or Control + click
(Mac OS) a color swatch.
pop-up color picker, and click a color.
bottom of the color palette.
You can display color names by pointing to a color swatch.
You can also choose foreground, background, and fill colors using the Color
Docker window/palette by clicking Window } Dockers / Palettes } Color.
To choose a color using a fixed or custom color palette
1 In the color control area of the toolbox, double-click one of the following:
Foreground color swatch
Background color swatch
2 Click the Palettes tab.
3 Choose a fixed or custom palette from the Palette list box.
4 Move the color slider to set the range of colors displayed in the color selection area.
5 Click a color in the color selection area.
You can also
Choose a fill color
Double-click the Fill color swatch in
the color control area, click the Uniform
fill button in the Select fill dialog box,
and click Edit.
42 Corel PHOTO-PAINT User Guide
Page 52

You can also
Swap colors
Click Options } Swap colors. This swaps
the Old color (the current foreground or
background color) and the New color
(which has been chosen in the color
selection area).
Each color swatch on a fixed color palette that is marked with a small white
square is a spot color.
You should use the same color model for all colors in an image; the colors
will be consistent and you will be able to predict the colors of the final
output more accurately. It is preferable to use the same color model that
you are using for the final output. For more information about reproducing
colors accurately, see “Managing color for display, input, and output” on
page 251.
You can also access color palettes in the Color Docker window/palette by
clicking the Color palettes button, and choosing a palette from the list
box. If the Color Docker window/palette is not open, click Window }
Dockers / Palettes } Color.
To sample a color
1 Click the Eyedropper tool .
2 Click the image to choose a foreground color.
The default sample size is 1 pixel.
You can also
Increase the sample size
Increase the sample size for a
high-resolution image
Sample from a selected area
Working with color 43
Click the Eyedropper3x3button on
the extended property bar.
Click the Eyedropper5x5button on
the extended property bar.
Click the Eyedropper selection button
on the extended property bar.
Page 53

You can also
Choose a background color
Choose a fill color
Press Control (Windows) or Command
(Mac OS), and click the image.
Right-click (Windows) or Control + click
(Mac OS) the image.
In the image window, a preview swatch is attached to the Eyedropper tool
, along with a box listing the color model component values.
You can also activate the Eyedropper tool by pressing the E key. Click
the Spacebar to return to the previously selected tool.
You can also view the color model component values for an image pixel, such
as the red, green, and blue components of a pixel in an RGB image, using
the Image info Docker window/palette. If the Image info Docker
window/palette is not open, click Window } Dockers / Palettes } Info.
Creating custom color palettes
Custom color palettes are collections of colors that you save. A number of preset
custom color palettes are available; however, you can create color palettes from
scratch. Custom color palettes are useful when you frequently choose the same colors,
or when you want to work with a set of colors that look good together.
You can create a custom color palette by choosing each color manually, or by using
colors in an object, an editable area, or an entire image.
To create a custom color palette
1 Click Window } Color palettes } Palette editor.
2 Click New palette .
3 Type a filename.
4 Click Save.
44 Corel PHOTO-PAINT User Guide
Page 54

From here
For more information about (Windows) In the Help index, see...
(Mac OS) In the Help Viewer, type...
Choosing a color using a color viewer color viewers, choosing colors
Choosing a color using color harmonies colors, using color harmonies
Choosing a color using color blends blending, creating colors
Creating a color palette from an object color palettes, creating custom palettes
Creating a color palette from an image color palettes, creating custom palettes
Creating a color palette from an editable
area
Setting color palette properties color palettes, customizing
Opening and editing custom color palettes color palettes, creating custom palettes
Understanding color models color models, theory
color palettes, creating custom palettes
Working with color 45
Page 55

Page 56

Changing color modes 7
Changing an image to another color mode, such as RGB, CMYK or grayscale,
changes the image’s color structure and size and can affect how the image displays
and prints.
In this section, you’ll learn about
changing the color mode of images
changing images to the paletted color mode
Changing the color mode of images
In Corel PHOTO-PAINT, the colors of images are defined by color modes. Computer
monitors display images in the RGB color mode; by default, images in Corel
PHOTO-PAINT are created in the RGB color mode. You can convert images to
different color modes, depending on their intended use. For example, it is
recommended that images sent for high-end printing be in the CMYK color mode.
For the World Wide Web, photos should be in the RGB color mode and GIF images
should be in the paletted color mode.
Color modes are described by their component colors and bit depth. For example, the
RGB (24-bit) color mode is composed of red, green, and blue values and has a bit
depth of 24 bits. Similarly, the CMYK (32-bit) color mode is composed of cyan,
magenta, yellow, and black values and has a bit depth of 32 bits.
Although on the screen you may not be able to see the difference between an image
in the CMYK color mode and an image in the RGB color mode, the images are quite
different. Colors from the RGB color space can cover a greater range of the visual
spectrum (they have a larger gamut) than those from the CMYK color space. For the
same image dimensions, a CMYK image has a larger file size than an RGB image.
Each time you convert an image, you may lose color information. For this reason, you
should finish editing and then save an image before you convert it to a new color
mode.
Color modes are based on standard color models used to describe, classify, and
reproduce color digitally. For more information about the CMYK, RGB, HSB, and
grayscale color models, see “Understanding color models” in the Help.
Changing color modes 47
Page 57

Corel PHOTO-PAINT supports the following color modes:
Black-and-white (1-bit)
Duotone (8-bit)
RGB color (24-bit)
CMYK color (32-bit)
Grayscale (16-bit)
NTSC RGB (video)
Grayscale (8-bit)
Paletted (8-bit)
Lab color (24-bit)
Multichannel
RGB color (48-bit)
PAL RGB (video)
The black-and-white, paletted, and duotone color modes provide conversion options.
For more information, see
“Changing images to the black-and-white color mode” in the Help
“Changing images to the paletted color mode” on page 49
“Changing images to the duotone color mode” in the Help
RGB original Converted to CMYK Converted to the
Paletted color mode
(256 colors)
48 Corel PHOTO-PAINT User Guide
Page 58

Converted to the
Multichannel color
mode
Converted to the
Black-and-white
color mode
To change the color mode of an image
Click Image } Color mode, and click one of the following:
Grayscale (8-bit)
RGB color (24-bit)
Lab color (24-bit)
CMYK color (32-bit)
Multichannel
Grayscale (16-bit)
RGB color (48-bit)
NTSC RGB
PAL R GB
The current mode of the image determines the modes to which the image
can be converted. Modes which are not available are grayed.
Converted to
grayscale
Changing images to the paletted color mode
The paletted color mode, also called indexed color mode, is frequently used for GIF
images on the World Wide Web. When you convert a complex image to the paletted
color mode, a fixed color value is assigned to each pixel. These values are stored in a
compact color table, or palette. As a result, the paletted image contains less data than
Changing color modes 49
Page 59

the original, and it has a smaller file size. Paletted color mode is an 8-bit mode that
stores and displays images using up to 256 colors.
Choosing, editing, and saving a color palette
When you change an image to the paletted color mode, you use a predefined or a
custom color palette and then edit the palette by replacing individual colors. If you
choose the Optimized color palette, you can also edit the palette by specifying a range
sensitivity color. The color palette you use to convert the image is called the processed
color palette, and it can be saved for use with other images.
For more information about creating custom color palettes, see “Working with color”
on page 39.
Dithering
Paletted images can only contain up to 256 different colors. If the original image
contains many colors, you can use dithering to create the illusion of seeing more than
256 colors. Dithering creates additional colors and shades from an existing palette by
interspersing pixels of different colors. The relationship of one colored pixel to another
creates an optical mix, so you perceive additional colors.
Dithering can be done by distributing colors either regularly or randomly. Ordered
dithering approximates color blends using regular dot patterns; as a result, solid
colors are emphasized and edges appear harder. Error diffusion scatters pixels
randomly, making edges and colors softer. Jarvis, Stucki and Floyd-Steinberg are
methods of error diffusion.
If your image contains only a few colors and simple shapes, you do not need to use
dithering.
Setting the color range for a custom color palette
When you change an image to the paletted color mode using the Optimized palette,
you can choose a seed color, or base color, and a range sensitivity for the seed color.
The seed color, and similar colors that fall within the range settings, are included in
the processed color palette. You can also specify how much emphasis to place on the
range sensitivity. Because the palette has a maximum of 256 colors, emphasizing a
seed color reduces the number of colors that fall outside the range sensitivity.
Saving conversion options
After you choose a color palette and set the dithering and range sensitivity for the
changing of an image to the paletted color mode, you can save the selected options as
a conversion preset that you can use with other images. You can add and remove as
50 Corel PHOTO-PAINT User Guide
Page 60

many conversion presets as you want. You can also remove the presets you have
added.
Changing multiple images to the paletted color mode
You can change multiple images to the paletted color mode simultaneously. Before
you perform a batch conversion, you must open the images in Corel PHOTO-PAINT.
All images that you include in the batch are changed using the color palette and
conversion options you specify.
To change an image to the paletted color mode
1 Click Image } Color mode } Paletted (8-bit).
2 Click the Options tab.
3 Choose one of the following color palette types from the Palette list box:
Uniform — provides a range of 256 colors with equal parts of red, green, and
blue
Standard VGA — provides the Standard VGA 16-color palette
Adaptive — provides colors original to the image, and preserves the individual
colors (the entire color spectrum) in the image
Optimized — creates a color palette based on the highest percentage of colors
in the image. You can also select a range sensitivity color for the color palette.
Black Body — contains colors that are based on temperature. For example,
black may represent cold temperatures, while red, orange, yellow, and white
may represent hot temperatures.
Grayscale — provides 256 shades of gray, ranging from black (0) to white
(255)
System — provides a palette of Websafe and grayscale colors
Websafe — provides a palette of 216 colors that are common to Web browsers
in both Windows and the Mac OS
4 Choose a dithering option from the Dithering list box.
5 Move the Dither intensity slider to adjust the amount of dithering.
You can also
Save the conversion options as a preset
Changing color modes 51
Click Add preset , and type a name in
the Save preset box.
Page 61

You can also
Edit the processed color palette
Save the processed color palette
Click the Processed palette tab, and click
Edit.IntheColor table dialog box, edit
the color palette.
Click the Processed palette tab, and click
Save. Choose the folder where you want to
save the processed color palette, and type a
filename.
The Ordered dithering option applies more quickly than do the error
diffusion options Jarvis, Stucki, and Floyd-Steinberg; however, it is less
accurate.
You can choose a custom color palette by clicking the Options tab, clicking
Open, locating the color palette file you want, and double-clicking the
filename.
You can load preset conversion options by choosing a preset from the Presets
list box on the Options tab.
From here
For more information about (Windows) In the Help index, see...
(Mac OS) In the Help Viewer, type...
Changing images to the black-and-white
color mode
black-and-white color mode
Changing images to the duotone color
mode
Setting the color range for a custom color
palette
Changing multiple files to the paletted color
mode
duotone color mode
paletted color mode, creating custom
palettes
paletted color mode, batch conversion
52 Corel PHOTO-PAINT User Guide
Page 62

Undoing, redoing, repeating, and fading
Corel PHOTO-PAINT lets you undo, redo, repeat, and fade actions. You can also
restore an image or part of an image to a previously saved version.
In this section, you’ll learn about
undoing and redoing actions
reverting to an earlier image state
repeating and fading actions
8
Undoing and redoing actions
Corel PHOTO-PAINT lets you undo actions you apply to an image, starting with the
most recent action. If you don’t like the result of undoing actions, you can redo them.
You can undo or redo actions applied to an image, such as a brush stroke, an effect, or
a transformation; however, you cannot undo or redo actions applied to the workspace,
such as changing preferences.
The undo settings can be customized, allowing you to increase or decrease the
number of actions you can undo and redo.
Keep in mind that the higher the number of actions in the undo list, the more
memory is required to maintain the undo list. You can free memory by permanently
clearing all actions from the undo list.
You can also restore parts of an image by erasing the last action. For more
information, see “Erasing image areas” on page 101.
Undoing, redoing, repeating, and fading 53
Page 63

A brush stroke is applied to the image on the left and is undone on the
right. You can restore the brush stroke by redoing the action.
To undo or redo actions
To Do the following
Undo the last action
Redo the last action
Undo or redo a series of actions
Remove all actions in the Undo Docker
window/palette to free memory
Click Edit } Undo [last action].
Click Edit } Redo [last action].
In the Undo Docker window/palette,
choose an action from the list. All actions
listed below the action you choose will be
undone. If the Undo Docker
window/palette is not open, click Window
} Dockers / Palettes } Undo.
Click Edit } Purge } Undo list.
When you undo a series of actions, the action you choose and all actions
listed below it are undone.
When you redo a series of actions, the action you choose and all actions listed
between it and the last undone action are redone.
54 Corel PHOTO-PAINT User Guide
Page 64

To customize undo settings
1 Do one of the following:
(Windows) Click Tools } Options.
(Mac OS) Click Corel PHOTO-PAINT 11 } Preferences.
2 In the Workspace list of categories, click Memory.
3 Type a value in the Undo levels box.
4 Restart Corel PHOTO-PAINT.
You can specify up to 99 undo levels; however, the number of undo levels
affects the size of the swap disk (Windows) or scratch disk (Mac OS).
Reduce the number of undo levels if you find that your computer is not
operating at the speed you want.
If you disable the Enable undo list check box, you will be able to undo
only the number of levels specified in the Undo levels box. With the check
box enabled, you can undo all changes you made to the image from the
Undo Docker window/palette, regardless of how many undo levels you’ve
specified. Note that the number of undo levels will still be limited if you are
using menu commands, and not the Undo Docker window/palette, to
undo your actions.
Reverting to an earlier image state
As you create or edit an image, you can revert to its last-saved version to remove all
the changes you made since you saved the image. If you want to remove only some
changes, you can restore specific image areas to the way they look in the last-saved
version of the image.
You can also create a checkpoint to save the current image temporarily, so that later
you can return the image to that state if necessary.
You can also create a workspace that lets you save automatically using a checkpoint.
For more information, see “To specify auto-save settings” on page 246.
To revert to the last saved version of an image
Click File } Revert to saved.
You can also revert to the last saved image by clicking the Revert to last
saved button in the Undo Docker window/palette.
Undoing, redoing, repeating, and fading 55
Page 65

To restore image areas
1 Open the Touch-up flyout , and click the Clone tool .
2 On the property bar, open the Clone tool picker, and click the Clone from saved
tool .
3 Choose a brush from the Type list box.
4 Drag in the image window.
If you are creating an image from scratch, you must save it before using the
Clone from saved tool. For more information about saving images, see
“Saving and closing” on page 245.
To create or return to a checkpoint
To Do the following
Create a checkpoint
Return to a checkpoint
Click Edit } Checkpoint.
Click Edit } Restore to checkpoint.
Repeating and fading actions
You can repeat or fade actions. When you repeat an action, it is reapplied to the
image, producing a stronger visual effect. When you fade an action, it is gradually
56 Corel PHOTO-PAINT User Guide
Page 66

removed. You can also use a merge mode to modify the fade effects. For more
information about merge modes, see “Understanding merge modes” in the Help.
You can repeat the last action to intensify the effect. The left image is the
original, a wind effect is applied to the center image, and the effect is
repeated in the right image.
You can fade the last action by a specified amount. The original image is
on the left, the center image is blurred, and the blur effect is faded in the
right image.
Undoing, redoing, repeating, and fading 57
Page 67

To repeat or fade actions
To Do the following
Repeat the last action
Fade the last action
To repeat or fade an action, you must first apply an action, such as an effect,
a brush stroke, or a transformation, to an image. Actions performed on the
work area, such as changing preferences, cannot be repeated or faded.
When you have maximized the settings for a special effect, you can repeat
the effect to exaggerate it. For more information about special effects, see
“Applying special effects” on page 131.
Click Edit } Repeat [last action].
Click Edit } Fade last command. Move
the Percent slider to set the fade level. If
you want to modify the fade effect, choose a
merge mode from the Merge list box.
58 Corel PHOTO-PAINT User Guide
Page 68

Bringing images into Corel PHOTO-PAINT
You can bring images into Corel PHOTO-PAINT in a variety of ways.
In this section, you’ll learn about
opening images
finding and inserting image content
importing files
scanning images
loading photos from a digital camera
starting new images
working with vector graphics
9
Opening images
You can open most bitmaps in Corel PHOTO-PAINT. Each image you open displays
in its own image window.
You can also import images. Importing allows you to add a new image to the active
image window. For more information, see “Importing files” on page 62.
To open an image
1 Click File } Open.
2 Choose the folder where the file is stored.
3 Double-click the filename.
You can also
(Windows) View image previews
Decrease the dimensions of an image as you
open it
Bringing images into Corel PHOTO-PAINT 59
Enable the Preview check box.
Choose Resample from the list box beside
the Files of type list box.
Page 69

You can also open an image by clicking the Open button on the
standard toolbar. If the standard toolbar is not displayed, click Window }
Toolbars } Standard.
Finding and inserting image content
You can use clipart, photos, and sounds stored on the Corel content CDs or that are
available online. The digital content manual contains pictures of the graphics
available on the CD and their folder locations.
In Windows, you can also access online images directly from Corel on the Web
through the Scrapbook™ Docker window.
Mac OS X has a content find and search tool, Sherlock®. You can use Sherlock to
browse for images using the thumbnail views or use keywords to search for content on
the CDs.
To browse for clipart, photos, and sound files (Windows)
1 Click Window } Dockers } Scrapbook } Browse.
2 Insert a Corel contents CD into the CD drive.
3 Double-click an icon in the CD list, and navigate to a folder.
You can also
Browse for files on your computer or
network
Browse for images online
Display the folder tree Click the flyout arrow at the top of the
Double-click the Desktop icon on the
Windows task bar, and navigate to a folder.
Click the Content on the Web
button .
Scrapbook Docker window, and click
Show tree.
To browse for images online, you must be connected to the Internet.
To change your browsing view in the Scrapbook Docker window, click the
flyout arrow, click View, and choose a view type.
60 Corel PHOTO-PAINT User Guide
Page 70

To browse for clipart, photos, and sound files (Mac OS)
1 Insert a Corel contents CD into the CD drive.
2 Double-click the Sherlock icon in the Dock.
3 Double-click the CD icon in the list of disks.
4 Choose the folder you want to browse.
When you insert a CD into the CD drive, its icon displays on the desktop.
Double-click the icon to browse for content in the folders on the CD.
To get Help using Sherlock, click Help } Sherlock Help.
To search for clipart, photos, and sound files (Windows)
1 Click Window } Dockers } Scrapbook } Search.
2 Insert a Corel contents CD into the CD drive.
3 Type a word in the Search for box.
You can also
Search different categories
Display the next page of search results
Search using a different word
In the Search in area, enable the check box
for each category you want to search.
Click the Forward button .
Click the New search button , and
type a new word.
You can specify how you want the search results displayed by clicking one
of the following view buttons: Large icons , Small icons , List
icons , Detail view .
Bringing images into Corel PHOTO-PAINT 61
Page 71

To search for clipart, photos, and sound files (Mac OS)
1 Insert a Corel contents CD into the CD drive.
2 Double-click the Sherlock icon in the Dock.
3 Enable the CD icon check box in the list of disks.
4 Enable the Filenames option.
5 Type a word in the text box.
6 Click the magnifying glass button.
To get Help using Sherlock, click Help } Sherlock Help.
To insert a file into an active image
Drag the image or sound file to the image window.
You can also open a file in a new image window by dragging the file to the
application window.
Importing files
Corel PHOTO-PAINT provides filters that convert files from one format to another
when you import them. You can import a file and place it in the active application
window as an object. The imported file becomes part of the active image. You can also
bring in a file by opening it in a new application window.
You can use the import filter’s default settings or choose the settings you want when
you import the file. You can also save a file’s embedded International Color
Consortium (ICC) profile to a local color folder.
While importing a bitmap, you can resample it to change the number of pixels,
eliminate unusable detail, and reduce the file size. You can also crop a bitmap to select
only the exact area and size of the image you want to import.
62 Corel PHOTO-PAINT User Guide
Page 72

To import a file into an active image
1 Click File } Import.
2 Choose the folder where the file is stored.
3 Choose a file format from the Files of type list box (Windows) or Show list box
(Mac OS).
4 Click the filename.
5 Enable any of the following active check boxes:
Do not show filter dialog — lets you use the filter’s default settings without
opening the dialog box
(Windows) Check for watermark — lets you check the image for a watermark
and any information it contains such as copyright
Extract embedded ICC profile — lets you save the embedded International
Color Consortium (ICC) profile to the color folder where the application is
installed
6 Click Import.
7 Click the image window.
You can also import a file by opening it in a new application window. For
more information about opening a file in a new application window, see “To
open an image” on page 59.
Scanning images
You can scan photos into Corel PHOTO-PAINT.
In Windows, Corel PHOTO-PAINT supports scanners that use Microsoft®
Windows Image Acquisition (WIA), which provides a standard interface for loading
images. You can also use WIA to set Corel PHOTO-PAINT as the default application
for opening images; you can then load images directly from a scanner into Corel
PHOTO-PAINT without having to start the application first.
If your scanner does not support WIA, or if you are using the Mac OS, you can use
the scanner’s software and TWAIN driver for loading images. The software interfaces
and options vary. For information about using your scanner’s software, see the
manufacturer’s documentation.
Bringing images into Corel PHOTO-PAINT 63
Page 73

To scan images (Windows)
1 Click File } Acquire image } Select source.
2 Choose your scanner from the Sources list.
3 Click Select.
4 Click File } Acquire image } Acquire.
5 In the Get pictures dialog box, choose the images you want to copy.
If your scanner does not support WIA, you are presented with the scanner’s
interface for loading images. Options will vary.
6 Click Get pictures.
The WIA interface is available only for the Windows Me and Windows XP
operating systems.
To scan additional images during the same session, click File } Acquire
image } Acquire.
To scan images (Mac OS)
1 Click File } Acquire image } Select source.
2 Choose your scanner from the Sources list.
3 Click Select.
4 Click File } Acquire image } Acquire.
5 Follow the instructions provided by the scanner’s manufacturer to choose the
images.
To scan additional images during the same session, click File } Acquire
image } Acquire.
Loading photos from a digital camera
You can load photos from a digital camera into Corel PHOTO-PAINT.
In Windows, Corel PHOTO-PAINT supports digital cameras that use Microsoft
Windows Image Acquisition (WIA), which provides a standard interface for loading
photos.
64 Corel PHOTO-PAINT User Guide
Page 74

You can also use WIA to set Corel PHOTO-PAINT as the default application for
opening photos; you can then load photos directly from a camera into Corel
PHOTO-PAINT without having to start the application first.
If your digital camera does not support WIA, or if you are using the Mac OS, you can
use the digital camera’s software and TWAIN driver for loading photos. The software
interfaces and options for loading photos vary. For information about using your
digital camera’s software, see the manufacturer’s documentation.
In the Mac OS, you can also bring images from iPhoto™ into Corel PHOTO-PAINT.
Once you set Corel PHOTO-PAINT as the default image editing application, you can
open photos stored in iPhoto simply by double-clicking them. Corel PHOTO-PAINT
will start automatically.
Viewing digital camera photo information
In both Windows and the Mac OS, you can view EXIF data about digital camera
images. When you take a photo with a digital camera, the camera attaches
information to the image, such as the date and time the image was captured, the
exposure, and flash settings. When you load a digital camera image into Corel
PHOTO-PAINT, you can view this extra information.
To load photos from a digital camera (Windows)
1 Connect a digital camera to your computer.
2 Click File } Acquire image } Select source.
3 Choose a digital camera from the Sources box.
4 Click File } Acquire image } Acquire.
5 In the Get pictures dialog box, choose the images you want to copy.
If your digital camera does not support WIA, you are presented with the digital
camera’s interface for loading photos. Options will vary.
6 Click Get pictures.
The WIA interface is available only for the Windows Me and Windows XP
operating systems.
To load additional photos during the same session, click File } Acquire
image } Acquire.
Bringing images into Corel PHOTO-PAINT 65
Page 75

To load photos from a digital camera (Mac OS)
1 Connect a digital camera to your computer.
2 Click File } Acquire image } Select source.
3 Choose a digital camera from the Sources box.
4 Click File } Acquire image } Acquire.
5 Follow the instructions provided by the digital camera’s manufacturer to choose
the images.
To load additional photos during the same session, click File } Acquire
image } Acquire.
To open digital camera photos automatically in Corel PHOTO-PAINT
(Windows)
1 Connect a digital camera to your computer.
2 In the dialog box, choose Corel PHOTO-PAINT in the Select the program to
launch for this action area.
3 Enable the Always use this program for this action check box.
Double-clicking a thumbnail in the digital camera directory will bring the image
into Corel PHOTO-PAINT.
If your camera does not support WIA, you cannot associate Corel
PHOTO-PAINT with the digital camera.
To load photos from iPhoto (Mac OS)
1 Start iPhoto.
2 Click iPhoto } Preferences.
3 In the Double-clicking photos opens them in area, enable the Other option.
4 Click Set.
5 In the Open dialog box, choose the Corel PHOTO-PAINT application icon.
6 Click Open.
7 In iPhoto, double-click the thumbnail for the photo you want to open.
Corel PHOTO-PAINT starts automatically and opens the selected photo.
66 Corel PHOTO-PAINT User Guide
Page 76

To view EXIF information for digital camera photos
1 Do one of the following:
(Windows) Click Document } Properties.
(Mac OS) Click Document } Info.
2 Click the EXIF tab.
When an image does not have EXIF data attached, the EXIF tab will not display.
Starting new images
You can produce original artwork by starting an image from scratch, or by
duplicating an existing image. You can also use data copied to the Clipboard from
another image window or another application.
When you start an image from scratch, you can specify the size of the image, its
background color, and the color mode you want to use. You can also choose the image
resolution, or the number of pixels per unit of measure.
To start an image from scratch
1 Click File } New.
2 Choose a color mode from the Color mode list box.
3 Open the Background color picker, and click a color for the background.
4 Choose a size from the Size list box.
5 Enable one of the following options:
Portrait
Landscape
6 Choose a value from the Resolution list box.
Higher image resolution results in a larger file size.
You can specify a custom page size by choosing Custom from the Size list
box and typing values in the Width and Height boxes.
You can also create an image by clicking the New button on the
standard toolbar. If the standard toolbar is not displayed, click Window }
Toolbars } Standard.
Bringing images into Corel PHOTO-PAINT 67
Page 77

To start an image from a duplicate
1 Click Image } Duplicate.
2 Type a filename in the As box.
If you want to combine the objects and background in the new image, enable the
Merge objects with background check box.
To create an image using the Clipboard contents
Click File } New from Clipboard.
Working with vector graphics
In Corel PHOTO-PAINT, you work with bitmaps, also called raster images. Bitmaps
are composed of tiny squares called pixels; each pixel is mapped to a location in an
image, and has numerical color values. The location and color value data is stored as
bits — hence the name bitmaps.
Vector graphics are made up of lines, curves, objects, and fills that are all calculated
mathematically. Although you cannot work with vector graphics in Corel
PHOTO-PAINT, you can convert vector graphics to bitmaps as you open or import
them. This conversion process is called rasterization. You can also copy vector graphics
from CorelDRAW® and paste them into Corel PHOTO-PAINT.
The top illustration is a vector graphic consisting of lines, objects and fills.
The bottom version is a bitmap made up of pixels.
Vector graphics usually have a smaller file size than bitmaps, so expect file size to
increase when you convert vector graphics to bitmaps.
68 Corel PHOTO-PAINT User Guide
Page 78

To open a vector graphic
1 Click File } Open.
2 Choose the folder where the file is stored.
3 From the Files of type list box (Windows) or Show list box (Mac OS), choose the
vector file format of the file you want to import.
4 Click the filename.
5 Click Open.
6 In the Convert to bitmap dialog box, specify the settings you want.
You can copy a vector graphic in CorelDRAW and paste it into Corel
PHOTO-PAINT by clicking File } New from clipboard.
To import a vector graphic
1 Click File } Import.
2 Choose the folder where the file is stored.
3 From the Files of type list box (Windows) or Show list box (Mac OS), choose the
vector file format of the file you want to import.
4 Click the filename.
5 Click Open.
6 Click in the image window.
7 In the Convert to bitmap dialog box, specify the settings you want.
You can copy a vector graphic in CorelDRAW and paste it into Corel
PHOTO-PAINT by clicking File } New from clipboard.
From here
For more information about (Windows) In the Help index, see...
(Mac OS) In the Help Viewer, type...
Resampling a graphic while importing importing, resampling
Cropping a graphic while importing importing, cropping
Bringing images into Corel PHOTO-PAINT 69
Page 79

Page 80

Cropping, stitching and changing orientation
You can crop an image to remove unwanted areas, or combine multiple images to
create a single, large image. You can also change the orientation of an image by
flipping it or rotating it.
In this section, you’ll learn about
cropping images
stitching images together
changing image orientation
You can also change the size of an image without removing or adding image areas by
changing the image dimensions and resolution. For more information, see “Changing
image dimensions, resolution, and paper size” on page 87.
10
Cropping images
You can crop an image to remove unwanted areas and improve its composition.
Cropping allows you to select a rectangular area that you want to keep and discard
the rest. As a result, you reduce the file size of an image without affecting its
resolution.
Corel PHOTO-PAINT also lets you crop around the editable area of a mask;
however, the resulting image is always rectangular. For information about masks, see
“Masking” on page 111.
You can also easily crop a single-color border surrounding an image, such as a white
edge surrounding an old photograph.
Cropping, stitching and changing orientation 71
Page 81

Cropping lets you remove unwanted image areas.
To crop an image
1 Click the Crop tool .
2 Drag to select an area on the image.
3 Double-click inside the cropping area.
You can also
Enlarge or reduce the cropping area Drag the cropping handles.
Move the cropping area Click and drag inside the cropping area to
reposition it.
Rotate the cropping area to straighten it Click inside the cropping area to display the
rotation handles . Drag the rotation
handles to align the cropping area with the
image area you want to crop.
Expand the cropping area outside the
original image
Click Image } Crop } Expand, and drag a
cropping handle outside the image.
You can hide the crop overlay to view the image you are cropping more
clearly. Click Image } Crop } Crop overlay.
You can also crop an image area by clicking the Crop tool and typing values
in the Size and Position boxes on the property bar.
72 Corel PHOTO-PAINT User Guide
Page 82

To crop a border color from an image
1 Click Image } Crop } Crop border color.
2 Enable one of the following options:
Background — crops the color specified in the Background color swatch
in the color control area of the toolbox
Foreground — crops the color specified in the Foreground color swatch
in the color control area of the toolbox
Other — crops the color you choose using the color picker or the Eyedropper
tool
3 In the Tolerance area, enable one of the following options:
Normal — determines the color tolerance based on the similarity of hue values
between adjacent pixels
HSB mode — determines the color tolerance based on the similarity of hue,
saturation, and brightness levels between adjacent pixels
4 Move the Tolerance slider to set the tolerance for the color that you want to crop.
You may need to experiment with different Tolerance slider positions to
successfully remove the border color.
To crop to an editable area of a mask
1 Define an editable area on an image.
2 Click Image } Crop } Crop to mask.
For more information about defining editable areas, see “Masking” on page
111.
Stitching images together
Image stitching allows you to seamlessly join 2D images. For instance, you can scan a
large image in smaller, overlapping pieces and reassemble them.
In Corel PHOTO-PAINT, you can stitch multiple images interactively. You can
select, move, and rotate the images, as well as change your view of them to allow
more precise positioning. As you position the images, overlapping areas will turn
black to signal that you have aligned the edges correctly. You can then save the
stitched images as a single, flattened image, or as objects that you can continue to
edit individually.
Cropping, stitching and changing orientation 73
Page 83

You can stitch images in all color modes except black-and-white, duotone, 16-bit
grayscale, 48-bit RGB, and multichannel. If the selected images use the same color
mode, except paletted color mode, the new file will use that color mode as well. If the
selected files use a different color mode, or are all paletted color mode, the new file
uses RGB color mode. For more information about color modes, see “Changing color
modes” on page 47.
You can stitch images together to create a single, large image. This image
has been scanned in four sections and stitched.
To stitch images together
1 Open the images you want to stitch together.
2 Click Image } Stitch.
3 Choose a filename from the Source files list, and click Add.
If you want to select all open images, click Add all.
4 To change the position of an image in the Selected files list, click a filename, and
click one of the following buttons:
Up button
Down button
5 Click OK.
6 In the Image stitch dialog box, click the Selection tool .
7 In the image stitch window, drag an image to align it with another image.
Repeat to align all images.
74 Corel PHOTO-PAINT User Guide
Page 84

8 Type a value in the Blend images list box to define the number of overlapping
pixels used to blend images together.
9 Enable one of the following options:
Combine to background — creates a single, flattened image
Create objects from images — creates a stitched image in which each source
image becomes a separate object. You can later adjust the brightness and
contrast of each object so they match.
You can also
View image alignment
Rotate one or more selected images
Zoom in to inspect an area where images
join
Zoom out
View areas outside the image stitch window
Stitched images that are flattened have a smaller file size than stitched
images containing separate objects.
Use the Arrow keys with the Selection tool , the Rotate tool , and
the Pan tool to move, rotate and view images precisely in the image
stitch window.
Changing image orientation
Click the Difference tool . Overlapping
image areas are highlighted; correctly
aligned image edges display as black.
Click the Rotate tool , and drag an
image. If you want to rotate an image by a
precise angle, type a value in the Rotate
image box.
Click the Zoom in tool , and click
where you want a close-up view.
Click the Zoom out tool , and click the
image.
Click the Pan tool , and drag an image.
You can change the orientation of an image by flipping or rotating it in the image
window. You can flip an image horizontally or vertically to reposition a scanned image
or to create unique effects.
When you rotate an image, you can specify the angle and direction of rotation, as
well as the paper color that is visible after the image is rotated.
Cropping, stitching and changing orientation 75
Page 85

To flip an image
Click Image } Flip, and click one of the following:
Flip horizontally
Flip vertically
You can mirror an image by flipping it.
To rotate an image
1 Click Image } Rotate } Rotate custom.
2 Type a value in the Angle box.
3 Enable one of the following options:
Clockwise
Counterclockwise
4 Enable any of the following check boxes:
Maintain original image size — maintains the size of the original image
Anti-aliasing — smooths the edges in the image
5 Open the Background color picker, and click a color.
76 Corel PHOTO-PAINT User Guide
Page 86

You can rotate an image by clicking Image } Rotate, and clicking 90°
Clockwise, 90° Counterclockwise,or180°.
You can rotate an image to change its orientation.
Cropping, stitching and changing orientation 77
Page 87

Page 88

Adjusting color and tone 11
You can improve the quality of images by adjusting the color and tone to correct color
casts and exposure problems or to alter specific colors.
In this section, you’ll learn about
adjusting image color and tone
adjustment filters
working with color channels
Adjusting image color and tone
Corel PHOTO-PAINT provides you with filters and tools to make adjustments to the
color and tone of images. When you adjust the color and tone, you adjust elements
such as hue, saturation, brightness, contrast, or intensity. If you want to adjust the
color and tone of the entire image, you can apply an adjustment filter directly to the
image or apply a lens which exists on a separate object layer and can be edited
without changing the original image. For information about lenses, see “Working
with lenses” on page 105.
You can adjust part of an image by editing the size and shape of a lens or by creating
an editable area before applying an adjustment filter. For information about editable
areas, see “Masking” on page 111.
Adjusting color and tone 79
Page 89

The table below shows the filters that can be used to make adjustments to images.
To adjust Use the following filters
Exposure, adjust shadows, midtones, and
highlights
Overall color
Auto equalize, Tone curve, Gamma,
Sample/Target balance, Balance tone,
Histogram equalization
Color hue, Color balance, Channel mixer
Specific colors
Selective color, Replace colors
80 Corel PHOTO-PAINT User Guide
Page 90

To adjust Use the following filters
Contrast
Saturation
Color tone,
Brightness/Contrast/Intensity, Contrast
enhancement, Local equalization
Hue/Saturation/Lightness, Desaturate
Choosing color and tone filters
Some filters adjust the image automatically, while others give you varying degrees of
control. For example, the Auto equalize filter adjusts the tonal range automatically,
while the Tone curve filter lets you pinpoint and adjust tone, or color, using separate
color channels. More advanced filters, such as the Tone curve filter and the Contrast
enhancement filter, are precise and can correct a variety of problems, but require
practice. If you are new to color and tone correction, consider the following options:
Automatic adjustments: apply the Auto equalize filter. This filter improves the
tone of most images instantly. If the filter doesn’t correct the problem, you can
undo the change, and try another filter.
Quick tone adjustments: apply the Color tone filter to brighten or darken an
image, or improve contrast using thumbnail buttons. You can also try the
Adjusting color and tone 81
Page 91

Brightness/Contrast/Intensity filter. After you adjust the brightness, you must
adjust the contrast and intensity to retain image detail.
Quick color adjustments: apply the Color hue filter to adjust the color using
thumbnail buttons, or apply the Color balance filter which lets you increase or
decrease specific color values. For example, if an image has a green cast, you can
remove some green, or add a contrasting color (magenta) to neutralize the green
cast.
Adjusting tone interactively
You can view the tonal range of an image using a histogram to evaluate and adjust
the color and tone of an image. For example, a histogram can help you determine if
there is hidden detail in an underexposed photo. A histogram has a horizontal bar
chart that plots the brightness values of the pixels in your image on a scale from 0
(dark) to 255 (light). The left part of the histogram represents the shadows of an
image, the middle part represents the midtones, and the right part represents the
highlights. The height of the spikes indicates how many pixels are at each brightness
level. For example, a large number of pixels in the shadows (the left side of the
histogram) indicates the presence of image detail in the dark areas of the image.
A histogram is available with the following filters:
Contrast enhancement
Histogram equalization
Sample/Target balance
Adjusting the color and tone using brush strokes
You can adjust the brightness, contrast, hue or saturation in part of an image by
applying brush strokes. You can use preset brushes or create a custom brush. For more
information, see “Creating custom brushes” in the Help.
To adjust image color and tone
1 Click Image } Adjust, and click an adjustment filter.
2 In the filter’s dialog box, specify the settings you want.
For descriptions of adjustment filters, see “Adjustment filters” in the Help.
82 Corel PHOTO-PAINT User Guide
Page 92

You can compare the original image with the adjusted image by clicking
the Dual window preview button in filter dialog boxes.
You can adjust the color and tone in an editable area by defining an
editable area before you click an adjustment filter.
To adjust image tone interactively
1 Click Image } Adjust } Contrast enhancement.
2 Move the Input value clipping arrows to adjust shadows and highlights.
The arrow on the left lets you darken shadow areas. Drag the arrow until it points
to the area where the histogram starts to spike.
The arrow on the right lets you lighten highlight areas. Drag the arrow until it
points to the area where the histogram stops spiking.
3 Move the Gamma slider to adjust the midtones.
4 Move the Output range compression arrows to fine-tune the contrast:
The arrow on the left lets you lighten darker areas as you drag the arrow to the
right.
The arrow on the right lets you darken light areas as you drag the arrow to the
left.
You can also
Adjust image color
Automatically redistribute pixels across the
tonal range
Set input and output values by sampling
pixels in the image
Choose a color channel from the Channel
list box, before making adjustments.
Enable the Auto-adjust check box.
Enable the Set input values or Set output
values option from the Eyedropper
sampling area. Click the Shadow
eyedropper button to sample shadow
areas, or click the Highlight eyedropper
button to sample highlight areas.
The histogram displays adjusted values as a black outline and original
values as gray shading.
Adjusting color and tone 83
Page 93

You can compare the original image with the adjusted image by clicking the
Dual window preview button in filter dialog boxes.
To adjust image color and tone using brush strokes
1 Select an object or the background image.
2 Open the Brush flyout , and click the Effect tool .
3 On the property bar, open the Effect tool picker, and click one of the following:
Brightness tool — brightens or darkens the image
Contrast tool — increases or decreases the contrast
Hue tool — shifts all hues along the color wheel by the number of degrees
that you specify in the Amount box
Hue replacer tool — retains the brightness and saturation of the original
colors, but replaces all hues with the current paint color
Sponge tool — saturates or desaturates the colors
Dodge/Burn tool — brightens (overexposes) or darkens (underexposes) the
image
Tint tool — tints the image using the current paint color
4 Choose a preset brush from the Type list box on the property bar.
If you want to customize the brush, specify the settings you want on the property
bar.
5 Drag in the image window.
You can also
Increase the effect of the brush across an
area without clicking over the area multiple
times
Click the Cumulative button on the
Stroke attributes bar that displays in the
Brush settings Docker window/palette.
This option is available only for some of the
Effect tools. If the Brush settings Docker
window/palette is not open, click Window
} Dockers / Palettes } Brush settings.
84 Corel PHOTO-PAINT User Guide
Page 94

You can also
Apply the effect to an object and the
background simultaneously
Click the Merge source button on the
Dab attributes bar that displays in the
Brush settings Docker window/palette.
This option is only available when the
Cumulative button is disabled.
From here
For more information about (Windows) In the Help index, see...
(Mac OS) In the Help Viewer, type...
Adjustment filters adjustment filters
Working with color channels color channels
Adjusting color and tone 85
Page 95

Page 96

Changing image dimensions, resolution, and paper size
You can change the dimensions and resolution of an image. You can also change the
size of the paper border that surrounds an image.
In this section, you’ll learn about
changing image dimensions
changing image resolution
changing the paper size
You can also change the size of an image by removing unwanted areas, or by joining
multiple images. For more information, see “Cropping, stitching, and changing
orientation” on page 71.
12
Changing image dimensions
You can change the physical dimensions of images by increasing or decreasing their
height and width. When you increase image dimensions, the application inserts new
pixels between existing pixels, and their colors are based on the colors of adjacent
pixels. If you increase image dimensions significantly, images may appear stretched
and pixelated.
The size of the image on your screen depends on the pixel height and width of the
image, on the zoom level, and on your monitor settings. As a result, an image may
display as a different size on your screen than when it is printed.
Changing image dimensions, resolution, and paper size 87
Page 97

You can change the height and width of an image without changing the
resolution. The center image is the original, the first image has smaller
dimensions, and the third image has larger dimensions. Notice the
pixelation of the larger image.
To change the dimensions of an image
1 Click Image } Resample.
2 Enable any of the following check boxes:
Anti-alias — smooths the edges in the image
Maintain aspect ratio — avoids distortion by maintaining the width-to-height
ratio of the image
3 In the Image size area, type values in one of the following pairs of boxes:
Width and Height — let you specify the image dimensions
Width % and Height % — let you resize the image to a percentage of its
original size
When you change the dimensions of an image, you produce better results
using width and height values that are factors of the original values. For
example, reducing an image by 50 per cent produces a better-looking image
than by reducing the size by 77 per cent. When reducing an image by 50 per
cent, the application removes every other pixel; to reduce an image by 77 per
cent, the application must remove pixels irregularly.
88 Corel PHOTO-PAINT User Guide
Page 98

Changing image resolution
You can change the resolution of an image. Resolution is measured by the number of
dots per inch (dpi) when the image is printed. The resolution you choose depends on
how the image is output. Typically, images created only for display on computer
monitors are 96 or 72 dpi and images created for the World Wide Web are 72 dpi.
Images created for printing on desktop printers are generally 150 dpi, while
professionally printed images are usually 300 dpi.
Increasing resolution
Higher resolution images contain smaller and more densely packed pixels than lower
resolution images. Upsampling increases the resolution of an image by adding more
pixels per unit of measure. Image quality may be reduced because the new pixels are
interpolated based on the colors of neighboring pixels; the original pixel information
is simply spread out. You cannot use upsampling to create detail and subtle color
gradations where none existed in the original image. When you increase image
resolution, the image size increases on your screen; by default the image maintains its
original size when printed.
Decreasing resolution
Downsampling decreases the resolution of an image by removing a specific number of
pixels per unit of measure. This produces better results than upsampling. Best results
are usually achieved when downsampling is done after correcting an image’s color and
Changing image dimensions, resolution, and paper size 89
Page 99

tone but before sharpening. For more information about correcting and sharpening
images, see “Adjusting color and tone” on page 79 and “Retouching” on page 93.
You can change the resolution and size of an image at the same time. The
center image is the original, the first image is downsampled, and the third
image is upsampled.
You can change the resolution of an image to increase or decrease its file size.
To change the resolution of an image
1 Click Image } Resample.
2 Enable any of the following check boxes:
Identical values — sets the same value in the Horizontal and Vertical boxes
Anti-alias — smooths the edges in the image
Maintain original size — maintains the size of the file on your hard disk when
you change the resolution of the image
3 In the Resolution area, type values in the following boxes:
Horizontal
Vertical
If you resample an image using pixels as the unit of measure, the size of the
image also changes.
The Identical values check box is grayed if the Maintain aspect ratio check
box is enabled.
90 Corel PHOTO-PAINT User Guide
Page 100

Changing the paper size
Changing the paper size lets you modify the dimensions of the printable area, which
contains both the image and the paper. When you resize the paper, you increase or
decrease the paper-colored border, but not the dimensions of the original image.
However, if you reduce the paper size so that its height and width are smaller than
the dimensions of the original image, the original image will be cropped.
You can change the paper size surrounding the original image.
To change the paper size
1 Click Image } Paper size.
2 Choose a unit of measure from the list box beside the Width box.
3 Type values in the following boxes:
Width
Height
If you want to lock the paper size ratio, click Lock .
Changing image dimensions, resolution, and paper size 91
 Loading...