


ENGLISH
WITH REALVOICE™ OUTPUT
AVEC SORTIE REALVOICE™
CON SALIDA REALVOICE™
MIT REALVOICE™ SPRACHAUSGABE
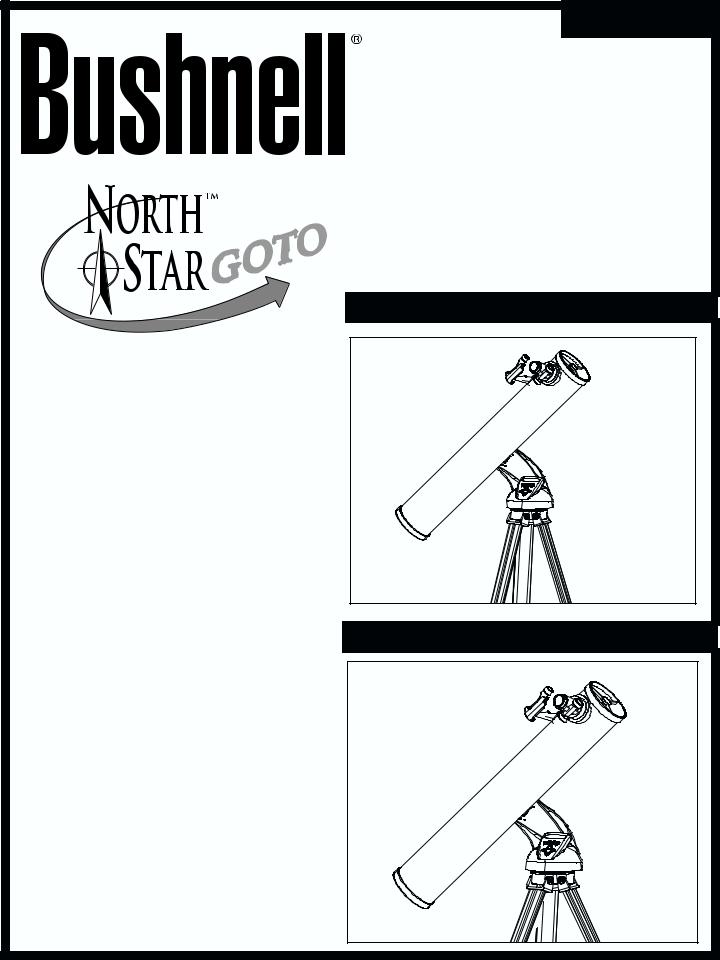
78-8831 76mm Reflector
INSTRUCTION MANUAL
MANUEL D'INSTRUCTIONS
MANUAL DE INSTRUCCIONES
BEDIENUNGSANLEITUNG
78-8846 114mm Reflector
Lit.#: 98-0195/11-02

Congratulations on the purchase of your Bushnell Northstar Goto Telescope with Real Voice Output!! This is the first telescope ever created that actually speaks to you to educate you about the night sky. Consider this feature as your personal astronomy assistant.
After reading through this manual and preparing for your observing session as outlined in these pages you can start enjoying the Real Voice Output feature by doing the following:
To activate your telescope, simply turn it on! The Real Voice Output feature is built in to the remote control handset.
Along the way the telescope will speak various helpful comments during the alignment process. Once aligned, the Real Voice Output feature will really shine anytime the enter key is depressed when an object name or number is displayed at the bottom right of the LCD viewscreen. That object description will be spoken to you as you follow along with the scrolling text description.
If at anytime you wish to disable the speaking feature, you can cancel the speech by pressing the “Back” button on the remote control keypad.
It is our sincere hope that you will enjoy this telescope for years to come!
|
|
|
|
|
|
|
Never Look Directly At The Sun |
||||
|
|||||
|
With |
Your Telescope |
|||
|
|
||||
|
Permanent |
Damage To Your Eyes |
|||
|
|||||
|
|
|
May Occur |
||
2

WHERE DO I START?
Your Bushnell telescope can bring the wonders of the universe to your eye. While this manual is intended to assist you in the set-up and basic use of this instrument, it does not cover everything you might like to know about astronomy. Although Northstar will give a respectable tour of the night sky, it is recommended you get a very simple star chart and a flashlight with a red bulb or red cellophane over the end. For objects other than stars and constellations, a basic guide to astronomy is a must. Some recommended sources appear on our website at www.bushnell.com. Also on our website will be current events in the sky for suggested viewing. Some of the standbys that you can see are:
The Moon—a wonderful view of our lunar neighbor can be enjoyed with any magnification. Try viewing at different phases of the moon. Lunar highlands, lunar maria (lowlands called "seas" for their dark coloration), craters, ridges and mountains will astound you.
Saturn—even at the lowest power you should be able to see Saturn’s rings and moons. This is one of the most satisfying objects in the sky to see simply because it looks like it does in pictures. Imagine seeing what you’ve seen in textbooks or NASA images from your backyard!
Jupiter—the largest planet in our solar system is spectacular. Most noted features are its dark stripes or bands both above and below its equator. These are the north and south equatorial belts. Also interesting are Jupiter’s four major moons. Pay close attention to their positions from night to night. They appear to be lined up on either side of Jupiter.
Mars—The Great Red Planet appears as a reddish-orange disk. Look at different times of the year and try to catch a glimpse of the white polar ice caps.
Venus—just like the moon, Venus changes phases from month to month. At times Venus appears brilliantly in the night sky, just as if you were looking at a distant crescent moon.
Nebulae—The Great Orion Nebula is a very well known night sky object. This and many others are brought to you by this telescope.
Star Clusters—View millions of stars densely packed in a cluster that resembles a ball.
Galaxies—One of the greatest and most interesting galaxies is our neighbor the Andromeda Galaxy. Enjoy this and many others.
3

PARTS DIAGRAM |
78-8830 76mm and 78-8845 114mm Reflectors |
|
|
1.
2.
3.
8. |
7. |
|
6.
4.
5.
9.
TELESCOPE PARTS DIAGRAM
1. |
Red Dot Finderscope |
6. |
Quick-Release Accessory Tray |
2. |
1.25" Format Eyepiece |
7. |
Remote Computer Controller |
3. |
Rack and Pinion Focusing Mechanism |
8. |
Main Telescope Tube |
4. |
Accessory Tray Brace |
9. |
Quick-Release Adjustable Aluminum Tripod |
5. |
Quick-Release Tripod Leg Lever |
|
|
|
|
|
|
4

QUICK ASSEMBLY DIAGRAM |
78-8830 76mm and 78-8845 114mm Reflectors |
|
|
2.
1.
|
|
|
|
|
|
|
|
|
|
|
|
|
|
|
|
|
|
|
|
|
PARTS LIST |
||
|
|
|
|
• Adjustable Aluminum Tripod Assembly |
• Red Dot Finderscope |
||
|
|
||
(Pre-assembled to Northstar Computerized Star Locator Base) |
• 20mm 1.25" Diameter Eyepiece |
||
• Quick Release Accessory Tray |
• 4mm 1.25" Diameter Eyepiece |
||
• Northstar Telescope with finger attachment nuts |
• Barlow Lens |
||
|
|
|
|
5

DETAILED ASSEMBLY
No tools are required for assembly of your telescope.
Remove all components from the carton and identify all components. It is a good idea to lay all the parts out in front of you before assembly. Since your telescope is a precision optical system the parts require careful handling—particularly the onboard computer, telescope, eyepieces, and various accessory lenses.
SET UP TRIPOD AND ACCESSORY TRAY
1.Stand Northstar Computerized Star Locator Assembly and attached tripod legs in the upright position. Spread tripod legs to a comfortable distance.
2.Fold down the accessory tray braces and place the Quick Release Accessory Tray on top of braces. (See Quick Assembly Diagram)
3.Turn accessory tray until it snaps into place.
4.Adjust tripod leg height to suit by opening tripod leg lever and extending tripod legs to desired height. Clamp Tripod Leg lever closed when complete.
ATTACH TELESCOPE TUBE
1.Locate Main Telescope Tube.
2.Remove Telescope Tube Thumb Nuts from side of Telescope Tube. (See Quick Assembly Diagram)
3.Position Main Telescope Tube Attachment Bolts through Telescope Tube Bracket at the top of the Northstar Computerized Star Locator Assembly. Make sure the telescope is pointing in the correct direction. (Logo on telescope tube should be right-side up.)
4.Reattach Telescope Tube Thumb Nuts to Main Telescope Tube Attachment Bolts once Main Telescope Tube and Northstar Computerized Star Locator Assembly are assembled together.
ATTACH FINAL TELESCOPE ACCESSORIES
1.Locate Red Dot Finderscope.
For Reflector Telescopes: Remove Finderscope attachment nuts from Main Telescope Tube. Place Finderscope Assembly over Finderscope Attachment Bolts and reattach Finderscope thumb nuts to Finderscope Mount Bolts.
NOTE: The large end of the finderscope should face the open end of telescope tube.
2.Attach Low Power Eyepiece.
For Reflector Telescope Models: Insert lowest power eyepiece in the focusing mechanism by backing out eyepiece set screw and inserting eyepiece fully.
3.Tighten all set screws to secure accessories.
4.Remove Objective Dust Cover exposing entire diameter of open end of telescope.
SELECTING AN EYEPIECE
You should always start viewing with the lowest power eyepiece, which in this case is the 20 mm lens. Note: the base power of each eyepiece is determined by the focal length of the telescope objective lens. A formula can be used to determine the power of each eyepiece: telescope OBJECTIVE lens focal length divided by EYEPIECE focal length = MAGNIFICATION (e.g. Using the 20 mm lens, a sample calculation could look like this: 750 mm / 20 = 38x or 38 power. Telescope models will vary in focal length.)
Included with this telescope is a Barlow lens. Barlow lenses are used to double or triple the power of your telescope. Place your Barlow between the focusing tube and the eyepiece. Using the example above, your 3x Barlow lens would give you a total power of 114x or 114 power. (38 x 3 = 114x or 114 power). The magnification calculation would look like this: 750 mm /20mm = 38 power. 38 power x 3=114 power.
6

DETAILED ASSEMBLY (CONTINUED)
MFOCUSING TELESCOPE
1.After selecting the desired eyepiece, aim main telescope tube at a land-based target at least 200 yards away (e.g. a telephone pole or building).
2.Fully extend Focusing Tube by turning Rack and Pinion Focusing Mechanism.
3.While looking through selected eyepiece (in this case the 20 mm), slowly retract Focusing Tube by turning Rack and Pinion Focusing Mechanism until object comes into focus.
MATTACH REMOTE COMPUTER CONTROLLER AND BATTERY
1.Locate Remote Computer Controller and coil cord.
2.Locate Battery Door on Northstar Computerized Star Locator Base.
3.Remove Battery Door and insert one 9V battery.
4.Replace Battery Door.
5.Attach Remote Computer Controller with coil cord to Northstar Computerized Star Locator Base.
MALIGNING FINDERSCOPE
Look through Main Telescope Tube and establish a well-defined target. (see Focusing Telescope section)
Remove plastic insulator from between Red Dot Finderscope battery and battery clip.
Turn Red Dot Finderscope on.
Looking through Red Dot Finderscope, turn adjustment wheels until the red dot is precisely centered on the same object already centered in Main Telescope Tube’s field of view.
Now, objects located first with the Red Dot Finderscope will be centered in the field of view of the main telescope.
Never Look Directly At The Sun
With Your Telescope
Permanent Damage To Your Eyes
May Occur
7

MENJOYING YOUR NEW TELESCOPE
1.First determine your targeted object. Any bright object in the night sky is a good starting point. One of the favorite starting points in astronomy is the moon. This is an object sure to please any budding astronomer or experienced veteran. When you have developed proficiency at this level, other objects become good targets. Saturn, Mars, Jupiter, and Venus are good second steps to take.
2.The first thing you need to do after assembling the telescope as planned is center the desired object in the finderscope’s cross hairs. Provided you did a reasonable job aligning the finderscope, a quick look through the main telescope tube at low power should reveal the same image. With the lowest power eyepiece (the one with the largest number printed on it) you should be able to focus the same image that you saw through the finderscope. Avoid the temptation to move directly to the highest power. The low power eyepiece will give you a wider field of view, and brighter image—thus making it very easy to find your target object. At this point with a focused image in both scopes, you’ve passed the first obstacle. If you don’t see an image after attempting to focus it in, you might consider aligning your finderscope again. Once you pass this step, you’ll will enjoy the time spent ensuring a good alignment. Every object you center in the finderscope will be easily found in the main telescope tube, which is important for continuing your exploration of the night sky.
3.The low power eyepieces are perfect for viewing the full moon, planets, star clusters, nebulae, and even constellations. These should build your foundation. However, for more detail, try bumping up in magnification to higher power eyepieces on some of these objects. During calm and crisp nights, the light/dark separation line on the moon (called the "Terminator") is marvelous at high power. You can see mountains, ridges and craters jump out at you due to the highlights. Similarly, you can move up to higher magnifications on the planets and nebulae. Star clusters and individual stars are best viewed through the low power no matter what.
4.The recurring astronomical theater we call the night sky is an ever-changing billboard. In other words, the same movie does not play all the time. Rather, the positions of the stars change not only hourly as they seem to rise and set, but also throughout the year. As the earth orbits the sun our perspective on the stars changes on a yearly cycle about that orbit. The reason the sky seems to move daily just as the sun and the moon "move" across our sky is that the earth is rotating about its axis. As a result you may notice that after a few minutes or a few seconds depending on what power you are viewing at, the objects in your telescope will move. At higher magnifications especially, you will notice that the moon or Jupiter will "race" right out of the field of view. To compensate, just move your telescope to "track" it in the necessary path.
8

MHELPFUL HINTS
1.Your telescope is a very sensitive instrument. For best results and fewer vibrations set your telescope up on a level location on the ground rather than your concrete driveway or your wooden deck. This will provide a more stable foundation for viewing, especially if you’ve drawn a crowd with your new telescope.
2.If possible view from a location that has relatively few lights. This will allow you to see much fainter objects. You’d be surprised how much more you’ll see from your local lake or park when compared to a backyard in the city.
3.Using your telescope out a window is NEVER recommended.
4.View objects that are high in the sky if possible. Waiting until the object rises well above the horizon will provide a brighter and crisper image. Objects on the horizon are viewed through several layers of earth’s atmosphere. Ever wonder why the moon appears orange as it sets on the horizon? It’s because you are looking through a considerable more amount of atmosphere than you would directly overhead. (Note: If objects high in the sky are distorted or wavy, you are probably viewing on a very humid night.) During nights of unstable atmosphere, viewing through a telescope can be frustrating if not impossible. Astronomers refer to crisp, clear nights as nights of "good seeing."
9

NORTHSTAR COMPUTER
INTERFACE DIAGRAM
1.On/Off Button (On Northstar Base)
6.
2.Back Button
3. |
Enter Button |
3. |
4. |
4.Scroll Up Button
2. |
5. |
5.Scroll Down Button
6.LCD Display
7. |
“GO” Button |
|
|
8. |
Motorized Movement Buttons (4) |
8. |
|
7. |
|||
9. |
Battery Door (On Northstar Base) |
||
|
BUTTON FUNCTIONS
ALL BUTTONS ARE ILLUMINATED FOR NIGHTTIME USE.
On/Off Button: The On/Off Button will turn the Northstar Computerized strobes on and off during normal use. To turn the unit off, simply
and release. (Note: The Northstar Computerized Star Locator will
Back Button: This button functions to navigate to the previous level previous level of input. If at anytime you wish to disable the speaking “Back” button on the remote control keypad.
Enter Button: This button functions to select certain menu choices. By to the selected level. When an object name or number is listed on the hear a spoken description and display a scrolling text description of the
Scroll Up Button: This button functions to scroll up through various blinking text/number option, the scroll button will display the various that you have scrolled to, just press the ENTER button.)
Scroll Down Button: This button functions to scroll down through encounter a blinking text/number option, the scroll button will display (Note: To select an option that you have scrolled to, just press the
“GO” Button: The GO button will automatically center any object button, the telescope will automatically find and follow the selected button is pushed again.
Motorized Movement Buttons: These four multi-directional buttons and move the telescope utilizing the motors manually to another desired the faster the Northstar will move until it reaches its maximum speed.
Locator on and off. This button flashes or hold the On/Off button for three seconds turn itself off after 10 minutes of inactivity.)
operating framework and/or back to the you can cancel the speech by pressing the
the ENTER button Northstar will advance the ENTER button can also be pressed to
within Northstar. Anytime you encounter a within that menu. (Note: To select an option
menus within Northstar. Anytime you choices within that menu.
.)
on the LCD display. By pushing the “GO” another object is selected and the “GO”
the user to override the tracking system
. The longer these buttons are depressed,
LCD DISPLAY
The Liquid Crystal Display (LCD) is a two-line, sixteen character display. The LCD is illuminated for use during nighttime viewing just like the buttons.
10
MMODE OVERVIEW OF PRODUCT
Explore: The Explore Mode of Northstar provides the ability to explore various astronomical objects categorized by object type. These objects would fall under one or more of the following types of objects: Deep Sky, Planets, Constellations, and Stars. Each of these subheadings would also have subcategories of objects beneath their menu structure. (See Menu Tree for full list of menu functions and options.)
Sky Tour: The Sky Tour Mode of Northstar provides the ability to take a quick tour of the best and brightest objects for any given month of the year. If the date has been input into the system, the Sky Tour Mode will automatically default to that month. Objects can be chosen by using the scroll up or down arrows and pressing ENTER. To find out more information about any given object press the ENTER button while that object is displayed to see the scrolling text message.
Telescope: The Telescope Mode of Northstar provides real-time data on where the telescope is pointing. Astronomical Coordinates for Right Ascension (RA) and Declination (DEC) as well as Altitude (ALT) and Azimuth (AZ) are displayed simultaneously. In addition, in the lower right-hand corner will be the abbreviation for the current constellation that the telescope is pointed at.
Identify: The Identify Mode of Northstar provides the ability to identify any object within your telescope field of view. Subcategories for different classes of identifiable objects are included as well as an Identify Any option.
Align Earth: The Align Earth Mode of Northstar provides the ability to easily align your telescope utilizing common information non-astronomers would readily know. By entering simple information such as time, date, city, etc. a first time telescope user can explore the immense Northstar database of astronomical objects
within minutes.
Align Star: The Align Star Mode of Northstar provides the ability to align your telescope utilizing some astronomical knowledge. By knowing where two stars are located in the sky, a novice user can circumvent the city, date, and time input and quickly start utilizing the Northstar database to locate amazing astronomical objects.
Align Object: The Align Object Mode of Northstar provides the ability to refine your telescope alignment during the middle of your observing session. This might come in very handy if the family dog has just bumped the telescope out of alignment. By using this mode you can center the telescope on any known object and select align object to quickly recalibrate the Northstar alignment allowing continued enjoyment for the duration
of the evening.
11

MMENU TREE
BUSHNELL NORTHSTAR COMPUTER MENU STRUCTURE
(For Step-By-Step Easy Use Refer to Quick Reference Guide)
WELCOME TO BUSHNELL NORTHSTAR
LEVEL TUBE
USE ALIGN MARKS
PRESS ENTER
WHEN LEVEL
SELECT MODE
ALIGN EARTH
TIME 19:00 GMT
DATE 25 DEC 2000
CITY
|
|
|
|
|
|
|
|
|
|
|
|
|
COUNTRY |
|
|
|
|
|
|
|
|
|
|
|
|
|
|
|
|
|
|
|
|||
|
|
|
|
|
|
|
|
|
|
|
|
|
|
|
CITY |
|
|
|
|
|
|
|
|
|
|
|
|
|
|
|
|
|
|
||
|
|
|
|
|
|
|
|
|
|
|
|
|
|
|
|
|
|
|
|
|
|
|
|
|
|
|
|
|
|
|
|
|
|||
|
|
|
|
|
|
|
|
|
|
|
|
|
|
|
|
|
|
POINT NORTH |
|
CENTER STAR 1 |
|
CENTER STAR 2 |
|
ALIGN COMPLETE |
|||||||||||
|
|
|
|
|
|
|
|
|
|
|
|
|
|
|
|
|
|
|
|
|
|
|
|
||||||||||||
|
|
|
|
|
|
|
|
|
|
|
|
|
|
|
|
|
|
|
|
|
|
|
|
|
|
|
|
|
|
|
|
|
|||
|
|
|
|
|
|
|
|
LATLON |
|
|
|
|
|
|
|
|
THEN PRESS ENTER |
THEN PRESS ENTER |
THEN PRESS ENTER |
|
RATING ***** |
||||||||||||||
|
|
|
|
|
|
|
|
|
|
|
|
|
|
|
|
|
|
|
|
|
|
|
|
|
|
|
|
|
|||||||
|
|
|
|
|
|
|
|
|
|
|
|
|
|
|
|
|
|
|
|
|
|
|
|
|
|
|
|
|
|
|
|||||
EXPLORE |
|
|
|
|
|
|
|
|
|
|
|
|
|
|
|
|
|
|
|
|
|
|
|||||||||||||
|
|
|
|
|
|
|
|
|
|
|
|
|
|
|
|
|
|
|
|
|
|
|
|
|
|
|
|
|
|
||||||
|
|
|
|
|
|
|
|
|
|
|
|
|
|
|
|
|
|
|
|
|
|
|
|
|
|
|
|
|
|
|
|
|
|||
|
|
|
|
|
|
|
|
|
|
|
|
|
|
ANDROMEDA . VULPECULA |
|
|
|
|
|
MERCURY |
NAMED |
NAMED |
|||||||||||||
|
CONSTELLATION |
|
|
|
|
|
|
|
|
|
|
|
|
VENUS |
VARIABLE |
MESSIER |
|||||||||||||||||||
|
|
|
|
|
|
|
|
|
|
|
|
|
|
|
|
|
|
|
|
|
|
|
|
|
|
|
|
|
MARS |
DOUBLE |
NCG |
||||
|
|
|
|
|
|
|
|
|
|
|
|
|
|
|
|
|
|
|
|
|
|
|
|
|
|
|
|
|
|||||||
|
PLANET |
|
|
|
|
|
|
|
|
|
|
|
|
|
|
|
|
|
|
|
|
|
JUPITER |
CATALOG |
IC |
||||||||||
|
|
|
|
|
|
|
|
|
|
|
|
|
|
|
|
|
|
|
|
|
|
|
|
|
|
|
|
|
SATURN |
|
|
GALAXY |
|||
|
STARS |
|
|
|
|
|
|
|
|
|
|
|
|
|
|
|
|
|
|
|
|
|
|
|
URANUS |
|
|
CLUSTER |
|||||||
|
|
|
|
|
|
|
|
|
|
|
|
|
|
|
|
|
|
|
|
|
|
|
|
|
|
||||||||||
|
|
|
|
|
|
|
|
|
|
|
|
|
|
|
|
|
|
|
|
|
|
|
|
|
|
|
|
|
NEPTUNE |
|
|
NEBULA |
|||
|
DEEP SKY |
|
|
|
|
|
|
|
|
|
|
|
|
PLUTO |
|
|
NS |
||||||||||||||||||
|
|
|
|
|
|
|
|
|
|
|
|
|
|
|
|
|
|
|
|
|
|
|
|
|
|
|
|
|
MOON |
|
|
UGC |
|||
TELESCOPE |
|
|
|
|
|
RA 22:09 DEC+052 |
|
|
|
|
|
|
|
|
|
|
|
|
|
|
|
|
|
ESO |
|||||||||||
|
|
|
|
|
|
|
|
|
|
|
|
|
|
|
|
|
|
|
|
|
|
||||||||||||||
|
|
|
|
|
|
|
|
|
|
AZ 089 ALT 080 PEG |
|
|
|
|
|
|
|
|
|
|
|
|
|||||||||||||
SKY TOUR |
|
|
|
|
|
|
|
|
|
|
|
|
|
|
|
|
JAN.DEC |
|
|
|
|
|
|
|
|
|
|
|
|
||||||
|
|
|
|
|
|
|
|
|
|
|
|
|
|
|
|
|
|
|
|
|
|
|
|
|
|
|
|
||||||||
IDENTIFY |
|
|
|
|
|
|
|
|
|
|
|
|
|
|
|
|
|
|
|
|
|
|
|
|
|
|
|
ANY |
|
|
|
|
|||
|
|
|
|
|
|
|
|
|
|
|
|
|
|
|
|
|
|
|
|
|
|
|
|
|
|
|
|
|
|
|
|||||
|
|
|
|
|
|
|
|
|
|
|
|
|
|
|
|
|
|
|
|
|
|
|
|
|
|
|
|
|
STAR |
|
|
|
|
||
ALIGN OBJECT |
|
|
|
|
|
|
|
|
|
|
|
|
|
|
|
|
|
|
|
|
|
|
|
DOUBLE |
|
|
|
|
|||||||
|
|
|
|
|
|
|
|
|
|
|
|
|
|
|
|
|
|
|
|
|
|
|
|
|
|
|
|
|
CLUSTER |
|
|
|
|
||
ALIGN STAR |
|
|
|
CENTER STAR 1 |
|
|
CENTER STAR 2 |
|
|
ALIGN COMPLETE |
|
|
|
|
|||||||||||||||||||||
|
|
|
|
|
|
THEN PRESS ENTER |
THEN PRESS ENTER |
RATING ***** |
|
|
|
|
|||||||||||||||||||||||
12

MALIGNING NORTHSTAR FOR THE FIRST TIME
(NOTE: Make certain that the telescope is set up on a level surface.)
STEP 1: POINT NORTH
Point the telescope in the direction of North.
NOTE: THE USER SHOULD JUST ATTEMPT TO GET THE TELESCOPE POINTED RELATIVELY CLOSE TO NORTH. THE ALIGNMENT WILL BE REFINED AS WE PROGRESS. HOWEVER, IF YOU CAN FIND THE BIG DIPPER AND USE THE "POINTER STARS", FOLLOW THE ARROW ON THE DIAGRAM TO THE NORTH STAR. THE NORTH STAR LIES DIRECTLY ABOVE DUE NORTH!
When you turn the telescope on, a scrolling message will appear:
BUSHNELL NORTHSTAR Vx.x
Following this message, the telescope will execute a diagnostic check and level the telescope tube in relation to the telescope mount.
Then the default menu will appear:
SELECT MODE
ALIGN EARTH ][
This mode assumes that even if the telescope user is a first time user and does not know anything about astronomy that they can be successful aligning the telescope in a few simple steps.
The ALIGN EARTH option is flashing.
Press ENTER to choose ALIGN EARTH option.
NOTE: ANY FLASHING ITEM ON THE DISPLAY IS A MENU CHOICE. OTHER CHOICES ARE AVAILABLE BY USING THE SCROLL UP OR SCROLL DOWN BUTTONS.
13

MALIGNING NORTHSTAR FOR THE FIRST TIME (Continued)
STEP 2: SET THE TIME
By using the SCROLL UP and SCROLL DOWN buttons and the ENTER button, the time can easily be set as well as the time zone. Each flashing option will need to be changed to read the appropriate number. Once the appropriate number is displayed, accept the number by pressing ENTER. Then set the next flashing option until the time and time zone
are set.
STEP 3: SET THE DATE
Again by using the SCROLL UP and SCROLL DOWN buttons and the ENTER button, the date can easily be set. Each flashing option will need to be changed to read the appropriate number or month. Once the appropriate number is displayed, accept the number by pressing ENTER. Then set the next flashing option until the day, month and year
are set.
STEP 4: SET THE LOCATION
The next screen will display:
ALIGN EARTH
CITY ][
CITY will be flashing. By pressing the ENTER button, the display will change to:
COUNTRY
U.S.A.][
The country will be flashing.
Again by using the SCROLL UP and SCROLL DOWN buttons and the ENTER button, the COUNTRY can be chosen.
When the appropriate Country is found and the ENTER button is pushed, choose the city that you are closest to by pressing ENTER when it is displayed.
NOTE: CHOOSE THE CITY CLOSEST TO YOUR VIEWING LOCATION. THIS IS NOT A CRITICAL STEP AND THE ALIGNMENT WILL BE REFINED AUTOMATICALLY AS WE PROGRESS.
After four simple criteria that any consumer should know, the telescope now knows where over 20,000 astronomical objects are in the night sky to a relative precision. With just two more steps, you will zero in on pinpoint accuracy.
Now the telescope will lead you through a simple two star alignment process. YOU DO NOT NEED TO KNOW WHERE ANY STARS ARE. You just simply follow the directions.
A scrolling message indicates to CENTER STAR 1 THEN PRESS ENTER
Then the display will read:
CENTER STAR 1 {120 ]52 MIZAR
Push the “GO” button and the telescope will automatically move to the general vicinity of the first guide star--in this case MIZAR
The guide stars will be the brightest stars found in that area of the sky. Northstar will automatically “zero out” the guide star and the display will read:
CENTER STAR 1 0◊0 0◊0 MIZAR
Note as you move from greater than 10 degrees away from an object to under ten degrees, the display moves into tenths of degrees with the arrows acting as decimal points (Example 8]5=8.5 degrees below the object).
After getting the star zeroed in, you need to do as the screen told you—CENTER STAR 1. In other words, the star might appear in the lower left corner of your telescope’s eyepiece.
By looking through the eyepiece, center the star in the field of view by using the Motorized Movement Buttons or move the telescope by hand and press ENTER.
14

MALIGNING NORTHSTAR FOR THE FIRST TIME (Continued)
The distance the object is from the center is related to how far outside of a city you might be located or how accurately you aligned with north.
Repeat this process for STAR 2 and press ENTER.
After this step is completed, you will see a display that reads:
ALIGN COMPLETE
RATING *****
(Note: The more stars that appear on the second line of the display the better, up to 5)
After the two star alignment is complete, your Northstar now knows with pinpoint accuracy where all 20,000+ objects are!!
MUSING NORTHSTAR FOR THE FIRST TIME
After EARTH ALIGN, the display will then read:
SELECT MODE
EXPLORE ][
Select EXPLORE by pressing ENTER. SCROLL UP and DOWN to see what flashing menu choices you have. Choose PLANET. These are the most interesting. Even if you are a first time telescope user, PLANET objects can be very exciting.
Press ENTER when the display reads:
EXPLORE
PLANET
This will take you into a list of named PLANET objects. By using the SCROLL UP or SCROLL DOWN buttons, you can explore several items in the object list.
PLANET
JUPITER ][
Press ENTER to choose the PLANET you wish to view. The display will then be:
PLANET
{120 ]52 JUPITER
NOTE: IF AN OBJECT IS BELOW THE HORIZON, THE DISPLAY WILL PERIODICALLY DISPLAY THE WORD "HORIZON".
SCROLL UP or SCROLL DOWN to see other PLANETS in the list. Notice the display shows you directions to each object. But what if you are a first time user wanting to find out more about the object? Wouldn’t it be nice to know what the object is before moving the telescope?
PRESS ENTER when:
PLANET
{120 ]52 JUPITER
any other PLANET item is displayed. You will see a scrolling message telling you the coordinates for the object, how bright it is, how big it is, what its proper name is, what constellation it is in, and a brief description of what the object is. For JUPITER it reads:
JUPITER fifth planet from sun. Largest planet in solar system. 16 moons. Orbit is 11.86 years.
Diameter 143,000 km. Named for roman king of gods.
15

MUSING NORTHSTAR FOR THE FIRST TIME (Continued)
Now imagine that you are a parent trying to impress your children (or vice versa). Ten minutes into your first observing session you are already learning astronomical objects.
This is a great educational tool !!!!
To find the object, just press the “GO” button and that object will be right in the telescope’s eyepiece!
By pressing the BACK button, you move back to the previous level each time the button is pressed. Press the button three times and you are back at the main level menu. The display will read:
SELECT MODE
EXPLORE ][
SCROLL UP or SCROLL DOWN to select
SELECT MODE
SKY TOUR ][.
Press ENTER.
This mode will take you through the best and brightest objects for each month. If you have done the ALIGN EARTH alignment and entered the date, it will automatically take you to the current month. Don’t know what some of these obscure objects and abbreviations mean? Just press the ENTER key for more information.
Press the BACK button until you get back to the main menu:
SELECT MODE
SKY TOUR ][.
SCROLL UP or SCROLL DOWN until the display reads:
SELECT MODE
IDENTIFY ][
PRESS ENTER
This mode will default to the level
IDENTIFY ANY
By selecting this option with the ENTER key, it will IDENTIFY the object that you are currently viewing OR the closest object to where your telescope is currently pointed. You also have the options to choose other types of IDENTIFY menus. These will IDENTIFY the closest CLUSTERS, NEBULAS, etc. to your current
telescope position.
To select the final mode press ENTER at the display:
SELECT MODE
TELESCOPE ][
The display reads something like:
RA18:53 DEC+38.7
AZ280 ALT+62 LYR
The TELESCOPE mode gives you dynamic real-time information on your telescope’s current position in terms of astronomical coordinates. Play around with this mode by moving the telescope around. Notice the three letter abbreviation in the lower right portion of the display. This dynamically displays the current CONSTELLATION that the telescope is pointing at. These names are abbreviated in this mode. Definitions for the abbreviations will be in the catalog index.
16

WARRANTY / REPAIR
TELESCOPE LIFETIME LIMITED WARRANTY*
Your Bushnell® telescope is warranted to be free of defects in materials and workmanship for the lifetime of the original owner. The Lifetime Limited Warranty is an expression of our confidence in the materials and mechanical workmanship of our products and is your assurance of a lifetime of dependable service.
If your telescope contains electrical components, these components are warranted to be free of defects in materials and workmanship for two years after the date of purchase.
In the event of a defect under this warranty, we will, at our option, repair or replace the product, provided that you return the product postage prepaid. This warranty does not cover damages caused by misuse, improper handling, installation, or maintenance provided by someone other than a Bushnell Authorized Service Department.
Any return made under this warranty must be accompanied by the items listed below:
1)A check/money order in the amount of $15.00 to cover the cost of postage and handling
2)Name and address for product return
3)An explanation of the defect
4)Proof of Date Purchased
5)Product should be well packed in a sturdy outside shipping carton, to prevent damage in transit, with return postage prepaid to the address listed below:
IN U.S.A. SEND TO: |
IN CANADA SEND TO: |
Bushnell Performance Optics |
Bushnell Performance Optics |
Attn.: Repairs |
Attn.: Repairs |
8500 Marshall Drive |
25A East Pearce Street, Unit 1 |
Lenexa, Kansas 66214 |
Richmond Hill, Ontario L4B 2M9 |
For products purchased outside the United States or Canada please contact your local dealer for applicable warranty information. In Europe you may also contact Bushnell at: 33 141 44 94 80
Bushnell Performance Optics Service Centre Columbusstraat 25
3165 AC Rotterdam The Netherlands
This warranty gives you specific legal rights.
You may have other rights which vary from country to country.
©2002 Bushnell Corporation
17
18
FRENCH
AVEC SORTIE REALVOICE™
78-8831 76mm Reflectors
MANUEL
D'INSTRUCTIONS
78-8846 114mm Reflectors
19

Merci d'avoir acheté le télescope Northstar Goto avec sortie Real Voice de Bushnell ! C'est le premier télescope jamais créé qui vous parle et vous informe sur le ciel nocturne. Cette fonction peut être considérée comme votre assistant personnel en astronomie.
Après avoir lu ce manuel et vous être préparé à votre séance d'observation comme il est décrit dans ces pages, vous pouvez commencer à profiter de la fonction de sortie Real Voice en procédant comme suit :
Pour activer votre télescope, il suffit de le mettre en marche ! La fonction de sortie Real Voice est intégrée à la télécommande manuelle.
Au cours du processus d'alignement, la voix du télescope fournit divers commentaires utiles. Une fois le télescope aligné, la fonction de sortie Real Voice montre tous ses talents chaque fois que vous appuyez sur la touche d'entrée, lorsqu'un nombre ou le nom d'un objet apparaît à la partie inférieure droite de l'écran de visualisation à cristaux liquides.
La voix vous décrit l'objet à mesure que vous suivez le texte déroulant sur l'écran.
Si, à un moment quel qu'il soit, vous voulez supprimer la voix, vous pouvez le faire en appuyant sur le bouton "Back" (arrière) du clavier de la télécommande.
Nous espérons sincèrement que ce télescope vous divertira pendant les années à venir !
Ne regardez jamais directement le soleildans le télescope.Risque de lésions oculaires permanentes
20
MANUEL D'INSTRUCTIONS DU NORTHSTAR GOTO DE BUSHNELL
Votre télescope de Bushnell peut révéler à vos yeux les merveilles de l'univers. Bien que ce manuel soit conçu pour vous aider à installer et à utiliser cet instrument simplement, il ne couvre pas tout ce que vous aimeriez savoir sur l'astronomie. Même si Northstar donne une bonne vue d'ensemble du ciel nocturne, il est recommandé de se procurer une carte très simple des étoiles et une lampe de poche avec une ampoule rouge ou recouverte de cellophane rouge à l'extrémité. Pour les objets autres que les étoiles et constellations, il est nécessaire d'avoir un guide de base d'astronomie. Vous trouverez les sources recommandées sur notre site Internet à : www.bushnell.com. Vous y trouverez également les événements du ciel actuels et les suggestions d'observation. Mais, parmi les éléments principaux que vous pouvez voir, il y a :
La Lune—Une vue magnifique de notre voisine s'obtient à n'importe quel grossissement. Essayez d'observer ses différentes phases. Les montagnes lunaires, les mers lunaires (étendues basses ainsi appelées à cause de leur couleur sombre), les cratères, les crêtes vous étonneront.
Saturne—Même au grossissement le plus faible, vous devriez pouvoir voir ses anneaux et ses lunes. C'est l'un des objets les plus intéressants du ciel à observer car il ressemble vraiment à sa représentation sur les images. Imaginez que vous pouvez voir depuis votre jardin ce que vous avez vu dans des livres ou sur des images de la NASA !
Jupiter—La planète la plus grosse de notre système solaire est spectaculaire. Ses traits caractéristiques sont ses rayures ou bandes sombres au-dessus et au-dessous de son équateur. Ce sont les ceintures équatoriales du nord et du sud. Les quatre lunes principales de Jupiter sont aussi intéressantes. Remarquez leurs différentes positions une nuit après l'autre. Elles semblent alignées de chaque côté de Jupiter.
Mars—La grande planète rouge apparaît comme un disque rouge orangé. Observez-la à différents moments de l'année pour essayer d'apercevoir les chapeaux de glace polaire blancs.
Vénus—Tout comme la Lune, Vénus change de phases d'un mois à l'autre. Par moments, elle est très brillante dans le ciel nocturne, comme si l'on regardait une lune en croissant distante.
Nébuleuses—La grande nébuleuse d'Orion est un objet très connu du ciel nocturne. Vous pourrez voir celle-ci et bien d'autres grâce à ce télescope.
Amas d'étoiles—Regardez des millions d'étoiles groupées de manière dense en un amas qui ressemble à une boule.
Galaxies—L'une des galaxies les plus grandes et les plus intéressantes est notre voisine la galaxie d'Andromède. Vous l'aimerez ainsi que bien d'autres.
21

SCHÉMA ET LÉGENDES DU TÉLESCOPE |
78-8830 76mm and 78-8845 114mm Reflectors |
|
|
1.
2.
3.
8. |
7. |
|
6.
4.
5.
9.
SCHÉMA ET LÉGENDES DU TÉLESCOPE
1. |
Chercheur à point rouge |
6. |
Plateau d'accessoire à ouverture rapide |
2. |
Oculaire de 20 mm, diamètre 31,75 mm (1,25 po) |
7. |
Contrôleur d'ordinateur à distance |
3. |
Mécanisme de mise au point à crémaillère |
8. |
Tube de télescope principal |
4. |
Renfort de plateau d'accessoire |
9. |
Trépied en aluminium réglable, à ouverture rapide |
5. |
Levier de trépied à ouverture rapide |
|
|
|
|
|
|
22

SCHÉMA D'ASSEMBLAGE RAPIDE |
78-8830 76mm and 78-8845 114mm Reflectors |
|
|
2.
1.
LISTE DES PIÈCES
• Ensemble de trépied en aluminium réglable
(Pré-assemblé à la base du dispositif de repérage d'étoiles informatisé Northstar)
•Plateau d'accessoire à ouverture rapide
•Northstar Telescope with finger attachment nuts
•Chercheur à point rouge
•Oculaire de 20 mm, diamètre 31,75 mm (1,25 po)
•Oculaire de 4 mm, diamètre 31,75 mm (1,25 po)
•Oculaire Barlow
23

ASSEMBLAGE DÉTAILLÉ
Aucun outil n'est nécessaire pour l'assemblage du télescope.
Sortez toutes les pièces du carton et identifiez-les. Avant de faire l'assemblage, il est conseillé de poser toutes les pièces devant soi. Le télescope étant un système optique de précision, veuillez manipuler les pièces avec précaution : en particulier l'ordinateur intégré, le télescope, les oculaires et les diverses lentilles accessoires.
MISE EN PLACE DU TRÉPIED ET DU PLATEAU D'ACCESSOIRE
1.Mettez debout l'ensemble du dispositif de repérage d'étoiles informatisé Northstar et les pieds de trépied attachés. Écartez les pieds de trépied à une distance confortable.
2.Abaissez les renforts du plateau d'accessoire et placez le plateau d'accessoire à ouverture rapide au-dessus des renforts. (Reportez-vous au schéma d'assemblage rapide).
3.Tournez le plateau d'accessoire jusqu'à ce qu'il s'enclenche avec un déclic.
4.Réglez la hauteur du trépied en actionnant le levier des pieds et en écartant les pieds pour obtenir la hauteur souhaitée. Resserrez le levier en position fermée une fois le réglage terminé.
FIXATION DU TUBE DU TÉLESCOPE
1.Trouvez le tube principal du télescope.
2.Retirez les écrous à oreilles du côté du tube du télescope. (Reportez-vous au schéma d'assemblage rapide).
3.Faites passer les boulons de fixation du tube principal du télescope à travers le support du tube du télescope, en haut de l'ensemble du dispositif de repérage d'étoiles informatisé Northstar. Vérifiez que le télescope est dirigé dans la bonne direction. (Le logo situé sur le tube du télescope doit être droit en haut).
4.Une fois que le tube principal du télescope et l'ensemble du dispositif de repérage d'étoiles informatisé Northstar sont assemblés l'un à l'autre, fixez les écrous à oreilles aux boulons de fixation du tube principal du télescope.
FIXATION DU RESTE DES ACCESSOIRES DU TÉLESCOPE
1.Trouvez le chercheur à point rouge.
Pour les télescopes à réflecteur: Retirez les écrous de fixation du chercheur du tube principal du télescope. Placez le chercheur par-dessus les boulons de fixation et reposez les écrous à oreilles du chercheur sur les boulons de fixation.
Remarque: La grande extrémité du chercheur doit être en face de l'extrémité ouverte du tube du télescope.
2.Fixez l'oculaire à faible grossissement.
Pour les modèles de télescopes à réflecteur: Insérez l'oculaire à grossissement le plus faible dans le mécanisme de mise au point en dévissant la vis de serrage d'oculaire et en poussant l'oculaire à fond.
3.Vissez toutes les vis de serrage pour fixer les accessoires.
4.Retirez le cache-poussière de l'objectif pour exposer toute l'extrémité ouverte du télescope.
24

ASSEMBLAGE DÉTAILLÉ
CHOIX D'UN OCULAIRE
Il est recommandé de toujours commencer l'observation avec l'oculaire au grossissement le plus faible, dans ce cas, la lentille de 20 mm. Remarque : le grossissement de base de chaque oculaire est déterminé par la longueur focale de l'objectif du télescope. Il existe une formule servant à déterminer le grossissement de chaque oculaire : Longueur focale de l'OBJECTIF du télescope divisée par la longueur focale de l'OCULAIRE = GROSSISSEMENT (ex. : en utilisant une lentille de 20 mm, le calcul serait : 750 mm / 20 = 38 x ou grossissement de 38 fois. La longueur focale varie suivant les modèles de télescopes).
Un oculaire Barlow est inclus avec ce télescope. Les oculaires Barlow servent à doubler ou à tripler le grossissement du télescope. Placez l'oculaire Barlow entre le tube de mise au point et l'oculaire. Dans l'exemple ci-dessus, l'oculaire Barlow de 3x donnerait un grossissement total de 114 x ou 114 fois. (38 x 3 = 114 x ou 114 fois). Le calcul du grossissement serait : 750 mm / 20 mm = 38 fois. 38 fois x 3 = 114 fois.
MISE AU POINT DU TÉLESCOPE
1.Après avoir mis en place l'oculaire choisi, dirigez le tube principal du télescope sur une cible terrestre située à une distance d'au moins 200 mètres (poteau téléphonique ou bâtiment, par exemple).
2.Tournez le mécanisme de mise au point à crémaillère pour allonger entièrement le tube de mise au point.
3.Tout en regardant dans l'oculaire choisi (celui de 20 mm dans ce cas), rétractez lentement le tube de mise au point en tournant le mécanisme de mise au point à crémaillère jusqu'à ce que l'objet soit net.
FIXEZ LE CONTRÔLEUR D'ORDINATEUR À DISTANCE ET LA PILE.
1.Trouvez le contrôleur d'ordinateur à distance et le cordon spiralé.
2.Trouvez le couvercle de compartiment de pile sur la base du dispositif de repérage d'étoiles informatisé Northstar.
3.Enlevez le couvercle du compartiment de pile et placez-y une pile de 9 V.
4.Remettez le couvercle en place sur le compartiment.
5.Fixez le contrôleur d'ordinateur à distance avec le cordon spiralé sur la base du dispositif de repérage d'étoiles informatisé Northstar.
ALIGNEMENT DU CHERCHEUR
Regardez dans le tube principal du télescope et établissez une cible bien définie. (Reportez-vous à la section de mise au point du télescope).
Retirez l'isolateur en plastique se trouvant entre la pile du chercheur à point rouge et le clip de pile.
Activez le chercheur à point rouge.
En regardant dans le chercheur à point rouge, tournez les molettes de réglage jusqu'à ce que le point rouge soit centré précisément sur l'objet déjà centré dans le champ du tube principal du télescope..
Désormais, les objets repérés d'abord à l'aide du chercheur à point rouge seront centrés dans le champ du tube principal du télescope.
Ne regardez jamais directement le soleil |
|
dans le télescope. |
|
Risque de lésions oculaires permanentes |
25 |

POUR PROFITER DE VOTRE NOUVEAU TÉLESCOPE
1.Déterminez d'abord l'objet à observer. N'importe quel objet brillant du ciel nocturne est un bon point de départ. L'un des points de départ préférés en astronomie est la Lune. C'est un objet intéressant pour l'astronome débutant aussi bien que pour les astronomes expérimentés. Lorsque vous vous êtes exercés à ce niveau, d'autres objets deviennent de bonnes cibles. Saturne, Mars, Jupiter et Vénus sont intéressantes en seconde étape.
2.La première chose que vous devez faire après l'assemblage du télescope comme prévu est de centrer l'objet choisi dans la croisée de fils du chercheur. À condition que vous ayez suffisamment bien aligné le chercheur, un coup d'œil rapide dans le tube principal du télescope à faible grossissement doit révéler la même image. Avec l'oculaire de plus faible grossissement (celui qui a le nombre le plus grand inscrit dessus), vous devriez pouvoir mettre au point la même image que celle que vous avez vue dans le chercheur. Évitez la tentation de passer directement au grossissement le plus fort. L'oculaire de faible grossissement donne une plus grande largeur de champ et une image plus brillante, ce qui facilite le repérage de l'objet cible. À ce moment, avec une image mise au point dans les deux lunettes, vous avez franchi le premier obstacle. Si vous ne voyez pas d'image après avoir essayé de la mettre au point, pensez à aligner de nouveau le chercheur. Une fois cette opération effectuée, vous pourrez apprécier le temps passé pour obtenir un alignement correct. Chaque objet que vous centrerez dans le chercheur apparaîtra facilement dans le tube principal du télescope, ce qui est important pour continuer l'exploration du ciel nocturne.
3.Les oculaires de faible grossissement sont parfaits pour observer la pleine lune, les planètes, les amas d'étoiles, les nébuleuses et même les constellations. Ces objets constituent votre base. Toutefois, pour voir plus de détails, essayez d'utiliser des oculaires à plus fort grossissement sur certains de ces objets. Durant les nuits calmes et vives, la ligne de séparation des parties éclairée et obscure de la Lune (appelée « Terminateur ») est merveilleuse à fort grossissement. Les montagnes, crêtes et cratères paraissent avec un fort relief à cause de la mise en lumière. De manière similaire, vous pouvez utiliser de plus forts grossissements sur les planètes et nébuleuses. Quant aux amas d'étoiles et aux étoiles individuelles, la meilleure observation s'effectue toujours à faible grossissement.
4.Le théâtre astronomique renouvelé que nous appelons le ciel nocturne est un écran géant toujours changeant. Autrement dit, ce n'est pas toujours le même film qui repasse. Bien au contraire, les positions des étoiles changent non seulement d'heure en heure alors qu'elles semblent se lever et se coucher, mais aussi tout au long de l'année. À mesure que la Terre tourne autour du Soleil, notre vue des étoiles change sur un cycle annuel, selon cette orbite. La raison pour laquelle le ciel semble se déplacer chaque jour, tout comme le Soleil et la Lune « se déplacent » dans le ciel, c'est que la Terre tourne autour de son axe. C'est ainsi que vous pouvez remarquer qu'au bout de quelques minutes ou quelques secondes, suivant le grossissement utilisé, les objets se déplacent dans le télescope. Aux forts grossissements surtout, vous remarquerez que la Lune ou Jupiter « courent » et sortent du champ rapidement. Pour compenser, déplacez simplement le télescope pour qu'il suive sa trajectoire.
26

CONSEILS UTILES
1.Le télescope est un instrument très sensible. Pour obtenir les meilleurs résultats et le moins de vibrations, installez le télescope sur un endroit plat, sur le sol plutôt que sur une surface en béton ou une plate-forme en bois. Cela fournira une base plus stable pour l'observation, surtout si votre nouveau télescope a attiré une foule.
2.Si possible, observez à partir d'un endroit comportant relativement peu de lumière. Vous pourrez ainsi voir des objets d'une luminosité plus faible. Vous serez surpris(e) de constater que vous pouvez voir bien plus d'objets célestes à partir d'un lac ou d'un parc local qu'à partir d'un jardin situé en ville.
3.Il n'est JAMAIS recommandé d'observer avec le télescope à partir d'une fenêtre.
4.Autant que possible, observez les objets qui sont hauts dans le ciel. Attendez que l'objet monte bien au-dessus de l'horizon pour obtenir une image plus brillante et plus nette. Les objets situés à l'horizon sont aperçus à travers plusieurs couches de l'atmosphère terrestre. Vous êtes-vous jamais demandé pourquoi la Lune paraît orange lorsqu'elle se couche à l'horizon ? C'est parce que vous la regardez à travers une quantité d'atmosphère bien plus grande qu'il n'y en a directement au-dessus. (Remarque : Si les objets hauts dans le ciel paraissent déformés ou ondulés, la nuit est probablement très humide). Durant les nuits où l'atmosphère est instable, l'observation avec un télescope peut être difficile sinon impossible. Les astronomes parlent des nuits vives et claires comme des nuits de « bonne observation ».
27
 Loading...