


 Loading...
Dishwasher
SHE88PZ65N, SHX88PZ65N, SHV88PZ63N, SHEM78ZH5N
en-us Operating instructions
2
en-us
Table of contents
(Safety Definitions. . . . . . . . . . .5
(IMPORTANT SAFETY INSTRUCTIONS . . . . . . . . . . . .6
ƒCauses of Damage. . . . . . . . .11
*Getting Started . . . . . . . . . . . .12 oHome Connect . . . . . . . . . . . .17
+Water softening system / special salt . . . . . . . . . . . . . . .20
,Rinse Aid. . . . . . . . . . . . . . . . .23
-Loading the Dishwasher . . . .25
.Detergent . . . . . . . . . . . . . . . .37
/Dishwasher Cycles . . . . . . . .39
0Dishwasher Cycle Options . .40
1Operating the Dishwasher. . .43
2Care and Maintenance . . . . . .48
3Troubleshooting. . . . . . . . . . .52
4Customer Service. . . . . . . . . .59
‡Statement of Limited Product Warranty . . . . . . . . . . . . . . . . .60
3
en-us
'HDU 9DOXHG &XVWRPHU
7KDQN \RX IRU VHOHFWLQJ D %RVFK GLVKZDVKHU <RX KDYH MRLQHG WKH PDQ\ FRQVXPHUV ZKR GHPDQG TXLHW DQG VXSHULRU SHUIRUPDQFH IURP WKHLU GLVKZDVKHUV
7KLV PDQXDO ZDV ZULWWHQ ZLWK \RXU VDIHW\ DQG FRQYHQLHQFH LQ PLQG DQG WKH LQIRUPDWLRQ FRQWDLQHG KHUHLQ LV YHU\ LPSRUWDQW :H KLJKO\ UHFRPPHQG WKDW \RX UHDG WKLV PDQXDO EHIRUH XVLQJ \RXU GLVKZDVKHU IRU WKH ILUVW WLPH
7R OHDUQ PRUH DERXW \RXU GLVKZDVKHU DQG DYDLODEOH DFFHVVRULHV DV ZHOO DV PDQ\ RWKHU WRS TXDOLW\ %RVFK DSSOLDQFHV YLVLW RXU ZHE VLWH DW
ZZZ ERVFK KRPH FRP XV 86$
RU
ZZZ ERVFK KRPH FD &DQDGD
:KLOH WKHUH GRQ·W IRUJHW WR UHJLVWHU \RXU QHZ GLVKZDVKHU E\ FOLFNLQJ RQ WKH ´6XSSRUWµ WDE RU ILOOLQJ RXW WKH SURGXFW UHJLVWUDWLRQ FDUG HQFORVHG ZLWK \RXU QHZ XQLW
,I \RX KDYH DQ\ TXHVWLRQV RU FRPPHQWV SOHDVH FRQWDFW XV E\ SKRQH DW
RU ZULWH XV DW
%6+ +RPH $SSOLDQFHV &RUSRUDWLRQ0DLQ 6WUHHW 6XLWH ,UYLQH &$
4
Safety Definitions en-us
(Safety Definitions
9 WARNING
This indicates that death or serious injuries may occur as a result of non-observance of this warning.
9 CAUTION
This indicates that minor or moderate injuries may occur as a result of non-observance of this warning.
NOTICE
This indicates that damage to the appliance or property may occur as a result of non-compliance with this advisory.
Note: This alerts you to important information and/or tips.
5

9 IMPORTANT SAFETY INSTRUCTIONS
READ AND SAVE THESE INSTRUCTIONS
This dishwasher is provided with Installation Instructions and this Use and Care Manual. Read and understand all instructions before using the dishwasher.
This dishwasher is intended for use up to a maximum altitude of 13,000 ft (4,000 meters) above sea level.
To reduce the risk of fire, electrical shock, or serious injury, observe the following:
9 WARNING
RISK OF INJURY OR DEATH! Misuse of the dishwasher can result in serious injury or death. Do not use the dishwasher in any way not covered in this manual or for any purpose other than those explained in the following pages.
9 WARNING
RISK OF INJURY!
Severe injury and/or product damage could result from the use of unauthorized service technicians or non-original replacement parts. All repairs must be performed by an authorized service technician using only original equipment factory replacement parts.
9 WARNING
RISK OF ELECTRICAL SHOCK OR FIRE!
Electrical shock or fire could result if the electrical supply for the dishwasher covered in this manual is incorrectly installed or if the dishwasher has been improperly grounded. Do not use the dishwasher covered in this manual unless you are certain the electrical supply has been correctly installed and the dishwasher has been properly grounded.
6

9 IMPORTANT SAFETY INSTRUCTIONS
READ AND SAVE THESE INSTRUCTIONS
9 WARNING
RISK OF EXPLOSION!
■Under certain conditions, hydrogen gas may be produced in a hot water system that has not been used for two weeks or more. Hydrogen gas is explosive. Before using a dishwasher that is connected to a hot water system that has been unused for two weeks or longer, turn on all hot water faucets and let the water flow from each for several minutes. This will release any accumulated hydrogen gas. As the gas is explosive, do not smoke or use an open flame during this time.
■When cleaning your dishwasher with any cleaning agent, remove all cookware, utensils or any foreign material from inside. Some cleaning agents are highly acidic and/or caustic alkaline, which can cause hydrogen gas to form if aluminum material is also inside the dishwasher tub. Hydrogen gas is explosive.
Refer to the Care and Maintenance section of the dishwasher Use and Care manual for instructions on how to properly clean your dishwasher.
9 WARNING
HEALTH HAZARD!
Never use harsh chemicals to clean your dishwasher. Some bleach-based products can damage your dishwasher and may present health hazards!
GROUNDING INSTRUCTIONS
This appliance must be grounded to a metal, permanent wiring system or an equipment grounding conductor must be run with the circuit conductors and connected to the equipment grounding terminal or lead on the dishwasher. See the Installation Instructions included with this dishwasher for more information on electrical requirements.
9 WARNING
RISK OF ELECTRIC SHOCK! This appliance must be grounded. In the event of a malfunction or breakdown, grounding will reduce the risk of electric shock by providing a path of least resistance for electric current. This appliance is equipped with a cord having an equipment-grounding conductor.
Improper connection of the equipment-grounding conductor can result in risk of electric shock. Check with a qualified electrician if you are in doubt whether the appliance is properly grounded.
7

9 IMPORTANT SAFETY INSTRUCTIONS
READ AND SAVE THESE INSTRUCTIONS
Safe Operation
Use this dishwasher only for its intended function, which is the washing of household dishware and kitchenware rated as dishwasher safe.
Use only detergents or rinsing agents recommended for use in a dishwasher, and keep them out of the reach of children.
9 CAUTION
When loading items to be washed:
■Locate sharp items so they are not likely to damage the door seal.
■Load knives and other sharp utensils with their HANDLES UP to reduce the risk of cut-type injuries.
■Do not wash plastic items unless they are marked “dishwasher safe” or the equivalent. For plastic items not so marked, check the manufacturer’s recommendations.
■Do not operate your dishwasher unless all enclosure panels are in place.
■Do not tamper with or override controls and interlocks.
Do not abuse, sit or stand on the door or dish racks of the dishwasher.
9 WARNING
RISK OF INJURY!
■To avoid risk of injury, always use caution when opening the door during or following a wash cycle as hot water or steam may escape. Do not fully open the door until water noises have stopped and steam has subsided.
9 WARNING
CHILD SAFETY!
■To reduce risk of injury, do not allow children to play in or on the dishwasher
■When children become old enough to operate the appliance, it is the responsibility of the parents/legal guardians to ensure the children are instructed in safe practices by qualified persons
NSF/ANSI 184 Certified residential dishwashers are not intended for licensed food establishments.
8
9 IMPORTANT SAFETY INSTRUCTIONS
READ AND SAVE THESE INSTRUCTIONS
Proper Care and Maintenance
Remove the dishwasher door to the washing compartment when removing an old dishwasher for service or discarding.
To avoid floor damage and possible mold growth, do not allow wet areas to remain around or under the dishwasher.
Note: To avoid dishwasher damage, do not allow water to remain in your dishwasher systems through extended periods of freezing temperatures. Freezing temperatures can damage the water fill valve and potentially other components of your dishwasher.
NOTICE
It is highly recommended for the end user to become familiar with the procedure to shut off the incoming water supply and the procedure to shut off the incoming power supply. See the Installation Instructions or contact your installer for more information.
9

9 IMPORTANT SAFETY INSTRUCTIONS
READ AND SAVE THESE INSTRUCTIONS
Proposition 65 Warning:
This product may contain a chemical known to the State of California, which can cause cancer or reproductive harm. Therefore, the packaging of your product may bear the following label as required by California:
67$7( 2) &$/,)251,$ 352326,7,21 :$51,1*
:$51,1*
&DQFHU DQG 5HSURGXFWLYH +DUP ZZZ 3 :DUQLQJV FD JRY
10
Causes of Damage en-us
ƒCauses of Damage
NOTICES
■Never use steam cleaning products to clean your dishwasher. The manufacturer will not be liable for the possible damages or consequences.
■Bleach-based wipes can cause stainless-steel doors and tubs to rust.
■Using harsh chemicals
(e.g. bleach), abrasive cleaners, scouring pads (metal or plastic), or abrasive cloths/paper towels can damage your dishwasher’s exterior door panel, fascia panel and buttons.
■To avoid dishwasher damage, do not load the dishwasher with paper products, plastic bags, packing materials or anything other than normal, dishwasher safe dishware and kitchenware.
11

en-us Getting Started
*Getting Started
Appliance overview
|
|
|
|
|
|
|
$ZDMFT |
|
|
0QUJPOT |
|
0O 0GG |
|
*OGP |
%FMBZ |
|
4UBSU |
|
|
|
|
|
|
|
|
|
|
|
|
|
|
|
|
|
|
|
|
|
|
|
|
|
|
|
|
|
|
|
|
|
|
|
|
|
|
|
|
|
|
|
|
|
|
|
|
|
|
|
|
|
|
|
|
|
|
|
|
|
|
|
|
|
|
|
|
|
|
|
6HWXS VHF |
|
|
|
|
|
|
|
5HVHW VHF |
||||
|
|
|
|
|
|
|
|
|
|
|
|
|
|
|
|
|
|
|
|
|
|
|
|
|
|
|
|
12
The numbers stated below refer to the overview images on the previous page of this manual.
Operating panel
( On/Off button 0 Wash cycles** 8 Info button ( @ Digital display
H Rinse aid refill indicator P Salt refill indicator
X Selection buttons ` Delay start / < button
h Remote start / > buttton )" Wash cycle options** )* START button
)2 Door handle* ): Front display*
*optional feature which may or may not be included with your dishwasher.
**the wash cycles and options will vary by model
Dishwasher interior components
1" Interior light * 1* Third rack 12 Upper rack
1: Upper spray arm 1B Detergent tab tray
1R Zeolite outlet cover (zeolite container)
1Z Lower spray arm
1b Dispenser for special salt
1j Filters
9" Silverware basket * 9* Lower rack
92 Rinse aid dispenser 9: Detergent dispenser
9B Lock for detergent dispenser
9J Rating plate
* optional feature which may or may not be included with your dishwasher.
Getting Started en-us
Display indicators
‹:‹‹ Cycle time remaining
%Refill rinse aid indicator
Lights up when rinse aid is low
$ Refill salt indicator
Lights up when salt is low
Info button
The Info button 8 can be used to display additional wash cycle information.
1.Press the Info button 8.
2.Press the wash cycle button. Information on the selected wash cycle is indicated on the display window at the top @.
3.To leave, press Info button 8.
13
en-us Getting Started
Time setting
When the appliance is switched on for the first time, the time starts at 12:00 o’clock.
Set the time as follows:
1.Open the door.
2.Switch on On/Off switch (.
3.Press Info button 8 for
3 seconds until the following text is indicated on the display window at the top @:
Scroll with < > Set with - +
Leave with Setup 3 sec.
4.Keep pressing button > ` until the time setting is indicated on the display window at the top @.
5.Make the setting with setting buttons + - X. If the selection buttons + - X are held down, the set values are changed in 10-minute increments.
6.Press and hold the Info button 8 for 3 seconds.
The selected setting has now been stored.
Note: If the appliance was disconnected from the power supply for a prolonged period, the time starts at 12:00 o’clock. Set the time.
Switching on the appliance for the first time
When the dishwasher is switched on for the first time, you are taken directly to the settings for switching on the appliance for the first time.
The following text is indicated on the display window at the top @:
Scroll with < > Set with + -
Leave with Setup 3 sec.
The required settings for switching on the appliance for the first time are listed in the table below.
Change the setting as follows:
1.Keep pressing button > ` until the required setting is displayed.
2.Make the selection with setting buttons + - X.
3.Press and hold the Info button 8 for 3 seconds.
The selected setting has now been stored.
Settings |
Factory setting |
Infotext |
Switching on the appli- |
|
by pressing Info button |
ance for the first time |
|
|
Language |
American English |
Language selection. |
Time format |
12h |
12h or 24h. |
Time setting |
12:00 |
Set the current time. |
Water hardness |
°E0-8 Soft |
Setting water hardness. When using Multitabs, |
|
|
select the lowest setting. |
Rinse aid dispenser |
Level 5 |
Amount of rinse aid affects drying. When using |
|
|
Multitabs, select setting 0. |
|
|
|
14

Settings
The dishwasher has been preset with certain settings for your convenience. You can change these factory settings.
Change the setting as follows:
1.Open the door.
2.Switch on On/Off switch (.
3.Press Info button 8 for
3 seconds until the following text is indicated on the display window at the top @:
Scroll with < > Set with - +
Leave with Setup 3 sec.
4.Keep pressing button > ` until the required setting is displayed.
Getting Started en-us
5.Make the selection with setting buttons + - X.
6.Press and hold the Info button
8 for 3 seconds.
The chosen setting has now been stored.
You have the option of resetting all changed settings back to the original factory settings.
Note: When you reset your dishwasher to the factory settings, you are taken directly to the settings for switching on the dishwasher for the first time.
Setting |
Factory setting |
Infotext |
|
|
by pressing Info button |
Time setting |
12:00 |
Set the current time. |
|
|
|
Time format |
12h |
12h or 24h. |
|
|
|
Time display |
Time |
Show end of wash cycle with display "Finish in" or "Fin- |
|
|
ish at". |
|
|
|
Language |
American English |
Language selection. |
|
|
|
Water hardness |
°E 0 |
Setting water hardness. When using Multitabs, select |
|
|
the lowest setting. |
|
|
|
Rinse aid disp. |
Level 5 |
Amount of rinse aid affects drying. When using Multi- |
|
|
tabs, select setting 0. |
|
|
|
Sensor setting |
Standard |
Adjusting water clarity detection for best cleaning |
|
|
results. |
|
|
|
Extra dry |
Off |
Improved drying for glasses and plasticware. |
|
|
|
Eco forecast |
Off |
Show the water and energy consumption. |
|
|
|
Auto Power Off |
Off |
Appliance automatically switches off at end of rinsing |
|
|
process. |
|
|
|
Emotion Light * |
On |
Interior light. |
|
|
|
Front display * |
On |
The front display can be selected. |
|
|
|
Remaining time |
On |
While wash cycle is running, status information is pro- |
proj. * |
|
jected onto floor. |
|
|
|
Infolight * |
On |
Light is projected to signal an active wash cycle. |
* depending on the features of your dishwasher
15
en-us Getting Started
Setting |
Factory setting |
Infotext |
|
|
|
|
by pressing Info button |
Start program |
Auto 130-150° F |
When switching on, the last selected wash cycle |
|
|
|
|
appears. |
Tone volume |
Level 2 |
Volume of signal at end of wash cycle. |
|
Button volume * |
Level 2 |
Volume when using buttons. |
|
Wi-Fi |
on/off |
Switch wireless network connection on or off. |
|
Network login |
Manual or |
Check WPS function on router. |
|
|
|
Autom./ WSP |
No WPS function: Manual |
|
|
|
WPS function: Automatic |
Connect to the app |
Start with + |
Connect appliance to mobile terminal device. |
|
Greeting |
On |
When switching on the appliance, the brand logo can |
|
|
|
|
be deselected. |
Factory setting |
Reset |
Resetting to the factory setting. |
|
* depending on the features of your dishwasher |
|||
|
|
|
|
Notes |
|
|
|
■ |
The “Network login” menu option |
||
is only available if Wi-Fi has been switched on.
■ The “Connect to App” menu option is only available if a connection to the home network has been established.
16

oHome Connect
This dishwasher is Wi-Fi capable and can be remotely controlled via a mobile device.
If your dishwasher does not connect to the home network, you can also operate the dishwasher manually by pressing the buttons.
Refer to appliance overview for the location of the buttons.
~ "Appliance overview" on page 12
Info button
The Info button 8 can be used to display additional wash cycle information.
1.Press the Info button 8.
2.Press the wash cycle button. Information on the selected wash cycle is indicated on the display window at the top @.
3.To leave, press Info button 8.
Setting up the app
To be able to operate the appliance via Home Connect, the Home Connect app must be installed on your mobile device.
Observe the supplied Home Connect documents with regard to this.
Follow the steps specified by the app to implement the settings.
Setting up Home Connect
You can set your dishwasher by pressing the remote start button h or proceed as follows:
1.Open the door.
2.Switch on the On/Off switch (.
3.Press Info button 8 for
3 seconds until the following text is indicated on the display window at the top @:
Scroll with < >
Home Connect en-us
Set with - +
Leave with Setup 3 sec.
4.Keep pressing button > ` until the required setting is indicated on the display window at the top
@.
5.Make the setting with setting buttons + - X. See table in section ~ "Settings" on page 15
6.Press and hold the Info button 8 for 3 seconds.
The chosen setting has now been stored.
Wi-Fi |
In the Wi-Fi menu you can activate the wireless network connection with “on” and deactivate it with “off”.
RQ
:L)L !
Notes
■ If you have selected the Wi-Fi “off” setting, the “Network login” and “Connect to App” settings are not available.
■ Remote control of the appliance requires a stable wireless network connection.
Network login
The “Network login” menu option is not available unless you have activated Wi-Fi.
In the “Network login” menu you can select between “Autom./WPS” and “Manual” to connect the dishwasher to your home network.
0DQXDO $XWRP :36
1HWZRUN ORJLQ !
Automatic: Connect to the home network using the WPS function of your router.
17
en-us Home Connect
3UHVV :36 EXWWRQ RQ WKH URXWHU P V
Manual: Connect your mobile device to the Home Connect network. The network settings are then manually entered using the Home Connect App to connect to your home network.
Following successful connection, the following text is indicated on the display window at the top @.
6XFFHVVIXO
1HWZRUN ORJLQ
Observe the supplied Home Connect documents with regard to this.
Connect to App
The “Connect to App” menu option is not available unless there was a connection to the home network.
The “Connect to App” setting establishes the link between the dishwasher, App and your user account.
6WDUW ZLWK
&RQQHFW WR $SS !
Following successful connection, the following text is indicated on the display window at the top @.
6XFFHVVIXO
&RQQHFW WR $SS
Observe the supplied Home Connect documents with regard to this.
About data protection:
When your Home Connect dishwasher is connected for the first time to a WLAN network which is connected to the Internet, your Home
Connect dishwasher transmits the following categories of data to the Home Connect server (initial registration):
■Unique appliance identification (consisting of appliance codes as well as the MAC address of the installed Wi-Fi communication module).
■Security certificate of the Wi-Fi communication module (to ensure a secure IT connection).
■The current software and hardware version of your dishwasher.
■Status of any previous resetting to factory settings.
This initial registration prepares the Home Connect functions for use and is activated the first time you use these Home Connect functions. Please note that the Home Connect functions can be used only in conjunction with the Home Connect App. Information on data protection can be accessed in the Home Connect App.
Remote start button
Once the dishwasher is connected to the home network, press the remote start button h to control the dishwasher from your device.
If the dishwasher has still not logged into Home Connect, access the Home Connect settings by pressing the remote start button h.
Follow the directions in Home Connect app.
18
Note: Your dishwasher is protected against unintentional operation. If the appliance door remains open for more than 4 seconds after pressing the Remote Start buttonh, the operation will be paused. Press the Remote Start button h again and close the appliance door. Also see section ~ "Protection against unintentional operation" on page 43
Notes
■ When the login process is complete, the Remote Start button h goes out.
■ To activate the remote control, press the Remote Start button h.
■ If the Home Connect Assistant was aborted during start-up, press the Remote Start button h again.
■ If the connection to the router fails, the Wi-Fi symbol flashes on the display.
■ Opening the door deactivates Remote control.
Wi-Fi without a connection to the Home Connect server
ƒ
You can use the Home Connect App to disconnect from the Home Connect server.
The appliance is then locally connected to your mobile device without any connection to the Home Connect server.
Note: If you did not deactivate the connection to the Home Connect server, check your Internet connection.
Remote diagnosis ~
Customer Service can use Remote Customer Service~ to access your appliance if you contact them.
Home Connect en-us
Notes
■ You have to confirm Customer Service access on your appliance.
■ You can switch off Remote Customer Service ~ using the On/Off switch ( or deactivate Customer Service access in the Home Connect App.
Declaration of Conformity
y
Robert Bosch Hausgeräte GmbH hereby declares that the appliance with Home Connect functionality meets the basic requirements and other relevant provisions of Directive 2014/53/EU.
A detailed RED Declaration of Conformity can be found online at www.bosch-home.com among the additional documents on the product page for your appliance.
19
en-us Water softening system / special salt
+Water softening system / special salt
To ensure good rinsing results, the dishwasher requires soft water, i.e. water which is low in lime, otherwise limescale will be deposited on the utensils and interior container. Tap water above 7° dH (1.2 mmol/l) must be softened. The water
is softened with special salt (regeneration salt) in the water softening system of the dishwasher. The setting and therefore the required amount of salt depends on the degree of hardness of your tap water (see following water hardness table).
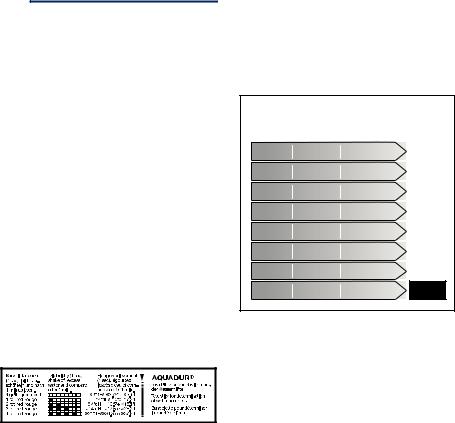
Using a “Water Hardness Test Strip”
The strip will be included in the use and care kit.
Sample test strip
Follow the instructions below for the included test strip. (If purchasing a different test strip, follow manufacturers instructions).
1.Run the water at the kitchen sink for 5 minutes.
2.Dip the end of the test strip with the colored squares into the tap water for 1 second and shake off excess water.
3.After one minute, compare the test strip to the chart on the test strip packaging and determine the Dishwasher Water Softener setting (see below).
4.Adjust the dishwasher Water Softener setting.
5.If required, add salt to the dishwasher salt chamber as shown. ~ "Using special dishwasher salt" on page 21
Water hardness table
:DWHU |
+DUGQHVV |
PPRO O |
6HWYDOXH |
|
KDUGQHVV |
UDQJH |
|
RQWKH |
|
YDOXH ( |
|
|
PDFKLQH |
|
|
|
|
|
|
Ȣ |
VRIW |
Ȣ |
|
|
|
|
|
|
|
Ȣ |
VRIW |
Ȣ |
|
|
|
|
|
|
|
Ȣ |
PHGLXP |
Ȣ |
|
|
|
|
|
|
|
Ȣ |
PHGLXP |
Ȣ |
|
|
|
|
|
|
|
Ȣ |
PHGLXP |
Ȣ |
|
|
|
|
|
|
|
Ȣ |
KDUG |
Ȣ |
|
|
|
|
|
|
|
Ȣ |
KDUG |
Ȣ |
|
|
|
|
|
|
|
Ȣ |
KDUG |
Ȣ |
|
Adjusting the water softening system
The amount of salt dispensed can be set from 0 to 62°E. Salt is not required at the set value 0-8.
Set the softening system as follows:
1.Ask your local water utility company for the water hardness value of your tap water or use test strip.
2.Required setting can be found in the water hardness table.
3.Open the door.
4.Switch on On/Off switch (.
5.Press Info button 8 for
3 seconds until the following text is indicated on the display window at the top @:
Scroll with < > Set with - +
Leave with Setup 3 sec.
6.Keep pressing button > ` until the water hardness is indicated on the display window at the top
@.
20
Loading...