


Bosch KGN 33NL20G, KGN 33NL20Z, KGN 33NL30, KGN 33NW20G, KGN 36NL30 User manual
...
Fridge-freezer
Soğutucu/Dondurucu kombine cihazı Холодильно-морозильная комбинация Hladilno-zamrzovalna kombinacija Kombinace chladničky s mrazničkou KGN..
en |
Instruction for Use |
tr |
Kullanma kılavuzu |
ru |
Инcтpyкция пo экcплyaтaции |
sl |
Navodilo za uporabo |
cs |
Návod na použití |

en Table of Contents |
|
Safety and warning information ........... |
5 |
Information concerning disposal ......... |
8 |
Scope of delivery ................................... |
9 |
Installation location ................................ |
9 |
Observe ambient temperature |
|
and ventilation ........................................ |
9 |
Connecting the appliance .................. |
10 |
Getting to know your appliance ........ |
11 |
Switching on the appliance ................ |
11 |
Setting the temperature ...................... |
12 |
eco .......................................................... |
12 |
Alarm functions .................................... |
12 |
Usable capacity .................................... |
13 |
Refrigerator compartment .................. |
14 |
Freezer compartment .......................... |
15 |
Max. freezing capacity ........................ |
15 |
Freezing and storing food .................. |
15 |
Freezing fresh food ............................. |
16 |
Super freezing ...................................... |
17 |
Thawing frozen food ............................ |
17 |
Interior fittings ....................................... |
17 |
Sticker “OK” .......................................... |
18 |
Switching off the appliance ................ |
18 |
Cleaning the appliance ....................... |
18 |
Light (LED) ............................................ |
19 |
Tips for saving energy ........................ |
19 |
Operating noises ................................. |
20 |
Eliminating minor faults yourself ....... |
20 |
Customer service ................................. |
22 |
tr İçindekiler |
|
Güvenlik ve ikaz bilgileri ..................... |
23 |
Giderme bilgileri ................................... |
26 |
Teslimat kapsamı ................................. |
27 |
Cihazın kurulacağı yer ......................... |
27 |
Mekan sıcaklığına ve |
|
havalandırmaya dikkat edilmelidir |
.... 28 |
Cihazın elektrik şebekesine |
|
bağlanması ............................................ |
28 |
Cihaz özelliklerinin öğrenilmesi ......... |
29 |
Cihazın açılması ................................... |
29 |
Sıcaklık derecesinin ayarlanması ...... |
30 |
Eco .......................................................... |
30 |
Alarm fonksiyonları .............................. |
30 |
Kullanılabilen hacim ............................. |
31 |
Soğutucu bölmesi ................................ |
32 |
Dondurucu bölmesi ............................. |
33 |
Azami dondurma kapasitesi .............. |
33 |
Besinlerin dondurulması ve |
|
depolanması ......................................... |
33 |
Taze besinlerin dondurulması ........... |
34 |
Süper dondurma .................................. |
35 |
Dondurulmuş besinlerin |
|
buzunun çözülmesi .............................. |
35 |
Dolap ...................................................... |
36 |
Çıkartma ”OK” ...................................... |
36 |
Cihazın kapatılması ............................. |
36 |
Cihazın temizlenmesi .......................... |
37 |
Aydınlatma (LED) ................................. |
37 |
Enerji tasarrufu ..................................... |
38 |
Çalışma sesleri ..................................... |
38 |
Basit hataları kendiniz |
|
giderebilirsiniz ....................................... |
39 |
Yetkili servis .......................................... |
40 |
ru Coдepжaниe |
|
Укaзaния пo бeзoпacнocти |
|
и пpeдyпpeждeния .............................. |
42 |
Укaзaния пo yтилизaции ................... |
46 |
Oбъeм пocтaвки .................................. |
46 |
Mecтo ycтaнoвки ................................. |
47 |
Teмпepaтypa oкpyжaющeй |
|
cpeды и вeнтиляция ........................... |
47 |
Подключение бытового |
|
прибора ................................................. |
48 |
Знакомство с бытовым |
|
прибором .............................................. |
49 |
Включение прибора .......................... |
50 |
Уcтaнoвкa тeмпepaтypы .................... |
50 |
eco .......................................................... |
51 |
Функции сигнализации ..................... |
51 |
Пoлeзный oбъeм ................................. |
52 |
Xoлoдильнoe oтдeлeниe ................... |
52 |
Mopoзильнoe oтдeлeниe .................. |
53 |
Maкc. пpoизвoдитeльнocть |
|
зaмopaживaния ................................... |
53 |
Зaмopaживaниe и xpaнeниe |
|
пpoдyктoв ............................................. |
54 |
Зaмopaживaниe cвeжиx |
|
пpoдyктoв питaния ............................. |
55 |
Cyпepзaмopaживaниe ....................... |
56 |
Paзмopaживaниe пpoдyктoв ............ |
57 |
Cпeциaльнoe ocнaщeниe ................. |
57 |
Haклeйкa «OK» ................................... |
57 |
Bыключeниe прибора ....................... |
58 |
Чистка прибора .................................. |
58 |
Ocвeщeниe (нa cвeтoдиoдax) .......... |
59 |
Kaк cэкoнoмить |
|
элeктpoэнepгию ................................. |
59 |
Paбoчиe шyмы ..................................... |
60 |
Caмocтoятeльнoe ycтpaнeниe |
|
мeлкиx нeиcпpaвнocтeй ................... |
60 |
Cлyжбa cepвиca ................................. |
62 |
sl Kazalo |
|
Varnostna navodila in opozorila ........ |
63 |
Navodila za odlaganje |
|
dotrajanega aparata ............................ |
66 |
Obseg dobave ...................................... |
66 |
Mesto postavitve .................................. |
67 |
Bodite pozorni na temperaturo |
|
prostora in prezračevanje ................... |
67 |
Priklop aparata ..................................... |
68 |
Spoznajte vaš aparat ........................... |
68 |
Vklop aparata ....................................... |
69 |
Nastavitev temperature ....................... |
69 |
eco .......................................................... |
70 |
Funkcije alarma .................................... |
70 |
Koristna prostornina ............................ |
71 |
Hladilni prostor ..................................... |
71 |
Zamrzovalni prostor ............................. |
72 |
Največja kapaciteta zamrzovanja ..... |
72 |
Zamrzovanje in shranjevanje ............. |
73 |
Zamrzovanje svežih živil ..................... |
73 |
Super zamrzovanje .............................. |
74 |
Odmrznite zamrznjeno živilo .............. |
75 |
Oprema .................................................. |
75 |
Nalepka «OK» ....................................... |
75 |
Izklop aparata ....................................... |
76 |
Čiščenje aparata .................................. |
76 |
Osvetlitev (LED) ................................... |
77 |
Prihranek energije ................................ |
77 |
Šumi, ki se lahko pojavijo med |
|
obratovanjem ........................................ |
77 |
Samostojno odpravljanje manjših |
|
motenj. ................................................... |
78 |
Servisna služba .................................... |
79 |

cs Obsah |
|
Bezpečnostní a výstražné |
|
pokyny .................................................... |
80 |
Pokyny k likvidaci ................................. |
83 |
Rozsah dodávky ................................... |
83 |
Místo instalace ...................................... |
84 |
Dbejte na teplotu místnosti |
|
a větrání ................................................. |
84 |
Připojení spotřebiče ............................. |
84 |
Seznámení se se spotřebičem .......... |
85 |
Zapnutí spotřebiče ............................... |
86 |
Nastavení teploty .................................. |
86 |
eco .......................................................... |
87 |
Alarmové funkce .................................. |
87 |
Užitný objem ......................................... |
88 |
Chladicí prostor .................................... |
88 |
Mrazicí prostor ...................................... |
89 |
Max. mrazicí kapacita ......................... |
89 |
Zmrazování a uložení .......................... |
89 |
Zmrazování čerstvých potravin ......... |
90 |
Superzmrazování ................................. |
91 |
Rozmrazení zmrazených potravin ..... |
92 |
Vybavení ................................................ |
92 |
Indikační nálepka “OK” ...................... |
92 |
Vypnutí spotřebiče ............................... |
93 |
Čistění spotřebiče ................................ |
93 |
Osvětlení (diody LED) ......................... |
94 |
Šetření energie ..................................... |
94 |
Provozní hluky ...................................... |
94 |
Odstranění malých poruch |
|
vlastními silami ..................................... |
95 |
Zákaznický servis ................................ |
96 |

Safety and warning information
Before you switch ON the appliance
Please read the operating and installation instructions carefully! They contain important information on how to install, use and maintain the appliance.
The manufacturer is not liable if you fail to comply with the instructions and warnings. Retain all documents for subsequent use or for the next owner.
Technical safety
The appliance contains a small quantity of environmentally friendly but flammable refrigerant R600a. Ensure that the tubing of the refrigerant circuit is not damaged during transportation and installation. Leaking refrigerant may cause eye injuries or ignite.
en
If damage has occurred
■Keep naked flames and/or ignition sources away from the appliance,
■thoroughly ventilate the room for several minutes,
■switch off the appliance and pull out the mains plug,
■inform customer service.
The more refrigerant an appliance contains, the larger the room must be in which the appliance is situated. Leaking refrigerant can form a flammable gas-air mixture in rooms which are too small. The room must be at least 1 m³ per 8 g of refrigerant. The amount of refrigerant in your appliance is indicated on the
rating plate inside the appliance.
If the power cord of this appliance is damaged, it must be replaced by the manufacturer, customer service or a similarly qualified person. Improper installations
and repairs may put the user at considerable risk.
5
en
Repairs may be performed by the manufacturer, customer service or a similarly qualified person only.
Only original parts supplied by the manufacturer may be used. The manufacturer guarantees that only these parts satisfy the safety requirements.
A extension cable may be purchased from customer service only.
Important information when using the appliance
■Never use electrical appliances inside the appliance (e.g. heater, electric ice maker, etc.). Explosion hazard!
■Never defrost or clean the appliance with a steam cleaner! The steam may penetrate electrical parts and cause a short-circuit. Risk of electric shock!
■Do not use pointed or sharpedged implements to remove frost or layers of ice. You could damage the refrigerant tubes. Leaking refrigerant may cause eye injuries or ignite.
■Do not store products which contain flammable propellants (e.g. spray cans) or explosive substances in the appliance. Explosion hazard!
■Do not stand on or lean heavily against base
of appliance, drawers or doors, etc
■For defrosting and cleaning, pull the mains plug out or switch off the fuse. Do not pull out the mains plug by tugging on the power cord.
■Store high-percentage alcohol tightly closed and standing up.
■Keep plastic parts and the door seal free of oil and grease. Otherwise, parts and door seal will become porous.
■Never cover or block the ventilation openings of the appliance!
6
■Avoiding placing children and vulnerable people at risk:
At risk are children, people who have limited physical, mental or sensory abilities, as well as people who have inadequate knowledge concerning safe operation of the appliance.
Ensure that children and vulnerable people have understood the hazards.
A person responsible for safety must supervise or instruct children and vulnerable people who are using the appliance.
Only children from 8 years and above may use the appliance.
Supervise children who are cleaning and maintaining the appliance.
Never allow children to play with the appliance.
en
■Do not store bottled or canned drinks (especially carbonated drinks) in the freezer compartment. Bottles and cans may burst!
■Never put frozen food straight from the freezer compartment into your mouth.
Risk of low-temperature burns!
■Avoid prolonged touching of frozen food, ice or the evaporator pipes, etc.
Risk of low-temperature burns!
Children in the household
■Keep children away from packaging and its parts. Danger of suffocation from folding cartons and plastic film!
■Do not allow children to play with the appliance!
■If the appliance features a lock:
keep the key out of the reach of children!
7

en
General regulations
The appliance is suitable
■for refrigerating and freezing food,
■for making ice.
This appliance is intended for use in the home and the home environment.
The appliance is suppressed according to EU Directive 2004/108/EC.
The refrigeration circuit has been checked for leaks.
This product complies with the relevant safety regulations for electrical appliances
(EN 60335-2-24).
This appliance is intended for use up to a maximum height of 2000 metres above sea level.
Information concerning disposal
* Disposal of packaging
The packaging protects your appliance from damage during transit. All utilised materials are environmentally safe and recyclable. Please help us by disposing of the packaging in an environmentally friendly manner.
Please ask your dealer or inquire at your local authority about current means of disposal.
* Disposal of your old appliance
Old appliances are not worthless rubbish! Valuable raw materials can be reclaimed by recycling old appliances.
This appliance is labelled in
accordance with European Directive 2012/19/EU concerning used electrical and electronic appliances (waste electrical and electronic equipment - WEEE). The guideline determines the framework for the return and recycling of used appliances as applicable throughout the EU.
m Warning
Redundant appliances
1.Pull out the mains plug.
2.Cut off the power cord and discard with the mains plug.
3.Do not take out the trays and receptacles: children are
therefore prevented from climbing in!
4.Do not allow children to play with the appliance once it has spent its useful life. Danger of suffocation!
Refrigerators contain refrigerant
and gases in the insulation. Refrigerant and gases must be disposed
of professionally. Ensure that tubing
of the refrigerant circuit is not damaged prior to proper disposal.
8
Scope of delivery
After unpacking all parts, check for any damage in transit.
If you have any complaints, please contact the dealer from whom you purchased the appliance or our customer service.
The delivery consists of the following parts:
■Free-standing appliance
■Interior fittings (depending on model)
■Bag containing installation materials
■Operating instructions
■Installation manual
■Customer service booklet
■Warranty enclosure
■Information on the energy consumption and noises
Installation location
A dry, well ventilated room is suitable as an installation location. The installation location should not be exposed to direct sunlight and not placed near a heat source, e.g. a cooker, radiator, etc. If installation next to a heat source is unavoidable, use a suitable insulating plate or observe the following minimum distances from the heat source:
■3 cm to electric or gas cookers.
■30 cm to an oil or coal-fired cooker.
The floor of the installation location must not give way; if required, reinforce floor. If the floor is uneven, compensate with supports.
en
Distance from wall
Fig. #
A gap is not required between the appliance and side wall. The containers and shelves are still fully extendable.
Observe ambient temperature and ventilation
Ambient temperature
The appliance is designed for a specific climate class. Depending on the climate class, the appliance can be operated at the following temperatures.
The climate class can be found on the rating plate. Fig. )
Climate |
Permitted ambient |
class |
temperature |
SN |
+10 °C to 32 °C |
N |
+16 °C to 32 °C |
ST |
+16 °C to 38 °C |
T |
+16 °C to 43 °C |
Note
The appliance is fully functional within the room temperature limits
of the indicated climatic class. If an appliance of climatic class SN
is operated at colder room temperatures, the appliance will not be damaged up to a temperature of +5 °C.
9

en
Ventilation
Fig. $
The air on the rear panel and on the side panels of the appliance heats up. Conduction of the heated air must
not be obstructed. Otherwise,
the refrigerating unit must work harder. This increases power consumption. Therefore: Never cover or block
the ventilation openings!
Connecting the appliance
After installing the appliance, wait at least 1 hour until the appliance is switched on. During transportation the oil in
the compressor may have flowed into the refrigeration system.
Before switching on the appliance for the first time, clean the interior of
the appliance (see chapter “Cleaning the appliance”).
Electrical connection
The socket must be near the appliance and also freely accessible following installation of the appliance.
The appliance complies with the protection class I. Connect the appliance to 220–240 V/50 Hz alternating current via a correctly installed socket with protective conductor. The socket must be fused with a 10 to 16 A fuse.
For appliances operated in nonEuropean countries, check whether the stated voltage and current type match the values of your mains supply. This information can be found on the rating plate. Fig. )
m Warning
Never connect the appliance
to electronic energy saver plugs.
Our appliances can be used with mains and sine-controlled inverters. Mainscontrolled inverters are used
for photovoltaic systems which
are connected directly to the national grid. Sine-controlled inverters must be used for isolated applications (e.g. on ships or in mountain lodges) which are not connected directly to the national grid.
10
Getting to know your appliance
Please fold out the illustrated last page. These operating instructions refer
to several models.
The features of the models may vary. The diagrams may differ.
Fig. !
* Not all models.
ARefrigerator compartment
BFreezer compartment
1–4 Controls
5Shelf for small bottles
6Shelf for large bottles
7Light
8Temperature controller
9Vegetable container
10Freezer tray
11Frozen food container (small)
en
Controls
Fig. "
* Not all models.
1Temperature selection button
The required temperature is set with this button.
2Super display
Illuminates when super cooling and super freezing is on.
3Temperature display freezer
compartment
The numbers correspond
to the set freezer compartment temperatures in °C.
4Eco mode indicator
This lights up when the eco mode is switched on.
Switching on the appliance
Fig. "
1.Insert the plug in the socket.
2.A warning signal sounds. The temperature display 3 flashes.
3.Press the temperature setting button 1. The warning signal switches off.
When the freezer compartment has reached the set temperature, the temperature display 3 is lit.
The factory recommends the following settings:
■Refrigerator compartment: medium setting
■Freezer compartment: -18°C
Store delicate foods in the refrigerator compartment.
11
en
Operating tips
■When the appliance has been switched on, it may take several hours until the set temperatures have been reached.
■The fully automatic NoFrost system ensures that the freezer compartment remains free of ice. Defrosting is no longer required.
■The sides of the housing are sometimes heated slightly. This prevents condensation in the area of the door seal.
■If the freezer compartment door cannot be immediately re-opened after it has been closed, wait until the resulting low pressure has equalised.
Setting
the temperature
Refrigerator compartment
Turn temperature controller, Fig. !/8, to the required setting.
We recommend the setting in line with the marking.
Changing the setting clockwise will lower temperatures in the refrigerator compartment.
At a room temperature below 16°C, slightly increase the temperature setting in the appliance. At a room temperature above 32°C, slightly reduce the temperature setting in the appliance.
Select a very cold setting only temporarily if:
■door is opened frequently,
■large quantities of food are placed in the refrigerator compartment.
Freezer compartment
The temperature can be set from -18°C to -24°C.
Keep pressing temperature setting button 1 until the required freezer compartment temperature is set.
The last set value is saved. The set temperature is indicated on temperature display 3.
eco
The “eco” function switches the appliance to energy-saving mode.
The appliance automatically sets the following temperatures:
■ Freezer compartment: -16°C
Switching on eco
Keep pressing the temperature setting button 1 until the eco indicator is highlighted.
Alarm functions
Fig. "
Door alarm
The door alarm (continuous sound) switches on if the appliance door is open for longer than one minute. Close
the door to switch off the warning signal.
12

Temperature alarm
The temperature alarm switches on if the freezer compartment is too warm and the frozen food is at risk of thawing.
Temperature display, Fig. "/3, is flashing.
The alarm may switch on without any risk to the frozen food:
■when the appliance is switched on,
■when large quantities of fresh food are placed in the appliance,
■if the freezer compartment door is open too long.
Note
Do not refreeze thawing or thawed food. Only ready meals (boiled or fried) may be refrozen.
No longer store the frozen produce for the max. storage period.
Switching off the alarm
Fig. "
Press the temperature setting button 1 to switch off the warning signal.
en
Usable capacity
Information on the usable capacity can be found inside your appliance on
the rating plate. Fig. )
Fully utilising the freezer volume
To place the maximum amount of frozen food in the freezer compartment, you can remove the containers. You can then stack the food directly on the shelf and on the floor of the freezer compartment.
Note
Avoid contact between food and rear panel. Otherwise the air circulation will be impaired.
Food or packaging could freeze to the rear panel.
Removing the fittings
Pull out the frozen food container all the way, lift at the front and remove. Fig. '
13

en
Refrigerator compartment
The refrigerator compartment is the ideal storage location for meat, sausage, fish, dairy products, eggs, ready meals
and pastries.
Storing food
■Store fresh, undamaged food. The quality and freshness will then
be retained for longer.
■In the case of ready-made products and bottled goods, observe the bestbefore date or use-by date specified by the manufacturer.
■To retain aroma, colour
and freshness, pack or cover food well before placing in the appliance. This will prevent the transfer
of flavours and the discolouration of plastic parts in the refrigerator compartment.
■Allow warm food and drinks to cool down before placing in the appliance.
Note
Do not block air outlet openings with food, otherwise the air circulation will be impaired. Food which is stored directly in front of the air outlet openings may be frozen by the cold air flowing out.
Note the chill zones in the refrigerator compartment
The air circulation in the refrigerator compartment creates different chill zones:
■Coldest zone is in the upper area of the refrigerator compartment.
Note
Store perishable food (e.g. fish, sausage, meat) in the coldest zone.
■Warmest zone is at the very bottom of the door and in the vegetable container.
Note
Store e.g. hard cheese and butter
in the warmest zone. Cheese can then continue to release its flavour and the butter will still be easy to spread.
Vegetable container
Fig. !/9
A high air humidity keeps leafy vegetables fresh for longer. Vegetables and fruit should be stored at a slightly lower air humidity.
The air humidity in the vegetable drawer depends on the amount of stored food.
Note
If the air humidity is too high, drips may form and cause decay.
14
Freezer compartment
Use the freezer compartment
■To store deep-frozen food.
■To make ice cubes.
■To freeze food.
Note
Ensure that the freezer compartment door has been closed properly. If the door is open, the frozen food will thaw. The freezer compartment will
become covered in thick ice. Also: waste of energy due to high power consumption!
Max. freezing capacity
Information about the max. freezing capacity within 24 hours can be found on the rating plate. Fig. )
Prerequisites for max. freezing capacity
■Switch on super freezing before placing fresh products
in the compartment (see chapter entitled “Super freezing”).
■Remove containers; stack food directly on the shelf and on the floor of the freezer compartment.
■Freeze large quantities of food preferably in the very top compartment where food freezes particularly quickly and therefore also gently.
en
Freezing and storing food
Purchasing frozen food
■Packaging must not be damaged.
■Use by the “use by” date.
■Temperature in the supermarket freezer must be -18 °C or lower.
■If possible, transport deep-frozen food in an insulated bag and place quickly in the freezer compartment.
Note when loading products
■Preferably freeze large quantities
of food in the top compartment, where food freezes particularly quickly
and therefore also gently.
■Place the food over the whole area of the compartments or the frozen food containers.
Note
Food which is already frozen must not come into contact with the food which is to be frozen. If required, move
the frozen food to other frozen food containers.
Storing frozen food
Insert frozen food container all the way to ensure unrestricted air circulation.
15

en
Freezing fresh food
Freeze fresh and undamaged food only.
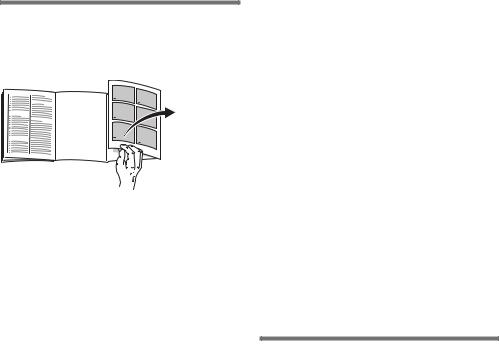
To retain the best possible nutritional value, flavour and colour, vegetables should be blanched before freezing. Aubergines, peppers, zucchini and asparagus do not require blanching.
Literature on freezing and blanching can be found in bookshops.
Note
Keep food which is to be frozen away from food which is already frozen.
■The following foods are suitable for freezing:
Cakes and pastries, fish and seafood, meat, game, poultry, vegetables, fruit, herbs, eggs without shells, dairy products such as cheese, butter and quark, ready meals and leftovers such as soups, stews, cooked meat and fish, potato dishes, soufflés and desserts.
■The following foods are not suitable for freezing:
Types of vegetables, which are usually consumed raw, such as lettuce or radishes, eggs in shells, grapes, whole apples, pears and peaches, hard-boiled eggs, yoghurt, soured milk, sour cream, crème fraîche and mayonnaise.
Packing frozen food
To prevent food from losing its flavour or drying out, place in airtight containers.
1.Place food in packaging.
2.Remove air.
3.Seal the wrapping.
4.Label packaging with contents and date of freezing.
Suitable packaging:
Plastic film, tubular film
made of polyethylene, aluminium foil, freezer containers.
These products are available from specialist outlets.
Unsuitable packaging:
Wrapping paper, greaseproof paper, cellophane, bin liners and used shopping bags.
Items suitable for sealing packaged food:
Rubber bands, plastic clips, string, coldresistant adhesive tape, etc.
Bags and tubular film
made of polyethylene can be sealed with a film heat sealer.
Shelf life of frozen food
Storage duration depends on the type of food.
At a temperature of -18 °C:
■Fish, sausage, ready meals and cakes and pastries:
up to 6 months
■Cheese, poultry and meat: up to 8 months
■Vegetables and fruit: up to 12 months
16
Super freezing
Food should be frozen solid as quickly as possible in order to retain vitamins, nutritional value, appearance and flavour.
Several hours before placing fresh food in the freezer compartment, switch on super freezing to prevent an unwanted temperature rise.
As a rule, 4–6 hours is adequate.
This appliance runs constantly
and the freezer compartment drops to a very low temperature.
If the max. freezing capacity is to be used, super freezing must be switched on for 24 hours before the fresh produce is placed in the freezer compartment.
Smaller quantities of food (up to 2 kg) can be frozen without “super freezing”.
Note
When super freezing is switched on, increased operating noises may occur.
Switching on and off
Fig. "
Keep pressing the temperature selection button 1 until the Super display 2 is lit.
Super freezing automatically switches off after approx. 2½ days.
en
Thawing frozen food
Depending on the type and application, select one of the following options:
■at room temperature
■in the refrigerator
■in an electric oven, with/without fan assisted hot-air
■in the microwave
m Caution
Do not refreeze thawing or thawed food. Only ready meals (boiled or fried) may be refrozen.
No longer store the frozen produce for the max. storage period.
Interior fittings
You can reposition the shelves inside the appliance and the door shelves as required:
■Pull shelf forwards, lower and swing out to the side. Fig. &
■Raise the door shelf and remove. Fig. %
17
en
Special features
(not all models)
Ice cube tray
Fig. (
1.Fill the ice cube tray ¾ full of drinking water and place in the freezer compartment.
2.If the ice tray is stuck to the freezer compartment, loosen with a blunt implement only (spoon-handle).
3.To loosen the ice cubes, twist the ice tray slightly or hold briefly under flowing water.
Sticker “OK”
(not all models)
The “OK” temperature monitor
can be used to determine temperatures below +4 °C. Gradually reduce
the temperature if the sticker does not indicate “OK”.
Note
When the appliance is switched on, it may take 12 hours until
the temperature is reached.
Correct setting
Switching off the appliance
Pull out mains plug or switch off fuse. Refrigerating unit switches off.
Disconnecting the appliance
If you do not use the appliance for a prolonged period:
1.Pull out the mains plug or switch off the fuse.
2.Clean the appliance.
3.Leave appliance doors open.
Cleaning the appliance
m Caution
■Do not use abrasive, chloride or acidic cleaning agents or solvents.
■Do not use scouring or abrasive sponges.
The metallic surfaces could corrode.
■Never clean shelves and containers in the dishwasher.
The parts may become deformed!
The cleaning water must not get into the following areas:
■Controls
■Illumination
■Ventilation openings
■Openings in the separating plate
18
Proceed as follows:
1.Pull out the mains plug or switch off the fuse.
2.Take out the frozen food and store in a cool location. Place ice pack (if available) on the food.
3.The rinsing water must not drip into the controls, lighting, ventilation openings or the openings in the partition!
Clean the appliance with a soft cloth, lukewarm water and a little pH-neutral washing-up liquid.
4.Wipe the door seal with clear water only and then wipe dry thoroughly.
5.After cleaning reconnect the appliance.
6.Put the frozen food back into the appliance.
Interior fittings
All variable parts of the appliance can be taken out for cleaning.
Take out shelves in the door
Fig. %
Lift shelves upwards and take out.
Take out glass shelves
Pull the glass shelves forwards and take out.
Removing the container
Fig. '
Pull out the container all the way, lift at the front and remove.
Taking out the frozen food container
Fig. '
Pull out the frozen food container all the way, lift at the front and remove.
en
Light (LED)
Your appliance features a maintenancefree LED light.
These lights may be repaired
by customer service or authorised technicians only.
Tips for saving energy
■Install the appliance in a dry, well ventilated room! The appliance should not be installed in direct sunlight
or near a heat source (e.g. radiator, cooker).
If required, use an insulating plate.
■Allow warm food and drinks to cool down before placing in the appliance.
■Thaw frozen food in the refrigerator compartment and use the low temperature of the frozen food to cool refrigerated food.
■Open the appliance as briefly as possible.
■To achieve the lowest energy consumption, leave a small wall gap at the side.
■The arrangement of the fittings does not affect the energy rating of the appliance.
19
en
Operating noises
Quite normal noises
Droning
Motors are running (e.g. refrigerating units, fan).
Bubbling, humming or gurgling noises
Refrigerant is flowing through the tubing.
Clicking
Motor, switches or solenoid valves are switching on/off.
Cracking
Automatic defrosting is running.
Preventing noises
The appliance is not level
Please align the appliance with a spirit level. Use the height-adjustable feet or place packing underneath them.
The appliance is not free-standing
Please move the appliance away from adjacent units or appliances.
Containers or storage areas wobble or stick
Please check the removable parts and re-insert them correctly if required.
Bottles or receptacles are touching each other
Move the bottles or receptacles slightly away from each other.
Eliminating minor faults yourself
Before you call customer service:
Please check whether you can eliminate the fault yourself based on the following information.
Customer service will charge you for advice – even if the appliance is still under guarantee!
Fault |
Possible cause |
Remedial action |
|
|
|
Temperature differs greatly |
|
In some cases it is adequate to switch off |
from the set value. |
|
the appliance for 5 minutes. |
|
|
If the temperature is too high wait a few hours |
|
|
and check whether the temperature has |
|
|
approached the set value. |
|
|
If the temperature is too low check |
|
|
the temperature again the next day. |
|
|
|
20
en
Fault |
Possible cause |
Remedial action |
|
|
|
|
|
Warning signal sounds. |
Fault - the freezer |
To switch off the warning signal, press the |
|
Temperature display flashes. |
compartment is too warm! |
temperature setting button, Fig. "/1. |
|
Fig. "/3 |
Frozen food is at risk. |
|
|
|
Appliance is open. |
Close the appliance. |
|
|
|
|
|
|
Ventilation openings have |
Ensure that there is adequate ventilation. |
|
|
been covered. |
|
|
|
|
|
|
|
Too much food was placed in |
Do not exceed max. freezing capacity. |
|
|
the freezer at once. |
|
|
|
|
|
|
|
|
When the fault has been rectified, the |
|
|
|
temperature display stops flashing. |
|
|
|
|
|
The temperature in |
Appliance opened |
Do not open the appliance unnecessarily. |
|
the freezer compartment is |
frequently. |
|
|
too warm. |
|
|
|
The ventilation openings |
Remove obstacles. |
||
|
|||
|
have been covered. |
|
|
|
|
|
|
|
Large quantities of fresh |
Do not exceed max. freezing capacity. |
|
|
food are being frozen. |
|
|
|
|
|
|
The light does not function. |
The LED light is defective. |
See chapter “Light (LED)” section. |
|
|
|
|
|
|
Appliance was open too |
When the appliance is closed and opened, |
|
|
long. |
the light is on again. |
|
|
Light is switched off after |
|
|
|
approx. 10 min. |
|
|
|
|
|
|
Controls have reduced |
When the appliance is not |
As soon as the appliance is again used, e.g. |
|
luminosity. |
used for some time, |
the door is opened, the display switches back |
|
|
the display on the fascia |
to normal illumination. |
|
|
switches to energy saving |
|
|
|
mode. |
|
Displays do not illuminate. |
Power failure; the fuse has |
|
been switched off; the mains |
|
plug has not been inserted |
|
properly. |
Connect mains plug. Check whether the power is on, check the fuses.
Appliance is not cooling, |
Showroom mode is |
Hold down temperature selection button |
temperature display and light |
switched on. |
fig. "/1 for 10 seconds until |
are lit. |
|
an acknowledgement signal sounds. |
|
|
After a short time check whether your |
|
|
appliance is cooling. |
|
|
|
21

en
Customer service
Your local customer service
can be found in the telephone directory or in the customer-service index. Please provide customer service
with the appliance product number (E-Nr.) and production number (FD).
These specifications
can be found on the rating plate. Fig. )
To prevent unnecessary call-outs, please assist customer service by quoting
the product and production numbers. This will save you additional costs.
Repair order and advice on faults
Contact information for all countries can be found on the enclosed customer service list.
GB |
0344 892 8979 |
Calls charged at local or |
|
|
mobile rate. |
IE |
01450 2655 |
0.03 € per minute at |
|
|
peak. Off peak 0.0088 € |
|
|
per minute. |
US |
800 944 2904 |
toll-free |
22

Güvenlik ve ikaz bilgileri
Cihazı çalıştırmadan önce
Kullanma ve montaj kılavuzlarını dikkatlice okuyunuz!
Bu kılavuzlarda cihazın kurulması, yerleştirilmesi, kullanılması ve bakımı ile ilgili önemli bilgiler bulunmaktadır.
Üretici, kullanma talimatlarındaki bilgi ve uyarıları dikkate almazsanız, herhangi bir sorumluluk üstlenmez. Tüm belge ve dokümanları sonradan kullanma ihtimalinden veya cihazı satacak olursanız, yeni sahibi için saklayınız.
Teknik güvenlik
Cihaz, çevreye zarar vermeyen ancak yanıcı özelliği olan az miktarda R600a soğutma maddesi içermektedir. Cihaz taşınırken veya monte edilirken cihazın soğutucu madde sirkülasyon sistemindeki boruların zarar görmemesine dikkat ediniz. Dışarı fışkıran soğutucu madde göz yaralanmalarına neden olabilir veya tutuşup yanabilir.
tr
Hasar durumunda
■Açık ateş veya alev kaynakları cihazdan uzak tutulmalıdır.
■Cihazın kurulu olduğu yer birkaç dakika havalandırılmalıdır.
■Cihazı kapatınız ve elektrik fişini çekip prizden çıkarınız.
■Yetkili servise haber verilmelidir.
Bir cihaz ne kadar fazla soğutucu madde ihtiva ederse, kurulduğu yer de o derece büyük olmalıdır. Çok küçük yerlerde, soğutma maddesi devresinde bir kaçak söz konusu olduğunda, yanıcı bir gaz hava karışımı oluşabilir. Her 8 gram soğutucu madde için gerekli olan yerin hacmi
en az 1 m³ kadardır. Cihazınızın içinde bulunan soğutma maddesinin miktarı, cihazın iç kısmındaki tip levhasında yazılıdır.
Eğer bu cihazın elektrik şebekesi kablosu zarar görürse, üretici, yetkili servis veya benzeri ustalık özelliklerine sahip başka bir kişi tarafından değiştirilmesi gerekir. Hatalı veya gerektiği şekilde yapılmayan kurma çalışmalarından ve onarımlardan dolayı cihazı kullanan kişi için oldukça önemli tehlikeler ortaya çıkabilir.
EEE Yönetmeliǧine Uygundur. |
23 |
tr
Onarımlar sadece üretici, yetkili servis veya benzeri eğitime sahip yetkili bir kişi tarafından yapılmalıdır.
Sadece üreticinin orijinal parçaları kullanılmalıdır. Üretici sadece bu parçalarda güvenlik taleplerine uyulduğunu garanti eder.
Elektrik şebekesi kablosu için bir uzatma parçası sadece yetkili servis üzerinden alınabilir.
Kullanım esnasında
■Cihazın içinde kesinlikle elektrikli cihazlar kullanmayınız (örn. ısıtma cihazları, elektrikli buz yapma makineleri vs.). Patlama tehlikesi!
■Cihazı temizlemek veya buzunu çözmek için asla buharlı temizleme cihazları kullanmayınız. Buhar elektrikli parçalara temas edebilir ve kısa devre olmasına sebep olabilir! Elektrik çarpma tehlikesi!
■Kar, kırağı ve buz tabakalarını temizlemek için, sivri veya keskin kenarlı cisimler kullanmayınız. Aksi halde cihazın soğutucu madde boruları zarar görebilir. Dışarı fışkıran soğutucu madde tutuşup yanabilir veya göz yaralanmasına sebep olabilir.
■Cihazın içinde yanıcı tahrik gazı ihtiva eden ürünler (örn. sprey kutuları) ve patlayıcı maddeler bulundurmayınız. Patlama tehlikesi!
■Cihazın tabanını, raflarını, kapılarını ve bu gibi parçalarını basamak niyetine veya destek olarak kullanmayınız.
■Buz çözme ve temizleme işlemi için, cihazın elektrik fişini prizden çekip çıkarınız veya bağlı olduğu sigortayı kapatınız. Fişi prizden çıkarırken, fişin kendisi tutulmalıdır, kablodan tutulup çekilmemelidir.
■Alkol oranı yüksek olan sıvı dolu şişeleri iyice kapatarak ve dik olarak buzdolabına koyunuz.
■Cihazın plastik parçalarına ve kapının contasına sıvı ve katı yağ değmemesine özen gösteriniz. Aksi halde bu parçalar delinip aşınabilir.
■Cihazın hava giriş ve çıkış delikleri kesinlikle örtülmemeli ve önleri kapatılmamalıdır.
24
■Çocuklar ve tehlikeye maruz kalabilecek kişiler için söz konusu olabilecek risklerin önlenmesi:
Çocuklar ve bedensel, ruhsal veya algısal yetenekleri sınırlı olan veya cihazın güvenli kullanılması hakkında yeterince bilgisi olmayan kişiler tehlikeye maruz kalabilecek kişiler olarak kabul edilirler.
Çocukların ve söz konusu tehlikeye maruz kalabilecek kişilerin tehlikeleri anlamış olmasını sağlayınız.
Güvenlikten sorumlu bir kişi çocukları ve tehlikeye maruz kalabilecek kişileri cihaz kullanılırken denetlemeli veya onlara rehberlik etmelidir.
Sadece 8 yaşından büyük çocukların cihazı kullanmasına izin veriniz.
Temizleme ve bakım çalışmalarında çocukları denetleyiniz.
Çocukların cihaz ile oynamasına kesinlikle izin verilmemelidir.
tr
■Şişe ve kutu içindeki sıvı maddeleri (özellikle karbonik asit ihtiva eden içecekleri) dondurucu bölümünde depolamayınız. Şişe ve kutular patlayabilir!
■Dondurulmuş besinleri kesinlikle dondurucudan çıkarır çıkarmaz ağzınıza almayınız.
Donma yanığı tehlikesi!
■Ellerinizin uzun bir süre dondurulmuş besine, buza veya buharlaştırıcı borularına vs. temas etmesini önleyiniz. Donma yanığı tehlikesi!
Evdeki çocuklar
■Ambalajları ve ambalaj parçalarını çocuklara vermeyiniz.
Katlanan kartonlardan
ve folyolardan dolayı boğulma tehlikesi söz konusudur!
■Bu cihaz, çocuk oyuncağı değildir.
■Kilit tertibatı olan cihazlarda: Anahtarı çocukların erişemiyecekleri bir yerde muhafaza ediniz!
25

tr
Genel yönetmelikler
Cihaz,
■besinlerin soğutulması ve dondurulması için kullanılır,
■buz hazırlamak için kullanılır.
Bu cihaz evde ve ev ortamında kişisel kullanımınız içindir, ticari amaçlı kullanım için öngörülmemiştir.
Cihaz, 2004/108/EC AB direktiflerine istinaden parazitlenmeye karşı korunmuştur.
Soğutucu madde devresinin sızdırmazlığı kontrol edilmiştir.
Bu ürün, elektrikli cihazlar için geçerli olan güvenlik yönetmeliklerine uygundur (EN 60335-2-24).
Bu cihaz, deniz seviyesinden en fazla 2000 metre yükseklikte kullanılmak üzere tasarlanmıştır.
Giderme bilgileri
* Yeni cihazın Ambalajının giderilmesi
Ambalaj, cihazınızı transport hasarlarına karşı korur. Ambalajda kullanılmış olan tüm malzemeler, çevreye zarar vermeyen türdendir ve yeniden kullanılabilir. Lütfen siz de yardımcı olunuz: Ambalajı çevreye zarar vermeyecek şekilde gideriniz.
Güncel giderme yol ve yöntemleri hakkında bilgi edinmek için, lütfen yetkili satıcınıza veya bağlı olduğunuz belediye idaresine başvurunuz.
* Eski cihazın giderilmesi
Eski cihazlar, hiç değeri olmayan çöp değildir! Çevreci bir giderme işleminden geçirilerek, çok değerli ham maddeler yeniden kullanılmak üzere değerlendirilebilir.
Bu ürün 2012/19/EU sayılı Atık
Elektrikli ve Elektronik Ekipmanlar Direktifi’ne göre etiketlenmiştir. Ulusal yönetmelik (Türkiye Resmi Gazetesi No:28300 Tarih: 22.05.2012) Avrupa genelinde geçerli olan, ürünlerin geri toplanması ve geri dönüştürülmesi ile ilgili yapıyı belirtir.
26
m Uyarı
Eskimiş ve artύk kullanύlmayacak cihazlarda:
1.Elektrik fişini çekip prizden çıkarınız.
2.Elektrik kablosunu kesip, fişi ile birlikte cihazdan ayırınız.
3.Çocukların cihazın içine girmesini zorlaştırmak için, rafları, çekmeceleri ve eşya gözlerini cihazdan çıkarmayınız.
4.Çocukların eskimiş cihaz ile oynamasına izin vermeyiniz. Boğulma tehlikesi!
Soğutma cihazlarının içinde soğutucu maddeler vardır, yalıtım tertibatlarında ise izolasyon gazları vardır. Soğutucu maddeler ve gazlar uzmanca giderilmelidir. Eski cihaz uzmanca ve çevreye zarar vermeyecek şekilde giderilinceye kadar, soğutucu madde sirkülasyon borularının zarar görmemesine dikkat ediniz.
Teslimat kapsamı
Ambalajdan çıkardıktan sonra, tüm parçaları olası transport hasarları açısından kontrol ediniz.
Şikayet veya itiraz söz konusu olduğunda, lütfen cihazı satın aldığınız yetkili satıcınıza veya yetkili servisimize başvurunuz.
Teslimat kapsamı, aşağıdaki parçalardan oluşmaktadır:
■Solo cihaz
■Donanım (modele bağlı)
■Montaj malzemelerini içeren torba
tr
■Kullanma kılavuzu
■Montaj kılavuzu
■Yetkili servis defteri
■Garanti ekleri
■Enerji tüketimi ve çalışma sesleri ile ilgili bilgiler
Cihazın kurulacağı yer
Cihazın kurulacağı yerin kuru ve havalandırılabilen bir yer olması gerekir. Cihazın kurulduğu yer doğrudan güneş ışınlarına maruz kalmamalı ve ocak, radyatör vs. gibi bir ısı kaynağının yanında olmamalıdır. Eğer cihazın bir ısı kaynağının yanına kurulması önlenemiyorsa, uygun bir izolasyon levhası kullanılmalıdır veya ısı kaynağına olan asgari mesafe aşağıdaki gibi olmalıdır:
■Elektrikli veya gazlı ocak ve fırınlarda: 3 cm.
■Gaz yağı ve kömür sobalarından: 30 cm.
Cihazın kurulacağı yerdeki zemin esnememelidir, gerekirse takviye ediniz. Zeminin düzgün olmaması halinde, uygun altlıklar kullanarak, dengesizliği gideriniz.
Duvar mesafesi
Resim #
Cihazın yan tarafında duvara mesafe bırakılması gerekli değildir. Kaplar ve raflar yine de tamamen dışarı çekilebilir.
27
tr
Mekan sıcaklığına ve havalandırmaya dikkat edilmelidir
Mekan sıcaklığı
Bu cihaz belli bir klima sınıfı için tasarlanmıştır. Klima sınıfına bağlı olarak bu cihazı şu çevre sıcaklıklarında kullanabilirsiniz.
İklim sınıfı tip levhasının üzerinde bulunur, Resim ).
Klima sınıfı Kabul edilebilir mekan sıcaklığı
SN |
+10 °C ile 32 °C |
N |
+16 °C ile 32 °C |
ST |
+16 °C ile 38 °C |
T |
+16 °C ile 43 °C |
Bilgi
Cihaz, bildirilmiş klima sınıfına ait oda sıcaklığı sınırları dahilinde, sahip olduğu tüm işlevleri ile çalışır. Eğer SN klima sınıfına dahil olan bir cihaz daha soğuk oda sıcaklıklarında işletilirse, +5 °C'ye kadar cihazda herhangi bir hasar olmayacağı garanti edilir.
Havalandırma
Resim $
Cihazın arka yüzündeki ve yan yüzlerindeki hava ısınır. Isınan bu havanın kolayca çıkıp gidebilmesi gerekir. Aksi halde soğutucunun daha fazla çalışması gerekir. Bu da daha fazla elektrik sarfiyatına yol açar. Bu sebepten dolayı: Havalandırma deliklerinin önünün kesinlikle kapanmamasına dikkat ediniz!
Cihazın elektrik şebekesine bağlanması
Cihazı kurduktan sonra, çalıştırmadan önce en az 1 saat bekleyiniz. Transport esnasında, kompresörün içindeki yağ soğutma sistemi içine dağılabilir.
Cihazı ilk kez devreye sokmadan önce, cihazın içini temizleyiniz (bakınız bölüm ”Cihazın temizlenmesi”).
Elektrik bağlantısı
Priz cihazın yakınında ve cihaz kurulduktan sonra da rahat ulaşılabilir olmalıdır.
Bu cihaz, koruma sınıfı I tipi bir cihazdır. Cihazı 220–240 V/50 Hz alternatif akım üzerinden, kurallara uygun şekilde monte edilmiş, toprak hattına sahip bir prize bağlayınız. Priz, 10–16 A değerinde bir sigortaya sahip olmalıdır.
Avrupa ülkelerinde işletilmeyen cihazlarda, bildirilen gerilimin ve akım türünün, sizin elektrik şebekenizin değerleri ile uyuşup uyuşmadığı kontrol edilmelidir. Bu bilgileri tip etiketi (levhası) üzerinde bulabilirsiniz. Resim )
m Uyarı
Bu cihaz kesinlikle elektronik enerji tasarruf prizlerine bağlanmamalıdır.
Cihazlarımızın işletilmesinde şebeke ve sinüs kontrollü konvertisörler kullanılabilir. Şebeke kontrollü konvertisörler, doğrudan umumi elektrik şebekesine bağlanan fotovoltaik sistemlerde kullanılır. Umumi elekrik şebekesine doğrudan bağlantısı olmayan tekil uygulamalarda (örn. gemilerde veya dağ evlerinde ya da dağ kulübelerinde), sinüs kontrollü konvertisörler kullanılmalıdır.
28
Cihaz özelliklerinin öğrenilmesi
Lütfen önce resimlerin bulunduğu son sayfayı açınız. Bu kullanma kılavuzu birçok cihaz modeli için geçerlidir.
Modellerin donanım kapsamı farklı olabilir.
Resimlerde farklılıklar olabilir. Resim !
* Her model için geçerli değil.
ASoğutucu bölmesi
BDondurucu bölmesi
1–4 Kumanda elemanları
5Küçük şişe rafı
6Büyük şişe rafı
7Aydınlatma
8Isı ayar düğmesi
9Sebze kabı
10Dondurucu tablası
11Dondurulmuş besin kabı (küçük)
tr
Kumanda elemanları
Resim "
* Her model için geçerli değil.
1Isı derecesi ayar tuşu
Bu tuş ile, istenilen ısı derecesi ayarlanır.
2”super” göstergesi
Süper soğutma ve süper dondurma fonksiyonu devrede olduğu zaman yanar.
3Dondurucu bölmesi ısı derecesi
göstergesi
Işıklı gösterge çubuğundaki sayılar, dondurucu bölmesindeki soğukluk derecesinin °C türünden değerine eşittir.
4Eco mode göstergesi
Eco modu açık olduğunda vurgulanır.
Cihazın açılması
Resim "
1.Fişi prize takınız.
2.İkaz sesi duyulur. Isı derecesi göstergesi 3 yanıp söner.
3.Isı ayar tuşuna 1 basınız. İkaz sesi kapanır.
Dondurucu bölmesi ayarlanmış ısı derecesine ulaşınca, ısı derecesi göstergesi 3 yanar.
Fabrika ayarı olarak aşağıdaki ayarlar önerilmektedir:
■Soğutucu bölmesi: Orta ayar
■Dondurucu bölmesi: -18 °C
Hassas gıda maddelerini soğutucu bölmesinde muhafaza ediniz.
29
tr
İşletme hakkında bilgiler
■Devreye sokma işleminden sonra, ayarlanmış ısı derecelerine ulaşılıncaya kadar birkaç saat geçebilir.
■Tam otomatik NoFrost sistemi sayesinde, dondurucu bölmesinde buz oluşmaz. Bu nedenle, buz çözme işlemi yapılması gerekmez.
■Gövdenin ön yüzleri kısmen biraz ısıtılır; böylelikle kapı contasının bulunduğu alanda terlemeden kaynaklanan su oluşması önlenir.
■Dondurucu bölmesinin kapısı kapatıldıktan sonra hemen tekrar açılamazsa, oluşmuş olan vakum dengeleninceye kadar, biraz bekleyiniz.
Sıcaklık derecesinin ayarlanması
Soğutucu bölmesi
Isı ayar düğmesini, Resim !/8, istediğiniz ayar konumuna çeviriniz.
İşaretlemeye ayarlanmasını öneririz.
Ayarın, saatin çalışma yönünde değiştirilmesi sonucunda soğutucu bölmesinde daha soğuk dereceler elde edilir.
16 °C'nin altında oda sıcaklığında cihazı biraz daha yüksek bir ısı derecesine ayarlayınız. 32 °C'nin üzerinde oda sıcaklığında cihazı biraz daha düşük bir ısı derecesine ayarlayınız.
Sadece müteakip durumda geçici olarak çok soğuk bir ayar seçiniz:
■Cihaz kapısının sık açılması,
■Soğutucu bölmesine çok miktarda besin yerleştirilmesi.
Dondurucu bölmesi
Isı derecesi -18° C ile -24 C arasında ayarlanabilir.
İstediğiniz dondurucu bölmesi ısı derecesi ayarlanıncaya kadar, ısı ayar tuşuna 1 arka arkaya basınız.
Son olarak ayarlanmış olan değer hafızaya kaydedilir. Ayarlanmış ısı derecesi ilgili ısı derecesi göstergesinde 3 gösterilir.
Eco
Eco fonksiyonu ile, cihazı enerji tasarruf moduna alabilirsiniz.
Cihaz otomatik olarak şu ısı derecelerini ayarlar:
■ Dondurucu bölmesi: -16 °C
Eco fonksiyonunun devreye sokulması
“eco” göstergesi vurgulanmaya başlayıncaya kadar ısı derecesi ayar tuşuna 1 peş peşe basınız.
Alarm fonksiyonları
Resim "
Kapı alarmı
Cihazın kapısı bir dakikadan daha uzun bir süre açık kalırsa, cihaz kapısı alarmı (sürekli ses) devreye girer. Kapı kapatılınca, uyarı sesi de yine kapanır.
30
 Loading...