

Aprilia RSV MILLE Dealer Instruction Sheet 1999
aprilia
RSV mille
RSV mille R
aprilia
INSTRUCTIONS FOR THE DEALER
MIN
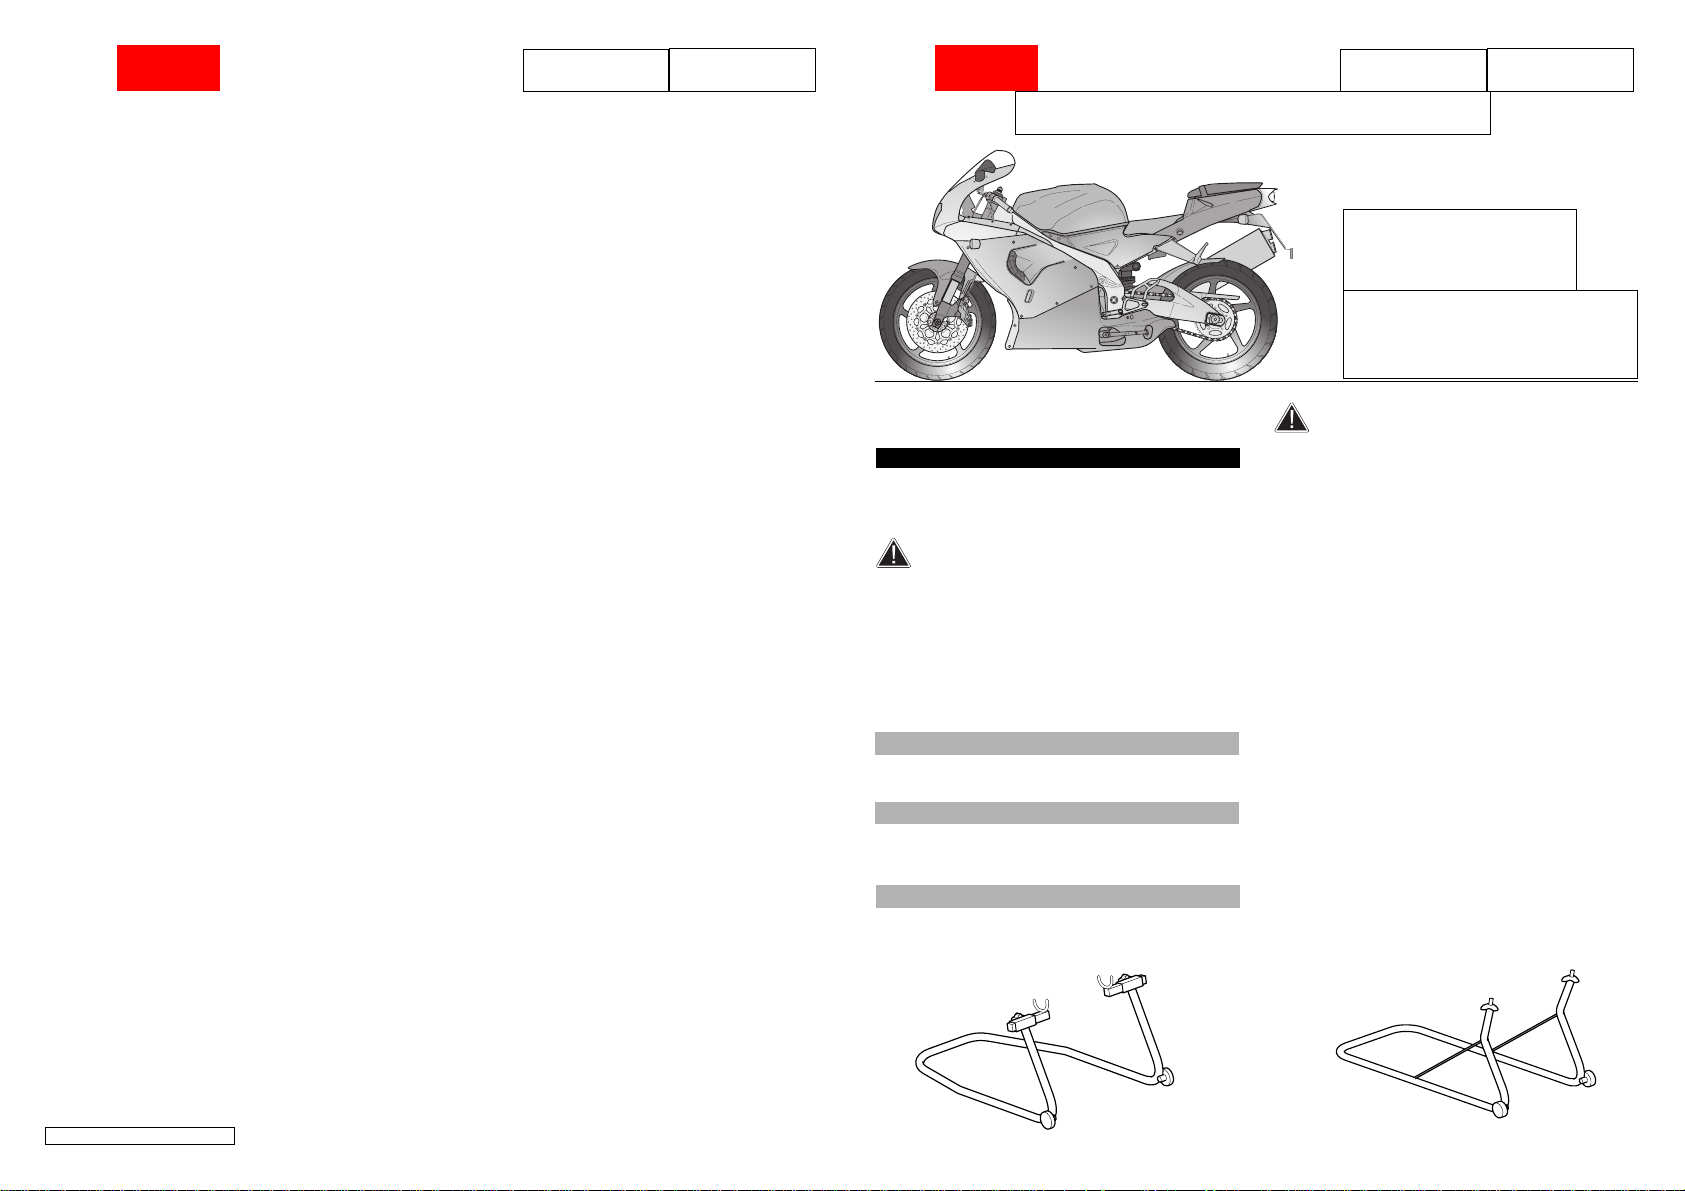
INSTRUCTIONS FOR REMOVING
MOTORCYCLE FROM CRATE
SAFETY MESSAGES
The following warning messages are used on all
the instruction sheets to draw your attention to the
situations described below.
Safety warning symbol. When you see
this symbol on the motorcycle or instruction
sheets, beware of potential injury hazards.
Failure to observe the instructions following
these symbols may affect your safety, the
safety of others and that of the motor cycle!
Risk of serious injury or death.
Possible risk of slight injury or damage
to motor cycle.
DANGER
Risk of serious injury or death.
CAUTION
Possible risk of slight injury or damage to
motor cycle.
IMPORTANT
The word “IMPORTANT”is written before any
important information on the instruction sheet.
RSV mille
RSV mille R
RSV mille
RSV mille
RSV mille R
RSV mille R
For the sake of safety, before starting
the vehicle, carry out a thorough preliminary
check. See the PRELIMINARY CHECK LIST IN
THE VEHICLE OPERATION AND MAINTENANCE
HANDBOOK.
Failure to carry out these checks may lead to
serious injury or damage to the vehicle.
Very little time is required, and the benefits
in terms of safety are enormous.
The components in this handbook are supplied
disassembled, and have to be fitted to the motor
cycle. These instruction sheets for dealers describe
the correct fitting procedures.
Read the instructions in the sheets to avoid
breakages or incorrect assembly.
Remove the bag containing the mirrors and other
loose parts (i.e. not fitted to the motor cycle body)
from the crate.
After removing the nailed-on supports and
crosspieces from the crate (used for transport
purposes), push the motor cycle off the bottom of
the crate and position it on the stand.
You can now proceed with the operations
described below.
aprilia part #8104187 - 11/99 - USA
Pag. 4
Pag. 1
aprilia
RSV mille
RSV mille R
aprilia
RSV mille
INSTRUCTIONS FOR THE DEALER INSTRUCTIONS FOR THE DEALER
RSV mille R
1
BATTERY
DANGER
Battery electrolyte is toxic, caustic and the
contact with the skin may cause serious
burns, since it contains sulfuric acid. Wear
protective clothing, a face shield and/or tight
fitting goggles when working around the
battery. In case of contact with the skin, flush
immediately with plenty of water.
In case of contact with the eyes, flush with
plenty of water for at least 15 minutes.
Immediately consult an optician.
If the electrolyte is accidentally swallowed,
drink large quantities of water or milk, and
then milk of magnesia or vegetable oil.
Immediately consult a health professional.
The battery gives off noxious and explosive
gases; keep it away from cigarettes, flames,
sparks and any other source of heat. During
the recharging or the use, make sure that
the room is properly ventilated and avoid
inhaling the gases released during the
recharging. KEEP AWAY FROM CHILDREN. Do
not tip the vehicle too much, or tip the battery
too much, to avoid electrolyte leaking out.
CAUTION
The battery liquid is corrosive. Do not pour or
sprinkle it, particularly on plastic parts. When
the battery has been removed it must be
placed in a safe place out of the reach of
children. The battery is very dangerous and
may cause serious injury or death.
3
5
4
2
MAX
MIN
3
2
1
INITIAL BATTERY CHARGING
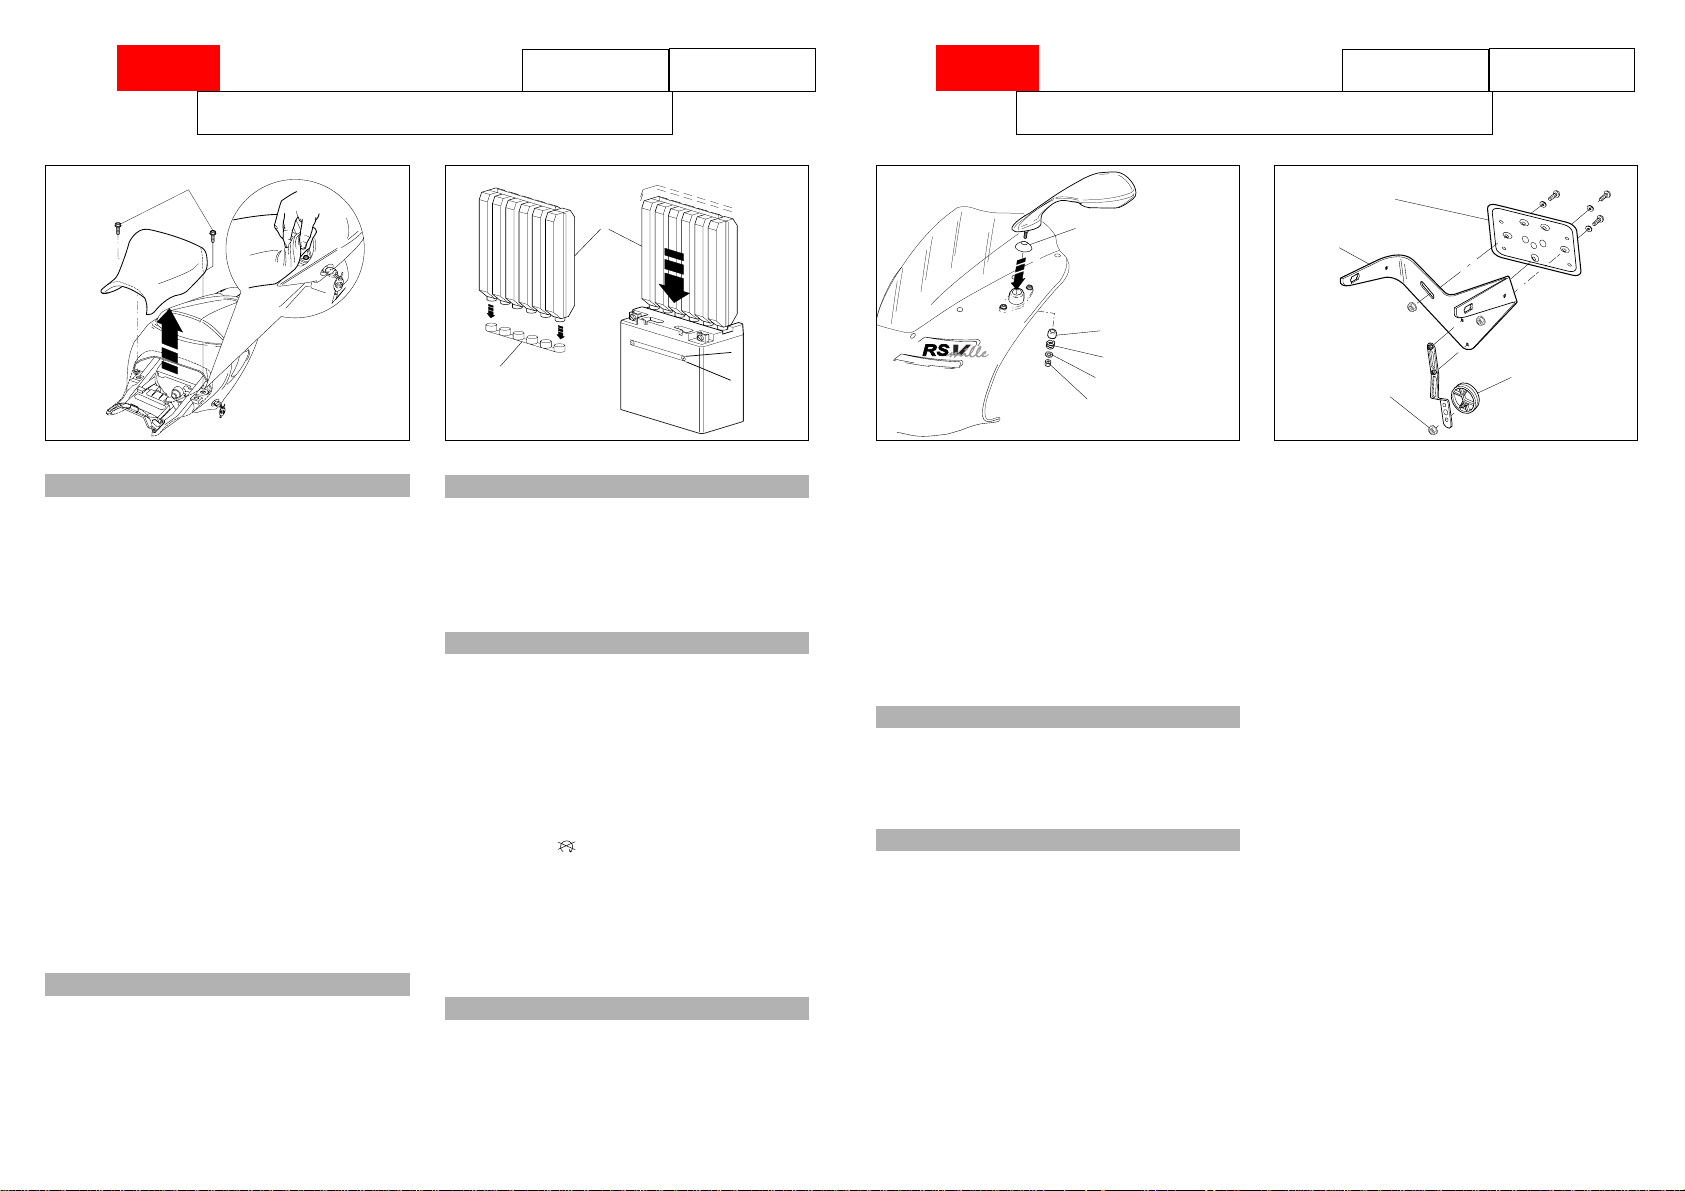
FITTING THE REAR-VIEW MIRROR
CAUTION
M Remove the saddle, by unscrewing the screws
(1).
M Remove the cap (2) from the recharge container
(3).
M Place the container in the battery as shown in the
drawing.
CAUTION
To top up the electrolyte use only distilled
water. Do not fill higher than the “MAX” level,
because the level rises during recharging.
M Top up with distilled water.
M Make sure the level is between “MIN” and “MAX”
printed on the side of the battery.
FITTING THE BATTERY
M Make sure the ignition
key is in the “ “ position.
M Place the battery into its housing.
M First connect the positive cable (+) then the ne-
gative (-).
M Use a neutral grease or vaseline to grease
terminals.
REFITTING THE BATTERY AFTER
FIRST RECHARGE
Fit the mirror as follows:
Assemble the washer (2) spring (3) and semisphere (4), tighten the nut (1) on the mirror pin.
Fit the spring cap (5) on the mirror pin.
Screw (1) tightening torque: 36.15 ftlb (50Nm)
IMPORTANT
Carry out the same operations for the other
mirror.
DANGER
After reassembling the mirrors, adjust for proper
view and tighten the nuts to prevent accidental
adjustment.
CAUTION
Wait 5-10 minutes after recharging and then
fit the battery, since it continues to produce
gas for a period after recharging.
Pag. 2 Pag. 3
8
9
7
6
FITTING THE RETROREFLECTOR
Place the retroreflector (7) on the mudguard and
secure with a self-tightening flanged nut (6) M5.
FITTING THE LICENSE PLATE HOLDER
Place the license plate holder (8) on the mudguard
(9) and secure with 3 screws M6 and 3 flanged
nuts.
 Loading...