

Page 1
Service Source
Apple Cinema Display 22” (DVI)
© 2002 Apple Computer, Inc. All rights reserved.
Page 2

Apple Cinema Display 22” (DVI)
Power Mac G4 -
1
Page 3

Service Source
Take Apart
Apple Cinema Display 22” (DVI)
© 2002 Apple Computer, Inc. All rights reserved.
Page 4

Tools
The following tools are recommended for the take apart procedures.
• 2 mm hex key
• #2 Phillips screwdriver
• jeweler’s #1 Phillips screwdriver
• ESD wriststrap and mat
• white cotton gloves (922-1592)
• nylon probe tool (922-5065)
Important:
Be very careful with tools, lay the display and plastic parts only on a clean soft surface,
and wear clean white cotton gloves when handling and servicing the display.
The display plastics, inside and out, retain fingerprints and can scratch easily.
Tools
Apple Cinema Display 22” (DVI) Take Apart -
1
Page 5

Foot Assembly
Tools
This procedure requires the following tools:
• 2mm hex key
• White gloves for handling plastics
Part Location
Preliminary Steps
Before you begin, do the following:
• Place the display face down on an ESD mat or soft cloth.
Note:
Plastics are easily damaged. The white gloves prevent fingerprints.
2
Apple Cinema Display 22” (DVI) Take Apart
Foot Assembly
Page 6

Procedure
1. Remove three screws and lift the foot off the hinge.
2. The clear hinge cap may fall off the foot. If it doesn’t, remove the hinge cap from the
foot.
3. Pull the ADC (Apple Display Connector) cable through the opening in the foot to
separate the foot and the cable.
Foot Assembly
Apple Cinema Display 22” (DVI) Take Apart -
3
Page 7
Rear Cover
Tools
This procedure requires the following tools:
• 2mm hex key
• White gloves for handling plastics
Part Location
Preliminary Steps
Before you begin, do the following:
• Place the display face down on an ESD mat
• Remove the foot assembly and hinge cover
4
Apple Cinema Display 22” (DVI) Take Apart
Rear Cover
Page 8
Procedure
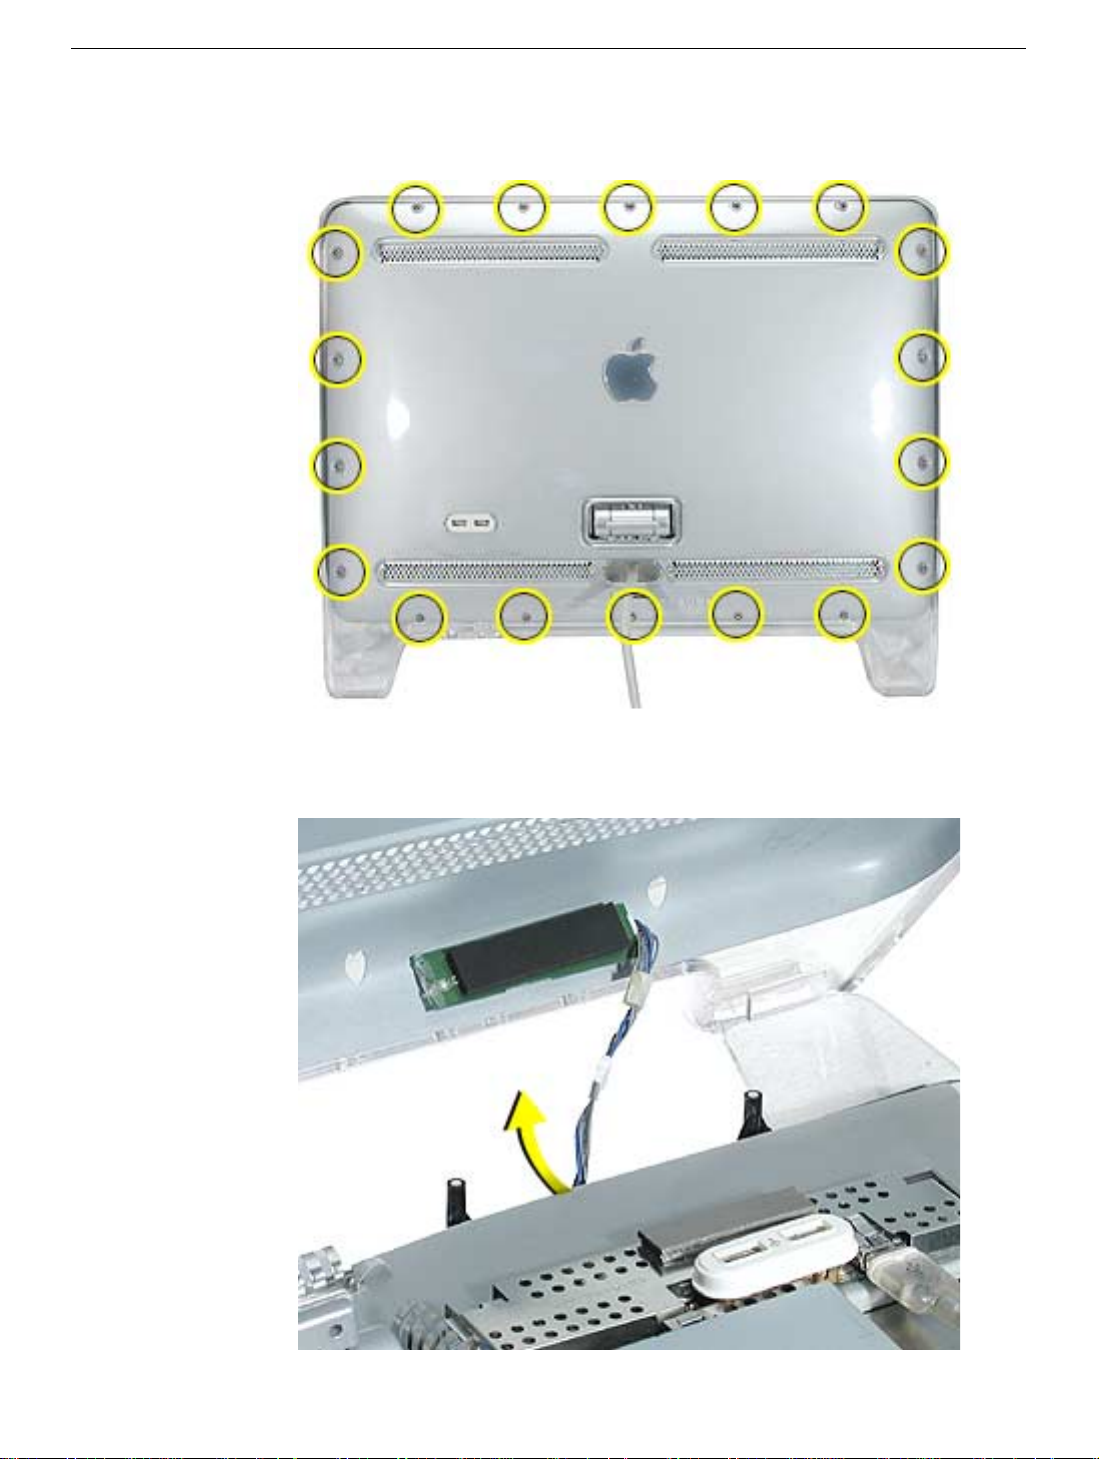
1. Remove eighteen hex screws on the rear cover.
2. Carefully lift the rear cover only enough to expose the power/brightness switch cable
and connector. Disconnect the cable, shown below.
rear cover is heat-staked to the cover. It can’t be removed.
Note:
The power switch on the
Rear Cover
Apple Cinema Display 22” (DVI) Take Apart -
5
Page 9
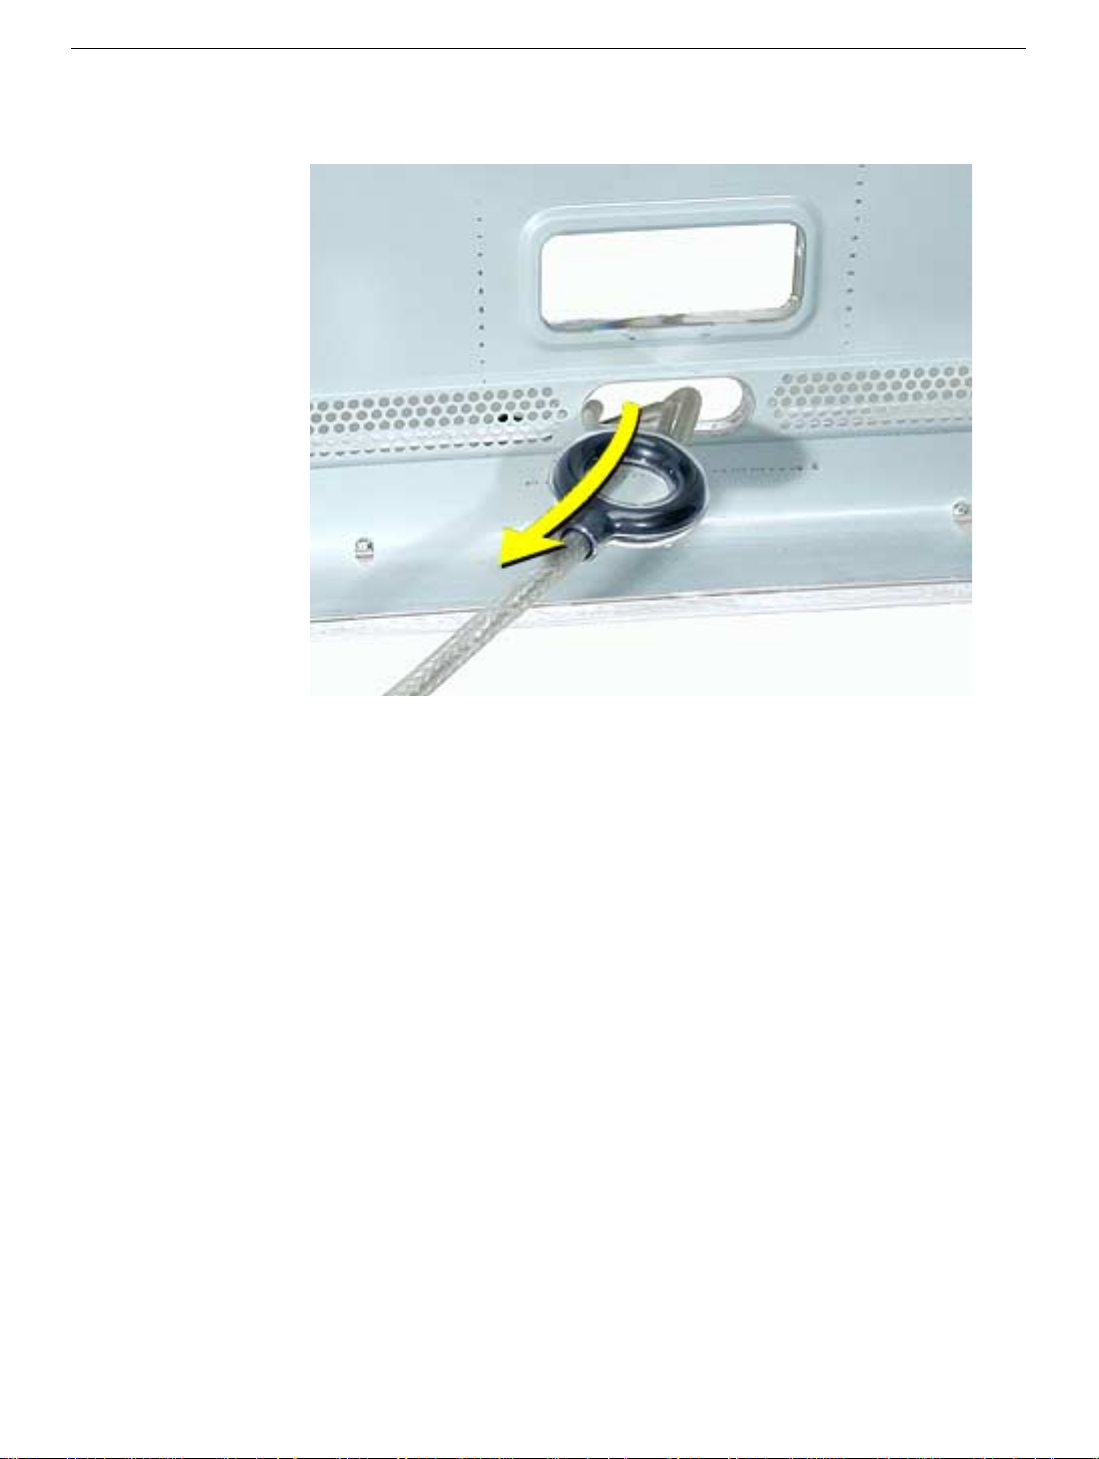
3. Carefully pull the ADC cable through the hole in the rear cover.
6
Apple Cinema Display 22” (DVI) Take Apart
Rear Cover
Page 10

Hinge
Tools
• #2 Phillips screwdriver
Part Location
Hinge
Preliminary Steps
Before you begin, do the following:
• Place the display face down on an ESD mat
• Remove the foot assembly and hinge cover
• Remove the rear cover
Apple Cinema Display 22” (DVI) Take Apart -
7
Page 11

Procedure
1. Remove four screws.
Note:
The two bottom screws are anodized (brass colored).
2. Pull the ADC cable out of the way and remove two more hinge screws.
3. Lift the hinge up and off the chassis.
it, so it seats correctly in the chassis.
Replacement Note:
The hinge has locators on
8
Apple Cinema Display 22” (DVI) Take Apart
Hinge
Page 12
ADC Cable
Tools
• #2 Phillips screwdriver
Part Location
ADC Cable
Preliminary Steps
Before you begin, do the following:
• Place the display face down on an ESD mat
• Remove the foot assembly and hinge cover
• Remove the rear cover
• Remove the hinge
Apple Cinema Display 22” (DVI) Take Apart -
9
Page 13
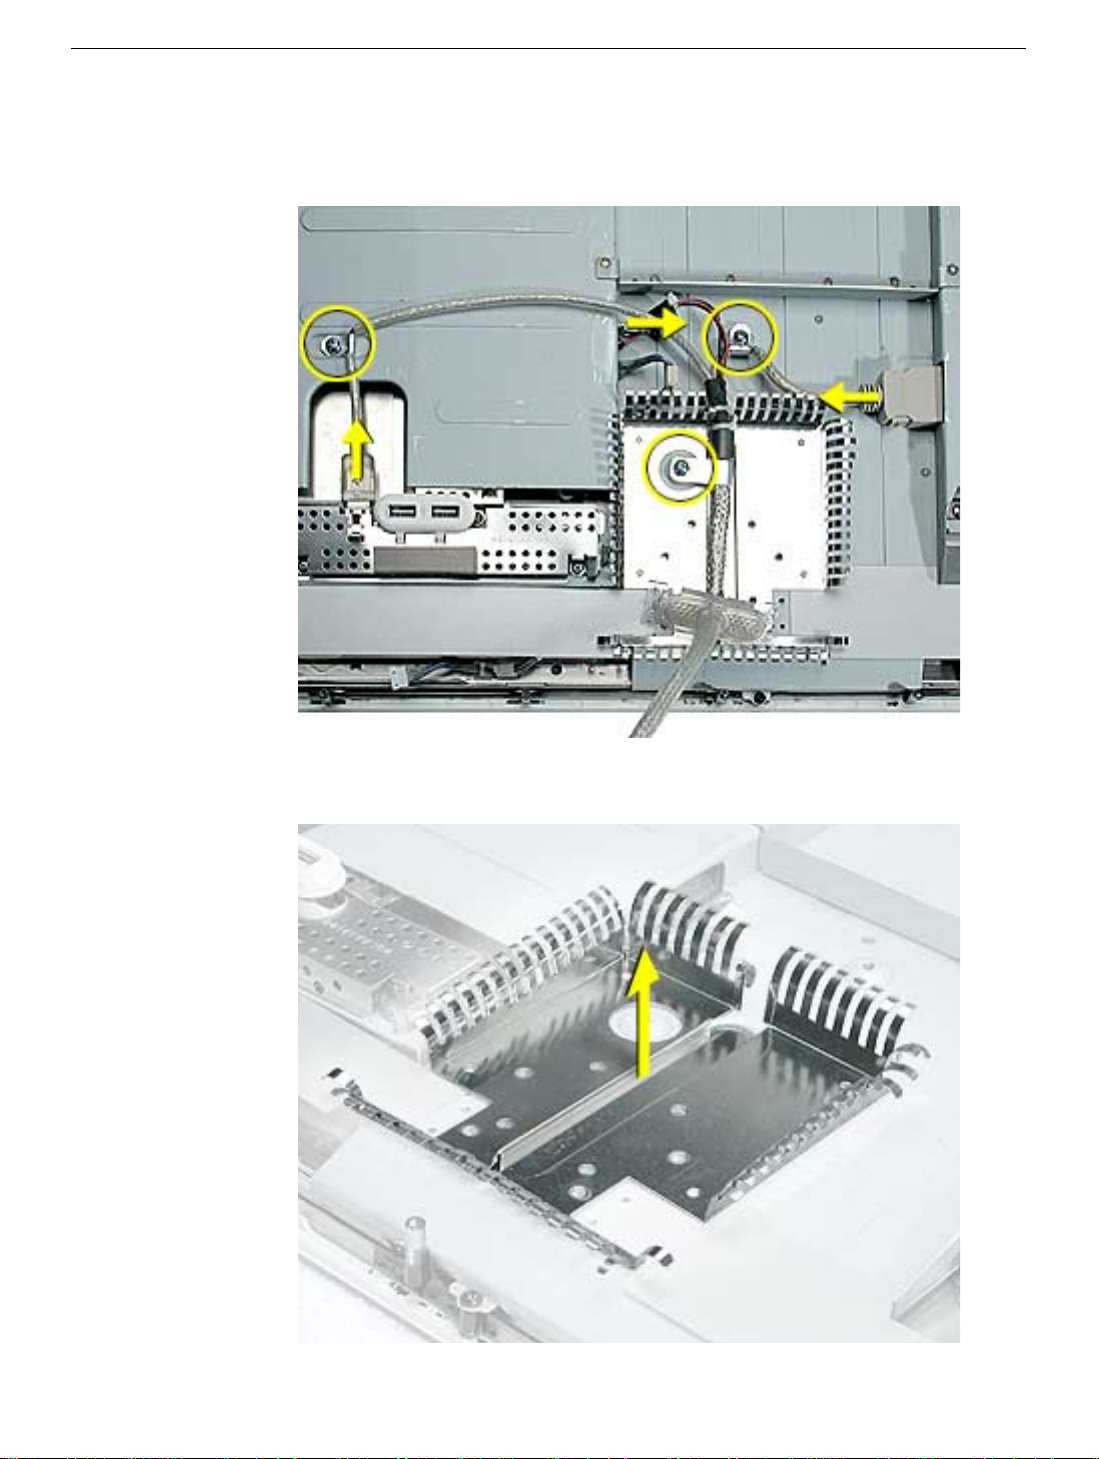
Procedure
1. Remove three screws holding the ADC cable clips (circled below) to the chassis.
Disconnect the three cable connectors (shown with arrows).
2. Lift the ADC cable from the chassis.
3. Lift the hinge shield from the chassis.
10
Apple Cinema Display 22” (DVI) Take Apart
ADC Cable
Page 14

USB Board
Tools
• #2 Phillips
• Nylon probe tool (922-5065)
Part Location
USB Board
Preliminary Steps
Before you begin, do the following:
• Place the display face down on an ESD mat
• Remove the foot assembly and hinge cover
• Remove the rear cover
• Disconnect the USB cable next to the USB ports
Apple Cinema Display 22” (DVI) Take Apart -
11
Page 15

Procedure
1. Pull the USB trim cap off the USB ports.
2. Remove four USB board screws; two silver screws on the bottom and two anodized
screws near the USB ports. Carefully disconnect the USB -to- main-board cable
(shown with arrow) using the nylon probe tool or similar tool.
3. Lift the USB board (located inside the shielding) from the chassis. Remove the USB
shield and copper ground shield.
returning the USB board to Apple.
Note:
The shielding needs to be removed before
12
Apple Cinema Display 22” (DVI) Take Apart
USB Board
Page 16

4.
Replacement Note:
Reassemble the USB board and shields as shown below.
USB Board
Apple Cinema Display 22” (DVI) Take Apart -
13
Page 17

Front Bezel
Tools
This procedure requires the following tools:
• #2 Phillips screwdriver
Part Location
Preliminary Steps
Before you begin, do the following:
• Place the display face down on an ESD mat
• Remove the foot assembly and hinge cover
• Remove the rear cover
• Remove the hinge
• Remove the ADC cable and hinge shield
14
Apple Cinema Display 22” (DVI) Take Apart
Front Bezel
Page 18

Procedure
1. Remove the four black bezel screws.
2. Carefully lift the display panel off the front bezel
Use caution when lifting the panel out of the bezel.
Note:
The display panel is very heavy.
Front Bezel
Apple Cinema Display 22” (DVI) Take Apart -
15
Page 19

Chassis
Tools
This procedure requires the following tools:
• #2 Phillips screwdriver
Part Location
Preliminary Steps
Before you begin, do the following:
• Place the display face down on an ESD mat
• Remove the foot assembly and hinge cover
• Remove the rear cover
• Remove the hinge
• Remove the ADC cable
• Remove the hinge shield
• Remove the USB board
• Remove the front bezel.
16
Apple Cinema Display 22” (DVI) Take Apart
Chassis
Page 20

Procedure
1. Remove the four screws (one in each corner) and the two silver screws on the top and
bottom of the chassis (shown with dotted lines).
2. Pull the cable (circled below) through the hole in the chassis, then lift the metal
chassis off the LCD panel.
Chassis
Apple Cinema Display 22” (DVI) Take Apart -
17
Page 21

Top Backlight Bulb
Tools
This procedure requires the following tools:
• #1Phillips screwdriver
Part Location
Preliminary Steps
Before you begin, do the following:
• Place the display face down on an ESD mat
• Remove the foot assembly and hinge cover
• Remove the back cover
• Remove the hinge
• Remove the ADC cable
• Remove the hinge shield
• Remove the USB board
• Remove the front bezel.
18
Apple Cinema Display 22” (DVI) Take Apart
Top Backlight Bulb
Page 22

Procedure
1. Peel the gray flexible material (see arrow) back to expose the top bulb cables.
2. Release the masking tape and disconnect the two bulb cables from the inverter board.
Top Backlight Bulb
Apple Cinema Display 22” (DVI) Take Apart -
19
Page 23

3. Remove the bulb screw.
4. Carefully slide the top bulb tray out of the panel.
interchangeable.
Note:
The top and bottom bulbs are
20
Apple Cinema Display 22” (DVI) Take Apart
Top Backlight Bulb
Page 24

Bottom Backlight Bulb
Tools
This procedure requires the following tools:
• #1 Phillips screwdriver
Part Location
Preliminary Steps
Before you begin, do the following:
• Place the display face down on an ESD mat
• Remove the foot assembly and hinge cover
• Remove the rear cover
• Remove the hinge
• Remove the ADC cable
• Remove the hinge shield
• Remove the USB board
• Remove the front bezel.
• Remove the chassis
Bottom Backlight Bulb
Apple Cinema Display 22” (DVI) Take Apart -
21
Page 25

Procedure
1. Release the masking tape, disconnect the two bulb cables from the inverter board,
and remove the bulb screw (circled).
2. Carefully slide the bottom bulb tray out of the panel.
interchangeable
Note:
The backlight bulbs are
22
Apple Cinema Display 22” (DVI) Take Apart
Bottom Backlight Bulb
Page 26

Inverter and Main Board
Tools
This procedure requires the following tools:
• #2 Phillips screwdriver
Part Location
Preliminary Steps
Before you begin, do the following:
• Place the computer face down on an ESD mat
• Remove the foot assembly and hinge cover
• Remove the back cover
• Remove the hinge
• Remove the ADC cable
• Remove the shield
• Remove the USB board
Inverter and Main Board
Apple Cinema Display 22” (DVI) Take Apart -
23
Page 27

• Remove the front bezel
• Remove the chassis
• Disconnect the bulbs cables (top and bottom) from the inverter
24
Apple Cinema Display 22” (DVI) Take Apart
Inverter and Main Board
Page 28

Procedure
1. Remove the six screws on the metal shield and disconnect any attached cables.
2. Lift the shield off the display panel.
3. Turn the shield over to access the inverter board (the longer board of the two) and the
main board. Flex the shield a bit to unlatch the boards from the metal tabs (smaller
circles). The boards slide under the metal tabs. Disconnect the cable connecting the
inverter to the main board (shown by the big circle).
Inverter and Main Board
Apple Cinema Display 22” (DVI) Take Apart -
25
Page 29

Display Panel
Tools
This procedure requires the following tools:
• #2 Phillips screwdriver
Part Location
Preliminary Steps
Before you begin, do the following:
• Place the computer face down on an ESD mat
• Remove the foot assembly and hinge cover
• Remove the back cover
• Remove the hinge
• Remove the ADC cable
• Remove the hinge shield
• Remove the USB board
• Remove the front bezel
26
Apple Cinema Display 22” (DVI) Take Apart
Display Panel
Page 30

• Remove the chassis
• Disconnect the bulbs cables (top and bottom) from the inverter
• Remove the inverter and main board
• Remove the power switch cable (near bottom backlight bulb)
Procedure
1. If attached, remove the two cables at the locations indicated by the yellow arrows.
Return the panel as it appears below. Important: The backlight bulbs must be
returned with the panel.
Display Panel
Apple Cinema Display 22” (DVI) Take Apart - 27
Page 31

Service Source
Troubleshooting
Apple Cinema Display 22" (DVI)
© 2002 Apple Computer, Inc. All rights reserved.
Page 32

Wiring Diagram
CN306
CN305
CN301
U11
CN303
CN304
CN4
J1
CN2
CN3
CN1
CN7
CN5
CN6
Wiring Diagram
Apple Cinema Display 22" (DVI) - 1
Page 33

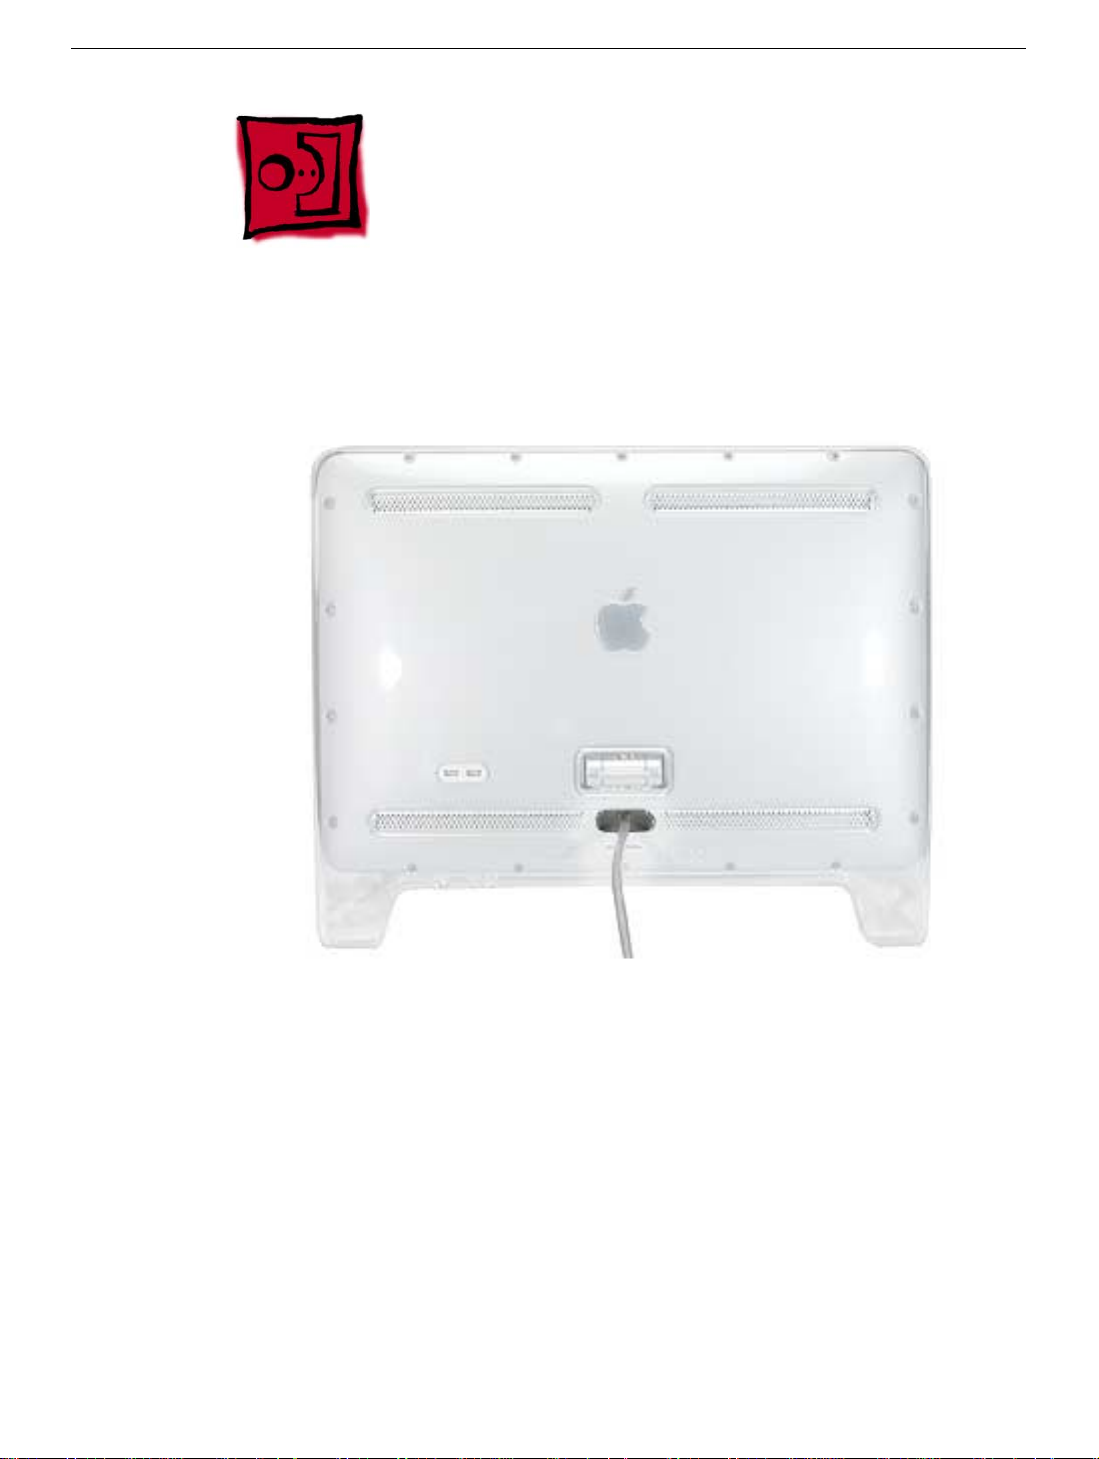
Front and Back Views
Brightness Buttons Power On/Off Button
Power Adapter Cord
Power Adapter
USB Ports
Security Ring
USB Connector
DVI-D Connector
Front and Back Views
Apple Cinema Display 22" (DVI) - 2
Page 34

Symptom Charts
How to Use the Symptom Charts
The Symptom Charts included in this chapter will help you diagnose specific symptoms
related to the product. Because cures are listed on the charts in the order of most likely
solution, try the cures in the order presented. Verify whether or not the product continues
to exhibit the symptom. If the symptom persists, try the next cure.
Note: If you have replaced a module, reinstall the original module before you proceed to
the next cure.
Note: Referring to the Wiring Diagram in this chapter may be helpful.
Symptom Charts
Apple Cinema Display 22" (DVI) - 3
Page 35

No Power
1. Check the main DVI cable. Replace the cable if damaged.
2. Check for bent pins in the DVI connector. If pins are slightly bent, carefully straighten.
If pins are severely bent, replace cable. Also, inspect or have the customer inspect the
display port on the computer for broken pin dividers. If the display port is damaged it
must be repaired before inserting the DVI connector.
3. Disconnect the display from the computer and disconnect the power cord from the
display’s power adapter. Open the display and check for secure connections on the
inverter and main board. Warning: The inverter board generates high voltage
when the display is plugged in. Do not touch the inverter board components,
pins or connectors, when the display is connected to the computer.
4. Disconnect CN303 (refer to wiring diagram in this chapter) from the main board, then
connect the power adapter. Check for approximately 16V between the red and black
pins on the connector. Voltage between 14V and 17V is okay. Replace the power
adapter if the voltage is out of spec.
5. Check the connection on the power switch- to- main -board cable. Note: The power
switch is located in the front bezel. Reseat the power switch cable. If you still have no
power, go on to the next step.
6. Replace the main board.
No Power Symptom Charts
Apple Cinema Display 22" (DVI) - 4
Page 36

Blank screen
This symptom may indicate a problem with the LCD panel, backlight bulbs, inverter, main
board, or related cables or connectors.
1. Check DVI cable. Replace cable if damaged.
2. Check for bent pins in the DVI connector. If pins are slightly bent, carefully straighten.
If pins are severely bent, replace cable. Also, inspect or have the customer inspect the
display port on the computer for broken pin dividers. If the display port is damaged it
must be repaired before inserting the DVI connector.
3. Plug the display into a known-good computer with a known-good video card and DVI
display port. Boot the computer and allow enough time to finish booting.
4. If the power button on the display is flashing, two short flashes then a long flash, in a
delayed repeating pattern, this indicates trouble with either the inverter, backlight
bulbs or related cables or connectors. With this in mind, continue with the
troubleshooting steps to determine the problem.
5. To check whether the LCD is working, make sure that the display’s power light is on
(glows green). Shine a bright light such as sunlight or a high intensity lamp (see
Important note, below) into the screen and at the same time notice whether you can
see faint images of desktop items on the screen.
• If desktop items can be seen, the LCD panel is working. The problem may be with
the inverter or backlight bulbs or related cables or connectors. Continue with the
troubleshooting steps.
• If no desktop items can be seen, the problem may be with the LCD panel or the
main board or related cables or connectors.
Important: Lights get very hot and can quickly damage the display; be extremely
careful not to allow too much heat next to the screen or other parts of the display and
do not allow the light fixture to touch the screen, or damage can result.
6. Warning: The inverter board generates high voltage when the display is plugged
in. Do not touch the inverter board components, pins or connectors, when the
display is connected to the computer.
Disconnect the display from the computer and remove the power from the power
adapter. Open the display and check for secure connections on the inverter and main
board at CN301, CN303, CN304, CN305, CN306, CN1, CN2, and the DVI cable
connection to the panel. Note: Refer to the Wiring Diagram in this chapter for
connector locations.
7. Plug the display into a known-good computer and reconnect the power adapter. Then
boot the computer.
8. Replace the main board.
9. Replace the inverter board.
10. Replace the LCD display panel.
Blank screen Symptom Charts
Apple Cinema Display 22" (DVI) - 5
Page 37

Partially dim screen
This symptom indicates a problem with the inverter or backlight bulbs (on the side of the
display that is dim), or related cables or connectors. This may be caused by the backlight
bulbs or the inverter not working properly.
1. Plug the display into a known-good computer with a known-good video card and DVI
display port. Boot the computer.
2. Notice whether the power button on the display is flashing, two short flashes then a
long flash, in a delayed repeating pattern. This indicates trouble with either the
inverter, backlight bulbs or related cables or connectors (this indicator may not always
be exhibited). With this in mind, continue with the troubleshooting steps to determine
the problem.
3. Warning: The inverter board generates high voltage when the display is plugged in.
Do not touch the inverter board components, pins or connectors, when the display is
connected to the computer.
Disconnect the display from the computer and remove power from the power
adapter. Then open the display and check for secure connections where the
backlight bulbs plug into the inverter.
Note: Refer to the Wiring Diagram in this chapter for connector locations.
4. Important: The backlight bulbs are extremely delicate. Handle with care.
To determine whether the problem is with the backlight bulbs or the inverter board,
disconnect the two CN connectors to the backlight bulbs on the side that is dim.
Connect the CN connectors to a known good backlight bulb tray (the bulb tray from
the other side of the display can be removed and plugged in to test, if known good).
Connect the display’s DVI connector to a known-good computer, then boot the
computer. If one or more of the bulbs does not light, replace the inverter. If the bulbs
light correctly, the original backlight bulb tray is bad, replace the bulb tray.
Note: The top and bottom backlight bulb trays are interchangeable. The bulb trays
are not specific to the top or bottom.
6 - Apple Cinema Display 22" (DVI)
Partially dim screen Symptom Charts
Page 38

USB device not working
1. Check for bent pins in the display’s cable USB connector. If pins are slightly bent,
carefully straighten. If pins are severely bent, replace cable. Also, inspect or have the
customer inspect the USB port on the computer for broken pin dividers. If the USB
port is damaged it must be repaired before inserting the USB connector.
2. Plug the display into a computer with a known-good DVI display port, then boot the
computer. On the back of the display, connect a known-good USB device into one of
the USB ports, then check Apple System Profiler to see if it is recognized. Check both
USB ports. If the device is recognized, the customer’s USB device may be the issue. If
the device is not recognized, check the J1 and U11 USB board connections (see
wiring diagram in this chapter). If the problem still exists, replace the USB board.
Note: x+R, refreshes the Apple System Profiler list when USB devices are changed.
3. If the USB device is not working after replacing the USB board, replace the main
board.
USB device not working Symptom Charts
Apple Cinema Display 22" (DVI) - 7
Page 39

Power/brightness switch not working
1. Verify that the cable is connected to the power/brightness switch cable connector.
2. Replace the rear cover (the power/brightness board is permanently affixed).
3. Replace main board.
8 - Apple Cinema Display 22" (DVI)
Power/brightness switch not working Symptom
Page 40

Pixel anomalies
Refer to the KnowledgeBase article 22194 (www.info.apple.com/kbnum/n22194) for
information about pixel anomalies.
The document explains why such anomalies occur, and describes what to do if the
customer believes that their active matrix LCD panel has more than an acceptable number
of pixel anomalies.
Important: The information and specifications in the section labeled “EXTENDED
Information section - Apple Internal Use - Service Providers and Support Professional” is
CONFIDENTIAL and is not for release to customers.
Pixel anomalies Symptom Charts
Apple Cinema Display 22" (DVI) - 9
Page 41

Service Source
Views
Apple Cinema Display 22" (DVI)
© 2002 Apple Computer, Inc. All rights reserved.
Page 42

Wiring Diagram
CN306
CN305
CN301
U11
CN303
CN304
CN4
J1
CN2
CN3
CN1
CN7
CN5
CN6
Apple Studio Display 22" (DVI) Views
Page 43

Exploded View
Rear Logo
076-0985
Shield, Hinge Cage
922-3945
USB Trim Ring
922-5690
USB Shield
922-5691
USB Board
922-5692
Chassis
922-5688
Foot
922-3941
Cover, Rear
922-5687
Hinge
922-5670
Cable, DVI, Main
922-5689
Inverter Shield
922-5693
Inverter
661-2809
Backlight
Bulb
922-5675
2 Apple Studio Display 22" (DVI) Views
Main Board
922-5694
Display, LCD, 22"
661-2801
Front Bezel
922-5668
 Loading...