


Whirlpool WTW7000DW1, WTW8040DW2, WTW8040DW1, WTW8000DW2, WTW7300DW1 Owner’s Manual
...Use & Care Guide
Guide d’utilisation et d’entretien
Top-Loading High Efficiency Low-Water Washer Laveuse haute efficacité à faible consommation d’eau avec chargement par le dessus
Para obtener acceso al Manual de uso y
cuidado en español, o para obtener información adicional acerca de su producto, visite: www.whirlpool.com.
If you have any problems or questions, visit us at www.whirlpool.com
Pour tout problème ou toute question, consulter www.whirlpool.ca
Designed to use only HE High Efficiency detergents.
Conçue pour l’utilisation d’un détergent haute efficacité seulement.
W10607424B W10607425B - SP
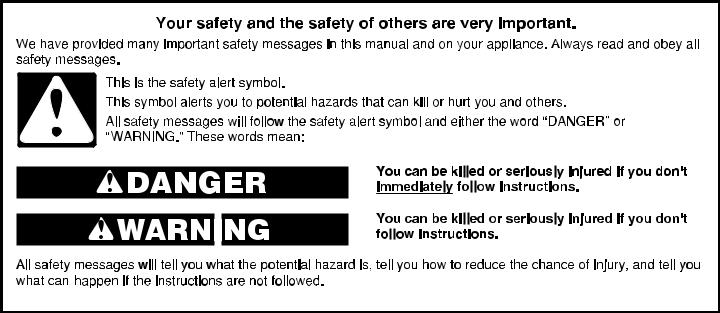
Table of Contents |
|
Table des matières |
|
|
WASHER SAFETY............................................................. |
2 |
SÉCURITÉ DE LA LAVEUSE.......................................... |
|
21 |
WHAT’S NEW UNDER THE LID?..................................... |
4 |
QUOI DE NEUF SOUS LE COUVERCLE? .................... |
22 |
|
CONTROL PANEL AND FEATURES............................... |
5 |
TABLEAU DE COMMANDE |
|
|
Dispensers........................................................................... |
7 |
ET CARACTÉRISTIQUES .............................................. |
|
23 |
CYCLE GUIDE................................................................... |
8 |
Distributeurs...................................................................... |
|
25 |
USING YOUR WASHER................................................... |
9 |
GUIDE DES PROGRAMMES.......................................... |
|
26 |
WASHER MAINTENANCE................................................... |
13 |
UTILISATION DE LA LAVEUSE..................................... |
|
28 |
TROUBLESHOOTING........................................................... |
15 |
ENTRETIEN DE LA LAVEUSE............................................ |
|
32 |
WARRANTY............................................................................ |
20 |
DÉPANNAGE.......................................................................... |
|
34 |
ASSISTANCE OR SERVICE.............................. |
Back Cover |
GARANTIE............................................................................... |
|
42 |
|
|
ASSISTANCE OU SERVICE................. |
Couverture arrière |
|
Washer Safety
2

3
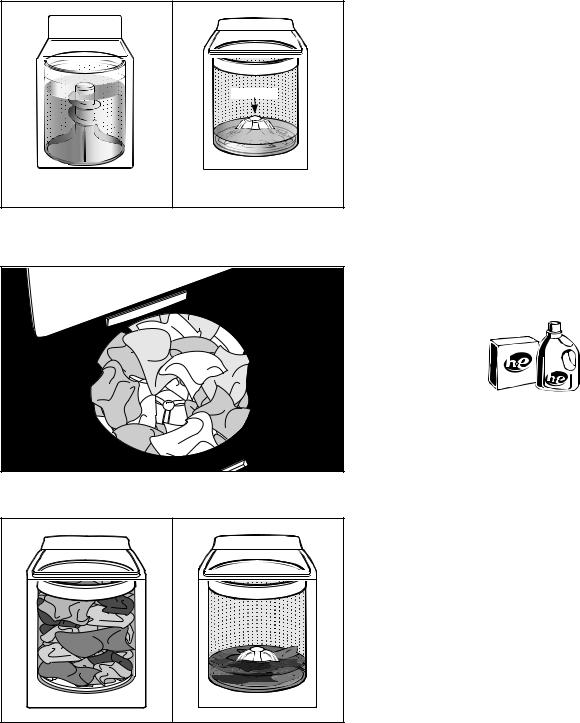
What’s New Under the Lid?
Cleaning with Less Water
|
Washplate |
Traditional agitator-style |
Low-water washer |
washer |
|
The most striking difference in your new washer is the low-water washplate wash system. The washer automatically adjusts the water level to the load size—no water level selector is needed.
For best performance, it is recommended to load items in loose heaps evenly around the washplate.
As the washer dampens and moves the load, the level of the items will settle in the basket. This is normal and does not indicate that more items should be added.
IMPORTANT: You will not see a washer basket full of water as with your past agitator-style washer. It is normal for some of the load to be above the water line.
Automatic Load Size Sensing
Once you start the cycle, the lid will lock, and the washer will begin the sensing process to determine the correct water level for the load.
Initially the basket will start to spin prior to adding water, this is part of the sensing process and is normal. This low-water wash method uses less water and energy compared to a traditional agitator-style washer.
Choosing the Right Detergent
Use only High Efficiency detergents. The package will be marked “HE” or “High Efficiency.” Low-water washing creates excessive sudsing with a regular non-HE detergent. Using regular detergent will likely result in longer cycle times and reduced rinsing performance. It may also result in component failures and noticeable mold or mildew. HE detergents are made to produce the right amount of suds for the best performance. Follow the manufacturer’s instructions to determine the amount of detergent to use, and do not go over the Max line. See “Using Laundry Product Dispensers” for more information.
Use only High Efficiency (HE) detergent.
Improved Cleaning
Low-water cleaning means concentrated cleaning. Rather than diluting detergent as done in an agitator-style washer, this washer delivers the detergent directly to the soils. This low water wash also allows the clothing to move in a more effective way to remove soils.
Normal Sounds You Can Expect
At different stages of the wash cycle, you may hear sounds and noises that are different from those of your previous washer. For example, you may hear a clicking and hum at the beginning of the cycle as the lid lock goes through a self-test. There will be different kinds of humming and whirring sounds as the washplate moves the load and as basket is slowing down to stop. And sometimes, you may hear nothing at all as the washer determines the correct water level for your load or allows time for clothes to soak.
4
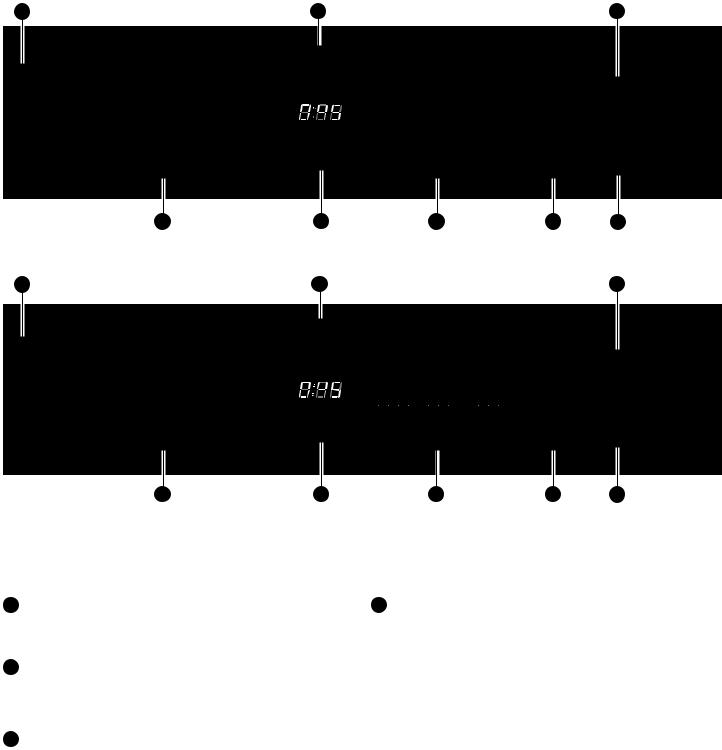
Control Panel and Features
Not all features and cycles are available on all models.
STEAM MODEL
1 |
2 |
3 |
5 |
4 |
6 |
5 |
7 |
NON-STEAM MODEL
1 |
2 |
3 |
5 |
4 |
6 |
5 |
7 |
NOTE: The control panel features a sensitive surface that responds to a light touch of your finger. To ensure your selections are registered, touch the control panel with your finger tip, not your fingernail. When selecting a setting or option, simply touch its name until the desired section is illuminated.
1POWER BUTTON
Touch to turn the washer On. Touching once while the washer is on will cancel the current cycle, touching twice will turn the washer Off.
2WHAT TO WASH/HOW TO WASH
First select a cycle from the “What to Wash” and then select the “How to Wash” to get the best combination cycle available for the type of items you are going to wash. See “Cycle Guide” for cycle details.
3START/PAUSE BUTTON
Touch and hold START/PAUSE to begin the selected cycle; touch again to pause a cycle.
4LED TIME/STATUS DISPLAY
The Estimated Time Remaining display shows the time required for the cycle to complete. Factors such as load size and water pressure may affect the time shown in the display. Tightly packed loads, unbalanced loads, or excessive suds may cause the washer to adjust the cycle time, as well.
If you have set a delay start to the cycle, the Estimated Time Remaining display will show the delay time adjusted.
When the cycle is complete, the Done indicator will light until the lid is opened.
ADD GARMENT
When Add Garment is lit, you may pause the washer, open the lid, and add items. Touch and hold START to start the washer again.
5

5OPTIONS
You may add or remove options for each cycle. Not all options can be used with all cycles, and some are preset to work with certain cycles.
DELAY START
Touch Delay Start to delay the start of the wash cycle up to 12 hours “12H”. Touch Delay Start until a “0H” appears in the status display to turn off, or touch POWER.
END BEEP
Use this to turn the signal indicating the end of a wash cycle to low, medium, high, or off.
NOTE: You may also adjust the tones that sound when a feature, setting, or option is touched. Touch and hold End Beep for about 3 seconds to turn key activation sounds to low, medium, high or off.
STEAM CLEAN (depending on model)
The Steam Clean option adds additional soak and wash time to many cycles to help remove tough stains, as well as a steam boost for added cleaning power. Steam Clean uses a heater within the washer to maintain the selected temperature setting throughout the wash period. Steam Clean may be selected as an option with other cycles.
DEEP CLEAN (depending on model)
This option provides enhanced cleaning action for tough stains. It will add additional agitation and soak time to the cycle.
CLEAN BOOST (depending on model)
This option provides enhanced cleaning action for tough stains. It will add additional agitation and soak time to the cycle.
UTILITY TOOLS
Clean Washer
Use this every 30 washes to keep the inside of your washer fresh and clean. This cycle uses a higher water level. Use with affresh® Washer Cleaner tablet or liquid chlorine bleach to thoroughly clean the inside of your washer. This cycle should not be interrupted. See “Washer Care.”
IMPORTANT: Do not place garments or other items in the washer during the Clean Washer cycle. Use this cycle with an empty wash tub.
Rinse & Spin
Combines a rinse and high speed spin for loads requiring an additional rinse cycle or to complete a load after power interruption. Also use for loads that require rinsing only.
EXTRA RINSE
This option can be used to automatically add a second rinse to most cycles.
PRESOAK
Use this option to add an extra soak period to any cycle to help loosen tough stains. The washer will fill and then pause to soak, and then begin the selected cycle.
6CYCLE MODIFIERS
When you select a cycle, its default settings or the previous cycle selection used will light up.
TEMPERATURE
Temperature Control senses and maintains uniform water temperatures by regulating incoming hot and cold water.
Select a wash temperature based on the type of fabric and soils being washed. For best results and following the garment label instructions, use the warmest wash water safe for your fabric.
•On some models and cycles, warm and hot water will be cooler than what your previous washer provided.
•Even for cold wash settings, some warm water may be added to the washer to maintain a minimum temperature.
SOIL LEVEL
Soil Level (wash time) is preset for each wash cycle.
As you touch the Soil Level pad, the cycle time (minutes) will increase or decrease in the Estimated Time Remaining display and a different wash time will appear.
Select the most suitable setting for your load. For heavily soiled items, select Heavy Soil Level for more wash time. For lightly soiled items, select Light Soil Level for less wash time. Lighter soil level setting will help reduce tangling and wrinkling.
SPIN SPEED
This washer automatically selects the spin speed based on the cycle selected. The preset speeds can be
changed. Not all spin speeds are available with all cycles.
•Faster spin speeds mean shorter dry times, but may increase wrinkling in your load.
•Slower spin speeds mean less wrinkling, but will leave your load more damp.
7 LID
The Lid Lock (

 ) indicator lights up when the lid is locked and cannot be opened. If you need to open the lid, touch and hold START/PAUSE. The lid will unlock once the washer movement has stopped. This may take several minutes if the load was spinning at
high speed. Touch and hold START/PAUSE button again to restart the cycle.
6
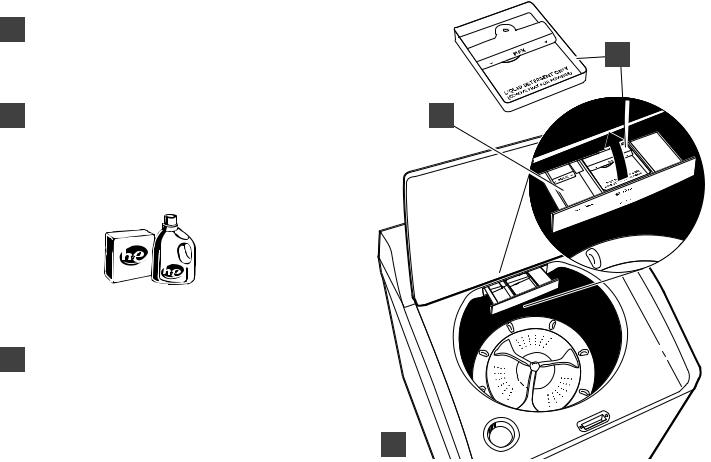
Dispensers
A |
Liquid fabric softener dispenser |
|
|
Pour measured liquid fabric softener into the liquid fabric |
B |
|
softener dispenser if desired. It will dispense automatically |
|
|
at the optimum time. |
|
• Use only liquid fabric softener in this dispenser.
B High Efficiency “HE” detergent dispenser |
A |
Add liquid or powdered HE detergent product to this dispenser for your main wash cycle. Remove tray if using powder detergent.
IMPORTANT: Make sure tray is in drawer when using liquid detergent and removed when using powder detergent and do not go over the Max line.
Use only High Efficiency (HE) detergent.
NOTE: Follow the manufacturer’s instructions to determine the amount of detergent to use.
C Liquid chlorine bleach dispenser
This dispenser holds up to 3/4 cup (180 mL) liquid chlorine bleach. The bleach will be automatically diluted and dispensed at the optimum time during the wash cycle. This dispenser cannot dilute powdered bleach.
NOTE: Fill dispenser with only liquid bleach.
C
7
 Loading...