


WZC5422DW00
Whirlpool WZC5422DW00, WZC5415DW01, WZC5415DW00, WZC3122DW00, WZC3115DW01 Owner’s Manual
...
Wh User Guide
Chest Freezer
THANK YOU for purchasing this high-quality product. Register your freezer at www.whirlpool.com. In Canada, register your freezer at
www.whirlpool.ca.
For future reference, please make a note of your product model and serial numbers. These numbers can be found inside your freezer.
Model Number ..........................................
Serial Number ..........................................
Your safety and the safety of others are very important.
We have provided many important safety messages in this manual and on your appliance. Always read and obey all safety messages.
This is the safety alert symbol.
This symbol alerts you to potential hazards that can kill or hurt you and others.
All safety messages will follow the safety alert symbol and either the word "DANGER" or "WARNING."
These words mean:
You can be killed or seriously injured if you don't immediately follow instructions.
You can be killed or seriously injured if you don't follow instructions.
All safety messages will tell you what the potential hazard is, tell you how to reduce the chance of injury, and tell you what can happen if the
instructions are not followed.
IMPORTANT SAFETY iNSTRUCTiONS
WARNING:To reduce the risk of fire, electric shock, or injury when using your freezer, follow these basic precautions:
m Plug into a grounded 3 prong outlet.
m Do not remove ground prong.
m Do not use an adapter.
m Do not use an extension cord.
m Disconnect power before servicing.
m Replace all parts and panels before operating.
m Use nonflammable cleaner.
m Keep flammable materials and vapors, such as gasoline, away
from freezer.
m Use two or more people to move and install freezer.
m Keep key away from children.
m Remove doors or lid from your old freezer or refrigerator.
m Disconnect power before installing ice maker (on ice maker kit
ready models only).
SAVE THESE INSTRUCTIONS
State of California Proposition 65 Warnings:
WARNING: This product contains one or more chemicals known to the State of California to cause cancer.
WARNING: This product contains one or more chemicals known to the State of California to cause birth defects or other reproductive harm.
1 W10668402B
PROPER DISPOSAL OF YOUR OLD
FREEZER OR REFRIGERATOR
Suffocation Hazard
Remove doors or lid from your old freezer or
refrigerator.
Failure to do so can result in death or brain damage.
IMPORTANT: Child entrapment and suffocation are not problems of the
past. Junked or abandoned freezers or refrigerators are still dangerous
... even if they will sit for "just a few days."
BEFORE YOU THROW AWAY YOUR OLD FREEZER OR
REFRIGERATOR REMOVE THE DOORS OR LID.
Important information to know about disposal of
refrigerants:
Dispose of freezer in accordance with Federal and Local
regulations. Refrigerants must be evacuated by a licensed,
EPA certified refrigerant technician in accordance with
established procedures.
IIIL,,,,ooationIIIBequi_ements
Excessive Weight Hazard
Use two or more people to move and install freezer.
Failure to do so can result in back or other injury.
Remove Packaging Materials
• Remove tape and glue residue from surfaces before turning on the
freezer. Rub a small amount of liquid dish soap over the adhesive
with your fingers. Wipe with warm water and dry.
Do not use sharp instruments, rubbing alcohol, flammable fluids, or
abrasive cleaners to remove tape or glue. These products can
damage the surface of your freezer. For more information, see the
front cover for safety instructions.
When Moving Your Freezer:
Your freezer is heavy. When moving the freezer for
cleaning or service, be sure to cover the floor with cardboard
or hardboard to avoid floor damage. Always pull the freezer
straight out when moving it. Do not wiggle or "walk" the
freezer when trying to move it, as floor damage could occur.
Clean Before Using
After you remove all of the packaging materials, clean the inside of your
freezer before using it. See the cleaning instructions in "Caring for Your
Freezer."
E×plosion Hazard
Keep flammable materials and vapors, such as
gasoline, away from freezer.
Failure to do so can result in death, explosion, or fire.
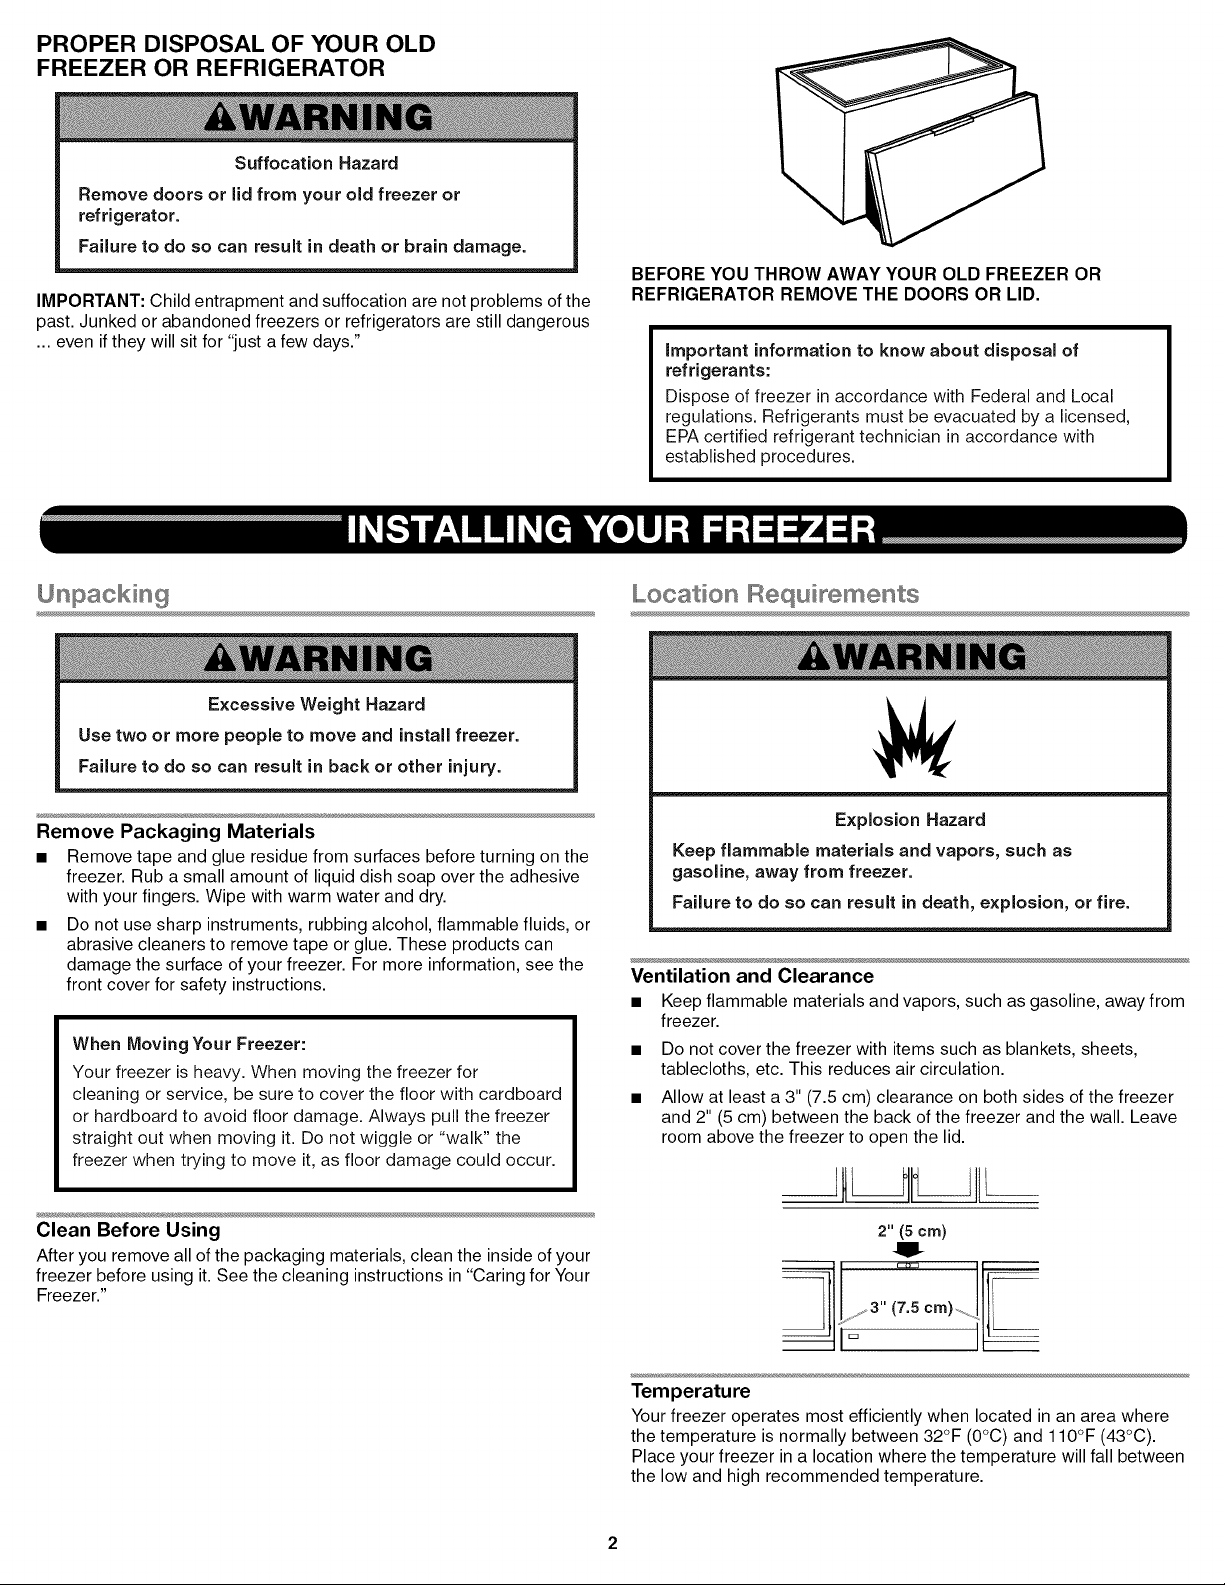
Ventilation and Clearance
• Keep flammable materials and vapors, such as gasoline, away from
freezer.
Do not cover the freezer with items such as blankets, sheets,
tablecloths, etc. This reduces air circulation.
Allow at least a 3" (7.5 cm) clearance on both sides of the freezer
and 2" (5 cm) between the back of the freezer and the wall. Leave
room above the freezer to open the lid.
2" (5 crn)
ql
Tern peratu re
Your freezer operates most efficiently when located in an area where
the temperature is normally between 32°F (0°C) and 110°F (43°C).
Place your freezer in a location where the temperature will fall between
the low and high recommended temperature.
UponMoving to Final Location
• Level the freezer from side to side and front to back so that the lid
will seal properly. Use shims to level the freezer if necessary.
NOTE: It should not be necessary to remove the lid during
installation. If, for any reason, the hinges need adjustment, contact
a designated service company.
IIEleotdoa IIRequi eme ts
Electrical Shock Hazard
Plug into a grounded 3 prong outlet.
Do not remove ground prong.
Do not use an adapter.
Do not use an extension cord.
Failure to follow these instructions can result in death,
fire, or electrical shock.
Recommended Grounding Method
A 115 Volt, 60 Hz., AC only, 15- or 20-amp fused, grounded electrical
supply is required. It is recommended that a separate circuit serving
only your freezer be provided. Use an outlet that cannot be turned off
by a switch. Do not use an extension cord.
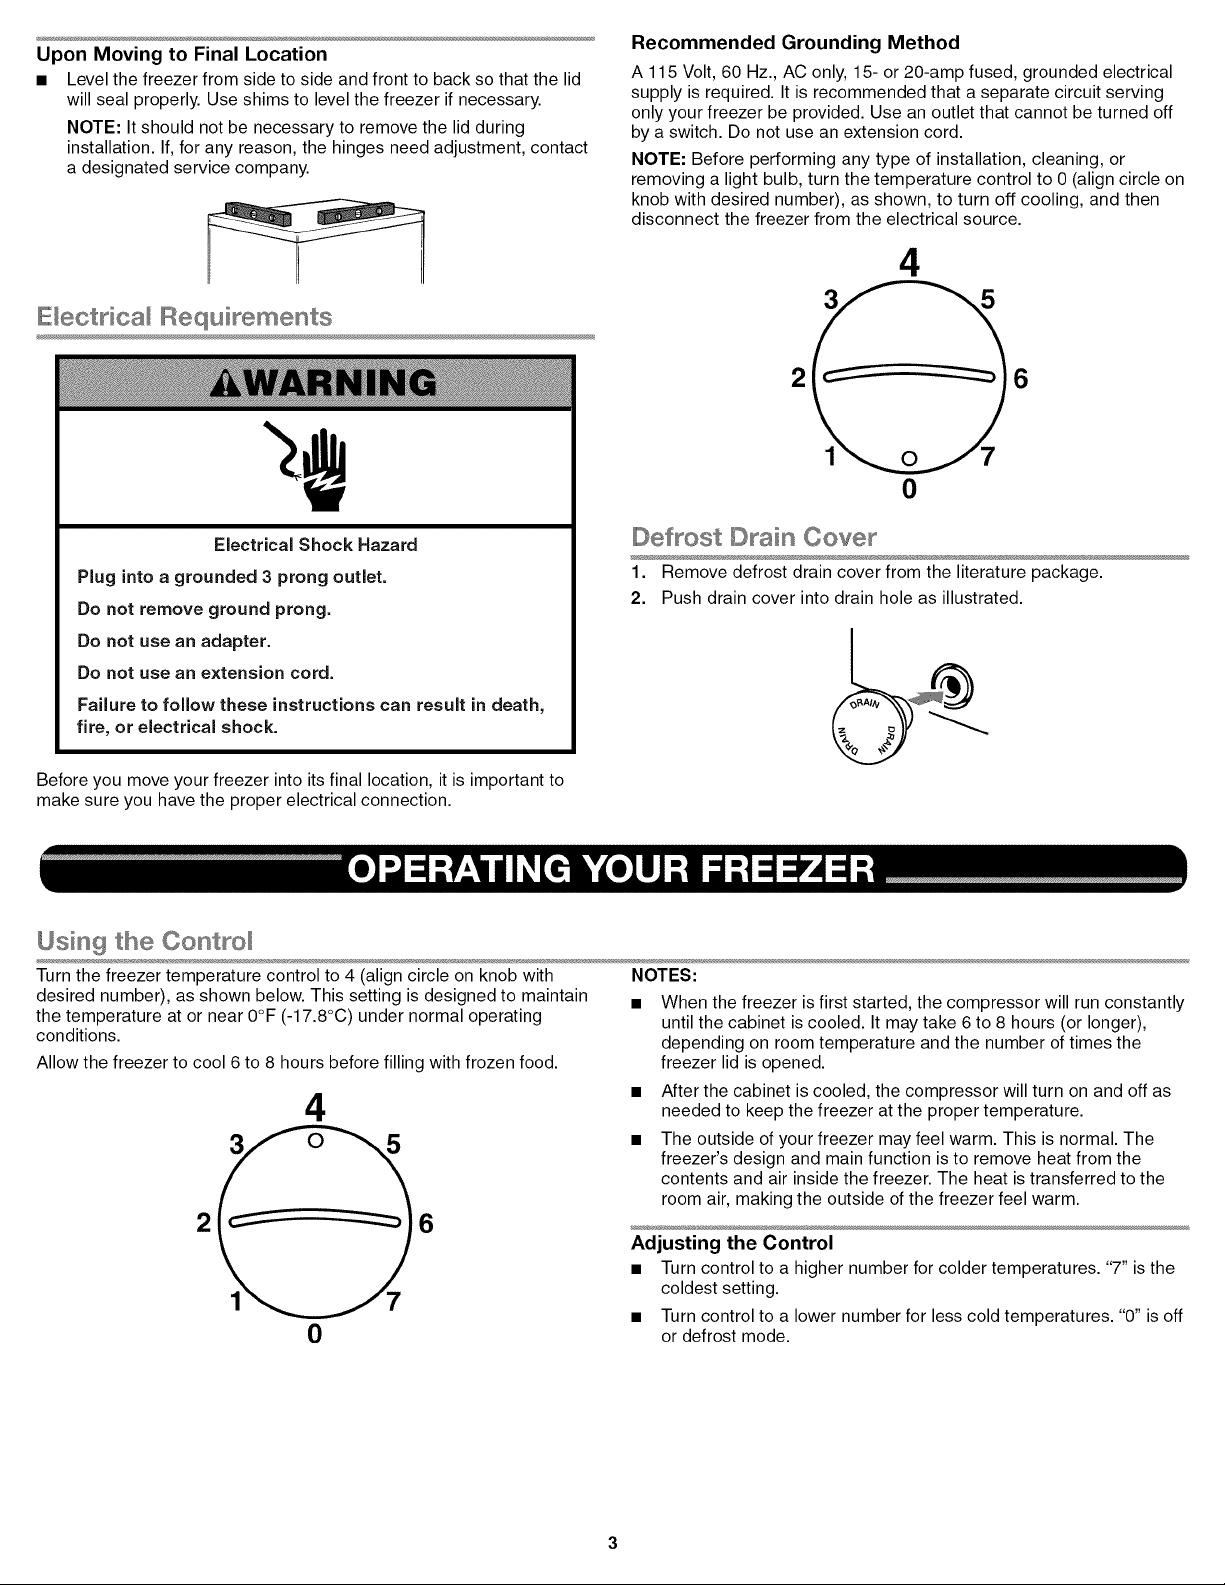
NOTE: Before performing any type of installation, cleaning, or
removing a light bulb, turn the temperature control to 0 (align circle on
knob with desired number), as shown, to turn off cooling, and then
disconnect the freezer from the electrical source.
0
IIl[:::}ef ost Oove
2. Push drain cover into drain hole as illustrated.
Before you move your freezer into its final location, it is important to
make sure you have the proper electrical connection.
Using the Con tro
Turn the freezer temperature control to 4 (align circle on knob with
desired number), as shown below. This setting is designed to maintain
the temperature at or near 0°F (-17.8°C) under normal operating
conditions.
Allow the freezer to cool 6 to 8 hours before filling with frozen food.
NOTES:
When the freezer is first started, the compressor will run constantly
until the cabinet is cooled. It may take 6 to 8 hours (or longer),
depending on room temperature and the number of times the
freezer lid is opened.
2 6
0
After the cabinet is cooled, the compressor will turn on and off as
needed to keep the freezer at the proper temperature.
The outside of your freezer may feel warm. This is normal. The
freezer's design and main function is to remove heat from the
contents and air inside the freezer. The heat is transferred to the
room air, making the outside of the freezer feel warm.
Adjusting the Control
• Turn control to a higher number for colder temperatures. "7" is the
coldest setting.
• Turn control to a lower number for less cold temperatures. "0" is off
or defrost mode.
IIIl_dioato_ IIL,,,,ight(on sore÷ models}
The indicator light assures you that your freezer is running. If the
indicator light is not glowing, immediately check for:
• Power interruption.
• An unplugged power cord.
• An open circuit breaker or blown fuse.
• A burned out indicator light. If light is burned out, contact service for
a replacement.
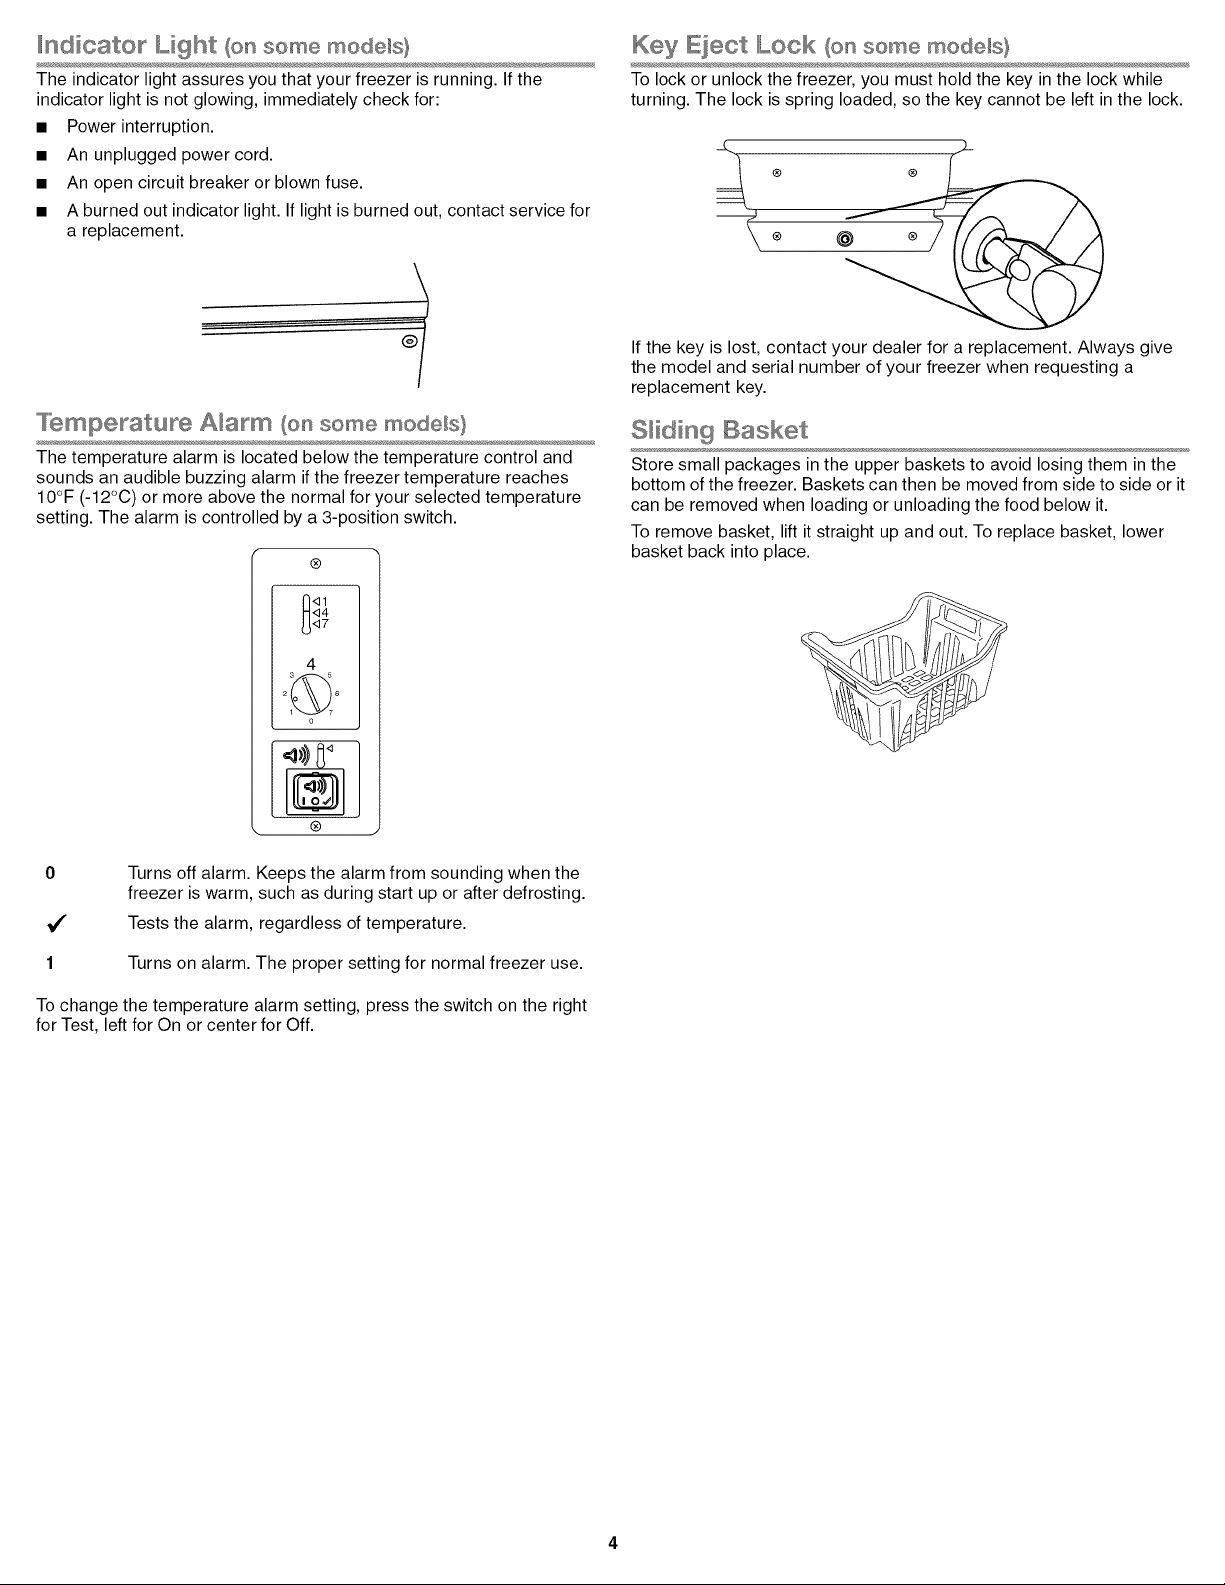
......_"'empe_stu_÷ A_srm (on some mode_s}
The temperature alarm is located below the temperature control and
sounds an audible buzzing alarm ifthe freezer temperature reaches
10°F (-12°C) or more above the normal for your selected temperature
setting. The alarm is controlled by a 3-position switch.
®
q4
q7
o
@
®
Key IEieot IIL,,,,ook(on sore÷ mode_s}
To lock or unlock the freezer, you must hold the key in the lock while
turning. The lock is spring loaded, so the key cannot be left in the lock.
® ®
If the key is lost, contact your dealer for a replacement. Always give
the model and serial number of your freezer when requesting a
replacement key.
S_idin 9 Basket
Store small packages in the upper baskets to avoid losing them in the
bottom of the freezer. Baskets can then be moved from side to side or it
can be removed when loading or unloading the food below it.
To remove basket, lift it straight up and out. To replace basket, lower
basket back into place.
0
v"
1
Turns off alarm. Keeps the alarm from sounding when the
freezer is warm, such as during start up or after defrosting.
Tests the alarm, regardless of temperature.
Turns on alarm. The proper setting for normal freezer use.
To change the temperature alarm setting, press the switch on the right
for Test, left for On or center for Off.
• I
Illl)ef_osti_g and C_eaning You_ IIIF:_eeze_
Explosion Hazard
Use nonflammable cleaner.
Failure to do so can result in death, explosion, or fire.
Defrost and clean your freezer when frost has built up to about 1/4"
(0.6 cm) thickness, and thoroughly defrost and clean your freezer at
least once a year. In high humidity areas, a freezer may need more
frequent defrosting and cleaning.
Do not use abrasive cleaners on your freezer. Do not use cleaning
waxes, concentrated detergents, bleaches, or cleaners containing
petroleum on plastic parts. Damage can occur.
NOTE: The drain cap must be removed before defrosting the freezer
and replaced securely afterward.
1. Unplug freezer or disconnect power.
2. Remove all frozen food. Wrap frozen food in several layers of
newspaper and cover with a blanket. Food will stay frozen for
several hours. You may also store frozen food in a cooler,
additional refrigerator-freezer, or in a cool area.
3. Remove the drain cover by pulling it straight out. Then insert the
hose adapter (provided) into the drain outlet. Remove the plastic
cap from inside the bottom of the freezer. Place a pan under the
drain, or attach a hose to the threaded end of the hose adapter
and direct the water into a separate drain.
NOTE: Check the drain pan frequently to avoid water overflow.
Have a second pan handy for easier emptying.
4. Place pans of hot water infreezer with lid open to speed melting.
Directing air from an electric fan into freezer will also help. Do not
place fan or any electrical device in freezer.
5. Use a plastic scraper to remove frost.
NOTE: Do not use an ice pick, knife, or other sharp-pointed tool to
defrost freezer. Damage can occur.
6. Wipe water from walls with a towel or sponge.
7. Wash the inside walls with a solution of mild detergent in warm
water or 2 tbs (26 mg) baking soda to 1 qt (0.95 L) warm water. Do
not use abrasive or harsh cleaners.
8. Rinse well and wipe dry with a clean soft cloth.
9. Use a clean sponge or soft cloth and mild detergent in warm water
to clean outside of freezer, door liner, and gasket.
10. Rinse well and wipe dry with a clean, soft cloth.
11. Wax painted metal surfaces on the outside of freezer to avoid rust.
NOTE: Do not use wax on plastic parts. Wax may damage them.
12. Remove the hose adapter and replace the drain cover and the
plastic cap in the bottom of the freezer.
13. Replace all frozen food.
14. If your freezer is equipped with a temperature alarm, turn off alarm
for 24 hours after defrosting.
15. Plug in freezer or reconnect power. See "Using the Control."
Changin9 the IIL,ight IIBu bs (on sore@mode s}
NOTE: Not all appliance bulbs will fit your freezer. Be sure to replace
the bulb with one of the same size, shape, and wattage.
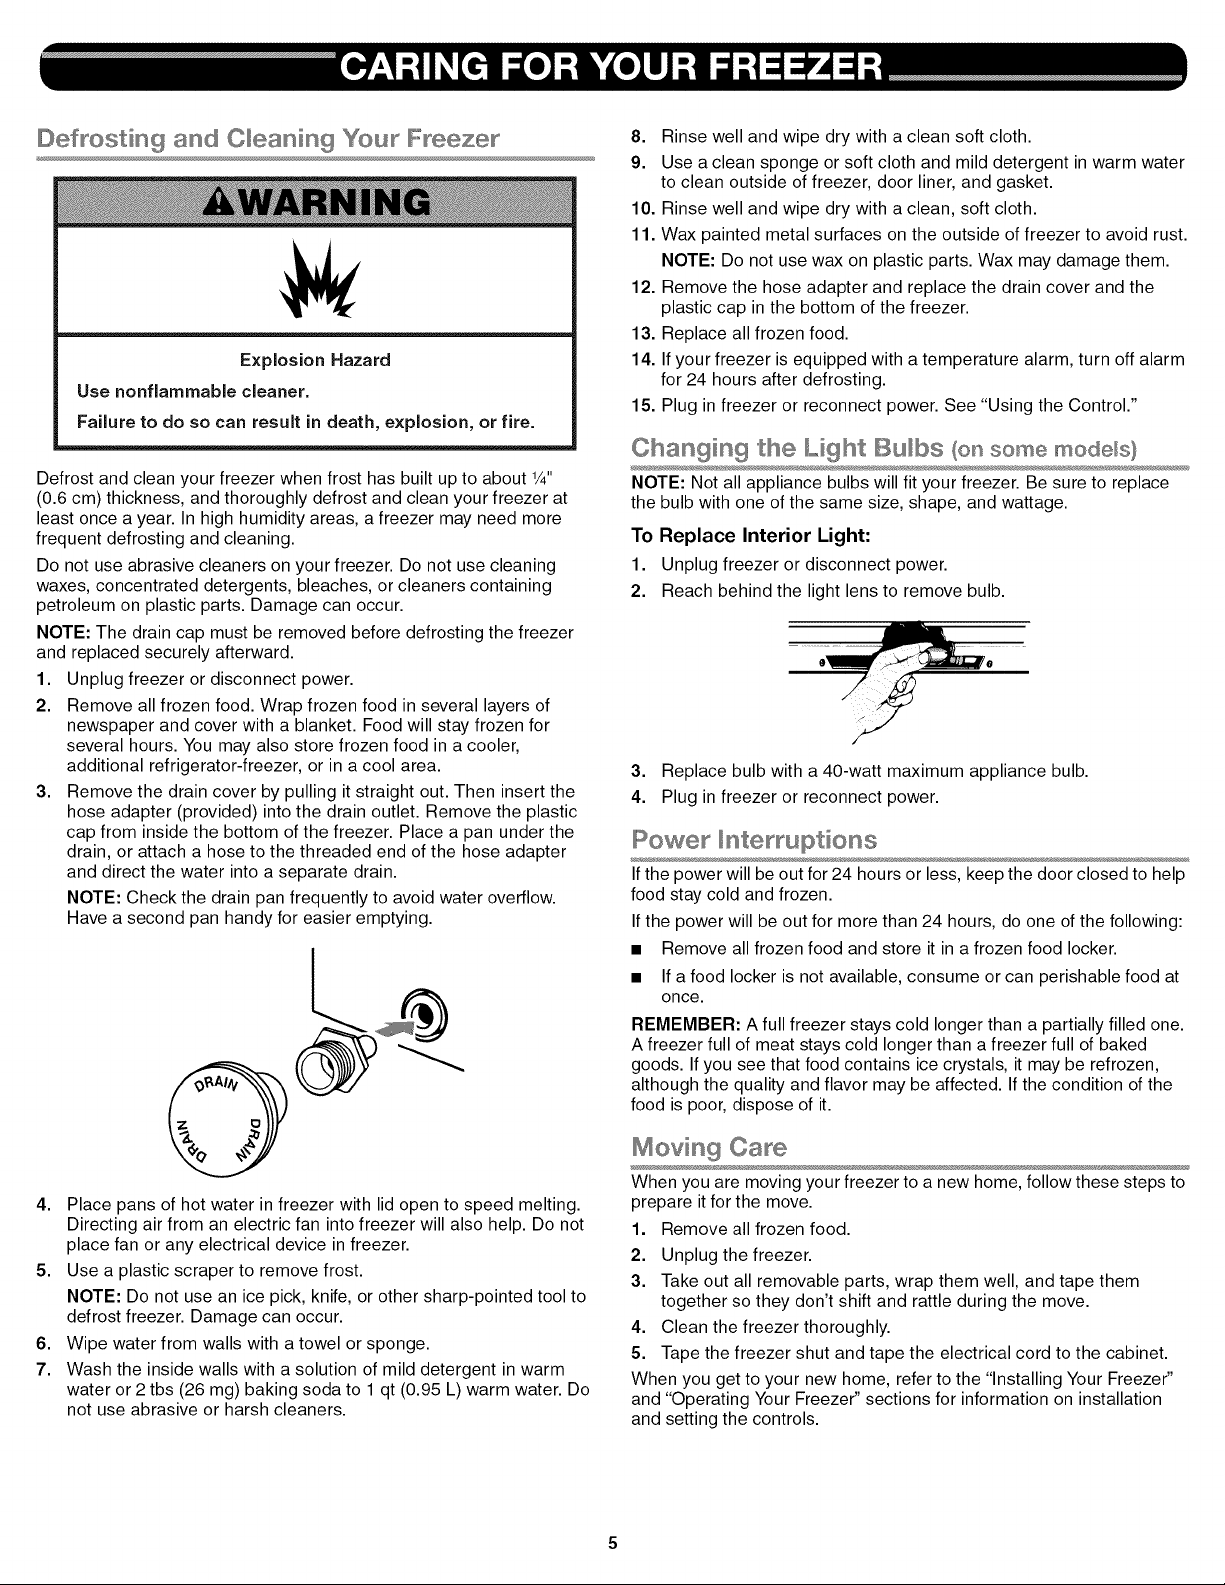
To Replace Interior Light:
1. Unplug freezer or disconnect power.
2. Reach behind the light lens to remove bulb.
3. Replace bulb with a 40-watt maximum appliance bulb.
4. Plug in freezer or reconnect power.
IIPowe Illnte uptions
If the power will be out for 24 hours or less, keep the door closed to help
food stay cold and frozen.
If the power will be out for more than 24 hours, do one of the following:
• Remove all frozen food and store it in a frozen food locker.
• If a food locker is not available, consume or can perishable food at
once.
REMEMBER: A full freezer stays cold longer than a partially filled one.
A freezer full of meat stays cold longer than a freezer full of baked
goods. If you see that food contains ice crystals, it may be refrozen,
although the quality and flavor may be affected. Ifthe condition of the
food is poor, dispose of it.
Moving Care
When you are moving your freezer to a new home, follow these steps to
prepare itfor the move.
1. Remove all frozen food.
2. Unplug the freezer.
3. Take out all removable parts, wrap them well, and tape them
together so they don't shift and rattle during the move.
4. Clean the freezer thoroughly.
5. Tape the freezer shut and tape the electrical cord to the cabinet.
When you get to your new home, refer to the "Installing Your Freezer"
and "Operating Your Freezer" sections for information on installation
and setting the controls.
 Loading...