


Use & Care Guide
Guide d’utilisation et d’entretien
Front-Loading Automatic Washer
Laveuse automatique à chargement frontal
Para obtener acceso al Manual de uso y
cuidado en español, o para obtener información adicional acerca de su producto, visite: www.whirlpool.com
If you have any problems or questions, visit us at www.whirlpool.com.
Pour tout problème ou toute question, consulter www.whirlpool.ca.
|
|
Designed to use only HE |
|
|
High Efficiency detergents. |
|
|
Conçue pour l’utilisation |
W11330506B |
|
d’un détergent haute |
|
efficacité seulement. |
|
W11330507B – SP |
|
|
|
|

Table of Contents |
|
WASHER SAFETY................................................................... |
2 |
OPERATING INSTRUCTIONS................................................ |
3 |
Accessories...................................................................... |
3 |
Control panel and features.............................................. |
4 |
Program/cycle guide........................................................ |
6 |
Choosing the right detergent............................................ |
8 |
Using the dispenser drawer.............................................. |
8 |
Using your washer............................................................ |
9 |
Washer maintenance...................................................... |
13 |
INSTALLATION INSTRUCTIONS......................................... |
17 |
Installation requirements................................................ |
17 |
Location requirements................................................... |
18 |
Drain system.................................................................. |
19 |
Electrical requirements................................................... |
20 |
Installation instructions................................................... |
20 |
Route drain hose............................................................. |
21 |
Connect inlet hose.......................................................... |
22 |
Level washer................................................................... |
23 |
Complete installation checklist....................................... |
24 |
TROUBLESHOOTING............................................................ |
25 |
WARRANTY........................................................................... |
35 |
ASSISTANCE OR SERVICE................................... |
Back Cover |
WASHER SAFETY
Table des matières |
|
SÉCURITÉ DE LA LAVEUSE................................................ |
36 |
INSTRUCTIONS D'UTILISATION......................................... |
37 |
Accessoires.................................................................... |
37 |
Tableau de commande |
|
et caractéristiques.......................................................... |
38 |
Guide de programmes................................................... |
40 |
Choix du détergent approprié......................................... |
42 |
Utilisation du tiroir distributeur........................................ |
42 |
Utilisation de la laveuse.................................................. |
43 |
Entretien de la laveuse.................................................... |
47 |
INSTRUCTIONS D’INSTALLATION...................................... |
51 |
Exigences d’installation................................................. |
51 |
Exigences d’emplacement............................................. |
52 |
Système de vidange...................................................... |
53 |
Spécifications électriques............................................... |
54 |
Instructions d’installation................................................ |
55 |
Acheminer le tuyau d’évacuation.................................... |
56 |
Raccorder la tuyau d’arrivée........................................... |
56 |
Réglage de l’aplomb de la laveuse................................. |
57 |
Liste de vérification pour |
|
installation terminée........................................................ |
58 |
DÉPANNAGE.......................................................................... |
59 |
GARANTIE.............................................................................. |
70 |
ASSISTANCE OU SERVICE...................... |
Couverture arrière |
2

OPERATING INSTRUCTIONS
Accessories
INSTALLATION & MAINTENANCE
ACCESSORIES
FACTORY CERTIFIED PARTS – these three words represent quality parts and accessories designed specifically for your appliance.
Time tested engineering that meets our strict quality specifications.
FACTORY CERTIFIED PARTS
Accessories designed for your appliance:
Customize your new washer and dryer with the following genuine Whirlpool accessories. For more information on options and ordering, call 1-866-698-2538 or visit us at: www.whirlpool.com/accessories. In Canada, call 1-800-688-2002 or visit us at www.whirlpool.ca.
Stack Kit
If space is at a premium, the stack kit allows the dryer to be installed on top of the washer.
12" Pedestal
Color-matched pedestals raise the washer and dryer to a more comfortable working height.
3

Control Panel and Features
|
|
|
|
|
3 |
4 |
|
9 |
|
|
|
|
|
|
||||||||||||
|
|
|
|
|
|
|
|
|
|
|
|
|
|
|
|
|
|
|
|
|
|
|
|
|
|
|
|
|
|
|
|
|
|
|
|
|
|
|
|
|
|
|
|
|
|
|
|
|
|
|
|
|
|
|
|
|
|
|
|
|
|
|
|
|
|
|
|
|
|
|
|
|
|
|
|
|
|
|
|
|
|
|
|
|
|
|
|
|
|
|
|
|
|
|
|
|
|
|
|
|
|
|
|
|
|
|
|
|
|
|
|
|
|
|
|
|
|
|
|
|
|
|
|
|
|
|
|
|
|
|
|
|
|
|
|
|
|
|
|
|
|
|
|
|
|
|
|
|
|
|
|
|
|
|
|
|
|
|
|
|
|
|
|
|
|
|
|
|
|
|
|
|
|
|
|
|
|
|
|
|
|
|
|
|
|
|
|
|
|
|
|
|
|
|
|
|
|
|
|
|
|
|
|
|
|
|
|
|
|
|
|
|
|
|
|
|
|
|
|
|
|
|
|
|
|
|
|
|
|
|
|
|
|
|
|
|
|
|
|
|
|
|
|
|
|
|
|
|
|
|
|
|
|
|
|
|
|
|
|
|
|
|
|
|
|
|
|
|
|
|
|
|
|
|
|
|
|
|
|
|
|
|
|
|
|
|
|
|
|
|
|
|
|
|
|
A |
|
B |
|
C |
|
|
D |
|
|
|
A |
|
B |
|
|
|
|
|
|
|
|
|
|
|
|
|
|
|
|
|
|
|
|
|
|
|
|
|
|
|
|
|
|
|
|
|
|
|
|
|
|
|
|
|
|
|
|
|
|
|
|
|
|
|
|
|
|
|
|
1 |
2 |
|
|
|
|
|
|
5 |
|
|
6 |
7 |
8 |
|||||||||||
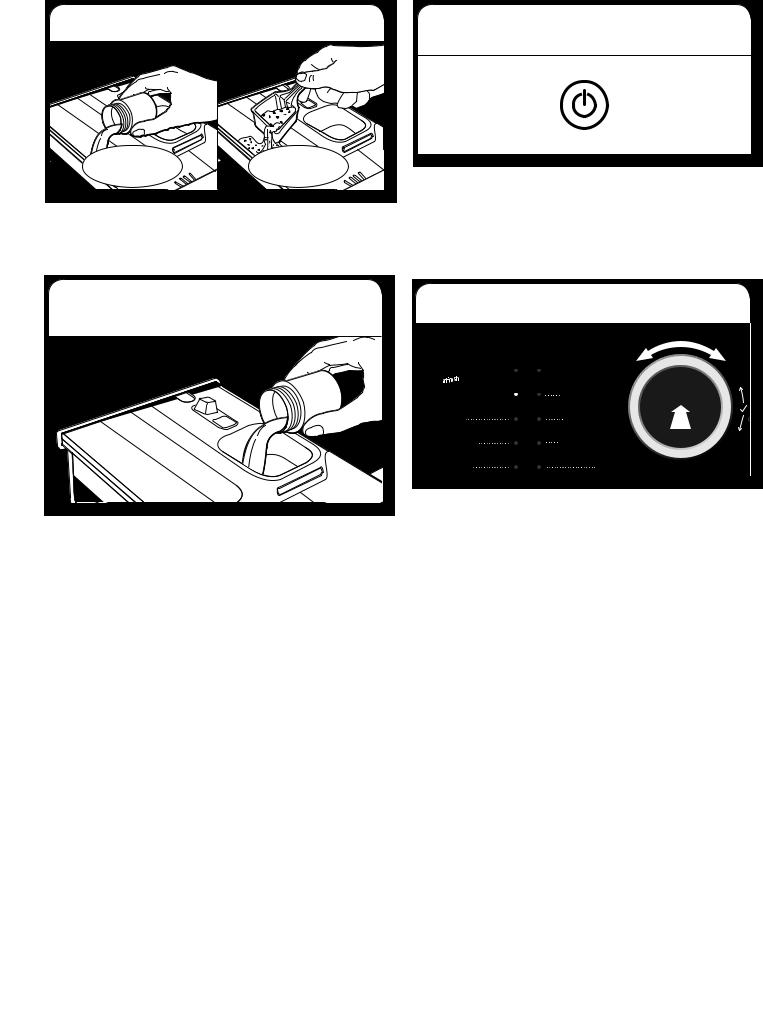
1POWER BUTTON
Touch and hold until the indicator above the Program button lights up. The indicators above all the buttons will scroll from left to right as the washer turns on. Symbols appear on the control panel and sounds are played.
Touch and hold POWER to cancel a cycle. “rES” is displayed when the cycle is cancelled.
2PROGRAM (cycle)
When you turn on the washer, the light above this button will turn on. This indicates you can now select your program or cycle. The program settings which you used last will appear on the control panel.
3PROGRAM/CYCLE AREA
An indicator next to each program/cycle lights up as you use the knob to scroll through the list. Press the knob when the indicator next to the desired program/cycle lights up.
4CONTROL KNOB
Turn the knob to select a program/cycle for your laundry load, change program/cycle temperature, adjust spin speed, set delay start time or dosing values, or select
Other Options. Press the knob to confirm your selection.
5OPTIONS
Touch to select additional wash options or additional features on the washer before touching the Start/Pause button. Additional wash options or additional features selected after touching the Start/Pause button may not be activated.
25 |
To return to factory default cycle settings, unplug the washer |
|
|
for 30 seconds, then plug back in. |
|
|
|
Colors |
A |
A |
|
|
|
This option helps to preserve the colors of your laundry |
|
|
by washing them with cold water 59°F (15°C). Suitable |
|
|
for lightly soiled colored laundry without stains. |
BTumbleFresh™ Option
The TumbleFresh™ option will periodically tumble the load after the end of the cycle every 3 minutes for 7 seconds, for up to 6 hours. To turn on the TumbleFresh™ option, touch the TUMBLEFRESH button. If, however,
the TumbleFresh™ option is turned on, it will stay on for all future cycles until turned back off – the washer remembers the last on/off status set. To turn off the
TumbleFresh™ option, touch the TUMBLEFRESH button.
CDetergent Dosing Aid
This option helps to determine the correct amount of detergent for your laundry load. The concentration
of detergents varies considerably, so adjust the amount of detergent as needed. Also check if the washer’s preset water hardness level matches your local water hardness level and adjust it if needed (see the “Using Your Washer” section).
When you touch this button, the Detergent Dosing Aid symbol lights up in the display.
When you touch the Start/Pause button to start the program/cycle, the drum will rotate to detect the load size of the laundry. During load detection, the time display changes from cycle time to a chasing LED animation. The display will then show the recommended detergent amount in milliliters (see Concentration
Chart in “About Detergent Concentration”). Use any standard measuring cup to measure out the right detergent amount. After adding detergent, close the detergent dispenser. Touch and hold the START/PAUSE button to continue the cycle.
DDelay Wash
This option starts your program/cycle at a later time, up to 24 hours.
6 SETTINGS
ATemperature
This setting lets you change the temperature of the program/cycle selected, if desired.
BSpin Speed
This setting lets you change the spin speed of the program/cycle selected, if desired.
Rinse/Hold
This option will stop at the end of the rinse portion of the cycle and leave the clothes soaking until you touch the Start/Pause button to continue the drain and final spin.
4

7 OTHER OPTIONS
Save Time
This option enables quicker washing. Only recommended for lightly soiled laundry.


 Extra Rinse
This option helps to avoid detergent residues in the laundry by extending the rinse time. Especially suitable for baby laundry, people with allergies, or areas with soft water.
Heavy Soil
This option optimizes the stain-removal efficiency of additives. Ideal for heavily soiled, stained laundry. Add an appropriate amount of powder in-wash additive for stain removal to the main wash compartment, together with your detergent (powder only). This may extend the program
by up to 15 minutes. Appropriate for use with oxygen-based stain removers.
IMPORTANT: Chlorine or perborate bleach agents must not be used.
Pre-Soak
The Pre-Soak option may be set either on or off. The Pre-soak option will perform a 30 minute cold soak at the beginning of the cycle.
NOTE: Pretreatment is recommended for stubborn stains.
Sanitize
This option eliminates 99.9% of the most common bacteria found in clothes, sheets, and towels. The extra hot wash temperature ensures sanitization.
Check recommended wash temperature of your items. Bacteria tested were K. pneumonia,
P. aureginosa, and S. aureus.
PreWash
This option helps to clean heavily soiled laundry by adding a 20 minute prewash to the program/cycle selected.

 Control Lock
This option allows you to lock the buttons and knob to avoid unwanted use by small children or other unqualified persons. Touch and hold the OPTION button until the “key” symbol lights up. All controls will be locked except for the Power button. To cancel Key Lock, touch and hold the OPTION button until the key symbol goes off.
8START/PAUSE BUTTON
Touch to start, or touch and hold to pause, a program/ cycle. When you start a program/cycle, the display shows an animation of chasing LEDs. This indicates the washer is estimating dry load size. Once the load size is estimated, water will be added to start the wash cycle.
9LED DISPLAY
When you select a program/cycle, its default settings will light up and the Estimated Time Remaining will be displayed. Factors such as load size, wash temperature, and water pressure may affect the time shown in the display. Tightly packing, unbalanced loads, or excessive suds may cause the washer to lengthen the program/cycle time, as well.
Symbols
Door canDoorbecanopenedbe opened. .
Water supply is inadequateinadequate.
Water supply is .
WaterWaterc nnotcannotbe drainedbe drained. Drain. Drainpumppumpfilter, drainfilter, drainhose, or pumphose,mayorbepumpblockedmay.beCheckblockeddrain. Checkhose fordainkinkshose or cleanforthekinksfiltero ascleanshownthe filterin “WashershownMaintenance“Washer.”
Maintenance.”
Call for service.
Call for service.
 Dosingaidaidsymbols. .
Dispenser Drawer
The dispenser drawer gives you the convenience of adding HE detergent and liquid fabric softener to the wash load at the proper time. See “Using the Dispenser Drawer” for information on using the dispenser drawer.
A |
C |
B |
ALiquid fabric softener compartment
Automatically dilutes and dispenses liquid fabric softener at the optimum time in the cycle.
■ Use only liquid fabric softener in this dispenser.
BPrewash compartment
When using the PreWash option, add detergent here or directly into the drum.
CMain wash compartment
This compartment holds liquid or powdered HE detergent for your main wash cycle. If PreWash detergent has been added to the drum, use powdered detergent in the main wash compartment; this ensures that the detergent stays in the detergent dispenser until the start of the main wash phase.
IMPORTANT: Do not use chlorine bleach in this washer.
5

Program/Cycle Guide
Settings and options shown in bold are default settings for that program/cycle. For best fabric care, choose the program/cycle, options, and settings that best fit the load being washed. Not all settings are available with each program/cycle, and some options cannot be used together.
Load Size Recommendations
For best results, follow the load size recommendations noted for each program/cycle.
Small load: Fill the washer drum with 3–4 items, not more than 1/4 full.
Medium load: Fill the washer drum up to about 1/2 full.
Rinse Hold Option
 Large load: Fill the washer drum up to about 3/4 full.
Extra-large load: Fill the washer drum, but make sure clothes can tumble freely. For best results, avoid packing tightly.
This option keeps laundry in the final rinse water without spinning. Rinse Hold is suitable for delicate laundry and items that require a lower spin speed, but is not appropriate for silk.
To turn off Rinse Hold and drain the water:
■Turn the knob to select “0” for spin speed, press the knob to confirm your selection, and touch the START/PAUSE button.
OR
■Spin the laundry, if desired. Touch the START/PAUSE button to spin at the default speed or turn the knob to select a different spin speed, press the knob to confirm your selection, and touch the START/PAUSE button.
|
Items to Wash Using |
|
|
|
|
Program/ |
Default Program/ |
Wash |
Spin |
Available |
|
Cycle: |
Cycle Settings: |
Temperature:* |
Speed: |
Options: |
Program/Cycle Details: |
Clean |
No clothes in washer |
X-hot |
N/A |
Delay Wash |
Use this program/cycle every 30 washes |
Washer |
|
|
|
|
to keep the inside of your washer fresh |
with |
|
|
|
|
and clean. This program/cycle uses a |
affresh® |
|
|
|
|
higher water level. Use with affresh® |
|
|
|
|
|
washer cleaner tablet to thoroughly |
|
|
|
|
|
clean the inside of your washer. This |
|
|
|
|
|
program/cycle should not be interrupted. |
|
|
|
|
|
See “Washer Care.” |
|
|
|
|
|
IMPORTANT: |
|
|
|
|
|
■ Do not place garments or other items |
|
|
|
|
|
in the washer during the Clean Washer |
|
|
|
|
|
with affresh® program/cycle. Use this |
|
|
|
|
|
program/cycle with an empty wash |
|
|
|
|
|
tub. See “Washer Care” in “Washer |
|
|
|
|
|
Maintenance.” |
|
|
|
|
|
■ Do not use bleach; however, a |
|
|
|
|
|
non-chlorinated oxidizing agent can |
|
|
|
|
|
be used. |
Heavy Duty |
Sturdy colorfast fabrics |
X-hot |
Max |
Colors |
Fast-speed tumbling and an |
|
and heavily soiled |
Hot |
High |
TumbleFresh™ |
extra-high-speed final spin help |
|
garments |
Warm |
Medium |
Detergent |
provide optimal cleaning and |
|
|
reduce drying times. |
|||
|
|
Cool |
Low |
Delay Wash |
|
|
|
Cold |
Off |
Extra Rinse |
|
|
|
Colors |
|
Heavy Soil |
|
|
|
|
|
Pre-Soak |
|
|
|
|
|
Save Time |
|
|
|
|
|
Sanitize** |
|
|
|
|
|
PreWash |
|
|
|
|
|
Rinse/Hold |
|
Normal |
Normally soiled |
X-hot |
Max |
Colors |
This program/cycle combines |
|
cottons, linens, sheets, |
Hot |
|
TumbleFresh™ |
medium-speed tumbling and |
|
and mixed-garment |
Warm |
|
Detergent |
an extra-high-speed spin. This |
|
loads |
|
program/cycle is designed |
||
|
Cool |
|
Delay Wash |
||
|
|
|
to provide the most energy |
||
|
|
Cold |
|
Extra Rinse |
efficiency. |
|
|
Colors |
|
Pre-Soak |
|
|
|
|
|
PreWash |
|
|
|
|
|
Heavy Soil |
|
|
|
|
|
Rinse/Hold |
|
*All temperature selections feature a Cold rinse. **Only available for X-hot setting.
Continued on next page
6

|
Items to wash using |
|
|
|
|
Program/ |
default program/ |
Wash |
Spin |
Available |
|
Cycle: |
cycle settings: |
Temperature:* |
Speed: |
Options: |
Program/Cycle Details: |
Synthetics |
Normally soiled laundry |
X-hot |
Max |
Colors |
This cycle uses |
|
made of artificial fibers |
Hot |
High |
TumbleFresh™ |
high-speed extraction |
|
or cotton blends |
Warm |
Medium |
Detergent |
spins to remove the |
|
|
maximum amount of |
|||
|
|
Cool |
Low |
Delay Wash |
|
|
|
water. Also utilizes a |
|||
|
|
Cold |
Off |
Save Time |
high-speed tumbling |
|
|
Colors |
|
Extra Rinse |
(similar to normal and |
|
|
|
heavy-duty cycles). |
||
|
|
|
|
Heavy Soil |
|
|
|
|
|
|
|
|
|
|
|
Pre-Soak |
|
|
|
|
|
PreWash |
|
|
|
|
|
Rinse/Hold |
|
|
|
|
|
|
|
Delicates |
Sheer fabrics, lingerie, |
Warm |
Medium |
Colors |
This program/cycle |
|
sweaters, and lightly |
Cool |
Low |
TumbleFresh™ |
combines gentle tumble |
|
soiled shirts, blouses, |
Cold |
Off |
Detergent |
action and low-speed |
|
trousers, pants, and |
spin for gentle fabric care |
|||
|
skirts |
Colors |
|
Delay Wash |
and reduced wrinkling. |
|
|
|
|
Save Time |
|
|
|
|
|
PreWash |
|
|
|
|
|
Rinse/Hold |
|
|
|
|
|
Extra rinse |
|
|
|
|
|
Heavy soil |
|
|
|
|
|
Pre-Soak |
|
|
|
|
|
|
|
Wool |
Wool items labelled with |
Cool |
Low |
Colors |
This cycle uses a |
|
the Woolmark logo and |
Cold |
Off |
TumbleFresh™ |
reduced/gentle tumble |
|
identified as machine |
Colors |
|
Delay Wash |
pattern that allows for |
|
washable |
|
soaking and limited wear |
||
|
|
|
Save Time |
||
|
|
|
|
on fabric. Also uses |
|
|
|
|
|
Rinse/Hold |
lower spin speeds. |
|
|
|
|
Detergent |
|
|
|
|
|
Extra Rinse |
|
|
|
|
|
Heavy soil |
|
|
|
|
|
PreWash |
|
|
|
|
|
Pre-Soak |
|
|
|
|
|
|
|
Quick Wash |
Small loads of 2–4 |
Hot |
Max |
Colors |
For small loads |
|
lightly soiled garments |
Warm |
High |
TumbleFresh™ |
(2–4 items) needed |
|
|
Cool |
Medium |
Detergent |
quickly. This program/ |
|
|
cycle combines |
|||
|
|
Cold |
Low |
Delay Wash |
|
|
|
high-speed tumbling, a |
|||
|
|
Colors |
Off |
Rinse/Hold |
shortened wash time, |
|
|
|
|
Save time |
and an extra-high-speed |
|
|
|
|
spin for reduced drying |
|
|
|
|
|
Extra rinse |
|
|
|
|
|
times. |
|
|
|
|
|
Heavy Soil |
|
|
|
|
|
PreWash |
|
|
|
|
|
Pre-Soak |
|
|
|
|
|
|
|
Handwash |
Silk (see care label |
Cool |
Medium |
Colors |
Use this cycle for delicate |
|
recommendations), |
Cold |
Low |
TumbleFresh™ |
fabrics. This cycle uses |
|
cashmere, viscose |
Colors |
Off |
Delay Wash |
a reduced/gentle tumble |
|
marked as machine |
pattern that allows for |
|||
|
washable |
|
|
Save Time |
soaking and limited wear |
|
|
|
|
Rinse/Hold |
on fabric. Also uses |
|
|
|
|
Detergent |
lower spin speeds. |
|
|
|
|
|
|
|
|
|
|
Extra Rinse |
|
|
|
|
|
Heavy Soil |
|
|
|
|
|
PreWash |
|
|
|
|
|
Pre-Soak |
|
|
|
|
|
|
|
*All temperature selections feature a Cold rinse. |
|
|
|
Continued on next page |
|
7

|
Items to wash using |
|
|
|
|
Program/ |
default program/ |
Wash |
Spin |
Available |
|
Cycle: |
cycle settings: |
Temperature:* |
Speed: |
Options: |
Program/Cycle Details: |
Rinse & |
All loads |
N/A |
Max |
TumbleFresh™ |
Use this program/cycle |
Spin |
|
|
High |
Extra Rinse |
to get a rinse and spin |
|
|
|
only. This program/cycle |
||
|
|
|
Medium |
Rinse/Hold |
|
|
|
|
has high-speed spin. |
||
|
|
|
Low |
Delay Wash |
Rinse & Spin is useful for |
|
|
|
Off |
|
loads that need rinsing |
|
|
|
|
only and for adding |
|
|
|
|
|
|
|
|
|
|
|
|
fabric softener to a load |
|
|
|
|
|
using the fabric softener |
|
|
|
|
|
dispenser. |
Spin |
Wet load of clothes |
N/A |
Max |
TumbleFresh™ |
Use Spin to remove |
|
|
|
High |
Delay Wash |
excess water from the |
|
|
|
load. Spin speed can be |
||
|
|
|
Medium |
|
|
|
|
|
|
set to a lower setting. |
|
|
|
|
Low |
|
|
|
|
|
|
|
|
|
|
|
Off |
|
|
|
|
|
|
|
|
*All temperature selections feature a Cold rinse.
Choosing the Right Detergent
Use only High Efficiency detergents. The package will be marked “HE” or “High Efficiency.” Low-water washing creates excessive sudsing with a non-HE detergent. Using non-HE detergent
will likely result in longer cycle times and reduced rinsing performance. It may also result in component malfunction and, over time, buildup of mold or mildew. HE detergents should be low-sudsing and quick-dispersing to produce the right amount of suds for the best performance. They should hold soil in suspension so it is not redeposited onto clean clothes. Not all detergents labeled as High Efficiency are identical in formulation and their ability to reduce suds. For example, natural, organic, or homemade HE detergents may generate a high level of suds. Always follow the detergent manufacturer’s instructions to determine the amount of detergent to use.
Use only High Efficiency (HE) detergent.
About Detergent Concentration
Today’s liquid HE detergents are concentrated. Most brands of concentrated HE detergent will show the level of concentration on the bottle.
However, if the detergent bottle does not give the concentration, it can be easily calculated. Just divide the package size in fluid ounces by the number of loads. Then refer to the chart below
to find the concentration.
If you do not get your desired cleaning results, try using a lower concentration number. If you have excess suds, try using a higher concentration number.
Concentration |
Number of ounces ÷ number of loads |
2X |
1.5–2.49 (44.4 ml–73.6 ml) |
3X |
0.9–1.49 (26.6 ml–44.1 ml) |
4X |
0.7–0.89 (20.7 ml–26.3 ml) |
5X |
0.5–0.69 (14.8 ml–20.4 ml) |
6X |
0.3–0.49 (8.9 ml–14.5 ml) |
8
Using the Dispenser Drawer
1.Open the dispenser drawer.
2.Add laundry products as described in steps 4–6 in the “Using Your Washer” section.
3.Slowly close the dispenser drawer. Make sure it is completely closed.
NOTE: A small amount of water may remain in the dispensers from the previous wash cycle. This is normal.
IMPORTANT: Do not use chlorine bleach in this washer.
Adding HE detergent to dispenser
HE detergent |
compartment |
Pour a measured amount of HE detergent into detergent compartment.
Do not overfill; adding too much detergent may cause detergent to be dispensed into the washer too early.
IMPORTANT: |
Use only High Efficiency |
|
■ Do not add single-dose laundry |
||
(HE) detergent. |
||
packet to dispenser drawer. |
|
■Use powdered detergent when using the Delay Wash option. Liquid detergent may seep out before the wash begins.
Adding the proper amount of detergent
■Only use detergent manufacturer’s recommended quantity of detergent (HE liquid or HE powder).
■If the PreWash option is selected, split the detergent dose between the Prewash and Main Wash compartments.
Using Your Washer
First wash cycle without laundry
Before washing clothes for the first time, add liquid or powdered
HE detergent to the detergent dispenser. Choose the Quick Wash cycle and run it without clothes. Use only HE detergent. This initial cycle serves to ensure the interior is clean and the dispenser drawer is ready for use before washing clothes.
1. Sort and prepare your laundry
Sort items by recommended cycle, water temperature,
and colorfastness. Separate heavily soiled items from lightly soiled. Separate delicate items from sturdy fabrics. Treat stains promptly and check for colorfastness by testing stain remover products on an inside seam.
IMPORTANT:
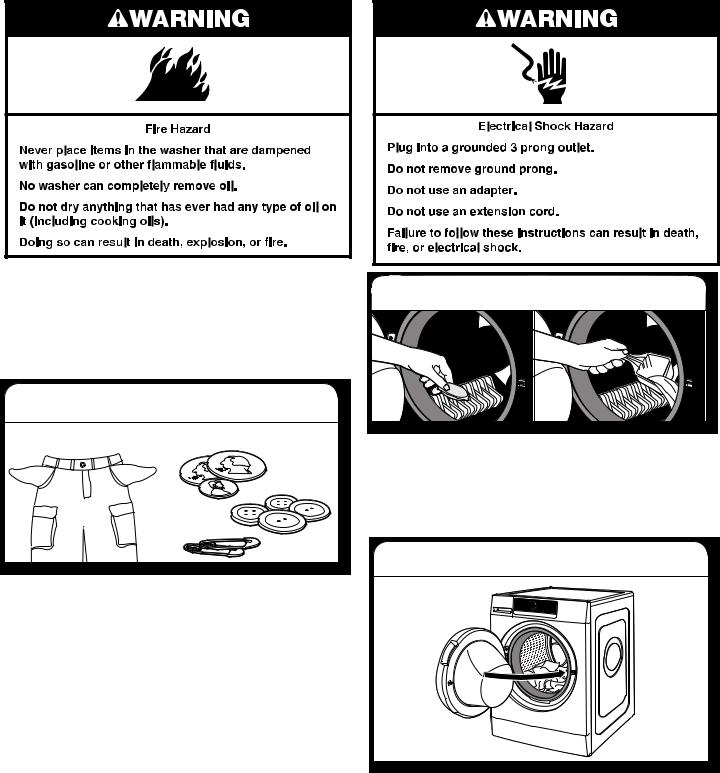
■Empty pockets. Loose change, buttons, or any small object can plug pumps and may require a service call.
■Close zippers, fasten hooks, tie strings and sashes, and remove non-washable trim and ornaments.
■Mend rips and tears to avoid further damage to items during washing.
■Turn knits inside out to prevent pilling. Separate lint-takers from lint-givers. Synthetics, knits, and corduroy fabrics will pick up lint from towels, rugs, and chenille fabrics.
■Do not dry garments if stains remain after washing, because heat can set stains into fabric.
■Always read and follow fabric care labels and laundry product instructions. Improper usage may cause damage to your garments.
2. Add laundry products (if desired)
Single-dose laundry packets, Oxi-type boosters, or fabric softener crystals can be added to the drum prior to adding laundry.
NOTES:
■Always follow manufacturer’s instructions.
■Do not use chlorine bleach.
3. Load laundry into washer
Place a load of sorted items loosely in the washer. Items need to move freely for best cleaning and to reduce wrinkling and tangling. Close the washer door by pushing it firmly until the latch clicks.
■Depending on load type and cycle, the washer can be fully loaded, but not tightly packed. Washer door should close easily. See “Program/Cycle Guide” for loading suggestions.
■Mix large and small items and avoid washing single items. Load evenly.
■Wash small items in mesh garment bags. For multiple items, use more than one bag and fill bags equally.
9
4. Add HE detergent*
Liquid |
Powdered |
HE detergent |
HE detergent |
NOTE: Do not add single-dose laundry packets, Oxi-type boosters, or fabric softener crystals to dispensers. They will not dispense correctly.
5. Add liquid fabric softener to dispenser (if desired)
Pour a measured amount of liquid fabric softener into liquid fabric softener compartment. Always follow manufacturer’s directions for correct amount of fabric softener based on your load size.
Fabric softener is always dispensed in the last rinse, even if Extra Rinse is selected.
IMPORTANT: Do not overfill, dilute, or use more than
1/4 cup (60 mL) of fabric softener. Do not fill past the MAX line. Overfilling dispenser will cause fabric softener to immediately dispense into washer.
■Do not spill or drip any fabric softener onto the clothes.
■Do not use liquid fabric softener dispenser balls in this washer. They will not dispense correctly.
6. Touch and hold POWER button to turn on washer
Touch and hold until the indicators turn on.
NOTE: To cancel a cycle, touch and hold the POWER button. “rES” is displayed when the cycle is cancelled.
NOTE: When powering on the washer, the indicator lights will scroll across the front of the control panel. Do not try to program the washer until the lights stop scrolling.
7. Select program/cycle†
Clean Washer |
Wool |
with |
|
Heavy Duty |
Quick Wash |
Normal |
Handwash |
Synthetics |
Rinse & Spin |
Delicates |
Spin |
Turn the knob to select a program/cycle for your laundry load. As you turn the knob, an indicator light will light up next to the program/cycle names to the left of the knob. Stop turning when the indicator next to the desired program/cycle lights up. Press the knob to confirm your selection.
See “Program/Cycle Guide” for details on program/cycle features.
*Detergent can be added after touching the Start/Pause button if the Dosing Aid is used (see Step 8).
†Not all options and settings are available with all program/cycles. See “Program/ Cycle Guide” for available options and settings.
10
8. Select options, if desired† |
9. Setting a delayed wash, if desired† |
Delay
Wash
Dosing Aid (Detergent Button):
The Detergent button calculates a recommended amount
of detergent in milliliters. This will be displayed after touching the Start/Pause button and the load is detected. The Detergent button also lets you adapt your washer to the dosing amounts of your detergent and the hardness of your local water.
To set the washer for the detergent dosing amount:
1.Check your detergent dosing amount for medium soil level and medium water hardness.
NOTE: Do not add more than the dose recommended by the detergent manufacturer.
2. Touch and hold the DETERGENT button
until the bottle symbol |
on the display |
lights up. |
Detergent |
|
|
|
3 Sec |
3.Turn the knob to adjust the dosing value to the one shown on the detergent bottle. Press the knob to confirm your selection. See the chart in “About Detergent Concentration.”
Wool |
m |
|
Quick Wash |
X-hot |
Max |
|
Handwash |
Hot |
High |
|
Warm |
Med |
||
|
|||
Rinse & Spin |
Cool |
Low |
|
Cold |
O |
||
|
|||
Spin |
Colors |
Rinse |
|
|
|
Hold |
To set the washer for local water hardness (washer is preset for soft water):
1. Check your regional water hardness level by consulting your local authorities or the Internet.
2. If your water is not soft, touch and hold the PROGRAM and
DETERGENT buttons at the same time. “1” (for soft water) |
|
appears on the display. |
|
P |
|
Program |
Detergent |
 3 Sec
3 Sec
3.Turn the knob to adjust the water level to either “2”
(Medium) or “3” (Hard). Press the knob to confirm your selection.
Wool |
m |
|
Quick Wash |
X-hot |
Max |
|
Handwash |
Hot |
High |
|
Warm |
Med |
||
|
|||
Rinse & Spin |
Cool |
Low |
|
Cold |
O |
||
|
|||
Spin |
Colors |
Rinse |
|
|
|
Hold |


 ml
ml
X-hot  Max
Max
Hot  High
High
Warm  Med
Med
Cool  Low
Low
Cold O
Colors |
Rinse |
|
Hold |
If you do not want to begin a cycle immediately, you may choose the Delay Wash option. This will delay the start of the wash cycle by up to 24 hours.
To set a Delayed Wash:
1.Touch the DELAY WASH button to set the desired delay time.
2.Turn the knob to the number of hours you want to delay the start of the wash cycle. The delay time will appear on the display. Press the knob to confirm your selection.
After touching the Start/Pause button, the door will lock and the time will count down until the delay time has been reached. The washer will start and the display will show the remaining time in the cycle.
10. Change temperature or spin speed, if desired†
Temp |
Spin |
|
Speed |


 ml
ml
X-hot  Max
Max
Hot  High
High
Warm  Med
Med
Cool  Low
Low
Cold O
Colors |
Rinse |
|
Hold |
Touch the TEMP or SPIN SPEED button; then turn the knob to select the desired temperature or spin speed. As you turn the knob, an indicator light will light up next to the temperatures or spin speeds to the right of the knob. Stop turning when
the indicator next to the desired selection lights up. Press the knob to confirm your selection.
†Not all options and settings are available with all program/cycles. See “Program/Cycle Guide” for available options and settings.
11
 Loading...