


WD ShareSpace™
Quick Install Guide
Systems Storage Network drive-Dual and Quad
Kit Contents |
About Your WD Product |
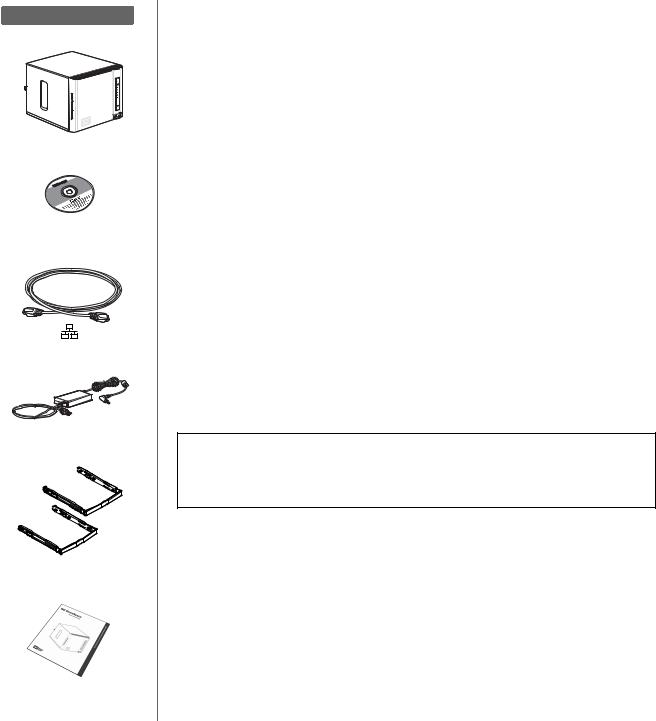
Kit Contents
• Network storage system with four or two drives
• Installation CD with software and user manual
• Ethernet cable
• AC adapter
•Mounting rails (two-drive systems only)
•Quick Install Guide
Optional Accessories
For more information on optional accessories for this product, visit shopwd.com (U.S. only). Outside the U.S., visit support.wdc.com.
System Requirements
•Pentium® III class, 500 MHz or newer
•Windows® 2000/XP/Vista; Mac OS® X 10.4.11+ and 10.5.2+; Linux distributions: Suse (10+), Ubuntu (6+), Fedora (Core 5+)
• Web browser (Internet Explorer 6.0 SP1 and later on Windows platforms supported by this product, Safari 2.0 and later on Mac platforms supported by this product, Firefox 2.0 and later on supported Windows, Mac, and Linux platforms)
• Ethernet connection (network adapter, router, switch, or hub port)
• Broadband internet connection
Note: Compatibility may vary depending on user’s hardware configuration and operating system.
Important: For highest performance and reliability, it is recommended that you install the latest updates and service pack (SP). For Windows, go to the Start menu and select Windows Update. For Mac, go to the Apple menu and select
Software Update.
Registering Your Product
Registering your device enables access to WD services such as news about your product, tips, and updates. Registration is quick and easy. Go to register.wdc.com and follow the instructions as prompted.
Format and Configuration
WD ShareSpace is preformatted for maximum capacity as a RAID 5 volume (for fourdrive systems) or a single large, spanned volume (for two-drive systems). See the full user manual on the software CD for more information on how to manage RAID on the network storage system.
WD ShareSpace | 1

Front and Rear View
|
|
|
|
|
|
|
|
|
|
|
|
|
|
|
|
|
|
|
|
|
|
|
|
|
|
|
|
|
|
|
|
|
|
|
|
|
|
|
|
|
|
|
|
|
|
|
|
|
|
|
|
|
|
|
|
|
|
|
|
|
|
|
|
|
|
|
|
|
|
|
|
|
|
|
|
|
|
|
|
|
|
|
|
|
|
|
|
|
|
|
|
|
|
|
|
|
|
|
|
|
|
|
|
|
|
|
|
|
|
|
|
|
|
|
|
|
|
|
|
|
|
|
|
|
|
|
|
|
|
|
|
|
|
|
|
|
|
|
|
|
|
|
|
|
|
|
|
|
|
|
|
|
|
|
|
|
|
|
|
|
|
|
|
|
|
|
|
|
|
|
|
|
|
|
|
|
|
|
|
|
|
|
|
|
|
|
|
|
|
|
|
|
|
|
|
|
|
|
|
|
|
|
|
|
|
|
|
|
|
|
|
|
|
|
|
|
|
|
|
|
|
|
|
|
|
|
|
|
|
|
|
|
|
|
|
|
|
|
|
|
|
|
|
|
|
|
|
|
|
|
|
|
|
|
|
|
|
|
|
|
|
|
|
|
|
|
|
|
|
|
|
|
|
|
|
|
|
|
|
|
|
|
|
|
|
|
|
|
|
|
|
|
|
1 |
Power button |
5 |
Power port |
|
||||||||||||||||
2 |
LED indicators |
6 |
Reset button |
|
||||||||||||||||
3 |
Auto-backup button |
7 |
Ethernet port |
|
||||||||||||||||
4 |
USB port 1 (Auto-backup) |
8 |
USB ports 2 and 3 |
|
||||||||||||||||
|
|
|
|
|
|
9 |
Kensington security slot |
|
||||||||||||
Hardware Setup
1.Connect one end of the Ethernet cable into the Ethernet port located on the back of the unit.
2.Connect the other end of the Ethernet cable directly into a router or network switch port.
3.Connect the end of the adapter into the DC power supply socket located on the back of the unit.
4.Plug the AC adapter into an electrical outlet.The unit powers up automatically after approximately 30 seconds indicated by a steady green LED illuminated on the power button.
Important: Wait for the network storage system to finish powering up (approximately three minutes) before configuring the device.
WD ShareSpace | 2
 Loading...