


TI Handheld Software and Localization Information
• TI Handheld Software
• TI Handheld Software Installation Instructions
• Localization Instructions — TI-83 Plus or TI-83 Plus Silver Edition
TI Handheld Software
Operating System (OS) — The OS is the software that operates the TI
Handheld. The OS may be upgraded by downloading the current
version.
TI Handheld Software Application (App) — An App is specialized
software, such as the CellSheet App, that can be installed and run on a
TI handheld.
Free Software — To obtain Free software, including OS upgrades and
language localization Apps, copy the software to your computer from the
web, a CD, or diskette. You also can transmit Free software between TI
handhelds.
For Purchase App — When you purchase an App, a unique code
(certificate) is included that allows you to install the App on your TI
handheld only.
Localizer © 2001, 2002 Texas Instruments 1
Note: A certificate (cert) is installed on your TI handheld automatically when
you install the App that you purchased. If you remove the App, the cert remains,
allowing you to re-install the App later.
File Names
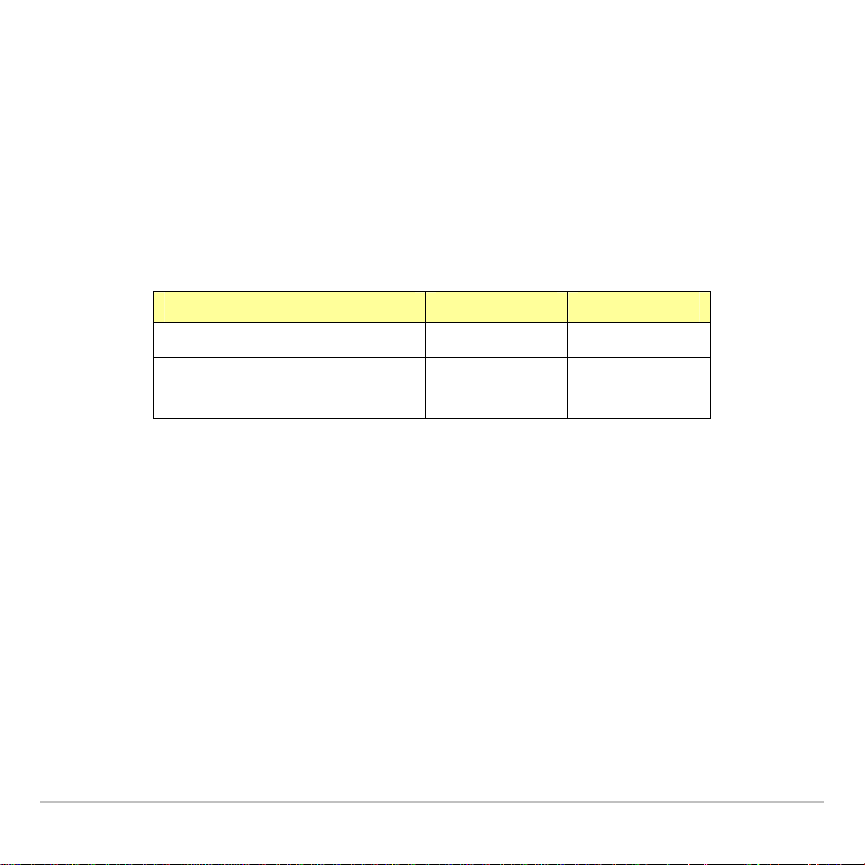
Use this table to identify and manage your TI handheld software files.
The file name extensions identify the TI handheld type and the software
type — OS or App.
TI Handheld OS Files App Files
TI-73 *.73u *.73k
TI-83 Plus an d
TI-83 Plus Si l ver E dit ion
Localizer © 2001, 2002 Texas Instruments 2
*.8xu *.8xk

TI Handheld Software Installation Instructions
We recommend that you print these instructions and refer to them during
an operating system (OS) upgrade or handheld software application
(App) installation.
You will need the latest version of either TI Connect™ or
TI-GRAPH LINK™ software and a TI-GRAPH LINK™ computer-tohandheld cable.
The latest versions of the TI Connect™ and TI-GRAPH LINK™ software
are available from: education.ti.com/softwareupdates. Select the
Connectivity Software link.
If you need a TI-GRAPH LINK computer-to-handheld cable, visit the TI
website: education.ti.com/graphlink.
Localizer © 2001, 2002 Texas Instruments 3

Important — Read This Before You Begin
• Upgrading the OS erases everything in random-access
memory (RAM). You may want to perform a backup using
TI Connect or TI-GRAPH LINK software before upgrading the
OS.
• New batteries should be installed in the TI handheld before
beginning an OS upgrade. Do not attempt to upgrade OS or install
an App if a low battery message appears on your TI handheld.
• Do not remove the TI-GRAPH LINK cable from either the
computer or the TI handheld during an OS upgrade or App
installation. Never interrupt an OS upgrade or App installation.
Choose the instructions for your software and computer type.
TI Connect™ Software—Windows®
TI-GRAPH LINK™ Software—Windows®
TI Connect or TI-GRAPH LINK Software — Macintosh
®
Localizer © 2001, 2002 Texas Instruments 4

TI Connect™ Software — Windows®
Important: Install the TI Connect software before connecting the
TI-GRAPH LINK USB cable (silver) to your computer.
1. Download the OS or App software file and save it in a folder on your
computer. Remember the location of the saved file.
2. Connect a TI-GRAPH LINK cable between the computer and the TI
handheld.
3. Using Windows Explorer, locate the OS or App software file that you
want to install on your TI handheld.
4. Resize the Explorer window until you can see both the TI handheld
software file and the TI Connect icon on your computer desktop.
5. Drag the TI handheld software file and drop it onto the TI Connect
icon. The progress displays as the file is sent to your TI handheld.
Localizer © 2001, 2002 Texas Instruments 5

TI-GRAPH LINK™ Software — Windows®
1. Download the OS or App software file and save it in a folder on your
computer. Remember the location of the saved file.
2. Connect a TI-GRAPH LINK cable between the computer and the TI
handheld.
3. Start the TI-GRAPH LINK software.
4. From the menu bar, choose Link > Send Flash Software >
Applications and Certificates... (or Operating Systems). The
Send Flash Software (or Upgrade Operating System) window
displays.
5. Select the drive and directory where the software file was saved.
6. Double click the software file name in the File Name field.
7. Click Add to copy the software file name into the File Selected field.
8. Click OK. The Sending window displays the progress as the software
file is sent to your TI handheld. The TI-GRAPH LINK window
displays when the installation is complete.
9. Click OK to return to the TI-GRAPH LINK main screen.
Localizer © 2001, 2002 Texas Instruments 6

TI Connect or TI-GRAPH LINK Software — Macintosh®
1. Download the OS or App software file and save it in a folder on your
computer. Remember the location of the saved file.
2. Connect a TI-GRAPH LINK cable between the computer and the TI
handheld.
3. Start the TI Connect or TI-GRAPH LINK software for Macintosh.
4. From the menu bar, click Connection and then select your TI
handheld type.
5. Select a computer port and click Connect. The window for the
previously selected TI handheld is displayed.
6. Drag the software file that you downloaded onto the TI handheld
window. The Writing window displays the progress as the file is sent
to your TI handheld. The updated TI handheld window displays when
the installation is complete.
Localizer © 2001, 2002 Texas Instruments 7

Localization Instructions — TI-83 Plus or TI-83 Plus Silver Edition
You can localize the TI-83 Plus or TI-83 Plus Silver Edition so that it will
display menus, prompts, functions, and error messages in a language
other than English.
Note: If you choose to reset All RAM or Arc Vars, the language is unaffected.
However, if you reset
language reverts to English.
Apps or All Memory, the language App is deleted and the
Localizer © 2001, 2002 Texas Instruments 8

Installing a Localization App
The localization App files are located on the CD\Localizers.
To find the localization App you want, use the appropriate folder name
and file name as shown in the table below.
Language Folder Name File Name
German deu Ger83f.8xk
Danish dnk Dan83f.8xk
Spanish esp Spa83f.8xk
Finnish fin Fin83f.8xk
French fra Fra83f.8xk
Italian ita Ita83f.8xk
Dutch nld Dut83f.8xk
Norwegian nor Nor83f.8xk
Portuguese prt Por83f.8xk
Swedish swe Swe83f.8xk
To install the localization App, follow the TI Handheld Software
Installation Instructions.
Localizer © 2001, 2002 Texas Instruments 9

Running a Localization App
1. On your TI-83 Plus or TI-83 Plus Silver Edition, press Œ. The
Applications menu displays.
2. Use } and † to move the cursor to the language you want, and
then press Í.
3. Press 1 to complete the localization.
Note: The built-in Finance App is automatically localized. The CBL/CBR
App and other Apps that you may have installed may not be localized.
Returning to English
1. On your TI-83 Plus / TI-83 Plus Silver
Edition, press Πto display the
APPLICATIONS menu.
2. Use } and † to move the cursor to a
language localization App, and then
press Í.
3. Press 2 to select English.
Localizer © 2001, 2002 Texas Instruments 10

Using the Special Character Set
After localization, a new item (CHARACTER) is added to the TI-83 Plus /
TI-83 Plus Silver Edition CATALOG. This item accesses special
characters and accent marks used in the language that you chose for
localization. You can use these special characters and accent marks for
display messages and text strings that you want to store to a variable.
You cannot, however, use them in variable names.
1. Press y N to display the CATALOG.
Note: CHARACTER is always the first item in the
CATALOG.
2. Press Í to display the CHARACTER screen.
A box appears around the first special
character.
Hecho
The accent marks are in the menus at the
bottom of the screen.
Note: Norwegian and Swedish language Apps have
a different
Localizer © 2001, 2002 Texas Instruments 11
CHARACTER screen.

3. You can:
• Select a special character:
a) Press |, ~, †, or } to move the box to the special
character that you want to use in a message or text string.
b) Press Í to place the character on the edit line.
c) Press |, ~, †, or } to move the box to Done and then
press Í to paste the contents of the edit line to the
previous screen.
— or —
• Add an accent mark to a character:
a) Press the function key (^, _, `, a, or b) immediately
above the accent mark to select it. The ALPHA uppercase
mode is automatically turned on. To change to lowercase,
press ƒ.
b) Press the key associated with the alpha character that you
want to accent, for example, [â] (above ˜). The accented
character is displayed in the edit line.
Localizer © 2001, 2002 Texas Instruments 12

c) Press |, ~, †, or } to move the box to Done and then
press Í to paste the contents of the edit line to the
previous screen.
Windows, Macintosh, and Adobe Acrobat Reader are registered trademarks of their respective
owners.
Localizer © 2001, 2002 Texas Instruments 13
 Loading...