


 Loading...
K-05X/K-07X
Super Audio CD/CD Player
OWNER’S MANUAL.................... |
3 |
MODE D’EMPLOI...................... |
33 |
MANUAL DEL USUARIO........... |
63 |
D01249621A
IMPORTANT SAFETY INSTRUCTIONS
CAUTION: TO REDUCE THE RISK OF ELECTRIC SHOCK, DO NOT REMOVE COVER (OR BACK). NO USERSERVICEABLE PARTS INSIDE. REFER SERVICING TO QUALIFIED SERVICE PERSONNEL.
<equilateral triangle, is intended to alert the user to the presence of uninsulated “dangerous voltage” within the
product’s enclosure that may be of sufficient magnitude to constitute a risk of electric shock to persons.The lightning flash with arrowhead symbol, within an
The exclamation point within an equilateral triangle is Bintended to alert the user to the presence of important operating and maintenance (servicing) instructions in
the literature accompanying the appliance.
WARNING: TO PREVENT FIRE OR SHOCK HAZARD,
DO NOT EXPOSE THIS APPLIANCE TO RAIN OR MOISTURE.
CAUTION
oo DO NOT REMOVE THE EXTERNAL CASES OR CABINETS TO EXPOSE THE ELECTRONICS. NO USER SERVICEABLE PARTS ARE INSIDE.
oo IF YOU ARE EXPERIENCING PROBLEMS WITH THIS PRODUCT, CONTACT THE STORE WHERE YOU PURCHASED THE UNIT FOR A SERVICE REFERRAL. DO NOT USE THE PRODUCT UNTIL IT HAS BEEN REPAIRED.
oo USE OF CONTROLS OR ADJUSTMENTS OR PERFORMANCE OF PROCEDURES OTHER THAN THOSE SPECIFIED HEREIN MAY RESULT IN HAZARDOUS RADIATION EXPOSURE.
1)Read these instructions.
2)Keep these instructions.
3)Heed all warnings.
4)Follow all instructions.
5)Do not use this apparatus near water.
6)Clean only with dry cloth.
7)Do not block any ventilation openings. Install in accordance with the manufacturer's instructions.
8)Do not install near any heat sources such as radiators, heat registers, stoves, or other apparatus (including amplifiers) that produce heat.
9)Do not defeat the safety purpose of the polarized or groundingtype plug. A polarized plug has two blades with one wider than the other. A grounding type plug has two blades and a third grounding prong. The wide blade or the third prong are provided for your safety. If the provided plug does not fit into your outlet, consult an electrician for replacement of the obsolete outlet.
10)Protect the power cord from being walked on or pinched particularly at plugs, convenience receptacles, and the point where they exit from the apparatus.
11)Only use attachments/accessories specified by the manufacturer.
12)Use only with the cart, stand, tripod, bracket,
or table specified by the manufacturer, or sold with the apparatus. When a cart is used, use caution when moving the cart/ apparatus combination to avoid injury from tip-over.
13)Unplug this apparatus during lightning storms or when unused for long periods of time.
14)Refer all servicing to qualified service personnel. Servicing is required when the apparatus has been damaged in any way, such as power-supply cord or plug is damaged, liquid has been spilled or objects have fallen into the apparatus, the apparatus has been exposed to rain or moisture, does not operate normally, or has been dropped.
oo The apparatus draws nominal non-operating power from the AC outlet with its POWER or STANDBY/ON switch not in the ON position.
oo The power plugs are used as disconnect devices; the disconnect devices shall remain readily operable.
oo Caution should be taken when using earphones or headphones with the product because excessive sound pressure (volume) from earphones or headphones can cause hearing loss.
CAUTION
oo Do not expose this apparatus to drips or splashes.
oo Do not place any objects filled with liquids, such as vases, on the apparatus.
oo Do not install this apparatus in a confined space such as a book case or similar unit.
oo The apparatus should be located close enough to the AC outlet so that you can easily reach the power cord plug at any time.
oo If the product uses batteries (including a battery pack or installed batteries), they should not be exposed to sunshine, fire or excessive heat.
oo CAUTION for products that use replaceable lithium batteries: there is danger of explosion if a battery is replaced with an incorrect type of battery. Replace only with the same or equivalent type.
WARNING
Products with Class ! construction are equipped with a power supply cord that has a grounding plug. The cord of such a product must be plugged into an AC outlet that has a protective grounding connection.
IN USA/CANADA, USE ONLY ON 120 V SUPPLY.
English
3
IMPORTANT SAFETY INSTRUCTIONS (continued)
Model for USA
This equipment has been tested and found to comply with the limits for a Class B digital device, pursuant to Part 15 of the FCC Rules. These limits are designed to provide reasonable protection against harmful interference in a residential installation. This equipment generates, uses, and can radiate radio frequency energy and, if not installed and used in accordance with the instructions, may cause harmful interference to radio communications. However, there is no guarantee that interference will not occur in a particular installation. If this equipment does cause harmful interference to radio or television reception, which can be determined by turning the equipment off and on, the user is encouraged to try to correct the interference by one or more of the following measures:
•Reorient or relocate the equipment and/or the receiving antenna.
•Increase the separation between the equipment and receiver.
•Connect the equipment into an outlet on a circuit different from that to which the receiver is connected.
•Consult the dealer or an experienced radio/TV technician for help.
Declaration of Conformity
Responsible party: TEAC AMERICA, INC.
Address: 1834 Gage Road, Montebello, California, U.S.A. Telephone number : 1-323-726-0303
This device complies with Part.15 of FCC Rules. Operation is subject to the following two conditions:
1)This device may not cause interference
2)This device must accept any interference, including interference that may cause undesired operation of the device.
Model for Canada
Industry Canada’s Compliance Statement:
This Class B digital apparatus complies with Canadian ICES-003.
Model for Europe
DECLARATION OF CONFORMITY
We, TEAC AUDIO EUROPE, Liegnitzer Straße 6, 82194 Gröbenzell, Germany declare in own responsibility, the TEAC product described in this manual is in compliance with the corresponding technical standards.
CAUTION
Changes or modifications not expressly approved by the party responsible for compliance could void the user’s authority to operate the equipment.
Laser information
This product contains a semiconductor laser system inside the cabinet and is classified as a “CLASS 1 LASER PRODUCT”.
To prevent being exposed to the laser beam, do not try to open the enclosure.
Laser:
Type: |
SLD6163RL-G |
Manufacturer: |
SONY CORPORATION |
Laser output: |
Less than 1 mW on the objective lens |
Wavelength: |
785±15 nm (CD) |
|
655±10 nm (Super Audio CD) |
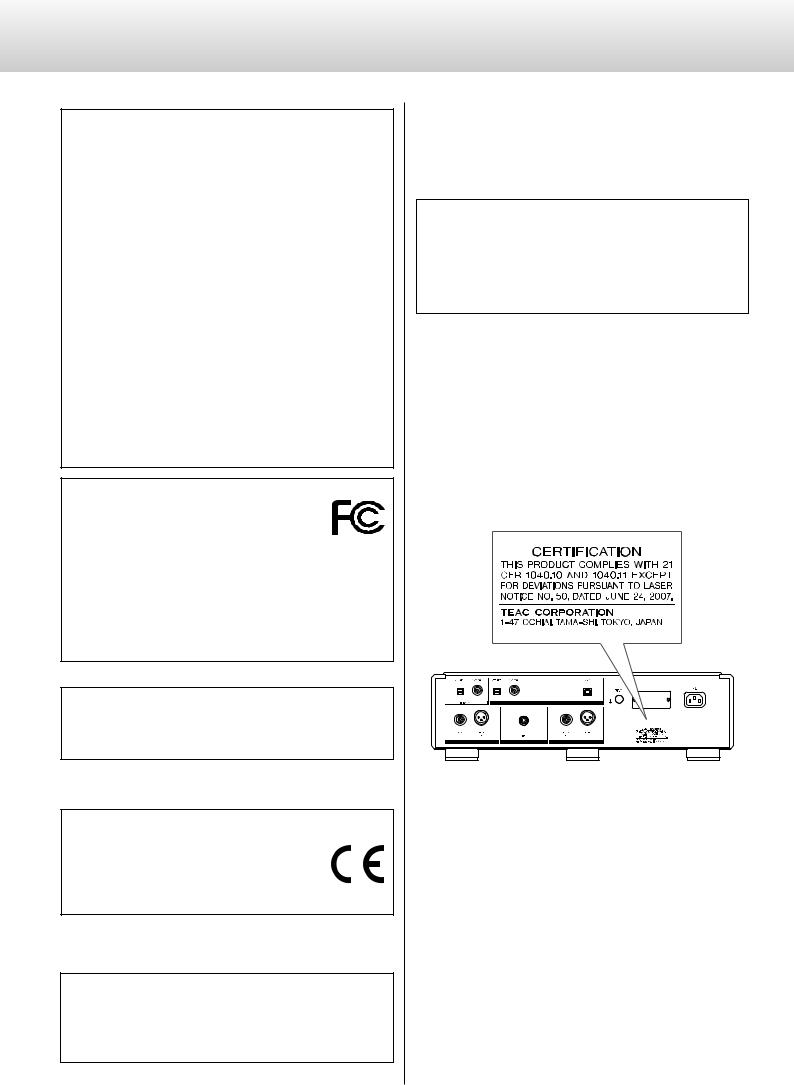
Model for USA
This product has been designed and manufactured according to FDA regulations “title 21, CFR, chapter 1, subchapter J, based on the Radiation Control for Health and Safety Act of 1968”, and is classified as class !laser product. There is not hazardous invisible laser radiation during operation because invisible laser radiation emitted inside of this product is completely confined in the protective housings.
The label required in this regulation is as follows:
4
VPrecautions concerning batteries
Misuse of batteries could cause them to rupture or leak leading to fire, injury or the staining of nearby things. Please read and observe the following precautions carefully.
oo Be sure to insert the batteries with correct positive (¥) and negative (^) orientations.
oo Use batteries of the same type. Never use different types of batteries together.
oo If the remote control is not used for a long time (more than a month), remove the batteries to prevent them from leaking.
oo If the batteries leak, wipe away the leakage inside the battery compartment and replace the batteries with new ones.
oo Do not use batteries of types other than those specified. Do not mix new batteries with old ones or use different types of batteries together.
oo Do not heat or disassemble batteries. Never throw batteries into fire or water.
oo Do not carry or store batteries with other metallic objects. The batteries could short circuit, leak or explode.
oo Never recharge a battery unless it is confirmed to be a rechargeable type.
For European Customers
Disposal of electrical and electronic equipment and batteries and/or accumulators
(a)All electrical/electronic equipment and waste batteries/accumulators should be disposed of separately from the municipal waste stream via collection facilities designated by the government or local authorities.
(b)By disposing of electrical/electronic equipment and waste batteries/accumulators correctly, you will help save valuable resources and prevent any potential negative effects on human health and the environment.
(c)Improper disposal of waste electrical/electronic equipment and batteries/accumulators can have serious effects on the environment and human health because of the presence of hazardous substances in the equipment.
(d) The Waste Electrical and Electronic Equipment (WEEE) symbols, which show wheeled bins that have been crossed out, indicate that electrical/electronic equipment and batteries/accumulators must be collected
and disposed of separately from household waste.
If a battery or accumulator contains more than the 

 specified values of lead (Pb), mercury (Hg), and/or cadmium (Cd) as defined in the Battery Directive

 (2006/66/EC), then the chemical symbols for those Pb, Hg, Cd elements will be indicated beneath the WEEE symbol.
(e)Return and collection systems are available to end users. For more detailed information about the disposal of old electrical/electronic equipment and waste batteries/accumulators, please contact your city office, waste disposal service or the shop where you purchased the equipment.
“DSD” is a registered trademark.
“Super Audio CD” is a registered trademark.
This product incorporates copy protection technology that is protected by U.S. patents and other intellectual property rights of Rovi Corporation. The use of Rovi Corporation’s copy protection technology in the product must be authorized by Rovi Corporation.
Reverse engineering and disassembly are prohibited.
Windows and Windows Vista are either registered trademarks or trademarks of Microsoft Corporation in the United States and/or other countries.
Mac and Mac OS X are trademarks of Apple Inc., registered in the U.S. and other countries.
MEXCEL is a registered trademark of Mitsubishi Cable Industries, Ltd. in Japan and other countries.
ESOTERIC is a trademark of TEAC CORPORATION, registered in the U.S. and other countries.
Other company names, product names and logos in this document are the trademarks or registered trademarks of their respective owners.
English
5

Contents
Thank you for purchasing this Esoteric product.
Read this manual carefully to get the best performance from this unit. After reading it, keep it in a safe place with the warranty card for future reference.
IMPORTANT SAFETY INSTRUCTIONS . . |
. . . . . . . . . . . . . |
. |
3 |
|
Before use. . . . . . . . . . . . . . . . . . . . . . . . . . . . |
. |
6 |
||
Precautions for use. . |
. . . . . . . . . . . . . . . . . . . . . . |
|
. 7 |
|
Notes about discs . . |
. . . . . . . . . . . . . . . . . . . . . . |
. |
8 |
|
Notes about the remote control. . . . . . . . . . . . . . . . . |
. |
9 |
||
Making connections.. . . . . . . . . . . . . . . . . . . . . . . |
|
10 |
||
Names and functions of parts (main unit). . . . . . . . . . . . . |
|
12 |
||
Names and functions of parts (display).. |
. . . . . . . . . . . . . |
|
13 |
|
Names and functions of parts (remote control). . . . . . . . . . |
|
14 |
||
Playback. . . . . . . . . . . . |
. . . . . . . . . . . . . . . . . |
|
|
16 |
Display. . . . . . . . . . . . . . . . . . . . . . . . . . . . . . |
|
18 |
||
Selecting tracks. . . . . . |
. . . . . . . . . . . . . . . . . |
. . |
|
18 |
Repeat playback. . . . . . . . . . . . . . . . . . . . . . . . . |
. 19 |
|||
Program playback. . |
. . . . . . . . . . . . . . . . . . . . . . |
. 20 |
||
D/A converter mode. |
. . . . . . . . . . . . . . . . . . . . |
. . |
|
21 |
Dimmer. . . . . . . . . . . . . . . . . . . . . . . . . . . . . |
. 21 |
|||
Connecting a computer and playing back audio files. . . . . . . |
|
22 |
||
Setting mode. . . . . . . . |
. . . . . . . . . . . . . . . . . . |
|
|
24 |
Setting items and their options. . . . . . . . . . . . . . . . . . |
|
25 |
||
Maintenance. . . . . . . . . . . . . . . . . . . . . . . . . . . |
|
27 |
||
Troubleshooting.. . . . . . . . . . . . . . . . . . . . . . . . . |
|
28 |
||
K-05X specifications . |
. . . . . . . . . . . . . . . . . . . . . . |
. 30 |
||
K-07X specifications . . |
. . . . . . . . . . . . . . . . . . . . . |
. 31 |
||
Dimensional drawings. . . . . . . . . . . . . . . . . . . . . . |
. 32 |
|||
Before use
What’s in the box
Check to be sure the box includes all the supplied accessories shown below. Please contact the store where you purchased this unit if any of these accessories are missing or have been damaged during transportation.
Power cord × 1
Remote control (RC-1301) × 1
Batteries (AAA) × 2
Owner’s manual (this document) × 1
Warranty card × 1
6

Precautions for use
oo Do not install this unit in a location that could become hot. This includes places that are exposed to direct sunlight or near a radiator, heater, stove or other heating equipment. Moreover, do not place it on top of an amplifier or other equipment that generates heat. Doing so could cause discoloration or deformation.
oo Avoid locations that are extremely cold or exposed to excessive humidity or dust.
oo In order to enable good heat dissipation, leave at least 20 cm (8") between this unit and walls and other equipment when installing it. If you put it in a rack, take precautions to prevent overheating by leaving at least 5 cm (2") open above the top of the unit and at least 10 cm (4") open behind the unit.
oo If installing in a rack with a glass door, do not use the remote control tray OPEN/CLOSE (-) button to open the disc tray when the door is closed. If the disc tray is forcibly prevented from moving, damage could result.
oo Place the unit in a stable location near the audio system that you will use.
oo DO NOT place anything, not even CDs, CD-Rs, LP records or cassette tapes, on top of the unit.
oo Do not put cloth on top of the unit or place the unit on top of bedding or thick carpet. Doing so could cause the unit to overheat or damage it.
oo Do not lift or move the unit during playback because the disc rotates at high speed. Doing so could damage the disc.
oo Always remove any loaded disc before moving this unit or packing it for installation in a different location, for example. Moving the unit with a disc inside could cause damage.
oo Supply voltage to the unit that matches the voltage indicated on the rear panel. If you are in any doubt regarding this matter, consult an electrician.
oo Do not open the body of the unit as this might result in damage to the circuitry or cause electric shock. If a foreign object should get into the unit, contact your dealer.
oo When removing the power plug from an outlet, always pull directly on the plug. Never pull on the cord itself.
Precaution when recording with a connected device
Some discs include signals to prevent copying. You cannot record the digital audio signal as is from a disc that has such copy-protection. (You can record the audio as an analog signal.)
English
7
Notes about discs
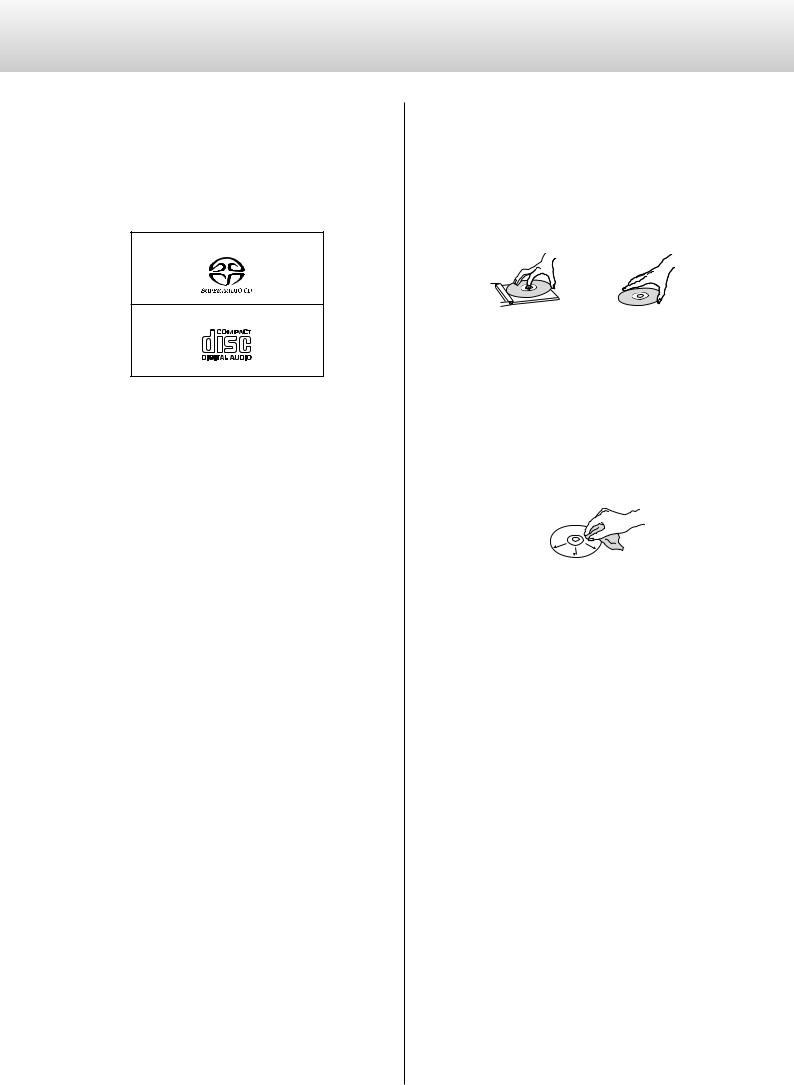
The following marks appear on disc labels and disc cases. This unit can play discs that have these marks without using an adapter.
This unit cannot play discs that do not have these marks.
Types of discs that can be played on this unit and their marks
Super Audio CDs
Audio CDs
If you try to play any other type of disc with this unit, loud noises that could damage speakers or harm hearing might occur. Never try to play any type of disc other than those shown above.
oo This unit cannot play DVD video, DVD audio, video CD, DVD-ROM and CD-ROM discs, for example.
oo This unit might not be able to properly play Dual Discs, Copy Control CDs or other special CDs that do not conform to the Red Book CD standard. Operation and sound quality cannot be guaranteed when special discs are used in this unit. If playback of a special disc should cause trouble, contact the seller of the disc.
CD-R/CD-RW discs
This unit can play CD-R/CD-RW discs that are in audio CD format.
oo Be sure to finalize discs created by CD recorders.
Depending on the quality of the disc and the condition of the recording, playback might not be possible. For details, see the operation manual for the device you are using.
Handling discs
oo Load discs with their labeled sides up. (CDs only have one playable side.)
oo To remove a disc from its case, always press down on the center of the case first and then hold the disc by its edges.
Removal from case |
Holding by edges |
oo Be careful when handling discs. If the side that contains the data (unlabeled side) is scratched, smudged with fingerprints or otherwise dirty or marred, errors could occur during playback.
oo If the side of the disc that has the data encoded on it (unlabeled side) becomes dirty with fingerprints or dust, use a soft cloth to wipe the surface from the center directly toward the edge.
Always clean discs before storing them. Leaving a disc in an unclean state might degrade its sound quality.
oo Never use record cleaners, antistatic treatments, thinners or similar chemicals to clean discs. Such chemicals could harm the surface of the disc.
oo Do not leave discs in places that are exposed to direct sunlight or that are very humid or hot.
oo When writing something on the label side of a disc, use a felt-tip permanent marker. The use of a ballpoint pen or other pen with a hard tip could damage the disc, making it unplayable.
oo After you finish playing a disc, always put it back into its case for storage. Failure to do so could result in warping or scratches.
oo Do not apply labels or other materials to discs. Do not use a disc that has sticky residue left on its surface after removing tape or a sticker, for example. If such a disc is loaded, it might become stuck in the unit or damage the unit.
oo Never use commercially-available CD stabilizers. Doing so could make the disc unplayable or damage the unit.
oo Do not use cracked discs because they could damage the unit.
8
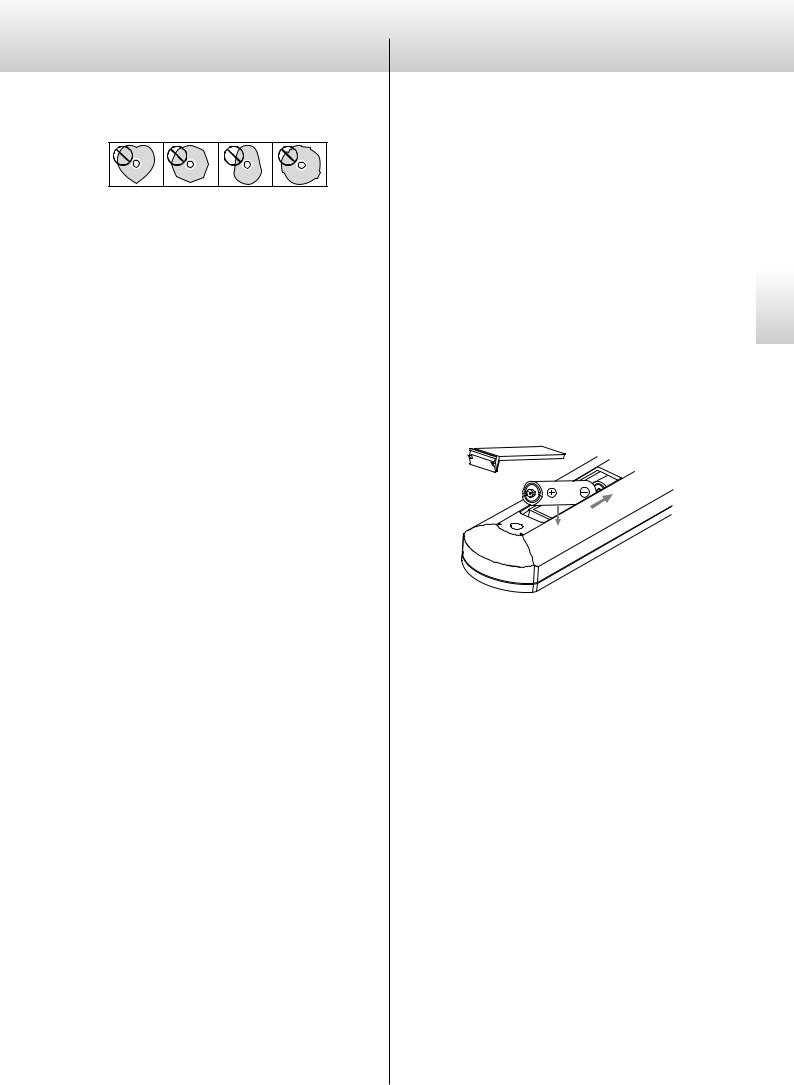
oo Never use discs with irregular shapes, including heart-shaped and octagonal discs, because they could damage the unit.
oo Do not use printable discs, which allow printing on the label side. Since the surface of such a disc has been specially treated, if loaded, it might become stuck in the unit or damage the unit.
If you have any questions about how to handle a CD-R or CD-RW disc, contact the manufacturer of the disc directly.
Notes about the remote control
Precautions when using the remote control
oo When using the remote control, point it toward the remote control signal receiver on the main unit from a distance of 7 m (23 ft) or less. Do not place obstructions between the main unit and the remote control.
oo The remote control might not work if the remote control signal receiver is exposed to direct sunlight or bright light.
oo Beware that use of this remote control could cause the unintentional operation of other devices that can be controlled by infrared rays.
Installing batteries
Remove the cover from the back of the remote control and insert two AAA batteries with their ¥/^ oriented as shown in the case. Replace the cover.
When to replace batteries
If the distance required between the remote and the main unit decreases or if the unit stops responding to the remote buttons, replace both batteries with new ones.
Dispose of the used batteries according to the instructions on them or requirements set by your local municipality.
VVCAUTION
Misuse of batteries could cause them to rupture or leak, which might result in fire, injury or the staining of nearby materials. Please read and observe the precautions on page 5 carefully.
English
9

Making connections
VV Precautions when making connections
oo After completing all other connections, plug the power plug into a power outlet.
oo Read the owner’s manuals of all devices that will be connected, and follow their instructions.
|
|
AV amplifier or |
|
|
AV amplifier or |
|
|
|
|
|
|
|
|
|
|
|
|
|
|
|
|
|
|
|
|
|
||||||||||||||
digital recording |
digital recording |
|
|
Equipment |
|
|
|
Equipment |
|
|
||||||||||||||||||||||||||||||
|
|
|
device |
|
|
|
device |
|
|
|
|
|
|
|
||||||||||||||||||||||||||
|
|
|
|
|
|
|
|
with digital |
|
|
|
with digital |
|
|
||||||||||||||||||||||||||
|
|
(CD recorder, |
|
|
(CD recorder, |
|
|
|
|
|
|
Computer |
||||||||||||||||||||||||||||
|
|
|
|
|
|
audio output |
|
|
|
audio output |
|
|||||||||||||||||||||||||||||
|
|
MD deck, etc.) |
|
|
MD deck, etc.) |
|
|
|
|
|
|
|||||||||||||||||||||||||||||
|
|
|
|
|
|
|
|
|
|
|
|
|
|
|
|
|
|
|
|
|
|
|
|
|
|
|
|
|
|
|
|
|
|
|
|
|
|
|
|
|
|
|
DIGITAL IN |
|
|
|
DIGITAL IN |
|
|
|
DIGITAL OUT |
|
|
|
DIGITAL OUT |
|
|
||||||||||||||||||||||||
|
|
(OPTICAL) |
|
|
|
(COAXIAL) |
|
|
|
(OPTICAL) |
|
|
|
(COAXIAL) |
|
|
||||||||||||||||||||||||
|
|
|
|
|
|
|
|
|
|
|
|
|
|
|
|
|
|
|
|
|
|
|
|
|
|
|
|
|
|
|
|
|
|
|
|
|
|
|
|
|
|
|
|
|
|
|
|
|
|
|
|
|
|
|
|
|
|
|
|
|
|
|
|
|
|
|
|
|
|
|
|
|
|
|
|
|
|
|
|
|
|
cable digital Optical
Digital output can be turned on/off (page 26).
cable digital coaxial RCA |
cable digital Optical |
cable digital coaxial RCA |
cable USB |
A A |
B B |
C |
Connect using a set of only one type.
|
D |
|
E |
F |
G |
|
cables audio RCA |
cables XLR |
cable coaxial BNC |
|
power Included |
|
|
|
|
|
cord |
R |
L |
R L |
|
|
Wall outlet |
|
Audio input |
|
CLOCK SYNC OUT |
|
|
|
(LINE IN, etc.) |
|
|
|
|
Stereo amplifier |
Device that outputs |
|
clock signal |
|
(G-01, G-02, etc.) |
The polarity of the XLR connectors can be set so that either 2 or 3 is HOT (page 26).
10
ADigital audio output connectors
These output digital audio signals from CDs played on this unit and signals input through this unit's digital input connectors. Connect the digital audio output connectors on this unit to the digital audio input connectors of other digital devices, such as a DA converter, AV amplifier or recorder.
Use commercially available cables for connections.
COAXIAL: RCA coaxial digital cable OPTICAL: optical digital cable (TOS)
oo These connectors cannot output Super Audio CD digital audio.
oo Digital output can be turned on/off (page 26).
BDigital audio input connectors
Use to input digital audio signals. They can be connected to the digital output connectors of appropriate audio devices.
They can receive up to 24-bit signals with sampling frequencies of 32–192 kHz.
Use commercially available cables for connections.
COAXIAL: RCA coaxial digital cable OPTICAL: optical digital cable (TOS)
CUSB port
Use to input digital audio from a computer. Connect it to a computer's USB port.
Use a commercially available USB cable for connections.
oo Before connecting, read “Connecting a computer and playing back audio files” on pages 22 to 23.
DAnalog audio output connectors
These output 2-channel analog audio. Connect the XLR or RCA connectors to an amplifier.
Use commercially available cables for connections.
XLR: balanced XLR cables RCA: RCA audio cables
Connect this unit's R connector to the R connector of the amplifier, and its L connector to the L connector of the amplifier.
oo Analog audio output can be set to either the RCA or XLR connectors (the XLR polarity can be set for pin 2 or 3 HOT) or OFF (page 26).
ECLOCK SYNC IN connector
Use to input a clock synchronization signal.
Connect the CLOCK SYNC IN connector to the clock output connector of a master clock generator.
Use a commercially available BNC coaxial cable for connection.
FGrounding connector (SIGNAL GND)
The audio quality might be improved by connecting this grounding connector to an amplifier or other device that is connected to this unit.
oo This is not a safety ground.
GAC power inlet
Connect the included power cord to this inlet.
After completing all other connections, plug the power plug into a power outlet.
oo Disconnect the power plug from the outlet if you will not use the unit for a long time.
VVUse only a genuine Esoteric power cord. Use of other power cords could result in fire or electric shock.
At Esoteric, we use Esoteric MEXCEL stressfree cables for reference.
For detailed information, access the following website.
http://www.esoteric.jp/products/esoteric/accessory/indexe.html
English
11
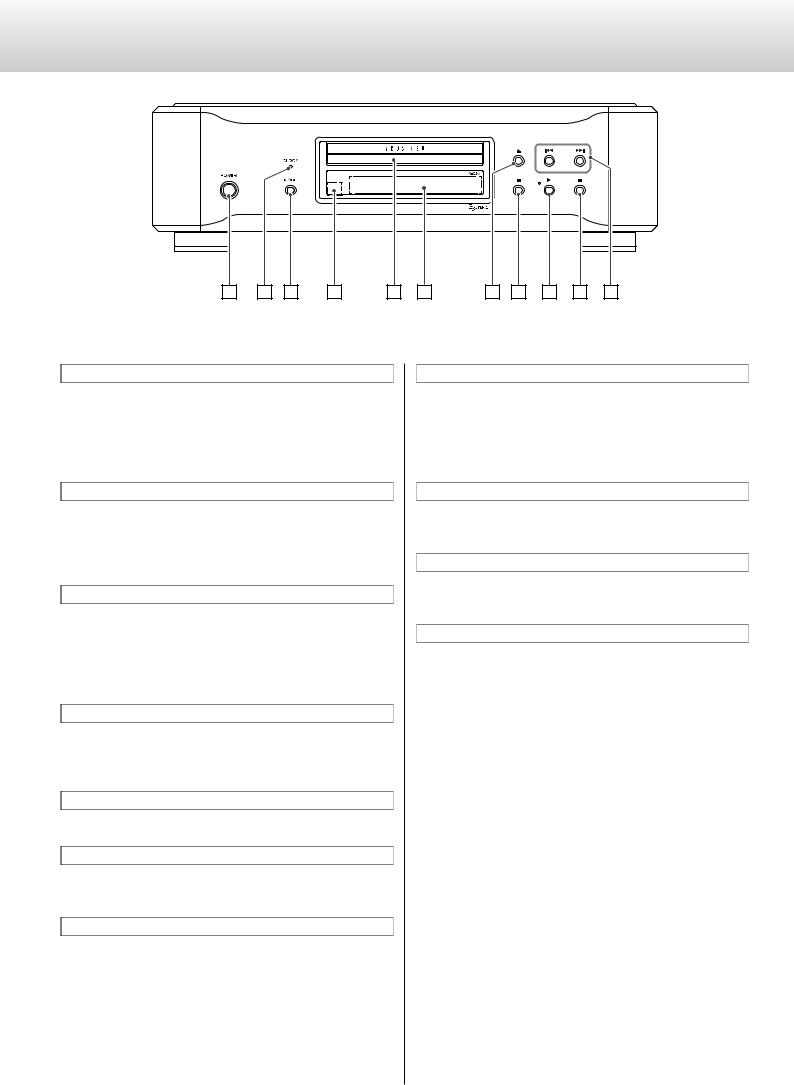
Names and functions of parts (main unit)
A B C |
D |
E F |
G H I J K |
oo This illustration is of the K-05X.
APOWER button
Press to turn the unit on and off.
When the unit is on, the ring around the button lights blue. When the unit is off, the ring is unlit.
When not using the unit, turn it off.
BCLOCK indicator
This shows the clock synchronization status.
The indicator blinks when a signal is input through the CLOCK SYNC IN connector, and it lights when the unit is locked to the signal.
CMODE button
Press when stopped to select disc playback or an external input as the source. When set to external input, the unit can be used as a D/A converter (page 21).
Press and hold for 2 or more seconds to change to setting mode (page 24).
DRemote control signal receiver
This receives signals from the remote control. When using the remote control, point the end of it toward this receiver panel (page 9).
EDisc tray
Load a disc for playback here (page 16).
FDisplay
This shows playback time, track number and other information (page 18).
GTray open/close (-) button
Press to open and close the disc tray.
HStop (8) button
Press to stop playback (page 17).
When stopped, press and hold for at least two seconds to change the playback area of a Super Audio CD (page 17).
Press when in setting mode to complete changing settings and show the ordinary display (page 24).
IPlay (7) button
Press to start disc playback (page 16).
During playback, the indicator near this button lights blue.
JPause (9) button
Press to pause playback (page 17).
When paused, the indicator near the play button blinks.
KSkip (.//) buttons
Use to skip to the previous or next track.
Press and hold for at least one second during playback to search forward/backward. Repeatedly press and hold for more than one second to change the forward/backward search speed to one of three levels (page 18).
Use to change parameters when in setting mode (page 24).
12
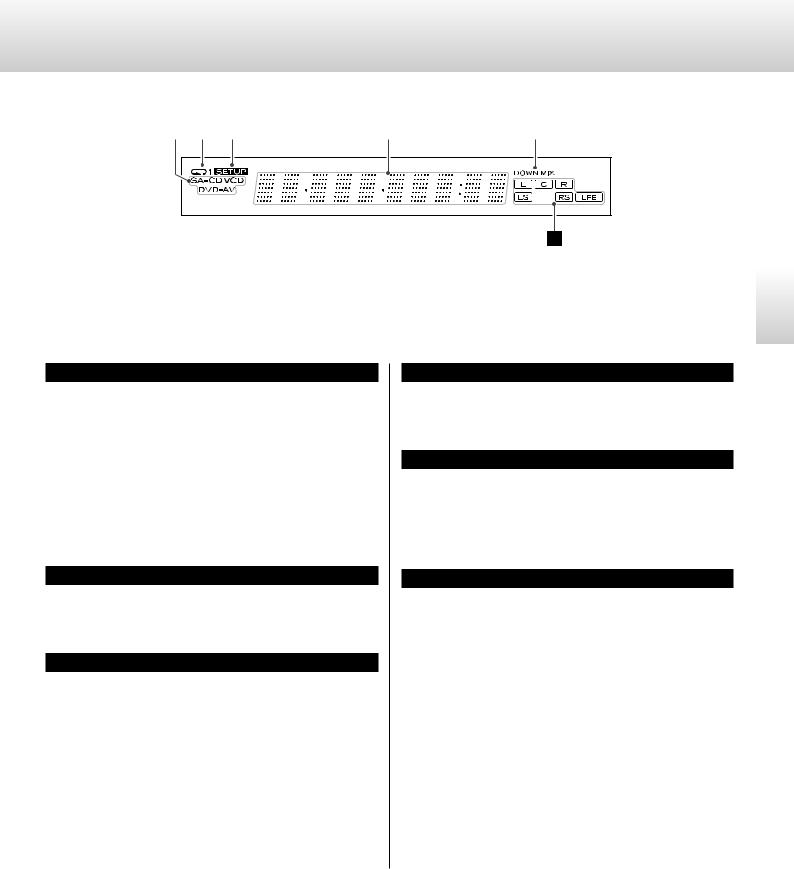
Names and functions of parts (display)
|
|
|
|
|
|
|
|
|
a |
b |
c |
d |
e |
f
English
aDisc indicator
This shows the type of disc that is loaded.
Super Audio CD: SA-CD
Standard audio CD: CD
oo If a DVD-Video (DVD-V), DVD-Audio (DVD-A) or video CD (VCD) is loaded, the indicator will light, but the disc cannot be played back.
bRepeat indicator
This appears during repeat playback (page 19).
cSETUP indicator
This appears when in setting mode (page 24).
dMessage display area
This shows the playback time and a variety of messages.
eDOWN MIX indicator
When playing back the multichannel audio of a Super Audio CD, it is downmixed and output as stereo audio (2 channels). The DOWN MIX indicator lights at such times.
fChannel indicators
L and R light during stereo audio (2-channel) playback.
During multichannel audio playback, the indicators that correspond to the recorded channels light.
13
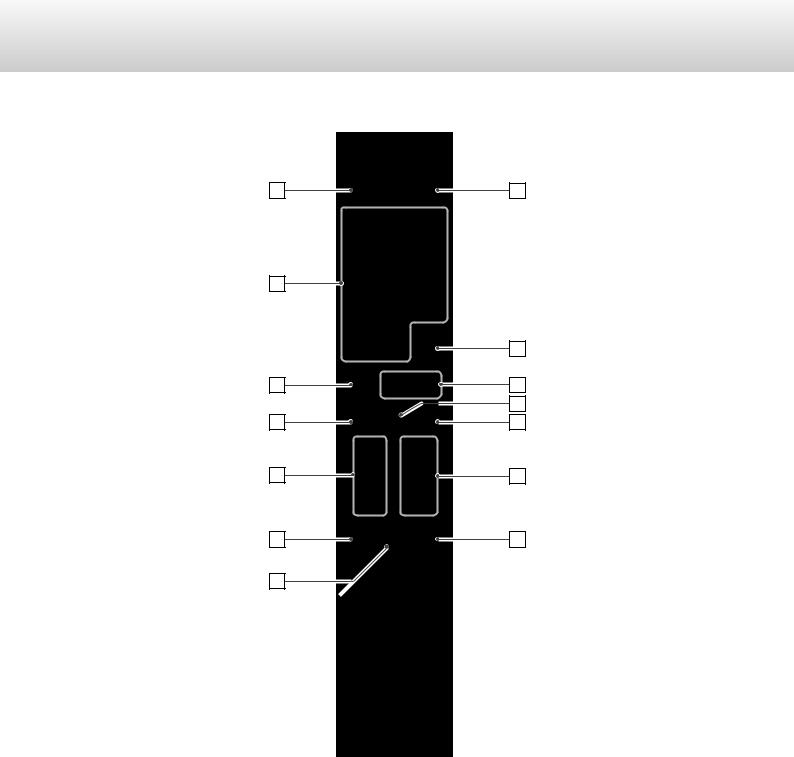
Names and functions of parts (remote control)
a |
h |
b |
|
|
i |
c |
j |
|
k |
d |
l |
e |
m |
f |
n |
g |
|
When the main unit and the remote control both have buttons with the same functions, this manual explains how to use one of the buttons. The other corresponding button can be used in the same manner.
14
aSTANDBY/ON button
This button is not used with this unit.
bNumber buttons
Use to select tracks.
cREPEAT button
Use for repeat playback (page 19).
Press and hold to enter program mode (page 20).
dPLAY AREA button
When stopped, press to change the playback area of a Super Audio CD (page 17).
eINPUT buttons (k/j)
These buttons are not used with this unit. They can be used to switch the inputs of Esoteric D/A converters (including the D-02) and amplifiers.
fSETUP button
This button is not used with this unit. It can be used with Esoteric D/A converters (including the D-02), amplifiers and other products.
gDIMMER button
Use to adjust the brightness of the main unit's display (page 21).
hTray OPEN/CLOSE (-) button
Press to open and close the disc tray (page 16).
iDISPLAY button
During playback, press this button to change what is shown on the display (page 18).
jSkip (.//) buttons
Press to skip to the previous or next track.
Press and hold for at least one second during playback to search forward/backward. Repeatedly press and hold for more than one second to change the forward/backward search speed to one of three levels (page 18).
Use to change parameters when in setting mode (page 24).
kStop (8) button
Press to stop playback (page 17).
lPlay/pause (y/9) button
Press when stopped or paused to start playback (page 16). Press during playback to pause (page 17).
mVOLUME buttons (+/−)
These buttons are not used with this unit. It can be used with Esoteric D/A converters (including the D-02), amplifiers and other products.
nMUTE button
This button is not used with this unit. It can be used to mute Esoteric D/A converters (including the D-02) and amplifiers.
English
15
Playback
4
|
|
2 |
|
1 |
3 |
4 |
5 |
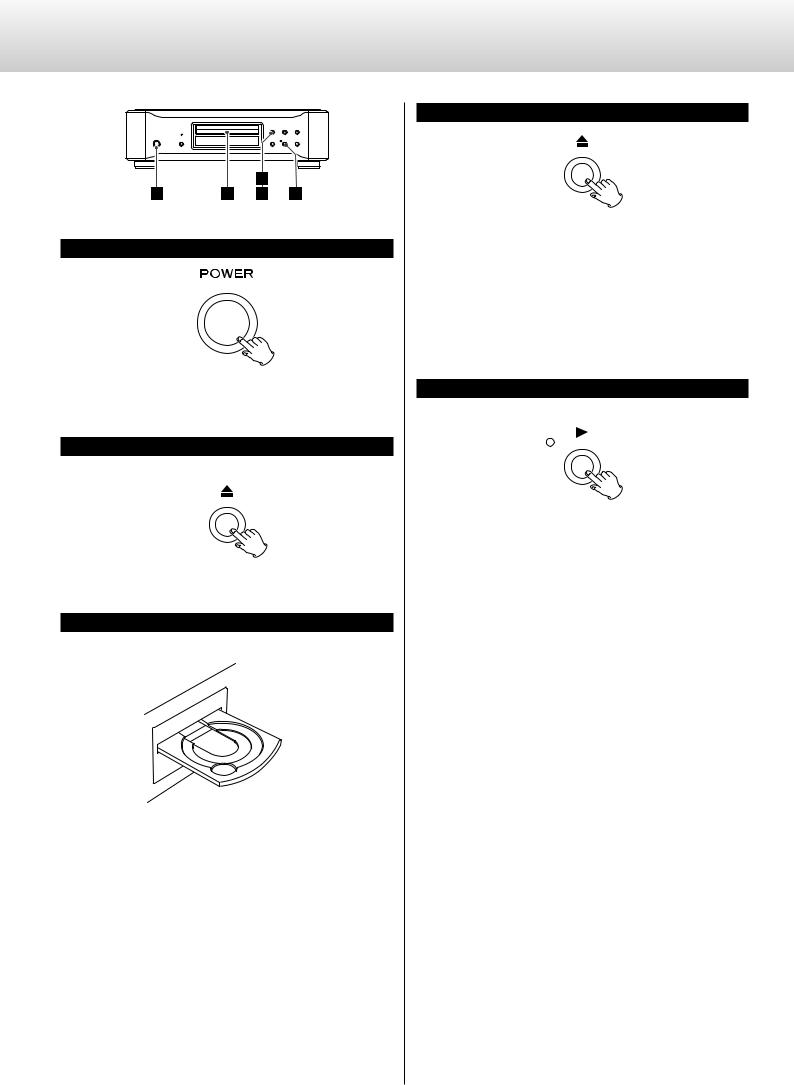
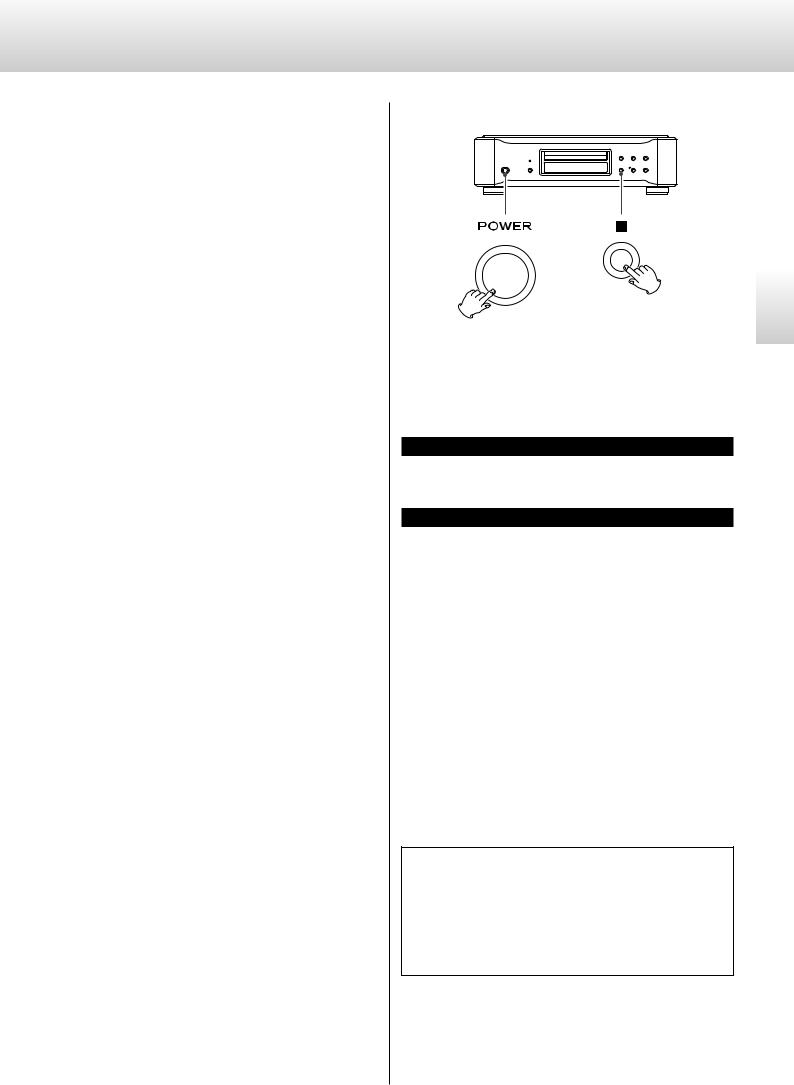
1 Turn the unit on.
The ring around the POWER button lights blue. |
5 |
|
2Press the tray open/close (-) button.
The disc tray opens forward.
3Place a disc centered on the tray with the labeled side up.
oo If the tray is closed while a disc is outside the center guides, the disc might become stuck inside and the tray might not open. Be sure to always place discs within the guides at the center of the tray.
Press the tray open/close (-) button.
The disc tray will close. Be careful not to let your fingers be pinched when the tray closes.
oo The unit takes some time to load the disc.
When the disc is loaded, the type of disc, the number of tracks it contains and the total time of those tracks will appear on the display (page 18).
Press the play (7) button.
Playback starts.
During playback the indicator near this button lights.
16
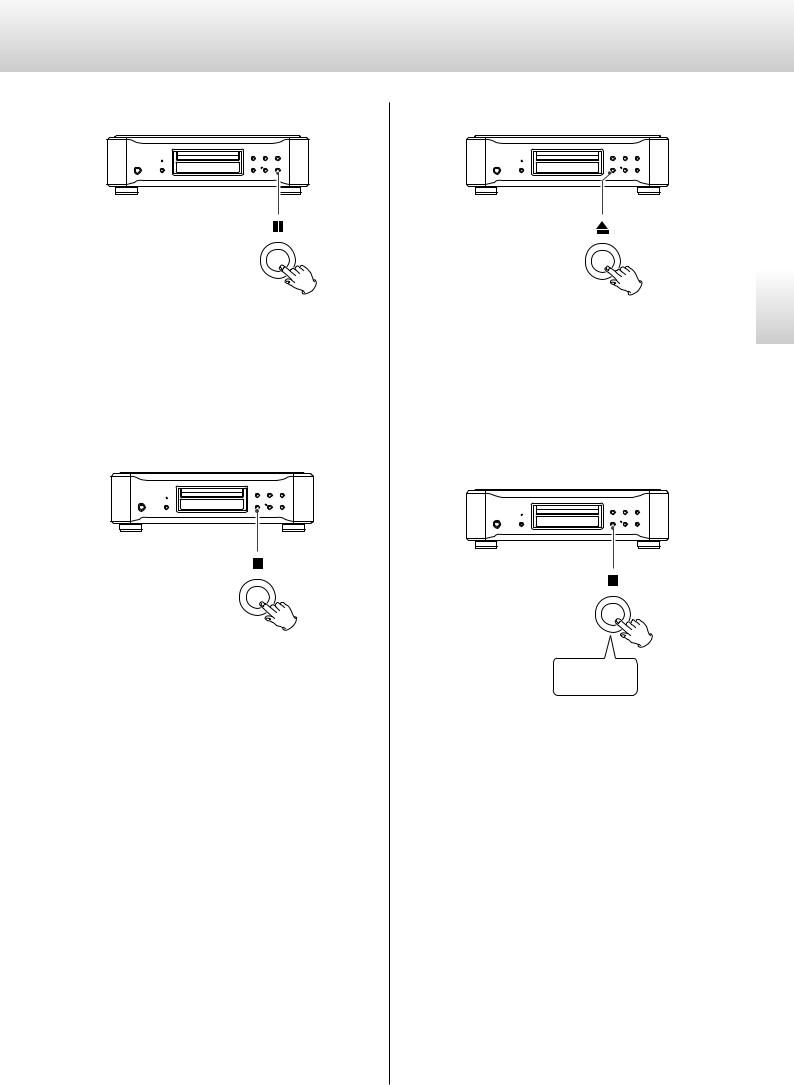
Pausing playback
During playback, press the PAUSE (9) button to pause playback. When paused, the playback indicator on the main unit blinks.
Press the play (7) or pause (9) button to restart playback.
Stopping playback
Press the stop (8) button to stop playback.
Opening and closing the disc tray
Press the tray open/close (-) button once to open the tray, and press it again to close the tray.
oo If you press the open/close (-) button during disc playback, several seconds will pass before the tray opens.
Changing the playback area
Press for at least 2 seconds
Some Super Audio CDs have multiple areas, including stereo (2-chan- nel) and multichannel. Hybrid Super Audio CDs have two layers with one containing ordinary CD-quality audio.
When stopped, press the stop (8) button for at least two seconds to change the playback area.
oo To change the playback area using the remote control, press the PLAY AREA button when the unit is stopped.
English
17
Display
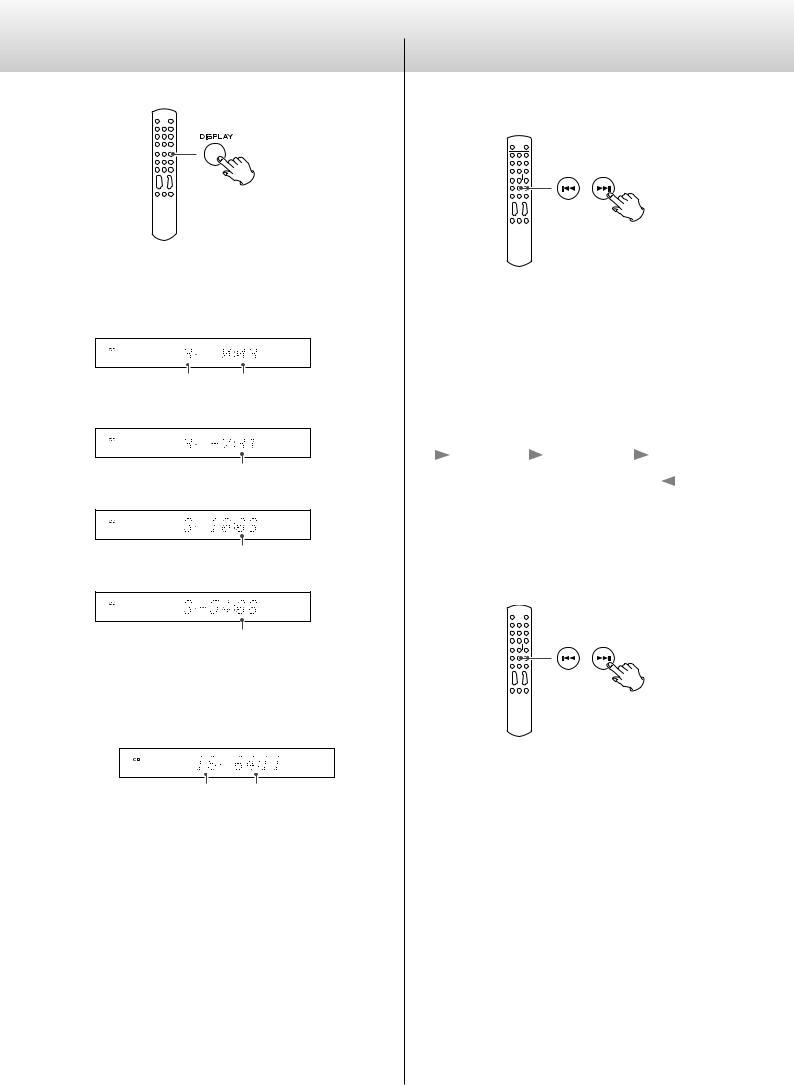
During disc playback and when paused, each time the DISPLAY button is pressed, the information shown on the display changes as follows.
Examples:
Track number of |
Elapsed time of currently |
currently playing track |
playing track |
c
Remaining time of currently playing track
c
Disc elapsed time
c
Disc remaining time
oo When stopped, the total number of tracks and total playback time of the disc are shown.
Example:
Total number of tracks Total disc playback time
Selecting tracks
Searching forward/backward
During playback, press and hold a skip (.//) button on the main unit or the remote control until searching forward/backward starts. When you find the point where you want to listen, press the play (y) button on the main unit or the play/pause (y/9) button on the remote control.
You can change the forward/backward search speed by pressing the skip (.//) button for at least one second and then releasing it. The speed that the < or > blinks on the display also changes.
|
Low speed |
|
|
Medium speed |
|
|
High speed |
|
|
|
|
|
|
|
|
||||
|
|
|
Playback at normal speed |
|
|
|
|||
|
|
|
|
|
|
||||
oo Continuously holding the button down will not change the speed.
Skipping tracks
During playback, press a skip button (.//) on the main unit or the remote control to skip to the previous or next track and start playback.
oo Press the .button once to return to the beginning of the current track. Press the .button repeatedly to return to an earlier track.
If the playback position is less than one second from the beginning of the current track, however, pressing the . button will skip to the beginning of the previous track.
oo When stopped or paused, use the .// buttons to select a track and pause at its beginning.
18
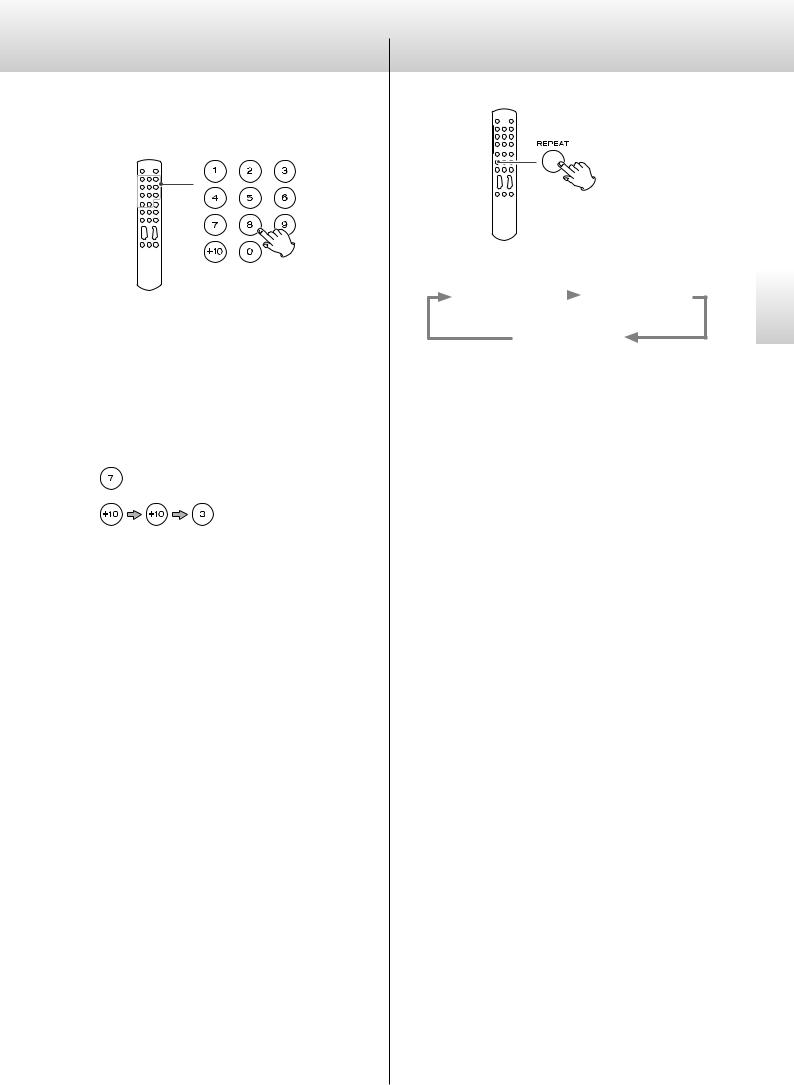
Using the number buttons to select a track for playback
When playing or stopped, you can press number buttons to select a track and start playing it back.
To play a single-digit track number, press the corresponding number button. To play a double-digit track number, press the +10 button as many times as necessary, and then press the corresponding number button for the second digit. After the track number is input, playback starts.
Examples:
Track 7:
Track 23:
Repeat playback
During playback, press the REPEAT button to cycle through the following repeat modes.
REPEAT TRK |
|
REPEAT DISC |
|
||
(track repeat) |
|
(disc repeat) |
REPEAT OFF (ordinary playback)
REPEAT TRK
The current track is played back repeatedly. During repeat playback, select a different track to repeat playback of that track.
REPEAT DISC
All tracks on the current disc are played back repeatedly.
oo Stopping playback ends repeat playback mode.
English
19

Program playback
You can program up to 30 tracks in the order that you want to listen to them.
1When stopped or during playback, press the REPEAT button for at least two seconds.
If you press this button during playback, the currently playing track will be added to the program as the first track.
Press for at least 2 seconds
2Use number buttons to select tracks you want to program.
Examples: |
|
Track 3: |
3 |
Track 12: +10 q 2
Track 20: +10 q +10 q 0
Programmed track number |
Program number |
To program multiple tracks, continue pressing the number keys.
oo Track numbers that do not exist on the currently loaded disc cannot be added to the program.
3When you are done adding tracks to the program, press the play/pause (y/9) button.
Program playback starts.
oo If you created the program during playback, you do not need to press the play/pause (y/9) button.
Adding tracks to the end of the program
When stopped or during playback, use the number buttons to select the track you want to add.
Clearing the entire program and resuming ordinary playback
When stopped or during playback, press the REPEAT button for at least two seconds to end program mode. Press the REPEAT button during program playback for at least two seconds to resume ordinary playback from that point.
oo The contents of the program will be cleared.
In addition, when stopped or during playback, if you press the tray open/close (-) or main unit POWER button, the program contents will also be cleared.
20
D/A converter mode
This unit can be used as a D/A converter when its input source is set to an external digital input (COAX in, OPT in or USB in).
Changing the input source
When stopped, press the MODE button repeatedly to cycle through the following input sources.
CD/SACD |
COAX in |
|
(coaxial digital input) |
USB in |
OPT in |
(USB input for |
(optical digital input) |
computer) |
|
oo When an external digital input (COAX in, OPT in, USB in) is selected, the name and sampling frequency of the selected input appear on the display. If there is no input signal or the unit is not locked to the input signal, the input sampling frequency is not shown and the input name blinks.
oo If the input signal is not a digital audio signal or uses an audio signal format that is not supported by this unit (such as Dolby Digital, dts or AAC) “- - -” appears in place of the sampling frequency. Set the digital output of the connected equipment to PCM audio output.
oo When an external input (COAX in, OPT in, USB in) is selected, disc controls other than the tray open/close (-) button do not function.
Dimmer
You can adjust the brightness of this unit's display and indicators.
FL Dimmer3 (normal brightness)
c
FL Dimmer2
c
FL Dimmer1
c
Off
oo If you select “Off”, the display and the indicators will be unlit.
oo In this mode, the display will light at normal brightness for about 3 seconds when you press 7or another button.
oo Even when set to any value other than Dimmer3, normal brightness (Dimmer3) will be used when displaying error messages and setting menus.
English
21

Connecting a computer and playing back audio files
Installing the driver
With Mac OS X
The driver works with the following versions (as of February 2015). OS X Lion (10.7)
OS X Mountain Lion (10.8) OS X Mavericks (10.9)
OS X Yosemite (10.10)
oo This unit can be operated with the standard OS driver, so there is no need to install a driver.
With Windows
The driver works with the following versions (as of February 2015). Windows Vista 32/64-bit
Windows 7 32/64-bit
Windows 8 32/64-bit
Windows 8.1 32/64-bit
oo Operation with other operating systems cannot be guaranteed.
Installing the driver on a computer
Before you can use this unit to play files on a computer, you must first download the dedicated driver from the following ESOTERIC download page and install it on your computer.
Website address for driver software download http://www.esoteric.jp/products/esoteric/usb/usb_driver_e.html
Install the dedicated driver software after downloading it from the above download site.
IMPORTANT NOTICE
You must install the dedicated driver software before connecting this unit with a computer using a USB cable.
If you connect this unit with a computer before installing the driver, it will not function properly.
For details about driver installation, see the instructions on the ESOTERIC download page.
Depending on the computer hardware and software integration, proper operation might not be possible even with the above operating systems.
Note about transmission modes
This unit connects using HIGH SPEED asynchronous mode.
The sampling frequencies that can be transmitted are 44.1 kHz, 48 kHz, 88.2 kHz, 96 kHz, 176.4 kHz, 192 kHz and 352.8 kHz.
2.8MHz, 5.6MHz and 11.2MHz DSD are also supported.
oo 11.2MHz DSD is only supported with DSD Native playback. It is not supported with DoP (DSD Audio over PCM Frames) playback.
If the proper connection has been made, you should be able to select “ESOTERIC USB AUDIO DEVICE” as the computer's audio output.
In asynchronous mode, the audio data sent from the computer will be processed using this unit's clock, enabling the amount of jitter that occurs during data transmission to be reduced.
22

Playing audio files
You can use ESOTERIC HR Audio Player to play audio files on a computer. Please download this free application from the following URL.
http://www.esoteric.jp/products/esoteric/hr_audio/indexe.html
ESOTERIC HR Audio Player is a software audio player that supports the high-quality playback of high-resolution sources. Windows and Mac versions are available. You can use it to enjoy the high-quality playback of high-resolution audio sources, including DSD, without needing to make complicated settings.
1Connect this unit to a computer using a USB cable.
Use a cable with a connector that matches that of this unit.
cable USB
2Turn the computer on.
Confirm that the operating system has started properly.
3Press the POWER button to turn this unit on.
4Press the MODE button repeatedly to select “USB in” (page 21).
5Start playback of an audio file on the computer.
Better sound quality can be achieved by setting the volume on the computer to the maximum level and using the amplifier connected to this unit to adjust the volume. Set the amplifier volume to the minimum when you start playback and gradually increase it.
oo The computer cannot control this unit, nor can this unit control the computer.
oo This unit cannot send audio files to the computer by USB.
oo Do not do any of the following when playing back an audio file via USB. Doing so could cause the computer to malfunction. Always quit the music playback software before doing any of the following.
-Unplug the USB cable
-Turn this unit off
-Change the input
oo When playing back an audio file via USB, computer operation sounds will also be output. If you do not want these sounds to be output, make appropriate settings on the computer to turn them off.
oo If you connect this unit with the computer or change its input to “USB in” after starting the music playback software, audio files might not play back correctly. If this should occur, restart the audio playback software or restart the computer.
English
23

Setting mode
3
1 3
2
4
Changing settings
4
1When stopped or during playback, press and hold the MODE button for 2 or more seconds.
Press for at least 2 seconds
2Press the MODE button repeatedly to select different setting items.
Each time you press the MODE button, the item shown on the display changes as follows.
APS> UPCONV>
3 |
c |
DPaOFF> |
PCMF> |
3 |
c |
DOUT> |
DSDF> |
3 |
c |
AOUT> |
CLK> |
oo Depending on the selected source and operation status, some items might not appear.
oo If you do nothing for 10 or more seconds, setting mode will end and ordinary display will resume.
oo When the menu is open, if you press and hold the MODE button for at least two seconds, or you press the stop (8) button once, setting mode will end and the ordinary display will reappear.
Use the main unit or remote control skip buttons (.//) to change settings.
To change multiple items, repeat steps 2 and 3 .
Press and hold the MODE button for 2 or more seconds to end setting mode.
Press for at least 2 seconds
Setting mode will also end and the ordinary display will reappear if nothing is done for 10 seconds or the stop (8) button is pressed once.
oo Settings are retained even if the unit is left unplugged.
24

Setting items and their options
Upconversion setting Display: UPCONV>***
oo This setting can be made for each input.
oo During Super Audio CD playback, the DSD signal is sent directly to the D/A converter.
ORG (original)
The original input signal is sent directly to the D/A converter without upconversion.
2Fs
32kHz, 44.1kHz and 48kHz sources are upconverted to double values of 64 kHz, 88.2 kHz and 96 kHz, respectively, and then sent to the D/A converter.
4Fs
32kHz, 44.1kHz, 48kHz, 88.2kHz and 96kHz sources are upconverted to double or quadruple values of 128 kHz, 176.4 kHz or 192 kHz and then sent to the D/A converter.
8Fs
32kHz, 44.1kHz, 48kHz, 88.2kHz, 96kHz, 176.4kHz and 192kHz sources are upconverted to double, quadruple or octuple values of 256 kHz, 352.8 kHz or 384 kHz and then sent to the D/A converter.
DSD
The signal is converted to DSD digital format, and then sent to the D/A converter.
Note about the digital filter during PCM playback
FIR-type digital filters
This type of filter has an established reputation for sound quality and features tonal quality with both dense, rich sound reverberations and crisp sound transients.
SDLY-type digital filters
This type of filter has no pre-echo in the impulse response and features natural sound attack and reverberation for a tonal quality that is close to the original.
Digital filter setting during PCM playback Display: PCMF>***
oo This setting can be made for each input.
oo During Super Audio CD playback, this is automatically set to the dedicated DSD filter.
OFF
No digital filter is used during PCM playback.
oo Using this setting, high-frequency harmonic components will be output. If noise occurs because of cross modulation from high frequency harmonic components, for example, set “PCMF” to “FIR” or “SDLY” instead.
FIR1
An FIR filter with a steep roll-off is used to sharply cut signals outside the audio band.
FIR2
An FIR filter with a slow roll-off is used to gently cut signals outside the audio band.
SDLY1
A short delay filter with a steep roll-off is used to sharply cut signals outside the audio band.
SDLY2
A short delay filter with a slow roll-off is used to gently cut signals outside the audio band.
Digital filter setting during DSD playback Display: DSDF>***
oo This setting can be made for each input.
OFF
A filter that cuts signals over 50 kHz is not used.
ON
A filter that cuts signals over 50 kHz is used.
English
25

Setting items and their options (continued)
Clock sync mode setting Display: CLK>***
oo This setting can be made for each input.
oo During COAX or OPT input, input a clock that is synchronized with the input source. If the source device does not support clock input, set this to OFF.
oo During USB input, the clock frequencies that can be input depend on whether the playback file is 44 .1 kHz or 48 kHz. 10MHz clock can be input for any type of playback file.
OFF
No clock sync is used.
SYNC
This unit's master clock is synchronized to the clock signal (44.1 kHz, 48 kHz, 88.2 kHz, 96 kHz, 176.4 kHz, 192 kHz or 10 MHz) input through the CLOCK SYNC IN connector and used for operation.
MCK
The 22.5792MHz/24.576MHz signal input through the CLOCK SYNC IN connector is used as the master clock.
Analog output setting
Display: AOUT>***
XLR2
Analog audio signals are output through the XLR connectors with pin 2 HOT.
XLR3
Analog audio signals are output through the XLR connectors with pin 3 HOT.
RCA
Analog audio signals are output through the RCA connectors.
OFF
Analog outputs are disabled and the D/A converter is turned off.
Digital output setting Display: DOUT>***
oo The signal is output without upconversion.
oo During Super Audio CD playback, this is automatically set to off.
OFF
Turns the digital output off.
ON
Turns the digital output on.
CD digital audio is output during disc playback.
During COAX or OPT input, the input signal is output as is.
During USB input, a digital signal is output only during playback of PCM files.
During DSD file playback, a digital signal is not output.
Automatic display (FL) off setting
Display: DPaOFF>***
ON
If playback is stopped and no operation is conducted for 30 minutes, the display automatically turns off.
OFF
The display never turns off automatically.
oo If the display is left on with the same indication for a long time, brightness irregularities can occur. For this reason, we recommend that you set the automatic display off function to ON.
26

Automatic power saving setting Display: APS>***
oo By default, the setting is 30m.
When the input source is CD/SACD, the unit will turn off automatically if the set amount of time passes without a disc being loaded or with the disc remaining stopped.
When the input source is COAX in, OPT in or USB in, the unit will turn off automatically if the set amount of time passes without being able to lock an input signal from the selected input source.
oo The input sources that are not selected have no effect on automatic power saving.
30m
30 minutes
60m
60 minutes
90m
90 minutes
120m
120 minutes
OFF
The automatic power saving function is disabled.
Maintenance
Use a soft dry cloth to wipe the surface of the unit clean.
For stubborn smudges, use a damp cloth that has been thoroughly wrung out to remove excess moisture.
VVFor safety, disconnect the power plug from the outlet before wiping the unit.
oo Never spray liquid directly on this unit.
oo Do not use chemically-treated wipes, thinner or similar substances because they could damage the surface of the unit.
oo Avoid allowing rubber or plastic materials to touch the unit for long periods of time because they could damage the cabinet.
English
27

Troubleshooting
If you experience a problem with the unit, please take a moment to review the following information before requesting service. Moreover, the problem might be caused by something other than this unit. Please also check the operation of the connected units.
If this product still does not operate correctly, contact the retailer where you purchased it.
General
The unit does not turn on.
ee Insert the power plug into an outlet.
ee Check the connection of the power cord to this unit.
The unit automatically turns off.
ee This is because the automatic power saving function turned it off. Press the POWER button on the main unit to turn it on. Change the automatic power saving setting if necessary (page 27).
Remote control does not work. ee Turn the main unit on (page 16).
ee If the batteries are exhausted, replace both of them with new ones (page 9).
ee The remote control will not work if there is an obstruction between it and the main unit. Point the remote control at the front panel of the unit from a distance of less than about 7 m (23 ft) (page 9).
A television or other device is operating improperly.
ee The use of this unit’s remote control might cause some televisions with wireless remote control functions to operate incorrectly.
Cannot play back a CD or Super Audio CD.
ee Press the MODE button repeatedly to select “CD/SACD” (page 21).
ee Load the disc correctly. If the disc is upside down, reload it with the labeled side up.
ee If the disc is dirty, wipe it clean (page 8).
ee If condensation has occurred inside this unit, turn it on and leave it for 1–2 hours (page 29).
The unit does not respond when buttons are pressed.
ee Multiple button presses without pause can cause the unit to stop responding. After pressing a button, wait momentarily for the unit to respond.
There is noise.
ee Place the unit as far away as possible from TVs and other devices that have strong magnetism.
No sound is output from the speakers. The sound is distorted. ee Check the connections with the amp and the speakers (page
10).
ee Adjust the volume of the amplifier and other devices. ee If the disc is dirty, wipe it clean.
ee Super Audio CD digital audio cannot be output from the digital audio output connectors.
ee No sound is output when playback is paused. Press the play (7) button to resume ordinary playback.
ee Check the analog output setting (page 26).
Digital recording is not possible on connected external equipment.
ee You cannot record the digital audio signal as is from a disc that has copy-protection.
Noticeable difference in volume between CDs and Super Audio CDs.
ee You might notice volume differences between ordinary CDs and Super Audio CDs. This is the result of differences between their data recording methods, mastering and authoring.
Clock sync
The CLOCK indicator does not stop blinking.
ee Set clock synchronization mode to OFF when not using it.
ee Synchronization with the clock signal being input might not be possible. Check the connection of the CLOCK SYNC IN connector and the settings of the connected device.
A cyclical humming noise is being output.
ee If a cyclical humming noise is being output when using clock sync mode, the connected device might not be in clock sync mode. Check the connection of the CLOCK SYNC IN connector and the clock sync mode setting of the connected device.
28
USB connections with a computer
Computer does not recognize this unit.
ee This unit can be connected by USB and used with a computer running one of the following operating systems (as of February 2015).
OS X Lion (10.7)
OS X Mountain Lion (10.8) OS X Mavericks (10.9)
OS X Yosemite (10.10)
Windows Vista 32/64-bit Windows 7 32/64-bit Windows 8 32/64-bit Windows 8.1 32/64-bit
Operation with other operating systems cannot be guaranteed.
There is noise.
ee Starting other applications during playback of a music file may interrupt playback or cause noise. Do not start other applications during playback.
ee When the unit is connected to a computer via a USB hub, for example, noise might be heard. If this occurs, connect the unit directly to the computer.
Audio files cannot be played back.
ee Connect the computer with this unit and switch to “USB in” before starting the music playback software and music file playback. Audio data might not play back correctly if you connect this unit with the computer or change its input to “USB in” after starting the music playback software.
Since this unit uses a microcontroller, external noise and other interference can cause the unit to malfunction. In such a case, turn the unit off and wait about one minute before restarting operation from the beginning.
Restoring factory settings
Setting changes are retained even when the power cord is disconnected.
Follow these procedures to restore all settings to their factory defaults and clear the unit's memory.
1Turn the unit off.
If the unit is on, press the POWER button to turn it off and wait for more than 30 seconds.
2Press the POWER button while holding down the stop (8) button on the main unit.
Release the stop (8) button when “Setup CLR” (setup clear) appears on the display.
Note about condensation
If this unit is brought from a cold outdoor environment into a warm room, or the heater has just been turned on in the room where it is located, for example, condensation might occur on operating parts or lenses, resulting in improper operation. If this occurs, leave the unit on and wait 1–2 hours. This should enable normal playback.
English
29
Loading...