


D00742000A
DVD/DVD-A/SACD/CD PLAYER
OWNER’S MANUAL . . . . . . . . . . . . . . . 2
MANUEL DU PROPRIÉTAIRE . . . 56
Important Safety Instructions
Y
CAUTION: TO REDUCE THE RISK OF ELECTRIC SHOCK, DO NOT REMOVE COVER (OR BACK). NO USER-SERVICEABLE PARTS INSIDE. REFER SERVICING TO QUALIFIED SERVICE PERSONNEL.
The lightning flash with arrowhead symbol, within an Eequilateral triangle, is intended to alert the user to the presence of uninsulated "dangerous voltage" within the product’s enclosure that may be of sufficient magnitude to constitute a risk of electric shock to
persons.
The exclamation point within an equilateral triangle is Rintended to alert the user to the presence of important operating and maintenance (servicing) instructions in the literature accompanying the
appliance.
WARNING : TO PREVENT FIRE OR SHOCK HAZARD, DO NOT EXPOSE THIS APPLIANCE TO RAIN OR MOISTURE.
Important Safety Instructions
1)Read these instructions.
2)Keep these instructions.
3)Heed all warnings.
4)Follow all instructions.
5)Do not use this apparatus near water.
6)Clean only with dry cloth.
7)Do not block any ventilation openings. Install in accordance with the manufacturer's instructions.
8)Do not install near any heat sources such as radiators, heat registers, stoves, or other apparatus (including amplifiers) that produce heat.
9)Do not defeat the safety purpose of the polarized or grounding-type plug. A polarized plug has two blades with one wider than the other. A grounding type plug has two blades and a third grounding prong. The wide blade or the third prong are provided for your safety. If the provided plug does not fit into your outlet, consult an electrician for replacement of the obsolete outlet.
10)Protect the power cord from being walked on or pinched particularly at plugs, convenience receptacles, and the point where they exit from the apparatus.
For U.S.A.
This equipment has been tested and found to comply with the limits for a Class B digital device, pursuant to Part 15 of the FCC Rules. These limits are designed to provide reasonable protection against harmful interference in a residential installation. This equipment generates, uses, and can radiate radio frequency energy and, if not installed and used in accordance with the instructions, may cause harmful interference to radio communications. However, there is no guarantee that interference will not occur in a particular installation. If this equipment does cause harmful interference to radio or television reception, which can be determined by turning the equipment off and on, the user is encouraged to try to correct the interference by one or more of the following measures:
•Reorient or relocate the equipment and/or the receiving antenna.
•Increase the separation between the equipment and receiver.
•Connect the equipment into an outlet on a circuit different from that to which the receiver is connected.
•Consult the dealer or an experienced radio/TV technician for
help.
CAUTION
Changes or modifications to this equipments not expressly approved by TEAC CORPORATION for compliance will void the user's warranty.
11)Only use attachments/accessories specified by the manufacturer.
12) Use only with the cart, stand, tripod, bracket, or table specified by the manufacturer, or sold with the apparatus. When a cart is used, use caution when moving the cart/apparatus combination to avoid injury from tip-over.
13)Unplug this apparatus during lightning storms or when unused for long periods of time.
14)Refer all servicing to qualified service personnel. Servicing is required when the apparatus has been damaged in any way, such as power-supply cord or plug is damaged, liquid has been spilled or objects have fallen into the apparatus, the apparatus has been exposed to rain or moisture, does not operate normally, or has been dropped.
<Do not expose this apparatus to dripps or splashes.
<Do not place any objects filled with liquids, such as vases, on the apparatus.
<Do not install this apparatus in a confined space such as a book case or similar unit.
<The apparatus draws nominal non-operating power from the AC outlet with its POWER switch in the off position.
2
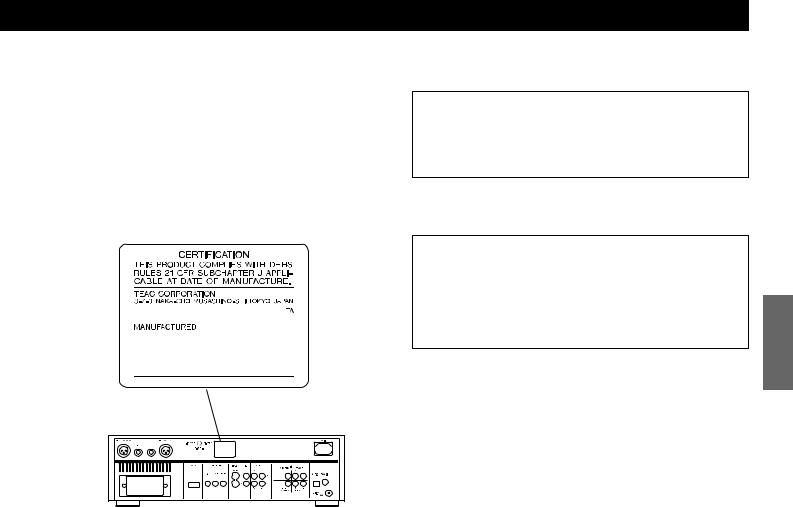
This product has been designed and manufactured according to FDA regulations “title 21, CFR, chapter 1, subchapter J, based on the Radiation Control for Health and Safety Act of 1968“, and is classified as class 1 laser product. There is not hazardous invisible laser radiation during operation because invisible laser radiation emitted inside of this product is completely confined in the protective housings.
The label required in this regulation is shown .
For CANADA
AC POWER CORD CONNECTION
CAUTION:
TO PREVENT ELECTRIC SHOCK, MATCH WIDE BLADE OF PLUG TO WIDE SLOT, FULLY INSERT.
For U.S.A.
Optical pickup : |
|
|
Type |
: |
OWY8007 |
Laser output |
: Less than 0.62 µW on the objective lens |
|
Wavelength |
: |
790±20 nm (CD), 650±10 nm (DVD) |
|
|
|
CAUTION
<DO NOT REMOVE THE PROTECTIVE HOUSING USING SCREWDRIVER.
<USE OF CONTROLS OR ADJUSTMENTS OR PERFORMANCE OF PROCEDURES OTHER THAN THOSE SPECIFIED HEREIN MAY RESULT IN HAZARDOUS RADIATION EXPOSURE.
<IF THIS PRODUCT DEVELOPS TROUBLE, MAKE A CONTACT WITH OUR SERVICEMAN, AND DO NOT USE THE PRODUCT IN A TROUBLED STATE.
Pour le CANADA
CORDE DE CONNEXION CA
ATTENTION:
POUR ÉVITER LES CHOCS ÉLECTRIQUES, INTRODUIRE LA LAME LA PLUS LARGE DE LA FICHE DANS LA BORNE CORRESPONDANTE DE LA PRISE ET POUSSER JUSQU’AU FOND.
ENGLISH
3

Contents
Thank you for choosing TEAC. Read this manual carefully to get the best performance from this unit.
Important Safety Instructions . . . . . . . . . . . . . . . . . . . . . . . . . . . . . |
. 2 |
Contents . . . . . . . . . . . . . . . . . . . . . . . . . . . . . . . . . . . . . . . . . . . . . . . . |
. 4 |
Before Use . . . . . . . . . . . . . . . . . . . . . . . . . . . . . . . . . . . . . . . . . . . . . . |
. 5 |
Discs. . . . . . . . . . . . . . . . . . . . . . . . . . . . . . . . . . . . . . . . . . . . . . . . . . . . |
. 6 |
Connection to an amplifier . . . . . . . . . . . . . . . . . . . . . . . . . . . . . . . . . |
. 8 |
Connection to a TV . . . . . . . . . . . . . . . . . . . . . . . . . . . . . . . . . . . . . . . |
10 |
Names of Each Control . . . . . . . . . . . . . . . . . . . . . . . . . . . . . . . . . . . . |
13 |
Remote Control Unit . . . . . . . . . . . . . . . . . . . . . . . . . . . . . . . . . . . . . . |
14 |
Getting Started (Setup Navigator) . . . . . . . . . . . . . . . . . . . . . . . . . . 15 Playback . . . . . . . . . . . . . . . . . . . . . . . . . . . . . . . . . . . . . . . . . . . . . . . . 17 Select an Audio Language . . . . . . . . . . . . . . . . . . . . . . . . . . . . . . . . . 19 Select a Subtitle Language . . . . . . . . . . . . . . . . . . . . . . . . . . . . . . . . 19 Playback from a specific part . . . . . . . . . . . . . . . . . . . . . . . . . . . . . . 20 Title Search . . . . . . . . . . . . . . . . . . . . . . . . . . . . . . . . . . . . . . . . . . . . . 21 Time Search and Frame search . . . . . . . . . . . . . . . . . . . . . . . . . . . . 22 Change the Angle . . . . . . . . . . . . . . . . . . . . . . . . . . . . . . . . . . . . . . . . 23 Single Stepping Playback . . . . . . . . . . . . . . . . . . . . . . . . . . . . . . . . . . 23 Slow-Motion Playback . . . . . . . . . . . . . . . . . . . . . . . . . . . . . . . . . . . . 24 Shuffle Playback . . . . . . . . . . . . . . . . . . . . . . . . . . . . . . . . . . . . . . . . . 24 Repeat Playback . . . . . . . . . . . . . . . . . . . . . . . . . . . . . . . . . . . . . . . . . 25 A-B Repeat . . . . . . . . . . . . . . . . . . . . . . . . . . . . . . . . . . . . . . . . . . . . . . 25 Programmed Playback . . . . . . . . . . . . . . . . . . . . . . . . . . . . . . . . . . . . 26 Programmed Playback of MP3 . . . . . . . . . . . . . . . . . . . . . . . . . . . . . 28 Last Memory . . . . . . . . . . . . . . . . . . . . . . . . . . . . . . . . . . . . . . . . . . . . 29 Memorizing disc settings (Condition Memory) . . . . . . . . . . . . . . . 29 Display (during playback) . . . . . . . . . . . . . . . . . . . . . . . . . . . . . . . . . 30 Display (in the stop mode) . . . . . . . . . . . . . . . . . . . . . . . . . . . . . . . . . 32 Digital Filter . . . . . . . . . . . . . . . . . . . . . . . . . . . . . . . . . . . . . . . . . . . . . 33
Settings . . . . . . . . . . . . . . . . . . . . . . . . . . . . . . . . . . . . . . . . . . . . . . . . . |
34 |
How to initialize the settings . . . . . . . . . . . . . . . . . . . . . . . . . . . . |
35 |
Setup Menu Mode. . . . . . . . . . . . . . . . . . . . . . . . . . . . . . . . . . . . . |
35 |
Audio DRC (Dynamic Range Controlling). . . . . . . . . . . . . . . . . . |
35 |
Dolby Digital Out . . . . . . . . . . . . . . . . . . . . . . . . . . . . . . . . . . . . . . |
35 |
DTS Out . . . . . . . . . . . . . . . . . . . . . . . . . . . . . . . . . . . . . . . . . . . . . . |
36 |
Linear PCM Out . . . . . . . . . . . . . . . . . . . . . . . . . . . . . . . . . . . . . . . |
36 |
MPEG Out . . . . . . . . . . . . . . . . . . . . . . . . . . . . . . . . . . . . . . . . . . . . |
36 |
Digital Out . . . . . . . . . . . . . . . . . . . . . . . . . . . . . . . . . . . . . . . . . . . |
36 |
SACD Playback . . . . . . . . . . . . . . . . . . . . . . . . . . . . . . . . . . . . . . |
37 |
Virtual Surround. . . . . . . . . . . . . . . . . . . . . . . . . . . . . . . . . . . . . . . |
37 |
Audio Out . . . . . . . . . . . . . . . . . . . . . . . . . . . . . . . . . . . . . . . . . . . . |
37 |
Speaker Setting . . . . . . . . . . . . . . . . . . . . . . . . . . . . . . . . . . . . . . |
38 |
Gain Setting (Test Tone) . . . . . . . . . . . . . . . . . . . . . . . . . . . . . . |
39 |
CD Digital Direct . . . . . . . . . . . . . . . . . . . . . . . . . . . . . . . . . . . . . |
40 |
TV Screen . . . . . . . . . . . . . . . . . . . . . . . . . . . . . . . . . . . . . . . . . . . . |
40 |
Component Video . . . . . . . . . . . . . . . . . . . . . . . . . . . . . . . . . . . . . |
41 |
Video Out (European model only) . . . . . . . . . . . . . . . . . . . . . . . |
41 |
S-Video Out . . . . . . . . . . . . . . . . . . . . . . . . . . . . . . . . . . . . . . . . . |
41 |
Frame Search . . . . . . . . . . . . . . . . . . . . . . . . . . . . . . . . . . . . . . . . |
42 |
Screen Saver . . . . . . . . . . . . . . . . . . . . . . . . . . . . . . . . . . . . . . . . |
42 |
Background . . . . . . . . . . . . . . . . . . . . . . . . . . . . . . . . . . . . . . . . . . |
42 |
Video Adjust . . . . . . . . . . . . . . . . . . . . . . . . . . . . . . . . . . . . . . . . . |
42 |
Still Picture . . . . . . . . . . . . . . . . . . . . . . . . . . . . . . . . . . . . . . . . . |
44 |
On Screen Display . . . . . . . . . . . . . . . . . . . . . . . . . . . . . . . . . . . . |
44 |
Angle Indicator . . . . . . . . . . . . . . . . . . . . . . . . . . . . . . . . . . . . . . |
44 |
OSD Language . . . . . . . . . . . . . . . . . . . . . . . . . . . . . . . . . . . . . . . |
44 |
Audio Language . . . . . . . . . . . . . . . . . . . . . . . . . . . . . . . . . . . . . . |
44 |
Subtitle Language . . . . . . . . . . . . . . . . . . . . . . . . . . . . . . . . . . . . . |
45 |
Auto Language. . . . . . . . . . . . . . . . . . . . . . . . . . . . . . . . . . . . . . . . |
45 |
DVD Language . . . . . . . . . . . . . . . . . . . . . . . . . . . . . . . . . . . . . . . |
45 |
Selecting a Language from the Language Code List . . . . . . . |
45 |
Subtitle Display . . . . . . . . . . . . . . . . . . . . . . . . . . . . . . . . . . . . . . |
46 |
Subtitle Off . . . . . . . . . . . . . . . . . . . . . . . . . . . . . . . . . . . . . . . . . . |
46 |
Bonus Group . . . . . . . . . . . . . . . . . . . . . . . . . . . . . . . . . . . . . . . . . |
46 |
Auto Disc Menu . . . . . . . . . . . . . . . . . . . . . . . . . . . . . . . . . . . . . . |
46 |
Group Playback . . . . . . . . . . . . . . . . . . . . . . . . . . . . . . . . . . . . . . |
46 |
Parental Lock . . . . . . . . . . . . . . . . . . . . . . . . . . . . . . . . . . . . . . . . . . . . 47 Shortcuts to the Setup Menu items (Function Memory) . . . . . . . 49 Troubleshooting . . . . . . . . . . . . . . . . . . . . . . . . . . . . . . . . . . . . . . . . . . 50 Maintenance . . . . . . . . . . . . . . . . . . . . . . . . . . . . . . . . . . . . . . . . . . . . 51 Glossary . . . . . . . . . . . . . . . . . . . . . . . . . . . . . . . . . . . . . . . . . . . . . . . . 52 Specifications . . . . . . . . . . . . . . . . . . . . . . . . . . . . . . . . . . . . . . . . . . . 54 Language Code List . . . . . . . . . . . . . . . . . . . . . . . . . . . . . . . . . . . . . . . 55
“DTS” and “DTS Digital Surround” are trademarks of Digital Theater Systems, Inc. ©1996 Digital Theater Systems, Inc. All rights reserved.
Manufactured under license from Dolby Laboratories. “Dolby”, “Pro Logic” and the double-D symbol are trademarks of Dolby Laboratories. Confidential Unpublished Works. ©1992-1997 Dolby Laboratories, Inc. All rights reserved.
This product incorporates copyright protection technology that is protected by method claims of certain U.S. patents and other intellectual property rights owned by Macrovision Corporation and other rights owners. Use of this copyright protection technology must be authorized by Macrovision Corporation, and is intended for home and other limited viewing uses only, unless otherwise authorized by Macrovision Corporation. Reverse engineering or disassembly is prohibited.
TruSurround and the 
 symbol are trademarks of SRS Labs, Inc. TruSurround technology is incorporated under license from SRS Labs, Inc.
This unit is equipped with the ADV7300A that consists of six 12-bit/108MHz NSV Precision Video DACs for multiple video outputs. NSV(Noise Shaped Video) technology reduces video noise and achieves precise images free from encoder deterioration.
Noise Shaped Video and NSV are registered trademarks of Analog Devices, Inc.
4

Before Use
What's in the box
Please confirm that the following accessories are in the box when you open it.
Remote control unit x 1
Batteries (AA, R6, SUM-3) x 2
Felt sheet x 3
Power cord x 1
Owner's manual x 1
Warranty card x 1
Conventions about This Manual
<Instructions in this manual describe the controls on the remote control. You can also use the buttons on the front panel if they have the same or similar names as those on the remote.
<The types of functions and operations that can be used for a particular disc vary depending on the features of that disc. In some cases, these functions and operations may differ from the descriptions given in this Owner's Manual. In this event, follow the instructions given on the screen. This Owner's Manual only covers basic disc operations.
<For some operations, the PROHIBIT icon ( 
 or
or  ) may appear on the screen. This indicates that the operation described in this Operations Manual is not permitted for the current disc.
<The drawings about the TV screen and front panel display used in this Operations Manual are purely for the purposes of explanation. The actual displays may differ slightly from what are shown here.
Read this before operation
<As the unit may become warm during operation, always leave sufficient space around the unit for ventilation.
<The voltage supplied to the unit should match the voltage as printed on the rear panel. If you are in any doubt regarding this matter, consult an electrician.
<Choose the installation location of your unit carefully. Avoid placing it in direct sunlight or close to a source of heat. Also avoid locations subject to vibrations and excessive dust, heat, cold or moisture.
<Do not place the unit on the amplifier/receiver.
<Do not open the cabinet as this might result in damage to the circuitry or electrical shock. If a foreign object should get into the unit, contact your dealer or service company.
<When removing the power plug from the wall outlet, always pull directly on the plug, never yank the cord.
<To keep the laser pickup clean, do not touch it, and always close the disc tray.
<Do not attempt to clean the unit with chemical solvents as this might damage the finish. Use a clean, dry cloth.
<Keep this manual in a safe place for future reference.
CAUTION
The product shall not be exposed to dripping or splashing and that no object filled with liquids, such as vases, shall be placed on the product.
Do not install this equipment in a confined space such as a book case or similar unit.
DO NOT MOVE THE UNIT DURING PLAYBACK
During playback, the disc rotates at high speed. Do NOT lift or move the unit during playback. Doing so may damage the disc or the unit.
WHEN MOVING THIS UNIT
When changing places of installation or packing the unit for moving, be sure to remove the disc and return the disc tray to its closed position in the player. Then, press the power switch to turn the power off, and disconnect the power cord. Moving this unit with the disc loaded may result in damage to this unit.
Placement of the unit
High-quality hardened tool steel is used for the pin-point feet, securely attached to the bottom of the player. Although the cover feet may appear loose, the weight of the unit causes them to be firm and secure, and the design effectively damps and reduces vibration.
<Be careful to avoid injury when moving the unit, on account of its weight. Get someone to help you if necessary.
<To protect floors, etc. you may stick the felt supplied with the unit to the bottom of the cover feet.
Pin-point foot
Bottom plate
of the unit
Steel foot
Cover foot |
Cover foot retaining screws |
ENGLISH
5
Discs
Type of Discs That Can be Played on This System
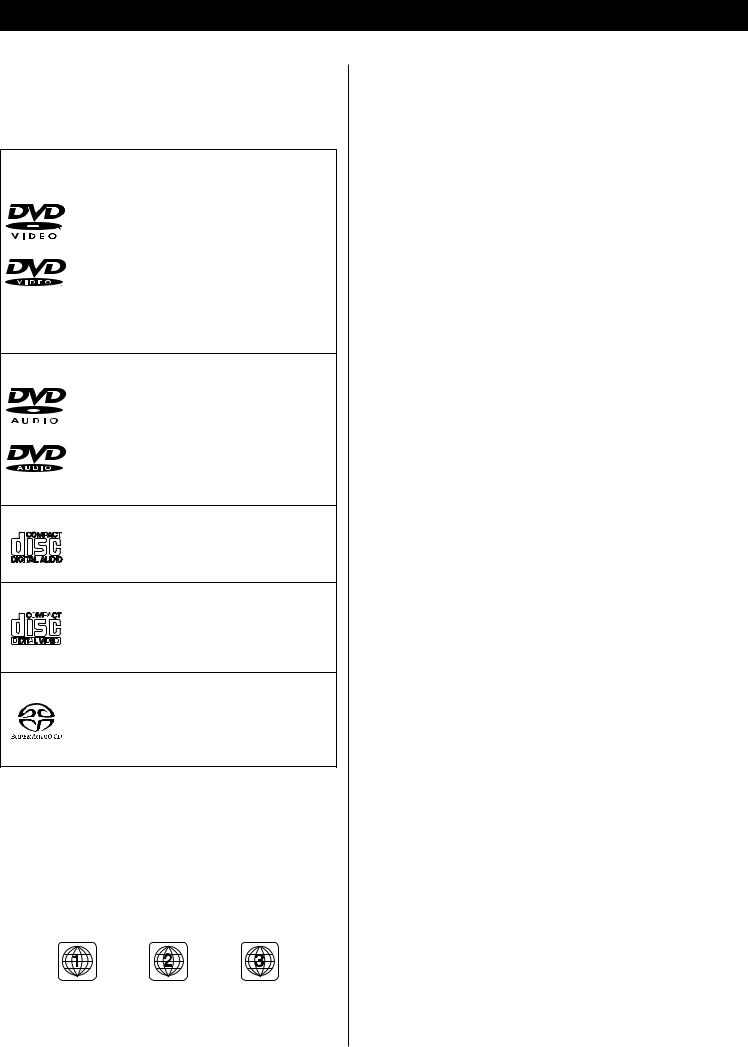
This player can playback discs bearing any of the following logos:
DVD Video:
•Single-sided or double-sided discs
•Single layer or dual layer discs
•Dolby Digital, DTS, MPEG or Linear PCM digital audio
•MPEG-2 digital video
•This unit can play DVD-R discs recorded in DVD video format.
• This unit can play DVD-RW discs recorded in DVD video format or DVD video recording format.
Discs are generally divided into one or more titles. Titles may be further subdivided into chapters.
DVD Audio:
•Single sided discs
•Single layer or dual layer discs
• Linear or packed PCM digital audio
•Some discs may contain MPEG-2 video, and Dolby Digital, DTS or MPEG digital audio.
Discs are generally divided into one or more groups. Groups may be further subdivided into tracks.
Audio CD:
• 12cm or 8cm discs
• Linear PCM digital audio
Audio CDs are divided into tracks.
Video CD:
• 12cm or 8cm discs
• MPEG-1 digital audio
• MPEG-1 digital video
Video CDs are divided into tracks.
SACD:
•Single layer, dual layer or Hybrid layer
•12cm or 8cm discs
• Digital audio (DSD)
SACDs are divided into tracks.
Region Number of DVD Video discs:
DVD players and discs are designed with region numbers that dictate the regions in which a disc can be played. If the region number on the disc you want to play does not match the region number of your DVD player, you will not be able to play the disc. In that case, an error message will appear on the screen.
The region number is printed on the rear panel of this unit.
U.S.A./Canada model |
Europe model |
Korea model |
About DVD-RW
<DVD-RW discs that were recorded with copy-once only permission cannot be played. The message, "COPY PROTECT PROGRAM, UNPLAYABLE" appears in the display during these parts of the disc.
<When playing a DVD-RW disc that was edited on a DVD recorder, the screen may momentarily black out at the edited point.
<When playing a DVD-RW disc that was edited on a DVD recorder, you may see scenes from just before the edited point.
<Up to 20 characters of a title name can be displayed.
About CD-R/CD-RW
CD-R/RW discs recorded in Audio CD format and finalized correctly are playable. But depending on the quality of the disc and/or the condition of the recording, some CD-R & CD-RW discs may not be playable.
MP3 compatibility
This player is compatible with CD-R, CD-RW and CD-ROM discs that contain MP3 audio tracks.
<File names of MP3 should be alphanumeric characters. This unit cannot display symbols and full-size or 2 bytes-wide characters (such as Japanese, Chinese, etc.) correctly. Also, be sure to use the file extension ".mp3".
<Only the first 8 characters of folder and track names (excluding the ".mp3" extension) are displayed.
<Use CD-R or CD-RW media for recording your MP3 files. The disc must be finalized in order to play.
<The CD-ROM must be ISO 9660 compatible.
<Mono or stereo MPEG-1 Audio Layer 3 format, 44.1 or 48kHz, fixed bit-rate. Incompatible files will not play and "UNPLAYABLE MP3 FORMAT" will be displayed.
<Not compatible with variable bit-rate (VBR) files.
<This player is not compatible with multi-session discs. If you try and play a multi-session disc, only the first session will be played.
<Audio encoded at 128Kbps should sound close to regular audio CD quality. Although this player will play lower bit-rate MP3 tracks, the sound quality becomes noticeably worse at lower bit-rates.
<When more than 250 MP3 files or folders are recorded on the disc, the unit might not be able to play it correctly.
Caution:
<If you record a disc using a personal computer, even if it is recorded in a compatible format, there are cases in which it may not play because of the settings of the application software used to create the disc. (Check with the software publisher for more detailed information.)
<Unfinalized DVD-R/RW discs cannot be played.
6
Following discs cannot be played with this unit:
•CD-G, Data part of CD-EXTRA, PHOTO CD, CD-ROM and DVDROM discs
•discs recorded in a color system other than PAL or NTSC
•illegally produced discs
•scratched discs
•discs that are dusty, soiled or marked with fingerprints
Warning:
If you attempt to play back such discs, there is a risk that sudden loud noise can blast over the speakers at full volume and cause damage to the speakers and your hearing.
Copy-protected discs and other discs which do not conform to the CD standard may not play back correctly in this player. If you use such discs in this unit, TEAC Corporation and its subsidiaries cannot be responsible for any consequences or guarantee the quality of reproduction. If you experience problems with such non-standard discs, you should contact the producers of the disc.
Example of Icons used on DVD discs:
number of audio tracks recorded on the disc
number of subtitles recorded on the disc
screen aspect ratio
disc recorded with multiple camera angles
region code
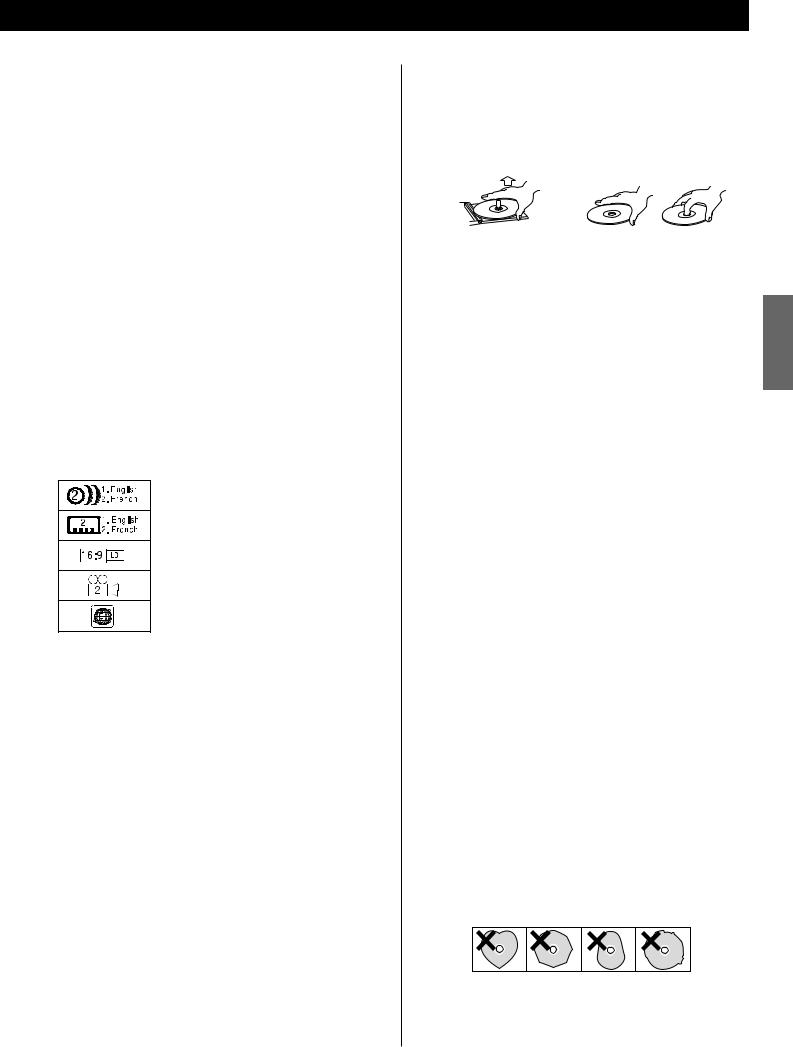
<Always place the disc on the disc tray with the label side uppermost. (Compact discs can be played or recorded only on one side.)
<To remove a disc from its storage case, press down on the center of the case and lift the disc out, holding it carefully by the edges.
How to remove the disc How to hold the disc
< Should the disc become dirty, wipe the surface radially (from the center hole outward towards the outer edge) with a soft, dry cloth:

 ENGLISH < Never use such chemicals as record sprays, antistatic sprays
or fluid, benzine or thinner to clean the discs. Such chemicals will do irreparable damage to the disc's plastic surface.
< Discs should be returned to their cases after use to avoid dust and scratches that could cause the laser pickup to "skip."
< Do not expose discs to direct sunlight or high humidity and temperature for extended periods. Long exposure to high temperatures will warp the disc.
< Do not play any disc that is warped, deformed or damaged. Playing such discs may cause irreparable harm to the playing mechanisms.
< CD-R and CD-RW discs are more sensitive to the effects of heat and ultraviolet rays than ordinary CDs. It is important that they are not stored in a location where direct sunlight will fall on them, and which is away from sources of heat such as radiators or heat-generating electrical devices.
< Printable CD-R and CD-RW discs aren't recommended, as the label side might be sticky and damage the unit.
< Do not stick papers or protective sheets on the discs and do not use any protective coating spray.
< Use a soft oil-based felt-tipped pen to write the information on the label side. Never use a ball-point or hard-tipped pen, as this may cause damage to the recorded side.
< Never use a stabilizer. Using commercially available CD stabilizers with this unit will damage the mechanisms and cause them to malfunction.
< Do not use irregular shape CDs (octagonal, heart shaped, business card size, etc.). CDs of this sort can damage the unit:
< If you are in any doubt as to the care and handling of a CD- R/CD-RW disc, read the precautions supplied with the disc, or contact the disc manufacturer directly.
7

Connection to an amplifier
Decoder
DIGITAL IN
XLR (balanced)
pin numbers
Digital recording equipment such as CD recorder, MD deck, etc.
DIGITAL IN
cable digital Optical |
cable coaxial RCA |
A |
|
D |
C |
|
B |
E
cable XLR |
cable RCA |
cable RCA |
cable RCA |
|
|
|
|
|
|
|
|
|
|
|
|
|
|
|
|
|
|
|
|
R |
|
|
|
L |
R |
|
|
|
L |
||||||
|
|
|
|
||||||||||||||
|
|
LINE IN |
LINE IN |
||||||||||||||
|
|
|
|
|
|
|
|
|
|
|
|
|
|
|
|
|
|
Amplifier
R |
L |
|
SUB |
R |
L |
R |
L |
|
LINE IN |
CENTER |
SURROUND |
FRONT |
|||||
WOOFER |
||||||||
|
|
|
|
|
|
|||
5.1CH AUDIO IN
Surround Amplifier
TV (Monitor)
8

CAUTION:
<Switch off the power to all equipment before making connections.
<Read the instructions of each component you intend to use with this unit.
<Be sure to insert each plug securely. To prevent hum and noise, avoid bundling the signal interconnection cables together with the AC power cord or speaker cables.
A 2 channel high quality AUDIO OUT terminals
The XLR and RCA terminals output 2 channel analog audio. The sound output from these terminals is superior in quality.
If your amplifier has XLR analog inputs, connect the XLR outputs of the DV-50 to the appropriate inputs of the amplifier with commercially available balanced XLR cables.
If there are no XLR input terminals on the amplifier, use commercially available RCA cables to connect the RCA outputs of the DV-50 to the appropriate inputs of the amplifier.
B DIGITAL OUT terminals
Connect one of the digital output terminals to the appropriate digital input terminal of a digital device such as a decoder, CD recorder, MD deck, etc.
Use a commercially-available RCA coaxial cable or optical digital cable.
When inserting the plug of the optical cable, the protective shutter of the terminal will open and you should hear it click into position when fully inserted. Be careful that you do not force the plug, because this could result in damage to the protective shutter, the cable, or the unit itself.
< Select the proper digital output setting in accordance with your connection.
C 5.1CH AUDIO OUT terminals
5.1 channel analog audio is output from these terminals.
If your amplifier has 5.1 channel analog inputs, connect them with commercially-available RCA cables.
< Select "5.1" in the setup menu.(See page 15, 37)
D 2CH AUDIO OUT terminals
2 channel analog audio is output from these terminals.
E SIGNAL GND
You may improve the sound quality by connecting the earth terminal of DV-50 and the amplifier using a commercial PVC-covered electric cord.
< This is not a safety earth.
If you listen to multi-channel DVD-Audio through one of the digital outputs, it will be downmixed to stereo. Also, high sampling rate DVD-Audio (192kHz or 176.4kHz) will be downsampled to 96kHz, 88.2kHz, 48kHz or 44.1kHz, depending on the disc. Multi channel and high sampling rate DVD-Audio is only available through the analog outputs.
Some DVD-Audio and all SACD audio is output only through the analog outputs.
If you want to enjoy multi-channel sound of DVD-Audio and SACD, use the 5.1CH AUDIO OUT terminals.
ENGLISH
9
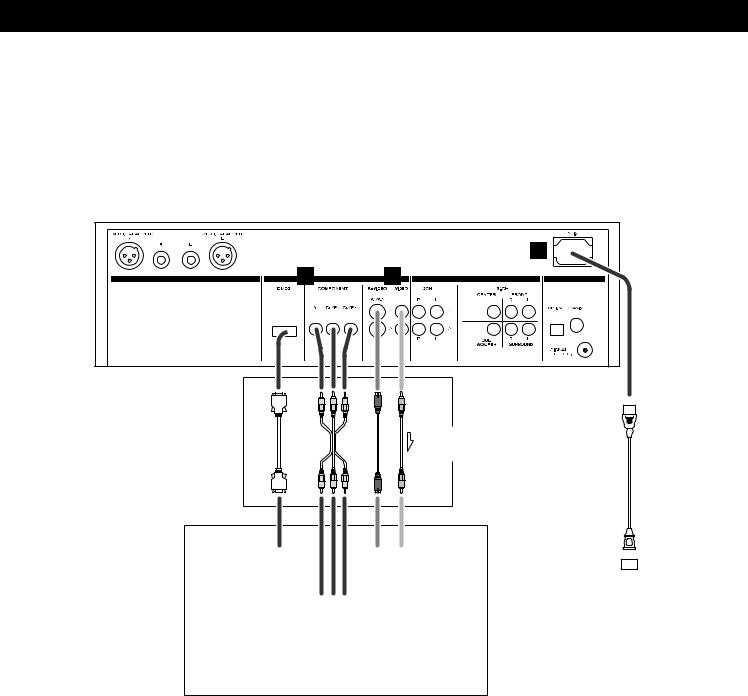
Connection to a TV
H
F  G
G
cableVIDEO-D |
cablevideocomponent |
cableVIDEO-S |
cableRCA |
Connect one of |
|
|
|
|
|
|
|
|
|
these cables |
Supplied Power cord
D1/D2 |
S-VIDEO |
VIDEO |
|
|
|
|
|
|
D-VIDEO IN |
IN |
IN |
|
|
|
|
||
|
|
|
|
|||||
Wall socket
Y PB PR
COMPONENT
VIDEO IN
TV (Monitor)
10
Connect the unit using one of the following terminations to your TV or monitor. The connections are listed in order of quality of picture from the best possible first. Additional information on each connection type is provided below:
If your TV or monitor is compatible with progressive scan, connect the TV via the COMPONENT VIDEO jacks using a component video cable, and select "Progressive" in the Setup menu (see page 41).
Connecting the COMPONENT VIDEO jacks using a component video cable is next to it.
S-VIDEO is your third choice. If your TV has an S-Video input jack, connect the TV using a quality S-Video cable.
Composite video output (VIDEO OUT) would be your final choice.
<For better picture quality, do not connect more than one video cable.
<Please connect this unit to a TV directly. If the TV is connected through a video cassette recorder, playback of a copy protected DVD disc could result in distorted picture quality.
F COMPONENT VIDEO jack
If your TV or monitor has COMPONENT VIDEO IN jacks, connect them with a quality component video cable.
<You can also use the D1/D2 D-Video jack.
<If your TV or monitor is compatible with progressive scan, connect the TV via the COMPONENT VIDEO jack and select "Progressive" in the Setup menu. When your TV or monitor isn't compatible with progressive scan, never select "Progressive". No picture will be shown on the monitor.
G S-VIDEO or VIDEO jacks
S-VIDEO connection is your third choice and is superior to the standard composite video connection.
If the component has a S-VIDEO jack, connect them with a high quality S-VIDEO cable.
If neither COMPONENT VIDEO nor S-VIDEO is available, connect the component with a high quality RCA cable designed for video applications.
H AC power cord
Insert the supplied AC power cord in the DV-50's socket. After all other connections are complete, connect the plug to the wall socket.
Do not use any power cords other than the one included with the DV-50 to avoid fire, electric shock, etc. If you are not going to use the unit for some time, disconnect the power cord from the wall socket.
Changing the Color System (NTSC/PAL)
The default color setting of this player is AUTO, and unless you experience picture distortion with some discs, you can leave the setting as it is.
If you experience picture distortion, you need to change the setting to match your TV.
1Turn the unit off.
2While holding down the SCAN button, press the POWER switch.
The color system changes as follows, and the selected color system is shown on the front panel display.
PAL :
Select PAL when a PAL TV (European standard) is connected.
NTSC :
Select NTSC when a NTSC TV (American standard) is connected.
AUTO :
Select AUTO when a MULTI TV is connected.
Note that you have to turn the unit off before each change.
About MOD.(Modulation) PAL:
Most models of the newly developed countdown PAL TV system detect 50 Hz (PAL)/60 Hz (NTSC) and automatically switch vertical amplitude, resulting in a display without vertical shrinkage.
If your PAL TV does not have a V-Hold control, you may not be able to view NTSC disc because the picture may roll. If the TV has a V-Hold control, adjust it until the picture stops rolling. On some TVs, the picture may shrink vertically, leaving black bands at the top and bottom of the screen. This is not a malfunction; it is caused by the NTSC-PAL conversion.
ENGLISH
11

Front Panel
Front Panel |
Display |
Remote Control Unit
12

Names of Each Control
Front Panel
aPOWER switch
When power is ON, the indicator lights.
<When moving the player, remove any disc and turn this switch OFF.
The equipment draws nominal nonoperating power from the AC outlet with its POWER switch in the OFF position.
bDigital Filter switch
This switch changes the digital filter for the 2 channel high quality analog output.
cUP CONVERT indicators
Indicate the up-converted sampling frequency.
dRemote Sensor
Receives signals from the remote control unit. When you use the remote control unit, point the top of the remote control unit at this remote sensor.
eDisc tray
f Display
gSTOP button
Stops playback.
hPLAY button
Starts playback.
iPAUSE button
Pauses playback.
jSKIP buttons
Skip tracks either forward or backwards.
kOPEN/CLOSE button
Opens and closes the disc tray.
Front Panel Display
atype of the disc loaded
bgroup
ctitle
dchapter
etrack
f
gIlluminates to show the remaining play time
hIlluminates when LAST MEMORY function is active.
iIlluminates during playback of a DVD disc recorded in DOLBY DIGITAL format.
jIlluminates when CONDITION MEMORY function is active.
kIlluminates during playback of a DVD disc recorded in DTS format.
lIlluminates when Virtual Surround is on.
mIlluminates when multi-channel source is downmixed to 2 channel.
nIlluminates when 5.1CH is selected.
oThe channels recorded on the disc illuminate.
pIlluminates when an on-screen menu or MP3 navigator is displayed.
qDisplays current status, play time, etc.
r Illuminates during repeat playback
sIlluminates during playback of a multiangle section.
t Illuminates during pause.
uIlluminates during playback.
vIlluminates when "Progressive" is selected.
Remote Control Unit
Anumeric buttons
Used for track selection, password, etc.
BSEARCH MODE
Changes the search mode.
CREPEAT
Used for repeat playback.
DLAST MEMORY
Used for bookmarking.
ECONDITION MEMORY
Used for memorizing settings for a disc.
FVIDEO OFF
Turns off the video output.
GFL DIMMER
Changes the brightness of the front panel display.
HSCAN
Used for scanning.
ISTOP
Stops playback.
JPLAY
Starts playback.
KMENU
Displays a DVD disc menu.
LDIRECTION (UP/DOWN/LEFT/RIGHT), ENTER
Used for selecting an item in a menu.
MSETUP
Displays the Setup menu.
NDISPLAY
Displays the disc's information.
OAUDIO
Used for selecting an audio language.
POPEN/CLOSE
Opens and closed the disc tray.
QCLEAR
Used for clearing selection, etc.
RPROGRAM
Used for programmed playback.
SA-B
Used for A-B repeat playback.
TRANDOM
Used for shuffle playback.
UFUNCTION MEMORY
Used for memorizing shortcuts to items in the Setup menu.
VSTEP/SLOW
Used for single stepping playback and slow-motion playback
WSKIP
Skip chapters or tracks.
XPAUSE
Pauses playback.
YTOP MENU
Displays the top menu of a DVD disc.
ZRETURN
Returns to the previously displayed menu screen.
aANGLE
During playback of DVD recorded with multiple angles, this button is used to change the angle.
bSUBTITLE
Used for selecting a subtitle language.
13

Remote Control Unit
How to insert the batteries
Remove the cover of the remote control unit with a screwdriver. After checking the polarity (+/_) of two AA batteries, insert the batteries, replace the cover and replace the screws.
Battery Replacement
If the distance required between the remote control unit and main unit decreases, the batteries are exhausted. In this case replace the batteries with new ones.
Precautions concerning batteries
<Be sure to insert the batteries with correct positive “+“ and negative “_“ polarities.
<Use batteries of the same type. Never use different types of batteries together.
<Rechargeable and non-rechargeable batteries can be used. Refer to the precautions on their labels.
<When the remote control unit is not to be used for a long time (more than a month), remove the batteries from the remote control unit to prevent them from leaking. If they leak, wipe away the liquid inside the battery compartment and replace the batteries with new ones.
<Do not heat or disassemble batteries and never dispose of old batteries by throwing them in a fire.
Notes on use
<Point the remote control unit at the player’s remote sensor and use it within seven meters’ distance of the player. There should not be any obstacles between the player and the remote control unit.
<Do not allow direct sun or other light to shine on the remote sensor part of the player. This may cause the remote control unit to work incorrectly.
<Note that other units with remote controls may operate incorrectly because of infrared light “overspill” when you operate this remote control unit.
14
Getting Started (Setup Navigator) 1
DIRECTION |
ENTER |
SETUP |
|
The Setup Navigator will help you to make the basic settings.
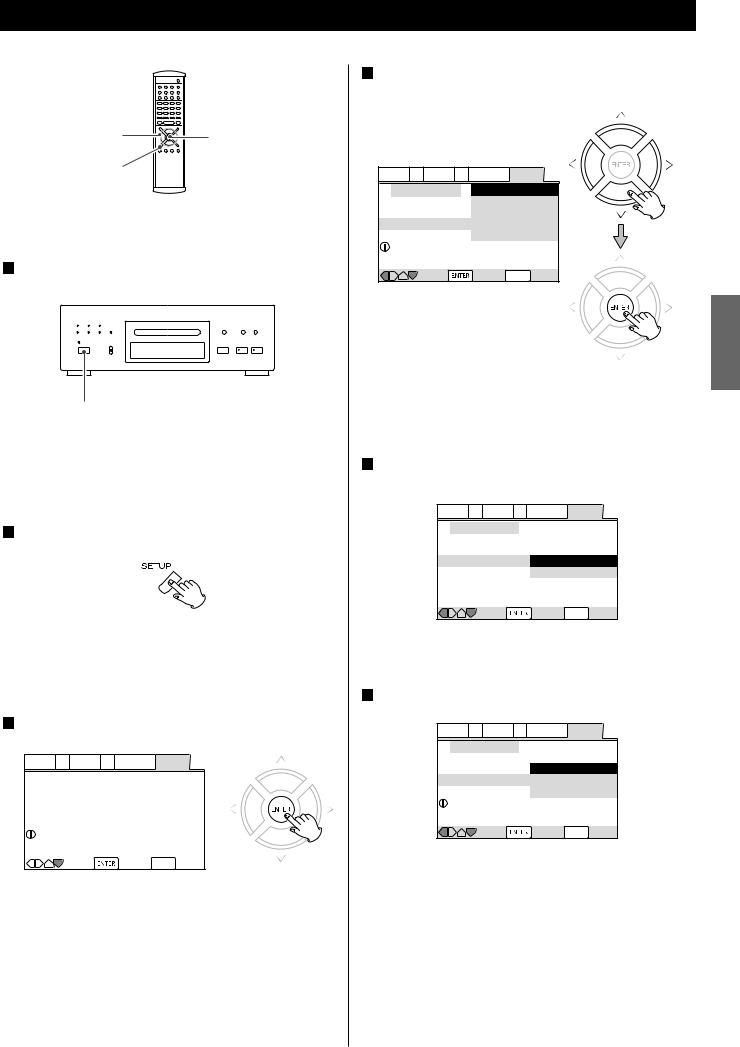
1 Press the POWER switch to turn the unit on.
POWER
<Also turn on your TV and set its input to the correct position for DVD viewing (VIDEO, etc.).
<If a disc is set, press the OPEN/CLOSE button and remove the disc.
2Press the SETUP button.
The Setup Navigator appears on the screen.
<Buttons which can be used in the OSD menu are shown at the bottom of the screen.
3Press the ENTER button to start the Setup Navigator.
Audio1 A2 Video1 V2 Language General
|
Setup Navigator |
|
|
|
|
|
|
|
Setup Navigator |
Start |
|
|
|
|
Auto Start Off |
Setup using the Setup Navigator |
|||
|
|
|
|
|
Move |
Select SETUP Exit |
|
<If you don't want to use the Setup Navigator, select "Auto Start Off" by pressing the DOWN button and the ENTER button.
<If you want to return to the previous screen, press the LEFT button.
4Select a language for OSD (On Screen Display) by pressing the UP/DOWN buttons, and press the ENTER button.
Audio1 A2 Video1 V2 Language General
Setup Navigator |
English |
Language |
français |
Deutsch |
|
OSD Language |
Italiano |
|
Español |
Select the On Screen Language |
|
Move |
Select SETUP Exit |
ENGLISH
The language for audio and subtitle is also set to the language you selected here. If you want to select other language for audio and subtitle, see 44 page later.
5Select the type of TV by pressing the UP/DOWN buttons and the ENTER button.
Audio1 A2 Video1 V2 Language General
Setup Navigator
TV Connection
TV Type Widescreen (16:9)
Standard (4:3)
 Widescreen TV 16:9 aspect ratio
Move |
Select SETUP Exit |
Select 16:9 when a wide-screen TV is connected. Otherwise select 4:3.
6 Select the type of analog audio connections.
Audio1 A2 Video1 V2 Language General
Setup Navigator |
|
Amp Connection |
2 Channel |
Analog Jacks |
5.1 Channel |
|
Not Connected |
2 channel jacks for L/R |
|
Move |
Select SETUP Exit |
2 Channel:
Select this when the amplifier is connected via the 2CH AUDIO OUT jack.
5.1 Channel:
Select this when the amplifier is connected via the 5.1CH AUDIO OUT jack.
Not Connected:
Select this when you don't use analog audio output.
15
Getting Started (Setup Navigator) 2
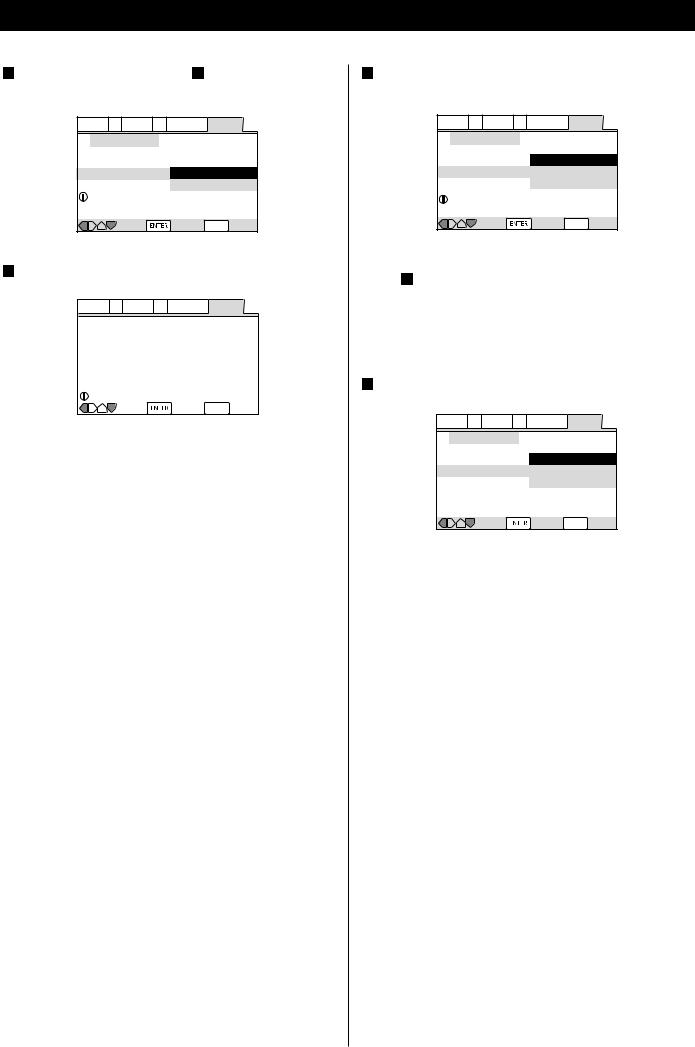
7If you select "5.1 Channel" in step 6 , confirm which speakers are connected to your amplifier.
Audio1 A2 Video1 V2 Language General
Move |
Select SETUP Exit |
8 Select the type of digital audio output.
Audio1 A2 Video1 V2 Language General
|
Setup Navigator |
|
Dolby Digital |
Amp Connection |
Dolby Digital/DTS |
||
Dolby Digital/MPEG |
|||
|
Digital Jack |
Dolby D/DTS/MPEG |
|
|
|
|
PCM |
|
|
|
Not Connected |
Compatible with Dolby Digital |
|||
|
Move |
Select SETUP Exit |
|
Dolby Digital:
Select this when the unit is connected to an audio component equipped with a built-in Dolby Digital decoder via the DIGITAL OUT terminal.
Dolby Digital/DTS:
Select this when the unit is connected to an audio component equipped with a built-in Dolby Digital and DTS decoder via the DIGITAL OUT terminal.
Dolby Digital/MPEG:
Select this when the unit is connected to an audio component equipped with a built-in Dolby Digital and MPEG decoder via the DIGITAL OUT terminal.
Dolby D/DTS/MPEG:
Select this when the unit is connected to an audio component equipped with a built-in Dolby Digital, DTS and MPEG decoder via the DIGITAL OUT terminal.
PCM:
Select this when the unit is connected to an audio component such as CD recorder or MD deck via the DIGITAL OUT terminal.
Not Connected:
Select this when you don't use the DIGITAL OUT terminal.
9Confirm whether your amplifier is compatible with 96kHz audio.
Audio1 A2 Video1 V2 Language General
Setup Navigator |
|
Amp Connection |
No |
96 kHz PCM Audio |
Yes |
|
Don't Know |
Digital jack not compatible with 96kHz |
|
Move |
Select SETUP Exit |
<This screen will not appear if you selected "Not Connected" in step 8 .
<When you select "No" or "Don't Know", any 96kHz audio will be downsampled to 48kHz.
10 Select "Save Changes" to save the settings.
Audio1 A2 Video1 V2 Language General
Setup Navigator
Save ChangesYes
Exit Setup Navigator Delete Changes
Start Again
 Changes are saved
Move |
Select SETUP Exit |
The settings are kept in memory, and the Setup Navigator disappears.
<If the Setup Navigator is still on the screen, press the SETUP button to exit.
<If you want to use the Setup Navigator again, it is available from the "General" tab of the Setup menu. Also, each individual setting can be changed using the appropriate menu option. See 34 page for details.
16
DVD VCD CD SACD MP3
Playback 1
<In this manual, the term "DVD" means DVD-Video, DVD-Audio and DVD-R/RW. If a function is specific to a particular kind of DVD disc, it is specified.
<Turn the TV on and set its input to the correct position for DVD viewing (VIDEO etc.).
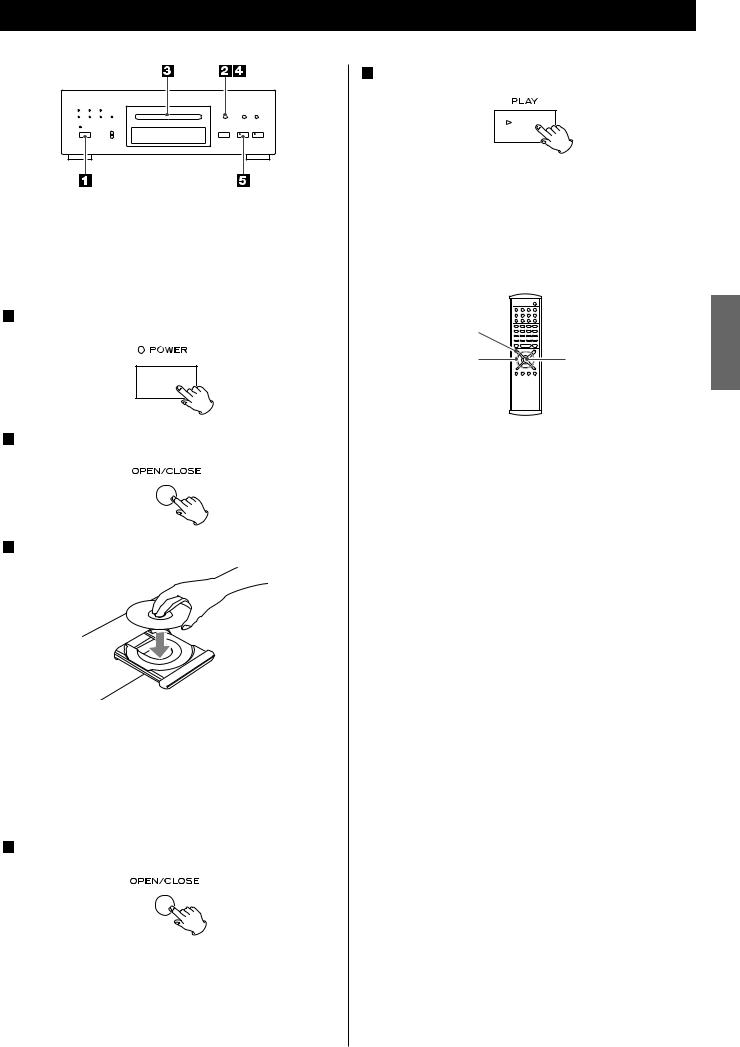
1 Press the POWER switch to turn the unit on.
2 Press the OPEN/CLOSE button (L).
3 Place a disc on the tray with the printed label face up.
<If you are loading a double-sided DVD disc, load it with the side you want to play face down.
<Never place more than one disc on the tray.
<The disc must be loaded centrally into the disc tray. If the disc is not correctly loaded, it may not be possible to open the tray again once it has closed, so you should ensure the disc is always centrally loaded in the tray.
4Press the OPEN/CLOSE button (L) to close the tray.
When a DVD is loaded, the playback may start automatically.
<It takes a while for the unit to load the disc.
<When loading a SACD, "Loading DVD" briefly appears on the screen, and then "SACD" indicator appears on the front panel display.
5 Press the PLAY button (y) to start playback.
DVD:
If a title menu appears on the screen, select an item by pressing the DIRECTION buttons and then press the ENTER button.
MENU |
|
ENGLISH |
|
|
|
DIRECTION |
ENTER |
|
<Depending on the disc, you can use the numeric buttons to select an item.
<"Title menu" may simply be called "menu" or "title" in the instructions supplied with the disc.
<If you press the MENU button or the TITLE button during playback, title menu will appear on the screen. (In some cases, the playback might restart from the beginning of the disc automatically.)
Video CDs with PBC:
When a Video CD (Version 2.0) with Playback Control functions(PBC) is loaded, a menu will appear on the screen. Select an item by pressing the numeric buttons to start playback.
<Press the / button to advance to the next page. Press the
.button to return to the previous page.
<If you press the RETURN button during playback, the menu will appear on the screen.
<Following buttons does not work during PBC playback: REPEAT, A-B, PROGRAM, RANDOM, SEARCH MODE
<If you want to play a Video CD without PBC function, press the numeric buttons or the SKIP buttons in the stop mode. PBC function is turned off, and the playback will start from the selected track.
17
 Loading...