

Page 1
lйЙк~нбеЦ=fелнкмЕнбзел
MOKOMNP
pfolfелйЙЕн
kÉï=~ë=çÑW==
bеЦдблЬ
Cover page
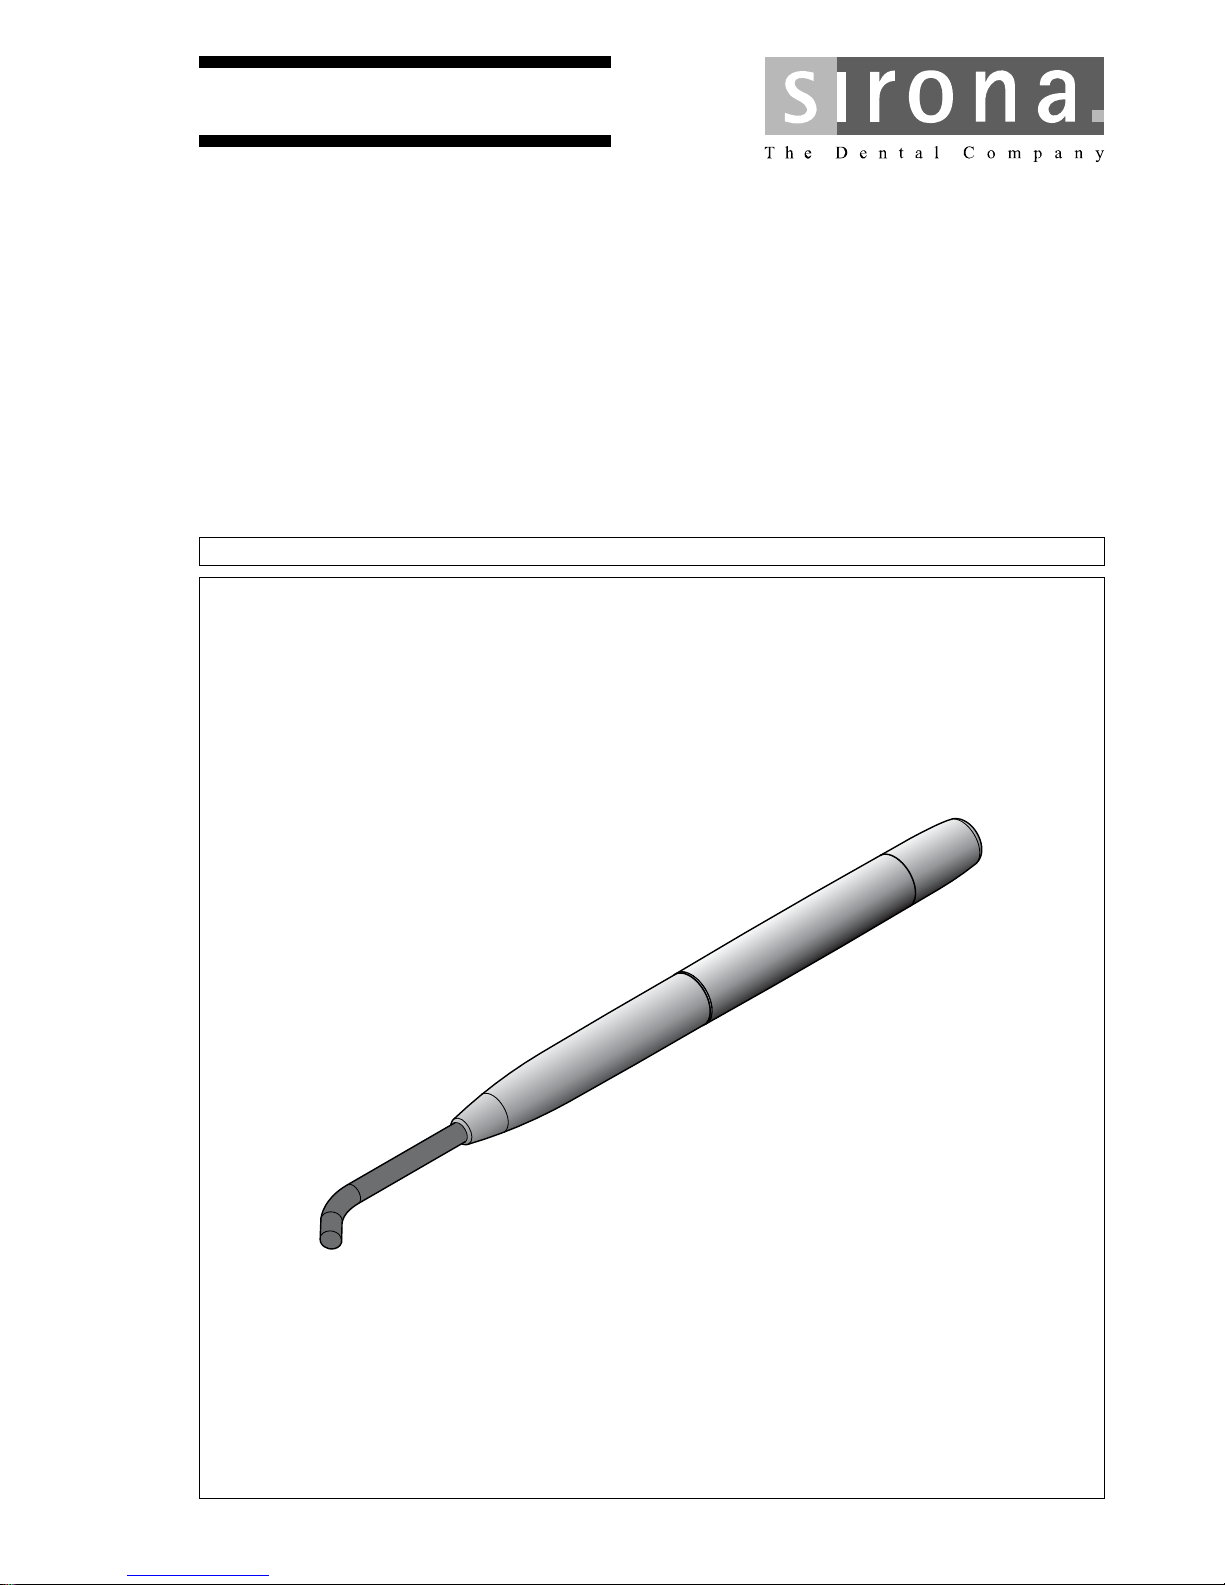
SIROInspect
Page 2

63 82 936 D3584
2 D3584.201.01.03.02 02.2013
Sirona Dental Systems GmbH
Operating Instructions SIROInspect
Table of Contents
1
Before you begin ….................................................................................................. 4
1.1 Identification of the danger levels.................................................................. 4
1.2 Formats and symbols used ........................................................................... 5
1.3 Symbol description........................................................................................ 5
1.4 Abbreviations ................................................................................................ 6
2
Safety information .................................................................................................... 7
3
Technical description................................................................................................ 8
3.1 Task .............................................................................................................. 8
3.2 Functionality .................................................................................................. 8
3.3 SIROInspect probe design ............................................................................ 9
3.4 Scope of supply............................................................................................. 9
3.5 Technical data............................................................................................... 10
3.6 Service life of Sirona instruments.................................................................. 11
4
Operation.................................................................................................................. 12
4.1 Connect the power supply unit...................................................................... 12
4.2 Replace and charge the battery .................................................................... 12
4.3 Install attachable filter ................................................................................... 13
4.4 Inserting the light guide ................................................................................. 13
4.5 Align attachable filter..................................................................................... 13
4.6 Switching SIROInspect on/off ....................................................................... 14
4.7 Treatment...................................................................................................... 14
5
Care and maintenance ............................................................................................. 15
5.1 Dismantling SIROInspect .............................................................................. 15
5.2 Cleaning the outer surface ............................................................................ 15
5.3 Disinfecting the surface................................................................................. 15
5.4 Sterilization instructions ................................................................................ 16
6
Electromagnetic compatibility................................................................................... 17
6.1 Electromagnetic emission ............................................................................. 17
6.2 Interference immunity.................................................................................... 18
Page 3

63 82 936 D3584
D3584.201.01.03.02 02.2013
3
Sirona Dental Systems GmbH
Operating Instructions SIROInspect
bеЦдблЬ
6.3 Working clearances...................................................................................... 19
7
Storage and transport conditions............................................................................. 21
8
Disposal................................................................................................................... 22
Page 4
63 82 936 D3584
4 D3584.201.01.03.02 02.2013
1 Before you begin … Sirona Dental Systems GmbH
1.1 Identification of the danger levels Operating Instructions SIROInspect
1
Before you begin …
Before you begin …
Intended use
SIROInspect
SIROInspect aids detection and monitoring of carious tooth substance
during excavation of previously opened cavities.
Contraindications Do not use SIROInspect in conjunction with caries detection dyes!
Do not use SIROInspect if you have red-green color blindness or visual
impairment.
Target group
Trained dental personnel
This product is intended for use only by trained dental personnel in dental
practices and laboratories.
Manufacturer's address
1.1
Identification of the danger levels
Identification of the danger lev els
To prevent personal injury and material damage, please observe the
warning and safety instructions provided in this document, which are
highlighted as follows:
Tip: Information for simplifying work.
DANGER
Imminent danger that could result in serious bodily injury or death.
WARNING
Potentially dangerous situation that could result in serious bodily injury
or death.
CAUTION
Potentially dangerous situation that could result in slight bodily injury.
NOTICE
Potentially harmful situation which could lead to damage of the product
or an object in its environment.
IMPORTANT
Instructions for use and other important information.
Page 5
63 82 936 D3584
D3584.201.01.03.02 02.2013
5
Sirona Dental Systems GmbH 1 Before you begin …
Operating Instructions SIROInspect 1.2 Formats and symbols used
bеЦдблЬ
1.2
Formats and symbols used
Formats and symbols used
The formats and symbols used in this document have the following
meaning:
1.3
Symbol description
Symbol description
RX only Only for the (treating) physician
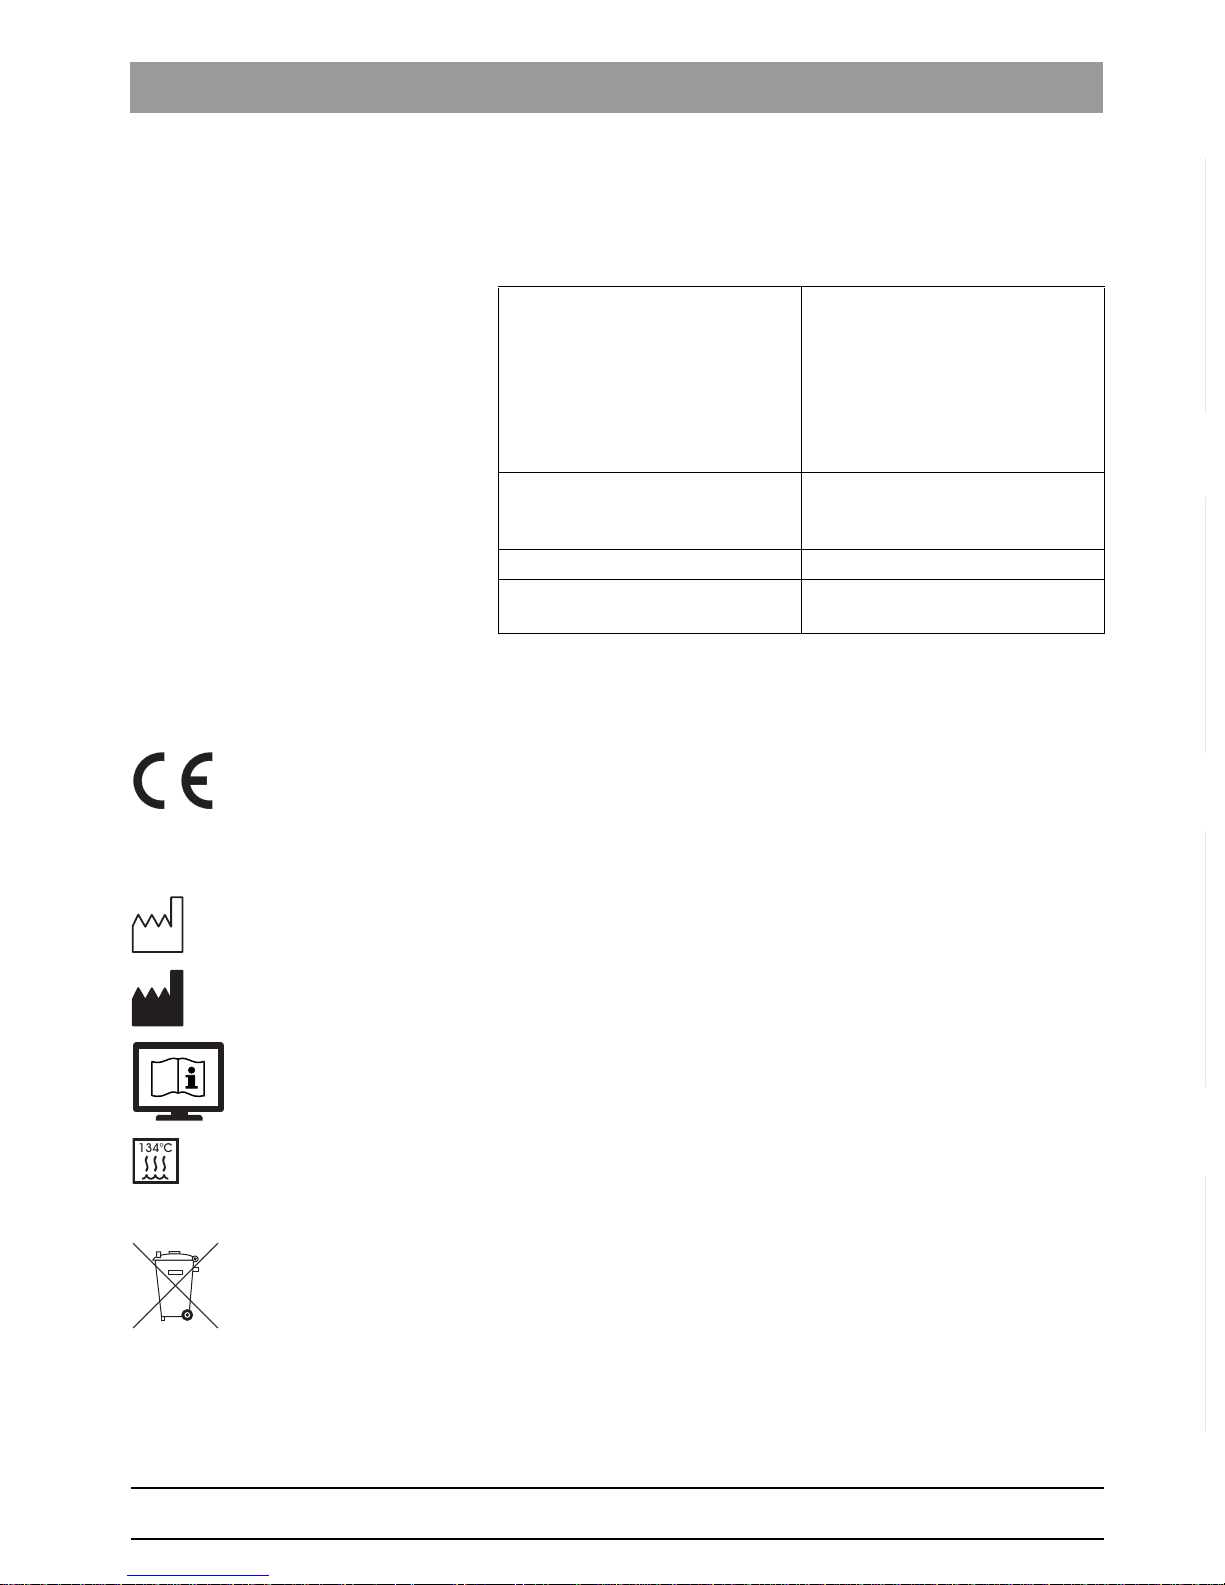
CE marking pursuant to Council Directive 93/42/EEC. Verifies the
compliance of SIROInspect
REF Sirona reference number
LOT yyxx Batch number: yy = week / xx = year
Year of manufacture
Manufacturer
This product only has an electronic operation manual
The disassembled handpiece sleeves and light guides are to be sterilized
only in autoclaves with saturated water vapor at minimum sterilization
values of 134 °C (273.2 °F), 3 min. holding time and 2.04 bar (29.59 psi)
overpressure.
Refers to Directive 2002/96/EC and EN 50419
Do not dispose with domestic waste
✔ Prerequisite
1. First action step
2. Second action step
or
➢ Alternative action
Result
Requests you to do something.
See “Formats and symbols
used [ → 5]”
Identifies a reference to another
text passage and indicates the
relevant page number.
● List Identifies a list item.
"Command / menu item" Identifies commands / menu items
or a quote.
20XX
134°C
Page 6

63 82 936 D3584
6 D3584.201.01.03.02 02.2013
1 Before you begin … Sirona Dental Systems GmbH
1.4 Abbreviations Operating Instructions SIROInspect
1.4
Abbreviations
Abbreviations
LED Light-emitting diode
VVolt
mAh Milliampere hour
mW Milliwatt
m Meter
nm Nanometer
°C Degree Celsius
°F Degree Fahrenheit
Page 7

63 82 936 D3584
D3584.201.01.03.02 02.2013
7
Sirona Dental Systems GmbH 2 Safety information
Operating Instructions SIROInspect
bеЦдблЬ
2
Safety information
Safety information
Obligations of the user ➢ Use only fault-free materials that do not deviate from the specified
data [ → 10].
➢ Protect yourself, patients, and others against hazards. To do this,
follow the safety instructions.
➢ Use the equipment as intended.
➢ You should always keep these operating instructions within reach for
further reference.
Cross contamination and spreading of infection
Prevention of the spread of infection and
cross contamination
Prevent the spread of infections and cross contamination among patients,
users, and others; sterilize after every patient.
Take the appropriate hygiene measures, e.g. wear protective gloves.
Before startup _ FACE
Before startup Sterilize the new light guide prior to initial start-up.
Periods of non-use _ SIR OInspect
Periods of non-use In the event of prolonged non-use, SIROInspect must be cleaned and
disinfected in accordance with the instructions. Sterilize the light guide.
Observe the instructions for storing the battery [ → 12].
SIROInspect safety instructions
Normalization phase An adequate period of normalization must be maintained following
transport and initial operation.
Blinding Do not shine directly into the eyes.
Only switch the SIROInspect on once it is in the patient’s mouth to avoid
glare. The glare is not harmful, but may temporarily impair vision.
UV radiation LED product of risk class 0. SIROInspect emits UV light. Prevent the oral
mucosa from being unnecessarily exposed to radiation from UV rays.
Light guide Make sure the SIROInspect is in good condition and that the light guide
fits tightly prior to every use.
If the glass in the light guide has shattered or has sharp edges, there is a
risk of cutting injuries. By not using a damaged light guide, you can
prevent cutting injuries.
The light guide or SIROInspect must not be dropped or knocked. Should
this occur, inspect the light guide or SIROInspect for damage.
Temperature rise during contin uous operation, SIROInsp ect
Temperature rise The maximum operating period is 3 minutes. In this time, SIROInspect
can heat up to 48 °C. Afterwards, the cool-down time is 12 minutes.
Malfunction / Damage _ Instruments
Malfunction or damage Immediately discontinue use in the case of malfunction or damage.
Damaged instruments may cause injury. Notify the dental depot or the
manufacturer.
Accessory parts
Spare and accessory parts Use only Sirona original or approved parts. Safe operation is not
guaranteed for parts that have not been approved by Sirona.
Power supply unit _ SIROIn spect
Only the power supply unit provided may be used.
No unauthorized changes may be made. Position SIROInspect so it is
easy to disconnect it from the power line.
If you have any questions, please contact your dental depot or the
manufacturer.
Page 8
63 82 936 D3584
8 D3584.201.01.03.02 02.2013
3 Technical description Sirona Dental Systems GmbH
3.1 Task Operating Instructions SIROInspect
3
Technical description
Technical description
3.1
Task
Task
SIROInspect
FACE ® (Fluorescence aided caries excavation) is a method which
enables the practitioner to remove infected tooth material in a targeted
manner, based on the special fluorescent properties of the decomposition
products resulting from caries-causing bacteria.
3.2
Functionality
Functionality
FACE
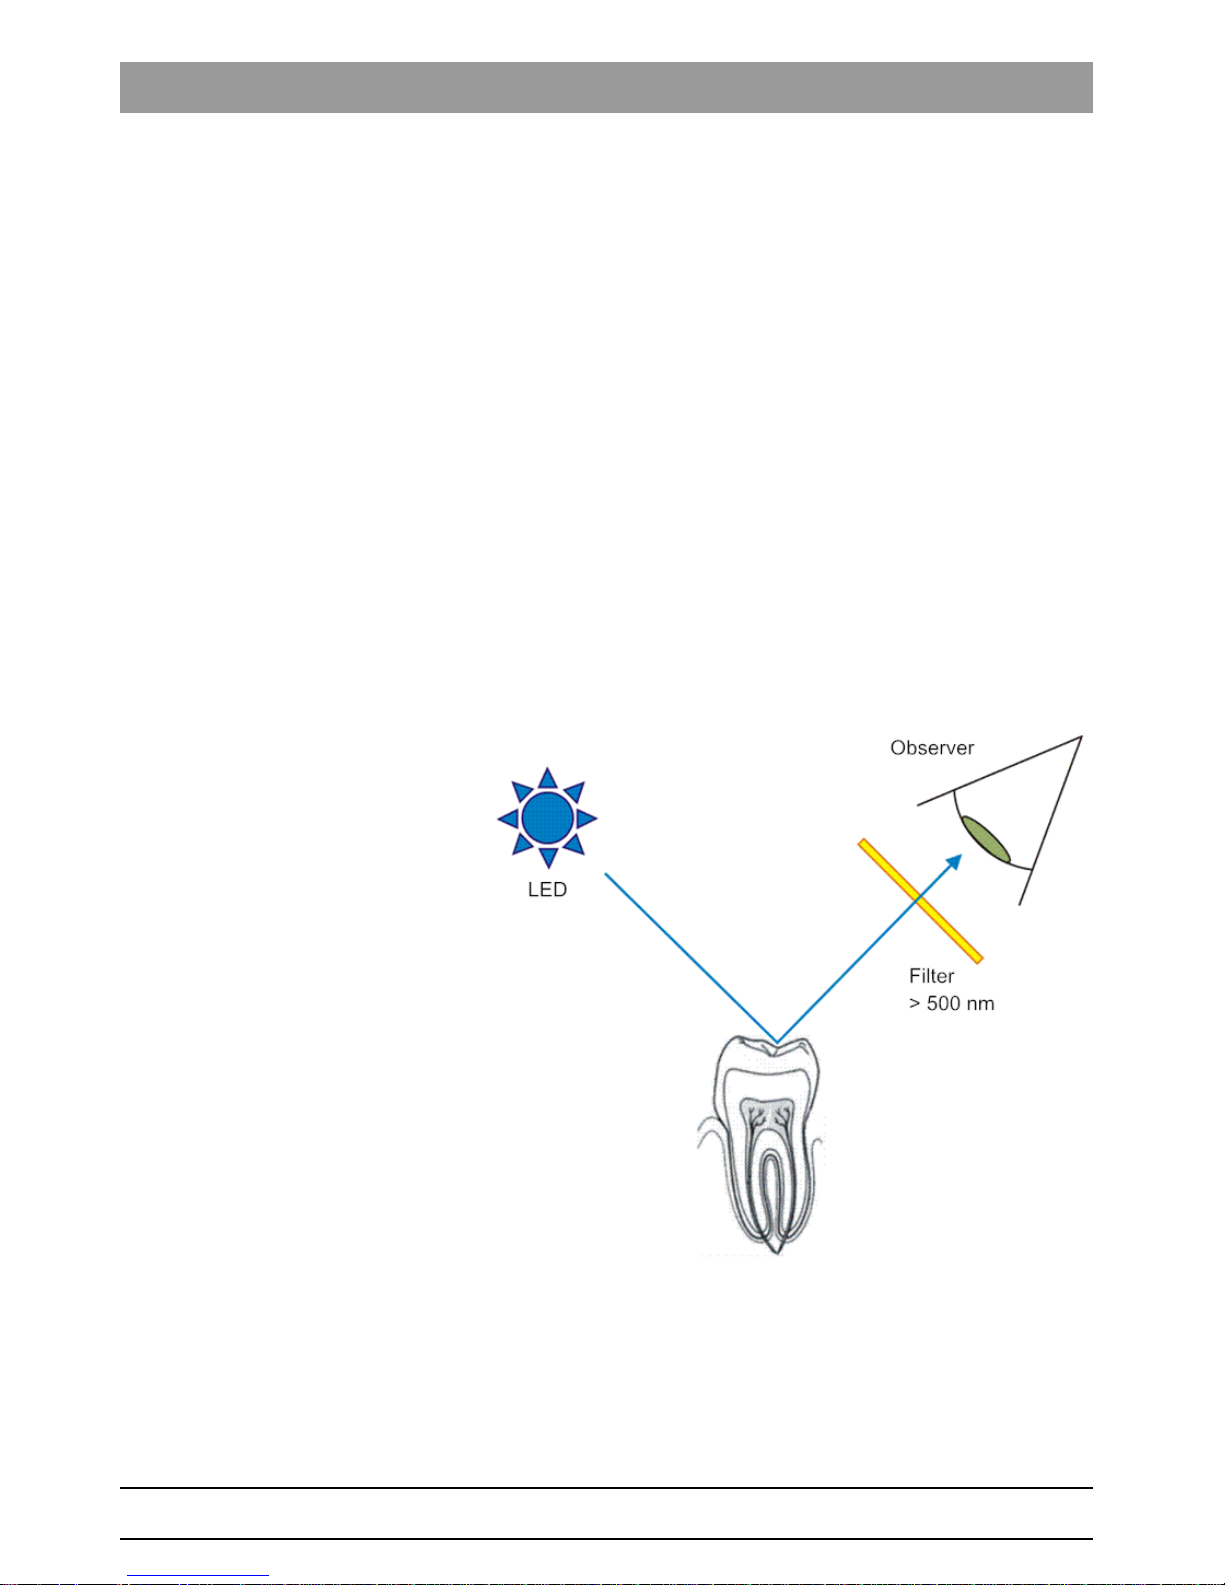
As shown in the illustration below, the tooth is illuminated with an violet
light during the excavation. Carious tooth material and healthy dentin is
excited to fluorescence. The operator views the cavity through a filter.
Shorter wavelengths are thereby filtered out, in particular the violet
excitation light. Light with higher wavelengths remains visible through the
filter, so that the red-fluorescent sections of a caries can be precisely
detected. The red-fluorescent carious tooth material can be easily
detected and compared to neighboring green-fluorescent, normal tooth
material. The carious tooth material can therefore be precisely removed
with a bud bur or scraper.
Page 9

63 82 936 D3584
D3584.201.01.03.02 02.2013
9
Sirona Dental Systems GmbH 3 Technical description
Operating Instructions SIROInspect 3.3 SIROInspect probe design
bеЦдблЬ
3.3
SIROInspect probe design
SIROInspect probe design
3.4
Scope of supply
Scope of supply
Basic equipment, SIROInspect diagnostic set, REF 63 25 174
A SIROInspect charging
station
D SIROInspect battery
B SIROInspect 90° light guide E SIROInspect attachable filter
C SIROInspect base body F SIROInspect power supply unit
A
B
C
D
E
F
SIROInspect
Quantity Designation REF No.
1 SIROInspect base body 63 75 401
2 SIROInspect 90° light guide 63 75 419
1 SIROInspect charging station 63 75 435
1 SIROInspect EU power supply unit 63 75 567
2 SIROInspect battery 63 75 443
2 SIROInspect attachable filter 64 30 057
1 Clinical guidelines 63 75 492
1 SIROInspect operating instructions 63 79 650
1 SIROInspect brief operating instructions 63 90 848
Page 10

63 82 936 D3584
10 D3584.201.01.03.02 02.2013
3 Technical description Sirona Dental Systems GmbH
3.5 Technical data Operating Instructions SIROInspect
Special accessories
3.5
Technical data
Technical data
LED and diagnosis goggles
Storage battery
Charging station
Electrical protection
Level of protection against the ingress of
solid materials and water
Operating conditions
Storage and transport conditions
This product bears the CE marking in accordance with the provisions of
Council Directive 93/42/EEC of June 14, 1993 concerning medical
devices.
Designation REF No.
Complete SIROInspect probe 63 75 534
SIROInspect 140° light guide 63 75 542
SIROInspect 140° light guide (3 pcs.) 63 75 559
SIROInspect 90° light guide (3 pcs.) 63 75 484
SIROInspect clip-on for magnifying glasses 63 75 583
SIROInspect diagnosis goggles (orange) 63 75 518
SIROInspect diagnosis goggles (yellow) 63 75 450
LED radiation output in mW 60 - 250
LED wavelength in nm approx. 405
Filter of diagnosis goggles in nm > 500
Battery voltage in V 2.4
Battery capacity in mAh 400
Voltage in V 6
Maximum power consumption in VA6
Protection class “Internal power supply”
Type of protection against electric
shock
Light guide applied part: Type BF
Charging station IP 20
SIROInspect base body IP 20
Ambient temperature 10° C to 35° C (50° F to 104° F)
Relative humidity in % 30 - 95
Air pressure in hPa 700 - 1060
Ambient temperature: -20° C to +70° C (-4° F to 158° F)
Relative humidity in % 10 - 95
Air pressure in hPa 500 - 1060
Page 11

63 82 936 D3584
D3584.201.01.03.02 02.2013
11
Sirona Dental Systems GmbH 3 Technical description
Operating Instructions SIROInspect 3.6 Service life of Sirona instruments
bеЦдблЬ
3.6
Service life of Sirona instruments
Service life of Sirona instruments
Service life 5 + 3 years /3 + 1 1/2 year s
When used as intended:
Additional service life periods_FACE
● The battery has a typical service life of up to 12 months
● The light pens have a typical service life of approx. 2 years or 2000
sterilization cycles
No warranty claim can be inferred here, as wear may occur earlier or later
than indicated above depending on use, frequency of sterilization, and
frequency of maintenance.
Page 12

63 82 936 D3584
12 D3584.201.01.03.02 02.2013
4 Operation Sirona Dental Systems GmbH
4.1 Connect the power supply unit Operating Instructions SIROInspect
4
Operation
Operation
4.1
Connect the power supply unit
Connect the power supply unit
1. Snap the power cable connector into the connecting socket, on the
bottom side of the charging station.
2. Lay the cable into the channel adjacent to the connecting socket and
clamp the cable in under the holders.
➢ Pull out the plug to disconnect the unit from the power supply.
4.2
Replace and charge the battery
Replace and charge the battery
The battery can operate continuously for up to 25 minutes. Once the
battery has been completely discharged, a full recharge takes approx. 1
hour. The light pen starts to blink when the battery is running low.
The batteries can be stored for 4 months. Once this period has expired,
the battery must be charged. If this is not the case, it may cause the
battery to have reduced charging capacity or to fail completely. Sirona
recommends storing the battery on the charging station.
As a general rule, the batteries included with the delivery have a service
period of up to 12 months. After this period, power decreases accordingly.
Please check the usage period based on the LOT number (definition of
LOT = week week year year e.g. 0212 for calendar week 2, 2012).
1. Remove the discharged battery (B) from SIROInspect (A).
2. Insert the charged battery into SIROInspect until it audibly clicks into
place.
3. Position the discharged battery onto the charging station (C) until it
audibly clicks into place.
As soon as the charging light switches on, the battery is fully
charged.
IMPORTANT
Check that the power supply voltage corresponds to the voltage data on
the power supply unit before connecting the power supply cable.
IMPORTANT
Position the device at least 1.5 m away from the patient on a stable,
horizontal surface. Position the unit so it is easy to disconnect it from the
power supply.
B
A
C
SIROInspect
CAUTION
Risk of crushing
When sliding open the battery, the skin on your fingers may become
trapped.
➢ Hold the battery as far back as possible.
Page 13

63 82 936 D3584
D3584.201.01.03.02 02.2013
13
Sirona Dental Systems GmbH 4 Operation
Operating Instructions SIROInspect 4.3 Install attachable filter
bеЦдблЬ
4.3
Install attachable filter
Install attachable filter
➢ Slide the attachable filter from the front onto the base body. Press the
silicone ring with the fingers until the attachable filter is firmly in place.
4.4
Inserting the light guide
Inserting the light guide
After 2000 sterilization cycles or 2 years which marks the end of the
service period, the light guides will have reached their wear limit.
Please check the usage period based on the LOT number (definition of
LOT = week week year year e.g. 0212 for calendar week 2, 2012). Please
replace the light pen accordingly. The optical output can be reduced and
distinction between red and green fluorescence is therefore not so clearly
depicted.
➢ Screw the light pen (90° or 140°) into the base body until it reaches
the end stop.
4.5
Align attachable filter
Align attachable filter
1. Hold the base body behind the attachable filter.
2. Look through the attachable filter to the light guide.
3. Grasp the attachable filter on the outside edge.
4. Turn the attachable filter into the desired position.
SIROInspect
SIROInspect
Page 14

63 82 936 D3584
14 D3584.201.01.03.02 02.2013
4 Operation Sirona Dental Systems GmbH
4.6 Switching SIROInspect on/off Operating Instructions SIROInspect
4.6
Switching SIROInspect on/off
Switching SIROInspect on/off
1. Hold the SIROInspect in the patient’s mouth.
2. Align the attachable filter.
3. Operate the rotary switch (A) ("on - off") with your other hand. A 90°
rotation is performed. The direction of the rotation is not important
here.
SIROInspect is switched on.
4. If the rotary switch (A) (“on - off”) is operated again, i.e., rotated either
backwards or forwards, the SIROInspect is switched off.
4.7
Treatment
Treatment
SIROInspect assists operators when excavating caries in already open
cavities and functions as a visual detection and monitoring tool. It works
by highlighting carious tooth material in fluorescent red and healthy tooth
material in fluorescent green.
SIROInspect cannot assess initial caries.
Use SIROInspect if an initial diagnosis has been made and a decision has
already been made on how the caries is to be treated and if the cavity is
open.
The fluorescent results of SIROInspect provide extensive information,
which can be used for treatment. The final decision as to whether
treatment is performed and how long it should last is made by the user.
Avoid external sources of light to ensure that the distinction between red
and green fluorescence is clearly maintained. Turn the OP lights away or
switch them off while using SIROInspect.
While excavating a deep caries, the fluorescent light may appear brown
near the pulp. The reason for this has not been fully established. In this
case in particular, a further detection tool (e.g. probe) can be used to
decide on the course of treatment.
After removing carious tooth material, we recommend checking the cavity
with SIROInspect before finishing the process.
Clinical guidelines illustrate how to use a treatment process and
fluorescence. The red fluorescence alters depending on the degree of
treatment.
The clinical guidelines can also be downloaded from the Internet.
A
SIROInspect
CAUTION
Avoid glare!
If the probe is shone directly into the eyes, it may cause blinding. This is
not harmful, but can temporarily impair vision.
➢ Switch SIROInspect on only when it is in the patient’s mouth.
➢ Never shine SIROInspect directly into the eyes.
Page 15

63 82 936 D3584
D3584.201.01.03.02 02.2013
15
Sirona Dental Systems GmbH 5 Care and maintenance
Operating Instructions SIROInspect 5.1 Dismantling SIROInspect
bеЦдблЬ
5
Care and maintenance
Care and maintenance
5.1
Dismantling SIROInspect
Dismantling SIROInspect
The SIROInspect can be dismantled for cleaning, disinfection or
sterilization.
1. Pull the battery (D) out of the base body (C).
2. Unscrew the light pen (A or B) from the base body.
3. Slide the attachable filter (E) off the base body.
4. Carry out cleaning, disinfection, and sterilization.
5.2
Cleaning the outer surface
Cleaning the outer surface
Combining cleaning and disinfection
Manual cleaning must always be combined with disinfection.
Cleaning SIROInspect
The SIROInspect must not be cleaned or disinfected with a machine.
1. Remove the silicone ring from the attachable filter.
2. Clean the light guide, the silicone ring and attachable filter by placing
it under running water (< 38 °C, water must be at least drinking water
quality).
3. Wipe down the battery and base body with a damp cloth. NOTICE!
The battery and base body must not be cleaned under running water.
5.3
Disinfecting the surface
Disinfecting the surfa ce
Immersion in disinfecta nts, SIROInspect
The SIROInspect must not be cleaned or disinfected with a machine.
SIROInspect can be disinfected by wiping it. NOTICE! The battery and
base body must not be disinfected by immersion.
A
C
D
B
SIROInspect
E
NOTICE
Risk of short circuit
The battery (D) and the base body (C) must not under any
circumstances be immersed in liquid. These components can only be
disinfected by wiping them down.
SIROInspect
NOTICE
Never clean in an ultrasonic bath!
NOTICE
Never immerse in disinfectants!
Page 16

63 82 936 D3584
16 D3584.201.01.03.02 02.2013
5 Care and maintenance Sirona Dental Systems GmbH
5.4 Sterilization instructions Operating Instructions SIROInspect
Wipe disinfection
✔ The disinfectants that are approved in your country must have proven
bactericidal, fungicidal and virucidal properties.
➢ Disinfect by wiping the parts down according to manufacturer
documentation.
Disinfectants to be used
Please observe the manufacturer's instructions for using instrument
disinfectants.
5.4
Sterilization instructions
Sterilization instructio ns
1. Clean and disinfect the components.
2. Sterilize the light guides (A/B) in the autoclave with saturated steam
at 134 °C (274 °F) and 3 min. holding time (2.04 bar; 29.59 psi
overpressure). NOTICE! Never sterilize the battery (D), attachable
filter (E) or the base body (C).
DAC PROFESSIONAL FACE
Steam sterilizers are permitted, but must correspond either to EN 13060
class B (for example, DAC PROFESSIONAL) or to EN 13060 class S and
in addition, must be suitable for the sterilization of dental instruments and
products.
NOTICE
Use only disinfectants that comply with the requirements of your
national authorities and whose bactericidal, fungicidal and virucidal
properties have been tested and properly certified.
Sirona recommends using MinuteWipes from Alpro. In the US:
Caviwipes
™
.
Observe the instructions of the disinfectant manufacturers.
A
C
D
B
SIROInspect
E
274
3 min
NOTICE
Sterilize the light guides in a packing material suitable for sterilization
and storage so as to prevent scratching or chipping the light guides in
the autoclave.
Do not exceed a temperature of 140 °C (284 °F) during the drying cycle.
Do not abort the drying cycle before it has ended.
Do not try to accelerate the cool-down process by placing the light
guides in cold water. This could cause the light guides to crack.
CAUTION
Store all components so that they are protected against contamination.
Sterilize again once the storage period has elapsed.
Page 17

63 82 936 D3584
D3584.201.01.03.02 02.2013
17
Sirona Dental Systems GmbH 6 Electromagnetic compatibility
Operating Instructions SIROInspect 6.1 Electromagnetic emission
bеЦдблЬ
6
Electromagnetic compatibility
Electromagnetic compatibility
Definitions:
Emission (electromagnetic)
When electromagnetic energy is emitted by a source.
Interference immunity
The ability of a device or system to work without errors even if there is
electromagnetic interference.
Immunity level
The maximum level of a certain electromagnetic interference that affects
a particular device or system, where the device or system remains
operative with a certain level of performance.
6.1
Electromagnetic emission
Electromagnetic emission
The UNIT is intended for operation in the electromagnetic environment
specified below.
The customer or user of the UNIT should make sure that it is used in such
an environment.
NOTICE
SIROInspect complies with all requirements for electromagnetic
compatibility according to IEC 60601-1-2: 2007.
Emission measurement Conformity Electromagnetic environment – guidance
RF emissions according to CISPR 11 Group 1 The UNIT uses RF energy only for its internal
function. Therefore, its RF emissions are very low
and are not likely to cause any interference in
nearby electronic equipment.
RF emissions according to CISPR 11 Class B The UNIT is intended for use in all facilities,
including residential areas and those directly
connected to a public power supply, which also
provides electricity to buildings used for residential
purposes.
Harmonics
according to IEC 61000-3-2
Class A
Voltage fluctuations/flicker according to
IEC 61000-3-3
Complies
Page 18

63 82 936 D3584
18 D3584.201.01.03.02 02.2013
6 Electromagnetic compatibility Sirona Dental Systems GmbH
6.2 Interference immunity Operating Instructions SIROInspect
6.2
Interference immunity
Interference immunity
The UNIT is intended for operation in the electromagnetic environment
specified below.
The customer or user of the UNIT should make sure that it is used in such
an environment.
Interference immunity
tests
IEC 60601-1-2 test
level
Conformance level Electromagnetic environment –
guidance
Electrostatic discharge
(ESD) according to IEC
61000-4-2
± 6 kV contact
discharge
± 8 kV air discharge
± 6 kV contact
discharge
± 8 kV air discharge
Floors should be made of wood or
concrete or finished with ceramic
tiling. If floors are covered with
synthetic material, the relative
humidity should be at least 30%.
Electrical fast transient/
burst according to
IEC 61000-4-4
± 1 kV for input and
output lines
± 2 kV for power supply
lines
± 1kV for input and
output lines
± 2 kV for power supply
lines
The quality of the power supply
should be that of a typical
commercial or hospital environment.
Surge voltages
according to IEC 610004-5
± 1 kV differential mode
± 2 kV common mode
voltage
± 1 kV differential mode
± 2 kV common mode
voltage
The quality of the line power supply
should be that of a typical
commercial or hospital environment.
Voltage drops, short
interruptions and
fluctuations of the power
supply
according to IEC 610004-11
<5% U
T
for ½ period
(>95% drop of U
T
)
40% U
T
for 5 periods
(60% drop of U
T
)
70% U
T
for 25 periods
(30% drop of U
T
)
<5% U
T
for 5 sec.
(>95% drop of U
T
)
<5% U
T
for ½ period
(>95% drop of U
T
)
40% U
T
for 5 periods
(60% drop of U
T
)
70% U
T
for 25 periods
(30% drop of U
T
)
<5% U
T
for 5 sec.
(>95% drop of U
T
)
The quality of the line power supply
should be that of a typical
commercial or hospital environment.
If the user of the UNIT requires it to
continue functioning following
interruptions of the power supply, it is
recommended to have the UNIT
powered by an uninterruptible power
supply.
Magnetic field of power
frequencies (50/60 Hz)
according to IEC 610004-8
3 A/m 3 A/m Power frequency magnetic fields
should at levels characteristic of
those found in the business and
hospital environment.
Remark: U
T
is the alternating supply voltage prior to application of the test level.
Portable and mobile radio equipment
are not used at a smaller distance to
the UNIT and cables that is lower
than the recommended working
clearance, which is calculated
according to the equation suitable for
the transmission frequency.
Recommended working clearance:
Page 19

63 82 936 D3584
D3584.201.01.03.02 02.2013
19
Sirona Dental Systems GmbH 6 Electromagnetic compatibility
Operating Instructions SIROInspect 6.3 Working clearances
bеЦдблЬ
1. The higher frequency range applies at 80 MHz and 800 MHz.
2. Field strength from fixed transmitters, such as base stations for radio
(cellular/cordless) telephones and land mobile services, amateur
radio stations, and AM and FM radio and TV stations, cannot be
predicted beforehand with accuracy. An investigation of the location
is recommended to determine the electromagnetic environment
resulting from stationary HF transmitters. If the measured field
strength in the location in which the UNIT is used exceeds the
applicable RF compliance level specified above, the UNIT should be
observed to verify normal operation. If unusual performance
characteristics are observed, it may be necessary to take additional
measures, such as a reorientation or repositioning of the UNIT.
3. Over the frequency range of 150 kHz to 80 MHz, the field strength is
less than 3 V/m.
6.3
Working clearances
Working clearances
Recommended working clearances
between portable and mobile RF
communication devices and the UNIT
The UNIT is intended for operation in an electromagnetic environment,
where radiated RF interference is checked. The customer or the user of
the UNIT can help prevent electromagnetic interference by duly
observing the minimum distances between portable and mobile HF
communication devices (transmitters) and the UNIT. These values may
vary according to the maximum output power of the communication
device as specified below.
Conducted RF
interference
IEC 61000-4-6
3 V
eff
150 kHz to 80 MHz
1
3 V
eff
d= [1.2] √P
Radiated RF interference
IEC 61000-4-3
3 V/m
80 MHz to 800 MHz
1
3 V/m
800 MHz to 2.5 GHz
1
3 V
eff
3 V
eff
d= [1.2] √P
at 80 MHz to 800 MHz
d= [2.3] √P
at 800 MHz to 2.5 MHz
where P is the nominal transmitter
output in watts (W) specified by the
transmitter manufacturer and d is t he
recommended working clearance in
meters (m).
According to an electromagnetic onsite survey,
²
the field strength of fixed
radio transmitters is less than the
compliance level in each frequency
range.
³
Interference is possible in the vicinity
of equipment bearing the following
symbol.
Interference immunity
tests
IEC 60601-1-2 test
level
Conformance level Electromagnetic environment –
guidance
Page 20

63 82 936 D3584
20 D3584.201.01.03.02 02.2013
6 Electromagnetic compatibility Sirona Dental Systems GmbH
6.3 Working clearances Operating Instructions SIROInspect
For transmitters whose maximum nominal output is not specified in the
above table, the recommended working clearance d in meters (m) can be
determined using the equation in the corresponding column, where P is
the maximum nominal output of the transmitter in watts (W) specified by
the manufacturer of the.
Remark 1
The higher frequency range applies at 80 MHz and 800 MHz.
Remark 2
These guidelines may not be applicable in all cases. The propagation of
electromagnetic waves is influenced by their absorption and reflection by
buildings, objects and persons.
Rated maximum output power of
transmitter
[W]
Working clearance according to transmission frequency [m]
150 kHz to 80 MHz 80 MHz to 800 MHz 800 MHz to 2.5 GHz
d= [1.2] √P d= [1.2] √P d= [2.3] √P
0.01 0.12 0.12 0.23
0.1 0.38 0.38 0.73
1 1.2 1.2 2.3
10 3.8 3.8 7.3
100 12 12 23
Page 21

63 82 936 D3584
D3584.201.01.03.02 02.2013
21
Sirona Dental Systems GmbH 7 Storage and transport conditions
Operating Instructions SIROInspect
bеЦдблЬ
7
Storage and transport conditions
Storage and transport c onditions
Dispatch Clean and disinfect the instrument or accessory used on the patient
before sending it in.
Protect against
moisture
Sensitive
contents
Relative humidity Air pressure
Temperature After a severe change in
temperature, allow sufficient time
for acclimatization.
kPa
Page 22

63 82 936 D3584
22 D3584.201.01.03.02 02.2013
8 Disposal Sirona Dental Systems GmbH
Operating Instructions SIROInspect
8
Disposal
Disposal
To the best of our knowledge, apart from the battery, SIROInspectdoes
not contain any environmentally hazardous substances.
Disinfected
● Disinfect the product prior to disposal.
● Please observe the disposal regulations applicable in your country.
Disposing of batteries and charging stations
Batteries must be disposed of according to disposal regulations and
statutory provisions in your country.
Remove the battery from the base body of the SIROInspect probe before
disposal.
Your product is marked with the adjacent symbol. Within the European
Economic Area, this product is subject to Directive 2002/96/EC as well as
the corresponding national laws. This directive requires environmentally
sound recycling/disposal of the product. The product must not be
disposed of as domestic refuse!
Please observe the disposal regulations applicable in your country.
Disposal procedure
Please note that this product is subject to the stipulations in EC Directive
2002/96 governing waste electrical and electronic equipment and must
be disposed of in line with these special requirements within the
European Union (EU).
Prior to disassembly / disposal of the product, it must be fully prepared
(cleaned / disinfected / sterilized).
When disposing of equipment permanently, please proceed as follows:
In Germany:
To initiate return of the electrical device, please send a disposal order to
"enretec GmbH".
1. You can find a form for placing a disposal order on the company's
homepage (www.enretec.de) under the menu item "Entsorgung
elektrischer und elektronischer Geräte" (Disposal of electric and
electronic devices). The form can either be downloaded or completed
online.
2. Fill the form out with the relevant information and send it as an online
order or fax it to enretec GmbH at +49 (0)3304 3919 590.
Alternatively, for initiating a waste disposal order or for questions, the
following contact options are available:
Telephone: +49(0)3304 3919 500;
E-mail: pickup@eomRECYCLING.com
; Mailing address: enretec GmbH, Geschäftsbereich
eomRECYCLING
Kanalstraße 17, 16727 Velten
Any nonpermanently installed equipment will be picked up at its
installation site in the practice. Permanently installed equipment will
be picked up curbside at your address by appointment.
Page 23

63 82 936 D3584
D3584.201.01.03.02 02.2013
23
Sirona Dental Systems GmbH 8 Disposal
Operating Instructions SIROInspect
bеЦдблЬ
All disassembly, transport and packaging costs are to be borne by the
owner / operator of the equipment. The disposal itself is free of charge.
Worldwide (outside Germany):
Please contact your local dental equipment specialist for country-specific
information on disposal.
Page 24

tЙ=кЙлЙкоЙ=нЬЙ=кбЦЬн=нз=г~вЙ=~еу=~днЙк~нбзел=пЬбЕЬ=г~у=ДЙ=кЙимбкЙЗ=ЗмЙ=нз=нЙЕЬебЕ~д=бгйкзоЙгЙенлK
«=pбкзе~=aЙен~д=pулнЙгл=dгДe=OMNP pйк~ЕЬЙW ЙеЦдблЕЬ mкбенЙЗ=бе=dЙкг~еу
aPRUQKOMNKMNKMPKMO MOKOMNP ûKJkêKW= NNS=MUQ
pбкзе~=aЙен~д=pулнЙгл=dгДe
áå=íÜÉ=rp^W
c~Дкбвлнк~≈Й=PN
SQSOR=_ЙелЬЙбг
dЙкг~еу
пппKлбкзе~KЕзг
pбкзе~=aЙен~д=pулнЙгл=ii`
QUPR=pбкзе~=aкбоЙI=pмбнЙ=NMM
`Ь~кдзннЙI=k`=OUOTP
rp^
lêÇÉê=kç
SP=UO=VPS=aPRUQ
 Loading...