

GB IE NI
DE DK
BE
GB IE NI
BE
DK
FR
NL
HOYER Handel GmbH
Task öprüstraße 3
DE-22761 Hamburg
DEUTSCHLAND
Status of information · Informationernes stand · Version des informations
Stand van de informatie · Stand der Informationen:
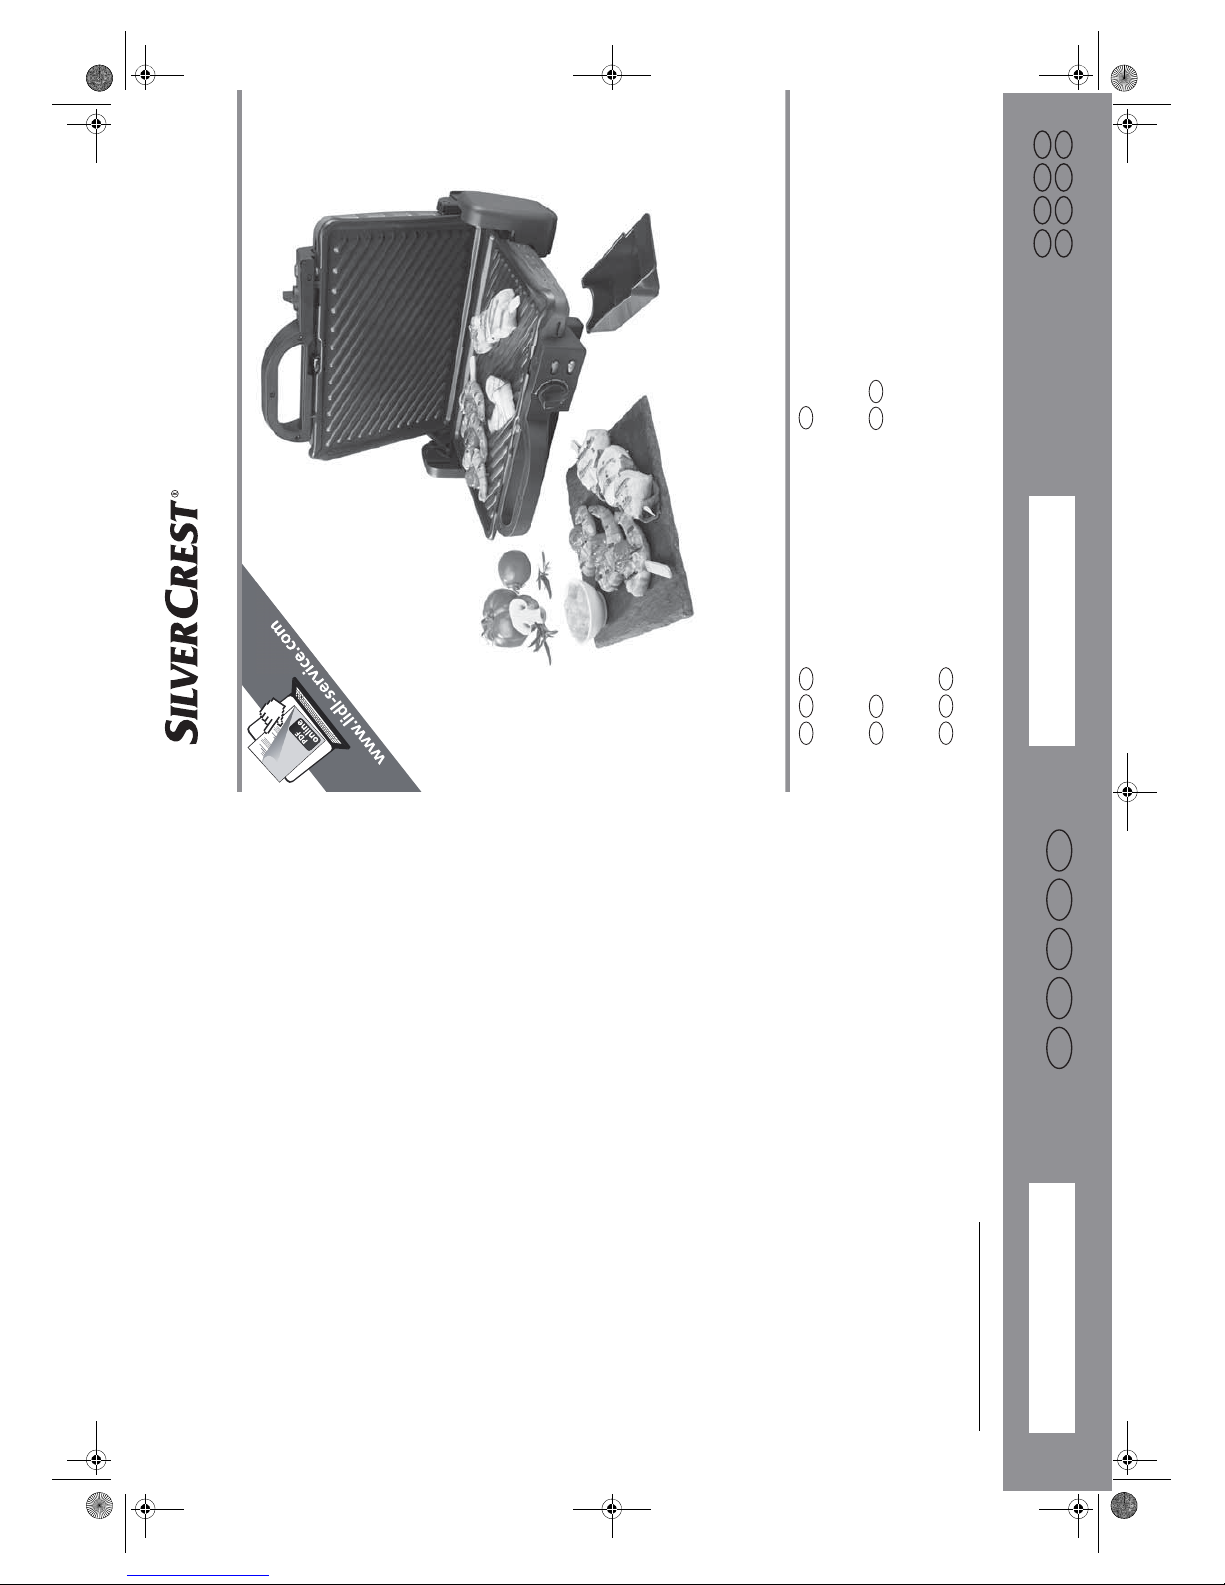
CONTACT GRILL SKG 1700 B3
IAN 283008 IAN 283008
06/2017 ID: SKG 1700 B3_17_V1.4
GRILL À CONTACT DOUBLE
Mode d'emploi
FR BE
KONTAKTGRILL
Betjeningsvejledning
DK
CONTACTGRILL
Gebruiksaanwijzing
NL BE
CONTACT GRILL
Operating instructions
IE NIGB
KONTAKTGRILL
Bedienungsanleitung
DE AT CH
__283008_Kontakgrill_B6.book Seite 1 Donnerstag, 29. Juni 2017 3:42 15
English..................................................................................... 2
Dansk.................................................................................... 16
Français................................................................................. 30
Nederlands............................................................................ 46
Deutsch.................................................................................. 60
__283008_Kontakgrill_B6.book Seite 2 Donnerstag, 29. Juni 2017 3:42 15
Overview / Oversigt / Aperçu de l'appareil / Overzicht / Übersicht
9
7
6
1
3
5
4
8
2
B
C
10
D
5
4
E
10
11
12
13
14
15
A
16
6
__283008_Kontakgrill_B6.book Seite 3 Donnerstag, 29. Juni 2017 3:42 15

2
GB
Contents
1. Overview ........................................................................................ 2
2. Intended purpose ............................................................................ 3
3. Safety information ........................................................................... 3
4. Items supplied ................................................................................. 6
5. How to use ...................................................................................... 6
6. Operation ........................... ....................................... ...................... 6
6.1 Heating up........................................................................................... 7
6.2 Preparation........ ....... ....... ....... ............................................................. 7
6.3 Grill plate setting .................................................................................. 8
6.4 Switching off ........................................................................................ 8
7. Cleaning .......................................................................................... 8
8. Storage ........................................................................................... 9
9. Disposal .......................................................................................... 9
10.Trouble-shooting ........... ................ ................ ................ ............. .... 10
11.Technical specifications .................................................................. 10
12. Recipes .......................................................................................... 11
13.Warranty of the HOYER Handel GmbH ........................................... 14
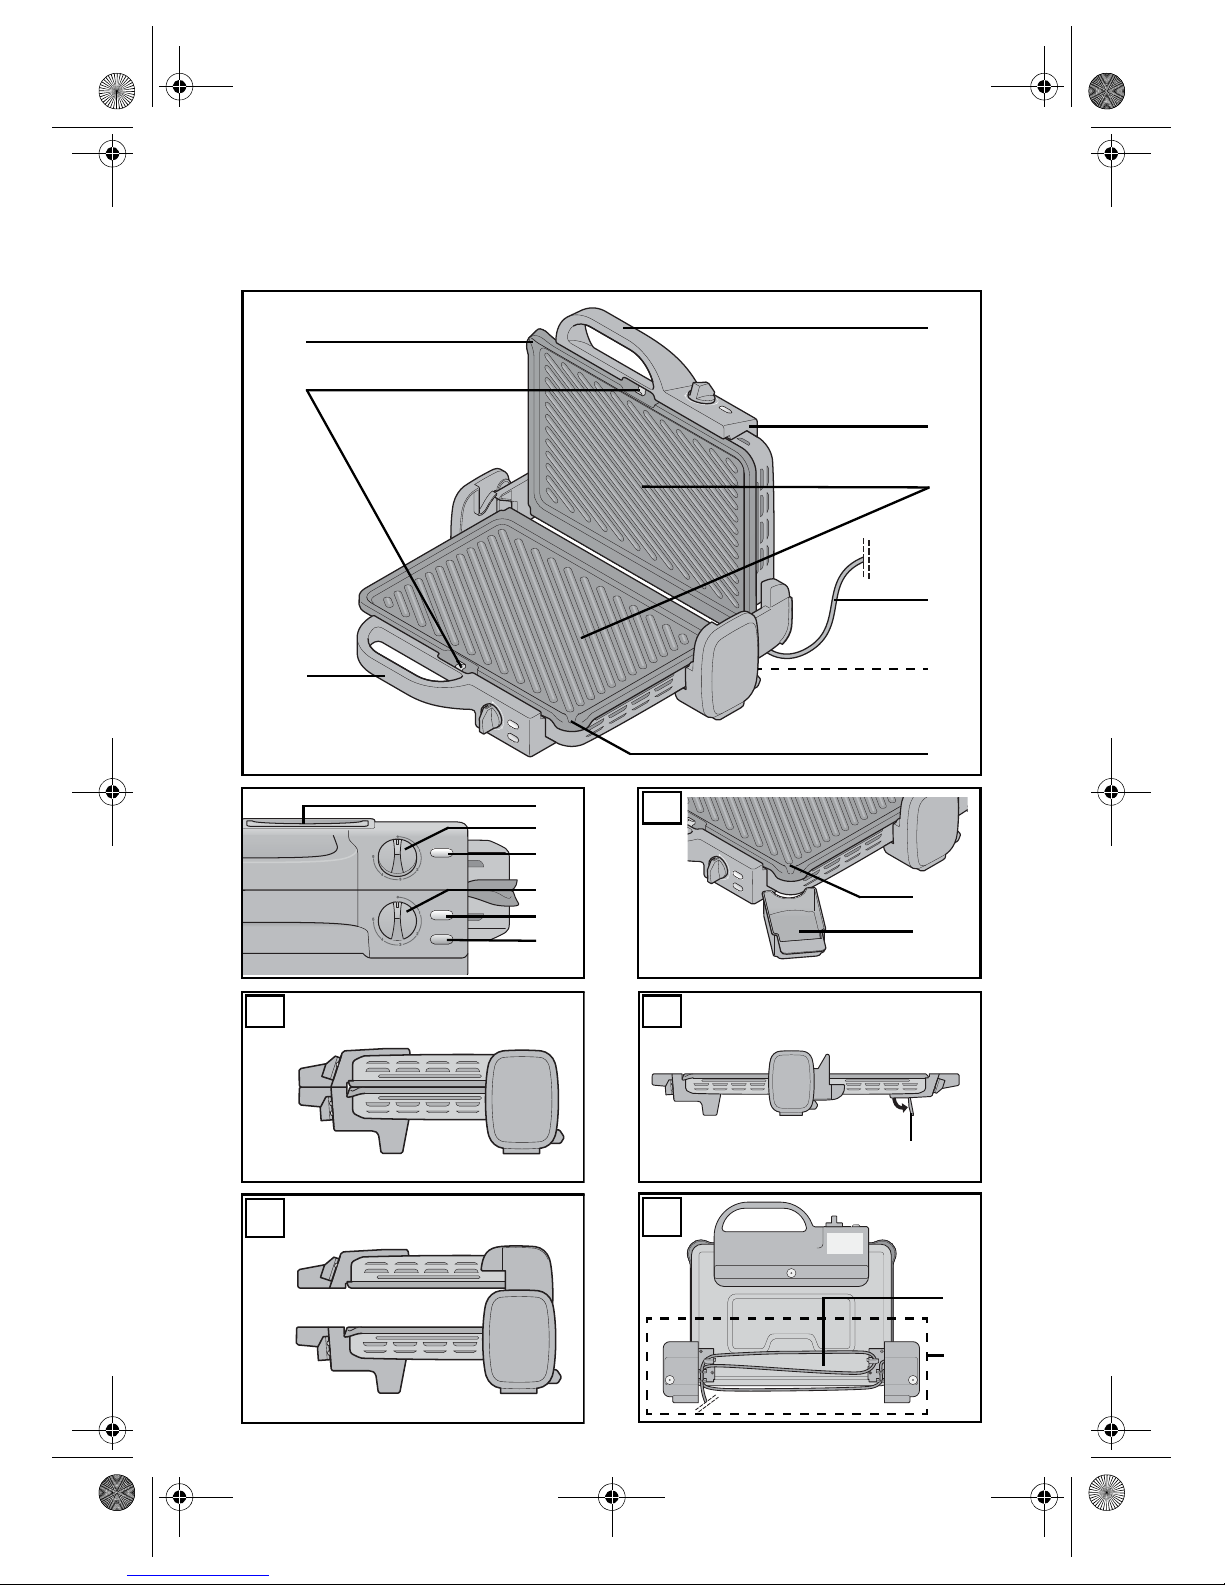
1. Overview
1 Handle
2 Lid
3 Grill plates
4 Power cable with mains plug
5 Cable spool on device base
6 Oil/fat runoff on lower grill plate
7 Handle
8 Grip clamps for grill plates
9 Oil/fat runoff on upper grill plate
10 Base (foldable)
11 Thermostat control for upper grill plate
12 Control light for upper grill plate
13 Thermostat control for lower grill plate
14 Control light for lower grill plate
15 Power indicator
16 Grease drip tray
Figure A: position grease drip tray / Figure B: contact grill / Figure C: barbecue /
Figure D: grill oven / Figure E: cable spool
__283008_Kontakgrill_B6.book Seite 2 Donnerstag, 29. Juni 2017 3:42 15

3
GB
Thank you for your trust!
Congratulations on your new Contact Grill.
For a safe handling of the device and in or-
der to get to know the entire scope of features:
• Thoroughly read these operating instructions prior to initial
commissioning.
• Above all, observe the safety instructions!
• The device should only be used
as described in these operating
instructions.
• Keep these operating instructions for reference.
• If you pass the device on to
someone else, please include
these operating instructions.
We hope you enjoy your new C ontact Grill!
Symbols on your appliance
Hot surfaces
In order to avoid injury as a result of burns,
the metal surfaces of the device must not be
touched during operation. Only use the handles and control elements provided.
The food-safe material of devices
with this symbol will not change the
taste or smell of food.
2. Intended purpose
The contact grill is inte nded for grilling, toasting and gratinating food (e. g. meat, fish,
vegetables, etc.) at home.
The device is designed for use in private
households. The device must only be used indoors.
This device must not be used for commercial
purposes.
Foreseeable misuse
WARNING! Risk of material damage!
~ The device is not designed for operation
outdoors.
3. Safety information
Warnings
If necessary, the following warnings will be
used in these operating instructions:
DANGER! High risk: failure to observe this warning may result in inju-
ry to life and limb.
WARNING! Moderate risk: failure to observe this warning may result in injury or serious material damage.
CAUTION: low risk: failure to observe this
warning may result in minor injury or material damage.
NOTE: circumstances and specifics that
must be observed when handling the device.
__283008_Kontakgrill_B6.book Seite 3 Donnerstag, 29. Juni 2017 3:42 15
4
GB
Instructions for safe operation
~ This device can be used by children from the age of 8 and peo-
ple with restricted physical, sensory or intellectual abilities or
people without adequate experience and/or understanding, if
they are supervised or instructed on how to use this device safely
and if they are aware of the resulting risks.
~ Children must not play with the device.
~
Cleaning and user maintenance must not be performed by unsupervised children unless they are older than 8 years and supervised.
~ Children under the age of 8 must be kept away from the device
and the power cable.
~
The outer surfaces of the device become very hot during
operation. Only touch the contr ol elements of the device
during operation.
~ This device is not intended to be operated using an external timer
clock or a separate remote control system.
~ If the power cable of this device should become damaged, it
must be replaced by the manufacturer, the manufacturer's customer service department or a similarly qualified specialist, in order
to avoid any hazards.
~ Charcoal and similar fuels must not be used in this device.
~ The heating spirals must not be wiped with a damp cloth.
~
Clean all parts and surfaces that will come into contact with food
before using the devic e for the first tim e
(see “Cleaning” on
page 8).
DANGER for children
~ Packing materials are not children's
toys. Children should not be allowed to
play with the plastic bags: There is a
risk of suffocation.
~ Please ensure that children are not able
to pull the device down from the work
surface with the power cable.
~ Keep the device out of the reach of chil-
dren.
DANGER to and from pets
and livestock
~ Electrical devices can represent a haz-
ard to pets and livestock. In addition,
animals can also cause damage to the
device. For this reas on you should k eep
animals away from electrical devices at
all times.
__283008_Kontakgrill_B6.book Seite 4 Donnerstag, 29. Juni 2017 3:42 15
5
GB
DANGER! Risk of electric
shock due to moisture
~ The device, the power cable and the
mains plug must not be immersed in water or any other liquids.
~ Protect the device from moisture, water
drops and water spray.
~ If liquid gets into the device, remove the
mains plug immediately. Have the device checked before reusing.
~ Never touch the device with wet hands.
~ If the device falls into water, disconnect
the mains plug immediately. Only then
is it safe to retrieve the device.
DANGER! Risk of electric
shock
~ Only plug the mains plug into the wall
socket after the device has been completely assembled.
~ Only connect the mains plug to a prop-
erly installed and easily accessible
earthed wall socket whose voltage corresponds to the specifications on the rating plate. The wall socket must co ntinue
to be easily accessible after the device
is plugged in.
~ Ensure that the power cable cannot be
damaged by sharp edges or hot points.
Do not wrap the power cable around
the device.
~ The device is not fully disconnected from
the power supply, even after it is
switched off. In order to fully disconnect
it, pull out the mains plug.
~ When using the device, ensure that the
power cable cannot be trapped or
crushed.
~ When removing the mains plug, always
pull the plug and never the cable.
~ Disconnect the mains plug from the wall
socket …
… if there is a fault,
… when you are not using the device,
… before you clean the device, and
… during thunderstorms.
~ To avoid any risk, do not make modifi-
cations to the device.
~ Do not use the device if there is visible
damage to the device or the power cable.
DANGER! R isk of fire
~ The device must not be operated close
to flammable liquids or materials, or in
a potentially explosive environment.
Keep at a distance of at least 30 cm
from walls. In order to prevent overheating of the device or a potential fire, the
device must not be covered. The grill
plates must under no circumstances be
covered with aluminium foil, aluminium
containers or heat-resistant materials.
~ The power cable must not touch the met-
al surfaces during operation.
DANGER! Risk of injury
through burning
~ The metal surfaces become very hot dur-
ing operation. Only touch the handles
and control elements of the device during operation.
~ The device remains very hot after it is
switched off, and must not be touched.
~ Only transport the device when it has
cooled down, and when doing so only
use the handles intended.
DANGER for birds
~ Birds breathe faster, distribute the air
differently in their bodies and are significantly smaller than humans. For this
reason, it may be dangerous for birds to
inhale even the smallest smoke quantities, which develop while this device is
running. When using this device, birds
should be relocated into a different
room.
__283008_Kontakgrill_B6.book Seite 5 Donnerstag, 29. Juni 2017 3:42 15
6
GB
WARNING! Risk of material
damage
~ Ensure that the device is switched off be-
fore you plug it into a wall socket (turn
both thermostat controls to "•" until they
go no further).
~ Only use the original accessories.
~ Do not use kitchen utensils made of met-
al to lift grilled food from the grill plate.
Use e.g. a wooden spatula.
~ Do not use any astringent or abrasive
cleaning agents.
~ The device is fitted with non-slip plastic
feet. As furniture is coated with a wide
array of varnishes and synthetics, and is
also treated with different care products,
it cannot be fully ruled out that some of
these materials contain ingredients that
could attack and soften the non-slip
plastic feet. If necessary, place a nonslip mat under the device.
4. Items supplied
1 Contact grill with two grill plates
2 Grease drip trays
1 Set of operating instructions
5. How to use
DANGER! Risk of fire!
~ Place the device on a dry, level, non-slip
and heat-resistant surface.
~ The device must not be operated close
to flammable liquids or materials, or in
a potentially explosive environment.
Keep at a distance of at least 30 cm
from walls.
NOTE: when in operation for the first time,
some smoke and odour may be generated
by the device. This is related to materials
used on the heating elements during assem-
bly, and is not a defect with the product. Ensure adequate ventilation.
• Remove all packing material.
• Check to ensure that all parts are present and undamaged.
• Clean the device prior to its first
use! (see “Cleaning” on page 8)
1. Open the lid|2 of the contact grill upwards. Be careful not to raise the lid
any further after it is vertical.
2. Before plugging in the device, check
that both thermostat controls|11 +|13
are set to the marking "•".
3. Insert the mains plug|4 into a wall socket corresponding to the specifications of
the rating plate. The power indicator|15 is illuminated as long as the device is connected to the power supply.
4. Rotate the thermostat controls|11 +|13
to temperature setting 5. The device then
heats up the grill plates|3, and the control lights|12 and|14 are illuminated.
5. Switch the device off after approx.
15 minutes by turning both thermostat
controls|11 +|13 to the marking "•".
6. Pull out the mains plug|4.
7. Clean the appliance again. (see
“Cleaning” on page 8)
6. Operation
DANGER! Risk of injury
through burning!
~ The metal surfaces become very hot dur-
ing operation. Only touch the handles
and control elements of the device during operation.
__283008_Kontakgrill_B6.book Seite 6 Donnerstag, 29. Juni 2017 3:42 15
7
GB
6.1 Heating up
1. Open the lid|2 of the contact grill upwards. Be careful not to raise the lid
any further after it is vertical.
2. Grease the grill plates|3 with a little
vegetable oil or vegetable fat (e.g. coconut or palm oil) if appropriate.
3. Figure A: Place a grease drip tray|16
under the oil/fat runoff of the bottom
grill plate|6.
4. Close the lid|2 downwards in order to
close the contact grill.
5. Before plugging in the device, check
that both thermostat controls|11 +|13
are set to the marking "•".
6. Insert the mains plug|4 into an earthed
wall socket corresponding to the specifications of the rating plate.
7. Turn the thermostat controls|11 +|13 to
the desired temperature setting 1, 2, 3, 4
or 5.
- Setting 1: thaw
- Setting 2: warm
- Settings 3 and 4: moderate grill set-
tings
- Setting 5: highest grill setting
The device then heats up the grill plates|3,
and the control lights|
12
and|14 are illu-
minated.
8. The control lights|
12
and|14 go out when
the corresponding grill plate|
3
has
reached the selected temperature setting.
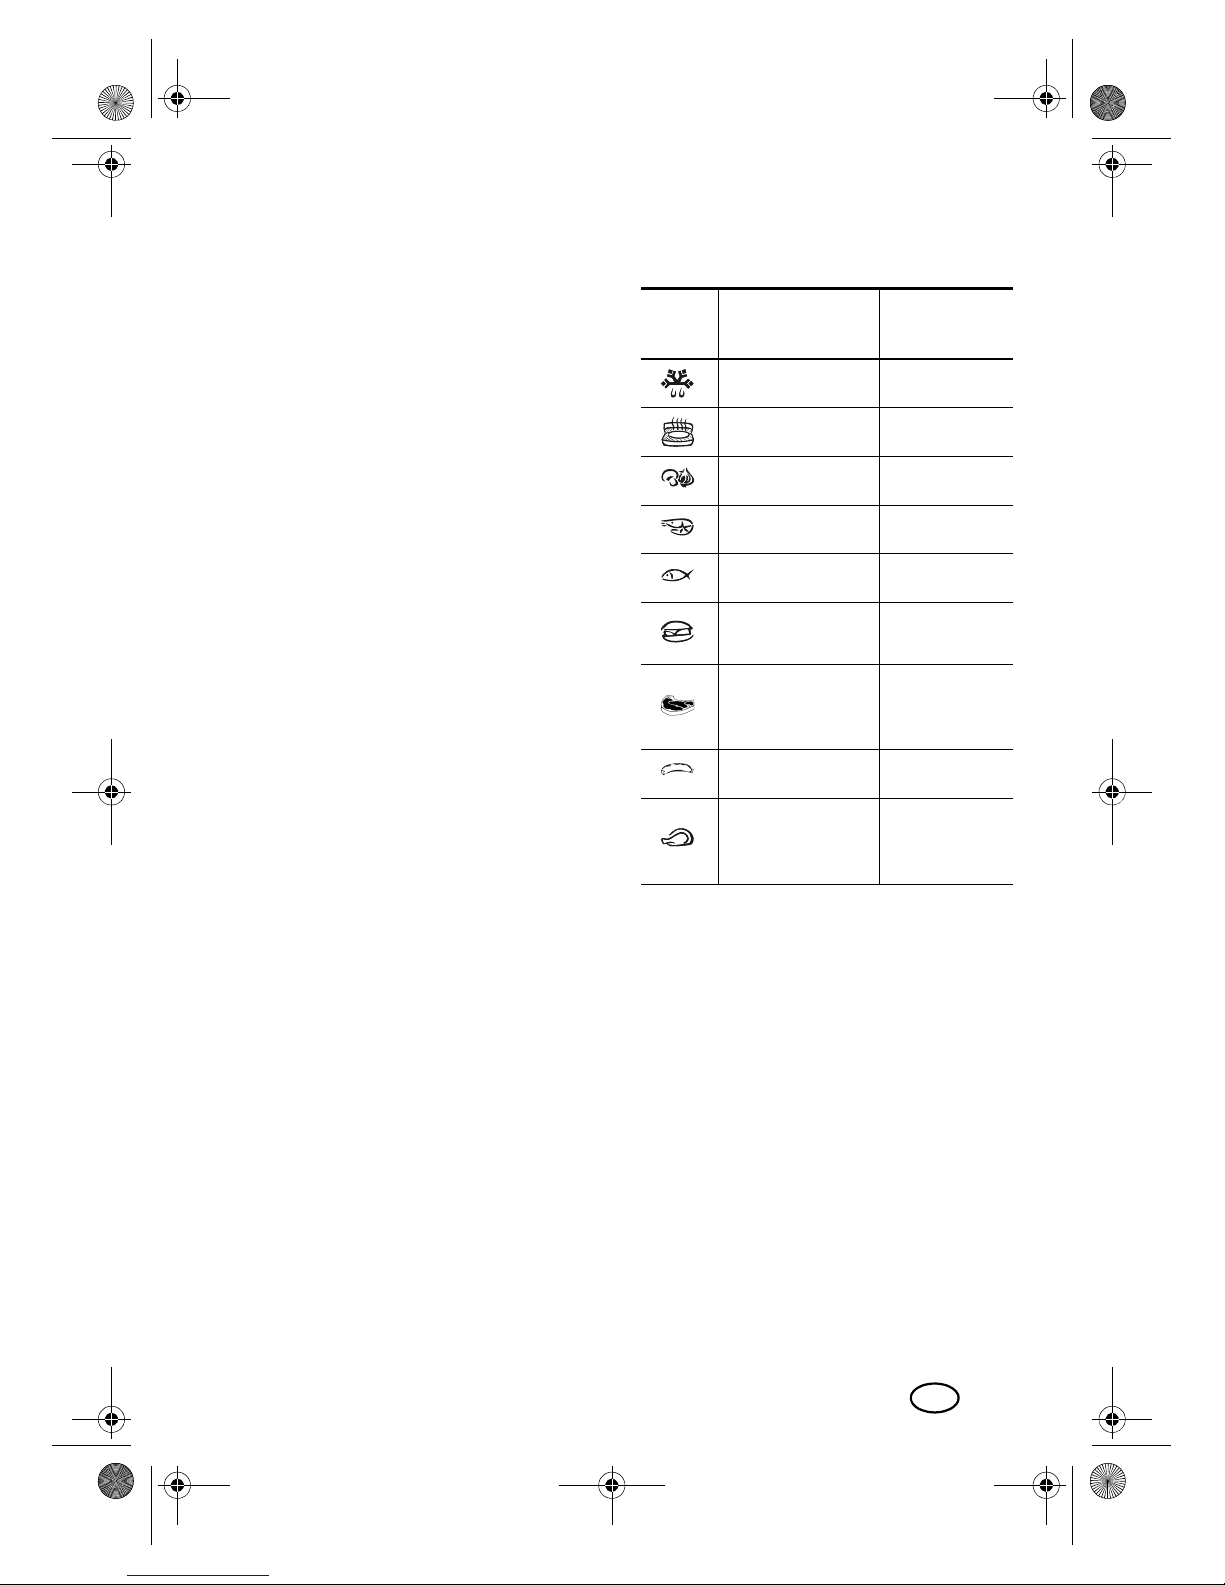
6.2 Preparation
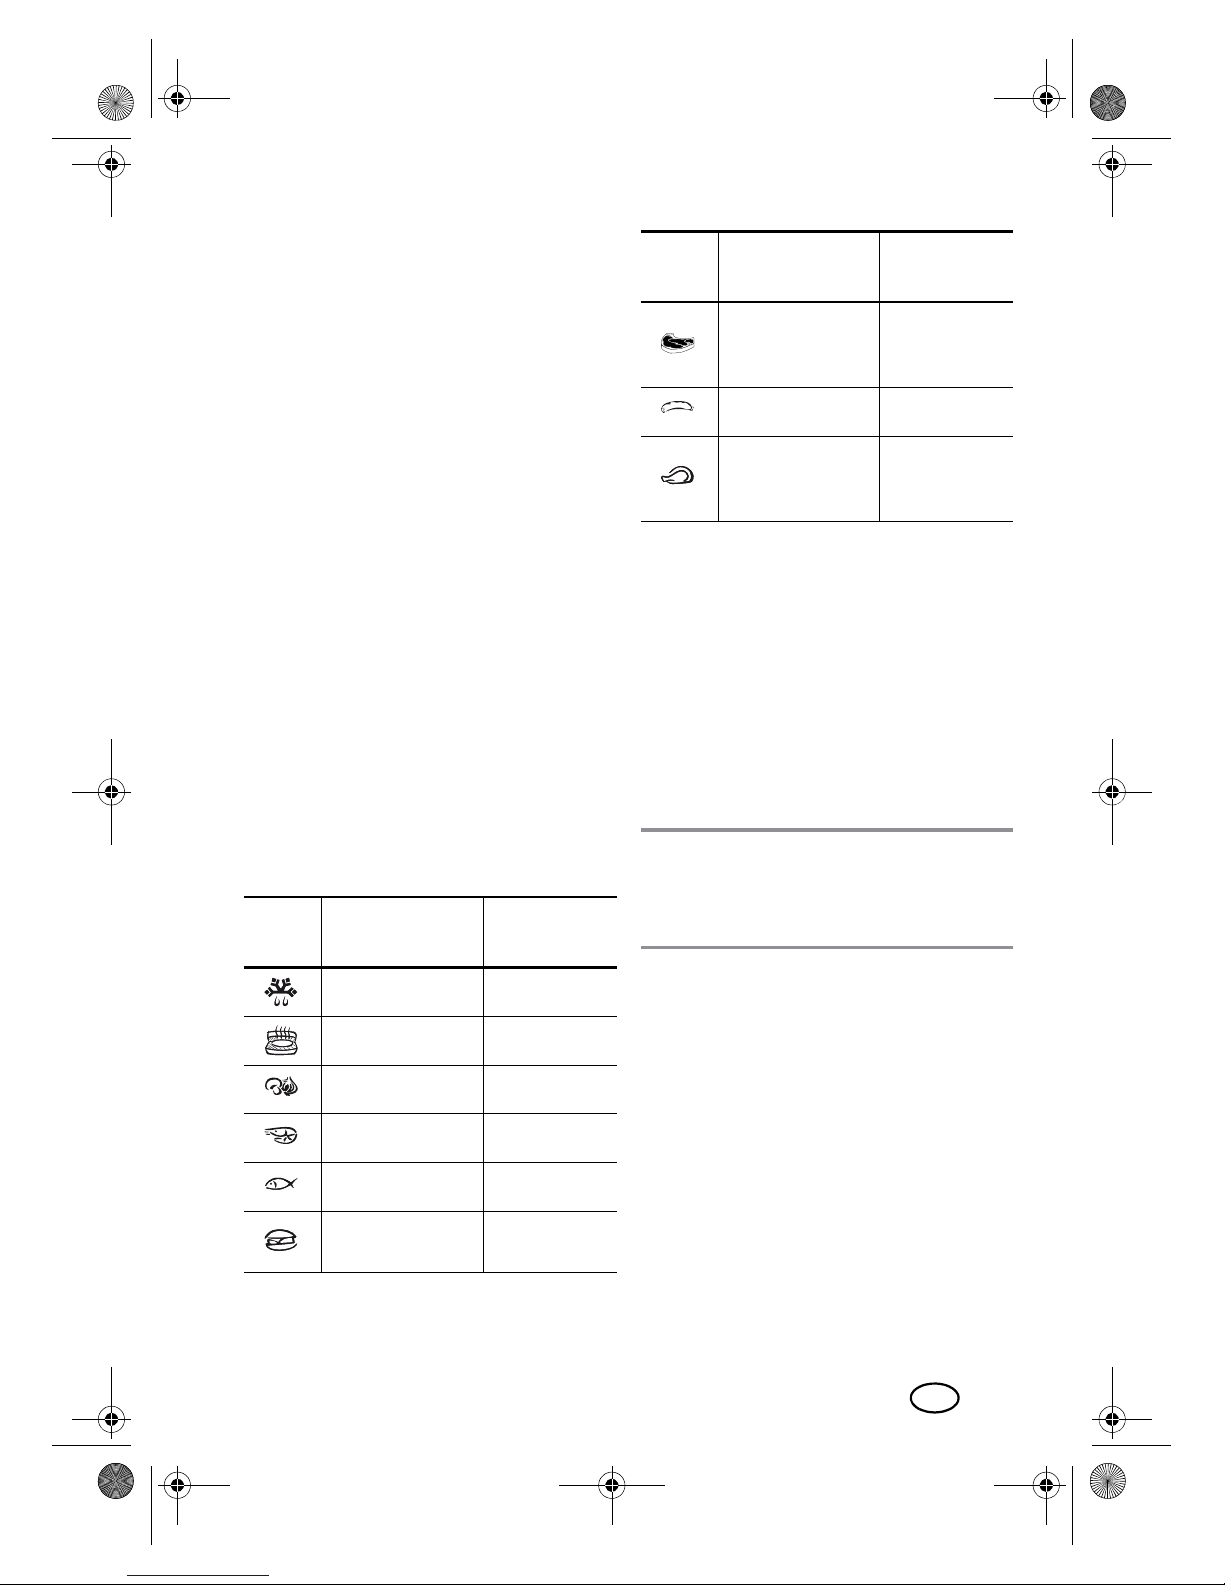
Temperature setting
On the lid|2 there is an overview with the
recommended temperature settings for various foods. The following table contains the
meanings of the food symbols (with the corresponding temperature settings).
Preparation time
The required preparation time depends on
the quantity, the thickness and the type of
food, and the desired level of cooking.
Sym-
bol
Meaning
Tempera-
ture setting
Thaw 1
Warm 2
Vegetables 3
Prawns 3
Fish 4
Hamburger,
sandwich
5
Meat
(e.g. steaks,
spare ribs)
5
Sausages 5
Poultry
(e.g. chicken,
turkey)
5
__283008_Kontakgrill_B6.book Seite 7 Donnerstag, 29. Juni 2017 3:42 15

8
GB
6.3 Grill plate setting
Depending on what you wish to prepare,
there are 3 different ways to set up the grill
plates|3.
Contact grill (Figure B)
NOTE: please note that opening the lid|2
may cause any oil or fat present to drip from
the lid onto the work surface.
This contact setting of th e grill plates|3 allows
double-sided, rapid grilling of pieces of
meat, e.g. filet steak, rump steak, cutlets, sausages, or of vegetables.
1. Preheat the grill plates|3 (see “Heating
up” on page 7).
2. Open the lid|2 of the contact grill upwards. Be careful not to raise the lid
any further after it is vertical.
3. Place the food to be grilled on the lower
grill plate|3.
4. Close the lid|2 and press it down gently
onto the food to be grilled, so that both
grill plates|3 are in contact with the
food.
Barbecue (Figure C)
The open position of the grill plates is suitable ...
… for slow grilling of comparatively
thick food,
… for preparing food with different tem-
perature settings simultaneously, and
… for preparing comparatively large
quantities of food.
1. Fold out the base|10.
2. Open the lid|2 upwards, lift it up, and
open it further until it is horizontal.
3. Preheat the grill plates|3 (see “Heating
up” on page 7), however do so with the
lid open.
4. For the barbecue position, also place
the second grease drip tray|16 under
the oil/fat runoff|9
of the upper grill
plate|
3.
5. Place the food to be grilled on both grill
plates|3.
Grill oven (Figure D)
The oven function is particularly suitable for
the gratinating of food.
1. Preheat the grill plates|3 (see “Heating
up” on page 7).
2. Open the lid|2 of the contact grill upwards. Be careful not to raise the lid
any further after it is vertical.
3. Place the food to be grilled on the lower
grill plate|3.
4. Lift the lid|2 upwards and pull it forwards and down, until it is parallel
above the lower grill plate|3.
6.4 Switching off
1. Set both thermostat controls|11 +|13
to the setting "•".
2. Pull out the mains plug|4.
3. Lift the grilled food off the grill plate|3
using a suitable kitchen utensil. Use e.g.
a spatula made from wood or heat-resistant plastic, but never from metal.
7. Cleaning
Clean the device prior to its first use!
DANGER! Risk of electric
shock!
~ Pull the mains plug|4 out of the wall
socket before you clean the cont act grill.
~ The device, the power cable and the
mains plug|4 must not be immersed in
water or any other liquids.
DANGER! Risk of injury
through burning!
~ Allow all the parts to cool down before
cleaning.
__283008_Kontakgrill_B6.book Seite 8 Donnerstag, 29. Juni 2017 3:42 15
9
GB
WARNING! Risk of material damage!
~ Do not use any astringent or abrasive
cleaning agents.
Clean the device after each use and remove
all food residues.
Outer surfaces
• Clean the outer surfaces using a soft,
damp cloth with a mild soap solution.
Grease drip trays
The grease drip trays|16 may be cleaned
by hand or in a dishwasher.
Grill plates
For purposes of cleaning, remove the grill
plates|3 from the device after it has cooled
down.
1. Press the grip clamps|8 to the side and
remove the grill plates|3 from their brackets.
2. The grill plates|3 may be cleaned by
hand or in a dishwasher. Dry them completely before re-inserting.
3. Place the grill plates|3 into the device
and press them against the grip
clamps|8 until the grill plates click into
position.
NOTE: burnt-on food or fat residue is often
easier to remove if you leave a damp washcloth on the baked-on residue overnight to
soften it.
8. Storage
DANGER for children!
~ Keep the contact grill out of the reach of
children.
• Clean all parts, and allow them to dry
properly before you put the contact grill
away.
• Figure E: wind the power cable|4
around the cable spool|5 when the device is upright.
• The device can be stored in an upright
position.
• Select a location where neither high
temperatures nor moisture can affect the
device.
9. Disposal
This product is subject to the
provisions of European Directive 2012/19/EC. The symbol showing a wheelie bin
crossed through indicates
that the product requires separate refuse collection in the European Union. This applies to the product and all
accessories marked with this symbol. Products identified with this symbol may not be
discarded with normal household waste, but
must be taken to a collection point for recycling electric and electronic appliances. Recycling helps to reduce the consumption of
raw materials and protect the environment.
Packaging
When disposing of the packaging, make
sure you comply with the envir onmental re gulations applicable in your country.
__283008_Kontakgrill_B6.book Seite 9 Donnerstag, 29. Juni 2017 3:42 15
10
GB
10. Trouble-shooting
If your device fails to function as required,
please try this checklist first. Perhaps there is
only a minor problem, and you can solve it
yourself.
DANGER! Risk of electric
shock!
~ Do not attempt to repair the device your-
self under any circumstances.
11. Technical
specifications
Technical Symbols
Subject to technical modifications.
Fault
Possible causes/
Action
No function
• Has the device been
connected to the power supply?
• Check the connection.
• Are the thermostat
controls|11 and|13
set to the marking
"•"?
Model: SKG 1700 B3
Mains voltage: 230 V
~ 50 Hz
Protection class: I
Power rating: Max. 1700 W
Protective earth connection
Certified Safety. Devices must
comply with the generally acknowledged rules of technology
and the German Product Safety
Act (Produktsicherheitsgesetz ProdSG).
With the CE marking, HOYER
Handel GmbH declares the conformity with EU guidelines.
__283008_Kontakgrill_B6.book Seite 10 Donnerstag, 29. Juni 2017 3:42 15

11
GB
12. Recipes
Sirloin beef steaks
• 2 sirloin beef steaks
•Salt
• Pepper, freshly ground
• 1 sprig of rosemary (leaves plucked off)
•Olive oil
1. Remove the steaks from the refrigerator
around 1 hour before cooking them, so
that they reach room temperature.
2. Preheat the contact grill to setting 5.
3. Rub both sides of the steaks with a little
olive oil, then season them with salt and
pepper, and sprinkle with rosemary.
4. Place the steaks into the preheated contact grill.
- Grill plate setting: contact grill
- Grilling time: approx. 4 - 7 minutes
NOTE: the grilling time varies depending
on the thickness and size of the steaks, and
on how you want them cooked (rare, medium, well done).
5. Remove the steaks from the contact grill,
cover them, and let them rest for a little
while.
Burger with cheese and bacon
• 250 g minced beef
•Salt
• Pepper, freshly ground
• 2 hamburger buns
• 2 slices of cheese (e.g. Chester)
• 4 slices of bacon
• 2 leaves of lettuce
• 4 slices of tomato
• a few slices of gherkin
•Ketchup
• Barbecue sauce
1. Season the minced beef, knead it thoroughly, and shape it into two flat, round
hamburgers.
2. Preheat the contact grill to setting 5.
3. Grill the bacon until crispy in the preheated contact grill.
- Grill plate setting: grill oven
4. Remove the slices of bacon from the
contact grill and put them aside.
5. Place the hamburgers into the lightly
oiled contact grill.
- Grill plate setting: contact grill
- Grilling time: approx. 5 - 8 minutes,
depending on the thickness and size
of the hamburgers.
6. Remove the hamburgers from the contact grill and put them aside.
7. Turn the temperature of the lower grill
plate down to setting 3.
8. Cut the hamburger buns open and
place them on the contact grill, placing
the hamburgers and one slice of cheese
on each of the bottom halves.
- Grill plate setting: grill oven
- Grilling time: approx. 2 - 3 minutes,
until the cheese melts.
9. Add the bacon, ketchup, barbecue
sauce, gherkin and tomato slices to the
burgers to taste, and place the upper
halves of the buns on top.
__283008_Kontakgrill_B6.book Seite 11 Donnerstag, 29. Juni 2017 3:42 15
12
GB
Fast panini with pesto
• 1 ciabatta
• Green pesto
• 2 - 4 tomatoes (in thin slices)
• 2 balls of mozzarella (in thin slices)
• To taste: salt
1. Cut ciabatta into slices and spread thinly with pesto.
2. Place slices of mozzarella and tomato
on the ciabatta.
3. Season to taste with a little salt.
4. Preheat the contact grill to setting 5.
5. Grill the paninis in the lightly greased
contact grill until the mozzarella melts.
- Grill plate setting: grill oven
NOTE: vary this basic recipe, e.g. with ham
and rocket, or with tuna fish and onions.
Pita bread sandwich with cheese
and ham
• 1 pita bread
• 4 tbs mayonnaise
• 3 tbs mustard (medium hot)
• 1 tbs honey
• Salt, cayenne pepper
• Approx. 8 slices of cheese
• Approx. 8 slices of cook ed ham, salami
and/or Parma ham
• Approx. 8 slices of tomato (hard)
1. Mix together the mayonnaise, mustard
and honey, and season to taste with salt
and cayenne pepper.
2. Cut the pita bread into quarters, and separate these into top and bottom halves.
3. Spread the mustard-mayonnaise on the
inside surfaces of the pita bread.
4. Place the cheese and the ham/salami
on the lower halves, and place the upper halves on top.
5. Preheat the contact grill to setting 5.
6. Grill the sandwiches in the lightly greased
contact grill until the cheese melts.
- Grill plate setting: contact grill
7. Do not place the tomato slices inside the
pita bread until after grilling it.
__283008_Kontakgrill_B6.book Seite 12 Donnerstag, 29. Juni 2017 3:42 15
13
GB
Aubergine rolls
• 1 small onion
• 1 clove of garlic
• A little olive oil
• 2 tins of tomatoes (in pieces)
• 2 tbs tomato paste
• Salt, pepper, dried Italian herbs
• 2 small aubergines
• 1 ball of mozzarella
• 50 g of Parmesan (freshly grated)
Tomato sauce
1. Finely dice the onions and garlic, and
fry them lightly in olive oil.
2. Add the tinned tomatoes and the tomato
paste, and season with salt, pepper and
the Italian herbs.
3. Allow everything to simmer lightly for
around 1 hour, initially in a closed
saucepan, then later with the pot open.
Aubergine rolls
4. In the meantime, cut the aubergines into
thin slices lengthwise, and cut the mozzarella into strips.
5. Preheat the contact grill to setting 3.
6. Grill the aubergine slices in the lightly
greased contact grill.
- Grill plate setting: contact grill
- Grilling time: approx. 3 - 4 minutes
7. After cooling, roll each of the mozzarella strips into a slice of aubergine to
make rolls.
Gratinating
8. Heat the oven to 175|°C.
9. Pour the tomato sauce into an ovenproof dish.
10.Place the aubergine rolls on the sauce,
and sprinkle with the grated Parmesan.
11.Bake everything for approx. 30 minutes
in the oven, until the cheese has melted.
Prawn skewers with lemongarlic marinade
• King prawn tails (deep-frozen, approx.
450 g drained weight)
• Salt, pepper
• Olive oil
• 1 untreated organic lemon
• 4 cloves of garlic
• 2 sprigs of lemon thyme
• Wooden skewers
Marinating
1. Allow the prawn tails to thaw, rinse them
with cold water, and drain, then season
with salt and pepper.
2. Prepare a marinade from olive oil, finely chopped lemon, finely chopped garlic, and the lemon thyme, in a container
that closes well.
3. Place the prawn tails into the marinade,
and allow to marinate in the refrigerator
for approx. 12 hours.
Grilling
4. Remove the prawn tails from the marinade, allow them to drip dry a little,
and then place them on the wooden
skewers. Season a little more to taste.
5. Preheat the contact grill to setting 4.
6. Place the skewers on the open contact
grill and have them grilled from all
sides.
- Grill plate setting: barbecue
- Grilling time: approx. 5 - 8 minutes
__283008_Kontakgrill_B6.book Seite 13 Donnerstag, 29. Juni 2017 3:42 15
14
GB
Gilthead seabream in aluminium
foil
• Salt, pepper
• 2 sprigs of thyme
• 1 clove of garlic
• Olive oil
• 1 gilthead seabream
• 1 slice of lemon
• 1 small onion (in thin slices)
• 2 tomatoes (in slices)
• Tear-resistant aluminium foil
1. Mix the salt, pepper, thyme leaves and
finely chopped garlic with a little oil.
2. Wash the inside and outside of the seabream, dab it dry, and make two diagonal incisions along each side.
3. Thoroughly rub the inside and outside of
the seabream with the mixture of seasonings.
4. Insert the slice of lemon into the abdominal cavity.
5. Brush the aluminium foil with olive oil,
distribute the slices of tomato and onion
over it, and place the seabream on top.
6. Wrap the aluminium foil tightly around
the seabream.
7. Preheat the contact grill to setting 4.
8. Carefully place the aluminium foil wrap
onto the lower grill plate.
- Grill plate setting: contact grill
- Grilling time: approx. 14 - 20 minutes
13. Warranty of the
HOYER Handel GmbH
Dear Customer,
your device is provided with a 3 year warranty starting with the purchase date. In the
event of product defects, you are entitled to
statutory rights against the vendor. These
statutory rights are not restricted by our warranty presented in the following.
Warranty conditions
The warranty period starts with the purchas e
date. Please keep the original purchase receipt in a safe place. This document is re quired to verify the purchase.
If within three years from the purchase date
of this product a material or factory defect
occurs, the product will be repaired or replaced by us – at our discretion – free of
charge to you. This warranty implies that
within the period of three years the defective
device and the purchase receipt are pr esented, including a brief written description of
the defect and the time it occurred.
If the defect is covered by our warranty, the
repaired or a new product will be returned
to you. No new warranty period starts with
a repair or replacement of the product.
Warranty period and statutory
claims for defects
The warranty period is not extended when
the warranty has been claimed. This also applies to replaced and repaired parts. Any
damages and defects already existing at the
time of purchase must be reported immediately upon unpacking. Repairs arising after
the expiration of the warranty period are
subject to a charge.
Warranty coverage
The device was produced car efully according
to strict quality guidelines and tested diligently prior to delivery.
The warranty applies to material or factory
defects.
__283008_Kontakgrill_B6.book Seite 14 Donnerstag, 29. Juni 2017 3:42 15
15
GB
Excluded from the warranty are
wear parts subject to normal wear
and damages to fragile parts, e.g.
switches, batteries, lamps or other
parts manufactured from glass.
This warranty expires if the pr oduct is damaged, not used as intended or not serviced.
For the proper operation of the product, all instructions listed in the operating instructions
must be observed carefully. Any form of use
and handling that is advised against in the
operating instructions or warned against
must always be avoided.
The product is only intended for pr ivate and
not for commercial use. In the case of inc o rrect and improper treatment, use of for ce and
interventions not performed by our authorised Service Centre, the warranty shall cease.
Handling in case of a warranty
claim
In order to ensure prompt pr ocessing of your
matter, please observe the following notes:
• Please keep the article number
IAN: 283008
and the purchase receipt
as a purchase verification for all inquiries.
• The article number can be found on the
rating plate, an engraving, the title
page of your instructions (in the bottom
left), or as a label on the rear or underside of the device.
• If faulty operation or other defects occur,
first contact the Service Centre listed in
the following by telephone or email.
• Then, you are able to send a product reported as defective free of charge to the
service address specified to you, including the purchase receipt and the information on the defect and when it
occurred.
Please visit www .lidl-service.com to
download this and many other
manuals, product videos and software.
Service Centre
Service Great Britain
Tel.: 0871 5000 720 (£ 0.10/Min.)
E-Mail: hoyer@lidl.co.uk
Service Ireland
Tel.: 1890 930 034
(0,08 EUR/Min., (peak))
(0,06 EUR/Min., (off peak))
E-Mail: hoyer@lidl.ie
Service Malta
Tel.: 80062230
E-Mail: hoyer@lidl.com.mt
Service Cyprus
Tel.: 8009 4409
E-Mail: hoyer@lidl.com.cy
IAN: 283008
Supplier
Please note that the following address is no
service address. First contact the afore-
mentioned Service Centre.
HOYER Handel GmbH
Tasköprüstraße 3
DE-22761 Hamburg
GERMANY
GB
IE
MT
CY
__283008_Kontakgrill_B6.book Seite 15 Donnerstag, 29. Juni 2017 3:42 15

16
DK
Indhold
1. Oversigt .......................................................................................16
2. Brug i overensstemmelse med formålet ........................................17
3. Sikkerhedsanvisninger .................................................................17
4. Leveringsomfang..........................................................................20
5. Ibrugtagning ................................................................................20
6. Betjening ......................................................................................20
6.1 Opvarmning..................................................................................... 20
6.2 Tilberedning..................................................................................... 21
6.3 Grillpladestilling ...............................................................................21
6.4 Sådan slukkes............................................................... ....... ....... ...... 22
7. Rengøring.....................................................................................22
8. Opbevaring..................................................................................23
9. Bortskaffelse ................................................................................23
10.Problemløsning.............................................................................23
11.Tekniske data...............................................................................24
12.Opskrifter.....................................................................................24
13.HOYER Handel GmbHs garanti .....................................................28
1. Oversigt
1 Greb
2 Overdel
3 Grillplader
4 Tilslutningsledning med netstik
5 Kabelopbevaring på fod
6 Olie-/fedtafløb på nederste grillplade
7 Greb
8 Fastgørelsesklemmer på grillplade
9 Olie-/fedtafløb på øverste grillplade
10 Fod (klapbar)
11 Termostatregulator på øverste grillplade
12 Kontrollampe på øverste grillplade
13 Termostatregulator på nederste grillplade
14 Kontrollampe på nederste grillplade
15 Netkontrollampe
16 Fedtopsamlingsskål
Fig. A: placering af fedtopsamlingsskål / Fig. B: kontaktgrill / Fig. C: barbecue /
Fig. D: grillovn / Fig. E: kabelopbevaring
__283008_Kontakgrill_B6.book Seite 16 Donnerstag, 29. Juni 2017 3:42 15
17
DK
Mange tak for din tillid!
Vi gratulerer dig til din nye kontaktgrill.
For at opnå en sikker omgang med appara-
tet og for at lære ydelsesomfanget at kende:
• Læs denne betjeningsvejledning
grundigt igennem, før apparatet
tages i brug første gang.
• Følg frem for alt sikkerhedsanvisningerne!
• Apparatet må kun betjenes, som
beskrevet i denne betjeningsvejledning.
• Opbevar denne betjeningsvejledning.
• Hvis apparatet gives videre til
anden bruger, bedes denne betjeningsvejledning vedlægges.
Vi ønsker dig god fornøjelse med din nye
kontaktgrill!
Symboler på apparatet
Varme overflader
For at undgå forbrændinger, må apparatets
metaloverflader ikke berøres når apparatet
er tændt. Brug kun de dertil beregnede
håndtag og betjeningselementer.
Dette symbol angiver, at således
mærkede materialer ikke ændr er fødevarers smag eller lugt.
2. Brug i overensstemmelse med formålet
Denne kontaktgrill er beregnet til grilning,
ristning og gratinering af fødevarer (f.eks.
kød, fisk, grøntsager, etc.) indendørs.
Apparatet er konstrueret til den private husholdning. Apparatet må kun benyttes indendørs.
Dette apparat må ikke anvendes til erhvervsmæssige formål.
Forudseeligt misbrug
ADVARSEL mod materielle skader!
~ Apparatet er ikke beregnet til udendørs
brug.
3. Sikkerhedsanvisninger
Advarselshenvisninger
Hvor det er påkrævet, anvendes følgende
advarselshenvisninger i denne betjeningsvejledning:
FARE! Høj risiko: manglende overholdelse af advarslen kan forårsage
skader på liv og lemmer.
ADVARSEL! Middel risiko: manglende
overholdelse af advarslen kan forårsage
kvæstelser eller alvorlige materielle skader.
FORSIGTIG: Lav risiko: manglende overholdelse af advarslen kan forårsage kvæstelser eller alvorlige materielle skader.
ANVISNING: forhold og særlige de taljer,
som skal overholdes ved brug af apparatet.
__283008_Kontakgrill_B6.book Seite 17 Donnerstag, 29. Juni 2017 3:42 15
18
DK
Anvisninger om sikker brug
~ Dette apparat kan benyttes af børn fra 8 år og af personer med
indskrænkede fysiske, sensoriske eller psykiske evner eller manglende erfaring og/eller manglende viden, hvis disse er under opsyn eller er blevet undervist i en sikker brug af apparatet og har
forstået de deraf resulterende farer.
~ Børn må ikke lege med apparatet.
~ Rengøring og brugervedligeholdelse må ikke udføres af børn un-
der 8 år, undtagen, hvis de er under opsyn.
~ Børn under 8 år skal holdes væk fra apparatet og tilslutningsled-
ningen.
~
Apparatets udvendige flader bliver meget varme under
brugen. Rør kun betjeningselementerne på apparatet, når
det er i brug.
~ Dette apparat er ikke beregnet til at blive brugt sammen med en
ekstern timer eller en separat fjernbetjening.
~ Hvis dette apparats tilslutningsledning bliver beskadiget, skal
den udskiftes af producenten eller hans kundeservice eller en lignende kvalificeret person for at undgå far er.
~ Trækul og lignende brændstoffer må ikke bruges i dette apparat.
~ Varmespiralerne må ikke tørres fugtigt af.
~
Rengør alle dele og flader, der kommer i forbindelse med fødevarer, inden apparatet tages i brug første gang
(se “Rengøring” på
side 22).
FARE for børn
~ Emballage er ikke legetøj. Børn må ikke
lege med plastikposerne. Der er fare for
at blive kvalt.
~ Sørg for, at børn ikke kan trække appa-
ratet ned fra arbejdsfladen i tilslutningsledningen.
~ Opbevar apparatet utilgængeligt for
børn.
FARE for og på grund af
kæle- og husdyr
~ Elektriske apparater kan udgøre en fare
for kæle- og husdyr. Desuden kan dyr
også forårsage skader på apparatet.
Hold derfor principielt dyr væk fra elektriske apparater.
FARE for elektrisk stød
pga. fugtighed
~ Apparatet, tilslutningsledningen og net-
stikket må ikke dyppes i vand eller andre væsker.
__283008_Kontakgrill_B6.book Seite 18 Donnerstag, 29. Juni 2017 3:42 15
19
DK
~ Beskyt apparatet mod fugt, dråber eller
stænkvand.
~ Hvis væske skulle være trængt ind i ap-
paratet, skal netstikket omgående trækkes ud. Få appar atet kontroller et, før det
tages i brug igen.
~ Brug ikke apparatet med våde hænder.
~ Skulle apparatet være faldet i vandet,
skal netstikket straks trækkes ud. Tag
først derefter apparatet op.
FARE for elektrisk stød
~ Stik først netstikket i en stikkontakt, når
apparatet er komplet samlet.
~ Sæt kun netstikket i en k orrekt installeret,
let tilgængelig beskyttelsesstikkontakt,
hvis spænding svarer til dataene på typeskiltet. Stikkontakten skal også være
let tilgængelig efter tilslutningen.
~
Vær opmærksom på, at tilslutningsledningen ikke kan blive beskadiget af skarpe
kanter eller varme steder . V ikl ikk e tilslutningsledningen omkring apparatet.
~
Apparatet er stadig ikke helt afbrudt fra
nettet, efter at det er blevet slukket. For at
gøre dette, skal du trække netstikk et ud.
~ Vær ved brugen af apparatet opmærk-
som på, at tilslutningsledningen ikke
kommer i klemme.
~ Træk altid i stikket, aldrig i ledningen,
når du trækker netstikket ud af stikkontakten.
~ Træk netstikket ud af stikkontakten, …
… hvis der opstår en fejl,
… hvis du ikke bruger apparatet,
… før du rengør apparatet og
… ved tordenvejr.
~ For at undgå risici, må du ikk e for e tage
nogen ændringer på apparatet.
~ Undlad at bruge apparatet, hvis der er
synlige skader på apparatet eller tilslutningsledningen.
FARE for brand
~ Apparatet må ikke bruges i nærheden
af brændbare væsker og materialer eller i eksplosionsfarlige omgivelser.
Overhold en afstand på mindst 30 cm
til vægge. For at undgå en overophedning af apparatet eller en mulig brand,
må apparatet ikke tildækkes. Grillpladerne må under ingen omstændigheder
tildækkes med aluminiumsfolie, aluminiumsbakker eller andre varmebestandige
materialer.
~ Tilslutningsledningen må ikke berøre
metaloverfladerne under brugen.
FARE for forbrændings-
skade
~ Metaloverfladerne bliver meget varme
under brugen. Berør kun apparatet på
håndtagene og betjeningselementerne
under brugen.
~ Apparatet er også meget varmt efter at
det er slukket og må ikke berøres.
~ Transportér kun apparatet i afkølet til-
stand og brug de dertil beregnede
håndtag.
FARE for fugle
~ Fugle trækker vejret hurtigere, for deler
luften anderledes i deres kroppe og er
meget mindre end mennesker. Derfor
kan det for fugle være meget farligt at
indånde selv meget små mængder røg,
som opstår ved brug af dette apparat.
Når du bruger dette apparat, bør fugle
bringes ind i et andet rum.
ADVARSEL mod materielle
skader
~
Sørg for, at apparatet er slukket, inden du
tilslutter det til stikkontakten (drej begge termostatregulatorer til anslag på “•“).
~ Anvend kun det originale tilbehør.
__283008_Kontakgrill_B6.book Seite 19 Donnerstag, 29. Juni 2017 3:42 15
20
DK
~ Brug ikke køkkenredskaber af metal for
at tage grillmaden af grillpladen. Brug
f.eks. træspatel.
~ Anvend ikke skrappe eller skurende ren-
gøringsmidler.
~ Apparatet er forsynet med skridsikre
plastikfødder. Da møbler bliver overfladebehandlet med mange forskellige lakker og kunststoffer og behandlet med
forskellige plejemidler, kan det ikke helt
udelukkes, at mange af disse stoffer indeholder ingredienser, der kan angribe
og opbløde plastikfødderne. Læg i givet
fald et skridsikkert underlag under apparatet.
4. Leveringsomfang
1 Kontaktgrill med to grillplader
2 Fedtopsamlingsskåle
1 Betjeningsvejledning
5. Ibrugtagning
BRANDFARE!
~ Stil apparatet på et tørt, plant, skridsik-
kert og varmebestandigt underlag.
~ Apparatet må ikke bruges i nærheden
af brændbare væsker og materialer eller i eksplosionsfarlige omgivelser.
Overhold en afstand på mindst 30 cm
til vægge.
ANVISNING: ved den første brug kan apparatet ryge og lugte lidt. Det skyldes monteringsmidler på varmeelementerne og er
ingen produktfejl. Sørg for tilstrækkelig udluftning.
• Fjern emballagen fuldstændigt.
• Kontrollér, om alle dele er til stede og
ubeskadigede.
• Rengør apparatet inden første
brug! (se “Rengøring” på side 22)
1. Klap kontaktgrillens overdel|2 op. Løft
kun overdelen, til den står lodret.
2. Kontrollér inden du tilslutter apparatet,
at begge termostatregulatorer|11 +|13
står på “•“ markeringen.
3. Sæt netstikket|4 i en stikkontakt, som
stemmer overens med typeskiltets angivelser. Netkontrollampen|15 lyser, så
længe apparatet er forbundet med nettet.
4. Drej termostatregulatorerne|11 +|13 på
temperaturtrin 5. Nu opvarmer apparatet grillpladerne|3 og kontrollamper|12
og|14 lyser.
5. Sluk apparatet efter 15 minutter, ved at
dreje begge termostatregulatorer|11
+|13 på “•“ markeringen.
6. Træk netstikket|4 ud.
7. Rengør apparatet på ny. (se “Rengøring” på side 22)
6. Betjening
FARE for forbrændingsskade!
~ Metaloverfladerne bliver meget varme
under brugen. Berør kun apparatet på
håndtagene og betjeningselementerne
under brugen.
6.1 Opvarmning
1. Klap kontaktgrillens overdel|2 op. Løft
kun overdelen, til den står lodret.
2. Indfedt om nødvendigt grillpladerne|3
med lidt vegetabilisk olie eller plantefedt (f.eks. kokos- eller palmefedt).
3. Fig. A: Stil en fedtopsamlingsskål|16
under olie-/fedtafløbet på den nederste
grillplade|6.
4. Klap overdelen|2 ned for at lukke kontaktgrillen.
__283008_Kontakgrill_B6.book Seite 20 Donnerstag, 29. Juni 2017 3:42 15
21
DK
5. Kontrollér inden du tilslutter apparatet,
at begge termostatregulatorer|11 +|13
står på “•“ markeringen.
6. Sæt netstikket|4 i en stikkontakt, som
stemmer overens med typeskiltets angivelser.
7. Drej termostatregulatorerne|11 +|13
på det ønskede temperaturtrin 1, 2, 3,
4 eller 5.
- Trin 1: optøning
- Trin 2: opvarmning
- Trin 3 og 4: mellemste grilltrin
- Trin 5: højeste grilltrin
Nu opvarmer apparatet grillpladerne|3
og kontrolla mper|
12
og|14 lyser.
8. Kontrollam pe|
12
og|14 slukker, når den
tilsvarende grillplade|
3
har nået det valg-
te temperaturtrin.
6.2 Tilberedning
Temperaturtrin
På overdelen|2 findes der en oversigt med
de anbefalede temperaturtrin til forskellige
fødevarer. I den følgende tabel finder du fødevaresymbolernes betydninger (med de tilsvarende temperaturtrin).
Tilberedningstid
Tilberedningstiden retter sig efter mængden,
fødevarernes tykkelse og art og efter den ønskede tilberedningsgrad.
6.3 Grillpladestilling
Alt efter tilberedningsønske kan du positionere grillpladerne|3 på 3 forskellige måder.
Kontaktgrill (Fig. B)
ANVISNING: vær opmærksom på, at
eventuelt tilstedeværende olie eller fedt fra
overdelen|2 kan dryppe ned på arbejdsfladen, når overdelen åbnes.
Denne grillplade-kontaktstilling tillader en
dobbeltsidet, hurtigere grilning af kødstykker ,
f.eks. oksefiletbøffer , højrebsbøffer , koteletter ,
pølser eller grønsager.
1. Forvarm grillpladerne|3 (se “Opvarmning” på side 20).
2. Klap kontaktgrillens overdel|2 op. Løft
kun overdelen, til den står lodret.
3. Læg grillmaden på den nederste grillplade|3.
4. Luk overdelen|2 og tryk den let ned på
grillmaden, så begge grillplader|3 får
kontakt.
Sym-
bol
Betydning
Temperatur-
trin
Optøning 1
Opvarmning 2
Grønsager 3
Rejer 3
Fisk 4
Hamburger,
sandwich
5
Kød
(f.eks. bøffer, ribben)
5
Pølser 5
Fjerkræ
(f.eks. kylling,
kalkun)
5
Sym-
bol
Betydning
Temperatur-
trin
__283008_Kontakgrill_B6.book Seite 21 Donnerstag, 29. Juni 2017 3:42 15
22
DK
Barbecue (Fig. C)
Grillpladernes åbne stilling er egnet ...
… til en langsom grilning af tykkere
stykker,
… for at tilberede grillmad med forskelli-
ge temperaturtrin samtidigt og
… for at tilberede større mængder.
1. Klap foden|10 ud.
2. Klap overdelen|2 op, løft den og åbn
den igen, til den er vandret.
3. Forvarm (se “Opvarmning” på side 20)
grillpladerne|3, dog kun i åben tilstand.
4. Stil nu til barbecue-stillingen også den
anden fedtopsamlingsskål|16 under
den øverste grillplades|3 olie-/fedtafløb|9
.
5. Læg grillmaden på begge grillplader|3.
Grillovn (Fig. D)
Ovnfunktionen egner sig specielt godt til
gratinering af grillmad.
1. Forvarm grillpladerne|3 (se “Opvarmning” på side 20).
2. Klap kontaktgrillens overdel|2 op. Løft
kun overdelen, til den står lodret.
3. Læg grillmaden på den nederste grillplade|3.
4. Løft overdelen|2 op og træk den ned
fremad, til den er parallelt med den nederste grillplade|3.
6.4 Sådan slukkes
1. Stil begge termostatregulatorer|11
+|13 på trin “•“.
2. Træk netstikket|4 ud.
3. Tag grillmaden af grillpladen|3 med et
egnet køkkenredskab. Brug f.eks. en
spatel af træ eller varmebestandigt plastik, men under ingen omstændigheder
af metal.
7. Rengøring
Rengør apparatet inden første brug!
FARE for elektrisk stød!
~ Træk netstikket|4 ud af stikkontakten, in-
den du rengør kontaktgrillen.
~ Apparatet, tilslutningsledningen og net-
stikket|4 må ikke dyppes i vand eller andre væsker.
FARE for forbrændingsskader!
~ Lad alle dele køle af inden de rengøres.
ADVARSEL mod materielle skader!
~ Anvend ikke skrappe eller skurende ren-
gøringsmidler.
Rengør apparatet efter enhver brug og fjern
derved alle madrester.
Yderflader
• Rengør yderfladerne med en blød, fugtig klud og mildt sæbevand.
Fedtopsamlingsskåle
Fedtopsamlingsskålene|16 kan du rengøre i
opvaskemaskinen eller med hånden.
Grillplader
Fjern grillpladerne|3 til rengøring fra det afkølede apparat.
1. Tryk fastgørelsesklemmerne|8 til side og
tag grillpladerne|3 ud af holderne.
2. Grillpladerne|3 kan du rengøre i opvaskemaskinen eller med hånden. T ør dem
godt af inden du sætter dem i.
3. Sæt grillpladerne|3 tilbage i apparatet
og tryk dem mod fastgørelsesklemmerne|8 til de går i indgreb.
__283008_Kontakgrill_B6.book Seite 22 Donnerstag, 29. Juni 2017 3:42 15
 Loading...