

Page 1
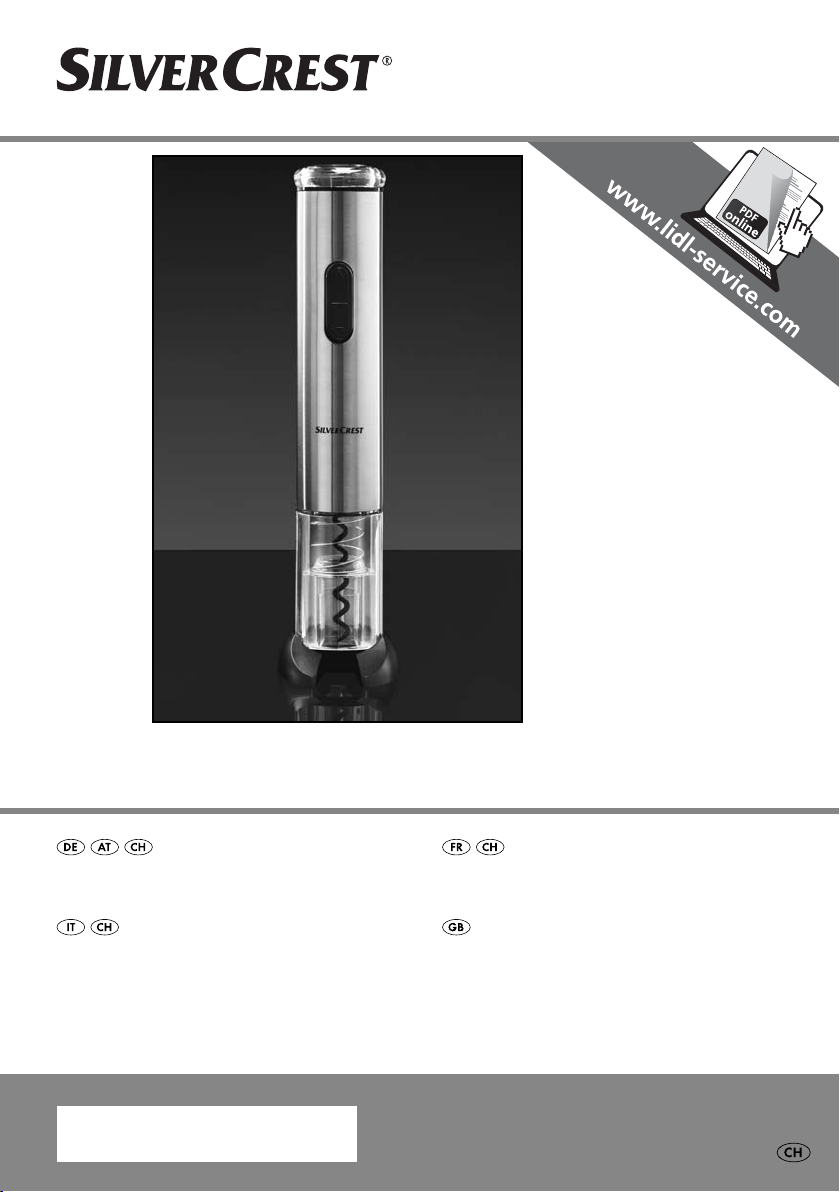
ELEKTRISCHER KORKENZIEHER SKE 6 A1
ELEKTRISCHER KORKENZIEHER
Bedienungsanleitung
CAVATAPPI ELETTRICO
Istruzioni per l'uso
IAN 100655
TIRE-BOUCHON ÉLECTRIQUE
Mode d'emploi
ELECTRIC CORKSCREW
Operating instructions
Page 2
Klappen Sie vor dem Lesen die Seite mit den Abbildungen aus und machen Sie sich anschließend mit allen
Funktionen des Gerätes vertraut.
Avant de lire le mode d'emploi, ouvrez la page contenant les illustrations et familiarisez-vous ensuite avec
toutes les fonctions de l'appareil.
Prima di leggere aprire la pagina con le immagini e prendere confi denza con le diverse funzioni
dell'apparecchio.
Before reading, unfold the page containing the illustrations and familiarise yourself with all functions of
the device.
DE / AT / CH Bedienungsanleitung Seite 1
FR / CH Mode d'emploi Page 7
IT / CH Istruzioni per l'uso Pagina 13
GB Operating instructions Page 19
Page 3
Page 4

Inhaltsverzeichnis
Einleitung . . . . . . . . . . . . . . . . . . . . . . . . . . . . . . . . . . . . . . . . . . . . . . . . . . . . . . . . . . . . .2
Bestimmungsgemäßer Gebrauch . . . . . . . . . . . . . . . . . . . . . . . . . . . . . . . . . . . . . . . . . .2
Lieferumfang . . . . . . . . . . . . . . . . . . . . . . . . . . . . . . . . . . . . . . . . . . . . . . . . . . . . . . . . . .2
Gerätebeschreibung . . . . . . . . . . . . . . . . . . . . . . . . . . . . . . . . . . . . . . . . . . . . . . . . . . . .2
Technische Daten . . . . . . . . . . . . . . . . . . . . . . . . . . . . . . . . . . . . . . . . . . . . . . . . . . . . . . .2
Sicherheitshinweise . . . . . . . . . . . . . . . . . . . . . . . . . . . . . . . . . . . . . . . . . . . . . . . . . . . . .3
Batterien einlegen / wechseln . . . . . . . . . . . . . . . . . . . . . . . . . . . . . . . . . . . . . . . . . . . . .4
Bedienung . . . . . . . . . . . . . . . . . . . . . . . . . . . . . . . . . . . . . . . . . . . . . . . . . . . . . . . . . . . .4
Reinigung und Pfl ege . . . . . . . . . . . . . . . . . . . . . . . . . . . . . . . . . . . . . . . . . . . . . . . . . . .5
Aufbewahrung . . . . . . . . . . . . . . . . . . . . . . . . . . . . . . . . . . . . . . . . . . . . . . . . . . . . . . . .5
Fehler beheben . . . . . . . . . . . . . . . . . . . . . . . . . . . . . . . . . . . . . . . . . . . . . . . . . . . . . . . .5
Garantie und Service . . . . . . . . . . . . . . . . . . . . . . . . . . . . . . . . . . . . . . . . . . . . . . . . . . .6
Entsorgung . . . . . . . . . . . . . . . . . . . . . . . . . . . . . . . . . . . . . . . . . . . . . . . . . . . . . . . . . . . .6
Importeur . . . . . . . . . . . . . . . . . . . . . . . . . . . . . . . . . . . . . . . . . . . . . . . . . . . . . . . . . . . . .6
DE
AT
CH
SKE 6 A1
1
Page 5
Einleitung
DE
AT
Herzlichen Glückwunsch zum Kauf Ihres neuen
Gerätes.
CH
Sie haben sich damit für ein hochwertiges Produkt
entschieden. Die Bedienungsanleitung ist Bestandteil dieses Produkts. Sie enthält wichtige Hinweise
für Sicherheit, Gebrauch und Entsorgung. Machen
Sie sich vor der Benutzung des Produkts mit allen
Bedien- und Sicherheitshinweisen vertraut. Benutzen Sie das Produkt nur wie beschrieben und für
die angegebenen Einsatzbereiche. Händigen Sie
alle Unterlagen bei Weitergabe des Produkts an
Dritte mit aus.
Bestimmungsgemäßer
Gebrauch
Der Korkenzieher ist ausschließlich zum Entkorken
handelsüblicher Weinfl aschen (Natur- oder Plastikkorken) bestimmt.
Er ist nicht zum Entkorken von Sektkorken bestimmt.
Der Korkenzieher ist nicht zum Entfernen/Öff nen
anderer Flaschenverschlussarten wie z.B. Kronkorken
oder Schraubverschlüssen geeignet.
Er ist ausschließlich für die Nutzung in privaten
Haushalten bestimmt. Nutzen Sie ihn nicht gewerblich.
Eine andere oder darüber hinausgehende Benutzung gilt als nicht bestimmungsgemäß.
Lieferumfang
▯ Elektrischer Korkenzieher
▯ 4 x AA-Batterie, 1,5 V LR6
▯ Kapselschneider (gleichzeitig Standfuß)
▯ Bedienungsanleitung
HINWEIS
► Überprüfen Sie direkt nach dem Auspacken
alles auf V
► Entfernen Sie alles Verpackungsmaterial.
ollständigkeit.
Gerätebeschreibung
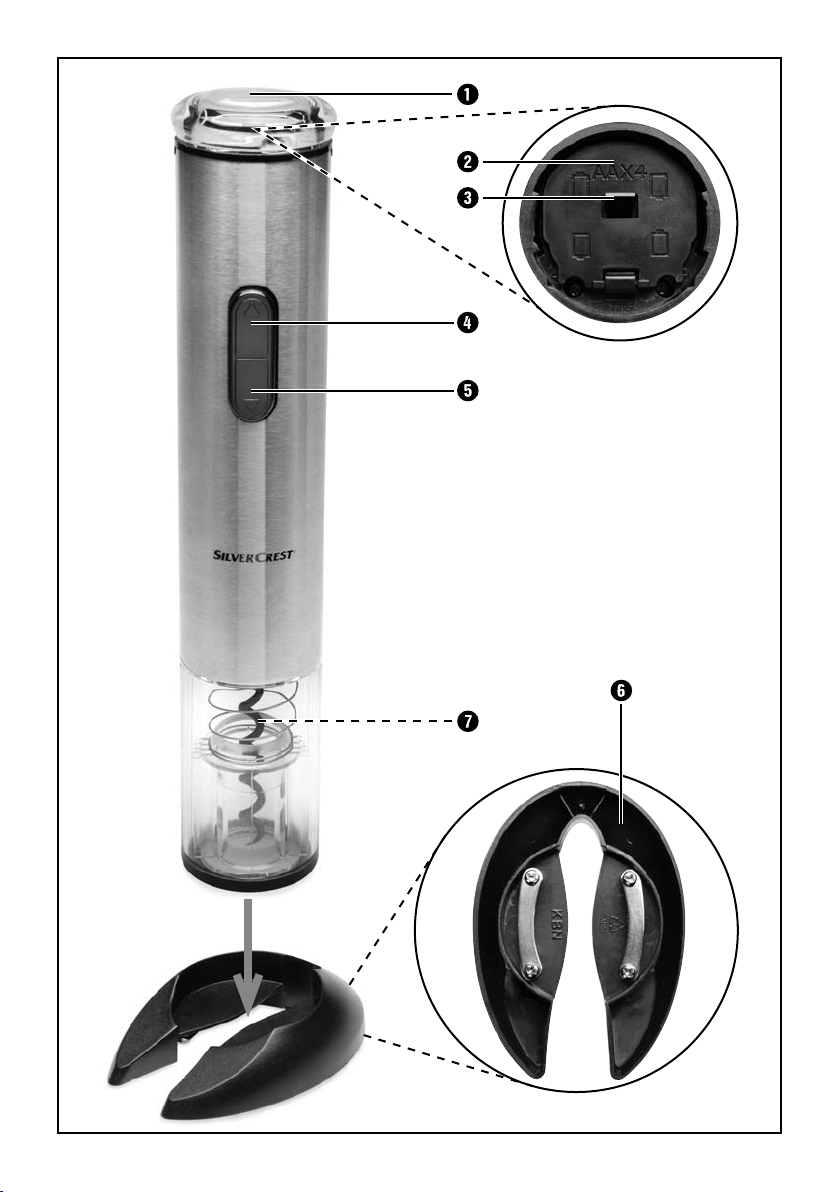
1 Zierkappe
2 Batteriefach
3 Verriegelung
4 Taste
5 Taste
6 Kapselschneider
7 Spirale
Technische Daten
Spannungsversorgung: 4 x 1,5 V
Stromaufnahme: 2,5 A
Batterietyp: 1,5 V, Mignon, AA, LR6
2
SKE 6 A1
Page 6
Sicherheitshinweise
WARNUNG! VERLETZUNGSGEFAHR!
► Dieses Gerät kann von Kindern ab 8 Jahren und darüber sowie von Perso-
nen mit verringerten physischen, sensorischen oder mentalen Fähigkeiten
oder Mangel an Erfahrung und Wissen benutzt werden, wenn sie beaufsichtigt oder bezüglich des sicheren Gebrauchs des Gerätes unterwiesen
wurden und die daraus resultierenden Gefahren verstehen.
► Kinder dürfen nicht mit dem Gerät spielen.
► Reinigung und Benutzer-Wartung dürfen nicht von Kindern ohne Beaufsich-
tigung durchgeführt werden.
► Seien Sie vorsichtig im Umgang mit der Spitze des Korkenziehers und dem
Kapselschneider.
WARNUNG!
Sicherheitshinweise für den Umgang mit Batterien:
► Werfen Sie keine Batterien ins Feuer. Laden Sie Batterien nicht wieder auf.
Es besteht Explosions- und Verletzungsgefahr!
► Öff nen Sie die Batterien niemals, löten oder schweißen Sie nie an Batterien.
Es besteht Explosions- und Verletzungsgefahr!
DE
AT
CH
► Überprüfen Sie regelmäßig die Batterien. Auslaufende Batterien können
Beschädigungen am Gerät verursachen.
► Wenn Sie ein Gerät längere Zeit nicht benutzen, entnehmen Sie die Batterien.
► Bei ausgelaufenen Batterien ziehen Sie Schutzhandschuhe an. Reinigen Sie
das Batteriefach und die Batteriekontakte mit einem trockenen Tuch.
► Batterien dürfen nicht in die Hände von Kindern gelangen. Kinder könnten Bat-
terien in den Mund nehmen und verschlucken. Sollte eine Batterie verschluckt
worden sein, muss sofort medizinische Hilfe in Anspruch genommen werden.
ACHTUNG! SACHSCHADEN!
Sie dürfen das Gerät keinesfalls in Wasser oder andere Flüssigkeiten
tauchen.
SKE 6 A1
3
Page 7
Batterien einlegen / wechseln
DE
AT
ACHTUNG! SACHSCHADEN!
CH
► Beachten Sie beim Einlegen der Batterien
immer die auf dem Batter
angegebene Polarität!
► Benutzen Sie immer Batterien des Typs
Mignon AA
► Benutzen Sie immer Batterien des gleichen Typs.
1)
Entfernen Sie die Zierkappe 1, indem Sie diese
so drehen, dass der Pfeil auf der Zierkappe 1
auf die Beschriftung „Open“ am Korkenzieher
weist. Heben Sie dann die Zierkappe 1 ab.
2) Öff nen Sie das Batteriefach 2, indem Sie
die Verriegelung 3 zu sich ziehen und das
Batteriefach 2 entriegeln.
3) Entnehmen Sie, falls bereits eingelegt, die alten
Batterien.
4) Legen Sie die neuen Batterien gemäß der auf
dem Batteriefachdeckel angegebenen Polarität
ein.
5) Schließen Sie das Batteriefach 2, so dass die
Verriegelung 3 einrastet.
6) Setzen Sie die Zierkappe 1 so auf das Gerät,
dass der Pfeil auf der Zierkappe 1 auf die
Beschriftung „Open“ weist. Drehen Sie dann
die Zierkappe 1, so dass der Pfeil auf die
Beschriftung „Close“ weist. Die Zierkappe 1
sitzt nun wieder fest am Gerät.
, LR6.
iefachdeckel
Bedienung
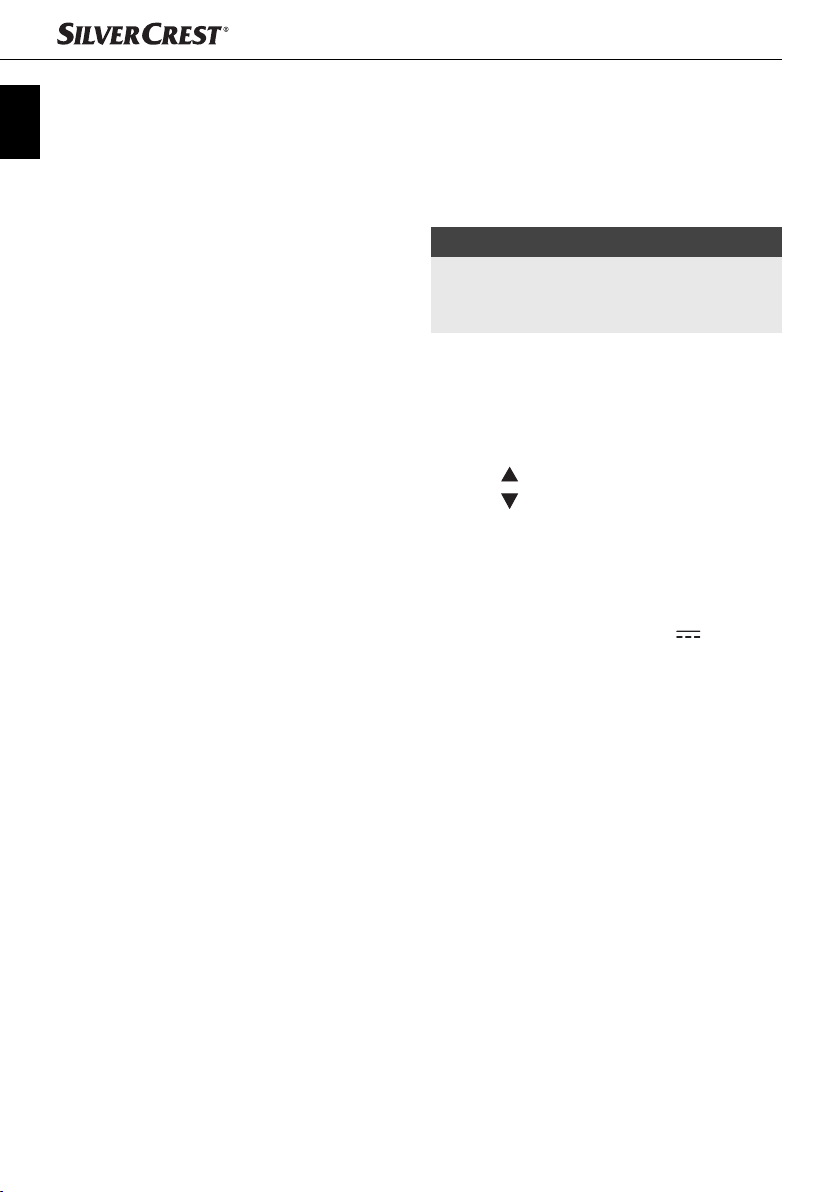
HINWEIS
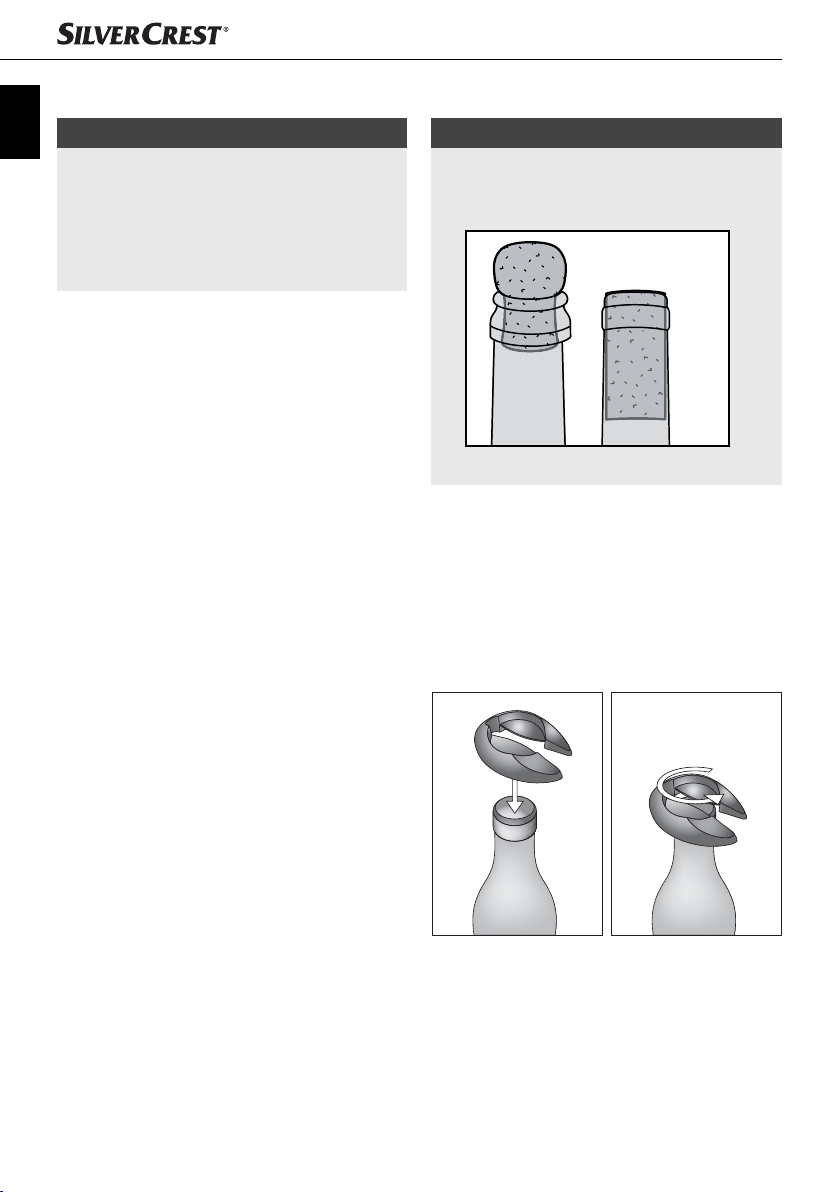
► Entfernen Sie keine Sektkorken mit Hilfe
orkenziehers! Diese können im Gerät
des K
verhaken.
✓
✕
Abbildung 1
1) Um die Folienmanschette über dem Flaschenkorken aufzu
Kapselschneider
Setzen Sie den Kapselschneider 6 wie in
Abbildung 2
Weinfl asche auf.
2) Drücken Sie ihn fest mit Daumen und Zeigefi nger
zusammen. Umgreifen Sie die Weinfl asche fest
mit einer Hand, damit sie nicht umfallen kann.
schneiden, benutzen Sie den
6
:
gezeigt auf die verschlossene
Abbildung 2
3) Drehen Sie die Weinfl asche um 360 Grad.
Eventuell müssen Sie dies mehrmals wiederholen, bis Sie die Kapsel der Folienmanschette
abnehmen können.
4
SKE 6 A1
Page 8
4) Nehmen Sie die abgeschnittene Folienmanschette ab.
5) Umgreifen Sie die Weinfl asche fest mit einer
Hand, damit diese nicht umfallen kann. Setzen
Sie den Korkenzieher auf die Weinfl asche auf.
Drücken Sie ihn fest auf, bis die Spirale 7
spürbar in den Korken eindringt.
6) Halten Sie dann die untere Taste
gedrückt. Die Spirale 7 wird in den Korken
hineingedreht und zieht ihn anschließend aus
dem Flaschenhals. Halten Sie Weinfl asche und
Korkenzieher dabei weiter fest umgriff en.
7) Lassen Sie die untere Taste
der Korken vollständig aus dem Flaschenhals
herausgezogen ist.
8) Nehmen Sie den Korkenzieher von der Flasche
herunter und halten Sie ihn mit der Öff nung nach
unten. Drücken Sie dann auf die Taste
Der Korken wird nun aus dem Inneren des
Korkenziehers herausgedreht.
9) Lassen Sie die Taste
Korken aus dem Korkenzieher herausfällt.
HINWEIS
► Den Kapselschneider 6 k
Standfuß für den Korkenzieher verwenden:
Stecken Sie den Korkenzieher einfach in die
Aussparung auf der Oberseite des Kapselschneiders 6. So hat der Korkenzieher einen
sichereren Stand.
4 los, sobald der
önnen Sie als
5
5 erst los, wenn
4.
Reinigung und Pfl ege
ACHTUNG! SACHSCHADEN!
Tauchen Sie das Gerät niemals in Wasser
oder andere Flüssigkeiten!
► Verwenden Sie keine scheuernden oder
aggr
essiven Reinigungsmittel. Diese können
die Oberfl ächen beschädigen!
■ Reinigen Sie die Gehäuse des Korkenziehers
so
wie den Kapselschneider 6 ausschließlich
mit einem leicht feuchten Tuch. Geben Sie bei
hartnäckigen Verschmutzungen einige Tropfen
eines milden Spülmittels auf das feuchte Tuch.
Achten Sie darauf, dass bei der Reinigung keine
Feuchtigkeit in den Korkenzieher gelangt!
Aufbewahrung
■ Reinigen Sie das Gerät vor dem Verstauen
gründlich.
■ Wenn Sie das Gerät längere Zeit nicht benutzen,
entfernen Sie die Batter
■ Bewahren Sie das gereinigte Gerät an einem
en, staubfreien und trockenen Ort auf.
sauber
ien.
Fehler beheben
Das Gerät funktioniert nicht.
■ Die Batterien sind leer/schwach.
– Wechseln Sie die Batterien wie im Kapitel
„Batterien einlegen/w
■ Das Gerät ist defekt.
– Wenden Sie sich an den Service.
echseln“ beschrieben.
DE
AT
CH
SKE 6 A1
5
Page 9
Garantie und Service
DE
AT
Sie erhalten auf dieses Gerät 3 Jahre Garantie
ab Kaufdatum. Das Gerät wurde sorgfältig
CH
produziert und vor Anlieferung gewissenhaft
geprüft. Bitte bewahren Sie den Kassenbon als
Nachweis für den Kauf auf. Bitte setzen Sie sich
im Garantiefall mit Ihrer Servicestelle telefonisch
in Verbindung. Nur so kann eine kostenlose
Einsendung Ihrer Ware gewährleistet werden.
Die Garantieleistung gilt nur für Material- oder
Fabrikationsfehler, nicht aber für Transportschäden,
Verschleißteile oder für Beschädigungen an zerbrechlichen Teilen, z. B. Schalter oder Akkus. Das Produkt
ist lediglich für den privaten und nicht für den
gewerblichen Gebrauch bestimmt.
Bei missbräuchlicher und unsachgemäßer Behandlung, Gewaltanwendung und bei Eingriff en, die
nicht von unserer autorisierten Service-Niederlassung vorgenommen wurden, erlischt die Garantie.
Ihre gesetzlichen Rechte werden durch diese Garantie nicht eingeschränkt.
Die Garantiezeit wird durch die Gewährleistung
nicht verlängert. Dies gilt auch für ersetzte und reparierte Teile. Eventuell schon beim Kauf vorhandene
Schäden und Mängel müssen sofort nach dem
Auspacken gemeldet werden, spätestens aber zwei
Tage nach Kaufdatum. Nach Ablauf der Garantiezeit anfallende Reparaturen sind kostenpfl ichtig.
Service Deutschland
Tel.: 0800 5435 111 (Kostenfrei aus dem
dt. Festnetz/Mobilfunknetz)
E-Mail: kompernass@lidl.de
IAN 100655
Service Österreich
Tel.: 0820 201 222 (0,15 EUR/Min.)
E-Mail: kompernass@lidl.at
IAN 100655
Entsorgung
Werfen Sie das Gerät kei-
nesfalls in den normalen
Hausmüll. Dieses Produkt
unterliegt der europäischen
Richtlinie 2012/19/EU.
Entsorgen Sie das Gerät über einen zugelassenen
Entsorgungsbetrieb oder über Ihre kommunale
Entsorgungseinrichtung. Beachten Sie die aktuell
geltenden Vorschriften. Setzen Sie sich im Zweifelsfall mit Ihrer Entsorgungseinrichtung in Verbindung.
Batterien/Akkus dürfen nicht
im Hausmüll entsorgt werden.
Jeder Verbraucher ist gesetzlich verpfl ichtet, Batterien/Akkus bei einer Sammelstelle seiner Gemeinde /
seines Stadtteils oder im Handel abzugeben.
Diese Verpfl ichtung dient dazu, dass Batterien/Akkus
einer umweltschonenden Entsorgung zugeführt
werden können. Geben Sie Batterien/Akkus nur im
entladenen Zustand zurück.
Die Verpackung besteht aus umweltfreundli-
chen Materialien, die Sie über die örtlichen
Recyclingstellen entsorgen können.
Importeur
KOMPERNASS HANDELS GMBH
BURGSTRASSE 21
44867 BOCHUM
GERMANY
www.kompernass.com
Service Schweiz
Tel.: 0842 665566 (0,08 CHF/Min.,
Mobilfunk max. 0,40 CHF/Min.)
E-Mail: kompernass@lidl.ch
IAN 100655
Erreichbarkeit Hotline: Montag bis Freitag von
8:00 Uhr – 20:00 Uhr (MEZ)
6
SKE 6 A1
Page 10

Table des matières
Introduction . . . . . . . . . . . . . . . . . . . . . . . . . . . . . . . . . . . . . . . . . . . . . . . . . . . . . . . . . . .8
Usage conforme . . . . . . . . . . . . . . . . . . . . . . . . . . . . . . . . . . . . . . . . . . . . . . . . . . . . . . .8
Matériel livré . . . . . . . . . . . . . . . . . . . . . . . . . . . . . . . . . . . . . . . . . . . . . . . . . . . . . . . . . .8
Description de l'appareil . . . . . . . . . . . . . . . . . . . . . . . . . . . . . . . . . . . . . . . . . . . . . . . . .8
Caractéristiques techniques . . . . . . . . . . . . . . . . . . . . . . . . . . . . . . . . . . . . . . . . . . . . . .8
Consignes de sécurité . . . . . . . . . . . . . . . . . . . . . . . . . . . . . . . . . . . . . . . . . . . . . . . . . . .9
Mise en place / remplacement des piles . . . . . . . . . . . . . . . . . . . . . . . . . . . . . . . . . . .10
Commande . . . . . . . . . . . . . . . . . . . . . . . . . . . . . . . . . . . . . . . . . . . . . . . . . . . . . . . . . . .10
Nettoyage et entretien . . . . . . . . . . . . . . . . . . . . . . . . . . . . . . . . . . . . . . . . . . . . . . . . .11
Entreposage . . . . . . . . . . . . . . . . . . . . . . . . . . . . . . . . . . . . . . . . . . . . . . . . . . . . . . . . . .11
Dépannage . . . . . . . . . . . . . . . . . . . . . . . . . . . . . . . . . . . . . . . . . . . . . . . . . . . . . . . . . .11
Garantie et service . . . . . . . . . . . . . . . . . . . . . . . . . . . . . . . . . . . . . . . . . . . . . . . . . . . .12
Mise au rebut . . . . . . . . . . . . . . . . . . . . . . . . . . . . . . . . . . . . . . . . . . . . . . . . . . . . . . . . .12
Importateur . . . . . . . . . . . . . . . . . . . . . . . . . . . . . . . . . . . . . . . . . . . . . . . . . . . . . . . . . .12
FR
CH
SKE 6 A1
7
Page 11

Introduction
Toutes nos félicitations pour l'achat de votre nouvel
appareil.
Ainsi, vous venez d'opter pour un produit de grande
FR
qualité. Le mode d'emploi fait partie de ce produit.
CH
Il contient des remarques importantes concernant
la sécurité, l'usage et la mise au rebut. Avant l'usage
du produit, veuillez vous familiariser avec toutes les
consignes d'utilisation et de sécurité. N'utilisez le
produit que conformément aux consignes et pour
les domaines d'utilisation prévus. Si vous cédez le
produit à un tiers, remettez-lui également tous les
documents.
Usage conforme
Ce tire-bouchon est exclusivement conçu pour
déboucher des bouteilles de vin du commerce
(bouchons en liège ou bouchons en plastique).
Il n'est pas conçu pour le débouchage de bouchons de champagne.
Le tire-bouchon n'est pas approprié pour enlever /
ouvrir d'autres types de fermetures de bouteilles,
comme par ex. des capsules ou des bouchons à vis.
Il est exclusivement réservé à un usage domestique.
Ne l'utilisez pas dans un contexte professionnel.
Tout usage autre ou dépassant ce cadre est réputé
non conforme.
Matériel livré
▯ Tire-bouchon électrique
▯ 4 piles AA, 1,5 V LR6
▯ Coupe-capsule
ant également servir de support)
(pouv
▯ Mode d'emploi
REMARQUE
► Vérifi ez directement après le déballage que
tout est bien complet.
► Retirez tous les éléments d'emballage.
Description de l'appareil
1 Capuchon décoratif
2 Compartiment à piles
3 Verrouillage
4 Touche
5 Touche
6 Coupe-capsule
7 Spirale
Caractéristiques techniques
Alimentation en tension: 4 x 1,5 V
Consommation
électrique : 2,5 A
Type de piles: 1,5 V, mignon, AA, LR6
8
SKE 6 A1
Page 12

Consignes de sécurité
AVERTISSEMENT ! RISQUE DE BLESSURE!
► Cet appareil ne doit pas être utilisé par des enfants de moins de 8 ans ni
par des personnes ayant des capacités physiques, mentales ou sensorielles
réduites ou qui n'ont pas l'expérience et les connaissances nécessaires,
à moins qu'elles ne soient sous la surveillance d'une personne responsable
de leur sécurité ou qu'elles n'aient reçu de cette personne des directives
concernant l'utilisation de l'appareil et qu'elles comprennent les dangers
pouvant en résulter.
► Ne pas laisser les enfants jouer avec l'appareil.
► Il est interdit aux enfants de nettoyer ou d'entretenir l'appareil sans surveillance.
► Faites attention au moment de manipuler la pointe du tire-bouchon et le
coupe-capsule.
AVERTISSEMENT!
Consignes de sécurité relatives à la manipulation des piles:
► Ne pas jeter de piles dans le feu. Ne pas recharger les piles.
Risque d'explosion et de blessures!
► N'ouvrez jamais les piles et n'essayez jamais de les braser ni de les souder.
Risque d'explosion et de blessures!
FR
CH
► Vérifi ez régulièrement les piles. Des piles qui coulent peuvent causer des
dommages à l'appareil.
► Si vous n'utilisez pas l'appareil pendant une période prolongée, retirez les piles.
► Si les piles présentent des fuites, mettez des gants de protection. Nettoyez
le compartiment à piles et les contacts des piles à l'aide d'un chiff on sec.
► Conservez les piles hors de portée des enfants. Les enfants pourraient
mettre les piles dans leur bouche et les avaler. En cas d'ingestion d'une pile,
consulter immédiatement un médecin.
ATTENTION! RISQUE DE DÉGÂTS MATÉRIELS!
Ne plongez en aucun cas l'appareil dans l'eau ou d'autres liquides.
SKE 6 A1
9
Page 13

Mise en place /
remplacement des piles
ATTENTION!
RISQUE DE DÉGÂTS MATÉRIELS!
FR
CH
► Lors de la mise en place des piles, veillez
s à respecter la polarité indiquée dans
toujour
le compartiment à piles !
► Utilisez toujours des piles de type Mignon
AA
, LR6.
► Utilisez toujours des piles du même type.
1)
Retirez le capuchon décoratif 1 en le tournant
de telle manière que la fl èche sur le capuchon
décoratif 1 indique l'inscription "Open" sur
le tire-bouchon. Retirez ensuite le capuchon
décoratif 1.
2) Ouvrez le compartiment à piles 2 en tirant le
verrouillage 3 vers vous et en déverrouillant
le compartiment à piles 2.
3) Retirez les piles usagées, si déjà en place.
4) Placez les nouvelles piles conformément à la
polarité fi gurant sur le couvercle du compartiment à piles.
5) Fermez le compartiment à piles 2 afi n que le
verrouillage 3 s'enclenche.
6) Insérez le capuchon décoratif 1 de telle manière sur l'appareil que la fl èche sur le capuchon
décoratif 1 indique l'inscription "Open".
Tournez ensuite le capuchon décoratif 1 de
telle manière que la fl èche indique l'inscription "Close". Le capuchon décoratif 1 est à
présent à nouveau fermement enclenché sur
l'appareil.
Commande
REMARQUE
► Ne retirez pas de bouchons de champagne
à l'aide du tir
rester coincés dans l'appareil.
e-bouchon ! Ils peuvent en eff et
✓
✕
Figure 1
1) Pour couper le manchon à feuille au-dessus du
bouchon
Posez le coupe-capsule 6 comme indiqué sur la
Figure 2
2) Appuyez fermement avec le pouce et l'index.
Serrez fermement la bouteille de vin avec une
main pour éviter qu'elle ne se renverse.
, veuillez utiliser le coupe-capsule 6 :
sur la bouteille de vin fermée.
10
Figure 2
3) Tournez la bouteille de vin de 360 degrés.
Il faudra éventuellement recommencer plusieurs
fois cette opération jusqu'à ce que vous puissiez
enlever la capsule du manchon à feuille.
SKE 6 A1
Page 14

4) Retirez ensuite le manchon à feuille coupé.
5) Serrez fermement la bouteille de vin avec une
main pour éviter qu'elle ne se renverse.
Posez le tire-bouchon sur la bouteille de vin.
Appuyez-le fermement dessus jusqu'à ce que
vous sentiez que la spirale 7 pénètre sensible-
ment dans le bouchon.
6) Maintenez alors enfoncée la touche inférieure
5. La spirale 7 est vissée dans le bouchon
et le tire ensuite du goulot de la bouteille.
Continuez de tenir fermement la bouteille de
vin et le tire-bouchon.
7) Ne relâchez la touche inférieure
fois que le bouchon a été complètement sorti
du goulot de la bouteille.
8) Retirez le tire-bouchon de la bouteille et tenez-le
avec son ouverture tournée vers le bas.
Appuyez ensuite sur la touche
Le bouchon est alors extrait de l'intérieur du
tire-bouchon.
9) Relâchez la touche
tombe du tire-bouchon.
REMARQUE
► Vous pouvez utiliser le coupe-capsule 6
comme suppor
insérez tout simplement le tire-bouchon dans
l'évidement sur la partie supérieure du coupecapsule 6. Le tire-bouchon bénéfi cie ainsi
d'une bonne assise.
4 dès que le bouchon
t pour le tire-bouchon :
5 qu'une
4.
Nettoyage et entretien
ATTENTION!
RISQUE DE DÉGÂTS MATÉRIELS!
Ne jamais plonger l'appareil dans de l'eau
ou d'autres liquides !
► N'utilisez pas de produits nettoyants abrasifs
essifs. Ceux-ci peuvent en eff et endom-
ou agr
mager les surfaces!
■ Nettoyez le boîtier du tire-bouchon ainsi que le
coupe-capsule 6 e
chiff on légèrement humidifi é. En cas d'encrassement tenace, ajoutez quelques gouttes de
liquide vaisselle doux sur le chiff on humide.
Veillez à ce qu'aucune forme d'humidité ne
pénètre dans le tire-bouchon lors du nettoyage !
xclusivement à l'aide d'un
Entreposage
■ Veillez à bien nettoyer l'appareil avant de le
ranger.
■ Si vous n'utilisez pas l'appareil pendant une
ée prolongée, retirez les piles.
dur
■ Conservez l'appareil nettoyé dans un endroit
opre et exempt de poussières.
sec, pr
Dépannage
L'appareil ne fonctionne pas.
■ Les piles sont mortes/faibles.
– Mettre en place les nouvelles piles, comme
indiqué au par
remplacement des piles“.
■ L'appareil est défectueux.
– Adressez-vous au service après-vente.
agraphe "Mise en place /
FR
CH
SKE 6 A1
11
Page 15

Garantie et service
Cet appareil est garanti 3 ans à partir de la date
d'achat. L'appareil a été fabriqué avec soin et
consciencieusement contrôlé avant sa livraison.
FR
Veuillez conserver le ticket de caisse en guise de
CH
preuve d'achat. Dans le cas où la garantie s'applique, veuillez appeler le service après-vente
compétent. Cette condition doit être respectée
pour assurer l'expédition gratuite de votre
marchandise.
La prestation de garantie s'applique uniquement
aux vices de matériau ou de fabrication, et non
aux dégâts de transport, aux pièces d'usure ou
aux dégâts subis par des pièces fragiles telles que
les commutateurs ou les batteries. Le produit est
destiné uniquement à un usage privé et ne répond
pas à un usage professionnel.
La garantie est annulée en cas de manipulation
incorrecte et inappropriée, d'usage de la force et
en cas d'intervention non réalisée par notre centre
de service après-vente agréé.
Vos droits légaux ne sont pas restreints par la
présente garantie.
L'exercice de la garantie ne prolonge pas la période
de garantie. Cette disposition s'applique également
aux pièces remplacées ou réparées. Signalez sans
attendre toute anomalie éventuelle sur le matériel
au moment de l'achat, au plus tard deux jours après
la date d'achat. Toute réparation fera l'objet d'une
facturation après expiration de la période de
garantie.
Service France
Tel.: 0800 919270
E-Mail: kompernass@lidl.fr
IAN 100655
Service Suisse
Tel.: 0842 665566 (0,08 CHF/Min.,
mobile max. 0,40 CHF/Min.)
E-Mail: kompernass@lidl.ch
IAN 100655
Heures de service de notre hotline :
du lundi au vendredi de 8 h à 20 h (HEC)
Mise au rebut
Mise au rebut
Ne jamais jeter l’appareil
avec les ordures ménagères.
Ce produit est assujetti à la
directive européenne
2012/19/EU.
Éliminez l’appareil par l’intermédiaire d’une entreprise de traitement des déchets autorisée ou via le
service de recyclage de votre commune. Respectez
la réglementation en vigueur. En cas de doute,
veuillez contacter votre centre de recyclage.
Ne pas jeter les piles/batteries
avec les ordures ménagères.
Chaque consommateur est légalement tenu de remettre les piles/batteries à un point de collecte de
sa commune/son quartier ou dans le commerce.
Cette obligation a pour objectif d’assurer le traitement écologique des piles et accus. Ne jetez que
des piles/accus à l’état déchargé.
L’emballage est réalisé à l’aide de
matériaux écologiques qu’il est possible
de confi eraux centres de recyclage
proches de chez vous.
Importateur
KOMPERNASS HANDELS GMBH
BURGSTRASSE 21
44867 BOCHUM
GERMANY
www.kompernass.com
12
SKE 6 A1
Page 16

Indice
Introduzione . . . . . . . . . . . . . . . . . . . . . . . . . . . . . . . . . . . . . . . . . . . . . . . . . . . . . . . . .14
Uso conforme . . . . . . . . . . . . . . . . . . . . . . . . . . . . . . . . . . . . . . . . . . . . . . . . . . . . . . . . .14
Volume della fornitura . . . . . . . . . . . . . . . . . . . . . . . . . . . . . . . . . . . . . . . . . . . . . . . . .14
Descrizione dell'apparecchio . . . . . . . . . . . . . . . . . . . . . . . . . . . . . . . . . . . . . . . . . . . .14
Dati tecnici . . . . . . . . . . . . . . . . . . . . . . . . . . . . . . . . . . . . . . . . . . . . . . . . . . . . . . . . . . .14
Indicazioni relative alla sicurezza . . . . . . . . . . . . . . . . . . . . . . . . . . . . . . . . . . . . . . . .15
Inserimento/sostituzione delle pile . . . . . . . . . . . . . . . . . . . . . . . . . . . . . . . . . . . . . . .16
Funzionamento . . . . . . . . . . . . . . . . . . . . . . . . . . . . . . . . . . . . . . . . . . . . . . . . . . . . . . .16
Pulizia e piccola manutenzione . . . . . . . . . . . . . . . . . . . . . . . . . . . . . . . . . . . . . . . . . .17
Conservazione . . . . . . . . . . . . . . . . . . . . . . . . . . . . . . . . . . . . . . . . . . . . . . . . . . . . . . . .17
Eliminazione dei guasti . . . . . . . . . . . . . . . . . . . . . . . . . . . . . . . . . . . . . . . . . . . . . . . . .17
Garanzia e assistenza . . . . . . . . . . . . . . . . . . . . . . . . . . . . . . . . . . . . . . . . . . . . . . . . . .18
Smaltimento . . . . . . . . . . . . . . . . . . . . . . . . . . . . . . . . . . . . . . . . . . . . . . . . . . . . . . . . . .18
Importatore . . . . . . . . . . . . . . . . . . . . . . . . . . . . . . . . . . . . . . . . . . . . . . . . . . . . . . . . . .18
IT
CH
SKE 6 A1
13
Page 17

Introduzione
Congratulazioni per l'acquisto del Suo nuovo
apparecchio.
È stato acquistato un prodotto di alta qualità.
Il manuale di istruzioni è parte integrante del presente prodotto. Esso contiene importanti indicazioni
per la sicurezza, l'uso e lo smaltimento. Prima di
IT
utilizzare il prodotto, familiarizzarsi con tutte le
indicazioni relative ai comandi e alla sicurezza.
CH
Utilizzare l'apparecchio solo come descritto e per
i campi d'impiego indicati. In caso di cessione del
prodotto a terze persone, consegnare anche tutta
la relativa documentazione.
Uso conforme
Il cavatappi è destinato esclusivamente ad aprire
bottiglie di vino normalmente presenti in commercio
(tappi in materiale naturale o in plastica).
Non è adatto ad aprire tappi di spumante.
Il cavatappi non è indicato per aprire altri tipi di
tappi per bottiglie, come ad es. i tappi a corona
o i tappi a vite.
Esso è destinato esclusivamente all'uso in ambito
privato. Non utilizzarlo a fi ni commerciali.
Un uso diverso o esulante da quanto sopra è
considerato non conforme.
Volume della fornitura
▯ Cavatappi elettrico
▯ 4 x pila AA, 1,5 V LR6
▯ Tagliacapsule (che serve contemporaneamente
da base di appoggio)
▯ Istruzioni per l'uso
AVVERTENZA
► Subito dopo il disimballaggio, verifi care che
la fornitur
► Rimuovere tutti i materiali di imballaggio.
a sia completa.
Descrizione dell'apparecchio
1 Cappuccio decorativo
2 Vano pile
3 Blocco
4 Tasto
5 Tasto
6 Tagliacapsule
7 Spirale
Dati tecnici
Tensione di alimentazione: 4 x 1,5 V
Assorbimento di
corrente: 2,5 A
Pile di tipo: 1,5 V, Mignon, AA, LR6
14
SKE 6 A1
Page 18

Indicazioni relative alla sicurezza
ATTENZIONE! PERICOLO DI LESIONI!
► Questo apparecchio può essere utilizzato dai bambini di almeno 8 anni di
età e da persone con capacità fi siche, sensoriali o mentali ridotte o insuffi ciente esperienza o conoscenza, solo se sorvegliati o istruiti sull'uso sicuro
dell'apparecchio e qualora ne abbiano compreso i pericoli associati.
► I bambini non devono giocare con l'apparecchio.
► La pulizia e la manutenzione a cura dell'utente non devono essere eseguite
da bambini, a meno che non siano sorvegliati.
► Prestare particolare attenzione quando si maneggia la punta del cavatappi
e il tagliacapsule.
ATTENZIONE!
Avvertenze sulla sicurezza per il trattamento delle pile:
► Non gettare le pile nel fuoco. Non ricaricare le pile. Pericolo di esplosione
e lesioni!
► Non aprire mai le pile, non eff ettuare mai lavori di brasatura o saldature
sulle pile. Pericolo di esplosione e lesioni!
IT
CH
► Controllare periodicamente le pile. Le pile deteriorate possono causare
danni all'apparecchio.
► Se non si utilizza l'apparecchio per lungo tempo, rimuovere le pile.
► In presenza di pile deteriorate, indossare guanti protettivi. Pulire il vano pile
e i contatti delle pile con un panno asciutto.
► Impedire ai bambini di impossessarsi delle pile. I bambini potrebbero
metterle in bocca e ingerirle. In caso di ingestione di una pila, consultare
immediatamente un medico.
ATTENZIONE! PERICOLO DI DANNI MATERIALI!
Non immergere assolutamente l'apparecchio in acqua o altri liquidi.
SKE 6 A1
15
Page 19

Inserimento/
sostituzione delle pile
ATTENZIONE!
PERICOLO DI DANNI MATERIALI!
► Quando si introducono le pile controllare
e la polarità indicata sul coperchio
sempr
IT
CH
del vano pile!
► Utilizzare sempre pile tipo Mignon AA, LR6.
► Utilizzare sempre pile dello stesso tipo.
1)
Rimuovere il cappuccio decorativo 1 ruotandolo in modo tale che la freccia presente sul
cappuccio decoraativo 1 sia rivolta verso la
scritta "Open". Dopo di ciò sollevare il cappuccio decorativo 1.
2) Aprire il vano pile 2 tirando verso di sé il
blocco 3 e sbloccando così il vano pile 2.
3) Rimuovere, se già inserite, le pile vecchie.
4) Inserire le nuove pile secondo la polarità
indicata sul coperchio del vano pile.
5) Richiudere il vano pile 2 in modo che il
blocco 3 si innesti in posizione.
6) Collocare il cappuccio decorativo 1 sull'apparecchio in modo tale che la freccia presente sul
cappuccio decorativo 1 sia rivolta verso la
scritta "Open". Ruotare il cappuccio decorativo 1 in modo tale che la freccia sia rivolta
verso la scritta "Close". Ora il cappuccio decorativo 1 è di nuovo fi ssato all'apparecchio.
Funzionamento
AVVERTENZA
► Non utilizzare il cavatappi per rimuovere
tappi di spumante! Essi potr
incastrati nell'apparecchio.
ebbero rimanere
✓
✕
Figura 1
1) Per tagliare la capsula che avvolge il tappo
della bot
collocare il tagliacapsule 6 come mostrato
nella fi gura 2
2) Premere saldamente con il pollice e l'indice.
Tenere ferma la bottiglia di vino con una mano
per impedire che cada.
tiglia, utilizzare il tagliacapsule 6:
sulla bottiglia di vino chiusa.
16
Figura 2
3) Ruotare la bottiglia di vino di 360 gradi.
Eventualmente, ripetere il procedimento varie
volte fi no a poter rimuovere la capsula.
SKE 6 A1
Page 20

4) Rimuovere la capsula tagliata.
5) Tenere ferma la bottiglia di vino con una mano
per impedire che cada. Collocare il cavatappi
sulla bottiglia di vino. Premere saldamente fi no
a inserire sensibilmente la spirale 7 nel tappo.
6) Tenere quindi premuto il tasto inferiore
La spirale 7 viene fatta ruotare nel tappo e lo
estrae quindi dal collo della bottiglia. Continuare
ad aff errare saldamente la bottiglia di vino e il
cavatappi.
7) Rilasciare il tasto inferiore
tappo è stato estratto completamente dal collo
della bottiglia.
8) Prelevare il cavatappi dalla bottiglia e tenerlo
con l'apertura rivolta verso il basso. Premere
poi il tasto
dall'interno del cavatappi.
9) Rilasciare il tasto
cade dal cavatappi.
AVVERTENZA
► Il tagliacapsule 6 può esser
come base di appoggio per il cavatappi:
basta infi lare il cavatappi nell'avvallamento
che si trova sul lato superiore del tagliacapsule 6. In tal modo il cavatappi rimane in
posizione stabile.
4. Il tappo viene quindi espulso
4 non appena il tappo
5 solo quando il
e utilizzato anche
5.
Pulizia e piccola manutenzione
ATTENZIONE!
PERICOLO DI DANNI MATERIALI!
Non immergere mai l'apparecchio in acqua
o altri liquidi!
► Non utilizzare detergenti abrasivi o aggressivi.
E
ssi potrebbero danneggiare le superfi ci!
■ Pulire l'involucro del cavatappi nonché il taglia-
capsule 6 esclusiv
germente inumidito. In caso di sporco ostinato,
versare alcune gocce di detergente delicato sul
panno umido. Accertarsi che durante la pulizia
non s'infi ltri dell'umidità nel cavatappi!
amente con un panno leg-
Conservazione
■ Pulire l'apparecchio a fondo prima di riporlo.
■ Se non si utilizza l'apparecchio per lungo tempo,
muovere le pile.
ri
■ Riporre l'apparecchio pulito in un luogo asciutto,
o di polvere e pulito.
priv
Eliminazione dei guasti
L'apparecchio non funziona.
■ Le pile sono scariche/deboli.
– Sostituire le pile come descritto nella sezione
"Inserimento/sostituzione pile".
■ L'apparecchio è guasto.
– Rivolgersi al servizio clienti.
IT
CH
SKE 6 A1
17
Page 21

Garanzia e assistenza
Questo apparecchio è garantito per tre anni a
partire dalla data di acquisto. L'apparecchio è
stato prodotto con cura e debitamente collaudato
prima della consegna. Conservare lo scontrino
come prova di acquisto. Nei casi contemplati
dalla garanzia, mettersi in comunicazione telefonicamente con il centro di assistenza più vicino.
IT
Solo in tal modo è possibile garantire una spedi-
CH
zione gratuita della merce.
La garanzia vale solo per difetti del materiale o di
fabbricazione, ma non per i danni da trasporto,
danni alle parti soggette a usura o alle parti fragili,
come per es. interruttori o accumulatori. Il prodotto
è destinato esclusivamente all'uso domestico e non
a quello commerciale.
La garanzia decade in caso di impiego improprio
o manomissione, uso della forza e interventi non
eseguiti dalla nostra fi liale di assistenza autorizzata.
Questa garanzia non costituisce alcun limite ai diritti
legali del consumatore.
Il periodo di garanzia non viene prolungato da
interventi in garanzia. Ciò vale anche per le parti
sostituite e riparate. I danni e difetti eventualmente
presenti già all'atto dell'acquisto devono venire
comunicati immediatamente dopo il disimballo, e
comunque entro e non oltre due giorni dalla data
di acquisto. Le riparazioni eseguite dopo la scadenza del periodo di garanzia sono a pagamento.
Assistenza Italia
Tel.: 02 36003201
E-Mail: kompernass@lidl.it
IAN 100655
Assistenza Svizzera
Tel.: 0842 665566 (0,08 CHF/Min.,
telefonia mobile max. 0,40 CHF/Min.)
E-Mail: kompernass@lidl.ch
IAN 100655
Raggiungibilità della hotline:
dal lunedì al venerdì, dalle 8.00 alle 20.00 (CET)
Smaltimento
Non smaltire per alcun motivo
l'apparecchio assieme ai
normali rifi uti domestici.
Questo prodotto è soggetto
alla Direttiva Europea
2012/19/EU-RAEE.
Smaltire l'apparecchio attraverso un'azienda di
smaltimento autorizzata o attraverso l'ente di smaltimento comunale. Rispettare le norme attualmente
in vigore. In caso di dubbi mettersi in contatto con
l'ente di smaltimento competente.
Le batterie / pile non devono
venire smaltite assieme ai
rifi uti domestici.
Ogni utente è obbligato per legge a portare le pile/
batterie presso un centro di raccolta del proprio
comune/quartiere o a restituirle al rivenditore.
Questo obbligo è fi nalizzato allo smaltimento
ecologico delle pile e/o delle batterie. Restituire
le pile/le batterie solo se scariche.
L'imballaggio è costituito da materiali
ecocompatibili che possono venire smaltiti tramite gli appositi centri di raccolta e
riciclaggio.
Importatore
KOMPERNASS HANDELS GMBH
BURGSTRASSE 21
44867 BOCHUM
GERMANY
www.kompernass.com
18
SKE 6 A1
Page 22

Contents
Introduction . . . . . . . . . . . . . . . . . . . . . . . . . . . . . . . . . . . . . . . . . . . . . . . . . . . . . . . . . .20
Intended use . . . . . . . . . . . . . . . . . . . . . . . . . . . . . . . . . . . . . . . . . . . . . . . . . . . . . . . . .20
Package contents. . . . . . . . . . . . . . . . . . . . . . . . . . . . . . . . . . . . . . . . . . . . . . . . . . . . . .20
Appliance description . . . . . . . . . . . . . . . . . . . . . . . . . . . . . . . . . . . . . . . . . . . . . . . . . .20
Technical data . . . . . . . . . . . . . . . . . . . . . . . . . . . . . . . . . . . . . . . . . . . . . . . . . . . . . . . .20
Safety guidelines . . . . . . . . . . . . . . . . . . . . . . . . . . . . . . . . . . . . . . . . . . . . . . . . . . . . . .21
Inserting/replacing batteries . . . . . . . . . . . . . . . . . . . . . . . . . . . . . . . . . . . . . . . . . . . .22
Handling . . . . . . . . . . . . . . . . . . . . . . . . . . . . . . . . . . . . . . . . . . . . . . . . . . . . . . . . . . . . .22
Cleaning and care . . . . . . . . . . . . . . . . . . . . . . . . . . . . . . . . . . . . . . . . . . . . . . . . . . . . .23
Storage . . . . . . . . . . . . . . . . . . . . . . . . . . . . . . . . . . . . . . . . . . . . . . . . . . . . . . . . . . . . . .23
Troubleshooting . . . . . . . . . . . . . . . . . . . . . . . . . . . . . . . . . . . . . . . . . . . . . . . . . . . . . . .23
Warranty and service . . . . . . . . . . . . . . . . . . . . . . . . . . . . . . . . . . . . . . . . . . . . . . . . . .24
Disposal . . . . . . . . . . . . . . . . . . . . . . . . . . . . . . . . . . . . . . . . . . . . . . . . . . . . . . . . . . . . .24
Importer . . . . . . . . . . . . . . . . . . . . . . . . . . . . . . . . . . . . . . . . . . . . . . . . . . . . . . . . . . . . .24
GB
SKE 6 A1
19
Page 23

Introduction
Congratulations on the purchase of your new
appliance.
You have selected a high-quality product.
The operating instructions are part of this product.
They contain important information on safety, usage
and disposal. Before using the product, familiarise
yourself with all handling and safety guidelines.
Use the product only as described and for the range
of applications specifi ed. Please also pass these
operating instructions on to any future owner(s).
GB
Intended use
This corkscrew is intended exclusively for the
uncorking of standard commercial wine bottles
(natural or plastic corks).
It is not designed for the uncorking of champagne
bottles.
This corkscrew is not suitable for removing/opening
other types of bottle closures, such as crown corks
or screw caps.
It is exclusively intended for use in private households. Do not use this corkscrew in a commercial
setting.
It is not intended for any other use or use beyond
that specifi ed.
Package contents
▯ Electric Corkscrew
▯ 4 x AA batteries, 1.5 V LR6
▯ Foil cutter (also functions as a stand)
▯ Operating instructions
NOTE
► Check for completeness directly after
unpacking.
► Remove all packaging material.
Appliance description
1 Decorative cap
2 Battery compartment
3 Catch
button
4
button
5
6 Foil cutter
7 Corkscrew thread
Technical data
Power supply: 4 x 1,5 V
Power consumption: 2.5 A
Battery type: 1.5 V, Mignon, AA, LR6
20
SKE 6 A1
Page 24

Safety guidelines
WARNING! RISK OF INJURY!
► This appliance may be used by children aged 8 years and above and
by persons with limited physical, sensory or mental capabilities or lack
of experience and knowledge, provided that they are under supervision
or have been told how to use the appliance safely and are aware of the
potential risks.
► Children must not use the appliance as a plaything.
► Cleaning and user maintenance tasks may not be carried out by children
unless they are supervised.
► Take care when handling the tip of the corkscrew and the foil cutter.
WARNING!
Safety information for handling batteries:
► Never throw batteries into the fi re. Do not recharge batteries. There is a risk
of explosion and injury!
► Never open batteries and never solder or weld batteries. There is a risk of
explosion and injury!
► Check the condition of the batteries at regular intervals. Leaking batteries
can cause damage to the appliance.
► If you do not intend to use the appliance for an extended period, remove
the batteries.
► If the batteries have leaked, use protective gloves. Clean the battery com-
partment and the battery contacts with a dry cloth.
► Keep batteries out of the reach of children. Children might put batteries into
their mouth and swallow them. If a battery is swallowed, medical assistance
must be sought immediately.
GB
ATTENTION! MATERIAL DAMAGE!
Never immerse the appliance in water or other fl uids.
SKE 6 A1
21
Page 25

Inserting/replacing batteries
Handling
ATTENTION! MATERIAL DAMAGE!
► When inserting the batteries, observe the
y indicated on the battery compart-
polarit
ment cover!
► Always use Mignon AA, LR6 batteries.
► Always use batteries of the same type.
1)
Remove the decorative cap 1 by turning it so
that the arrow on the decorative cap 1 points
GB
towards the marking "Open". Remove the
decorative cap 1.
2) Open the battery compartment 2 by pulling
the catch 3 towards you and unlatching the
battery compartment 2.
3) Remove the old batteries, if present.
4) Insert the new batteries as per the polarity
diagram provided on the cover of the battery
compartment.
5) Close the battery compartment 2 so that the
catch 3 clicks into place.
6) Replace the decorative cap 1 so that the arrow
on the decorative cap 1 points towards the
marking "Open". Turn the decorative cap 1
so that the arrow points to the marking "Close".
The decorative cap 1 is now fi rmly back in
place on the appliance.
NOTE
► Do not attempt to remove champagne corks
with the cork
the appliance.
screw! These can get caught in
✓
✕
Figure 1
the foil cutter 6 to cut open the foil sleeve
1) Use
encasing the bottle cork:
Place the foil cutter 6 onto the closed bottle of
wine as shown in Figure 2.
2) Press it together fi rmly with your thumb and
forefi nger. Grip the bottle fi rmly with one hand
so that it cannot fall over.
22
Figure 2
3) Turn the bottle of wine through 360 degrees.
You may have to repeat this several times
before you can remove the foil sleeve capsule.
SKE 6 A1
Page 26

4) You can now remove the cut foil sleeve.
5) Grip the bottle fi rmly with one hand so that
it cannot fall over. Place the corkscrew onto
the wine bottle. Press it down fi rmly until the
corkscrew thread 7 perceptibly penetrates
the cork.
6) Then keep the lower
The corkscrew thread 7 is screwed into the
cork and then pulls it out of the bottle neck.
Keep a fi rm grip on the wine bottle and the
corkscrew while doing this.
7) Do not release the lower
cork has been completely removed from the
bottle neck.
8) Remove the corkscrew from the bottle and hold
it with the opening pointing downwards.
Then press the
unscrewed from inside the corkscrew.
9) Release the
falls out of the corkscrew.
NOTE
► You can use the foil cutter 6 as a stand for
the cork
Simply insert the corkscrew into the notch
on the top surface of the foil cutter 6. This
provides the corkscrew with a secure stand.
screw:
button 5 depressed.
button 5 until the
button 4. The cork is now
button 4 as soon as the cork
Cleaning and care
ATTENTION! MATERIAL DAMAGE!
Never immerse the appliance in water or
other fl uids!
► Do not use abrasive or aggressive cleaning
materials. These may damage the sur
of your appliance.
■ Clean the housing of the corkscrew and the foil
cutter 6 only with a slightly damp cloth. In case
of stubborn soiling, pour a fe
detergent onto the damp cloth. Ensure that no
moisture enters the corkscrew during cleaning!
w drops of a mild
faces
Storage
■ Always clean the appliance thoroughly before
storing.
■ If you do not intend to use the appliance for an
xtended period of time, remove the batteries.
e
■ Store the cleaned appliance in a clean, dust-free
y place.
and dr
Troubleshooting
The appliance is not working.
■ The batteries are discharged/weak.
– Insert new batteries as described in the
section "Inser
■ The appliance is defective.
– Contact Customer Service.
ting/replacing batteries".
GB
SKE 6 A1
23
Page 27

Warranty and service
You are provided a 3-year warranty on this
appliance, valid from the date of purchase.
This appliance has been manufactured with care
and inspected meticulously prior to delivery.
Please retain your receipt as proof of purchase.
In the event of a warranty claim, please contact
your Customer Service unit by telephone. This is the
only way to guarantee free return of your goods.
The warranty only covers claims for material and
manufacturing defects, not for damage sustained
GB
during carriage, components subject to wear and
tear or damage to fragile components such as
switches or batteries. This appliance is intended
solely for private use and not for commercial
purposes.
The warranty shall be deemed void in the instance
of misuse or improper handling, use of force and
interventions which were not carried out by one
of our authorised Service centres.
Your statutory rights are not restricted by this warranty.
The warranty period is not prolonged by repairs
eff ected under the warranty. This also applies to
replaced and repaired components. Any damage
and defects present at the time of purchase must be
reported immediately after unpacking, but no later
than two days after the date of purchase. Repairs
eff ected after expiry of the warranty period shall
be subject to charge.
Service Great Britain
Tel.: 0871 5000 720 (£ 0.10/Min.)
E-Mail: kompernass@lidl.co.uk
IAN 100655
Hotline availability:
Monday to Friday 08:00 - 20:00 (CET)
Disposal
Under no circumstances should
the appliance be disposed of
in standard household waste.
This product is subject to
the provisions of European
Directive 2012/19/EU.
Dispose of the appliance via an approved waste
disposal company or your municipal waste disposal
facility. Please observe applicable regulations.
Please contact your waste disposal facility if you
are in any doubt.
Used batteries must not be
disposed of in household
waste.
Consumers are legally obligated to dispose of batteries at a collection point in their community / city
district or at a retail store.
The purpose of this obligation is to ensure that
batteries are disposed of in an environmentally
congruent manner. Only dispose of batteries when
they are fully discharged.
The packaging is made of environmen-
tally friendly materials which you can
dispose of at local recycling centres.
Importer
KOMPERNASS HANDELS GMBH
BURGSTRASSE 21
44867 BOCHUM
GERMANY
www.kompernass.com
24
SKE 6 A1
Page 28

KOMPERNASS HANDELS GMBH
BURGSTRASSE 21
44867 BOCHUM
DEUTSCHLAND / GERMANY
www.kompernass.com
Stand der Informationen · Version des informations
Versione delle informazioni · Last Information Update:
06/ 2014 · Ident.-No.: SKE6A1-042014-2
IAN 100655
1
 Loading...