


 Loading...
USER
MANUAL
SR-S20... SRS580DW
SRS579NP SRS581DTKM
SRS580DTKG SRS582DTKGM
SRS582DSSB SRS614DW
SRS615DP SRS616DSSB
SR-S22... SRS616DHSS
FRIDGE/FREEZER
Before operating the appliance, please read this manual thoroughly and retain it for future reference.
ENGLISH
DA68-00500P REV(0.2)
FEATURES
Energy-saving fridge/freezer
•Power consumption is kept to a minimum by distributing cool air separately to the refrigerator and freezer.
Faster cooling times
•The quick freezing function allow you to freeze food more quickly.
High humidity for fresher food
•You can keep food, fruit and vegetables fresh for longer because your refrigerator supplies highly humidified cold air. This can be up to four or five times more effective than a normal refrigerator.
Door alarm
•When the refrigerator door is left open for more than two minutes, a musical alarm is automatically triggered. This feature helps you save electricity and preserve stored foods.
Abundant supply of ice and cold water
•The ice and water dispenser provides ice and cold water at any time.
Extra refrigerating compartment
•You do not have to open the main door to access frequently used food in the extra refrigerating compartment. This saves time and money.
What is the H. M. Cycle (High-efficiency, Multi-evaporator Cycle)?
•The refrigerator and freezer have separate evaporators. Given this independent system, the refrigerator and freezer are cooled individually as required and are, therefore, more efficient.
Food odour from the refrigerator does not affect food in the freezer because the two are not connected.
CONTENTS |
|
FEATURES ............................................................................................ |
2 |
SAFETY WARNINGS............................................................................ |
2 |
INSTALLING THE APPLIANCE............................................................ |
4 |
PREPARING THE APPLIANCE............................................................ |
5 |
FRONT CONTROL PANEL................................................................... |
6 |
CONTROLLING THE FREEZER AND REFRIGERATOR |
|
TEMPERATURES ................................................................................. |
7 |
ICE/COLD WATER DISPENSER ......................................................... |
9 |
STORING FOOD ................................................................................. |
10 |
VIEW OF YOUR FRIDGE/FREEZER................................................. |
11 |
REMOVING THE FREEZER ACCESSORIES................................... |
12 |
REMOVING THE REFRIGERATOR ACCESSORIES ...................... |
13 |
EXTRA REFRIGERATING COMPARTMENT ................................... |
13 |
CLEANING THE ACCESSORIES ...................................................... |
13 |
CHANGING THE INTERIOR LIGHT................................................... |
14 |
ICE-MAKING FILTER.......................................................................... |
15 |
PROBLEMS AND SOLUTIONS.......................................................... |
15 |
SAFETY WARNINGS
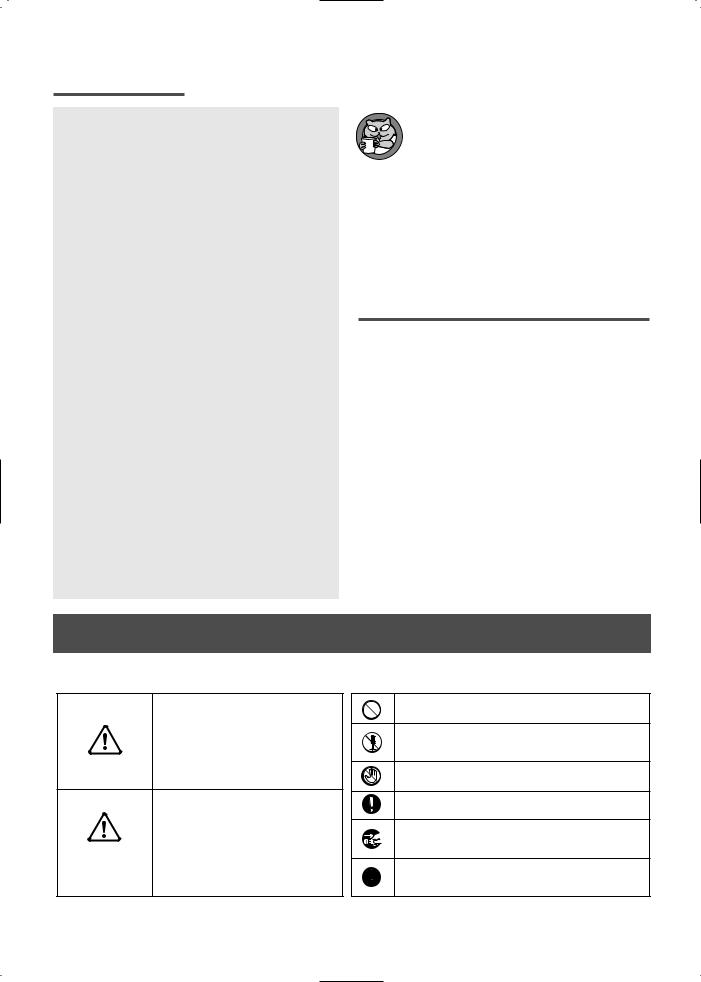
CAUTION/WARNING SYMBOLS USED
Indicates that a danger of death or serious injury exists.
WARNING
Indicates that a risk of personal injury or material
damage exists.
CAUTION
OTHER SYMBOLS USED
Represents something you must NOT do.
Represents something you must NOT disassemble.
Represents something you must NOT touch.
Represents something you must observe.
Indicates that you must disconnect the power plug from the socket.
Represents something that must be earthed to prevent electric shock.
These warnings are to prevent injury to users or other persons. Please observe them. After reading the warnings, keep them in a safe place for future reference.
2

WARNING
Do not use the fridge/freezer with a multi-plug adapter.
• This causes a potential fire hazard.
Make sure that the power plug is not squashed or damaged by the back of the fridge/freezer.
• A damaged power plug may overheat and cause a fire.
Do not allow water to splash or run on to the fridge/ freezer.
• There is a risk of fire or electric shock.
Do not use aerosols near the fridge/freezer.
• There is a risk of explosion or fire.
Do not place heavy articles on the power cord.
• There is a risk of a short circuit and fire.
Do not insert the power plug with wet hands.
• You may receive an electric shock.
Do not put a container filled with water on the appliance.
• If spilled, there is a risk of fire or electric shock.
Do not install the fridge/freezer in a damp place or a place where it might be splashed with water.
•Deteriored insulation of the electric parts may cause electric shock or fire.
Do not store volatile or inflammable substances in the refrigerator.
•The storage of benzene, thinner, alcohol, ether, LP gas and other such products may cause explosions.
Do not disassemble, repair or alter the appliance.
•You run the risk of causing a fire, malfunctions and/or personal injury.
Pull the power plug out before changing the interior light of the refrigerator.
• Otherwise, there is a risk of electric shock.
If you wish to dispose of the fridge/freezer, first remove the door and its seals.
•If a child plays in the appliance, the door can close and the child can become trapped. The child will die from suffocation.
Be sure to earth the appliance.
•If the appliance is not properly earthed, it may break down or cause electric shock.
CAUTION
Do not overfill the refrigerator with food.
•If food falls out when you open the doors, there is a risk of personal injury and/or material damage.
Do not put bottles or glass containers in the freezer.
•When the contents freeze, the glass may break and cause personal injury.
If the power plug socket is loose, do not insert the power plug.
• There is a risk of electric shock or fire.
Do not remove the power cord by pulling on its lead.
•Damage to the cord may cause a short-circuit, fire and/or electric shock.
•If the power cord is damaged, it must be replaced by the manufacturer, a certified service agent or qualified service personnel.
Do not store articles on the appliance.
•When you open or close the door, the articles may fall and cause personal injury and/or material damage.
Do not store medicine, scientific materials and temperature-sensitive products in the refrigerator.
•Check product labels to make sure that refrigeration is not prohibited.
Do not let children hang from the door.
If you detect abnormal sounds, smells or smoke, pull out the power plug immediately and contact your SAMSUNG Electronics service centre.
Do not touch the inside walls of the freezer or products stored in the freezer with wet hands.
• It may cause frostbite.
Do not put your hands under the fridge/freezer.
• Sharp edges may cause personal injury.
Never put fingers or other objects into the dispenser opening and ice chute.
Do not |
cleaning |
the plug. |
from the |
power |
|
• There is |
|
If you wish |
hold it |
by the |
|
• If the appliance |
the power |
supply, |
minutes |
before |
|
If the fridge/freezer |
for a long |
time, pull |
plug. |
• Any deterioration in the insulation may cause fire.
3
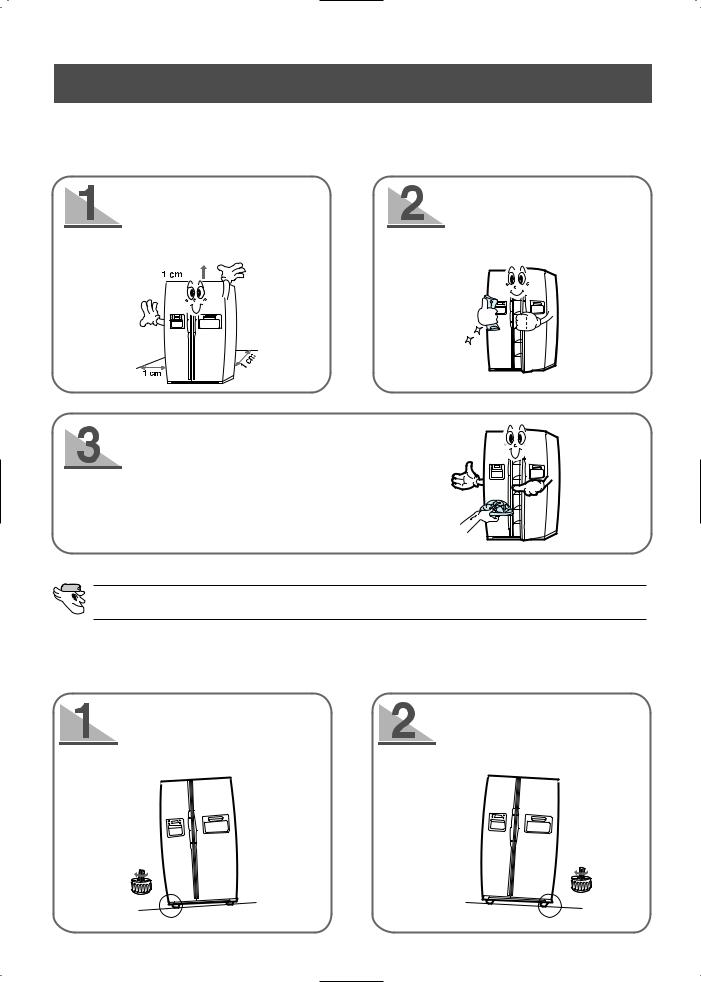
INSTALLING THE APPLIANCE
Allow a clearance of 1 cm to the right, left and back when installing the appliance; this has the advantage of reducing power consumption.
Allow sufficient space to install the appliance on a flat surface.
•If your appliance is not level, the internal cooling system may not work correctly.
Clean your fridge/freezer.
•Wipe the inside and outside of your fridge/freezer with a dry cloth.
Store food in the refrigerator.
• Wait for at least two or three hours after plugging your appliance in before storing food and other items in it.
LEVELLING
When you adjust the level of the fridge/freezer, set the front legs slightly higher than the rear legs, so that you can open and close the door more easily.
First disassemble the leg cover and then adjust the level of the fridge/freezer.
If your fridge/freezer tilts to the left, turn the left adjusting screw.
If your fridge/freezer tilts to the right, turn the right adjusting screw.
4
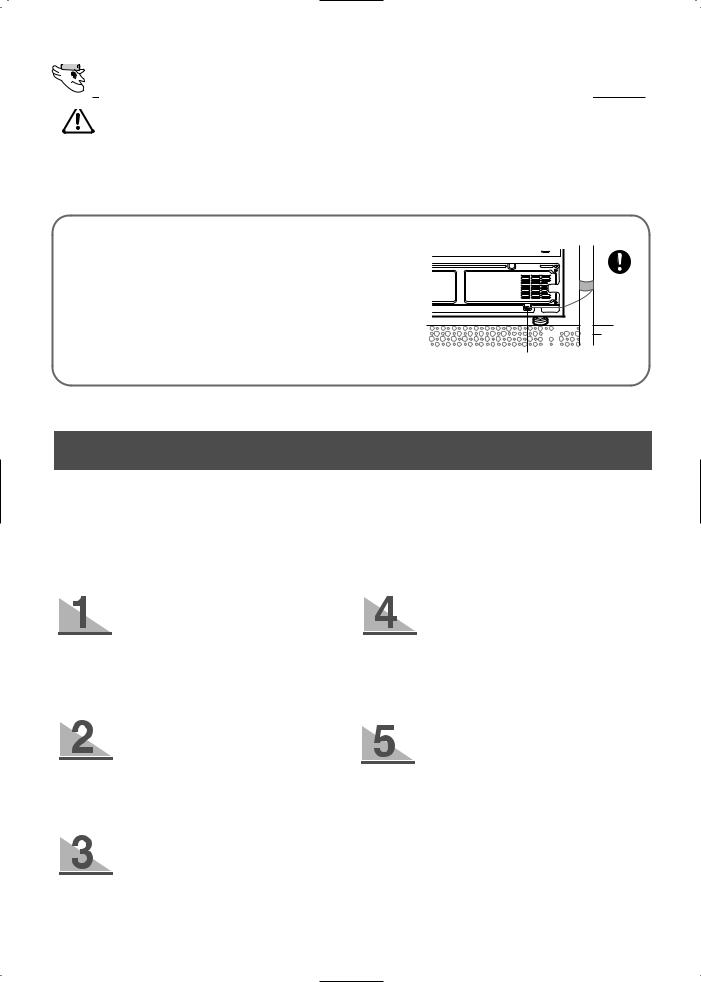
EARTHING THE APPLIANCE
WARNING
The appliance must be earthed.
You must earth the fridge/freezer to prevent any power leakage or electric shock caused by current leakage from the appliance.
• Never use gas pipes, telephone lines or other potential lightning rods as earths.
You are using a power plug without earth.
• Connect one end of the earthing wire (yellow/green or
green) to the earthing screw and the other end to a steel or
copper pipe, such as a water pipe.
 Earthing wire
Copper pipe
Earthing screw
PREPARING THE APPLIANCE
Once you have performed the following steps, your fridge/freezer should be fully operational. If not, check the power supply and electricity source. If you have any doubts or problems, contact your SAMSUNG service centre.
Place the shelves and containers which were removed for transport in their appropriate positions (refer to pages 10 to 12).
Clean the fridge/freezer and accessories to remove any dust that accumulated during packing and shipping (refer to page 13).
When the refrigerator is plugged in, the interior light should come on each time you open the refrigerator door.
Set the temperature control to the coldest temperature and wait for one hour. The freezer should get slightly chilled and the motor should run smoothly producing a soft humming noise.
Once the refrigerator temperature is sufficiently low, you can store food in the appliance.
It takes a few hours after starting the fridge/freezer to reach the appropriate temperature.
Your fridge/freezer is operated by a compressor which switchs “on and off” to maintain the internal temperature. When the compressor is new, it requires a running-in period, which can last for up to five months. During this period, it may be slightly noisy. This is quite normal and does not represent a fault.
5

FRONT CONTROL PANEL
Basic model
Model with ice and water dispenser
FREEZER TEMPERATURE BUTTON
Sets the freezer temperature.
Press the button repeatedly to change the temperature in sequence between -14°C and -26°C.
QUICK FREEZE BUTTON
Speeds up the freezing process in the freezer.
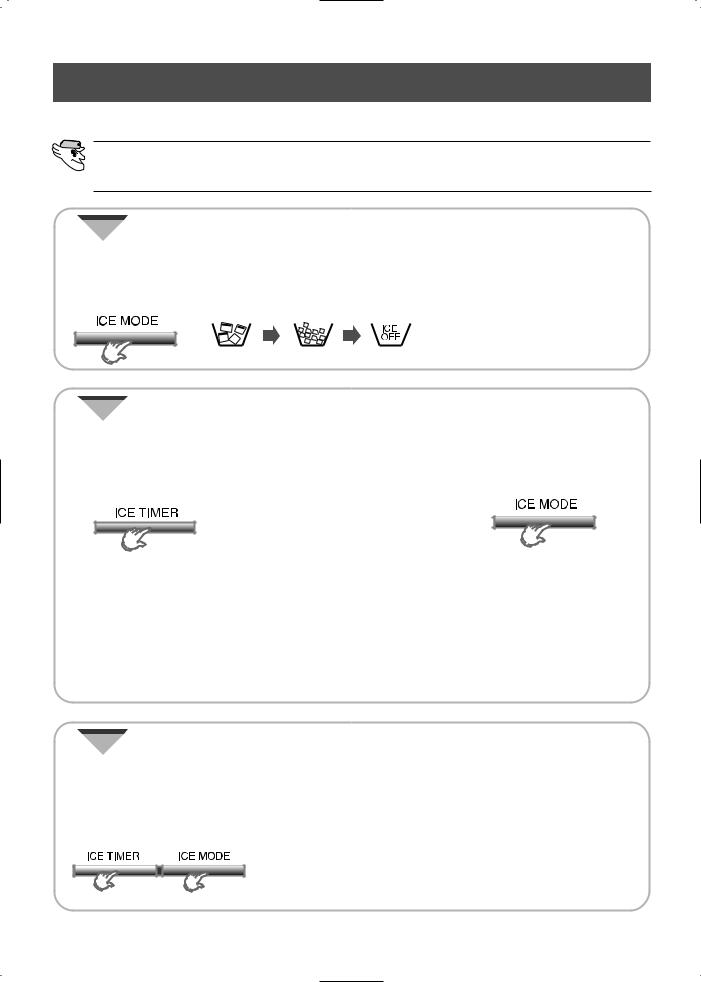
ICE TIMER BUTTON
Schedules ice making. On the specified day, the ice maker makes the ice cubes.
REFRIGERATOR TEMPERATURE BUTTON
Sets the refrigerator temperature.
Press the button repeatedly to change the temperature in sequence between 7°C and -1°C.
VACATION BUTTON
Turns the refrigerator off but not the freezer.
ICE MODE BUTTON
Sets the ice dispensing mode: ice cubes, crushed ice or ice off.
6
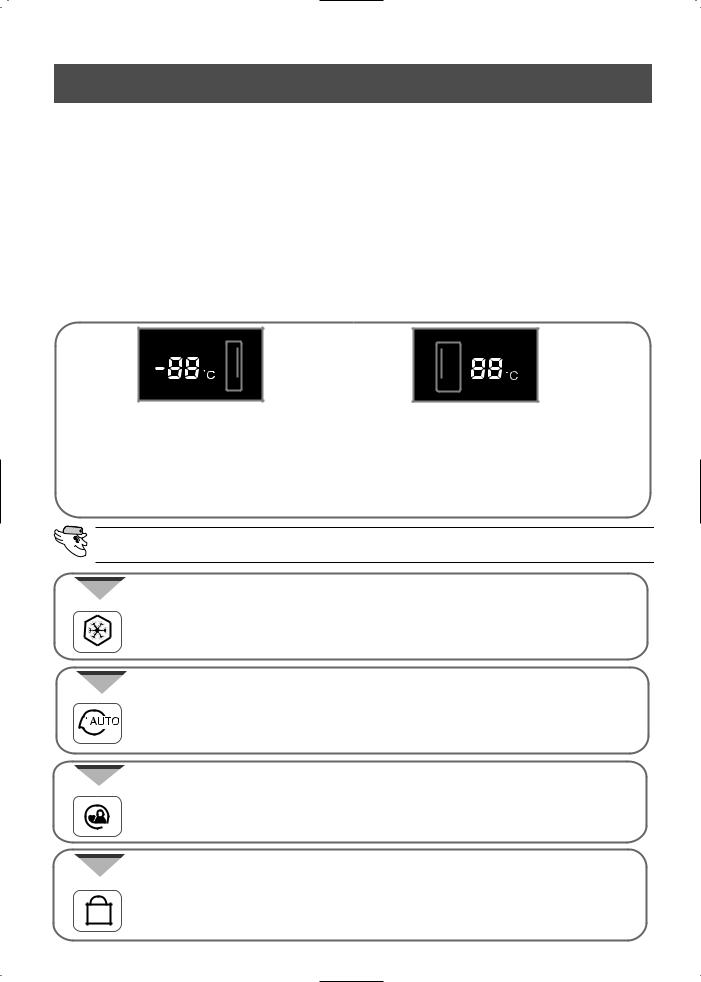
CONTROLLING THE FREEZER AND REFRIGERATOR TEMPERATURES
Freezer
•The freezer can be set to a temperature between -14°C and -26°C.
•Press the FREEZER TEMP. button repeatedly until the required temperature is shown in the temperature display.
•The temperature display changes in sequence between -14°C and -26°C. When the display reaches
-26°C, it returns to -14°C.
•After five seconds, the display reverts to the average freezer temperature, which changes as the freezer reaches the new temperature.
Temperature Display
Displays the current and selected freezer temperatures.
Freezer Display
Indicates that you are setting the freezer temperature or have opened the freezer door.
Refrigerator
•The refrigerator can be set to a temperature between 7°C and -1°C.
•Press the REFRIGERATOR TEMP. button repeatedly until the required temperature is shown in the temperature display.
•The temperature display changes in sequence and reverts same as the freezer control methods.
•When the setting temperature is -1°C or 0°C, it can cuase water on the shelf freeze slightly. If your unit has Auto lcemaker & Water Dispenser, be sure to set the refrigerator temperature above 0°C, because a reservoir system is in the refrigerator compartment.
Temperature Display
Displays the current and selected refrigerator temperatures.
Refrigerator Display
Indicates that you are setting the refrigerator temperature or have opened the refrigerator door.
INDICATORS (BASIC MODEL)
Quick Freeze
• This light switches on when you press the QUICK FREEZE button.
• Press the button again to cancel the Quick Freeze mode. The freezer automatically switches back to the normal control mode after 2.5 hours.
Fuzzy
• When the power cord is connected to the wall socket, the Fuzzy light is on. The compressor, fan and defrosting heater are automatically controlled to optimise food storage.
Vacation
• When the vacation light is on, the refrigerator is switched off but not the freezer. Press the button again to cancel the Vacation mode. Be sure to remove all food in the refrigerator when you select this mode.
Lock
• This light indicates that the four function buttons have been locked.
• To lock the buttons, press the FREEZER TEMP. and REFRIGERATOR TEMP. buttons at the same time for about three seconds. Press both buttons again for about three seconds to unlock them.
7
OTHER INDICATORS
(MODEL WITH ICE AND WATER DISPENSER)
Ice Cubes, Crushed Ice and Ice Off
•Press the ICE MODE button to make ice cubes or crushed ice and also to stop making ice.
•Press the button one or more times to change between ice cubes, crushed ice and ice off in sequence. The appropriate light comes on.
•If you select “Ice off”, the ice maker in the freezer is switched off until the ice mode is changed to ice cubes or crushed ice, also be sure to remove any ice cubes already in the ice bucket.
Ice Timer and Vacation
•Press the ICE TIMER button to schedule ice making.
•The “Ice off” mode is automatically selected. Remove any ice from the ice bucket.
•You can set the ice timer to between 3 and 30 days. When the display reaches 30 days, it goes back to 3 days. For example, if you are going to come back after 10 days, set the ice timer to 10 days; the ice maker will start making ice automatically after about 8 days.
•Press the ICE MODE button to cancel the ice timer. Be sure to remove any ice cubes in the ice bucket after setting the timer.
-If you select both the Vacation and Ice Timer modes, the refrigerator is switched off. Remove all food from the refrigerator but leave the water tap open. Check that the tap and other pipe connections do not leak. When the start time is reached, the appliance begins making ice, the Vacation mode is cancelled and the refrigerator operates normally.
-If you select the Vacation mode but not the Ice Timer mode and when you are away for an extended period of time, close the water tap. The refrigerator switches off and the “Ice off” mode is selected.
Remove any food from the refrigerator and any ice from the ice bucket.
-If the Vacation mode is selected for long periods of time, pour out about 10 cups of water from the water dispenser when you return home.
Water Filter Indicator
•The water filter indicator initially lights up green. Press the ICE TIMER and ICE MODE buttons at the same time for about three seconds to reset the water filter installation date.
•The green light changes to orange after five months to indicate that you should soon change the water filter. It changes to red after an additional one month (six months after the water filter was changed or installed) to indicate that you must change the water filter.
•If you wish to turn off the filter indicutor lamp or the filter is not connected, press the ice timer & icemode button simultaneously for 5 seconds.
If you wish to turn on the filter indicutor lamp again, press the ice timer & ice mode button simultaneously for 3 seconds.
+
8
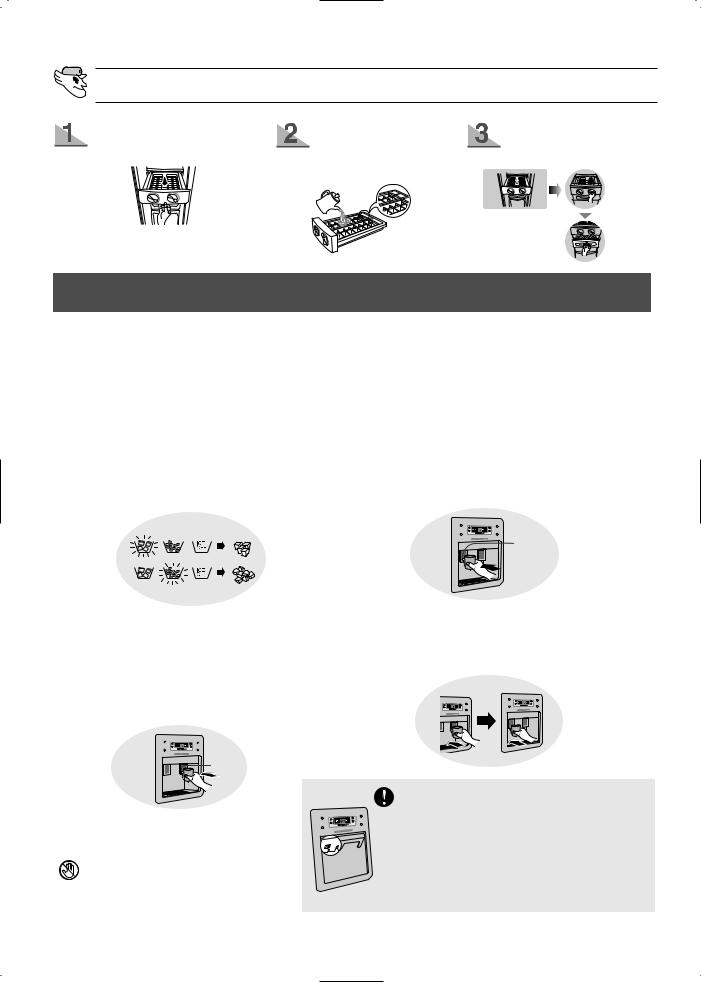
MAKING ICE (BASIC MODEL)
Pull out the ice tray.
Add water until it reaches the water level indicator.
Put the ice tray back in place.
ICE / COLD WATER DISPENSER (MODEL WITH ICE AND WATER DISPENSER ONLY)
The ice making device makes 10 cubes at a time and about 100 cubes a day automatically.
This quantity may be influenced by such factors as the freezer temperature and the number of times that the door is opened. When your appliance is first plugged in, the Cubed Ice mode is selected automatically.
Press the ICE MODE button to select the type of ice:
•Ice cubes
•Crushed ice
•No ice
The water dispenser can serve six glasses of water in succession.
You must then wait for several minutes to allow the stored water to cool again.
Cold Water
•Push the water dispenser lever with a cup.
•If you have just installed the appliance, you must pour the first six glasses of water away, to remove the initial plastic smell of the water storage case
Push
Push the ice dispenser lever with a cup.
•Place a cup near the dispenser to prevent the ice from jumping out.
•If you wish to use the ice dispenser and the cold water dispenser, use the ice dispenser first.
Push
Never put your fingers or any other objects in the dispenser opening.
•If the water from the cold water dispenser is not chilled, pour the warm water away, add ice from the ice dispenser and fill your glass with water.
The refrigerator is provided with anti sweatheater inside of dispenser panel and is delivered to user with heater switch “ON”
You’d better turn off the anti sweat-heater under normal use for saving energy by pressing heater switch. Please turn on the anti sweat-heater the time when sweat occurs on the surface of dispenser panel.(position : ON)
9
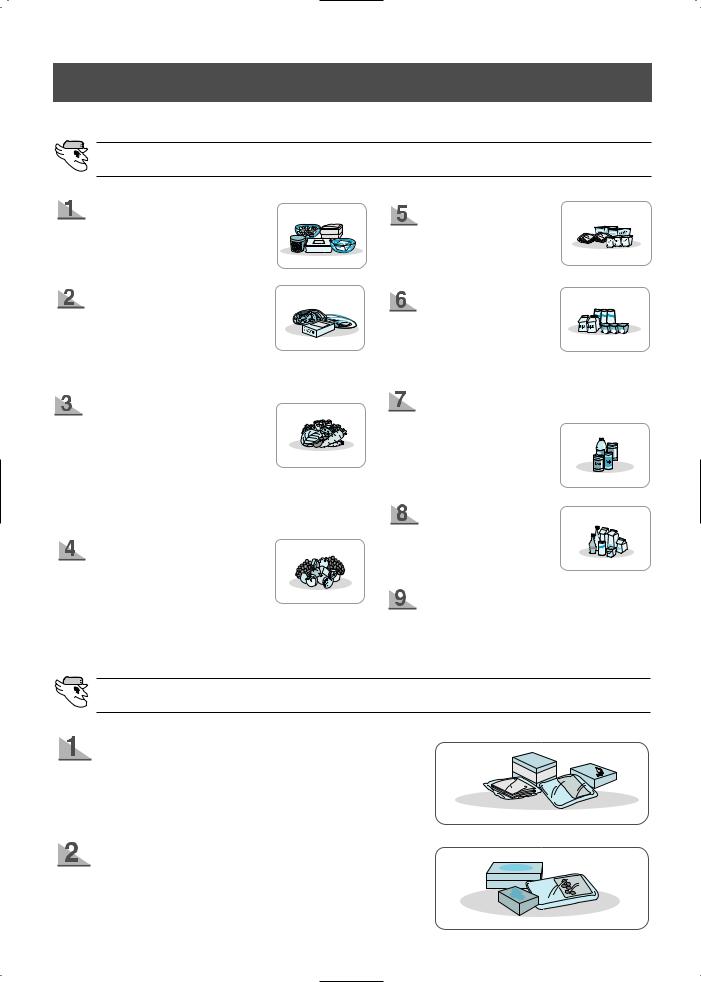
STORING FOOD
REFRIGERATED FOOD STRORAGE METHODS
Tempered glass shelf
• Can be used safely because it will not break if it falls.
Fresh center (option)
• Helps preserve the taste of food and prolongs its freshness. Use the chiller to store cheese, meat, snacks, fish or any food to be used quickly.
Fresh salad drawer(Upper)
• Is used to store vegetables.
•This compartment is airtight. The cooling system does not,
therefore, directly affect the food stored in it. It maintains the water content and freshness of the food for a long time.
Fresh fruit salad drawer(Low)
• Is used to store fruit.
•This compartment preserves freshness for a long time by maintaining the moisture in the food.
For more space, you can store food with drawers removed.
Dairy compartment
• Can be used to store fatty foods, like butter and cheese.
Multiple guard
• Can be used to store foods in small packages, such as milk and yoghurt.
Extra refrigerating compartment (model with Home Bar)
• Can be used to store frequently used items, such as beverages.
Beverage shelf
• Can be used to store a variety of bottles, cans and cartons.
Egg rack
•Put eggs in the egg rack and then place the rack on the tempered glass shelf.
FROZEN FOOD STORAGE METHODS
Multiple guard
• Can be used for small packages of frozen food.
Tempered glass shelf
• Can be used to store all types of frozen food.
10
Loading...