

Page 1

hobby
4240,
4250,
F
4260
-4
Instructions
for
use
Page 2

For
please
easier
fold
understanding
or
this
the
Safety
For
The
to
with
The
according
As
of
colour
proceed
The
nected
the
The
connected
with
Cut-off
used,
mains
Only
approved
the
the
The plug
cover.
electrical
Please
on
this
of
last
page
rules
the
United
must
leads
safety
the
the
this appliance
pins.
three
in
the
wires
Blue:
Brown:
wire
letter
wire which
fuse
corresponding
page
to
colours
coding
follows:
as
which
the
to
N
to
letter
the
mains
disposed
but
leads
3Aspare
by
cover
must
Spare
suppliers
also
2.
the
or
must
observe
instruction
out
Kingdom
definitely
terminal
load
mains
following
Neutral
Live
the
of
may
of
the
is
coloured
terminal
coloured
coloured
is
the
terminal
or
coloured
L
plugs
of
be
fuses
according
ASTA
must
colour
never
covers
fuse
or
when
only
not
lead
code:
wires
in
correspond
not
terminals
blue
which
black.
brown
which
definitely
are
immediately.
replaced
must
be
marked
be
code.
be
used
are
PFAFF
the
general
the
manual
reading.
be
I
nor
are
coloured
the
your
in
must
marked
is
is
red.
completely.
used
BS
to
3
without
available
agencies.
safety
connected
plug
a
to
mains
with
plug,
be
with
must
marked
not
to
Defective
as
1362
with
or
A
fuse
from
notes
lead
the
con
be
be
and
find
the
will
You
contents
on
page
and
5
4
Page 3

from
unplug
reach
place
in
To
machine
the
before
for
or
store
drop
or
DANGER
sewing
The
1.
appliance
Always
2.
not
Do
3.
not
Do
4.
place
not
reduce
electric
sewing
a
the
should
relamping.
sewing
a
water
into
Important
United
the
For
use
you
When
ons
tions
risk
never
outlet
machine
machine
or
of
immediately
other
should
before
electric
left
be
Replace
that
always
unattended
bulb
has
where
liquid.
States
an
using
shock:
after
fallen
it
safety
and
electrical
adhered
be
this
sewing
when
using
same
with
water.
into
fall
can
instructions
only
Canada
as
to
machine.
before
rated
Unplug
pulled
basic
follows:
Always
in.
cleaning
5
Watts.
1
immediately.
into
a
appliance,
plugged
and
type
be
or
safety
Read
it.
tub
precauti
all
unplug
sink.
or
instruc
this
Do
reduce
VVARNING
allow
not
Do
1.
2.
3.
4,
5.
6.
7.
9.
10.
11.
12.
1
14.
1
16.
Please
used
Use
attachments
Never
perly,
nearest
adjustment.
Never
the
of
cloth.
Never
not
Do
not
Do
administered.
disconnect,
To
8.
Never
blocked.
Do
Keep
machine
Always
Do
3.
Do
Switch
5.
threading
as
Always
when
also
by
this
operate
it
if
authorized
operate
sewing
drop
use
operate
operate
unplug
not
fingers
use
not
pullorpush
not
the
making
observe
to
near
or
sewing
recommended
has
or
outdoors.
away
needle.
the
use
bent
sewing
unplug
To
be
children.
machine
this
been
sewing
the
machine
insert
where
turn
on
a
pulling
by
proper
or
needle,
sewing
any
the
used
sewing
dropped
dealer
any
aerosol
all
soft
from
blunt
fabric
machine
changing
other
general
the
a
as
only
by
machine
or
machine
foot control
and
object
controls
surface
on
moving
all
needle
needles.
while
machine
user
riskofburns,
Close
toy.
its
for
manufacturer
the
if
damaged,
or
service
with
into
(spray)
off
to
such
To
cord.
parts.
plate.
Use
stitching.
(“0”)
off
needle,
from
servicing
notes
safety
attention
intended
it
has
center
any
free
opening.
any
products
(“0”)
a
as
unplug,
The
needles
when
threading
the
adjustments
fire,
a
dropped
or
for
air
from
position,
bed
Special
wrong
It
may
making
electric
on
page
use
damaged
electric
necessary
Is
described
as
contained
as
cord
into
examination,
openings
accumulation
the
being
are
then
couch
or
grasp
the
is
care
can
plate
recommended
deflect
any
bobbin,
outlet
mentioned
2.
shock,
when
in
in
plug,
or
water.
repair,
blocked.
or
used
remove
the
where
plug,
not
required
cause
by
needle,
the
adjustments
changing
or
removing
when
in
injury
or
this
this
Return
electrical
Keep
of
where
plug
air
the
around
the
the
the
to
sewing
this
manual.
manual.
not
is
if
it
the
ventilation
lint,
dust,
oxygen
outlet.
from
openings
cord.
the
needle
to
manufacturer
causing
needle
in
the
presser
covers,
instruction
persons:
machine
Use
working
appliance
mechanical
or
and
is
may
sewing
break.
it
to
foot,
lubricating,
manual.
only
openings
loose
being
be
only.
break.
area,
etc.
to
is
pro
the
such
or
instructions
designed
is
and
sewing
these
machine
Keep
This
in
manufactured
safe
a
for
place
HOUSEHOLD
use
only.
Page 4

20
19
18
17
16
15
____________
PFAFF
H
10
11
—d
12
13
14
—
29
26------------
232425
Page 5

Parts
of
the
sewing
machine
hobby
Bobbin
1
Thread
2
Needle
3
Carrying
4
Bobbin
5
Bobbin
6
7
Stitch-width
Hand
8
Hand
9
Stitch-length
10
Reverse
11
Connection
1
2
On/off
3
1
Baseplate
14
5
Detachable
1
Needle
6
1
Presser
7
1
Thread
8
1
Thread
9
1
Threading
20
Take-up
21
Needle
22
Presser
23
Stitch
24
Stitch
25
Free-arm
26
Feed
27
Needle
28
Sewing
29
Thread
30
4260
winder
guide
thread
handle
pins
winder
wheel
wheel
key
switch
plate
foot
guide
guide
lever
holder
foot
pattern
pattern
dog
bar
lamp
trimmer
tension
tension
adjustment
release
adjustment
bushing
work
holder
slots
with
lifter
adjustment
chart
cover
(enclosing
disc
support
with
retaining
dial
dial
with
presser
knob
sewing
accessory
foot
screw
hook)
box
Page 6

Notes
safety
on
Notes
machines
or
28
The
1.
with
of
sewing
When
2.
maintenance
mechanical
always
the
plug.
The
3.
sewing
The
4.
be
The
5.
according
specification
6.
the
7.
8.
9.
10.
11.
on
IEC
user
the
adjusted
Do
Do
there
—
its
—
it
—
Do
socket
this
If
pose
rated,
any
To
open
inside
repair.
of
Be
parts.
safety
according
Section
335,
must
regard
needle
area
leaving
disconnect
mains
maximum
lamp
tension
machine
place
not
machine.
use
not
is
function
wet,
is
pull
not
by
appliance
than
we
damage
the
avoid
the
the
This
qualified
our
to
sure
domestic
for
exercise
the
to
and
during
the
work
parts
pulling
by
permissible
15
is
the
of
by
must
the
to
plate.
any
the
visible
is
with
e.g.
the
cord.
its
intended
not
will
caused.
risk
machine.
machine
solely
is
use
DIN
to
28.
and
up
constantly
work.
machine,
or
accessories,
or
the
out
Watts.
drive
Pfafl
a
put
be
indications
objects
sewing
damage,
disturbed,
condensation.
mains
used
is
or
accept
electric
of
There
which
the
service
only
sewing
700,
57
adequate
down
when
machine
the
wattage
belt
mechanic.
into
openings
in
machine
plug
for
is
it
if
any
are
the
responsibility
staff.
original
caution
moving
observe
during
changing
mains
must
operation
on
of
out
another
wrongly
liability
shock,
no
user
PFAFF
Section
from
for
only
the
if:
the
pur
do
parts
can
the
the
on
ope
for
not
Environment
recommended
The
temperature
80%.
sewing
This
nic-mechanical
supervised
in
such
rated
severe
dust,
electricity,
tic
chemicals
rosive
ventilation
For
used
even.
Treatment
on
Always
which
Cleaning
Housing:
clean
To
cloth
stubborn
paraffin.
Please
not
Do
ducts
cleaning
for
a
protect
night
the
which
Note!
use
such
100
C
machine
appliance;
in
use
way
a
dampness,
heat-producing
purposes
surface,
free
the
occur
housing,
free
is
use
dirt,
any
petrol
as
the
environment
40°
to
is
a
home.
the
itisnot
that
liquids.
or
the
which
machine
hitting
by
use
fluff.
of
soft
a
insecticides
(gas)
housing.
is:
Humidity
C,
high-quality
machine
is
a
it
should
It
subjected
sunlight,
direct
objects,
machine
is
both
against
dropping
or
dry,
a
remove
To
with
cloth
chemical
or
thin
or
Ambient
damage
clean
alcohol
chemicals
20%
electro
ope
be
cor
must
firm
and
any
to
for
to:
sta
be
and
it.
soft
or
pro
2
Page 7

Effective
and
modern
sewing
Congratulations!
Your
any
you.
machine
take
carefully,
it!
about
and
should
PFAFF
it!
for
reality.
a
quality
material
and
are
the
how
specialist
highest
the
benefits.
almost
for
thin
design
The
state-of-the-art
are
instructions
sewing
you
If
booklet
worth
It’s
out
find
offer
to
you
If
Your
go
So
ideas
You
which
new
technology
just
itself.
time
nothing
Because
of
all
to
have
have
And
have
sewing
and
and
easy
as
read
to
this
the
make
questions
any
is
fun
purchased
offers
machine
will
used
will
you
to
through
can
is
options
the
always
making
sew
go
the
you
through
on
find
use
only
your
most
happy
a
unique
can
this
that
your
as
the
wrong.
way
machine
of
No
—
your
product
deal
thick
machine
these
PFAFF
instruction
to
them.
problem!
help.
to
fashion
of
with
and
really
has
3
Page 8

Contents
Accessories
Accessory
Adjusting
Attaching
Bias
Blind-stitch
Bobbin
Bobbin
Bobbin
Buttonhole
Changing
Changing
Cleaning
Closed
Control
Control
Cording
Covering
Darning
Darning
Darning
Detachable
Drawing
Edge
Elastic
Elastic
stretch
binder
tape
case
thread
winding
and
overlock
panel
pedal
foot
plate
tears
guide
blind
stitch
stitches
Elastic
Electrical
control
Foot
arm
Free
Gathering
Gathering
General
Handwheel
with
Hem
Hem-stitching
Honeycomb
Knit-edge
Lace
feller
Lap
needle-position
Left
bulb
Light
buttonhole
Linen
buttonhole
Linen
Lubrication
Mounting
Multi-stitch
Needle
needles.
and
compartment
stitches
buttons
foot
tension
needle
the
presser
the
oiling
stitch
dog
feed
the
support
work
bobbin
the
up
stitch
connection
the
with
the
with
aids
sewing
release
twin
the
stitch
foot
bobbin
the
gathering
chart
foot
elastic
straight
disc
needle
with
.
.
.
thread
thread
stitch
.
.
.
gimp
attachment.
thread
4
Page 9

position
Needle
thread
Needle
Non-elastic
on
Notes
switch
On/off
overlock
Open
Overlock
Patches
Patchwork
Practical
Presser
Presser
Presser
and
Quilt
Removing
Reverse
Richelieu
Serging
Serging
Servicing
Setting
Sewing
Sewing
edging
Shell
Smocking
Special
Spring
Stabilizing
Stitch
Stitch
Stitch
Stitch
Straight
Stretch
Stretch
Thread
Threading
Threading
Topstitching
Trouble
Trouble
needle
Twin
Unlocking
Utility
Zigzag
stitches
safety
stitches
quilt
sewing
feet
feet
foot
patchwork
the
sewing
with
with
and
the
lamp
zippers
on
accessory
stitch
chart
density
length
width
stitch
triple
triple
trimmer
the
the
shooting
shooting
stitch
stitch
tension
stitch
(special
(standard
lifter
needle
blind
the
zigzag
the
trouble
utility
adjustment
adjustment
straight
zigzag
machine
needle
hook
the
chart
accessories)
accessories)
foot
plate
stitch
stitch
shooting
stitches
chart
stitch
stitch
thread
button
button
foot
29
20,
39
1
10
34
34
42
51
27
55
54
58
18
63
22
50
29,
29
61
24
63
44,
48
39
46
28
48
—
34
30,
64
—
45
55
35
8
—
6
22
23
23
29
32
32
18
17
16
28
64
64
38
23,
62
8
—
6
29
5
Page 10

hobby
A
C
FE
these
For
stitch-length
the
Program
B/AC/D
E
F
G
H
I
K
L
flfl
JI
till
Ill!
fl
jflj
Iii
E
F
G
H
I
K
L
4260
I
I
I
programs
Name
Buttonhole
Straight
Zigzag
Elasticstitch
Elastic
Decorativ
Greek
Shell-edging
Stretch
straight
Stretch
zigzag
-
,,
..
“S
“-
V
.-—
‘-..
the
adjustment
stitch
stitch
blind
stitch
triple
stitch
triple
stitch
Honeycomb
Florentine
stitch
Spring
Closed
overlock
Open
overlock
Stitch
—
stitch
stitch
elastic
stitch
stitch
stitch
stitch
stitch
length
button
stitch
chart
(_
N
\
can
(10).
_j
_....
set
be
Application
Standard
For
For
For
and
For
simultaneous
For
layers
A
towels
For
e.
—
anywhere
straight
all
serging
stitching
patches
invisible
overstitching
classical
decorative
linen
g.
stretch
For
and
sport
attaching
For
elastic
sewing
For
towelling
decorative
A
overstitching
For
for
Also
closing
A
materials
closing
A
non-fraying
II)
Ill
III
III
between
buttonhole
stitch
and
on
hem
serging
decorative
seams,
workwear
materials
on
and
stretch
and
and
materials
///
-
.‘,,-
//7
-*..
appliqué
elastic
attachment
two
hems
elastic
elastic
decorative
for
stretch
two
fabrics.
serging
serging
/\/
\/\
i\i
\/\
/\/
\i\
0
for
and
band,
touching
stitch
on
g.
e.
tape
threads,
stitch
touching
-W
‘,,\\
‘
—i,
-‘
“‘\
and
blouses
e.g.
lockstitch
e.g.
fine
crotch
on
seam
seam
‘Si
“,
mm
4
work
darning
and
fabric
for
materials,
seams
overlocking
seams
hem
fabric
fraying
for
stronger,
for
I’
/
l
with
and
tears
borders
on
I—,j
--
i
-
the
bed
up
layers.
to
and
aid
linen
4
.,
of
mm
6
Page 11

hobby
118
U
A
=
C
[
these
For
stitch-length
the
Program
8/AC/D
E
F
G
H
I
K
L
E
liii
fill
fill
fill
4250
EFG
I
G+D<>
programs
Name
Buttonhole
Straight
needle
Straight
needle
Zigzag
Elastic
Elastic
Greekstitch
Shell-edging
Stretch-3fach-Geradstich
Nadelposition
F
G
Stretch
needle
Stretch
zigzag
H
Honeycomb
Stitch
—
,‘
—
stitch
the
adjustment
stitch
position
stitch,
position
stitch
stitch
blind
triple
position
triple
stitch
H
..-
-..
middle
stitch
stitch
straight
stitch
length
button
left
mitte
left
chart
I
can
(10).
stitch
K
—
._.—
set
be
Application
Standard
For
work
For
requiring
For
For
and
For
simultaneous
A
towels
For
e.
For
sport
For
position
For
elastic
For
towelling
E
L
ilflflUflflilflilflO
“
III
I
buttonhole
4
to
sewing
a
workwear
and
materials
between
stitch
mm
and
needle
left
and
on
hem
serging
decorative
seams,
seams
elastic
on
and
anywhere
straight
all
up
all
serging
stitching
patches
invisible
classical
decorative
linen
g.
stretch
stretch
attaching
sewing
F
III
I
for
topstitch
appliqué
elastic
attachment
hems
e.
requiring
elastic
decorative
for
G
,-
‘*
-“/
‘.
0
and
position
band,
stitch
on
g.
tape
threads,
H
,v
/\/
and
blouses
e.
g.
lockstitch
work
e.
fine
crotch
on
..
%
mm
4
darning
and
for
g.
materials,
seams
needle
left
a
overlocking
seams
hem
I
with
and
tears
borders
on
K
_—
‘—
i—.
the
bed
aid
linen
and
L
flu
%.
ii
of
decorative
I
fill
fiji
flil
Florentine
Closed
K
L
overlock
Open
overlock
stitch
stitch
stitch
A
closing
A
materials
closing
A
non-fraying
and
and
materials
stretch
serging
serging
stitch
seam
seam
for
for
fraying
stronger,
7
Page 12

hobby
4240
E
Stitch
-
F,G
chart
H
I
E
F,G
H
It
[I
these
For
stitch-length
the
Program
B/AC/D
E
F,
G
H
I
E
flfl
F,
1W
H
I
Ifil
A
C
I
programs
G
I
adjustment
Name
Buttonhole
Straight
Zigzag
various
in
Elastic
Elastic
Stretch
straight
Stretch
zigzag
various
in
Honeycomb
Florentine
the
stitch
stitch
stitch
blind
triple
stitch
triple
stitch
/
\N
/
\
/
\
stitch
widths
stitch
widths
stitch
stitch
.—
.z
N
—
N
button
length
,
,-“
-,.
(10).
can
set
be
Application
Standard
all
For
to
up
serging
For
stitching
For
darning
invisible
For
simultaneous
For
sport
For
elastic
For
overlocking
decorative
decorative
A
anywhere
buttonhole
straight
mm
4
tears
stretch
and
attaching
materials
sewing
HI
UI
NI
between
stitch
appliqué
and
elastic
on
and
hem
serging
seams,
workwear
elastic
elastic
on
towelling
seams
hem
stretch
\\\‘
///
‘
///
\\\
0
e.
for
and
band,
patches
attachment
crotch
e.
g.
tape
threads,
and
stitch
‘*.
.
4
and
blouses
g.
lockstitch
and
seams
on
for
mm
\/\
\/\
/\/
\,\
work
with
and
on
the
bed
aid
linen
of
8
Page 13

4
Operating
PFAFF
the
ir
machine
Electrical
Detachable
arm
Free
Bobbin
Bobbin
Bobbin
Threading
Drawing
Presser
Thread
Changing
Needle
Covering
Control
Reverse
Stitch
Stitch
Setting
Setting
winding
case
thread
foot
trimmer
thread
length
width
connection
work
tension
needle
the
the
up
lifter
needle
the
tension
feed
the
panel
sewing
adjustment
adjustment
utility
the
stretch
the
support
bobbin
dog
stitches
stitches
thread
thread
button
button
Page
Page
Page
Pages
Page
Page
Page
Page
Page
Page
Page
Page
Page
Page
Page
Page
Page
Page
Page
10
11
11
12,
14
15
16,17
18
18
18
19
20
20
21
21
22
23
24
25
13
9
Page 14

case
Carry
carry
The
equipment,
dust
from
case,
protects
and
which
damage
is
your
part
sewing
during
the
of
machine
transport.
basic
Carrying
can
This
round
handle
be
groove
raised
in
the
lightly
by
carrying
pressing
handle
the
(4).
Electrical
Connect
nection
the
and
regulated
appliance
This
intended
fit,
not
this
For
10
connection
the
bushing
electrical
by
fit
to
contact
sewing
plug
pressing
has
polarized
in
a
qulified
a
machine
the
of
(12)
socket.
polarized
a
foot
the
on
The
foot
the
plug
outlet
electrican
model
pedal
sewing
sewing
(one
only
to
4240,
pedal.
one
install
4250,
to
machine
blade
way.
the
speed
wider
If
the
4280
V
con
is
the
than
does
plug
the
outlet.
proper
foot
On/off
sewing
The
switch
ready
other(.
not
Do
controller
switch
(13)
sew.
to
To
fully
fit
not
type
lamp
turned
is
reduce
the
in
modify
YC-482-3
lights
the
outlet,
the
risk
plug
on.
of
reverse
has
up
The
electric
any
in
to
when
the
way.
be
the
machine
shock,
plug.
used.
1
on/off
If
this
it
is
still
now
plug
is
does
Page 15

Accessory
the
Open
Organizing
the
Lay
sory
compartment
detachable
the
enclosed
compartment.
work
L
accessories
accessories
support
into
(15).
the
acces
Detachable
both
Using
support
Removing
arm
free
order
In
must
you
the
to
When
work
flush
machine.
work
hands,
to
(15)
to
swing
and
left
removing
support,
with
the
be
the
the
able
support
swing
left.
detachable
sew
to
detachable
the
out
it
lift
inserting
and
careful
be
arm
free
the
of
to
of
detachable
work
the
with
work
hole.
the
the
ensure
sewing
the
work
support!
arm,
free
support
detachable
that
is
it
11
Page 16

I
7
Preparing
the
Hold
wheel
stops
This
machine
the
handwheel
release
the
is
machine
disc
needle
winding
(9)
the
<8)
for
and
to
from
bobbin.
the
bobbin
press
“bobbin”
moving
-
winding
the
while
4
I
handsymbol.
the
11
far
far
off
the
winding
as
as
It
is
it
the
the
empty
possible.
will
it
only
is
positioned
Mounting
Switch
Place
bobbin
as
as
Note:
when
possible.
12
bobbin
on/off
bobbin
mechanism
Pull
go.
possible
switch
onto
the
to
far
as
(13)
the
and
bobbin
wind
the
to
I
pin
press
to
the
right
the
of
it
the
bobbin
as
down
right
Page 17

—4
I
I
bobbin
and
the
it.
the
the
tight.
the
go
soon
procedure
bobbin
cut
the
spool
thread
tension
thread
Turn
foot
the
of
as
the
holder
pedal.
thread
the
the
to
thread.
(5)
clockwise
and
(1)
is
passed
the
on/off
bobbin
stops
left,
and
up
into
to
it
run
through
switch
few
a
after
the
full
is
automatically.
remove
place
bobbin
the
bobbin.
the
hole
a
(13)
revolutions.
bobbin
Press
from
it
a
the
spool
on
and
and
win
the
pin
Winding
Pull
on
Place
winder
There
held
press
Let
As
ding
full
‘p
Don’t
Press
the
towards
(8)
Bobbin
The
thread
crosses
forget:
handwheel
the
“sewing”
winder
thread
tension
over
symbol
you
passed
is
itself
until
tension
(1)
in
on
release
and
it
a
turn
clicks
through
clockwise
way
the
disc
the
into
the
to
back
(9)
handwheel
place.
bobbin
direction
bobbin.
the
to
and
13
Page 18

_
Hook
Switch
Hold
towards
it
cover
the
off
side
on/off
you.
a
case
bobbin
the
case.
bobbin.
the
bobbin
Release
case
cover
the
cover
and
and
pull
out
remove
the
Removing
open
Raise
bobbin
the
(13)
switch
and
(26)
cover
hook
the
of
ensure
To
adjusted
interlacing
and
holes
14
perfect
each
to
should
darning.
sewing
other
be
and
visible
a
and
the
underneath
durable
threads
seam,
must
the
the
be
bottom
and
top
interlaced
ply
when
bottom
between
sewing
thread-tensions
the
fabric
two
decorative
must
plies.
seams,
be
The
button
well
Page 19

nserting
Insert
doing
then
opening
the
Checking
Hold
case
bobbin
during
Adjusting
Using
turn
thread
Turn
the
the
so,
under
the
and
setting
bobbin
the
bobbin
pull
the
thread
pull
case
this
the
tension
setting
bobbin
into
thread
the
tension
arrow).
(see
bobbin
the
protruding
the
must
movement.
setting:
the
screwdriver
screw
becomes
screw
thread
the
thread
drop
C
C
tension
bobbin
through
plate
thread
down
from
the
to
just
until
B
tension
from
upwards
the
the
left
weaker
little
a
becomes
In
case
slit
the
lies
it
bobbin
the
sharply.
thread
accessories,
bobbin
—
the
the
to
stronger.
A,
in
right
The
—
Inserting
Open
hook
the
finger
case
Check:
the
Pull
case
cover
must
the
D
pin
F
bobbin
not
bobbin
and
as
E
must
thread
fall
slide
far
point
out
case
the
as
sharply.
of
it
into
will
the
bobbin
go.
cutout
The
hook.
case
The
onto
bobbin
G.
bobbin
15
Page 20

2
I
I
I
I
Threading
Switch
the
Pull
thread.
handwheel
the
needle
the
black
The
you
show
Using
to
back
it
pass
slot
ding
upwards
back
to
up
threaded
left.
to
it
lay
guide
the
the
off
spool
the
Raise
are
arrows
the
hands,
both
front
the
downwards
(20).
take
the
through
pass
Now
the
from
and
(19)
needle
on/off
holder
presser
until
their
at
correct
Pass
through
up
right
thread
on
pull
into
through
lever
the
the
(5)
the
the
the
hand
thread
switch
up
take
highest
sewing
path
the
the
thread
the
(21).
take
thread
guide
and
foot
up
for
thread
thread
the
left
up
side
(13).
mount
(23).
lifter
lever
point.
machine
thread.
the
from
guide
right
around
threading
thread
The
from
lever
downwards
behind
(18).
the
(21)
(2)
threa
lug
thread
Turn
and
the
and
(B)
slot
is
right
and
16
Page 21

Threading
Thread
needle
the
the
the
needle
from
needle
thread
the
front
through
the
to
the
back.
eye
of
17
Page 22

I
Presser
The
the
presser
presser
toot
foot
foot
lifter
is
lifter
raised
(23).
and
lowered
I’
I
with
Drawing
Raise
and
needle
bobbin
needle
4
turn
the
returns
thread
thread
up
presser
the
bobbin
the
foot.
handwheel
its
to
formed
has
draw
to
/30
thread
Hold
towards
highest
up
the
position
loop.
a
the
needle
you
Pull
bobbin
-
thread
until
and
the
thread.
the
the
Bobbin
Close
under
18
the
the
thread
hook
presser
cover
foot
(26)
to
the
and
left.
pass
the
thread
Thread
Pull
mer
the
(30).
trimmer
thread
forwards
over
the
thread
trim
Page 23

Disengaging
off
Switch
the
Raise
front
the
presser
the
foot
presser
the
needle
of
the
foot
the
on/off
presser
holder
presser
to
down
its
(17).
foot
switch
highest
foot
until
up
it
clicks
(13).
position.
and
the
out
Press
rear
of
the
of
Engaging
the
Lay
holder
foot
into
click
presser
the
presser
(17)
the
foot
presser
foot
presser
lifter
so
that
(23)
foot
underneath
pins
the
holder
foot
lowered.
is
the
of
when
presser
the
foot
the
Check:
Please
place
in
ensure
by
that
raising
the
the
presser
presser
foot
foot
correctly
is
lifter.
19
Page 24

Changing
Switch
Removal:
retaining
Insertion:
the
insert
retaining
off
screw
screw
the
the
Lower
The
needle
needle
on/off
the
(22)
flat
by
(22).
presser
and
side
pushing
switch
remove
of
the
(13).
foot
needle
upwards
it
the
and
raise
needle
must
A
as
far
the
by
be
needle
pulling
facing
possible.
as
highest
its
to
downwards.
it
rear.
the
Hold
Lower
the
_A
position.
the
needle
Loosen
presser
and
foot
tighten
the
needle
and
the
Adjusting
the
Turn
setting.
red
normal
The
5
and
3
and
20
and
(see
the
needle
setting
for
page
needle
thread
sewing
28).
V
thread
tension
sewing
for
buttonholes
tension
(3)
between
is
the
to
between
desi
4
certain
buttons,
with
fed. Place
dog
must
plate
the
(27).
sewing
the
darning
The
facing
be
procedures
feed
the
narrow
dog
plate
darning
the
(27)
to
half
front.
such
must
stop
plate
sewing
as
cove
be
fabric
the
the
over
darning
the
of
Darning
For
on
red
being
2
feed
plate
Page 25

Control
left
The
With
spacing
Only
With
the
on
provided
panel
adjustment
lower
the
and
model
on
upper
the
straight
for
right
the
sewing
stretch
4260:
right
stitch
button
adjustment
stitches.
adjustment
you
E
with
the
(24)
can
with
twin
button
button
alter
needle.
the
the
letters
(10)
(7)
needle
you
you
for
is
can
can
position.
selecting
adjust
the
vary
various
the
stitch
the
zigzag
Furthermore,
length,
width
limited
a
stitches.
the
from
buttonhole
5
to
0
area
is
mm
and
also
Page 26

I
Reverse
machine
The
reverse
the
‘
sewing
sewing
sews
in
key
I
reverse
(11)
only
pressed.
is
adjustment
stitch
turning
by
the
to
button
length
required
infinitely
the
button
point
length.
(10)
bet
mar
adjustment
length
Stitch
length
stitch
the
With
as
long
as
you
ween
king
can
0
on
adjust
and
the
the
mm
4
button
“Buttonhole”
“buttonhole”
The
the
9,
the
further
stitch
Between
the
optimum
les.
ser
stitch
symbol
numbers
symbol.
density
you
becomes.
turn
4
sew
the
you
button
symbol
stretch
must
(10)
stitches
the
turn
clockwise
on
stitch
to
the
the
black
length
symbol
back
adjust
“Stretch”
den
To
ground
ment
“stretch”.
0
This
sewing
for
dial
the
area
to
the
is
buttonho
the
0,
find
can
you
1
and
Page 27

6ACO
ji
EFG*,(L
button
the
button.
needle
you
1
wish
needle,
mm.
2
point
E
you
for
will
Turn
4d
(7)
to
the
you
marking
vary
can
find
sew
the
can
infinitely
the
on
needle
the
point
width
a
symbol.
Note:
be
not
straight
adjust
button
marking
which
For
wider
stitch
to
position
on
zigzag
than
the
the
from
the
underneath
is
sewing,
2
more
not
of
width
required
“middle”
adjustment
the
and
mm
than
the
width.
the
twin
when
3.5
zigzag
to
button
“twin
needle
mm.
needle”
sewing
cc’
1
adjustment
mm
the
adjustment
the
symbol
4260)
use
widths
needle”.
with
not
button
turning
by
straight
the
stitches!
0
the
exceed
twin
and
twin
If
stitch
you
Stitch
(only
With
stitch
When
,,right”
“Twin
(only
Important:
straight
Above
the
the
stitch
width
on
the
from
sewing
by
symbol
zigzag
model
stitch
0
turning
needle”
model
on
and
the
width
adjustment
4260)
length
5
to
with
Only
zigzag
stitch
“twin
stitch
must
(7)
to
must
the
23
Page 28

Setting
stitch
All
(25).
dial
Using
so
utility
patterns
that
the
the
stitches
that
stitch
required
you
pattern
letter
sew
can
adjustment
is
with
directly
machine
your
button
underneath
(24)
the
you
are
set
point
3
c,
illustrated
the
marking.
2
in
desired
0
I
chart
pattern
stitch
the
stitch
by
turning
the
24
Page 29

I-—-
cc
Adjusting
the
of
All
fabrics.
desired
the
stitches
Turn
stitch
stretch
the
with
on
stitch
the
stitches
the
length
stitch
black
background
adjustment
pattern
are
button
adjustment
stretch
(10)
button
stitches,
the
to
(24).
i.e.
“stretch”
they
are
symbol
suitable
and
for
select
stretch
the
25
Page 30

Page 31

Utility
General
Non-elastic
Elastic
Sewing
Overlock
Buttonhole
Hem
Smocking
stitches
with
Gathering
Darning
Sewing
Stabilizing
Sewing
edging
Shell
stitches
sewing
stitches
buttons
on
stitches
the
zippers
on
edges
lace
aids
twin
and
needle
practical
sewing
Page
Page
Pages
Page
Page
Pages
Page
Page
Pages
Pages
Pages
Page
Page
Page
28
29
31
34
38
39
46
30,
36,
40,
42,
44,
47
48
32,
37
41
43
45
33,
35
27
Page 32
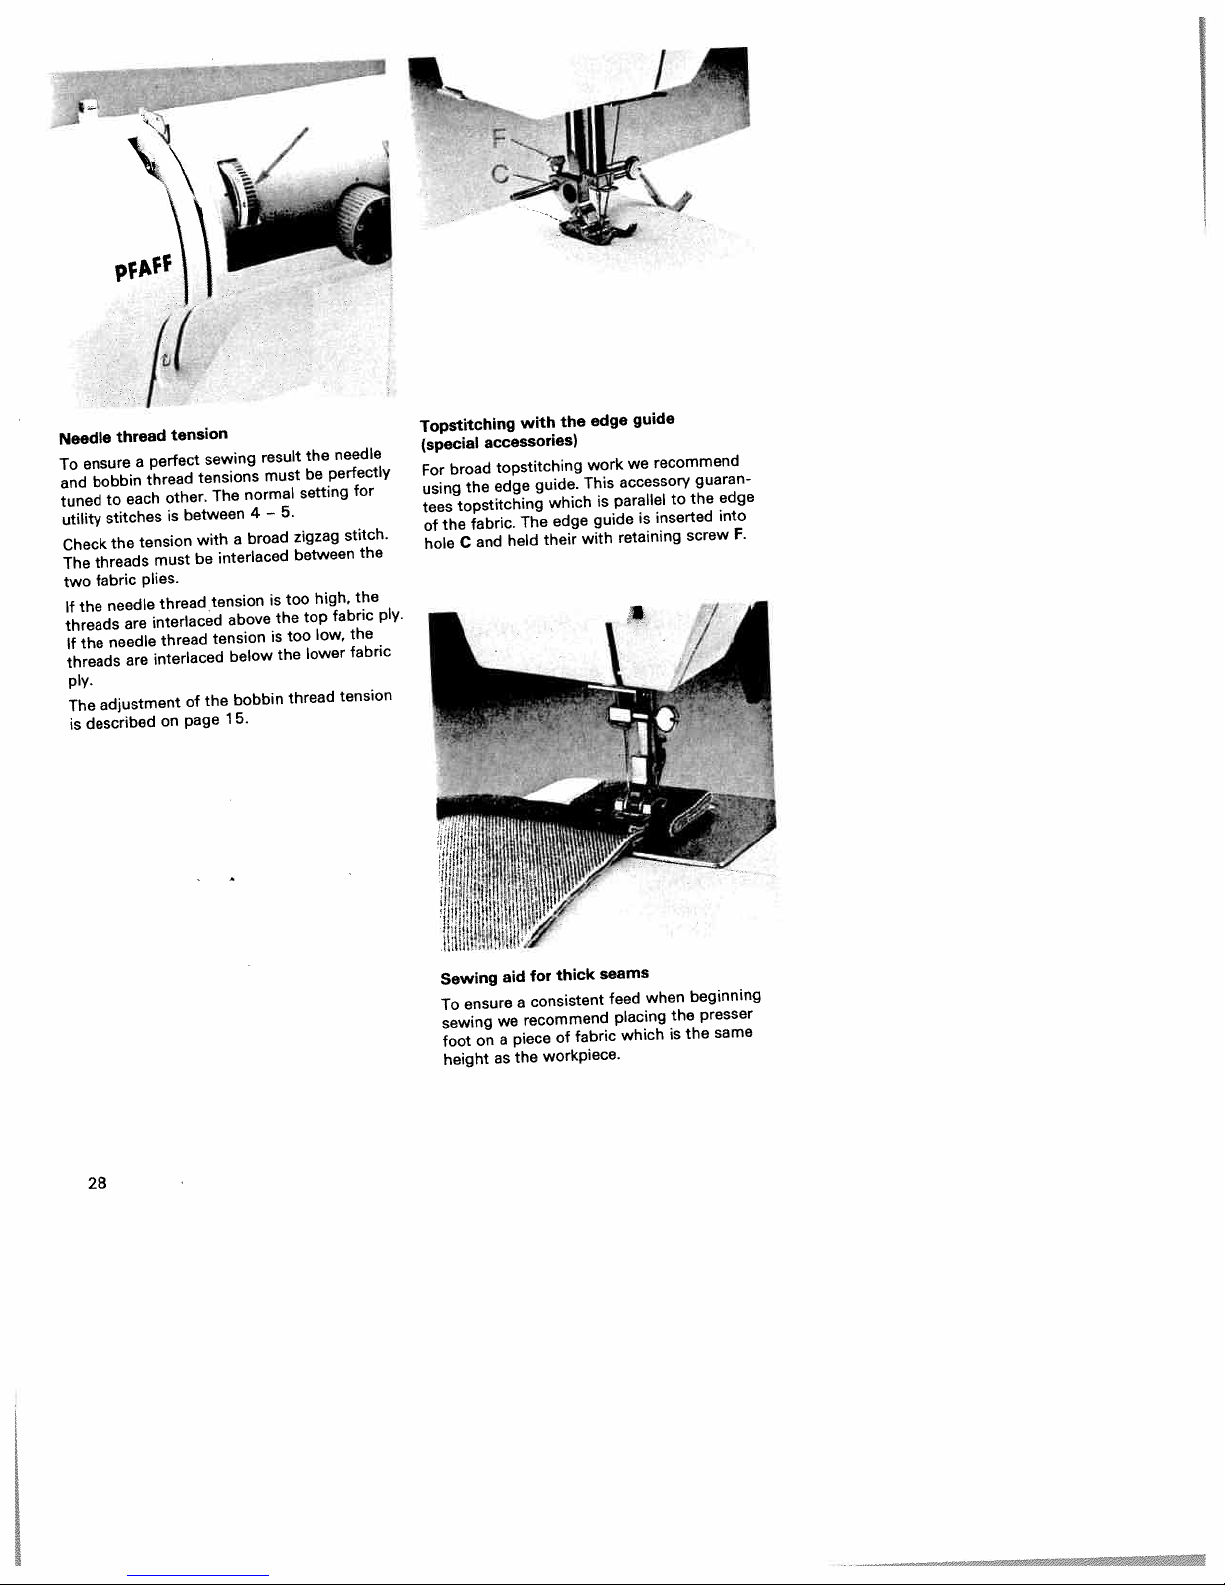
Needle
ensure
To
and
tuned
utility
Check
The
two
the
If
threads
If
the
threads
ply.
The
described
is
\\\
thread
bobbin
each
to
stitches
the
threads
fabric
needle
are
needle
are
adjustment
/1
tension
perfect
a
thread
other.
is
tension
must
plies.
thread
interlaced
thread
interlaced
on
V
sewing
tensions
The
between
with
interlaced
be
tension
tension
the
of
page
normal
a
above
below
bobbin
5.
1
result
must
—
4
broad
5.
is
the
is
the
the
be
setting
zigzag
between
too
top
too
lower
thread
needle
perfectly
high,
fabric
low,
tension
for
stitch.
the
the
the
fabric
I
ply.
Topstitching
(special
broad
For
the
using
topstitching
tees
fabric.
the
of
and
C
hole
r
with
accessories)
topstitching
guide.
edge
The
held
the
which
edge
their
edge
work
This
guide
with
accessory
parallel
is
retaining
guide
recommend
we
inserted
is
to
guaran
the
screw
edge
into
F.
seams
thick
for
ensure
sewing
foot
height
on
aid
a
we
piece
a
the
as
consistent
recommend
fabric
of
workpiece.
feed
placing
which
when
beginning
the
the
is
presser
same
Sewing
To
28
Page 33

Straight
Program
needle
lengthened
be
Basic
“left’s
Some
more
Eg.
per.
Model
Select
—
width
Model
Select
—
Please
position
Blind
for
the
the
good,
The
B.
screw
stitch
the
is
E
position
straight
models
(only
sewing
by
easily
topstitching
4260:
straight
adjustment
4250:
stitch
ensure
when
stitch
serging
thread
fabric
smooth
trimmed
can
You
A.
basic
middle.
to
up
stitch
processes
altering
a
stitch
F.
that
adjusting
foot
difficult
passes
edge
seam.
edge
adjust
4
4260
collar
button
the
no.
from
straight
The
mm.
with
cah
the
or
and
E
needle
its
is
3
materials.
bar
over
rolling
must
stop
the
stitch
stitch
needle
4250)
and
carried
be
needle
sewing
set
to
(7)
at
is
setting.
particularly
While
thus
C
up.
guided
be
with
with
length
position
position.
a
on
stitch
the
“0”.
its
preventing
This
retaining
the
can
out
zip
highest
suitable
sewing,
ensures
along
stop
Zigzag
Model
Select
—
ment
ween
Model
—
Model
—
a
stitch
4260:
button
0
Select
Select
careful
Be
fabric
between
fabric
stitch
and
4250:
stitch
4240:
stitch
edges
when
With
F.
you
(7)
mm.
5
G.
F
(2
ensure
to
the
entering
overstitching.
the
can
mm)
that
needle
the
stitch
the
vary
G
or
when
perforations
fabric
(4
and
width
width
mm).
serging
next
adjust
bet
the
alternate
the
to
29
Page 34

Elastic
elastic
The
invisible
for
necessary.
ger
stretch
hem
The
an
i.e.
necessary.
On
—
hem
Fold
—
Now
—
hem
Now
—
foot
red
The
—
when
blind
blind
hems;
non-stretch
and
sewn
is
extra
materials
edge
hem
the
the
lay
edge
the
lay
that
so
guide.
needle
entering
stitch
stitch
is
It
and
serging
which
separately.
width
hem
protrudes
fabric
the
must
sewing
equally
serged
of
back
underneath
crease
catch
the
especially
is
by
suitable
fabrics.
fabric
the
strongly,
fray
inwards.
outwards
about
by
line
only
fabric
suitable
hand
simultaneously,
edge
for
both
is
lon
no
is
serge
that
so
cm.
1
presser
the
along
runs
texture
one
crease
the
in
not
the
the
line.
the
yarn
4260:
4250/40:
stitch
stitch
H
I
30
Page 35

Sewing
sewing
For
removed
be
with
red
Select
—
stitch
4;
Turn
—
the
enters
Now
—
the
Now
—
that
hole
Knot
—
on
model
the
button
button
the
buttons
on
and
darning
the
the
stitch
F.
4250
handwheel
the
lower
sew
needle
the
in
the
buttons,
mm
4
in
right
the
off
on
button.
thread
the
width
and
such
presser
the
the
feed
plate.
zigzag
a
hole
blade.
button.
also
ends
presser
the
dog
stitch
adjustment
4240:
towards
that
way
the
in
foot
Take
enters
the
on
must
(model
stitch
you
the
button.
lifter;
the
reverse
care
right
foot
be
button
G)
and
needle
this
to
must
cove
4260:
move
hand
side.
at
holds
ensure
Sewing
Insert
—
Place
—
ton
column
—
—
on
the
match
a
and
Remove
button
the
Wrap
knot
buttons
presser
sew
this
on
the
the
it.
between
described
as
page.
match
apart.
shank
with
foot.
with
and
a
the
the
button
holes
the
in
111)
pull
sewing
the
shank
in
left
fabric
the
hand
thread
but
and
and
31
Page 36

Stitch
Stretch
With
high
seams.
E
this
level
stretch
triple
program,
of
straight
durability
all
stitch
seams
are
which
sewn:
e.g.
require
crotch
a
4260/4240:
Stitch
4250:
Stretch
stretch
The
decorative
T-shirts
for
Serge
—
Fold
—
Topstitch
—
triple
the
over
Stitch
triple
seam
and
fabric
the
the
stretch
G
zigzag
zigzag
which
underwear.
desired
hem
F
edge.
stretch
is
is
hem
from
elastic
very
a
particularly
width.
face
the
and
suitable
side.
32
Page 37

Stitch
4260:
4250/4240:
Elastic
Because
for
used
underwear.
off
Cut
—
fabric
Gather
—
straight
Slide
—
band
Sew
—
ends
and
On
—
sewn
red
Stitch
stitch
its
of
sewing
the
edge.
the
stitch
workpiece
the
lay
or
on
it
the
of
overstitch
skirts
onto
above,
as
G
high
on
old
fabric
it
using
elastic
and
the
4(1
H
elasticity,
elastic
elastic
with
page
(c.f.
between
underneath
elastic
the
band
the
with
trousers,
which
edge
the
using
/\JfSJV
band.
band
the
40).
to
elastic
the
elastic
I
this
close
mm
4
and
it
stitch.
overlap
elastic
has
stitch
e.g.
the
on
to
long
elastic
pin
Allow
stitch.
been
stitch.
the
a
tape
/
is
it
little
prepa
.f
down.
the
is
Stitch
4260:
4250/4240:
Honeycomb
honeycomb
The
hem
rative
on
hems
Fold
—
which
underwear
hem
the
E
Stitch
stitch
H
stitch
particularly
is
over
is
and
double
elastic
an
T-shirts.
and
and
suitable
overstitch
deco
for
it.
33
Page 38

is
What
elastic
For
models
which
ches
simultaneously.
serge
normal
than
to
fast
We
Tip:
when
3
no.
particularly
even
ring
overlock
an
and
4250
sew
sew.
recommend
sewing
well
on
knitted
and
two
seams,
broad
4260
and
stitch?
materials,
offer
fabric
They
durable
very
using
overlock
prevents
seams.
overlock
layers
are
blind
seams.
more
the
N
N
N
N
N
N
N
N
N
N
N
N
N
hobby
the
together
and
stitch
It
seam
stit
elastic
easy
foot
guides
pucke-
and
and
Stitch
(only
Closed
With
perfectly.
and
Tip:
while
K
models
overlock
this
knit
Ensure
it
stretch
stitch
You
collars.
being
is
that
4250
can
stitch
you
the
sewn.
also
and
can
sleeve
4260)
sew
sew
jersey
on
cuff
sleeve
is
quality
cuffs
stretched
Stitch
(only
Open
With
which
ther
Tip:
hand
it.
I.
on
overlock
this
perfectly.
Ensure
stitch
34
stretch
models
do
stitch,
not
that
just
fray
4250
stitch
thicker
strongly
the
next
and
materials
needle
the
to
4260)
can
sews
material
fabrics
and
toge
sewn
be
right
the
and
not
in
Page 39

0(1)
<C)
0
<GD
C
0)
o.
GD
-.
:7
<
ZGD
.
GD
0
p4
3
GD
:3.
GD
0
DI
:3
a.
GIG
GD
0
0
GD
C)
0•
GD
GD
:3-
ci
(0
-.,
o
GD
GO
—
GO
0cD
0
0(
—
EcD
o
cDc
U,
GD
—
00
C)
-0
0
3
ct,
U’
Page 40

Buttonholes
buttonholes
Sewing
models
hobby
be
to
have
even
es
(special
foot
Generally,
doubled
additionally
organza
the
that
sewn.
Avalon
purpose.
this
dissolves
which
and
velvet
it
poorly
fabric.
the
ciently
easier
much
Embroidery
good
larly
Using
points
ting
test
a
because
rotated.
we
easier
accessories).
buttonholes
fabric.
line
viscose
and
does
fabric
Madeira)
(from
This
thick
be
can
The
the
by
to
and
for
magic
a
of
buttonhole
is
To
recommend
However,
some
with
not
a
is
water.
in
wool
used
material
machine
sew.
darning
sewing
marker
buttonholes
the
first.
easy
very
fabric
the
make
sewn
are
is
it
materials
backing
gather
also
is
special
On
fabrics
either
thus
is
and
threads
attractive
pin,
or
with
does
buttonho
sewing
buttonhole
the
into
necessary
such
paper
when
good
very
of
type
materials
which
underneath
or
on
fed
buttonholes
are
seams.
mark
and
all
not
lined,
as
being
fleece
feed
more
particu
the
always
of
to
silk,
so
for
such
are
star
the
as
effi
sew
Note:
every
Before
of
runner
forwards
sories)
is
arrow
0.5
are
determining
36
the
at
cm
buttonhole
buttonhole
first
the
apart.
the
far
as
They
length
red
as
give
of
you
foot
line.
it
must
will
The
you
the
slide
(special
i.e.
go.
red
yardstick
a
buttonhole.
the
acces
the
markings
red
for
Page 41

Program
Stitch
Sewing
foot
Linen
Insert
—
forwards
Position
—
and
desired
Then,
—
ches
fabric
Then
—
buttonhole
the
in
Then
—
stitches
Model
Knot
—
Model
Adjust
—
Model
—
—
—
B/AC/D
length
buttonholes
buttonhole
the
sew
length.
with
for
while
select
same
set
4240:
the
4250:
needle
stitches.
4260:
Adjust
select
stitch
a
Sew
open
Cut
of
pair
wIiIEiT
symbol
buttonhole
far
as
pattern
the
first
the
setting
the
bartack.
the
doing
the
seam
length.
again
AC
while
thread
the
to
position)
setting
the
left
the
adjustment
width
tying
few
the
scissors
“buttonhole’s
with
foot
will
it
as
adjustment
buttonhole
You
this.
letter
the
in
and
holding
ends
straight
and
to
needle
off
buttonhole
a
or
zhe
and
go.
AC.
have
and
0
reverse
sew
the
on
stitch
sew
straight
position
stitches.
slitting
buttonhole
slide
seam
sew
to
sew
direction
few
a
fabric.
reverse
the
setting
few
a
(7)
dial
with
knife.
dial
few
a
the
tying
stitch
by
the
the
at
in
hold
bartack
turning
to
aid
foot
B
the
stit
the
second
and
side.
(left
F
off
and
E
0.
of
Linen
To
sportswear,
thread.
On
cularly
from
—
—
the
a
A
I
sew
elastic
Lay
sion
neath
Clamp
protrusion
Slide
—
as
described
Pull
—
buttonhole
Sewing
presser
Linen
Mark
—
buttonholes
Proceed
—
“Sewing
foot”.
When
—
do
buttonhole
especially
we
materials
important
stretching.
gimp
the
and
A
presser
the
the
buttonhole
the
possible
loop
the
buttonholes
foot
buttonholes
the
sewing
sew
not
point.
with
durable
recommend
the
prevent
to
thread
the
pass
foot
threads
B.
sew
and
left
the
in
the
of
cut
and
0
beginning
the
on
described
as
buttonholes
the
further
gimp
buttonholes,
gimp
over
thread
towards
the
to
runner
the
hand
gimp
the
with
and
fabric.
with
second
than
thread
using
thread
buttonhole
the
rear
the
ends
and
left
as
buttonhole
column.
thread
threads.
the
end
the
in
the
buttonhole
the
e.g.
gimp
a
parti
is
protru
under
front.
the
right
forwards
far
as
into
standard
points
section
buttonhole
beginning
B
the
of
on
of
the
seam.
37
Page 42

with
Hem
Topstitching
and
normal
needle.
Professional
shorts
cycling
the
with
various
in
lable
jersey
the
use
twin
The
when
cm
zigzag
the
needle
avoid
First
—
the
for
Then
—
Finally
—
seam.
the
On
Tip:
it
wear
topstitching
the
stretch
hems
twin
needle
sewing
stitch
over
iron
hem.
topstitch
cut
difficult
advisable
is
twin
work
on
be
can
needle.
widths.
needle
must
with
not
breakages.
the
the
protruding
the
materials
it.
needle
be
can
Materials
T-shirts,
sewn
The
Please
for
not
the
more
width
hem
to
twin
stretch
be
baste
carried
with
knitwear
quickly
needle
ensure
broader
straight
than
fabric
of
from
hem
such
the
out
the
and
fabricsl
stitch
2.0
the
edge
ribbed
as
hem
on
and
easily
is
that
than
mm)
desired
face
back
before
twin
avai
(with
to
side.
you
3.5
knit-
Threading
—
—
to
the
spool
a
Place
Simultaneously
other
—
Lay
(18)
into
the
the
In
must
the
to
the
and
each
through
arrows.
threads
twin
on
thread
right
pass
left
threads
(19)
of
both
pass
of
and
the
needle
both
guide
thread
to
the
behind
thread
right
the
of
the
tension
spool
the
of
marked
slot,
right
the
one
and
and
disc
thread
left
stands.
threads
with
one
the
of
needles.
of
the
C.
the
the
guides
threads
38
Page 43

Smocking
light
Fine,
are
silk
work.
king
thread
and
case
thread.
the
than
bobbin
the
forget
tension,
Sew
—
gather.
Mark
—
fabric
Each
—
presser
When
—
another,
original
seams.
lar.
Knot
—
of
effect
fabrics
especially
For
should
you
wind
the
As
normal
case
however,
more
the
test
a
first
the
and
additional
foot’s
sewing
you
length
Otherwise
the
seam
the
with
such
suitable
smocking
use
by
it
elastic
bobbin
must
the
intense
seam
line
along
sew
width
several
must
threads
on
hand
thread
higher
to
on
seam
when
at
the
elastic
Batist.
as
for
work
additional
an
with
thread,
set
be
the
the
determine
the
it.
can
from
seams
stretch
sewing
gather
the
beginning
the
reverse
threads
viscose
beautiful
with
the
much
is
the
very
at
bobbin
gathering
the
face
sewn
be
first
the
next
the
the
will
side.
the
bobbin
elastic
stronger
tension
low.
level
side
row.
to
fabric
subsequent
be
and
smoc
elastic
thread
effect.
the
of
at
one
to
irregu
and
of
Don’t
of
a
its
end
39
Page 44

Gathering
the
With
and
skirts
mm.
4
should
you
ring.
Mark
—
fabric
protrude
Each
—
presser
Gather
—
bobbin
of
Finally
—
secure
with
program
valances
ensure
To
sew
the
and
subsequent
foot
the
thread.
gather
the
the
the
two
first
sew
approx.
width
piece
by
thread
gather.
a
line
how
straight
you
E
with
regular
or
along
10
seam
of
You
can
a
three
the
on
it.
20
—
from
fabric
determine
much
ends
stitch
gather
stitch
gathering
rows
face
Allow
cm.
be
can
the
by
you
knotted
are
length
side
the
sewn
last.
pulling
the
pull
sleeves,
effect
gathe
of
of
threads
amount
the
of
the
to
one
the
thread.
to
40
Page 45

Stitch
4260:
4250/4240:
Gathering
and
Sleeve
using
ease
does
thread
bobbin.
Mark
—
reverse
Sew
—
stitch
The
presser
elastic
the
Lower
—
ches.
both
You
—
amount
The
-.
by
Finally,
—
Stitch
with
waist
an
not
first
the
side
few
a
and
needle
foot.
the
Then
ends.
determine
you
gather
pulling
knot
stretch
G
the
elastic
have
of
stitches
leave
must
thread
presser
pull
can
the
stretch
H
elastic
seams
thread.
to
gathering
fabric.
the
the
be
Raise
around
the
the
the
pull
also
ends
threads
the
can
be
using
needle
in
the
foot
elastic
amount
threads.
be
of
thread
be
The
wound
seam
the
the
presser
the
and
altered
the
gathered
elastic
on
honeycomb
the
in
middle
needle.
sew
thread
gather
of
elastic
the
and
onto
foot
after
the
fabric.
of
few
a
evenly
threads.
elastic.
with
the
the
and
by
sewing
stit
lay
at
the
The
Tip
particularly
grooves
guide
sewing
the
cording
suitable
process.
the
foot
elastic
(special
gathering.
for
fed
is
accessories)
Due
evenly
its
to
during
is
41
Page 46

Stitch
4260:
4250/4240:
Darning
Darning
suitable
over
Sew
—
well
is
rows
Stitch
with
with
repairing
for
the
covered.
overlap.
G
the
the
H
elastic
elastic
damaged
damaged
Take
stitch
stitch
care
area
to
is
areas.
in
ensure
especially
until
rows
that
the
patches
cover
Baste
—
damaged
Sew
—
on
damaged
the
the
of
the
to
fabric.
elastic
larger
piece
new
a
the
over
new
area
the
of
piece
of
fabric
fabric
the
edges
of
face
onto
fabric
side
the
onto
with
necessary
is
it
well,
holes
Sewing
To
sew
area.
it
stitch.
the
to
back
Now
—
seam
Tip:
patch,
in
turn
the
To
the
cut
from
simplify
turn
fabric.
fabric.
the
the
the
Then
damaged
turning
handwheel
reverse
raise
the
the
area
side
of
corners
until
presser
the
the
fabric.
the
of
needle
foot
is
and
42
Page 47

H
I
Repairing
tears,
On
lay
to
ful
of
side
forces
repair.
fect
Lay
—
rial.
damaged
Now
—
dance
Cut
—
the
the
the
piece
a
It
sew
the
seam.
frayed
a
must
tears
piece
fabric.
workpiece
of
always
area.
over
the
with
underlayed
edges
of
The
fabric
the
size
or
fabric
underlayed
and
underneath
be
damaged
of
piece
small
under
ensures
little
a
the
of
tear.
holes
the
fabric
you
larger
area
fabric
it
reverse
a
the
than
in
back
is
rein
per
mate
accor
use
the
to
43
Page 48

Sewing
There
For
pers.
concealed
the
sers
market
using
denim.
plastic
a
important
is
It
close
very
This
per.
foot
per
presser
the
If
the
of
use
and
on
various
are
skirts
unilaterally
offers
metal
a
For
zipper.
is
either
foot
zipper
presser
needle
the
4260.
zippers
zipper,
various
zipper
all
the
to
why
holder.
foot
methods
we
for
other
for
edge
it
on
foot
position
of
recommend
men’s
concealed
zippers.
strong
for
materials
types
all
the
of
possible
is
right
the
inserted
is
holder
“left”
and
of
or
you
sewing
the
ladies,
zipper.
We
fabrics
we
zipper
teeth
insert
to
the
into
can
on
zip
on
bilaterally
trou
The
recommend
such
recommend
sew
to
the
of
the
the
of
left
side
left
the
additionally
models
as
zip
zip
4250
Bilaterally
Insert
—
Baste
—
presser
the
run
per
Stitch
—
the
in
close
Now
—
the
to
seam.
concealed,
zipper
the
the
in
alongside
half
in
fabric,
zipper.
the
can
you
end
zipper
foot
of
raise
the
of
foot
and
that
so
the
the
the
continue
zipper
sewn
on
lay
the
foot.
zipper,
presser
sewing
in
the
it
and
zipper
right
underneath
teeth
the
leave
foot
the
sew
hand
of
and
seam
the
the
needle
lateral
side.
zip
up
44
Page 49

—
the
Stop
—
in
open
Now
—
The
—
—
—
same
the
Iron
to
—
after
fabric.
the
you
trouser
ensure
about
Baste
the
Insert
and
Sew
distance.
the
zipper.
can
over
4
the
teeth
the
move
along
Raise
finish
zipper
the
that
mm.
zipper
are
first
seam
visible.
zipper
the
the
half
the
sewing
the
under
foot
needle
edge
leave
and
presser
the
allowances,
underlap
the
the
on
the
to
the
of
the
and
foot
seam.
taking
protrudes
underlap
right
correct
zipper.
needle
so
hand
position.
care
by
that
side
—
—
—
Tip:
mend
ries).
Just
zipper
Close
evenly
Then
To
before
and
the
to
sew
achieve
using
the
finish
zipper
the
through
the
end
other
a
edge
of
sewing
and
half
the
perfect
guide
the
baste
basted
seam,
the
the
of
seam,
(special
the
seam.
overlap
zipper.
seam.
we
open
recom
accesso
the
45
at
parallel
zipper
the
of
half
second
the
Sew
Page 50

4i11
Stabilizing
the
With
stabilize
can
ease,
with
edges.
fabric
from
edges
result.
the
is
Fold
—
twice
the
Lay
—
hemmer
straight
Leave
—
presser
scroll
Lower
—
edge
ensure
the
hemmer
the
(each
the
into
the
evenly
right
edges
blouses,
without
The
fraying
beginning
approx.
folded
sew
and
stitch
needle
and
foot
the
presser
into
the
that
half
(special
silk
having
hemming
and
of
2
fabric
few
a
Stitch
E.
the
in
insert
fabric.
foot
the
fabric
the
of
accessories>
cravats
pre-iron
to
prevents
clean,
a
fabric
the
mm>.
underneath
edge
stitches
length
fabric,
the
and
hemmer.
does
presser
and
durable
edge
2.5
raise
hemmer
guide
Take
not
foot.
valances
the
the
with
—
the
run
you
edge
over
the
3
the
foot
fabric
care
under
the
mm.
to
Tip:
roll
hem
particularly
is
attractive
with
a
zigzag
the
fabrics,
chiffon
and
viscose
silk,
On
stitch.
46
Page 51

Inserting
can
You
e.g.
lace,
First
—
the
Sew
—
margin.
The
—
the
Sew
—
small,
Cut
—
lace
achieve
on
the
fabric.
on
fabric
middle
over
dense
back
baby
lace
both
underneath
and
both
the
beautiful
a
and
basted
is
sides
ironed
edges
zigzag
extra
children’s
onto
the
of
the
to
the
of
stitch.
fabric.
effect
lace
lace
the
clothing.
the
at
side.
lace
by
face
is
a
cut
with
inserting
side
narrow
down
a
of
:1
Attaching
can
You
an
with
here’s
And
First
—
Sew
fabric
Fold
—
Process
—
way.
lace
beautify
appropriate
how
the
serge
lace
the
the
to
up
corner
the
the
all
and
lace
done:
it’s
cut
onto
first
and
following
remodel
over
edges.
face
the
corner.
sew
and
over
sides
home
side
it
textiles
again.
over
the
of
diagonally.
same
the
in
$4
47
Page 52

Only
Shell
The
soft
used
the
edge
—
—
Serge
seam
Take
models
on
edging
edge
shell
fabrics
an
as
needle
feed.
the
allowance.
care
underneath
intensifies
This
edging.
such
edging
thread
fabric
that
4260
especially
is
as
on
tension,
the
presser
the
the
and
and
silk
underwear.
edge
fabric
effect
4250:
attractive
the
and
only
foot
viscose.
deeper
iron
runs
while
the
of
Stitch
The
over
shell
thin,
on
is
It
higher
the
the
half
sewing.
L
often
shell
Tip:
the
also
seam.
be
By
seam
creating
A
used
sewing
you
fine
instead
coloured
a
strengthen
attractive
an
fabric
of
of
woollen
a
woollen
the
contrast
another
shell
colour
thread.
thread
edge
in
can
into
while
the
also
48
Page 53

I
TradtionaI
Richelieu
Patchwork
Hemstitch
embroidery
quilt
seam
techniques
Page
Page
Page
50
51
52
49
Page 54

)
Richelieu
especially
This
insert
sewing
Using
—
the
Then
—
underneath
and
into
Insert
—
To
—
sew
straight
Then
—
areas
the
Embroider
—
stitch.
Due
—
the
Finally,
—
fleece
is
embroidery
machine.
magic
a
side
face
place
clamp
embroidery
an
foot
more
lend
the
of
all
stitch
carefully
which
contour.
the
to
work
simply
in
finished.
artistic
is
marker,
the
of
layers
two
parts
the
the
both
number
durability
contours
(stitch
cut
are
The
contours
the
embroidery
much
is
dissolve
water
cold
form
easy
out
to
fleece
to
draw
fabric.
of
to
fabric
frame.
0.
length
the
be
more
and
eyelet
of
sew
Avalon
embroidered
be
and
the
to
twice
fabric
hollow.
must
with
fleece,
stable
the
your
and
your
with
motif
your
fleece
fleece
the
embroidery,
using
approx.
from
mm
2
move.
not
dense
a
this
and
embroidery
one-off
onto
the
mm(.
1
the
next
zigzag
part
strong.
design
to
of
50
Page 55

Patchwork
Patching
techniques
American
north
leftover
of
into
ped
Patchwork
hand.
by
possibility
much
a
in
patchwork
A
of
ers
number
A
combined
patchwork
is
This
sewn
consists
often
is
quilt
and
which
fabric.
creative
a
quilts
Nowadays,
to
shorter
fabric:
of
in
then
onto
of
bound
quilting
pioneer
make
quilt
geometric
different
which
basted
back
the
one
by
were
Over
hobby.
used
time.
always
piece
are
originally
the
to
however,
your
variations
forms
a
to
of
of
this
traditional
women
years
sewn
be
creative
consists
pieces
the
fleece
quilt
the
fabric.
bottom
used
to
it
you
ideas
of
to
top
layer
The
layer.
handicraft
by
use
make
develo
has
exclusively
the
have
reality
a
three
of
are
fabric
create
quilt.
the
of
and
usually
which
entire
lay
a
then
quilt
here’s
And
Using
—
templates,
patchwork.
seam
Spread
—
accordance
squares
These
and
The
—
quilting,
down,
Baste
—
the
Traditionally,
—
sewn
this
with
straight
on
3
or
58).
You
making
bedspread.
how
your
allowance
these
which
squares
form
will
seam
never
the
fleece
together
procedure
sewing
a
model
next
mm
quilt
the
then
can
it
it’s
own
the
cut
The
pieces
with
the
allowances
rather
but
ironed!
finished
insert
these
stitch
4260).
to
and
continue
a
into
done:
commercially
or
pieces
templates
1/4
of
out
pattern
the
can
you
then
will
top
they
top
and
three
small
with
faster
is
machine,
the
or
Always
seam.
the
patchwork
cushion,
you
should
inch
in
then
be
of
ply
not
are
are
ply
bottom
the
and
e.g.
program
sew
to
a
need
(0.63
front
and
put
sewn
the
serged
be
to
the
of
fabric
manual
more
with
I
approximately
sew
foot
Use
foot
your
hanging
wall
available
for
include
cm).
you
of
form
together.
together
quilt.
smoothed
quilt
quilt
layers
stitches
practical
the
stretch
number
(see
quilt.
your
in
small
when
onto
layer.
are
page
a
(only
or
0
a
51
Page 56

Stitch
4260:
4250/4240;
Hemstitch
hemstitch
The
technique
linen
table
For
thing.
require
you
which
Furthermore,
particularly
is
you
stitch
niques
sewn
hem
as
seam
wing
a
such
seam
and
as
your
can
can
an
F
Stitch
as
with
edge.
stretch
G
is
seam
be
can
as
well
hemstitching
needle
easily
darning
the
suitable.
various
sew
wale
the
hemstitch
the
Use
stretch
an
used
decoration
for
and
pull
With
the
embroidery
old
secure
to
work
coarse
single
the
patching
and
the
hemstitching
hemstitch
and
normal
on
you
linen
threads.
stretch
seam,
a
presser
edges
clo
will
of
out
thread
zigzag
tech
a
hemstitch
foot.
and
stitch,
The
right
pull
the
needle
hand
on
seam
one
hem.
sew
the
or
the
must
side
left
Hem
hem
the
Iron
—
threads
more
the
Using
—
from
hem
perforate
on
and
hand
the
bundle
side.
over
out
stretch
the
the
face
hem
twice
from
zigzag
on
pulled
above
side.
the
threads
hemstitch
with
sewn
edge
Wale
—
—
hemstitch
with
As
threads
Using
along
must
threads
the
52
the
are
narrow
a
both
perforate
just
threads.
hand
pulled
the
of
next
seam
hemstitch
stretch
fabric
the
to
out
area
the
to
zigzag
edges.
of
edges.
the
seam
desired
the
stitch,
The
pulled
This
the
needle
width.
sew
bundles
Hemstitch
edge
This
particularly
is
It
No
fles.
Using
—
presser
fabric.
Using
—
excess
seam
used
is
threads
the
foot’s
small
a
fabric
suitable
stretch
as
for
have
width
pair
on
edge
very
to
zigzag
of
the
fine,
valances
for
pulled.
be
stitch,
along
scissors,
hemstitch
the
thin
materials.
sow
edge
trim
edge.
and
off
ruf
a
at
the
of
the
Page 57
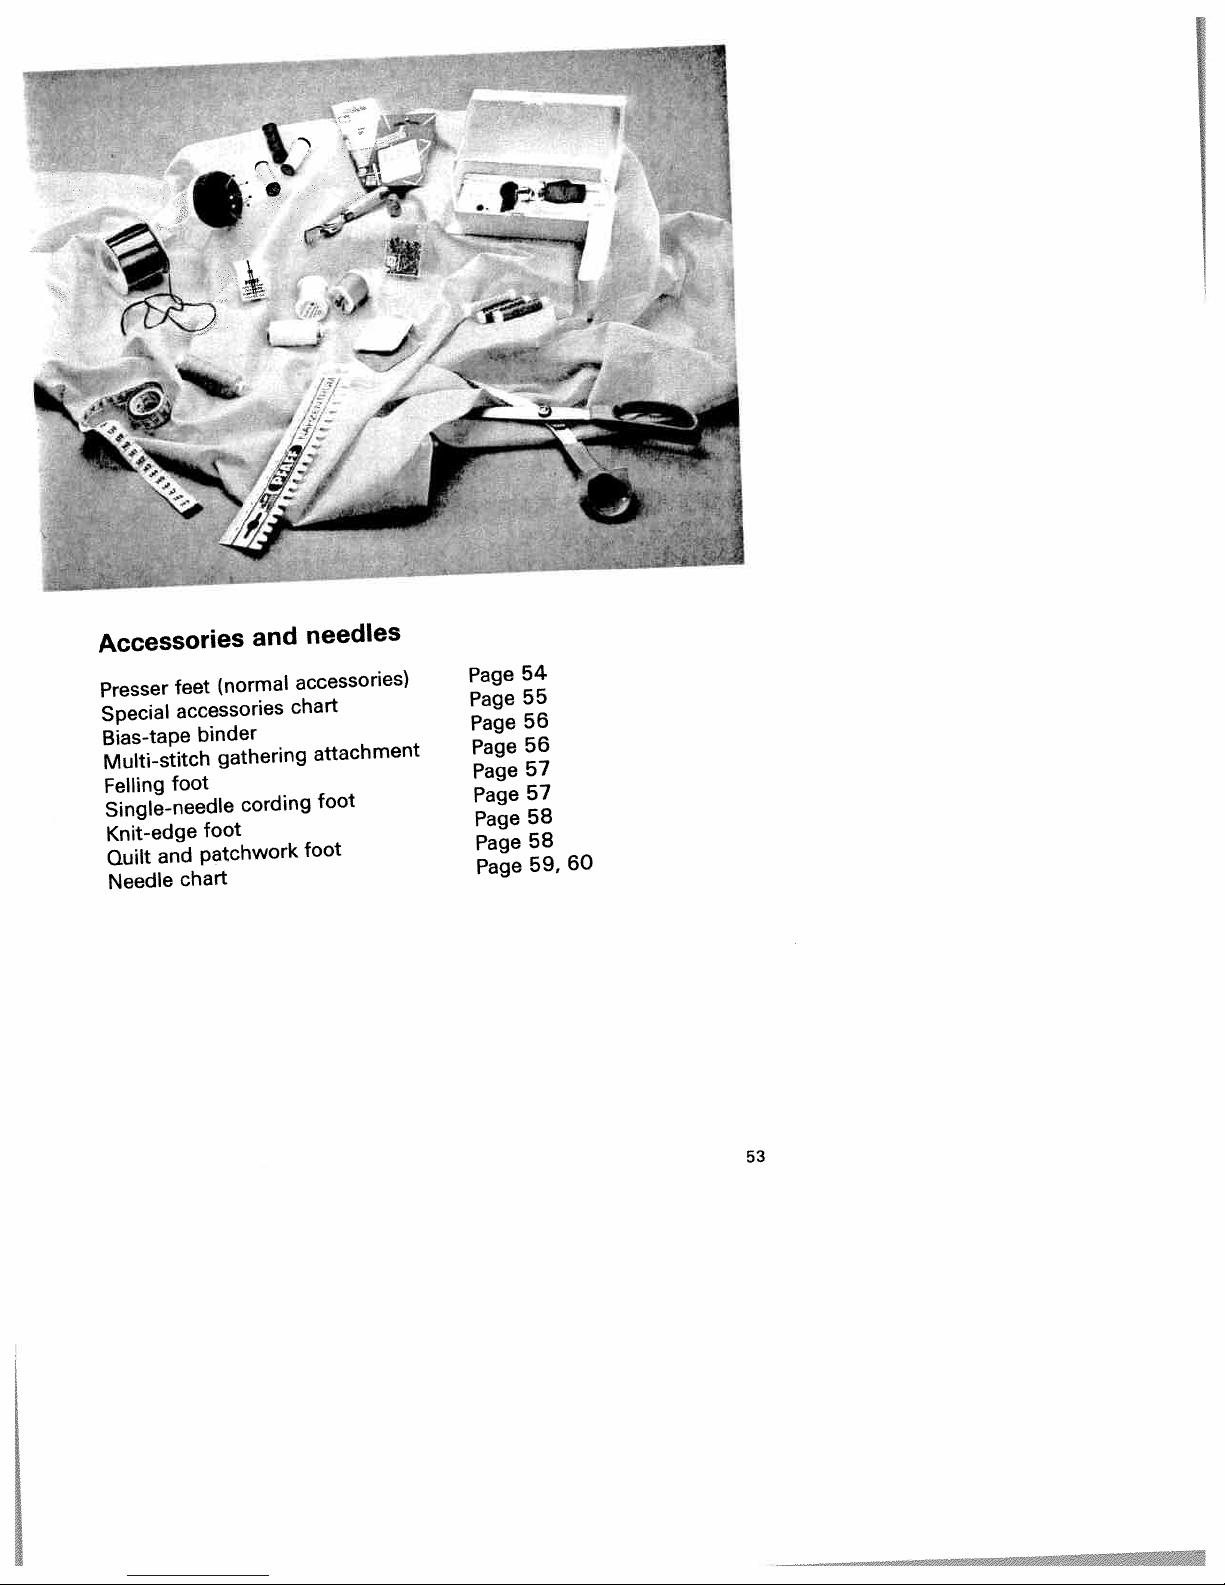
Accessories
Presser
Special
Bias-tape
Multi-stitch
Felling
Single-needle
Knit-edge
Quilt
Needle
feet
accessories
binder
foot
patchwork
and
chart
and
(normal
gathering
cording
foot
needles
accessories>
chart
attachment
foot
foot
Page
Page
Page
Page
Page
Page
Page
Page
Page
54
55
56
56
57
57
58
58
59,
60
53
Page 58

presser
accessories)
foot
847-00
Presser
Standard
O
Part
feet
no.:
(normal
98-694
I
no.:
no.:
98-694
foot
98-694
plate
foot
845-00
843-00
Blind-stitch
3
Part
Zipper
4
6
-*.
_s.
-_,
-
V
Part
Darning
I
I
54
Screwdriver
Brush
tube
Oil
Knife
discs
Felt
x)
(2
Page 59

Presser
special
The
Special
Decorative
(special
feet
accessories
accessories
cording
accessories)
for
are
foot
special
sewing
work.
They
Part
93-036
no.:
are
942-9
available
1
your
from
operation
Sewing
spaces
The
cording
the
embroidered.
dealer.
of
con
be
Cording
needle
(twin
Cording
needle
(twin
Straight
Finger
guide
Edge
Felling
Felling
Clear-view
Buttonhole
Multi-stitch
(remove
Single-needle
Quilting
Roll
Roll
Hemmer
Hemmer
Bias-tape
(remove
Knit-edge
Teflon
the
On
foot,
foot,
stitch
guard
foot
foot 6.5
presser
foot
hemmer
foot
foot
following
grooves
5
with
grooves
7
with
foot
4.5
foot
roller
gathering
cording
2
foot
foot
binder
presser
foot
needle
needle
mm
mm
foot
mm
mm
4
3mm
with
foot
pages
gauge
gauge
round
attachment
holder)
foot
holder(
you
1.6
1.6
needle
will
—
—
find
2.0)
2.0)
hole
exemples
93-042
93-042
(needl.
98-694
93-036
98-802
93-042
93-042
98-694
98-694
98-999
93-036
93-036
98-694
91
98-694
98-694
98-053
93-042
of
thickn.
-046
93-036
the
950-91
953-91
821-00
910-91
422-00
946-9
948-91
864-00
882-00
650-00
91
925-91
87
703-93
823-00
818-00
484-9
957-9
use
80
1
5-91
3-00
917-91
some
of
sewing
For
Attention’
stitch
middle.
all
For
topstitching
For
For
For
Multiple
buttonholes
For
For
broard
etc.
For
For
parts
For
For
duff,
For
For
For
1
bias
For
1
knitwear
For
the
of
cording
Only
needle
with
sewing
lap-felling
lap-felling
uses
sewing
sewing
pleats
cording
sewing
and
hemming
materials
feed
to
hemming
hemming
binding
tape
sewing
sewing
special
use
position
work
seams
seams
for
e.g.
buttonholes
dense
valances
on
patchwork
quilting
edges
which
(e.g.
edges
edges
edges
together
leather
accessories.
straight
or
are
leather)
with
55
Page 60

L
Bias-tape
Binding
lending
rance.
unfolded.
Remove
—
foot
Cut
—
bias
Guide
—
binder
Set
—
needle
ded
tion.
Sew
—
with
trimmed
slot
must
bias
edge
sewing
Tip:
using
binder
a
with
fabric
will
You
the
holder
diagonally
tape.
tape
the
and
tape
the
perforates
bias-tape
few
a
straight
the
edge
the
of
inserted
be
tape
the
of
operation.
can
You
zigzag
the
tape
bias
smooth,
a
edges
bias
need:
foot
presser
screw
and
across
the
into
out
it
pull
in
binder
—
1
edge
centimeters
stitch
which
binder.
tape
between
automatically
automatically
fabric
achieve
stitch.
is
tape,
on
the
pouch
towards
such
1.5
alter
or
is
additional
an
simple
a
clean
and
the
beginning
a
mm
the
along
before
be
to
trimmed
The
the
wraps
24
the
tape
of
the
way
from
the
bound
way
appea
mm
presser
binder.
the
back.
that
needle
bias
laying
band.
around
during
effect
of
the
of
wide,
the
tape
the
fol
posi
tape
the
into
edge
The
the
the
the
by
Multi-stitch
classic
The
choice
the
broad
or
attachment
Laying
1.
Laying
2.
simultaneously.
Laying
3.
onto
foot
The
you
when
attachment
gathering
all
of
whether
of
pleats.
offers
pleats
pleats
pleats
simultaneously.
them
comes
buy
at
the
The
in
in
in
with
your
you
attachment
presser
you
multi-stitch
three
fabric.
fabric
fabric
detailed
a
multi-stitch
PFAFF
wish
options
and
and
dealer.
feet!
to
gathering
for
sewing
sewing
description
gathering
You
lay
have
dense
use:
them
lace
56
Page 61

Felling
Felling
refore,
swear
jeans.
when
colours.
Lay
—
side
Let
—
protrude
Now
—
gue
laid
Now
—
straight
Then
—
the
and
These
you
the
the
hem
sewn
is
while
foot
seams
they
to
lay
of
totally
sew
pull
raised
is
sewing
are
especially
are
children’s
seams
sewing
use
pieces
reverse
trimmed
about
by
this
felling
the
under
over
stitch
the
hem
folded
over.
decorative
wear.
are
threads
material
of
side.
edge
1
protruding
foot.
the
folded
the
(stitch
fabric
into
over
the
Pull
them.
and
suitable
men’s
particularly
together,
the
of
cm.
1.5
—
edge
The
presser
edge
length
apart
layers
felling
the
foot and
the
by
pieces
durable.
for
shirts
contrasting
of
bottom
over
fabric
foot.
with
2.5
foot.
of
sport
and
attractive
reverse
ply
the
must
the
mm).
3
—
insert
and
The
the
fabric
The
ton
be
edge
apart
Single-needle
bead
to
purl
yarn
achieve
is
seam
Cording
red
braiding.
appliqué
the
Draw
—
avoid
to
the
Insert
—
gimp
the
presser
the
the
into
presser
Using
—
select
(24),
stitch
the
bol.
stitch
Now
—
narrow,
seam
purl
You
Tip:
embroidering
with
thread
colour.
cording
technique
a
results
fine
a
or
similar
a
raised
This
more
work
desired
tight
single-needle
thread
foot.
rear
foot.
stitch-pattern
the
the
length
over
dense
results.
achieve
can
a
filler
curves
groove
buttonhole
zigzag
over
sewing
foot
which
by
from
cord.
to
effect
seam
purl
expressive.
onto
motif
and
the
into
lay
Then
under
the
to
gimp
the
stitch.
special
a
medium
a
thread
embroide
an
embroidering
allows
This
of
that
also
fabric.
the
points.
sharp
foot
cording
left
front
gimp
the
sole
the
adjustment
symbol
“Buttonhole”
thread
The
effect
sized
different
a
of
over
soutache
makes
and
groove
thread
the
of
knob
Set
B.
sym
with
so-called
by
bead
you
Try
lay
of
the
57
Page 62

I
L
4
Knit-edge
knit-edge
the
As
soles
differing
of
sewn
be
can
open
the
or
seam
perfect
recommend
tension
slight
simultaneously
foot
with
closed
on
sewing
along
foot
height,
ease.
overtock
fashioned
a
with
sewing
two
has
thick
To
woollen
the
over
presser
knitted
select
so
do
stitch.
workpieces,
thread
thread
it.
To
foot
fabrics
ensure
under
while
the
we
a
Quilt
When
always
red
the
edge
the
Patching
Insert
—
Sew
—
straight
seam
along
When
fabric
Quilting
(sewing
bottom
—
and
using
sew
seam
distance
the
of
inner
the
Sew
straight
seam
patchwork
the
pieces
the
allowance
from
foot
edge
right
quilt
the
pieces
stitch.
allowance,
outer
the
working
the
along
through
of
layer
three
the
stitch>
page
(see
quilt
the
is
and
When
the
and
of
1/4
1/8
fabric
of
guide
right
with
inner
the
quilt)
fabric
approx.
51>.
foot
patchwork
fabric
of
or
1/4
needle
(0.63
inch
inch
patchwork
together
working
the
edge
inch
1/8
right
layer,
top
plies
3
with
1/8
to
(0.31
piece
of
edge
(e.g.
mm
inch
the
cm>
cm>.
foot.
with
the
guide
fleece
next
foot,
the
outer
of
foot.
of
with
because
and
with
1/4
fabric
the
the
layer
the
to
requi
right
to
the
inch
foot.
and
the
58
Page 63

Needle
the
Using
chart
right
Fabric
Needle
60
needle
weight:
light
70
size
75
ensures
the
optimal
sewing
Fabric
medium
Needle
80
of
weight:
size
90
the
material.
Fabric
Needle
100
weight:
heavy
110
size
120
Needle
System
needle
130/705
Needle
70/80
130/705
Needle
70/110
130/705
Needle
90
+
75
130/705
Needle
0/110
7
130/705
Needle
90-110
130/705
Needle
20
70-1
130/705
Needle
80-110
H-N
130
Needle
70-110
130/705
Needle
100
points
and
size
H
thickness:
H-SLJK
thickness:
H-PS
thickness:
H-SKF
thickness:
H-J
thickness:
H-LR
thickness:
H-PCI
thickness:
thickness:
H-WING
thickness:
Profile
and
Point
eye
Small
point
ball
Medium
point
ball
Medium
point
ball
Large
point
ball
Acute
round
Narrow
twist
(cuts
Narrow
point
groove
Small
point,
long
Hemstitching
point
point
point
rightl
wedge
left
(r.
bail
eye
twist
left)
Suitable
Universal
synthetics,
organdy,
batiste,
seams
fancy
knitted
Coarse
and
Quiana
Stretch-fabric
for
loped
delicate
meshed
Wide
Simplex
workwear,heavy
Twill,
light
and
Leather,
Imitatation
cloth.
oil
Seams
or
silk
Attractive
heavily
Organdy
for
needle
fine
and
fabrics,
Simplex
needle,
Pfaff.
stretch
corsetry,
Lastex.
and
canvas.
suede,
leather,
topstitched
30/3
no.
hemstitching
dressed
and
fine-meshed
for
chiffon,
linen,
woollens,
embroidery
Lastex,
specially
Particularly
knitted
and
and
calf
plastics
with
synthetic.
materials,
cambric.
glass
velvet,
suitable
Lycra,
linens,
goatskin.
buttonhole
seams
work.
interlock,
deve
for
fabrics.
denim
and
on
59
Page 64

Needle
chart
Decorative
Before
the
rate
System
needle
and
size
130/705
Thickness:
130/705
Thickness:
Thickness:
Thickness:
designs
your
sewing
properly.
fabric
Decorative
130/705
Thickness:
Thickness:
Thickness:
Hemstitch/special
H-ZWI
80
H-ZWI
80
90
100
with
desired
and
H-ZWI
80
80
80
This
Stitch
2,5
2,5
2,5
2,5
3,0
twin
design,
helps
zigzag
0,5
0,5
0,5
mm
mm
mm
mm
mm
needles
patterns
—
—
—
double
length
turn
to
1,5
1,5
1,5
needle
the
prevent
mm
mm
mm
width
Stitch
spacing
—
—
—
—
—
handwheel
needle
Wide
Narrow
Narrow
and
breakages.
Needle
1,6
2.0
2.5
3,0
4,0
check
1,6
2.0
2.5
mm
mm
mm
mm
mm
mm
mm
mm
Suitable
Normal
Normal
Wide
Extra
for
cording
cording
cording
wide
cording
needles
the
if
see
to
perfo
Ornamentation
Ornamentation
Ornamentation
130/705
H-ZWI-HO
Thickness:
Thickness:
80
100
2,3
2.0
Decorative
—
mm
3,0
—
Very
narrow
narrow
Very
mm
3,0
—
—
hemstitching
effect.
dressed
Heavily
materials
cambric
glass
particularly
are
and
suitable
Page 65
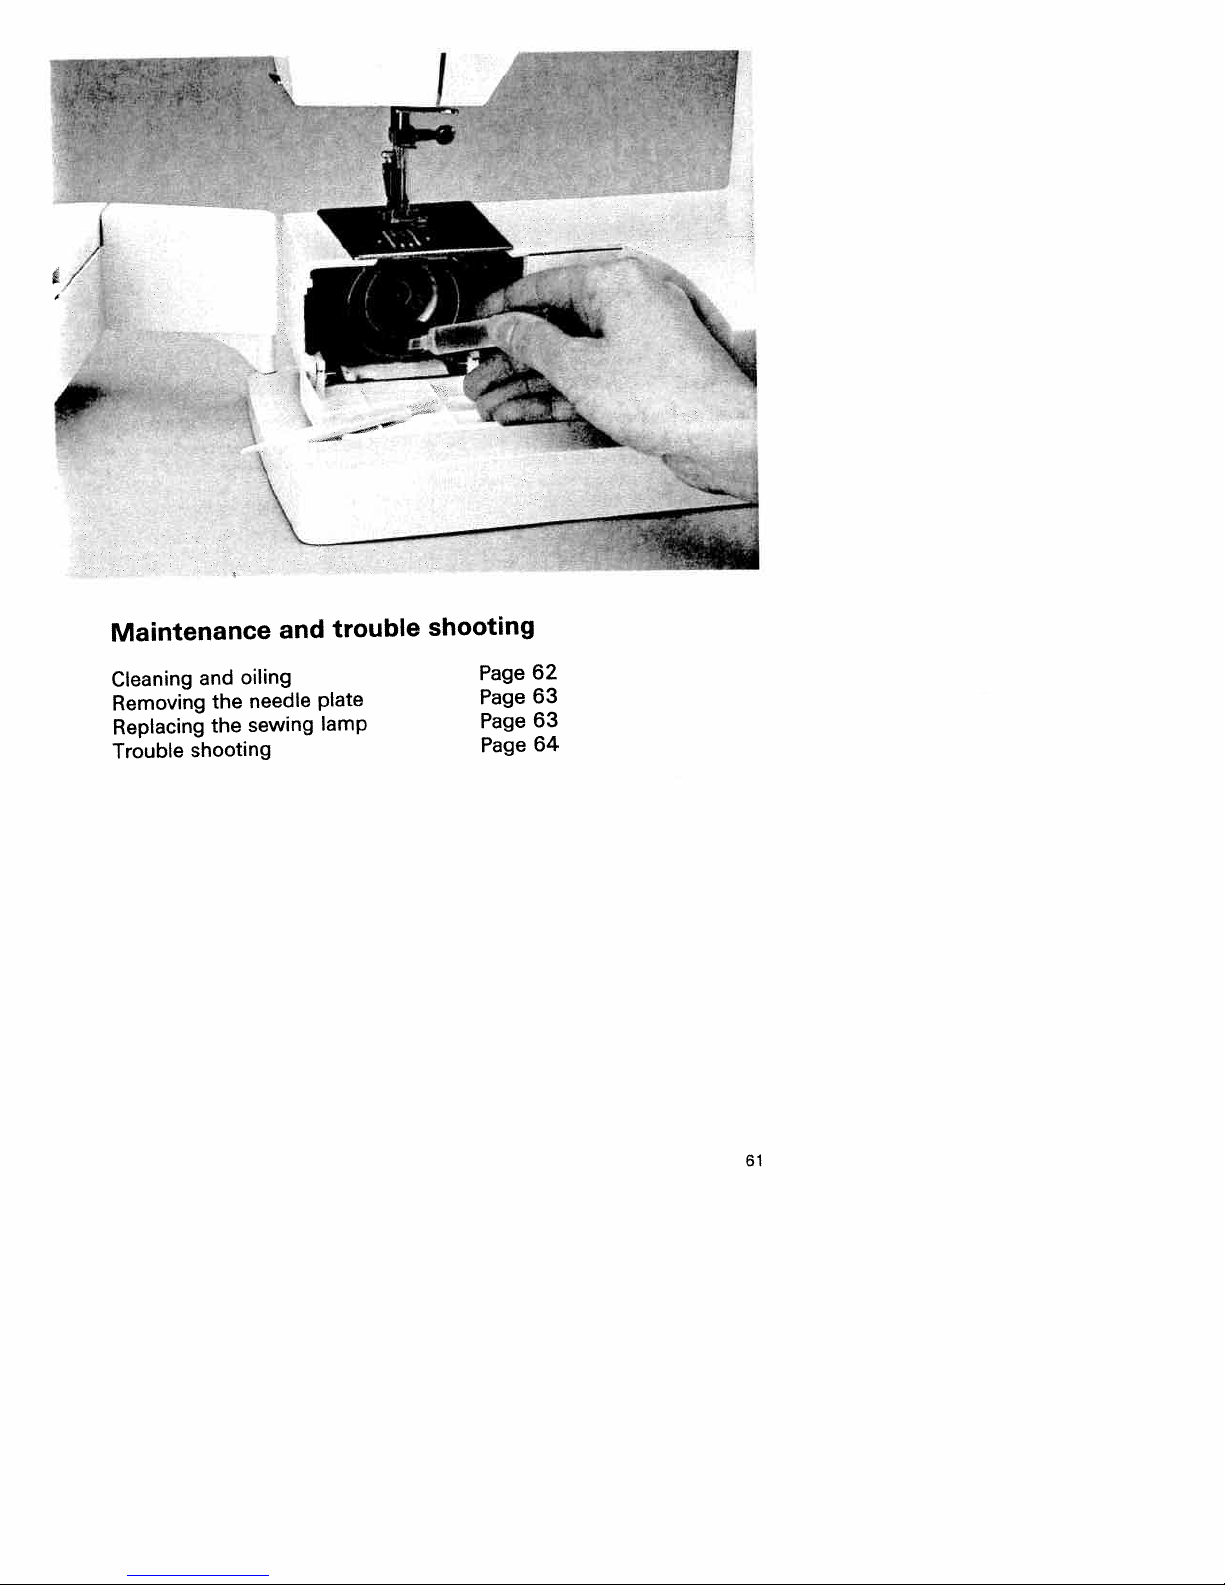
Maintenance
Cleaning
Removing
Replacing
Trouble
and
the
the
shooting
oiling
needle
sewing
and
trouble
plate
lamp
shooting
Page
Page
Page
Page
62
63
63
64
61
Page 66

q?1v
Unlocking
unlock
To
hook
the
can
You
the
the
race.
now
hook
hook,
remove
fold
the
open
the
hook.
black
bar
Pull
the
hook
cover
ring
out
towards
you.
of
oiling
Clean
Then
race
machine
be
and
the
place
(every
oiled
race
hook
drop
one
20
15
—
maintenance-free
is
other
any
at
with
of
hours
the
oil
of
points.
brush.
the
into
operation).
and
hook
must
Cleaning
—
—
The
not
62
Page 67

Removing
the
Raise
the
out
highest
the
presser
presser
position.
needle
foot
foot.
The
plate
holder
needle
TV
and
(23)
must
click
be
screws
plate
dog
work
with
(16).
with
screwdriver
the
the
brush.
detachable
Now
lift
clean
the
the
the
two
needle
the
feed
Remove
—
Loosen
and
its
at
—
(15).
support
Replacing
Switch
Pull
—
the
machine.
Remove
—
The
machine.
the
the
off
plug
sewing
the
sewing
on/off
the
of
detachable
is
lamp
Iamp
switch
foot
the
in
(13).
pedal
work
head
out
support
of
of
the
the
(15).
simplify
To
recommend
handwheel
on
Hold
its
of
out
and
lamp
Importanti
of
tage
to
socket.
screw
the
changing
laying
as
(8)
machine
the
The
sewing
the
sewing
the
shown.
you
Now
it
into
maximum
lamp
sewing
and
can
place.
permissible
is
twist
15
lamp,
machine
the
insert
Watts.
lamp
a
we
on
new
wat
the
63
Page 68
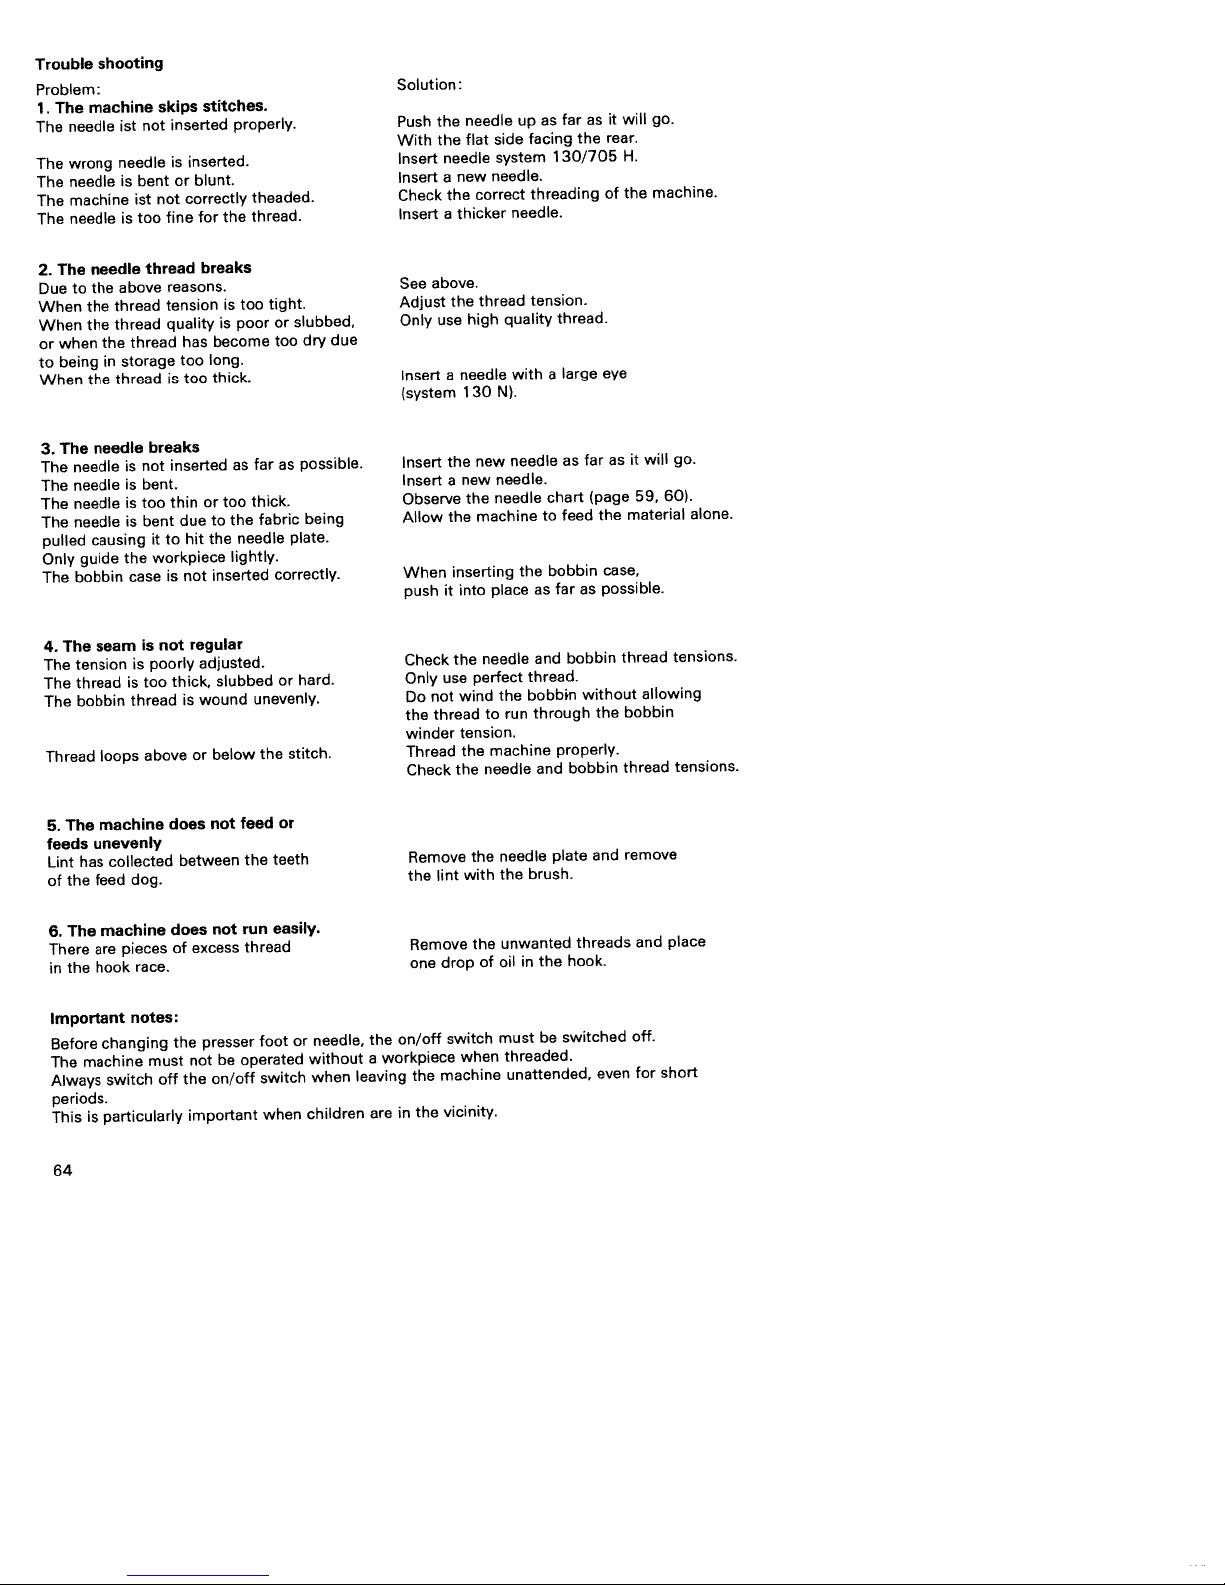
Trouble
Problem:
The
1.
needle
The
wrong
The
needle
The
machine
The
needle
The
The
2.
to
Due
When
When
when
or
being
to
When
The
3.
needle
The
needle
The
needle
The
needle
The
pulled
Only
bobbin
The
shooting
machine
needle
the
the
the
the
in
the
needle
causing
guide
ist
needle
is
ist
is
too
above
thread
thread
thread
storage
thread
is
is
is
is
the
case
skips
inserted
not
is
bent
or
not
fine
thread
reasons.
tension
quality
is
breaks
inserted
not
bent.
thin
too
bent
to
it
workpiece
is
stitches.
inserted.
blunt.
correctly
for
breaks
become
has
long.
too
thick.
too
or
to
due
hit
the
inserted
not
properly.
the
too
is
poor
is
as
too
the
needle
lightly.
theaded.
thread.
tight.
or
too
far
as
thick.
fabric
correctly.
slubbed.
dry
possible.
being
plate.
due
Solution:
the
Push
With
the
Insert
Insert
Check
Insert
above.
See
Adjust
use
Only
Insert
(system
Insert
Insert
Observe
Allow
When
push
needle
flat
needle
new
a
the
thicker
a
the
high
needle
a
130
the
new
a
the
the
inserting
into
it
side
system
needle.
correct
thread
quality
N).
needle
new
needle.
needle
machine
place
as
up
facing
threading
needle.
tension.
with
to
the
as
far
130/705
thread.
large
a
as
chart
feed
bobbin
far
as
the
far
(page
as
will
it
rear.
H.
the
of
eye
it
as
material
the
case,
possible.
go.
machine.
will
59,
go.
60).
alone.
The
4.
tension
The
thread
The
bobbin
The
Thread
The
5.
feeds
Lint
the
of
The
6.
There
the
in
Important
Before
The
Always
periods.
This
64
seam
loops
machine
unevenly
collected
has
feed
machine
are
hook
changing
machine
switch
particularly
is
is
is
too
is
thread
above
dog.
pieces
race.
notes:
not
poorly
thick,
does
does
of
the
must
off
regular
adjusted.
wound
is
below
or
not
between
not
excess
presser
not
on/off
the
important
slubbed
feed
the
run
thread
operated
be
hard.
or
unevenly.
stitch.
the
or
teeth
easily.
foot
or
switch
when
needle,
without
when
children
the
workpiece
a
leaving
are
Check
Only
Do
the
winder
Thread
Check
Remove
the
Remove
one
on/off
the
the
in
the
use
not
thread
the
lint
drop
switch
machine
vicinity.
needle
perfect
wind
to
tension.
machine
the
needle
the
with
the
of
when
and
thread.
bobbin
the
through
run
and
needle
brush.
the
unwanted
the
in
oil
be
must
threaded.
unattended,
bobbin
without
properly.
bobbin
plate
threads
hook.
switched
the
and
even
thread
allowing
bobbin
thread
remove
and
off.
for
tensions.
tensions.
place
short
Page 69

Page 70

Parts
of
the
sewing
machine
hobby
1
Bobbin
2
Thread
3
Needle
4
Carrying
5
Spool
6
Bobbin
8
Handwheel
Handwheel
9
1
Stitch
0
Reverse
11
Connection
1
2
1
3
On/off
14
Base
1
5
Detachable
Needle
1
6
1
7
Presser
Thread
1
8
Thread
1
9
Threading
20
Take-up
21
Needle
22
Presser
23
24
Stitch
Stitch
25
Hook
26
27
Feed
Needle
28
29
Sewing
30
Thread
4250,
winder
guide
thread
handle
stand
winder
length
key
switch
plate
plate
foot
guide
guide
lever
holder
foot
pattern
pattern
cover
dog
bar
lamp
trimmer
4240
tension
tension
release
adjustment
bushing
work
holder
groove
with
lifter
adjustment
chart
(hook
disc
support
with
retaining
inside)
button
with
presser
screw
button
accessory
foot
compartment
Page 71

UI
___
20
15
14
21
30\
PFAFF
PFAFF
II
hbby44O
8
49
12
13
29
28
/
232425
Page 72

PFAFF
M.
G.
Pfaff
Aktiengesellschaft
Werk
Gritznerstrale
76227
GedrucktinDeutschland
Druckerei
76356
Technisohe
Nr.:
DO
KarIsruheDurIach
Karlsruhe
Gablenz
Weingarten,
29-629996-66/000
deutsch
GmbH
Stettiner
Anderungen
.1/94
vorbehalten
11
StraBe
17
 Loading...