


343
Pfaff 343, 341, 343 U-12, 342, 344 U-12 Instruction Book
...
56-12-09661
engl.
P 770
PrintedinGermany
;•. ?w
•:.•
•i
^
^^(s)
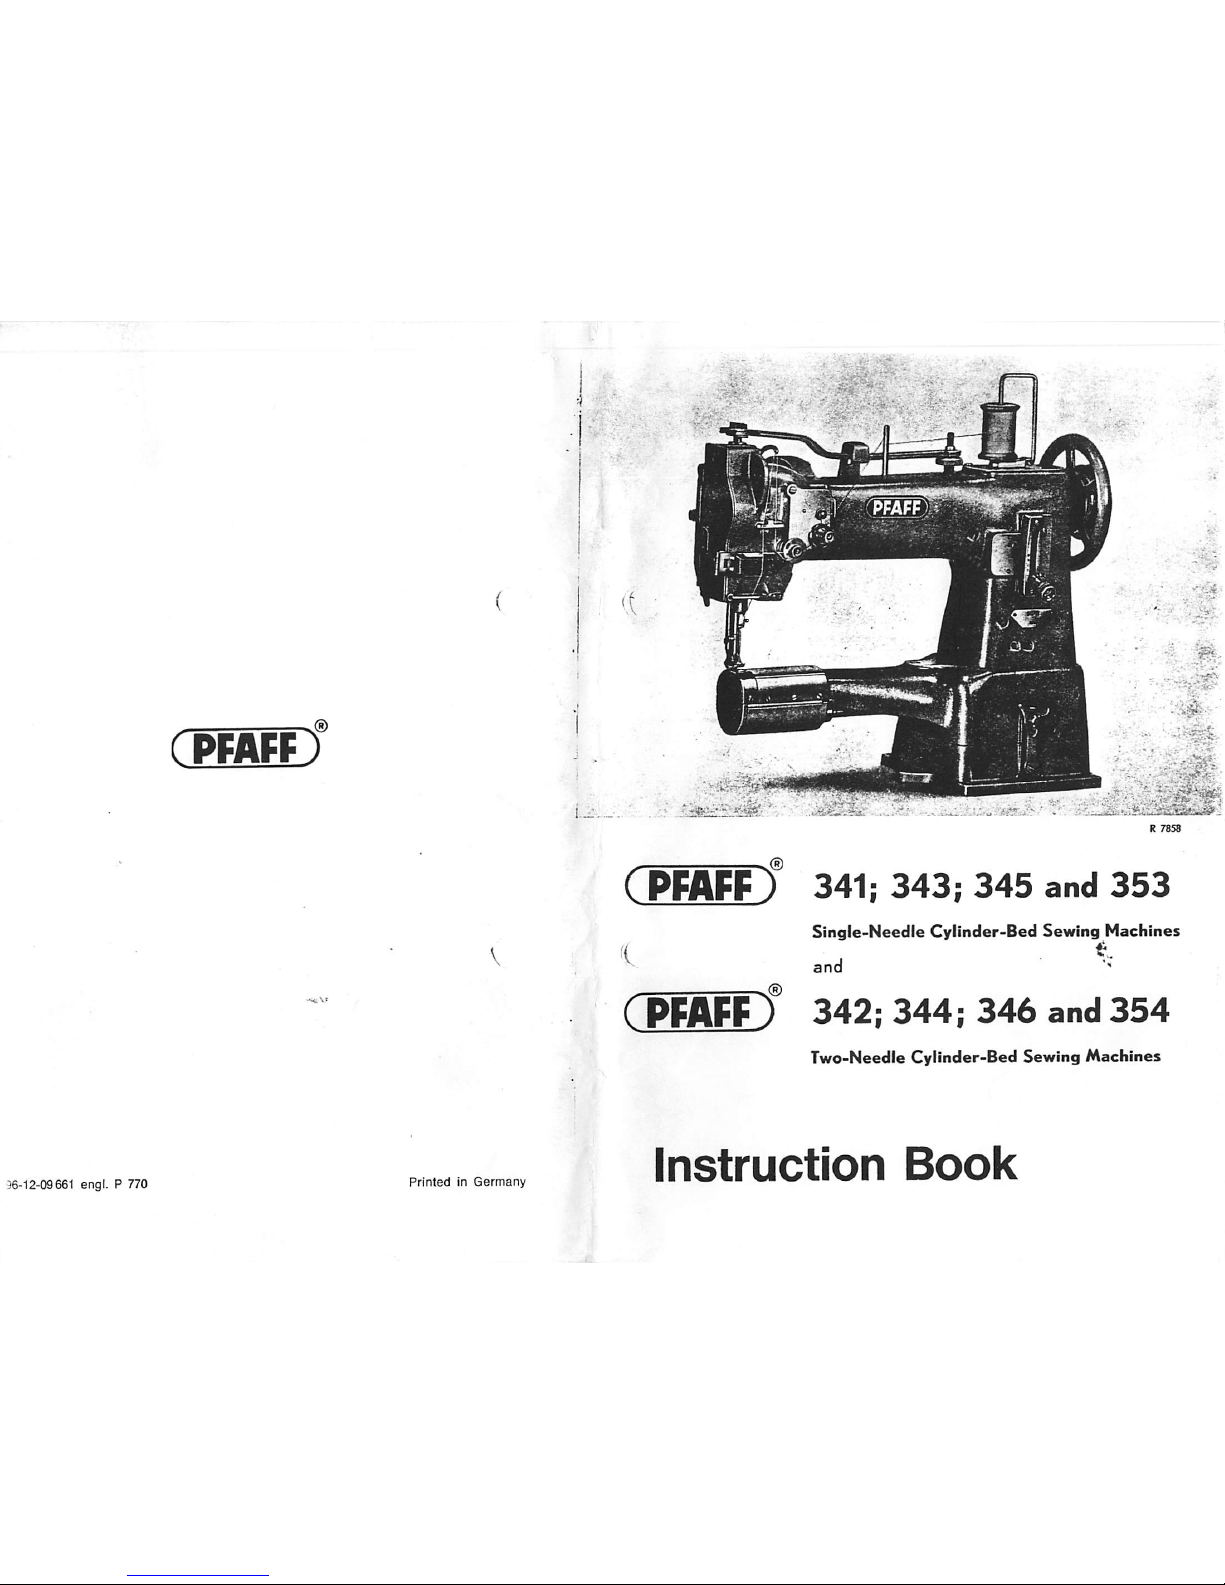
( PFAfF ) 341;
343;
345
and
353
Single-Needle
Cylinder-Bed
Sewing
Machines
and
"
^ .(5)
( PFAFF )
342;
344;
346
and
354
Two-Needle
Cylinder-Bed
Sewing
Machines
Instruction
Book
C)
o
1.
General
The
Pfaff 341. 343. 343 U-12
and
345
are
all cylinder-bed
sewing
machines
with right-
hand
balance
wheel
whose
vertical
hookisarrangedtothe
right of
the
needle.
The
Pfaff 353 with left-hand
balance
wheel
has
the
sewing
hook
arrangedtothe
left of
the
needle.
Both
the
Pfaff 341
and
342
are
equipped
with
compound
feed
while
the
Pfaff 343. 344
and
353
are
fitted with
ordinary
drop
feed
only.
The
Pfaff
345
and
the
Pfaff
346
both
feature
unison
feed.
All
the
afore-mentioned machines
are
equipped
with
sleeve
take-up.
The
rotating motion
of
the
top
shaftistransmittedtothe
hook
shaftbybevel
gears.
is
recommendedtomake
sure
that
the
take-up
leverisat
its
highest
point
before
oeginning or ending a seam. Observation of this rule prevents
the
thread slipping
out
of
the
needle
eye
and
thread
jamming in
the
hook raceway. It eliminates
the
necessity
of
holding
both
threads
when
beginningtosew.
The
maximum
stitch
lengthofstandard
machines
is 4.5 mm (5V2 s.p.i.).
c
It is
recommendedtorun
the
machinesatthe
following
top
speeds:
Pfaff
341
Pfaff
342
Pfaff
343
Pfaff
343
U-12
Pfaff
344
Pfaff
344
U-12
Pfaff
345
Pfaff
346
2.600
s.p.m.
2.500
s.p.m.
2.700
s.p.m.
1.400
s.p.m.
2,600
s.p.m.
1.400
s.p.m.
2.500
s.p.m.
2.400
s.p.m.
When sewing tightly woven or heavily
dressed
fabrics,
the
sewing
speed
must be
reducedtoprevent
overheatingofthe
needle.
On two-needle machines, the maximum sewing speed diminishes as the needle gauge
«creases.
To avoid trouble,
these
machines should be run at about 70% of their top
speed
until
all parts in movable
contact
have
become
thoroughly glazed by their action upon each
other.
This
should
normallybethe
case
after
about
two
weeks'
constant
use.
All machines
are
regularly
equipped
with a fixed pulley which is
castinone
with
the
balance wheel. If desired, however, the machines
can
be supplied with a disengageable
pulley.
If fitted with a disengageable pulley, the machine is dispatched with the sewing mecha
nism disengaged. To engage this mechanism, hold the balance wheel steady with your
left
hand
and
tighten
the
large
locknut by turning it clockwise.
The
spool
holderonthe
machine
armissuppliedonspecial
request
andatextra
cost
only
because
the
thread
stand
which is regularly
supplied
with
the
machine
ensures
better
thread
control.
SettingUpthe
Machine
3
machineisdrivenbya
V3-HP
clutch
motor
which,
like
all
motors
supplied
with
machines, is a squirrel-cage induction motor conforming to German
DIN
42691
deifications.
Voltage
and
typeofcurrent
are
determinedbylocal
requirements.
Power
ransmitted
from
the
motortothe
sewing
machinebya
V-belt.
When
mounting
the
elt for the
first
time,
do not force it onto the
pulley
because distorted
V-belts
wear
e
rapidly.
All
motors
are
pivotally
connected
to the
motor
bracketbymeans
of a
36
bolt (d in
Fig.
1). Loosen the nut of the hinge bolt or clamp screw k and
lift
the
or
until
the
V-belt
can be
easily
placed in the
grooves
of the balance
wheel
and
or
pulleys.
-quires some experience to correctly adjust the
tension
on the belt so as to
avoid
3ssive
pressureonthe
arm
shaft
bearings
and
the
resultant
overheating
and
sei2ln(^^
"le machine. v J
beltiscorrectly
tensionedifyou
can
compressitwith
two
fingers,
without
applying
9, by about 2 cm (abt.
V*')
midway
between both
pulleys.
'is
position,
securely
tighten
the
hinge
bolt
nut or
clamp
screw k
(Fig.
1).
1
machineisfitted
at the
factory
with
the
correct
motor
and
motor
pulleyinaccor-
'e
with
the
machine
class and the permissible top speed.
R
6835
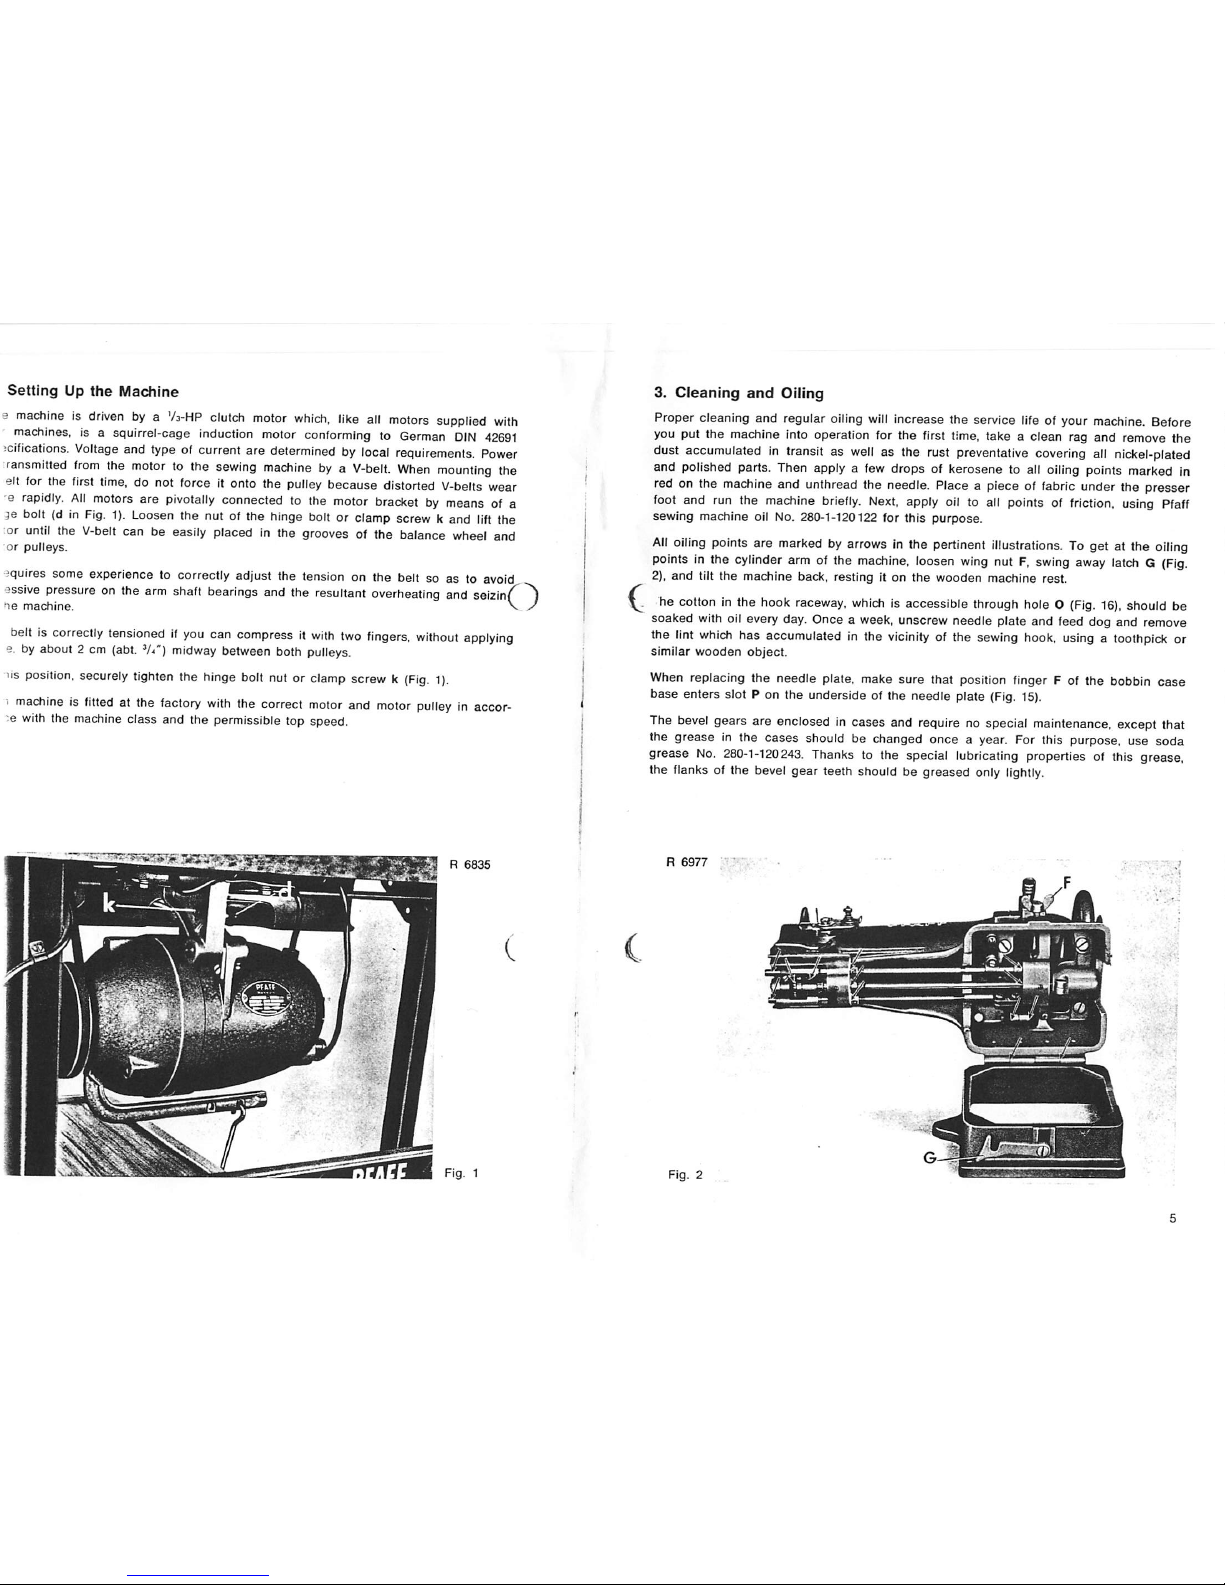
3.
Cleaning
and
Oiling
Proper cleaning and regular
oiling
will
increase the service life of your
machine.
Before
you put the machine into operation for the first time, take a clean rag and remove the
dust
accumulatedintransitaswell
as the rust
preventative
covering
all
nickel-plated
and polished parts. Then apply a few drops of kerosene to all oiling points marked in
red on the
machine
and unthread the needle. Place a piece of
fabric
under the presser
foot and run the
machine
briefly.
Next,
apply
oil to
all
points of
friction,
using
Pfaff
sewing machine oil No. 280-1-120122 for this purpose.
All
oiling
points
are
markedbyarrowsinthe
pertinent
illustrations.Toget at the
oiling
pointsinthe
cylinder
arm
of the
machine,
loosen
wing
nutF.swing
away
latchG(Fig.
2),
and
tilt the machine back, resting it on
the
wooden machine rest.
he cotton in the hook
raceway,
which
is accessible
through
hole O
(Fig.
16).
should be
soaked
with
oil everyday. Once a week,unscrew needle plate and feed dog and remove
the
lint
which
has accumulated in the
vicinity
of the
sewing
hook,
usingatoothpick
or
similar
wooden
object.
When replacing the needle plate, make sure that position finger F of the bobbin case
base enters slot P on the underside of the needle plate
(Fig.
15).
The
bevel
gears are enclosedincases and
requirenospecial
maintenance,
except
that
the grease in the cases should be
c^ianged
once a year. For this purpose, use soda
grease
No.
280-1-120243.
Thanks to the special lubricating properties of this grease,
the flanks of the bevel gear teeth should be greased only
lightly.
R
6977
.ing trouble, suchasskipping of stitches and thread breaking,
cannot
be remedied
applying excessive quantities of oil. Excessive oiling may result in soiling of
the
?rial and heavy working of the machine
caused
by a mixture of oil residues
and
strongly
recommended
to test-run
the
machine
without
thread
and
bobbin
case.
•re
you
plug
the
machine
in,
however,
checktomake
sure
the
line
voltageisth(
j
aasthat
indicatedonthe
motor
rating
plate,
and
the
motor
pulley
turnsinthe
right
ction.
direction
of motor pulley rotation is
correctifthe
balance
wheel
turns
toward
you,
idicated
by an
arrow
in Fig. 3.
direction of pulley rotation is best checked before mounting the V-belt. If the V-belt
already
been
mounted,
dieck
the
direction of rotation by switching on
the
motor
lightly tipping on
the
pedal
while holding
the
balance
wheel
fast.
•3
pulley
turnsinthe
wrong direction,
the
maintenance
man
has
merely to
exchange
.viresatthe
motor
terminal
board.
r run a
threaded
machine
unless
you
have
fabric
under
the
presser
footorthe
ser
footIsraised.
R
6976
5.
Removing
the
Bobbin
Case
Raise
the
take-up
lever
to its
highest
position
and
open
latch
B (Fig. 4) with
the
nail of
your
thumb.
Slightly
lift
the
bobbin
case
with
the
forefingerofyour
right
hand,
as
illustrated
above,
and
takeitoutofthe
machine,
together
with
the
bobbin,
with
thumb
and
forefinger.
c^.
Winding
the
Bobbin
The
bobbinIswoundonthe
power-driven
bobbin
winder
shown
in Fig. 5.
Placeaspoolofthread
on pin 1.
Pass
the
thread
through
eyelet2,clockwise
around
and
between
tension
discs3and,
from
the
inside,
through
the
slotinthe
bobbin.
Wind
a
few
turnsofthreadonthe
bobbininclockwise
direction,
and
place
the
latteronthe
bobbin
winder
spindle.
Start
the
bobbin
winderbypressing
down lever 6.
The
bobbin
winder
will
stop
auto
matically
when
the
bobbin
is full.
The
amountofthreadtobe
woundonthe
bobbin
is
regulatedbyscrew7.Turn
this
screw
clockwise
for
more
thread,orcounter-clockwise
for
less
thread.
If the
thread
should pile up at
one
end
of the bobbin, loosen
screw
4 and
adjust
the
positionofthe
bobbin
winder
tension
bracket,asappropriate.
 Loading...