

Parkside PBSA 12 A1 Original Instruction
CORDLESS DRILL PBSA 12 A1
CORDLESS DRILL
Translation of the original instructions
SLADDLÖS BORRSKRUVDRAGARE
Översättning av bruksanvisning i original
AKKU-BOHRSCHRAUBER
Originalbetriebsanleitung
IAN 273457
AKKUPORAKONE
Alkuperäisen käyttöohjeen käännös
WIERTARKO-WKRĘTARKA
AKUMULATOROWA
Tłumaczenie oryginalnej instrukcji obsługi
Before reading, unfold the page containing the illustrations and familiarise yourself with all functions of the
device.
Käännä ennen lukemista kuvallinen sivu esiin ja tutustu seuraavaksi laitteen kaikkiin toimintoihin.
Vik ut bildsidan och ha den till hands när du läser igenom anvisningarna och gör dig bekant med
apparatens / maskinens funktioner.
Przed przeczytaniem proszę rozłożyć stronę z ilustracjami, a następnie proszę zapoznać się z wszystkimi
funkcjami urządzenia.
Klappen Sie vor dem Lesen die Seite mit den Abbildungen aus und machen Sie sich anschließend mit allen
Funktionen des Gerätes vertraut.
GB / IE Translation of the original instructions Page 4
FI Alkuperäisen käyttöohjeen käännös Sivu 17
SE Översättning av bruksanvisning i original Sidan 31
PL Tłumaczenie oryginalnej instrukcji obsługi Strona 44
DE / AT / CH Originalbetriebsanleitung Seite 59
12
3
4
12
5
6
7
7
7
8
13
13
1415
15
16
16
8
9
1011

4
G B I E
Content
Introduction ................................. 4
Intended purpose .........................4
General description ......................5
Extent of the delivery ........................5
Overview ........................................5
Functional description .......................5
Technical data ..............................5
Safety instructions ........................ 6
Symbols and icons ...........................6
General safety instructions for power
tools ...............................................7
Charging the battery ..................11
Inserting/removing the battery .........11
Recharging the battery .................... 11
Used batteries ...............................12
Checking the battery charge level ....12
Operation .................................. 12
Choice of gear ..............................12
Set the direction of rotation .............12
Torque setting ................................12
Tool change ..................................13
Keyless drill chuck removal ..............13
Using the bitholder .........................13
Switching on/off ............................13
Cleaning and maintenance .........14
Cleaning .......................................14
Maintenance .................................14
Storage ......................................14
Disposal and protection of the
environment .............................. 14
Replacement parts/accessories ... 15
Guarantee ................................. 15
Repair Service ............................16
Service-Center ............................ 16
Importer .................................... 16
Translation of the original EC
declaration of conformity ............75
Introduction
Congratulations on the purchase of your
new device. With it, you have chosen a
high quality product.
During production, this equipment has
been checked for quality and subjected to
a nal inspection. The functionality of your
equipment is therefore guaranteed.
The operating instructions constitute
part of this product. They contain
important information on safety, use
and disposal.
Before using the product, familiarise
yourself with all of the operating
and safety instructions. Use the
product only as described and for
the applications specied.
Keep this manual safely and in the
event that the product is passed on,
hand over all documents to the third
party.
Intended purpose
The device is intended for drilling screws
in and out and for drilling holes in wood,
metal or plastic.
Any other use that is not explicitly approved in these instructions may result in
damage to the equipment and represent a
serious danger to the user.
The user or operator is responsible for accidents causing injury to other people or
damage to property.
This equipment is not suitable for commercial use. Commercial use will invalidate the
guarantee.

5
G B I E
General description
The illustrations are on the
front and back fold-out
page.
Extent of the delivery
Carefully unpack the appliance and check
that it is complete:
- Cordless Drill
- Battery-charger
- Battery
- Storage case
- Instruction Manual
Pictured bit and drill not included.
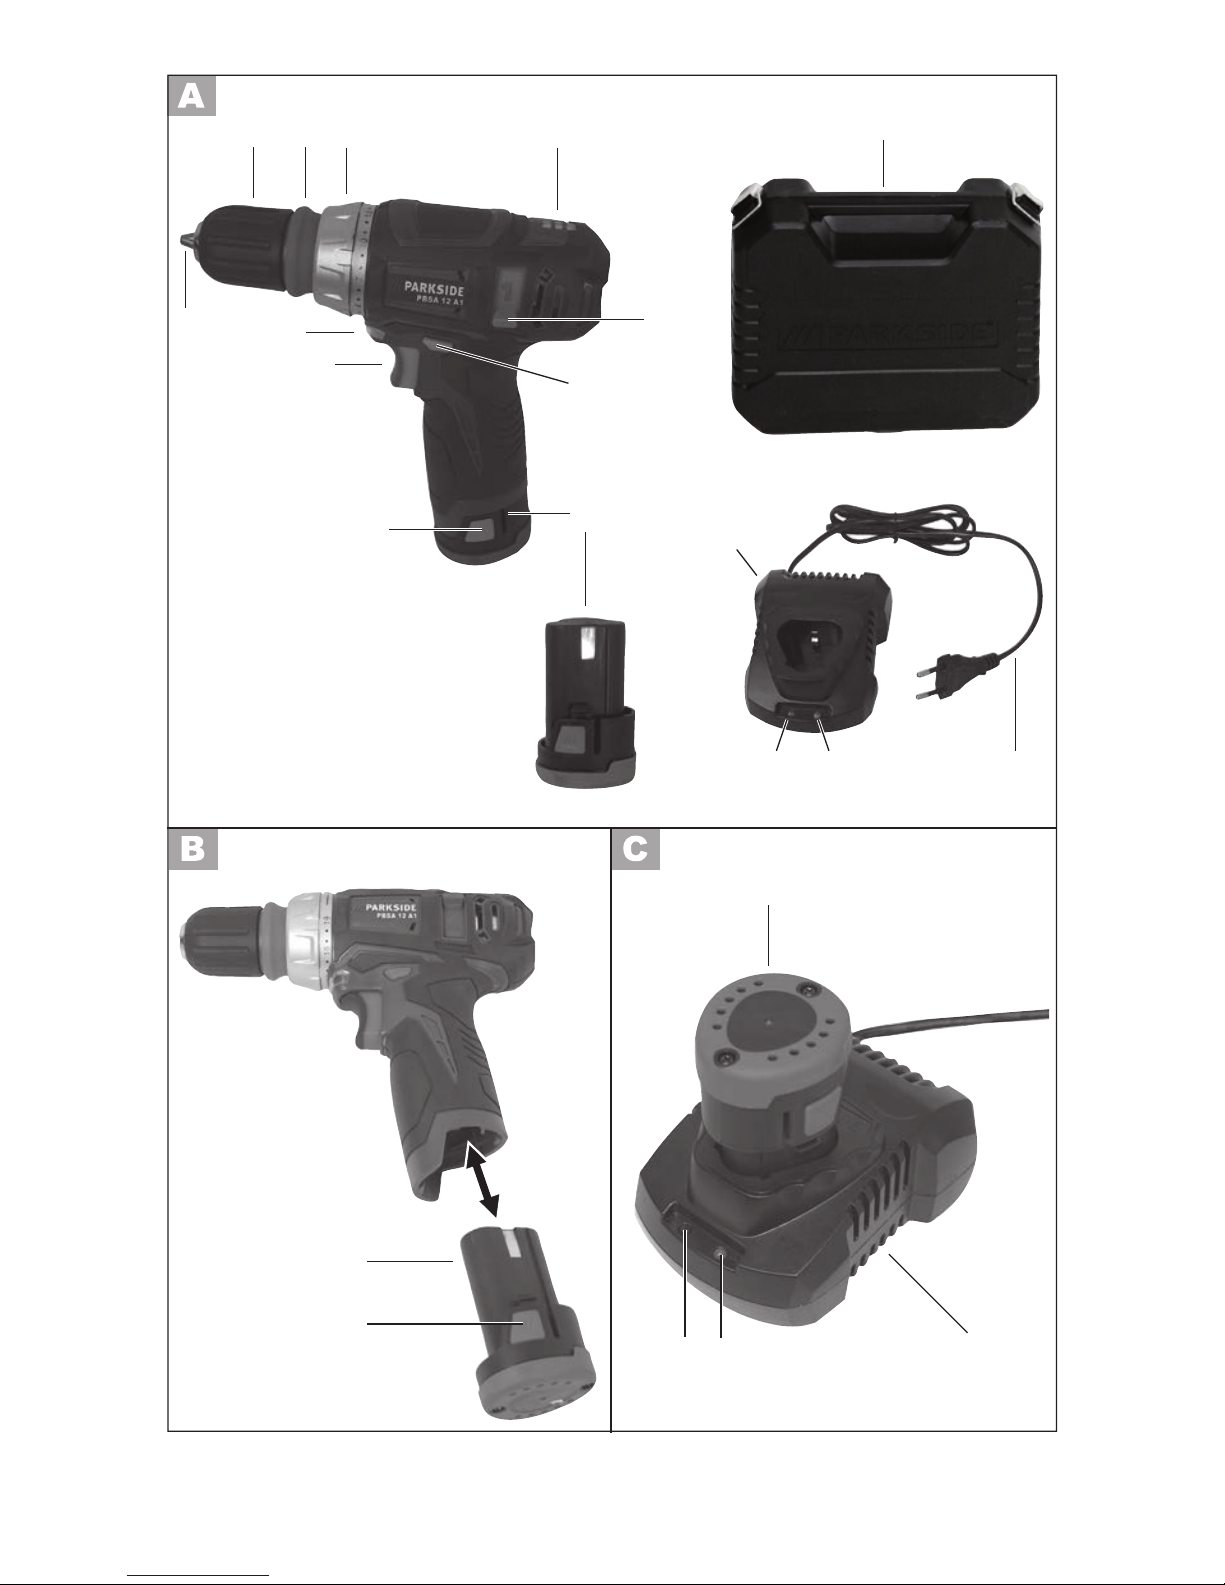
Overview
1 Keyless drill chuck
2 Chuck ring
3 Torque adjustment ring
4 Battery Indicator
5 Speed selector
6 Direction of rotation switch
7 Battery
8 Battery release button
9 On/off switch
10 LED working light
11 Drill chuck aperture
12 Storage case
13 Charger
14 Charger power supply cord
15 Green LED
16 Red LED
17 Bitholder
Functional description
The cordless drill with two-speed gearing
has a 19+1 level torque adjustment, left/
right running, a removable keyless chuck,
a 6-point bitholder and an LED working
light.
Technical data
Appliance
Motor voltage ............................. 12 V
Idling speed
1st gear .............................0-350 min
-1
2nd gear .........................0-1200 min
-1
Maximum torque ..........................25 Nm
Span-chuck ............................ 0.8-10 mm
Weight (without battery charger) .....1.1 kg
Drilling capacity
for wood .......................... max. 25 mm
for steel ............................. max. 8 mm
Sound power level
(L
pA
) ......................66.5 dB(A); K= 3 dB
Sound power level
(L
WA
) ........................77.5 dB(A); K= 3 dB
Vibration (a
h
)
Drilling in metal ...................< 2.5 m/s
2
Screwdriving without impact .. < 2.5 m/s
2
K= 1.5 m/s
2
Battery (Li-Ion) ............ DCBK-70-12
Nominal voltage ......................... 12 V
Capacity ..................................... 1.5 Ah
Charging time ...................... approx. 1 h
Recharger ............ JLH201261500G
Nominal consumption .....................30 W
Uptake voltage/Input
........................... 100-240 V~, 50-60 Hz
Voltage output/Output
.................................12.6 V
1500 mA
Protection class ................................
II
Protection category ......................... IPX0

6
G B I E
Noise and vibration values have been
determined according to the standards and
regulations mentioned in the declaration of
conformity.
Technical and optical changes may be
undertaken in the course of further development without notice. All dimensions,
references and information in this instruction manual are therefore not guaranteed.
Legal claims made on the basis of the
instruction manual can therefore not be
considered as valid.
The stated vibration emission value was
measured in accordance with a standard
testing procedure and may be used to compare one power tool to another.
The stated vibration emission value may
also be used for a preliminary exposure
assessment.
Warning: The vibration emission
value may differ during actual use
of the power tool from the stated
value depending on the manner in
which the power tool is used.
Safety precautions aimed at protect-
ing the user should be based on estimated exposure under actual usage
conditions (all parts of the operating
cycle are to be considered, including, for example, times during which
the power tool is turned off and
times when the tool is turned on but
is running idle).
Safety instructions
Ensure that the safety instructions are observed when operating the appliance.
Symbols and icons
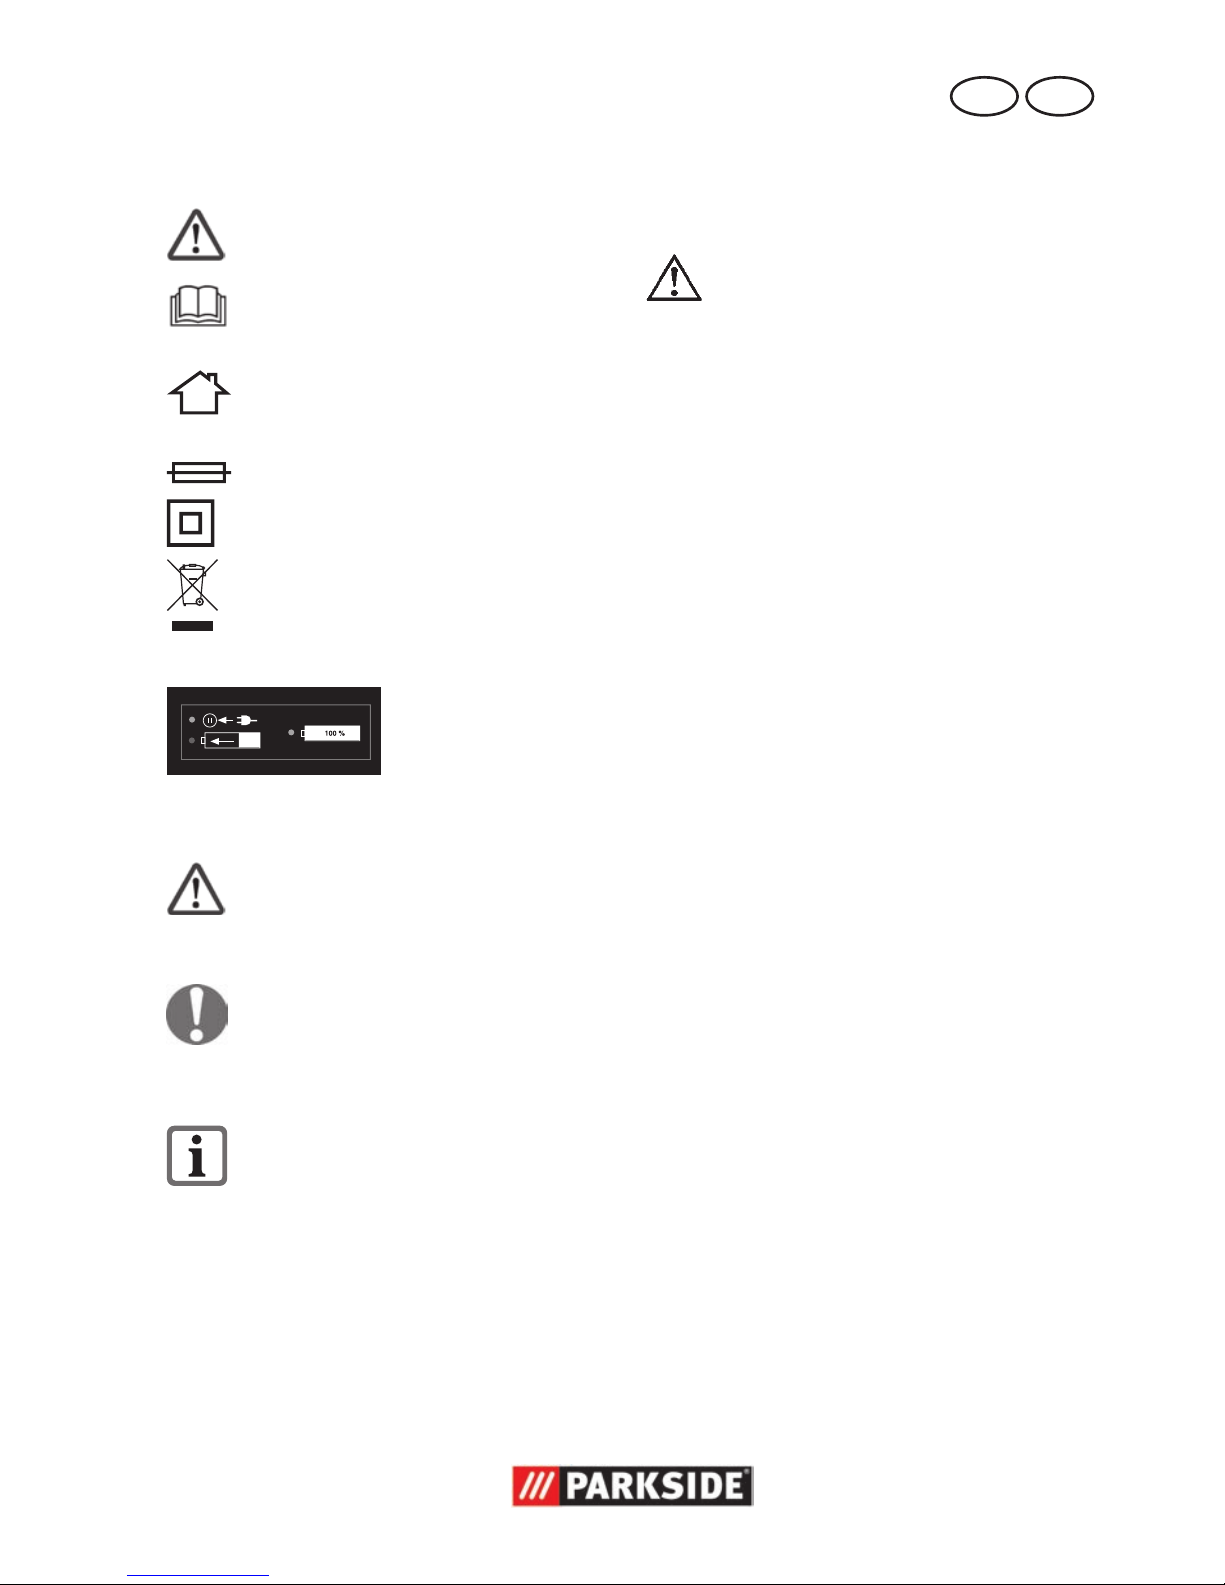
Symbols on the appliance:
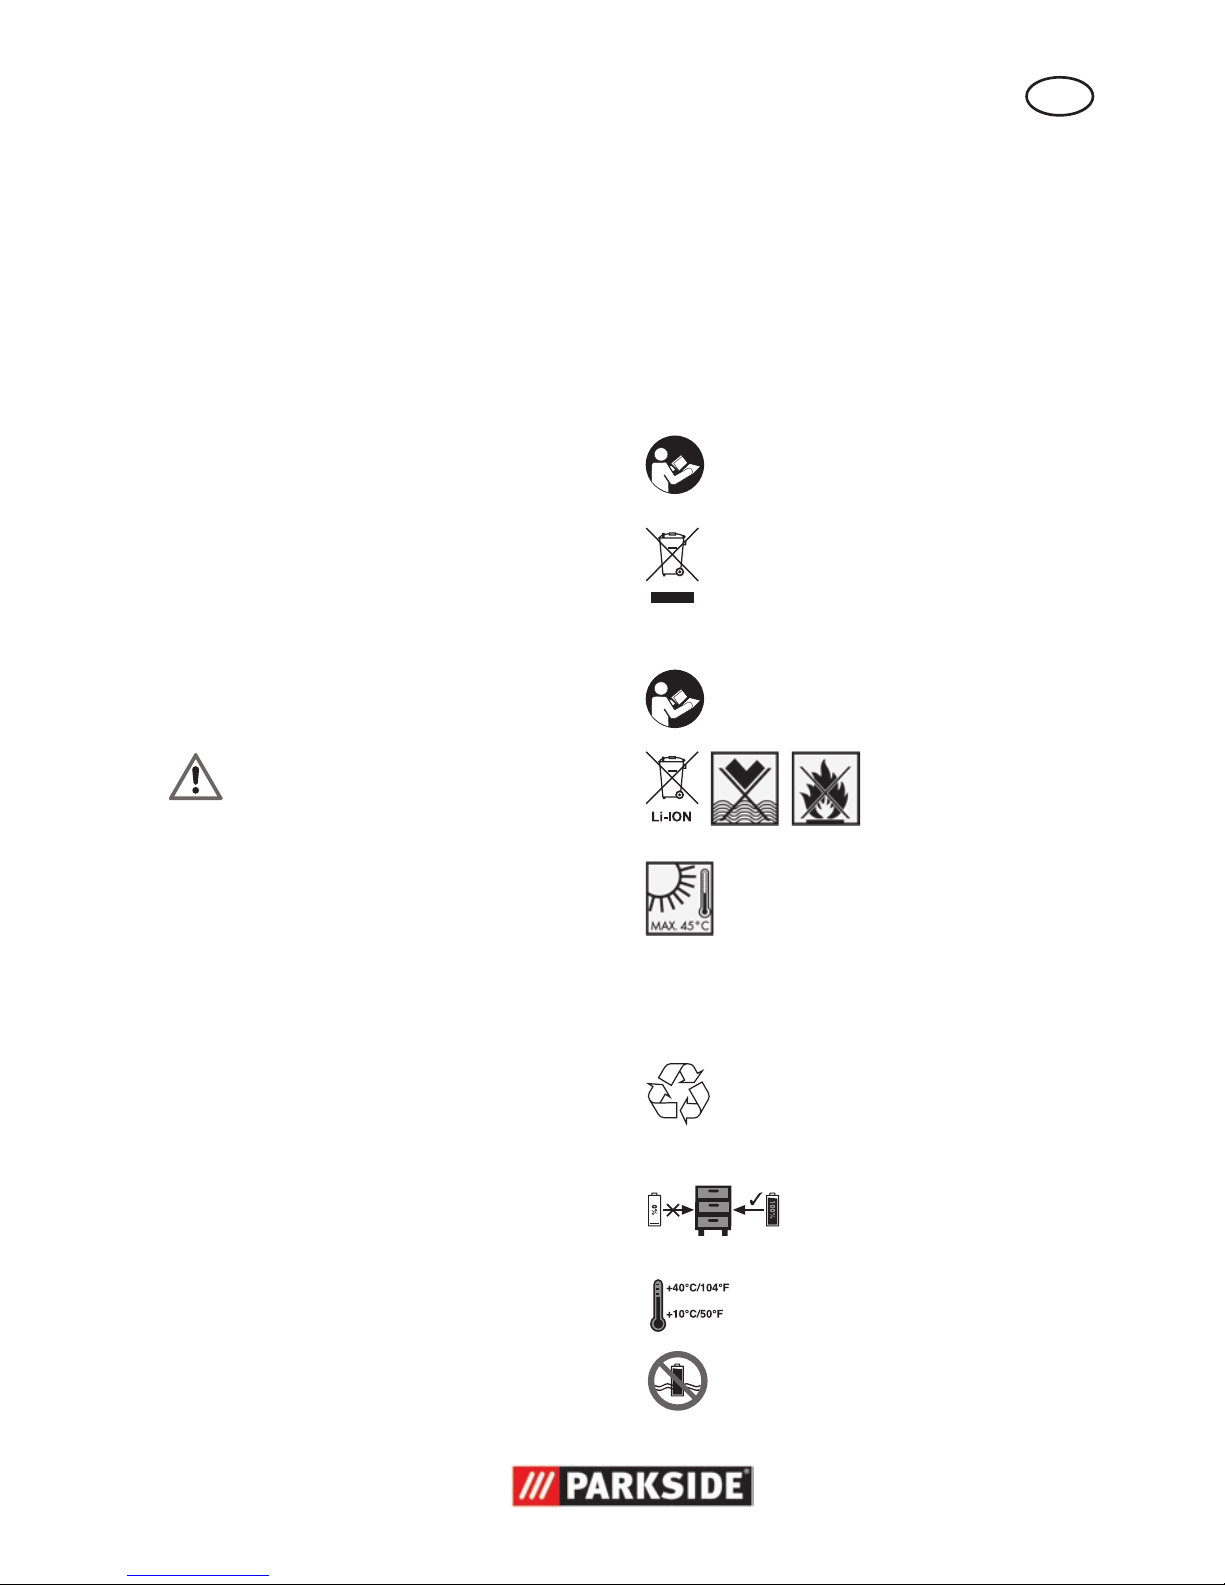
Carefully read these operating in-
structions.
Electrical appliances must not be dis-
posed of with the domestic waste.
Symbols on the battery:
Carefully read these operating in-
structions.
Do not dispose of
batteries in house-
hold waste, re or
water.
Do not subject the battery to strong
sunlight over long periods and
do not leave it on a heater (max.
45°C).
Take batteries to an old battery
collection point where they will
be recycled in an environmentally
friendly manner.
Store the battery in charged
condition
The battery requires an ambient
temperature of
+10°C to + 40°C.
The battery should never come into
contact with water.
7
G B I E
General safety instructions
for power tools
WARNING! Read all safety
directions and instructions.
Omissions in the compliance with
safety directions and instructions
can cause electrical shock, re
and/or severe injuries.
Retain all safety directions and instructions for future use.
The term “Power Tools” used in the safety
instructions refers to mains-operated power
tools (with power cord) and to battery-operated power tools (without power cord).
1) WORK AREA SAFETY
a) Keep work area clean and well
lit. Cluttered or dark areas invite acci-
dents.
b) Do not operate power tools in
explosive atmospheres, such as
in the presence of ammable
Iiquids, gases or dust. Power tools
create sparks which may ignite the dust
or fumes.
c) Keep children and bystanders
away while operating a power
tool. Distractions can cause you to lose
control.
2) ELECTRICAL SAFETY
a) Power tool plugs must match the
outlet. Never modify the plug in
any way. Do not use any adapter
plugs with earthed (grounded)
power tools. Unmodied plugs and
matching outlets will reduce risk of electric
shock.
b) Avoid body contact with earthed
or grounded surfaces, such as
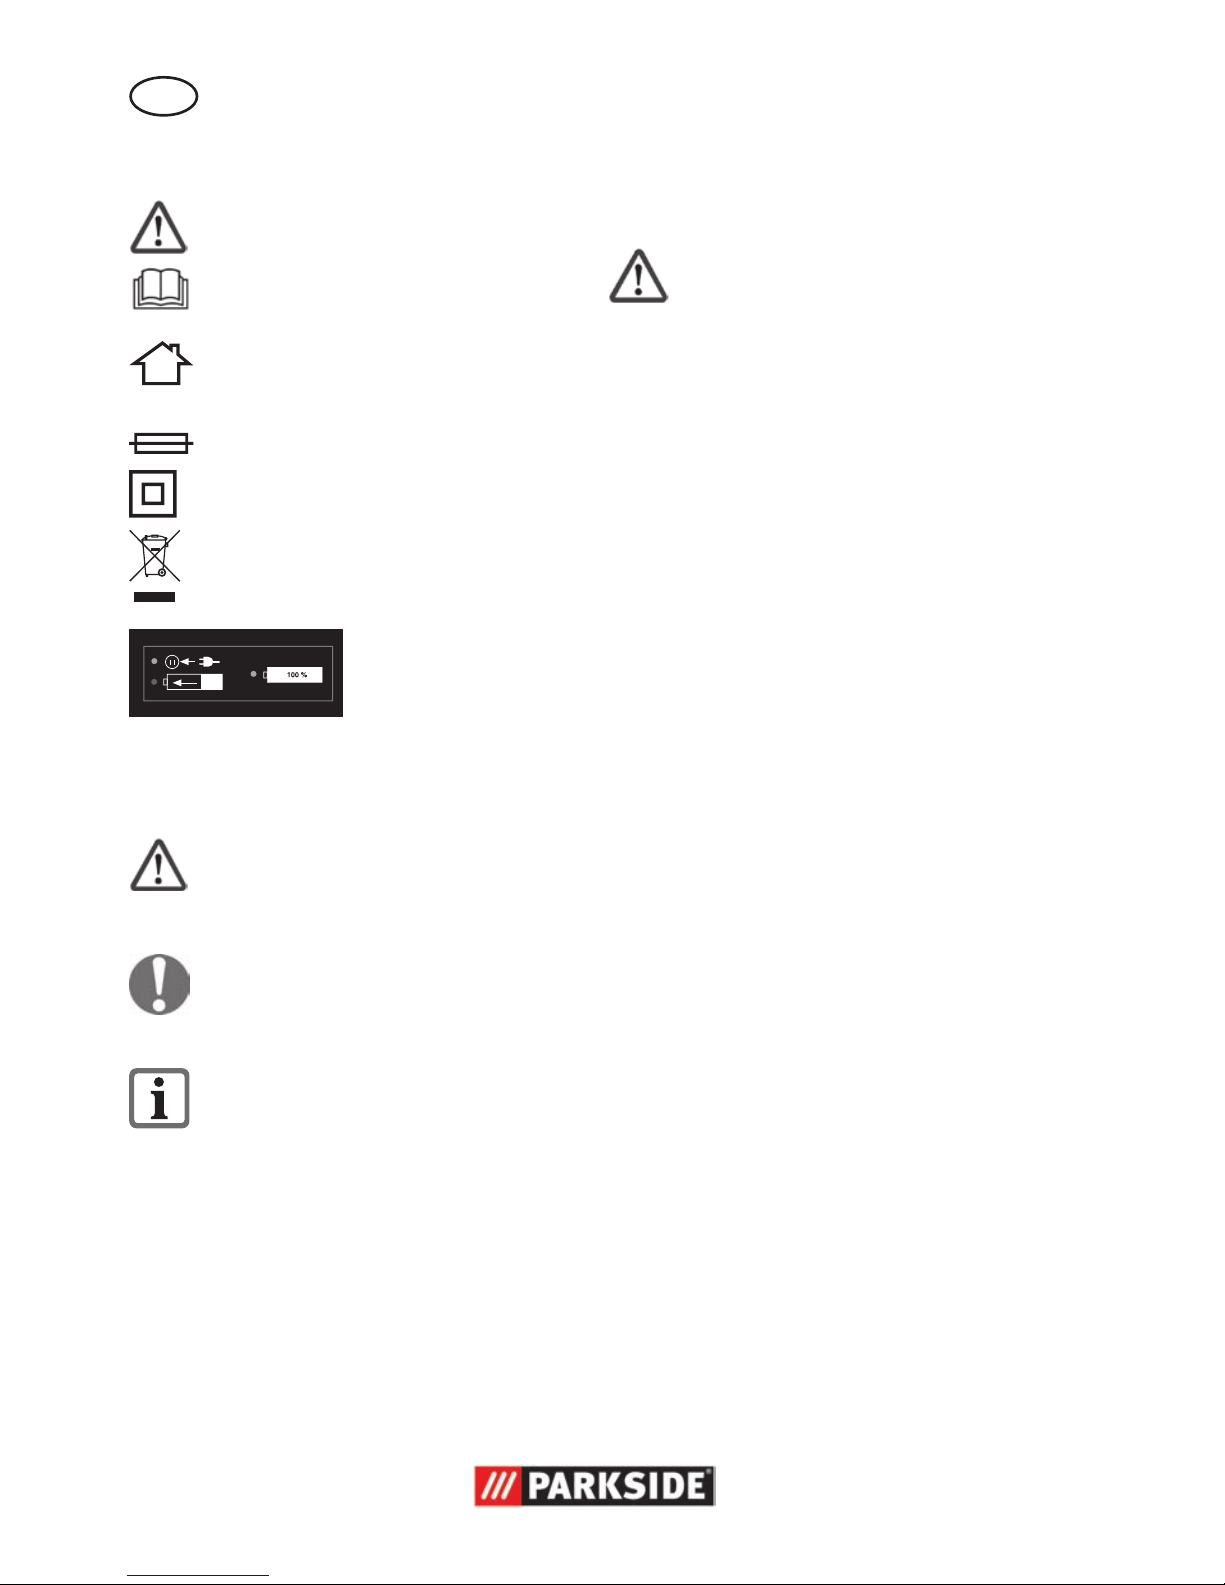
Symbols on the recharger:
Warning!
Before using for the rst time, care-
fully read through the user manual.
The recharger is for indoor use
only.
T2A
Miniature fuse
Protection class II
Electrical appliances must not be dis-
posed of with the domestic waste.
LED display while
charging.
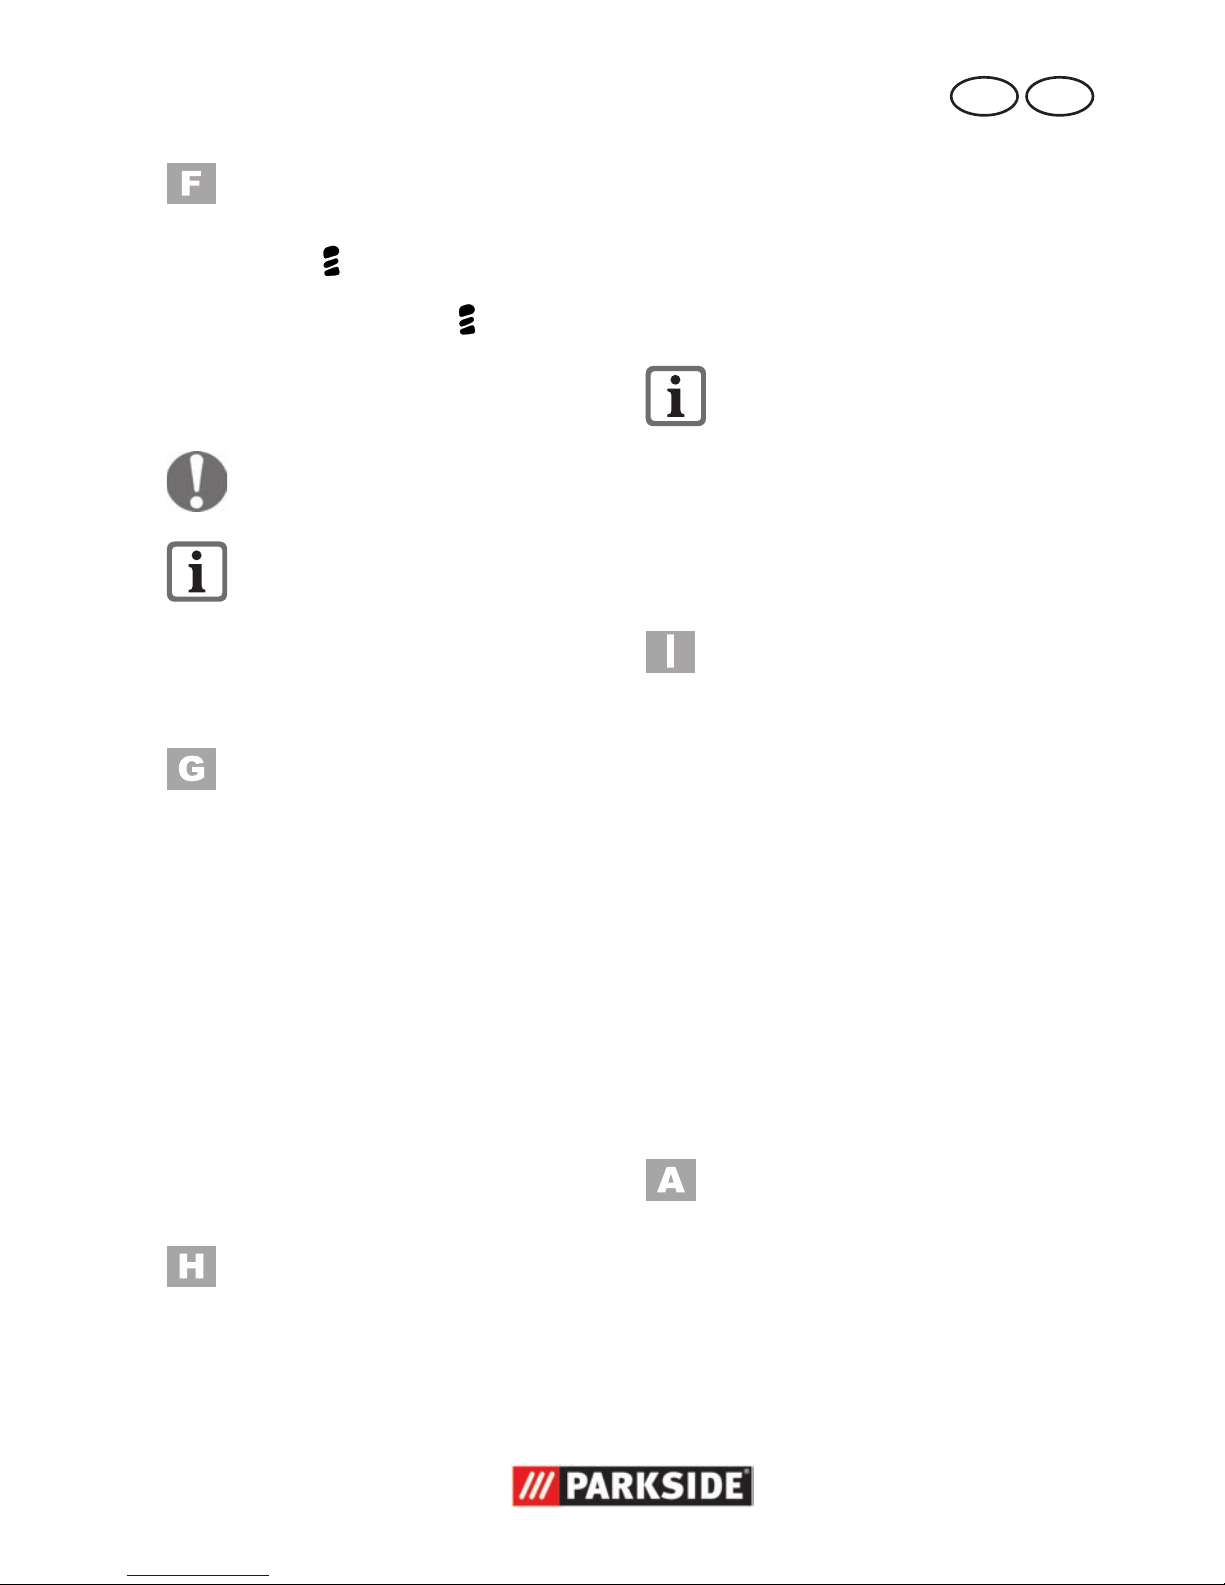
Symbols in the manual
Warning symbols with in-
formation on damage and
injury prevention.
Instruction symbols (the instruction
is explained at the place of the
exclamation mark) with information
on preventing damage.
Help symbols with information on
improving tool handling.

8
G B I E
pipes, radiators, ranges and refrigerators. There is an increased risk
of electric shock if your body is earthed
or grounded.
c) Do not expose power tools to rain
or wet conditions. Water entering a
power tool will increase the risk of electric
shock.
d) Do not abuse the cord. Never use
the cord for carrying, pulling or
unplugging the power tool. Keep
cord away from heat, oil, sharp
edges or moving parts. Damaged
or entangled cords increase the risk of
electric shock.
e) When operating a power tool
outdoors, use an extension cord
suitable for outdoor use. Use of a
cord suitable for outdoor use reduces the
risk of electric shock.
f) If operating a power tool in a
damp location is unavoidable,
use a residual current device
(RCD) protected supply. Use of an
RCD reduces the risk of electric shock.
3) PERSONAL SAFETY
a) Stay alert, watch what you are
doing and use common sense
when operating a power tool. Do
not use a power tool while you
are tired or under the inuence
of drugs, alcohol or medication.
A moment of inattention white operating
power tools may result in serious personal
injury.
b) Use personal protective equip-
ment. Always wear eye protection. Protective equipment such as dust
mask, non-slip safety shoes, hard hat, or
hearing protection used for appropriate
conditions will reduce personal injuries.
c) Prevent unintentional starting.
Ensure the switch is in the off-position before connecting to power
source and/or battery pack,
picking up or carrying the tool.
Carrying power tools with your nger on
the switch or energising power tools that
have the switch on invites accidents.
d) Remove any adjusting key or
wrench before turning the power
tool on. A wrench or a key left attached
to a rotating part of the power tool may
result in personal injury.
e) Do not overreach. Keep proper
footing and balance at all times.
This enables better control of the power
tool in unexpected situations.
f) Dress properly. Do not wear loose
clothing or jewellery. Keep your
hair, clothing and gloves away
from moving parts. Loose clothes,
jewellery or long hair can be caught in
moving parts.
g) If devices are provided for the
connection of dust extraction and
collection facilities, ensure these
are connected and properly used.
Use of dust collection can reduce dustrelated hazards.
4) POWER TOOL USE AND CARE
a) Do not force the power tool. Use
the correct power tool for your
application. The correct power tool will
do the job better and safer at the rate for
which it was designed.
b) Do not use the power tool if the
switch does not turn it on and off.
Any power tool that cannot be controlled
with the switch is dangerous and must be
repaired.
c) Disconnect the plug from the

9
G B I E
power source and/or the battery pack from the power tool
before making any adjust -ments,
changing accessories, or storing
power tools. Such preventive safety
measures reduce the risk of starting the
power tool accidentaIly.
d) Store idle power tools out of the
reach of children and do not allow persons unfamiliar with the
power tool or these instructions to
operate the power tool. Power tools
are dangerous in the hands of untrained
users.
e) Maintain power tools. Check for
misalignment or binding of moving parts, breakage of parts and
any other condition that may affect the power tool’s operation. If
damaged, have the power tool repaired
before use. Many accidents are caused
by poorly maintained power tools.
f) Keep cutting tools sharp and
clean. Properly maintained cutting tools
with sharp cutting edges are less Iikely to
bind and are easier to control.
g) Use the power tool, accessories
and tool bits etc. in accordance
with these instructions, taking into
account the working conditions
and the work to be performed.
Use of the power tool for operations different from those intended could result in
a hazardous situation.
h) Hold the device by the insulated
gripping surfaces when performing work in which the cutting tool may come into contact
with hidden wiring or its own
cord. Contact with a live wire can also
cause a charge in metal parts of the
device and result in an electric shock.
5) CAREFUL HANDLING AND USE OF
BATTERY DEVICES
a) Charge the batteries only in
chargers that are recommended
by the manufacturer. Risk of re if a
charger that is suitable for a specic type
of battery is used with other batteries.
b) In the power tools, use only the
batteries designed for the purpose. The use of other batteries may
result in injuries and risk of re.
c) Keep the unused battery away
from paper clips, coins, keys,
nails, screws and other small
metal objects, which could cause
bridging of the contacts. A short
circuit between the battery contacts may
cause burns or re.
d) If used incorrectly, liquid may
leak from the battery. Avoid
contact with this. In the event of
accidental contact, rinse off with
water. If the liquid gets into eyes,
seek medical assistance. Leaking
battery uid may cause skin irritations or
burns.
6) SERVICE
Have your power tool serviced by
a qualied repair person using
only identical replacement parts.
This will ensure that the safety of the
power tool is maintained.
7) SPECIAL SAFETY DIRECTIONS FOR
BATTERY-OPERATED TOOLS
a) Ensure that the device is switched
off before inserting the battery.
Inserting a battery into a power tool that
is switched on may result in accidents.
b) Recharge the batteries indoors

1 0
G B I E
only because the battery charger
is designed for indoor use only.
c) To reduce the electric shock haz-
ard, unplug the battery charger
from the mains before cleaning
the charger.
d) Do not subject the battery to
strong sunlight over long periods
and do not leave it on a heater.
Heat damages the battery and there is a
risk of explosion.
e) Allow a hot battery to cool before
charging.
f) Do not open up the battery and
avoid mechanical damage to the
battery. Risk of short circuit and fumes
may be emitted that irritate the respiratory
tract. Ensure fresh air and seek medical
assistance in the event of discomfort.
g) Do not use non-rechargeable bat-
teries!
8) CORRECT HANDLING OF THE BATTERY CHARGER
• This appliance can be used by children
aged from 8 years and above and persons with reduced physical, sensory or
mental capabilities or lack of experience
and knowledge if they have been given
supervision or instruction concerning use
of the appliance in a safe way and understand the hazards involved. Children
shall not play with the appliance. Cleaning and user maintenance shall not be
made by children without supervision.
• To charge the battery, use only
the charger supplied. Risk of re and
explosion. This ensures that the safety of
the device is maintained.
• Before each use, check the charg-
er, cable and plug and have them
repaired by qualied professionals and only with original parts.
Do not use a defective charger and do
not open it up yourself. This ensures that
the safety of the device is maintained.
• Connect the charger only to a
socket with an earth. Ensure that
the mains voltage matches the
specications on the charger rating plate. Risk of electric shock.
• Disconnect the charger from the
mains before closing or opening
connection to the battery / power
tool / device.
• Keep the charger clean and away
from wet and rain. Do not use
the charger outdoors. Dirt and the
entry of water increase the risk of electric
shock.
• Operate the charger only with
the appropriate original batteries.
Charging other batteries may result in
injuries and risk of re.
• Avoid mechanical damage to the
charger. This can result in internal short
circuits.
• Do not operate the charger on a
combustible surface (e.g. paper,
textiles). Risk of re due to heating dur-
ing charging.
• If the power cable for this equipment is
damaged, it must be replaced by the
manufacturer, a customer service agent of
the same or a similarly qualied person in
order to prevent hazards.
• The battery of the appliance is not fully
charged at the time of delivery. It therefore needs to be fully recharged before
you use it for the rst time. Slot the battery into the base and plug the battery
charger into a mains outlet.
• When the battery is fully charged, unplug
the charger from the mains and from the
appliance.
• Do not use the charger to charge nonrechargeable batteries.
1 1
G B I E
9) RESIDUAL RISKS
Even if properly operating and handling this
electric tool, some residual risks will remain.
Due to its construction and build, this electric
tool may present the following hazards:
a) Cuts
b) Ear damage if working without ear protec-
tion.
c) Damage to your health caused by swing-
ing your hands and arms when operating
the appliance for longer periods of time or
if the unit is not held or maintained properly.
Warning! During operation, this
electric tool generates an electromagnetic eld which, under certain circumstances, may impair the functionality of
active or passive medical implants. To
reduce the risk of serious or lethal injuries, we recommend that persons with
medical implants consult their doctor
and the manufacturer of their medical
implant before operating the machine.
Charging the battery
Do not expose the battery to
extreme conditions such as
heat or impact. Risk of injury
from escaping electrolytic solution! After eye/skin contact,
rinse the affected areas with
water or a neutraliser and
consult a doctor.
Charge the battery in a dry
room only.
Prior to attaching the charger,
check that the battery‘s outer
surface is clean and dry.
There is a risk of injury due to
electric shock.
Only use the original charger from
the package to charge the battery.
• Charge the battery before the rst time
of use. Do not briey charge the bat-
tery several time in a row.
• Recharge the battery when you notice
that the appliance is becoming slower.
• If a fully recharged battery lasts for
considerably shorter operating times,
the battery is used up and needs to
be replaced. Only use an OEM spare
battery available from our Customer
Service.
• Always take heed of the applicable
safety instructions as well as the environmental protection regulations and
information.
• The warranty excludes all defects
caused by improper handling.
Inserting/removing the
battery
1. To insert the battery (7), place it
on the guide track and push it
back into the appliance. It will
audibly snap in.
2. To remove the battery (7) from the
appliance, press the release buttons (8) on the battery and pull
out the battery.
Recharging the battery
1. Remove the battery (7) from the
appliance i necessary.
2. Insert the battery (7) in the charging compartment of the battery
charger (13). It will audibly snap
in.
3. Plug the battery charger (13) into
a mains outlet.
1 2
G B I E
4. When the battery is fully recharged unplug the battery
charger (13) from the mains.
5. Pull the battery (7)out of the battery charger (13).
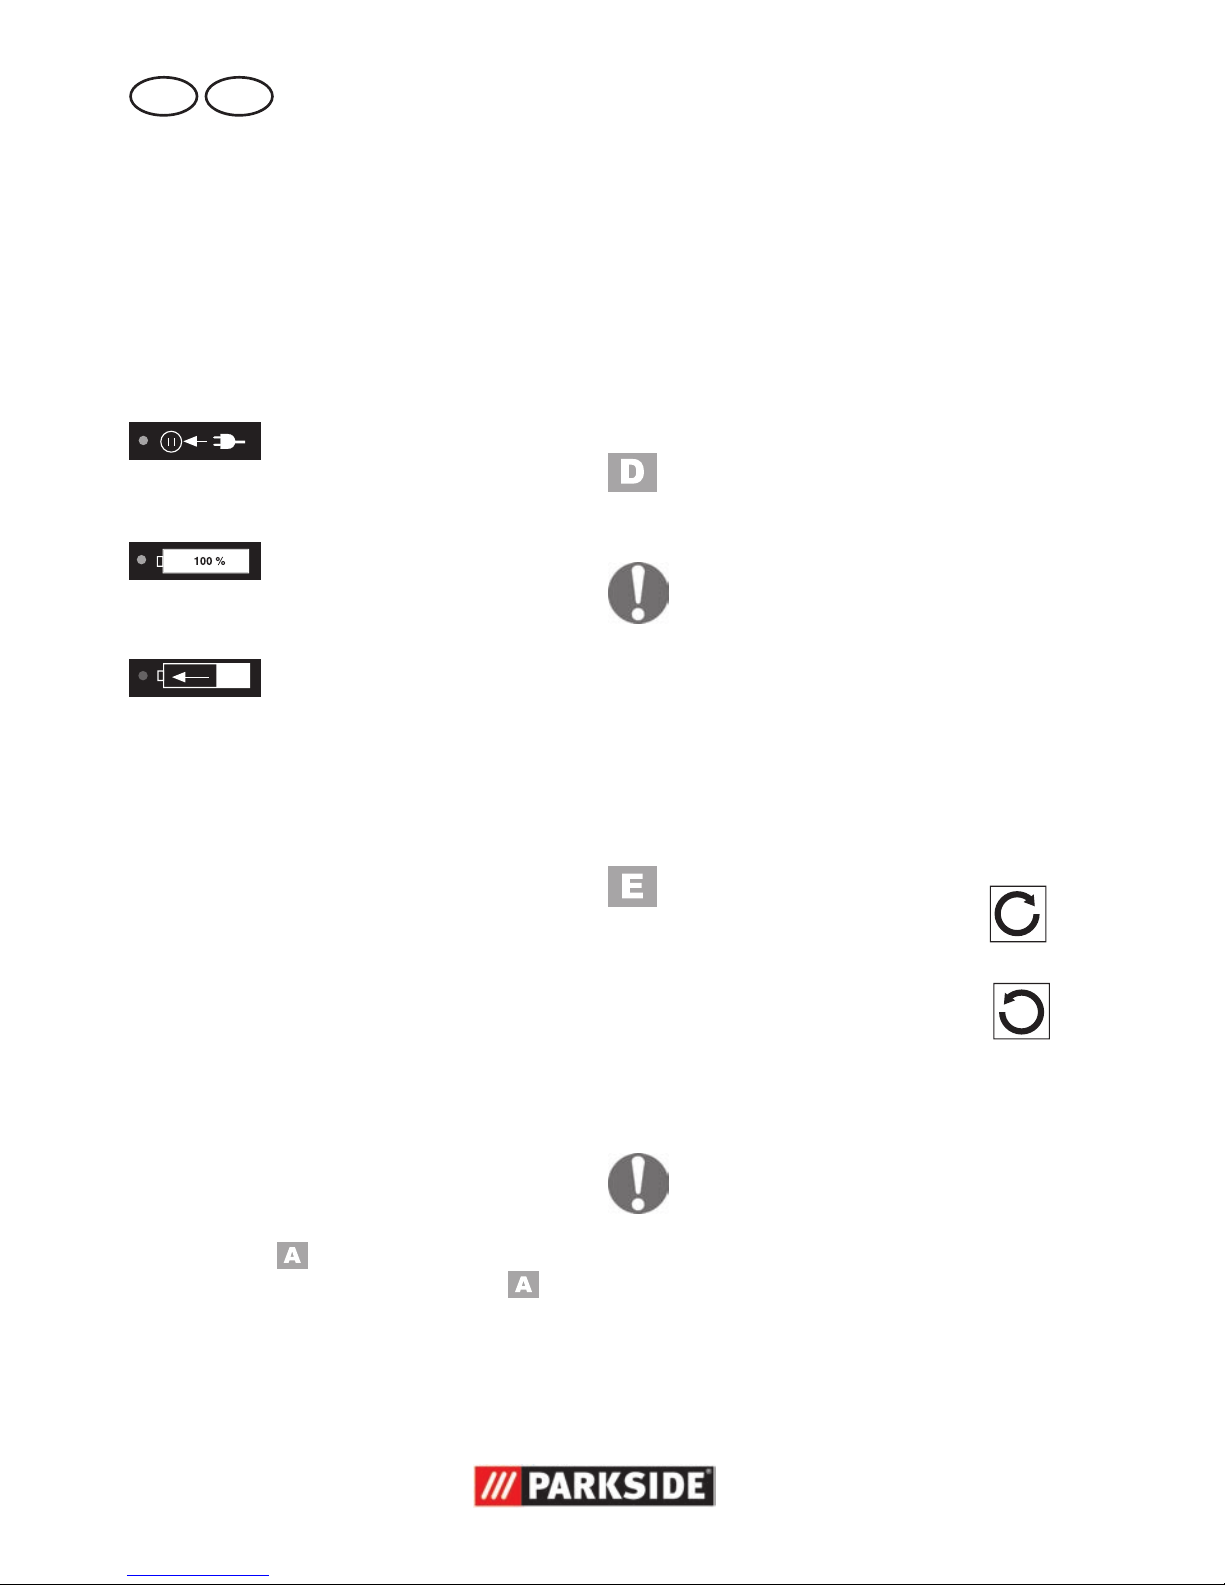
Overview of the LED indicators on
the charger (13):
Green LED (15) lights up
without battery inserted:
Charger ready.
Green LED (15) lights up:
Battery such alleged
charged.
Red LED (16) lights up:
Battery charging.
Used batteries
• If a fully recharged battery lasts for
considerably shorter operating times,
the battery is used up and needs to be
replaced. Only use an OEM battery
pack replacement available from our
Customer Service.
• Always take heed of the applicable
safety instructions as well as the environmental protection regulations and
information (see “Cleaning and Maintenance”).
Checking the battery charge
level
The battery’s ( 7) charge level is indicated by the charge state indicator (
4).
The LEDs indicate the battery’s charge
level, when the device is in operation.
red-yellow-green => Battery fully
charged
red and yellow => Battery half charged
red => Battery needs to be
charged
Operation
Choice of gear
Slide the gear selector (5) to 1 or
2, corresponding to a low or high
torque selection.
A gear change may only be per-
formed in standstill mode!
Set the direction of rotation
You can select the direction of rotation with
the direction switch (clockwise and anticlockwise direction) and secure the device
against accidental start up.
1. Wait for the device to shut-down.
2. Clockwise direction:
Press direction switch (6) to
the right.
3. Anticlockwise direction:
Press direction switch (6) to
the left.
4. Switch lock: Bring direction switch
to neutral position.
The direction changed may only be
performed in standstill mode.
Torque setting
You can preset the maximum torque by rotating the torque adjustment ring (3).
19+1 torque levels are provided.
1 3
G B I E
1. Turn the adjusting ring (3) to select the desired torque:
Step 1 --> lowest torque,
Step
--> highest torque.
Screws: Steps 1 - 19
Drilling: Step
.
2. Start with a lower torque step
and increase according to requirement.
Torque adjustment should only be
performed in standstill mode.
Reaching the preset torque limit pro-
duces a noticeable rasping sound.
This sound is caused by the slip
clutch.
Tool change
1. Rotate the keyless chuck (1) counter-clockwise, until the drill chuck
aperture (11) is large enough to
accommodate the tool.
2. Push the tool as far as possible
into the keyless chuck (1).
3. Rotate the chuck clockwise to
clamp the tool rmly.
4. To remove the tool again, rotate
the keyless chuck (1) and pull out
the tool.
Keyless drill chuck removal
To use the bitholder (17), you must remove
the keyless chuck (1).
1. Hold the keyless chuck (1) tightly
from the front. Pull or push the
drill chuck ring (2) in the direction
of the keyless chuck (1).
2. This unlocks the keyless chuck (1)
and it can be pulled off from the
front.
3. In order to put the keyless chuck
(1) back in position, pull the drill
chuck ring (2) in the direction of
the keyless chuck. Push the keyless chuck (1) on as far as it will
go.
If the keyless chuck (1) does not
engage automatically, turn the drill
chuck ring (2).
Using the bitholder
After removing the keyless chuck (1) you
can use the bitholder (17).
1. Insert a suitable 6-point bit in the
bitholder (17). Because of the
6-point bit holder, it may be that
you need to rotate the bit slightly.
2. Slide the bit right into the bithold-
er (17). The bit is held rmly
by the duct and the magnetic
bitholder.
3. To remove the bit, simply remove
the bit from the bitholder (17).
Switching on/off
By using the on/off switch (9) you can
progressively control the speed. The longer
you push the on-off button, the higher the
speed.
1. Press the on/off switch (9) to start
the device. The LED work light
(10) lights up during operation.
2. To turn it off, release the on/off
switch (9).
When you move the direction
switch (6) to the middle position,
the device is secured against being switched on.
1 4
G B I E
Cleaning and
maintenance
Contact our Service Centre about
repairs and servicing not described
in this manual. Only use OEM
parts. Risk of injury!
Turn off the appliance and, before
doing any servicing, remove the
battery.
The following cleaning and servicing
should be done regularly. This will ensure
a long and reliable service life.
Cleaning
Do not spray the appliance
with water and do not immerse it in water. Electric
shock hazard!
• Keep clean the ventilation slots, motor
housing and handles of the appliance.
Use a damp cloth or a brush.
Do not use cleaning agents or solvents.
You may otherwise irreparably damage the appliance.
Maintenance
The appliance cleaner is maintenance free.
Storage
• Store the equipment in a dry place
well out of reach of children.
• Store the equipment between 10° C
and 40° C. During storage, avoid extreme cold or heat so the battery does
not lose power.
• Remove the battery before storing the
unit for longer periods of time.
• During a longer storage period, check
the state of charge of the battery and
recharge if necessary roughly every
3months.
Disposal and protection
of the environment
Remove the battery from the device and
take the device, battery, accessories and
packaging for environmentally friendly
recycling.
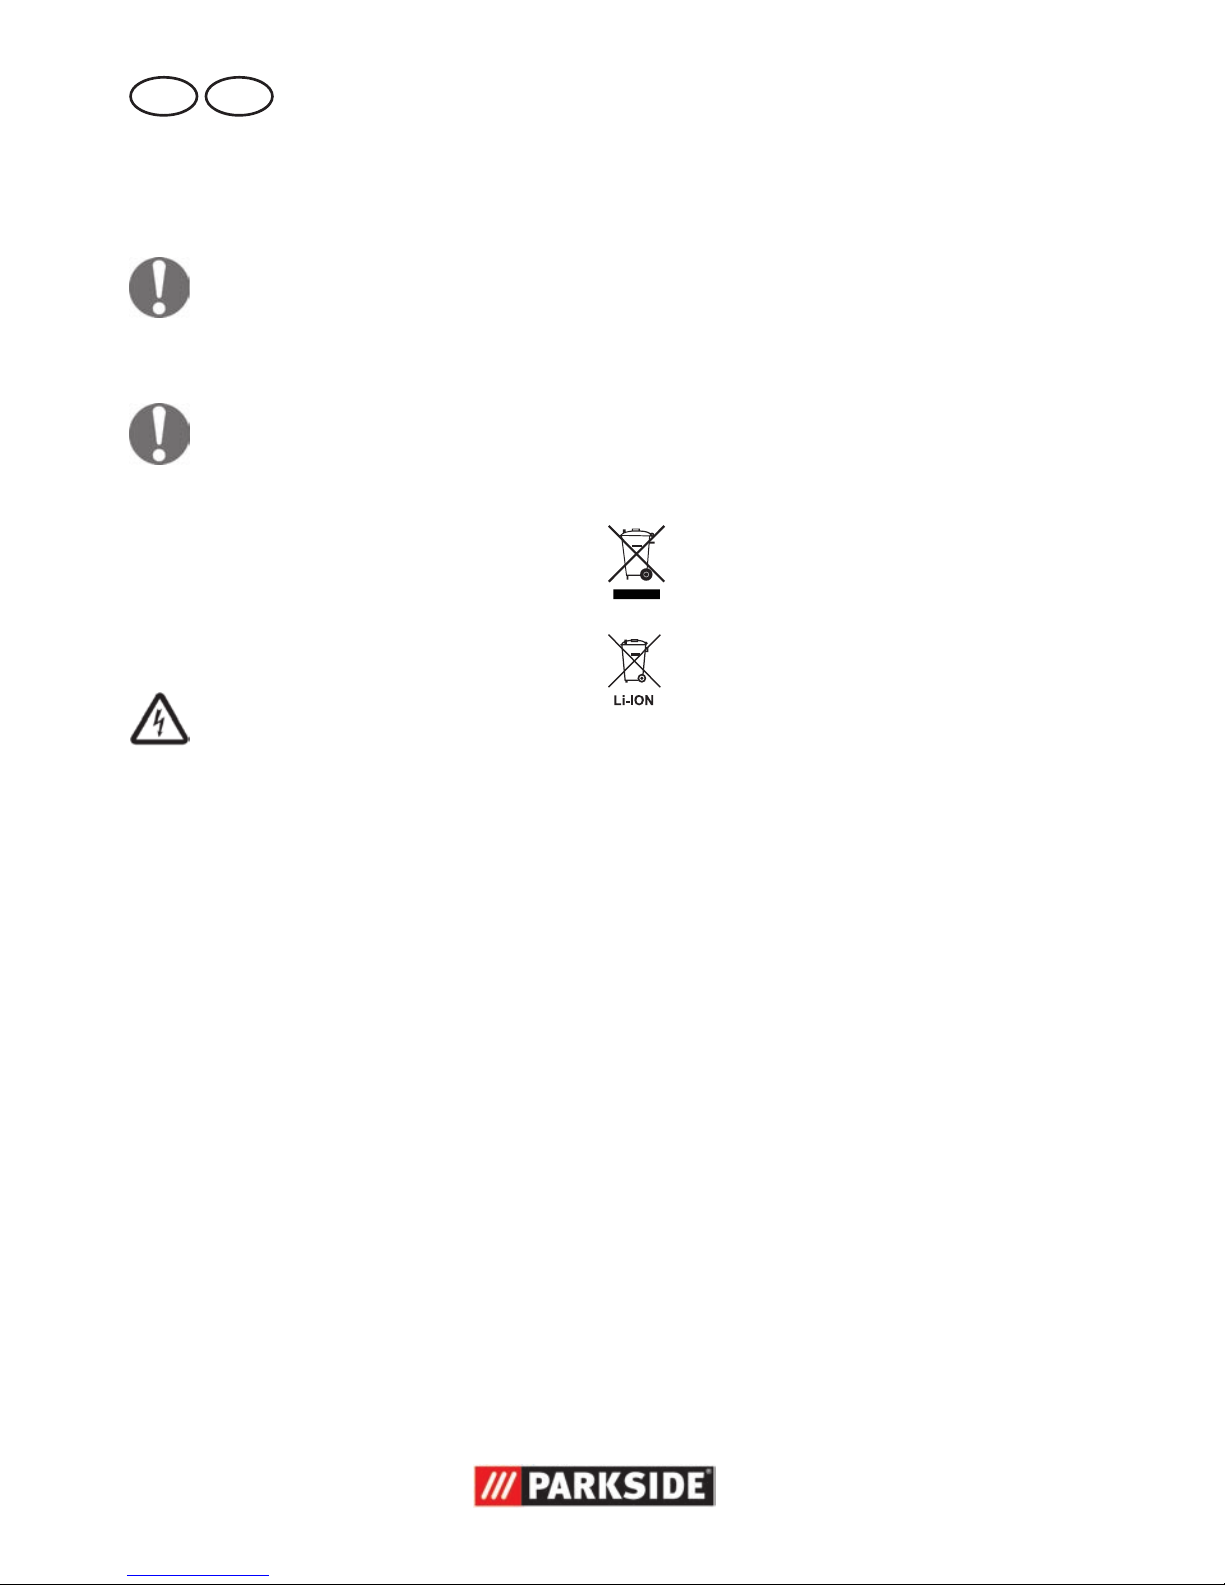
Machines do not belong with domes-
tic waste.
Do not dispose of batteries in
household waste, re (risk of explosion) or water. Damaged batteries
may damage the environment and
your health if toxic fumes or liquids
leak out.
• Return the unit to a recycling centre.
The plastics and metals in the unit can
be sorted and appropriately recycled.
Ask our Service Centre for details.
• Dispose of batteries in discharged condition. We recommend covering the pole
with adhesive tape to prevent a short
circuit. Do not open up the battery.
• Dispose of batteries in accordance with
the local regulations. Take batteries to
an old battery collection point where
they will be recycled in an environmentally friendly manner. For information about this, ask your local waste
management company or our service
centre.
• Defective units returned to us will be
disposed of for free.

1 5
G B I E
Replacement parts/
accessories
Spare parts and accessories
can be obtained at
www.grizzly-service.eu
If you do not have internet access, please
contact the Service Centre via telephone
(see “Service-Center” Page 16). Please
have the order number mentioned below
ready.
Keyless drill chuck (
1) ........ 91103353
Battery (
7) ....................... 80001133
Charger (
13) .................... 80001078
Guarantee
Dear Customer,
This equipment is provided with a 3-year
guarantee from the date of purchase.
In case of defects, you have statutory rights
against the seller of the product. These
statutory rights are not restricted by our
guarantee presented below.
Terms of Guarantee
The term of the guarantee begins on the
date of purchase. Please retain the original
receipt. This document is required as proof
of purchase.
If a material or manufacturing defect
occurs within three years of the date of
purchase of this product, we will repair or
replace – at our choice – the product for
you free of charge. This guarantee requires
the defective equipment and proof of purchase to be presented within the three-year
period with a brief written description of
what constitutes the defect and when it occurred.
If the defect is covered by our guarantee,
you will receive either the repaired product
or a new product. No new guarantee period begins on repair or replacement of the
product.
Guarantee Period and Statutory
Claims for Defects
The guarantee period is not extended by
the guarantee service. This also applies for
replaced or repaired parts. Any damages
and defects already present at the time of
purchase must be reported immediately after unpacking. Repairs arising after expiry
of the guarantee period are chargeable.
Guarantee Cover
The equipment has been carefully produced in accordance with strict quality
guidelines and conscientiously checked
prior to delivery.
The guarantee applies for all material and
manufacturing defects. This guarantee
does not extend to cover product parts that
are subject to normal wear and may therefore be considered as wearing parts (e.g.
keyless drill chuck) or to cover damage to
breakable parts (e.g. switches, batteries).
This guarantee shall be invalid if the product has been damaged, used incorrectly or
not maintained. Precise adherence to all of
the instructions specied in the operating
manual is required for proper use of the
product. Intended uses and actions against
which the operating manual advises or
warns must be categorically avoided.
The product is designed only for private
and not commercial use. The guarantee
will be invalidated in case of misuse or
improper handling, use of force, or interventions not undertaken by our authorised
service branch.

1 6
G B I E
Processing in Case of Guarantee
To ensure efcient handling of your query,
please follow the directions below:
• Please have the receipt and item number (IAN 273457) ready as proof of
purchase for all enquiries.
• Please nd the item number on the rating plate.
• Should functional errors or other defects occur, please initially contact the
service department specied below by
telephone or by e-mail. You will then
receive further information on the processing of your complaint.
• After consultation with our customer
service, a product recorded as defective
can be sent postage paid to the service
address communicated to you, with the
proof of purchase (receipt) and speci-
cation of what constitutes the defect
and when it occurred. In order to avoid
acceptance problems and additional
costs, please be sure to use only the address communicated to you. Ensure that
the consignment is not sent carriage
forward or by bulky goods, express or
other special freight. Please send the
equipment inc. all accessories supplied
at the time of purchase and ensure adequate, safe transport packaging.
Repair Service
For a charge, repairs not covered by
the guarantee can be carried out by
our service branch, which will be happy to
issue a cost estimate for you.
We can handle only equipment that has
been sent with adequate packaging and
postage.
Attention: Please send your equipment to
our service branch in clean condition and
with an indication of the defect.
Equipment sent carriage forward or by
bulky goods, express or other special
freight will not be accepted.
We will dispose of your defective devices
free of charge when you send them to us.
Service-Center
Service Great Britain
Tel.: 0871 5000 720
(£ 0.10/Min.)
E-Mail: grizzly@lidl.co.uk
IAN 273457
Service Ireland
Tel.: 1890 930 034
(0,08 EUR/Min., (peak))
(0,06 EUR/Min., (off peak))
E-Mail: grizzly@lidl.ie
IAN 273457
Importer
Please note that the following address is
not a service address. Please initially con-
tact the service centre specied above.
Grizzly Tools GmbH & Co. KG
Stockstädter Straße 20
63762 Großostheim
Germany
www.grizzly-service.eu
G B
I E

F I
1 7
Sisältö
Alkusanat .................................. 17
Käyttötarkoitus ..........................17
Yleinen kuvaus ..........................18
Toimituksen laajuus ......................... 18
Yleiskuva ......................................18
Toiminnon kuvaus ........................... 18
Tekniset tiedot ............................ 18
Turvallisuusmääräykset ............. 19
Symbolit ja kuvat ..........................19
Sähkötyökaluja koskevat
turvallisuusohjeet ............................ 20
Lataus ........................................ 24
Akun asennus/poisto ...................... 24
Akun lataus ................................... 25
Käytetyt akut .................................. 25
Akun lataustilan tarkistus ................. 25
Käyttö .......................................25
Vaihteen valitseminen ..................... 25
Pyörimissuunnan asettaminen ..........25
Vääntömomentin asettaminen .......... 26
Työkalun vaihtaminen ..................... 26
Pikakiristysistukan irrottaminen ......... 26
Ruuvauskärjen kiinnityksen käyttö ..... 26
Päälle- ja poiskytkentä ....................27
Puhdistus ja huolto ....................27
Puhdistus ....................................... 27
Huolto .......................................... 27
Säilytys ...................................... 27
Hävitys/ympäristönsuojelu ........28
Varaosat/Tarvikkeet .................. 28
Takuu ........................................ 29
Korjaus-huolto ........................... 30
Service-Center ............................ 30
Maahantuoja ............................. 30
Alkuperäisen CE yhdenmukai-
suustodistuksen käännös ........... 75
Alkusanat
Onnittelumme uuden laitteen ostollesi.
Olet valinnut laadukkaan tuotteen.
Tämän laitteen laatua on tarkastettu valmistuksen aikana ja siihen on suoritettu
lopputarkastus. Laitteesi toimintakyky on
siten taattu.
Käyttöohje on tuotteeseen kuuluva
osa. Se sisältää tärkeitä turvallisuuteen, käyttöön ja laitteen hävittämiseen liittyviä ohjeita. Tutustu
käyttö- ja turvallisuusohjeisiin ennen
tuotteen käyttöönottoa. Käytä tuotetta vain ohjeiden mukaisesti ja vain
sille tarkoitettuun käyttöön.
Pidä käyttöohje tallessa ja luovuta
kaikki asiakirjat laitteen mukana
seuraavalle käyttäjälle.
Käyttötarkoitus
Laite on tarkoitettu ruuvien sisäänkiertämiseen ja irrottamiseen sekä puun, metallin
tai muovin poraamiseen. Kaikenlainen muu
käyttö, jota tässä käyttöohjeessa ei nimenomaan sallita, voi vioittaa laitetta ja aiheuttaa käyttäjälle vakavia vaaratilanteita.
Käyttäjä on vastuussa tapaturmista tai vahingoista, jotka aiheutuvat muille henkilöille tai näiden omaisuudelle.
Valmistaja ei vastaa vahingoista, jotka
aiheutuvat epäasianmukaisesta käytöstä tai
vääränlaisesta käsittelystä.

F I
1 8
Yleinen kuvaus
Kuvat ovat avattavilla etu-
että takasivuilla.
Toimituksen laajuus
Poista laite pakkauksesta ja tarkasta, onko
se täydellinen.
- Akkuporakone-ruuvinväännin
- Laturi
- Akku
- Säilytyslaukku
- Käyttöohje
Kuvan terät ja palat eivät sisälly toimitukseen.
Yleiskuva
1 Pikakiristysistukka
2 Istukkarengas
3 Vääntömomentin säätörengas
4 Akun lataustilan näyttö
5 Vaihteen valintakytkin
6 Pyörimissuunnan valintakytkin
7 Akku
8 Akun lukituspainike
9 Virtakytkin
10 LED-työvalo
11 Istukan aukko
12 Säilytyslaukku
13 Latauslaite
14 Latauslaitteen verkkoliitäntäjohto
15 Vihreä LED
16 Punainen LED
17 Ruuvauskärjen kiinnitys
Toiminnon kuvaus
Kaksivaihteisessa akkuporakone-ruuvinvääntimessä on 19+1 -tasoinen vääntömomentin säätö, pyörimissuunta oikealle/
vasemmalle, irrotettava pikakiristysistukka,
kuusiokulmakärjen kiinnitys sekä LED-työvalo.
Tekniset tiedot
Laite
Moottorijännite ........................... 12 V
Tyhjäkäyntikiertonopeus
1. vaihde ...........................0-350 min
-1
2. vaihde .........................0-1200 min
-1
Suurin vääntömomentti .................. 25 Nm
Istukan kiristysleveys ............... 0,8-10 mm
Paino (ilman latauslaite) .................1,1 kg
Poran halkaisija puulle ......... enint. 25 mm
Poran halkaisija metallille ....... enint. 8 mm
Äänen painetaso
(L
pA
) .......................66,5 dB(A); K=3 dB
Äänitehotaso
(L
WA
) ......................77,5 dB(A); K=3 dB
Tärinä (a
h
) .............................................
Metallin poraaminen .............. < 2,5 m/s
2
Ruuvit ilman iskua................... < 2,5 m/s
2
K= 1,5 m/s
2
Akku (Li-Ion) ............... DCBK-70-12
Nimellisjännite ............................ 12 V
Kapasiteetti ................................. 1,5 Ah
Latausaika ......................................n 1 h
Laturi ................... JLH201261500G
Nimellisotto ...................................30 W
Tulojännite/Input
...........................100-240 V~, 50-60 Hz
Lähtöjännite/Output
.................................12,6 V
1500 mA
Suojaluokka ....................................
II
Suojatapa ...................................... IPX0
F I
1 9
Ilman työkaluja tehtävä ketjun kiristys
Melu- ja tärinäarvot on määritelty standard-inmukaisuustodistuksessa olevia normeja ja määräyksiä vastaaviksi.
Teknisiä ja ulkonäköä koskevia muutoksia
laitteen kehityksen suhteen voidaan tehdä
ilmoittamatta niistä etukäteen. Kaikki tässä
käyttöohjeessa annetut mitat, viitteet ja
tiedot ovat ilman takuuta. Käyttöohjeesta
poikkeavia muutosvaatimuksia ei voida
hakea oikeusteitse.
Esitetty värähtelyn päästöarvo on mitattu
normitetun tarkistusmenettelyn mukaisesti
ja arvoa voi käyttää sähkölaitetta toiseen
laitteeseen vertaillessa.
Esitetyn värähtelyn päästöarvoa voi käyttää myös alustavaan pysähdyksen arviointiin.
Varoitus:
Värähtelyn päästöarvo voi sähkö-
käyttöisen työkalun todellisen käytön aikana olla annetusta arvosta
eroavainen, riippuen sähkötyökalun
käytöstä ja käyttötavasta.
Tarpeen on määrätä käyttäjän
turvallisuuteen johtavat suojatoimenpiteet, jotka kohdistuvat todellisten
käyttöedellytyksien aikana arvioitavaan pysähdykseen (tällöin on
huomioitava kaikki käyttöjakson
osiot, esimerkiksi ajat, jolloin sähkötyökalu on pysähtynyt, ja sellaiset,
jolloin se on tosin käynnissä, mutta
kuormituksetta).
Turvallisuusmääräykset
Tämä luku käsittelee periaattellisia turvallisuusmääräyksiä, jotka on otettava huomioon sähkökuokkalla työskennellessä.
Symbolit ja kuvat
Laitteessa olevat tekstit:
Lue käyttöohje.
Sähkölaitteet eivät kuulu talousjättei-
siin.
Akussa oleva symboli
Lue käyttöohje.
Sähkölaitteet eivät
kuulu talousjätteisiin
Älä jätä akkua pitemmäksi ajaksi
suoraan auringonvaloon äläkä
myöskään lämpöpatterien päälle.
Kuumuus vahingoittaa akun ja on
olemassa räjähdysvaara (max.
45°C).
Vie käytetyt akut keräyspisteeseen,
josta se viedään ympäristöystävälliseen kierrätykseen.
Akku tulee varastoida lada-
tussa tilassa
Akun tarvitsema ympäristön
lämpötila on +10°C - + 40 °C
Akku ei saa joutua kosketuksiin
veden kanssa.
F I
2 0
Sähkötyökaluja koskevat
turvallisuusohjeet
VAROITUS! Lue kaikki turval-
lisuusohjeet ja neuvot.Turval-
lisuusohjeiden noudattamattomuus
voi johtaa sähköiskun saamiseen,
aiheuttaa tulipalon ja/tai vaarallisia vammoja.
Pidä turvallisuusohjeet ja neuvot
hyvin tallessa tulevaisuuden varalle.
Turvallisuusohjeissa käytetty termi „ Sähkötyökalu“ tarkoittaa sähköisesti toimivia työkaluja (verkkokaapelilla) ja akulla toimivia
työkaluja (ilman verkkokaapelia).
1) TYÖPAIKAN TURVALLISUUS
a) Pidä työpaikka puhtaana ja
huolehdi riittävästä valaistuksesta. Epäpuhtaus ja huono valaistus
työpaikalla voivat johtaa loukkaantumisiin.
b) Älä työskentele sähkölaitteella
räjähdysvaarallisella alueella,
jossa on helposti syttyviä nesteitä, kaasuja tai pölyä. Sähköllä
käyvät työkalut kehittävät kipinöintiä,
joka voi sytyttää pölyn tai höyryt.
c) Älä anna pienten lasten tai
asiattomien henkilöiden olla
työpaikalla sähkölaitteella
työskennellessä. Häiritseminen
voi aiheuttaa sen, että menetät koneen
hallinnan.
Laturissa olevat symbolit:
Huomio!
Lue käyttöohje.
Laturi on tarkoitettu käytettäväksi
vain sisätiloissa.
T2A
Lasiputkisulake
Suojaluokka II
Sähkölaitteet eivät kuulu talousjättei-
siin.
LED-näyttö latauksen
aikana.
Ohjeessa olevien kuvien selitys:
Vaaraan viittaava merkki
henlilö- ja esinevahinkojen
estämiseksi.
Kieltomerkki (huutomerkin asemasta
kielto on selitetty) vahinkojen estämiseksi.
Viite, joka antaa tietoa laitteen käy-
tön helpottamiseksi.

F I
2 1
2) TURVALLISUUS:
a) Sähkölaitteen pistokkeen täytyy
sopia pistorasiaan. Pistoketta
ei saa muuttaa millään tavalla.
Älä käytä adapteripistokkeita
yhdessä maadoitettujen sähkötyökalujen kanssa. Alkuperäiset
pistokkeet ja sopivat pistorasiat vähentävät sähköiskuvaaraa.
b) Vältä kosketusta maadoitet-
tuihin pintoihin, kuten putkiin,
lämmityksiin, hellaan tai jääkappiin. Sähköiskuvaara on olemas-
sa, kun kehosi on maadoitettu.
c) Älä pidä sähkölaitetta sateessa
tai märässä paikassa. Veden
pääsy laitteeseen kohottaa sähköiskuvaaraa.
d) Älä käytä kaapelia mihinkään
muuhun tarkoitukseen, älä
kanna sähkölaitetta kaapelista
kiinni pitäen tai ripusta laitetta kaapelista, älä myöskään
vedä kaapelia irti pistorasiasta
kaapelista vetämällä vaan pidä
silloin kiinni pistokkeesta. Varo,
ettei kaapeli joudu kuumuuteen, siihen ei pääse öljyä eikä
terävät reunat tai liikkuvat osat
voi vioittaa sitä. Vioittuneet tai kier-
tynyt kaapeli voi aiheuttaa sähköiskun.
e) Kun työskentelet sähkölaitteella
ulkona, käytä vain ulkokäyttöön soveltuvaa jatkokaapelia.
Ulkokäyttöön soveltuva jatkokaapeli
vähentää sähköiskuvaaraa.
f) Jos sähkölaitteen käyttöä mä-
rissä tiloissa ei voida välttää,
täytyy silloin olla käytettävissä
myös vikavirtakytkin. Vikavirta-
kytkimen käyttö vähentää sähköiskuvaaraa.
3) HENKILÖITÄ KOSKEVA TURVALLISUUS:
a) Ole varovainen ja käytä säh-
kölaitetta harkiten. Älä työskentele sähkölaitteella, jos olet
väsynyt tai huumeiden, alkoholin tai lääkkeiden vaikutuksen
alainen. Hetkellinen huolimattomuus
sähkölaitteen käytössä voi johtaa vaikeisiin tapaturmiin.
b) Käytä henkilökohtaisia suoja-
vaatteita ja aina suojalaseja.
Henkilökohtaisten suojavarusteiden
pito, kuten turvakengät, suojakypärä ja
kuulosuoja vähentävät loukkaantumisvaaraa.
c) Vältä tahatonta käynnistystä.
Varmista, että sähkölaite on
kytketty päältä pois ennen virtaan liittämistä tai kun nostat
tai kannat laitetta. Jos pidät säh-
kölaitetta kantaessasi sormea kytkimessä tai liität laitteen sähköihin, vaikka
sitä ei ole kytketty pois päältä, voi se
johtaa loukaantumiseen.
d) Poista kaikki säätötyökalut ja
ruuvivääntimet ennen sähkölaitteen kytkentää.
e) Pidä huoli siitä, että seisot tu-
kevasti ja vältät epätavallista
asentoa työskennellessäsi. Siten
voit parhaiten välttää odottamat tilanteet työskennellessäsi.
f) Käytä sopivia työvaatteita. Älä
pidä löysiä vaatteita, koruja.
Pidä hiukset, vaatteet ja käsineet etäällä liikkuvista osista.
Löysät vaatteet, korut ja pitkät hiukset
voivat jäädä kiinni liikkuviin osiin.
g) Mikäli pölynpoisto- ja keruulait-
teita voidaan asentaa, on varmistettava, että ne on kytketty
ja että niitä käytetään oikein.

F I
2 2
Pölynpoiston käyttö voi vähentää pölyn
aiheuttamia vaaroja.
4) SÄHKÖLAITTEEN KÄYTTÖ JA KÄSITTELY:
a) Älä ylikuormita laitetta. Käytä
työssäsi vain siihen tarkoitettuja
sähkötyökaluja. Sopivilla työkaluil-
la on parempi ja turvallisempi työskennellä määrätyllä tehoalueella.
b) Älä käytä sähkötyökaluja,
joiden koskettimet ovat rikki.
Laite, jota ei pysty kytkemään päälle
tai pois päältä, on vaarallinen, ja se
täytyy korjata.
c) Irrota pistoke pistorasiasta
ennen kuin teet laitteeseen säätöjä, vaihdat osia tai laitat työn
lopussa laitteen pois. Nämä varo-
toimenpiteet estävät sähköketjusahan
tahattaoman käynnistyksen.
d) Pidä käyttämätön sähkölaite
aina pois lasten ulottuvilta. Älä
anna laitetta käyttöön henkilölle, joka ei tunne laitteen käyttöä tai ei ole lukenut ohjeita.
Sähkölaitteet ovat vaarallisia käytöstä
kokemattomille henkilöille.
e) Hoida sähkölaitetta huolella.
Tarkista, että kaikki liikkuvat
osat toimivat kunnolla, osissa
ei ole vikaa eikä sähkölaitteen
toiminto ole häiriintynyt. Korjauta
vialliset osat laitteen käyttöä ennen.
Monen tapaturman syynä on huonosti
suoritettu huolto.
f) Tarkista, että terä on terävä ja
puhdas. Huolella hoidettu sähkölaite
ei juutu kiinni ja sitä on helpompi ohjata.
g) Käytä sähkölaitetta, tarvikkei-
ta, säätötyökaluja ym. ohjeiden mukaisesti. Ota huomioon
työolosuhteet ja työ itse. Sähkö-
laitteen käyttö vieraaseen tarkoitukseen
voi aiheuttaa vaarallisia tilanteita.
h) Pidä laitteesta kiinni pidettäessä
kiinni eristetyistä tartunta-aloista, mikäli suoritetaan töitä, joissa käytettävä työkalu voi osua
piilossa oleviin virtajohtoihin
tai laitteen omaan verkkokaapeliin. Jännitettä johtavaan johtoon
koskeminen voi asettaa myös metalliset
laiteosat jännitteen alaisiksi ja aiheuttaa sähköiskun.
5) KÄYTETTYJEN AKKULAITTEIDEN
HUOLELLINEN KÄSITTELY JA
KÄYTTÖ
a) Lataa akut vain valmistajan
suosittelemissa latauslaitteissa.
Jollekin muulle akulle tarkoitettu latauslaite on vaarallinen (palonvaara), eikä
sitä pidä käyttää muihin akkuihin.
b) Käytä sähkölaitteissa vain sii-
hen kuuluvia akkuja. Väärien
akkujen käyttö voi aiheuttaa loukkaantumisia ja tulipalon.
c) Älä jätä käyttämättömän akun
lähelle paperiliittimiä, kolikoita,
avaimia, nauloja, ruuveja tai
muitia pieniä metalliesineitä,
jotka voisivat olla siltana johtamaan virtaa. Oikosulku akkukontak-
tien välillä voi aiheuttaa palovammoja
tai jopa tulipalon.
d) Väärä käyttö voi aiheuttaa sen,
että akusta vuotaa nestettä.
Älä koske nesteeseen. Jos olet
koskenut siihen, huuhtele kädet
puhtaalla vedellä. Jos nestettä
joutuu silmiin, huuhtele silmät
ja hae lääkärin apua heti. Vuo-
tava akkuneste voi aiheuttaa ärsytystä
tai palovamman iholle.

F I
2 3
6) HUOLTO:
a) Anna pätevyyden omaavan
ammattimiehen korjata sähkötyökalusi, ja käytä ainoastaan
alkuperäisiä varaosia. Siten on
taattu, että sähkötyökalusi turvallisuus
on pysyvä.
7) AKKULAITTEILLE TARKOITETUT
ERITYISET TURVALLISUUSOHJEET
a) Varmista, että laite on kytketty
päältä pois, kun laitat akkua
paikallaan. Akun asennus johonkin
kytkettyyn sähkölaitteeseen voi aiheuttaa tapaturmia.
b) Lataa akut ainoastaan sisä-
alueella, koska latauslaite on
tarkoitettu siihen.
c) Sähköiskun saamisen välttämi-
seksi vedä laitteen puhdistusta
ennen latauslaitteen pistoke irti
pistorasiasta.
d) Älä aseta akkua ajaksi suoraan
auringonvaloon tai lämpöpatterien päälle. Kuumuus vahingoittaa
akkua ja on olemassa räjähdysvaara.
e) Anna lämmenneen akun jääh-
tyä ennen latausta.
f) Älä avaa akkua ja varo, ettei
akku vahingoitu mekaanisesti.
Oikosulkuvaara ja laitteesta voi
kehittyä höyryjä, jotka ärsyttävät hengityselimiä. Pidä huoli
raikkaan ilman saannista ja hae lääkärin apua heti, jos oireita esiintyy.
g) Älä käytä uudelleen ladattavia
paristoja!
8) AKUN LATAUSLAITTEEN OIKEA
KÄYTTÖ
• Tätä laitetta voivat käyttää yli 8vuotiaat lapset sekä henkilöt, joiden
fyysiset, aistimukselliset tai mentaaliset
kyvyt ja taidot ovat puutteelliset tai
vähäiset, mikäli käyttö tapahtuu valvonnan alaisuudessa tai jos he saavat
opastuksen laitteen käyttöön sen turvallisuudesta vastuulliselta henkilöltä ja
ymmärtävät laitteen vaarariskit. Lapset
eivät saa leikkiä laitteella. Lapset eivät
saa puhdistaa tai huoltaa laitetta yksin
ja ilman valvontaa.
• Käytä akun lataukseen ainos-
taan toimituksen mukana tullutta laturia. Palo- ja räjähdysvaara.
• Tarkista latauslaite, kaapeli ja
pistoke ennen jokaista käyttöä,
anna ammattimiehen korjata
se ja käytä ainoastaan alkuperäisiä varaosia. Älä käytä viallista laturia äläkä yritä aukaista
sitä itse. Siten varmistat sähköisen
työkalusi turvallisuuden.
• Tarkista, että verkkojännite
vastaa laturin tyyppikilvessä
olevaa arvoa. Sähköiskuvaara.
• Irrota laturi pistorasiasta, ennen
kuin akun /sähköisen työkalun/laitteen liitäntsulkemista tai
avaamis.
• Pidä laturi puhtaana ja pois
kosteudesta tai märästä. Älä
koskaan käytä laturia ulkona.
Lika ja veden pääsy laitteeseen voivat
aiheuttaa sähköiskun.
• Laturia saa käyttää vain siihen
kuuluvien akkujen kanssa. Vieraiden akkujen käyttö voi aiheuttaa
loukkaantumisia tai palovaaran.
• Varo, ettei laturi vioitu. Se voi
aiheuttaa oikosulkuja.
F I
2 4
• Laturia ei saa käyttää syttyvällä alustalla (esim. paperi tai
tekstiilit). Latauksessa tapahtuva kuu-
meneminen voi aiheuttaa palon.
• Jos tämän laitteen liitäntäjohto on vioittunut, valmistajan tai sen asiakaspalvelun tai muun pätevän henkilön tulee
vaihtaa se vaaratilanteiden välttämiseksi.
9) JÄÄNNÖSRISKIT
Varovaisesta käytöstä huolimatta on aina
olemassa jäännösrikejä. Tämän sähkölaitteen rakenteesta ja mallista johtuen voi
esiintyä seuraavia vaaroja:
a) Leikkaushaavoja
b) Kuulovammoja, jos ei käytetä sopivia
kuulosuojia.
c) Terveydellisiä haittoja käden ja käsi-
varsien tärinästä, jos laitetta käytetään
pitemmän aikaa tai jos sitä ei ohjata
oikein tai ei huolleta.
Varoitus! Tämä laite synnyttää käy-
tön aikana magneettisen kentän.
Magneettinen kenttä voi vaikuttaa
aktiivisesti tai passiivisesti lääkinnällisiin implantteihin. Vakavien
loukkaantumisien tai kuolemaan
johtamisen estämiseksi suosittelemme lääkinnällisten implanttien käyttäjille ennen laitteen käyttöönottoa
ottamaan yhteys omaan lääkäriin
ja kysyä neuvoa tilanteeseen.
Lataus
Älä pidä akkua äärim-
mäisolosuhteissa, kuten kuumuudessa ja varo kolhiintumisia. Loukkaantumisvaara
akusta vuotavasta elektrolyyttiliuoksesta. Huuhtele vedellä tai neutralisointiaineella
kosketuksen jälkeen ja hae
apua lääkäriltä, jos ainetta
on päässyt silmiin ym.
Lataa akku vain kuivissa
tiloissa. Akun pinnan täytyy
olla puhdas ja kuiva ennen
latauslaitteeseen liittämistä.
Sähköiskusta aiheutuva
loukkaantumisen vaara.
Lataa akku vain mukana toimitetulla
alkuperäisellä latauslaitteella.
• Lataa akku ennen ensimmäistä käyttöä.
Älä lataa akkua lyhyesti useampaan
kertaan peräkkäin.
• Huomattavasti lyhyempi käyntiaika on
merkki siitä, että akku on kulunut ja se
pitäisi vaihtaa uuteen. Käytä vain alkuperäistä vara-akkua, jonka voit tilata
asiakaspalvelusta.
• Noudata joka tapauksessa voimassa
olevia turvallisuusviitteitä ja määräyksiä sekä huomioi ympäristönsuojelua
koskevat ohjeet.
• Väärästä käytöstä aiheutuneet viat eivät kuulu takuun piiriin.
Akun asennus/poisto
1. Laita ladattu tai uusi akku (7)
paikalleen työntämällä sitä ohjauskiskoa myöten laitteeseen.
 Loading...