

NEC Versa Dock Installation Guide
NEC Versa® LX, LXi, and NEC Versa Dock
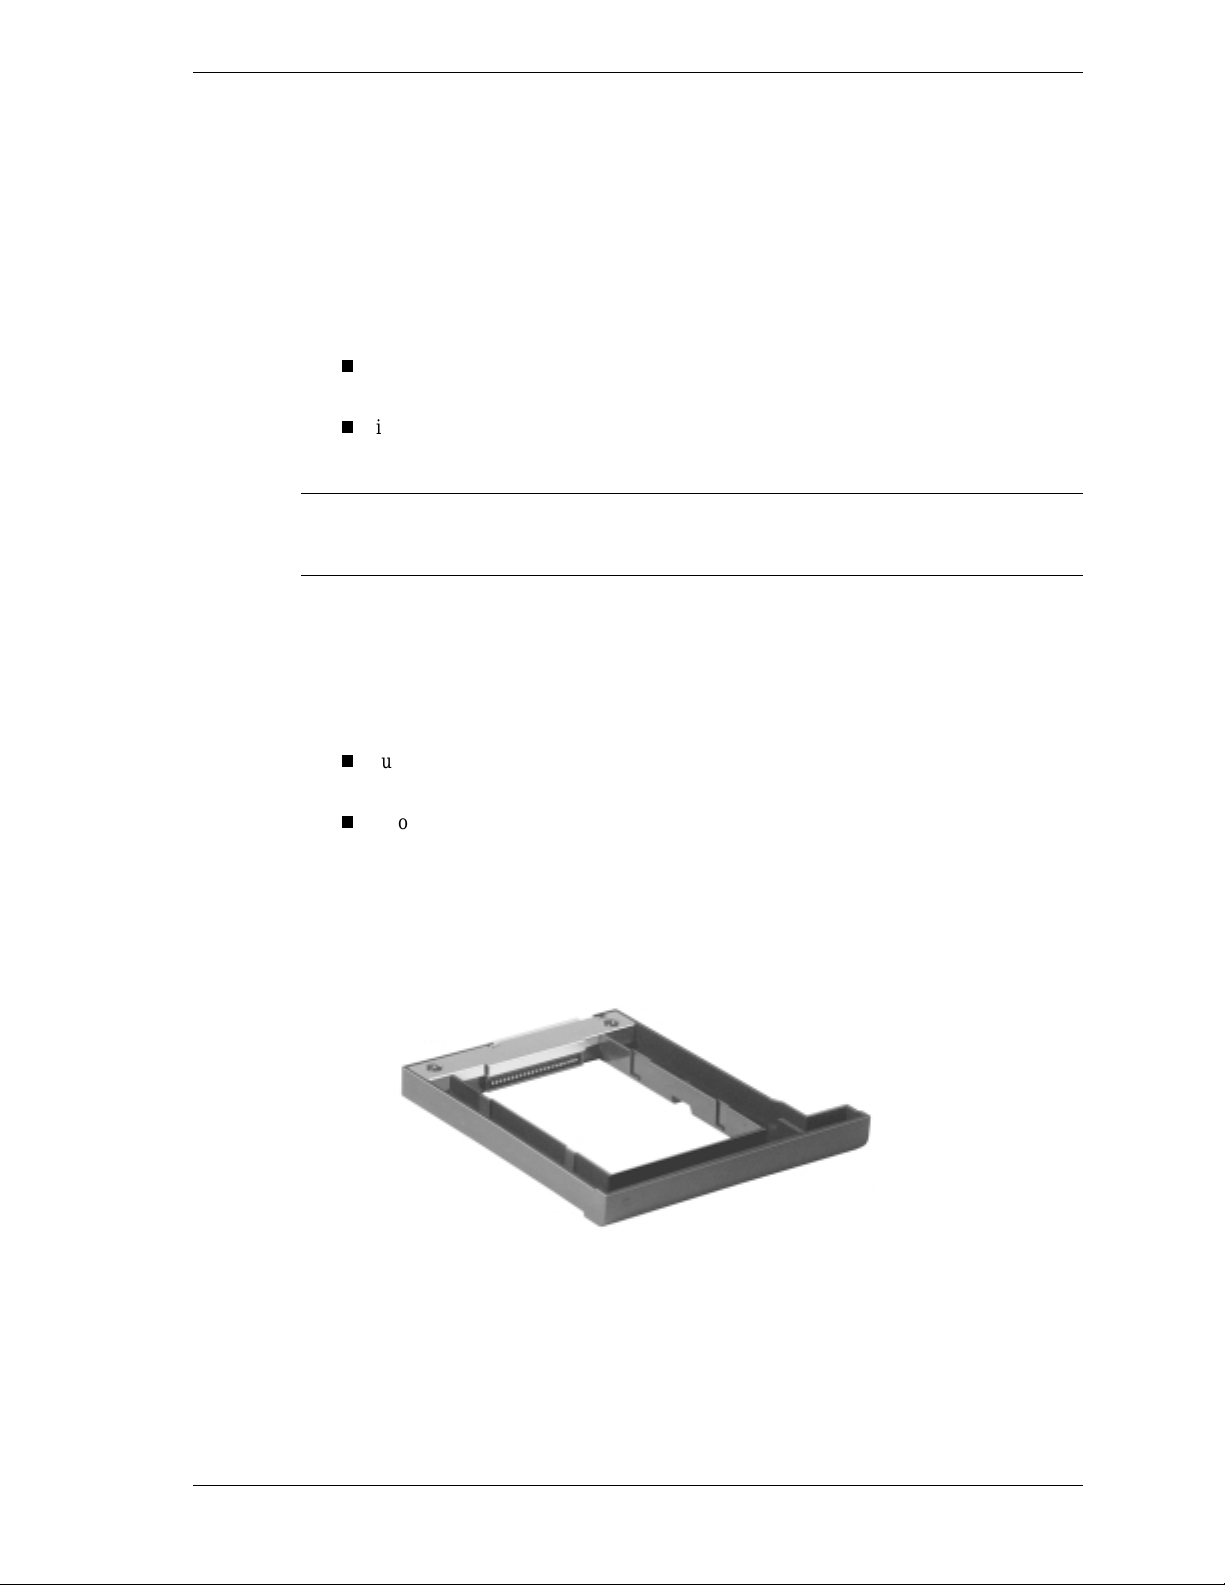
Hard Disk Drive Cradle Pack
Congratula tions on purchasing the NEC Versa LX, LXi, and NEC Versa Dock Hard Disk Drive
Cradle Pack.
If you upgrade to a lar ger internal disk dr ive, you can
use the cr adle pack t o h ol d your original interna l h ard disk drive as a second dr i ve in the
system’s VersaBay III after upgrading to a larger internal drive.
install a new hard disk drive into the cradle pack in the VersaBay III as a second hard
disk dr ive for the system.
Note
the system (run
Your Hard Disk Drive" later in this document.
This document describes how to remove the system’s internal hard disk drive and install it into
the cra dle pack as wel l as how to prepare a new har d disk drive usi ng
The cradle pack is designed to support the NEC Versa LX systems with
user-re movabl e hard disk drives only. To be sure that you own a unit with a
user-repla ceable hard di s k drive, check the followi ng.
Before attempting to use a new hard disk drive, you must first define the file format for
fdisk
) and f ormat your new ha r d dis k. For detai ls, s ee the section, "Preparin g
and
fdisk
Turn over your system. Note the label on the back of th e un it, which contain s the Doc
ID (model name), Model Number, and NEC Serial Number for the unit.
Look at the 14-alphanumeric characters in the model number. A unit with a user-
replaceable hard disk drive has the letter “A” in the next to last position of the model
number. An example of a model number for a unit with a user-replaceable hard disk
drive is VL210010-0000A0.
format
.
NEC Versa Hard Disk Drive Cradle Pack
Removing the Internal Hard Disk Drive
If you already upgraded th e in ternal drive, this procedure is not necessa ry. Thi s in formati on is
also found in the documentation that came with your hard disk drive upgrade.
NEC Versa LX, LXi, and NEC Versa Dock Hard Disk Drive Cradle Pack 1
The hard disk drive i s l oc ated under the battery bay in your NEC Versa n otebook computer . You
must remove the system’s ma in battery be fore removing t he har d disk drive. Remov e the ha rd
disk drive as follows.
1.
Make sure the system is powered of f a nd the AC adapter is disconnected.
2.
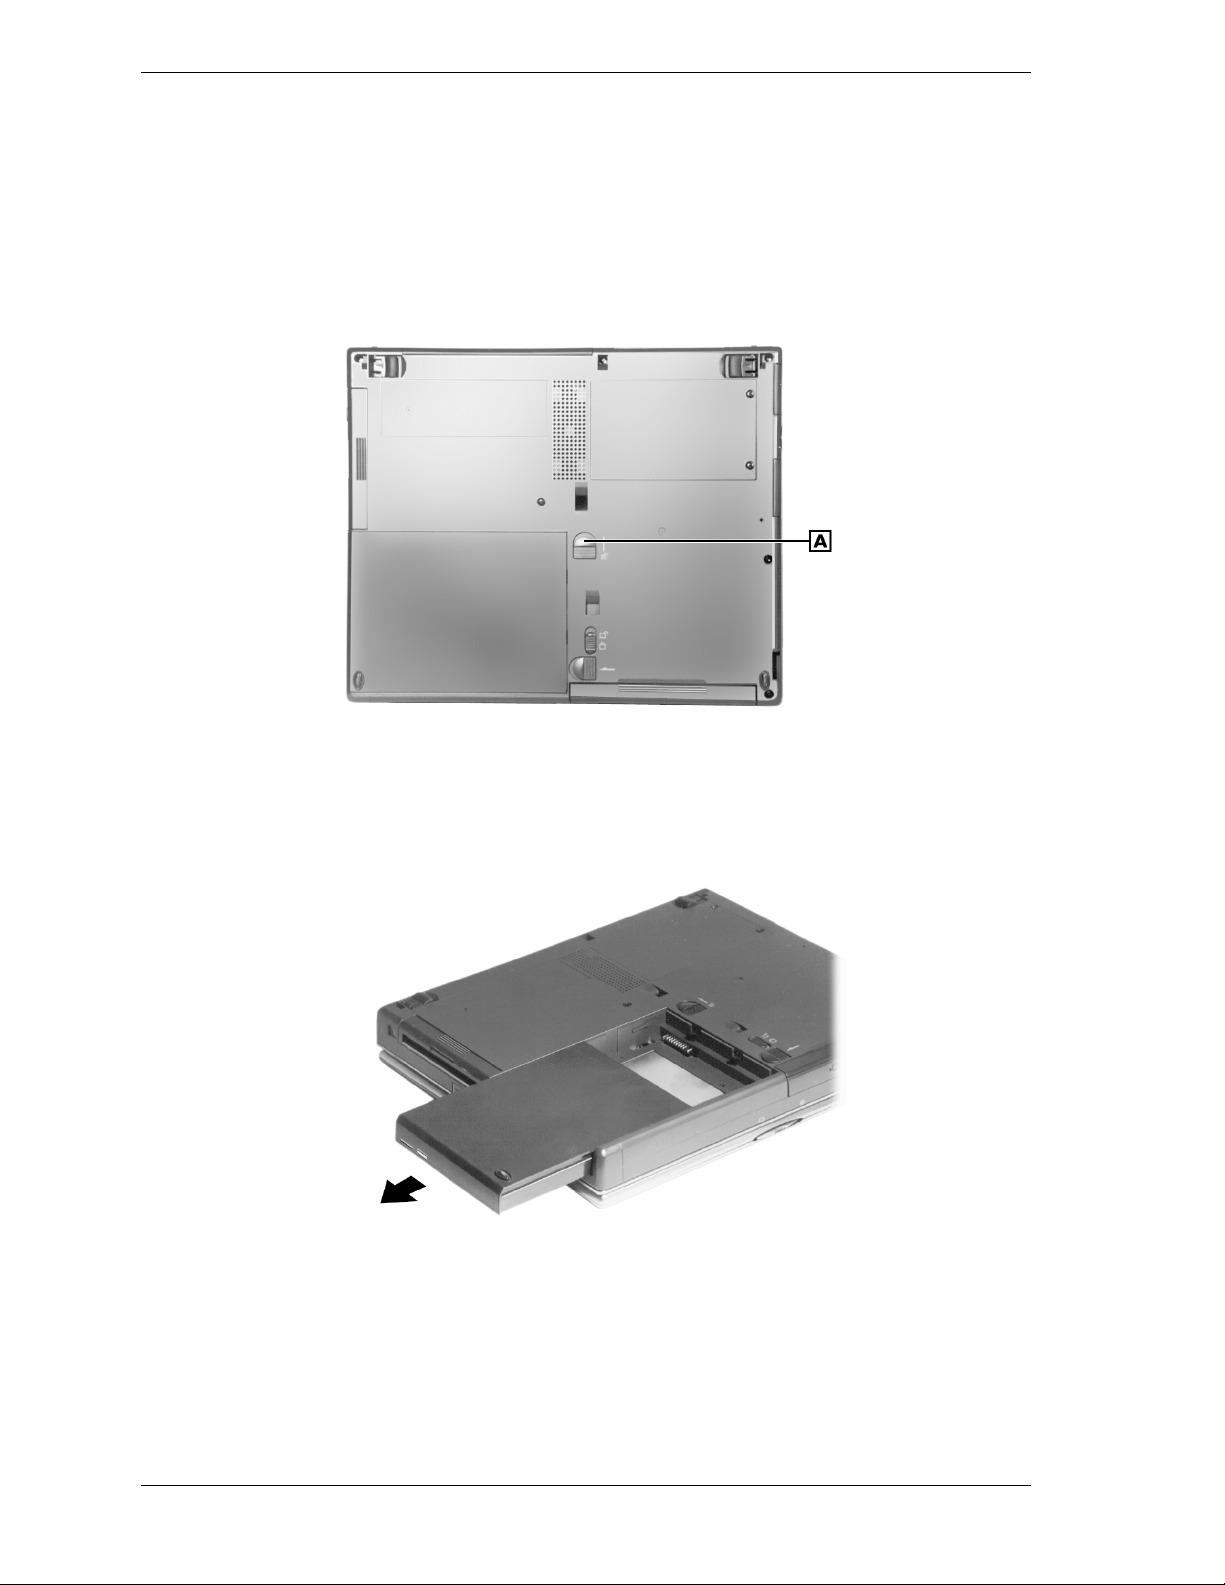
Close the LCD and turn over the syst em.
3.
Slide the battery release latch toward the back of the system and hold firmly.
A
— Battery R eleas e Latc h
4.
Continue to hold the battery release latch as you slide the battery out of the system.
Remo ving the battery
2 NEC V ersa LX, LXi, and NEC Versa Dock Hard Disk Drive Cradle Pack

5.
Remove the disk drive as follows:
Remove t he screw that secures the hard disk dr ive.
Place your finger in t he cen ter n otch of the hard drive lever and pull up the l e ve r. Be
sure th at both sid es of the lever are raised.
Hard disk drive in the drive bay
A
– Screw
With th e lever raised, place your fingers on the in side edge of th e lever and on ea ch
B
– Hard Disk Drive Lever
C
– Hard Disk Drive
side of the center notch. Pull the drive toward the open side of the battery bay. Do not
apply pressure to the drive surface as you pull.
Use c are when ha ndling the hard disk drive. Hold i t from the sides, do
not squeeze the drive by t he to p and bottom.
Disconn ecting the drive
Once the drive is di s con nected, use the lever to lift th e dr ive out of th e system. Once
removed, only handle the drive by its sides.
NEC Versa LX, LXi, and NEC Versa Dock Hard Disk Drive Cradle Pack 3
 Loading...