

INSTALLATION INSTRUCTIONS
PUSH TO SEAL BATH WASTE & OVERFLOW DR290
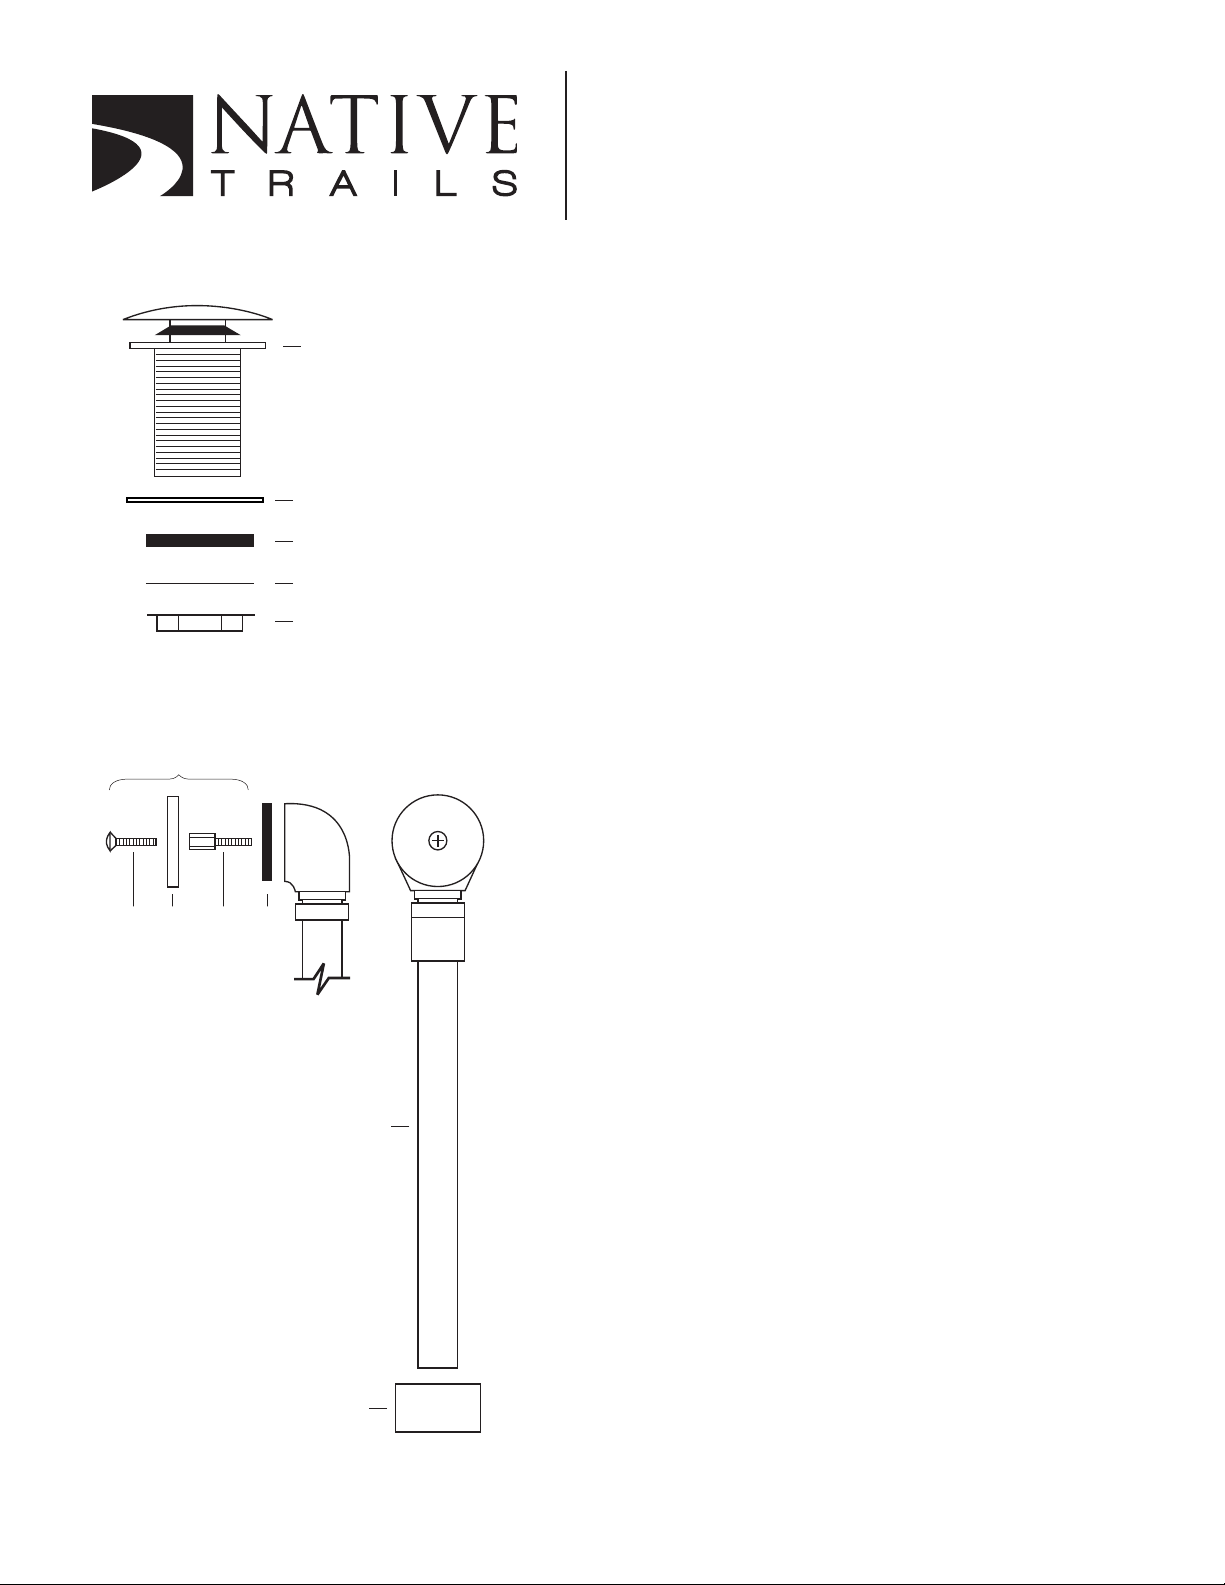
DRAIN
DRAIN
SIDE VIEW
Cover Assembly (G)
Flange (1)
Large Retaining Washer (Optional) (2)
Rubber Gasket (3)
Fiber Washer (4)
Lock Nut (5)
OVERFLOW
1. Separate all mounting hardware as shown.
2. Apply 100% silicone (non-water based) to
underside of Flange (1) and then place directly
into drain opening of the bathtub.
3. Depending on the size of the tub drain hole, the
Large Retaining Washer (2) may be necessary
between the tub and additional drain components.
4. If installing with a thin walled tub, from underneath
slide Rubber Gasket (3) onto the Drain Flange (1)
upward until it makes contact with the underside of
the tub or Large Retaining Washer (2) if using.
5. Slide the Fiber Washer (4) and Lock Nut (5) onto the
Drain Flange (1) and secure into place but do not
over tighten.
OVERFLOW
Overow Cover (E)
Screw (F)
Decorative Shroud (B)
Rubber Gasket (C)
**Screw Extender (D)
Overow Tube (A)
1. Cut Overow Tube (A) to the appropriate length.*
2. Position Decorative Shroud (B) on the Overow
Tube (A) so that it will be above the opening in
the suboor when installed.
3. Insert the 2" Screw (F) through the Overow Cover (E).
For thick walled tubs thread the Screw Extender (D)
onto the 2" Screw (F), creating the Cover Assembly (G).
For thin walled tubs proceed to step 4.
4. Put Rubber Gasket (C) onto Overow Tube (A) and
align (from the outside) with the overow hole of the
tub, hold in place.
5. From the inside of the tub insert Cover Assembly (G)
into the mounting hole on the Overow Tube (A).
Carefully tighten the Screw (F), making sure
the Overow Cover (E) is in the proper orientation
(opening toward the bottom).
* We strongly recommend that the tub waste and overow be installed
by a professional installer. These instructions do not detail the necessary
connections needed to connect the overow tub and bathtub waste.
Those connections will need to be made by the installer.
** Screw Extender (D) is used for Avalon or double walled tubs only.
 Loading...