

Page 1
INSTALLATION INSTRUCTIONS
1.5” Dome Drain, DR120
INSTALLATION INSTRUCTIONS
1.5” Dome Drain, DR120
1
2
*
3
4
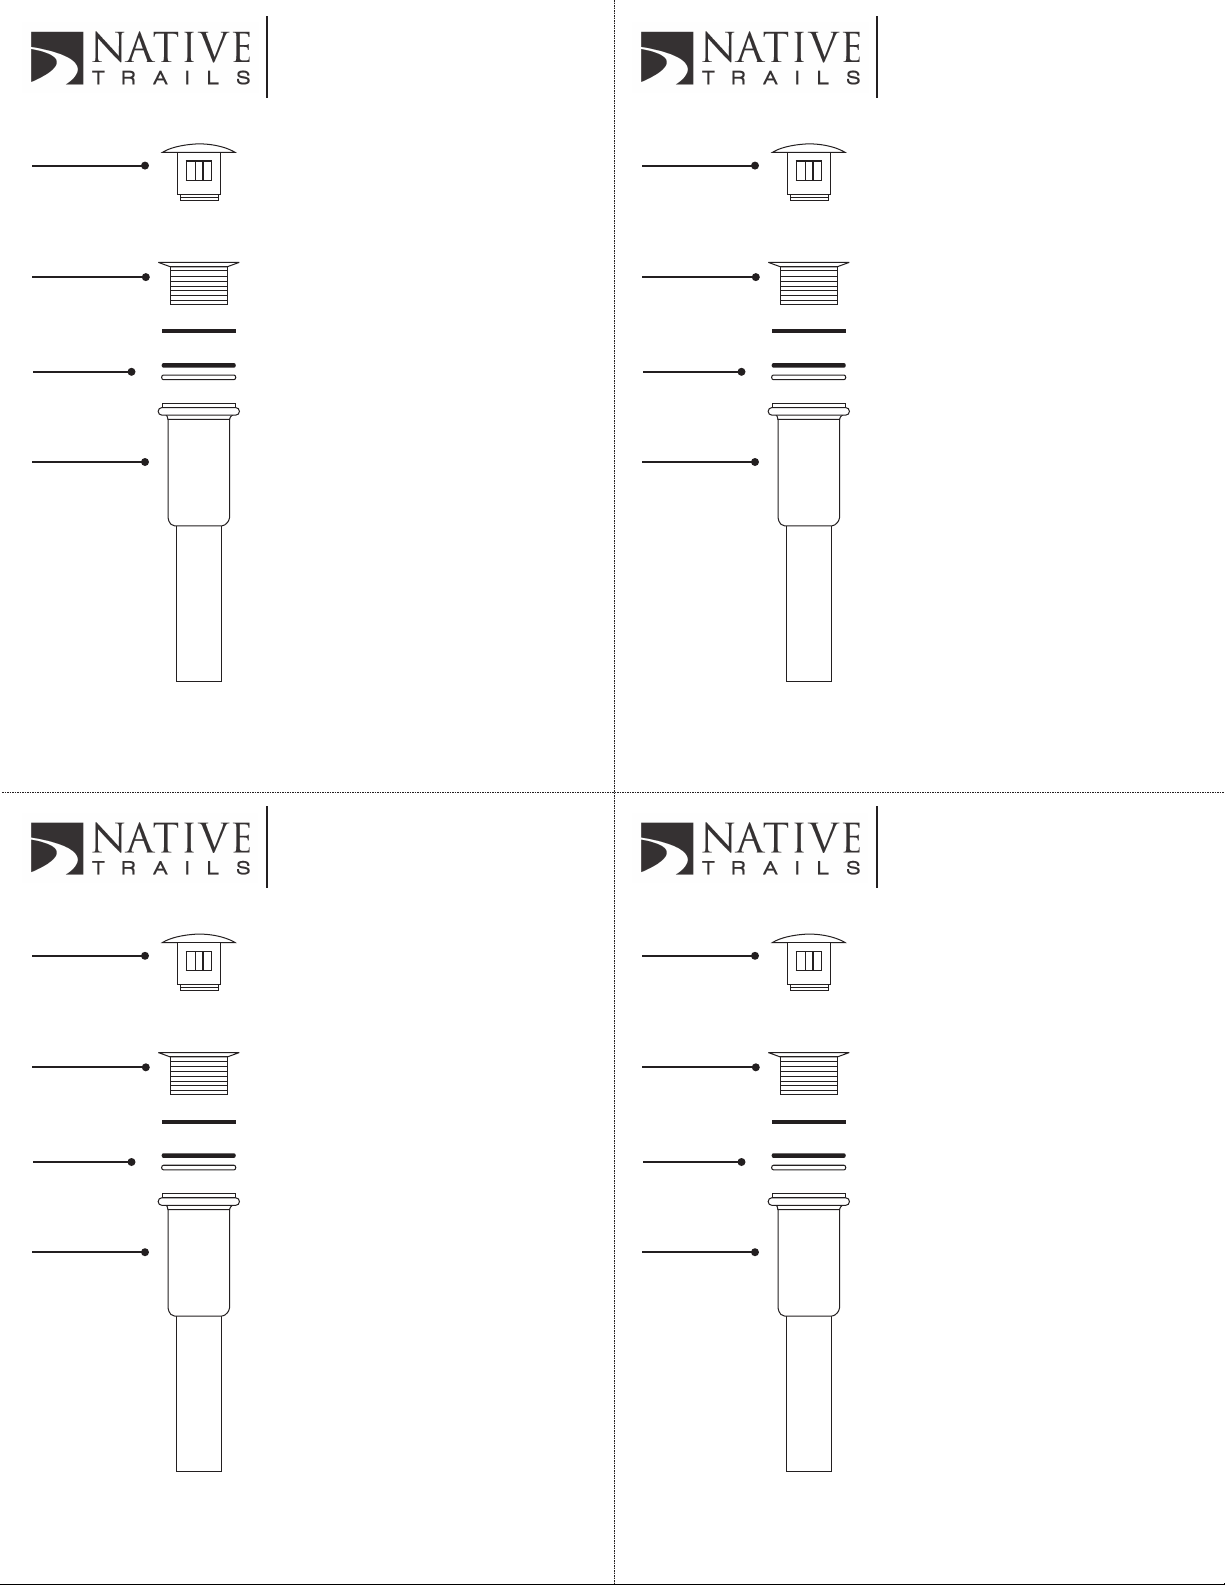
1. Assemble seals (3) into
the underbody (4)
2. Apply a small bead of
100% Silicone (non-water based) to the
underside of the waste (2)
3. Locate the underbody (4)
and seals (3) central to the
underside of the vessel
sink hole
4. Locate the waste (2)
central to the top side of
the vessel sink hole
5. Assemble decorative
cover (1) as per diagram,
hand tighten + ¼ turn.
Note: Rubber washer is only
*
used for glass sinks.
1
2
*
3
4
1. Assemble seals (3) into
the underbody (4)
2. Apply a small bead of
100% Silicone (non-water based) to the
underside of the waste (2)
3. Locate the underbody (4)
and seals (3) central to the
underside of the vessel
sink hole
4. Locate the waste (2)
central to the top side of
the vessel sink hole
5. Assemble decorative
cover (1) as per diagram,
hand tighten + ¼ turn.
Note: Rubber washer is only
*
used for glass sinks.
Remove all excess silicone around the drain after the drain has been installed
W W W .NA TIVETR A ILS. NET
INSTALLATION INSTRUCTIONS
1.5” Dome Drain, DR120
1
2
*
3
4
1. Assemble seals (3) into
the underbody (4)
2. Apply a small bead of
100% Silicone (non-water based) to the
underside of the waste (2)
3. Locate the underbody (4)
and seals (3) central to the
underside of the vessel
sink hole
4. Locate the waste (2)
central to the top side of
the vessel sink hole
Remove all excess silicone around the drain after the drain has been installed
W W W .NA TIVETR A ILS. NET
INSTALLATION INSTRUCTIONS
1.5” Dome Drain, DR120
1
2
*
3
4
1. Assemble seals (3) into
the underbody (4)
2. Apply a small bead of
100% Silicone (non-water based) to the
underside of the waste (2)
3. Locate the underbody (4)
and seals (3) central to the
underside of the vessel
sink hole
4. Locate the waste (2)
central to the top side of
the vessel sink hole
5. Assemble decorative
cover (1) as per diagram,
hand tighten + ¼ turn.
Note: Rubber washer is only
*
used for glass sinks.
Remove all excess silicone around the drain after the drain has been installed
W W W .NA TIVETR A ILS. NET
5. Assemble decorative
cover (1) as per diagram,
hand tighten + ¼ turn.
Note: Rubber washer is only
*
used for glass sinks.
Remove all excess silicone around the drain after the drain has been installed
W W W .NA TIVETR A ILS. NET
 Loading...