

Page 1

OPERATION MANUAL
Page 2

The information in this document is subject to change without
notice and does not represent a commitment on the part of
NATIVE INSTRUMENTS GmbH. The software described by
this document is subject to a License Agreement and may
not be copied to other media. No part of this publication may
be copied, reproduced or otherwise transmitted or recorded,
for any purpose, without prior written permission by NATIVE
INSTRUMENTS GmbH, hereinafter referred to as NATIVE
INSTRUMENTS. All product and company names are ™ or
® trademarks of their respective owners.
Furthermore, the fact that you are reading this text means you
are the owner of legal version rather than an illegal, pirated
copy. It is only through the loyalty and honesty of people like
yourself that NATIVE INSTRUMENTS GmbH can continue to
develop and create innovative audio software. On behalf of
the entire company, thank you very much.
Users Guide written by Thomas Loop.
Special thanks to the Beta Test Team, who were invaluable
not just in tracking down bugs, but in making this a better
product.
Page 3

Germany
NATIVE INSTRUMENTS GmbH
Schlesische Str. 28
D-10997 Berlin
Germany
info@native-instruments.de
www.native-instruments.de
USA
NATIVE INSTRUMENTS North America, Inc.
5631 Hollywood Boulevard
Los Angeles, CA 90028
USA
sales@native-instruments.com
www.native-instruments.com
MASSIVE was designed and developed entirely by
Native Instruments GmbH. Solely the name Massive is
a registered trademark of Massive Audio Inc, USA.
© Native Instruments GmbH, 2007. All rights reserved.
Page 4

1. Introduction
This part of the User’s Manual gives a brief overview over KORE 2’s abilities
and explains how to use this manual. Additionally, it contains notes about
using the KORE 2 Controller safely and provides some general productrelated information.
1.1 Welcome to KORE 2
Thank you for buying KORE 2. On behalf of the entire NATIVE
INSTRUMENTS team, we hope you are truly inspired by this product.
KORE 2 has been designed in order to let you nd the sound you have
in mind fast. The Browser of KORE 2 is lled with musical attributes
– specify any combination, and the sounds that match the description are
immediately listed.
The repertoire of the KORE 2 Browser is lled with more than 500 sounds,
each providing several variations which can be morphed seamlessly.
They have been created for immediate use in your production: All 3.000
variations can be loaded and played instantaneously without the need for
additional software, as KORE 2 is equipped with six Integrated Engines.
Their individual power and sonic variety shape KORE 2 as The Super
Instrument.
KORE 2 – 4
Page 5

Effort has been given to make all sounds of KORE 2 accessible in a simple
and unied way. While the technical details that generate a sound can
differ enormously from engine to engine, your sound control is always
similar: the most important parameters for each individual sound have been
manually assigned to the hardware, and you can tweak them directly and
effectively. The recall and morphing of variations can also be controlled
remotely with the KORE 2 Controller.
Beyond these immediate usage possibilities, you can integrate any other
plug-in into the KORE 2 host application. Import your favorite plug-in’s
presets into KORE 2 and integrate them into your sound database, or
create more personal sound processing using more than Internal Audio
and MIDI Components.
This manual will help you get the best out of KORE 2.
1.2 How to Use This Manual
This manual is split into three main parts: The rst part explains how to
install the KORE 2 hardware. The software installation and activation is
described within the separate Setup Guide. The second part covers KORE
2 systematically and provides information about all parts of KORE 2,
structured according to the software’s user interface. As each part of the
user interface is focused on a specic functionality, the manual structure
will guide you quickly and easily to the information you need. Note that
the reference part is introduced by two overview sections. They explain
some basic concepts of KORE 2 and show how the user interface is
Within the margin column
Within the margin column
%
%
information is given that often goes
information is given that often goes
beyond a specic chapter’s scope or
beyond a specic chapter’s scope or
provides additional hints.
provides additional hints.
of this manual, additional
of this manual, additional
KORE 2 – 5
Page 6

structured. Reading these is strongly recommended if you want to
understand and use all the features KORE 2 provides. The last part of the
manual, nally, is the appendix that contains some specic information
about using KORE 2 with other products by NATIVE INSTRUMENTS. It
also holds an index of important terms as well as a keyboard shortcut
overview.
1.3 Safety Considerations
Please always use the KORE 2 Controller according to the following security
advices.
Warning
Before using the KORE 2 hardware, please thoroughly read the
►
instructions below and the Owner’s Manual.
The device contains no user-serviceable parts. Do not open the device
►
or attempt to disassemble or modify any internal hardware. If it appears
to malfunction, immediately stop using it and have it inspected by
qualied service personnel.
Do not expose the unit to rain, and do not use it near water or in damp
►
or wet conditions. Also, make sure that no glasses or bottles containing
liquids which might spill are placed on the hardware. Do not allow any
objects or liquids of any kind to penetrate the unit.
The KORE 2 Controller is USB bus-powered. Operation can only be
►
guaranteed as a single device with a USB2 controller or with a selfpowered USB2 hub.
Those who don’t like read-
Those who don’t like read-
%
%
after mastering a few basics, KORE
after mastering a few basics, KORE
2 is unusually easy to learn. This is
2 is unusually easy to learn. This is
supported by the Info Pane of the
supported by the Info Pane of the
KORE 2 sof twa re: Each time you
KORE 2 sof twa re: Each time you
move your mouse over an element
move your mouse over an element
of KORE 2, the Info Pane explains
of KORE 2, the Info Pane explains
the control’s usage. Note that you
the control’s usage. Note that you
can set the Info Pane’s language
can set the Info Pane’s language
within the application’s Options
within the application’s Options
dialog explained in chapter 3.3.5
dialog explained in chapter 3.3.5
below.
below.
ing manuals will nd that
ing manuals will nd that
KORE 2 – 6
Page 7

Caution
Do not place the KORE 2 Controller in an unstable position where it
►
might accidentally fall to the ground.
Before moving the KORE 2 Controller, remove all connected cables.
►
Never use or store the unit in places that are subject to extreme
►
temperatures (e.g., direct sunlight in a closed vehicle, near to a heating
or heat-generating equipment), or high levels of vibration.
Do not use excessive force on the buttons, knobs, switches, or
►
connectors.
When cleaning the KORE 2 Controller, use a soft, dry cloth. Do not
►
use paint thinner, solvents, cleaning uids, or chemically-impregnated
wiping cloths.
1.4 Notes
Disclaimer: Native Instruments GmbH cannot be held responsible for
►
damage or data-loss caused by improper use or modication to the
KORE 2 Controller or the KORE 2 software.
Specications subject to change: The information contained in this
►
manual is believed to be correct at the time of printing. However, Native
Instruments reserves the right to make changes to the specications
of software and hardware at any time without notice or obligation to
update existing units.
KORE 2 – 7
Page 8

Name Plate Location: The name plate is located on the bottom of
►
the product. It lists the product’s model name and other technical
information. The serial number is also located on the bottom of the
unit.
Disposal Notice: Should this product become damaged beyond
►
repair, or for some other reason come to the end of its life, please
observe all regulations of your country that relate to the disposal of
electronic products. Copyright: © Native Instruments GmbH 2007. This
publication may not be reproduced in whole or in part, summarized,
transmitted, transcribed, stored in a retrieval system, or translated into
any language, in any form or by any means without the prior written
permission of Native Instruments GmbH.
All product and company name s are trademarks or registered
►
trademarks of their respective owners.
1.5 Software Installation
For details about the KORE 2 Controller driver installation, refer to
Chapter 2.2 of this manual. More information about the KORE 2 software
installation is available from the NATIVE INSTRUMENTS Setup Guide
included with this package.
KORE 2 – 8
Page 9

2. Hardware Setup
Thanks to the seamless integration of KORE 2’s software and hardware
components, your software becomes a tangible instrument that is highly
intuitive and uniform in its operation.
The KORE 2 Controller is a tactile interface to the world of KoreSounds.
►
By implementing the Control Page concept explained in chapter 3.1.4,
it unies the interface of all different instrument and effect plug-ins
within KORE 2.
The KORE 2 Controller can also access all types of S
►
and can act as a powerful hardware interface to KORE 2’s Sound
Database.
If you own a KORE 1 Controller, please note that it is fully compatible with
KORE 2. Read more on this in chapter 3.9.
ound VariationS
When you install KORE 2
When you install KORE 2
!
!
make sure that you also choose to
make sure that you also choose to
install the KORE 2 Controller driver.
install the KORE 2 Controller driver.
Refer to chapter 2.2 for more infor-
Refer to chapter 2.2 for more infor-
mation.
mation.
,
for the rst time, please
for the rst time, please
KORE 2 – 9
Page 10

2.1 The hardware elements of your KORE 2 Controller
2.1.1 Rear Panel
(1, 2) Footswitch ports
These two ports can be used to attach any type of foot controller. The
inputs only work with on/off signals. The footswitches can be assigned to
uSer Page buttons. Read more on using footswitches in chapter 2.3.3.
(3, 4) Pedal inputs
Various pedals (expression, sustain, volume, etc.) can be attached here.
The pedal input receives continuous signals. It can be assigned to u
Page Knobs. Read more on using pedals in chapter 2.3.3.
(5) USB 2 port
Be aware that at least the USB 2 connection has to be established to
make the KORE 2 Controller work; all other connections described here
are optional. It provides the unit’s functionality as a Controller and supplies
electrical power to the hardware.
Ser
KORE 2 – 10
Page 11

(6, 7) MIDI Input /Output
The KORE 2 Controller is also a MIDI interface. Use the IN port to attach
a master keyboard and the OUT to drive an external device such as a drum
machine or sampler. Please note that, at the time of writing, the KORE 2
Controller's knobs, buttons, and transport do not send MIDI information.
(8) Kensington Lock socket
Use this to attach a Kensing ton-style lock to prevent your KORE 2
Controller from being stolen. This kind of lock can be found at dealers for
notebook accessories.
KORE 2 – 11
Page 12

2.1.2 Top Panel
1-8: Controller Knobs
These are digital endless encoders with a far higher resolution than would
be possible with the MIDI standard. They control the target parameters
incrementally, leading to a very smooth control of values on the software side.
You can also use the Control Knobs to morph between S
ound VariationS
.
KORE 2 – 12
Page 13

The Control Knobs are touch-sensitive, i.e., if the knob is touched (without
altering its value) the KORE 2 Controller reacts and displays the controller’s
name and its current value in the hardware display (32). This is also very
convenient for assigning parameters. Each Control Knob is surrounded by
a Selection Ring that displays a dimmed red light if there is an assignment
(i.e., functionality) present. It blinks when the controller is becoming
assigned, and it is bright red when the knob is touched on the hardware
or clicked in the software.
9-16: Controller Buttons 1-8
The buttons contain a light indicating their on/off state. On the software
level (see the section about Control Pages) the buttons can be used in
gate or toggle mode. They can also be used to recall a Sound Variation’s
settings.
17: Stop
Equivalent to the tranSPort area’s StoP button.
18: Start
Equivalent to the tranSPort area’s Start button.
19: Record
Unused in this version of the KORE 2 software.
20: Pre-Listen
Activates Pre-liSten mode for quickly testing KoreSounds.
KORE 2 – 13
Page 14

21: Control
This button provides access to the Co ntro l PageS of the component
currently in focus.
22: F2
Jump to the BrowSer and the hardware options with this button.
23: Sound
Switches into S
ound Mode
for navigating the S
ound Matrix
. S
ound Mode
also
allows to morph Sound VariationS.
24: Enter
This button conrms a selection and enters a selected Sound Matrix
level.
25: F1
This button is context sensitive and changes its function depending on the
situation. Please read chapter 3.9 for details.
26: Escape
Use this button to return to the next higher level of the menu structure.
27: Scrollwheel
The wheel has the same function as the Up/Down buttons.
28-31: Up, Down, Left, Right
Navigation through channels, Pages, menus and lists.
KORE 2 – 14
Page 15

32: Display
The Main Display shows Controller states, Pages, parameter names and
values, menus, lists and folder structures.
2.2 Driver Installation
KORE 2 is a tightly integrated system of software and hardware. Before
using the KORE 2 Controller, the hardware driver must be installed.
If you are unsure if the driver was correctly installed during the installation
procedure, you can add it manually: The driver installer is located in the
KORE 2 Program Folder on your computer.
Windows: Program Files / Native Instruments / KORE 2 /
Mac OS X: Applications / KORE 2 / Driver /
Driver Installation on Windows XP
Insert the KORE 2 Installation CD into the CD-ROM drive or locate
►
the driver setup in the KORE 2 program folder, Program Files / Native
Instruments / KORE 2 /.
Use the Windows Explorer to view the contents of the folder.
►
Start the installation by double-clicking Kore 2 Driver Setup.exe
►
The setup program will suggest C:\Program Files\Native Instruments\
►
KORE 2\ as the path for the destination folder. You may also choose
another folder if you wish.
During the installation you will be asked to attach the KORE 2
►
Controller. Please connect the KORE 2 Controller to a USB2 port on
your computer and follow the installation dialogs until installation is
nished.
Start the driver inst all
Start the driver inst all
!
!
ing the KORE 2 Controller to your
ing the KORE 2 Controller to your
computer.
computer.
!
!
the KORE 2 Controller to function
the KORE 2 Controller to function
properly. This Windows update pro-
properly. This Windows update pro-
vides support for USB 2.0.
vides support for USB 2.0.
process before connect-
process before connect-
For Windows XP, Service
For Windows XP, Service
Pack 2 is nece ssary for
Pack 2 is nece ssary for
KORE 2 – 15
Page 16

Driver Installation on Mac OS X
Insert the KORE 2 Installation CD into the CD-ROM drive or locate the
►
driver setup in the KORE 2 application, folder Applications / KORE 2
/ Driver.
Start the driver installation package NI Hardware Driver Installer.app
►
with a double-click.
After clicking “Continue” you can select the installation location. The
►
startup disk is chosen by default.
2.3 Connecting the Hardware
2.3.1 Connecting the hardware to a computer
Before using your KORE 2 Controller, the driver must be installed. If
this has not taken place, please refer to the manual section above for
instructions on manual driver installation.
After star ting your computer, connect the KORE 2 C ontroller to
your computer with the enclosed USB cable and launch the KORE 2
application.
Whenever the KORE 2 Controller goes from a power-off to power-on state
(by connecting it to a powered-up computer or starting the computer with
the Controller connected), it initiates a routine that calibrates its knobs.
During this process, the red Selection Ring around the knobs stays lit. Do
not touch the controls, or have anything lying on top of the Controller that
might affect a knob position, during calibration as the calibration will be
KORE 2 – 16
Page 17

inaccurate. If you accidentally move a control, disconnect the KORE 2
Controller then re-connect it to re-initiate calibration.
2.3.2 Connecting to an external MIDI device
Hardware:
To receive data from a MIDI controller such as a keyboard or a MIDI pedal
board, connect the MIDI Out socket of your controller to the MIDI In socket
on the KORE 2 Controller with a MIDI cable. To send MIDI data from KORE 2,
connect its MIDI Out socket to the MIDI In on the device you wish to
control. Make sure both connected MIDI devices are set to the same MIDI
channel.
Software:
In the F
ile Menu
the NI KORE 2 MIDI device by clicking on oFF. When the device is enabled
it will show on.
choose Audio and MIDI Settings. On the Midi
taB
, activate
2.3.3 Connecting a pedal or footswitch
Additional pedals (expression, volume, etc.) can also be used with the
KORE 2 Controller by connecting them to the Pedal inPutS to the right of
the MIDI jacks. The pedals are calibrated automatically when the KORE 2
Controller is starts up. If the pedal and/or footswitch are plugged in after
KORE 2’s initial power-up, recalibrate KORE 2 as described in chapter
3.3.5.
It can h appen that the
It can h appen that the
!
!
or other artifacts. Go into the op-
or other artifacts. Go into the op-
tions m enu of the controlle r and
tions m enu of the controlle r and
tweak the Contrast and Brightness
tweak the Contrast and Brightness
settings to correct this.
settings to correct this.
display is showing stripes
display is showing stripes
KORE 2 – 17
Page 18

Footswitches can be connected to the two inputs at the far left of the back
panel. Either normally closed or normally open type footswitches can be
used, but make sure they’re plugged in on power-up so that KORE 2 can
detect which type you’re using. Please read chapter 3.5.3 for information
about assigning footswitches and pedals to KORE 2‘s Control PageS.
KORE 2 – 18
Page 19

3. Reference
The reference chapters make up the bulk of this manual. Here you will nd
detailed description of all functions, commands and interface elements of
KORE 2. Please make sure that you at least completely read the chapters
3.1 and 3.2 for getting an overview.
3.1 Important concepts: Understanding KORE 2
The following paragraphs provide general information about KORE 2.
You will read about hosts and plug-ins, integr ated engineS and other
NATIVE INSTRUMENTS products that work with KORE 2. You will also
be introduced to the way KORE 2 integrates hardware and software to
produce one easily usable entity, and the powerful concept of nested
sounds is presented. If these terms are familiar to you, feel free to skip
these passages. However, reading these chapters will help you to better
your understanding of KORE 2 and its concepts.
3.1.1 The instrument KORE 2: Stand-alone, plug-in and host
KORE 2 is an instrument that can create a wide variety of sounds natively
on your computer without the need for additional hardware. Just as you
would switch on a hardware synthesizer you can simply launch KORE 2 on
your computer and it connects directly to the computer’s hardware. This
KORE 2 – 19
Page 20

hardware would be your audio interface and any MIDI keyboard or controller
available. This mode is called stand-alone within this manual.
However, a hardware synthesizer will probably not be used alone but in
combination with a mixing desk, an effect rack and some cabling. You
cannot connect software with cables, so another mechanism is used to
accomplish this common use case: A so-called host application loads other
applications during runtime as plug-ins. While the plug-in applications
represent the synthesizers, samplers or effect units, the host application
mimics the mixing environment.
Within the host you can dene how the plug-ins are connected and there
you also handle your system’s hardware.
Sometimes an application can be used as a stand-alone and as
a plug-in; and some applications may be used as a plug-in and as a
host. Often, stand-alone applications are hosts that use plug-ins (in
both senses) – common examples are software sequencers. Those
sequencers mostly do not work as plug-in versions. Vice versa, there are
synthesizers and, more commonly, effects which are only available as
plug-ins and cannot be used as a stand-alone without the host. KORE 2
however, can be used in all suggested ways.
KORE 2 provides a stand-alone version and a plug-in version. You can use
KORE 2 without any other software, as described above, but you can also
use it as plug-in within another host. This ensures that you can combine
it with any other sound generator you want to use.
But KORE 2 is also a host by itself and can load other plug-ins. This
functionality is available when KORE 2 is running as stand-alone as well
as in plug-in mode; in the latter case, KORE 2 becomes a sub-host.
KORE 2 – 20
Page 21

We will expand on the sub-host concept in the following chapter
(introducing the idea of nesting) while chapter 3.1.3 comes back to plugin concepts.
KORE 2 as a stand-alone
As stand-alone software KORE 2 becomes your one-stop solution for live
and studio work.
The stand-alone version of KORE 2 adds four menus on the application
level:
The File Menu provides functions to create, load, and save Performances
►
and KoreSounds plus access to KORE 2’s Preferences.
The edit Menu allows working on the KORE 2 mixers by offering
►
functions like creating, copying and pasting channels. It also comes
with a handy Undo system.
On the Vie w Menu you can control the contents of the application
►
window.
The HelP Menu is your launchpad to the NATIVE INSTRUMENTS
►
Service Center for management of your licences and to support material
on the NATIVE INSTRUMENTS website.
KORE 2 as a plug-in
The plug-in version of KORE 2 is identic al with the stand-alone
version, except that it’s lacking the abovementioned menus and for
the fact that in a host environment the sequencer takes care of all
things audio and MIDI. The commands of the stand-alone menus that
are also of relevance for the plug-in can be found on the g
loBal Plug
-
KORE 2 – 21
Page 22

in Menu. In plug-in mode, KORE 2 works in any host program (e.g.,
Cubase, Logic Audio, Pro Tools, Ableton Live, Sonar, Digital Performer,
Tracktion, etc.). KORE 2 inserts into the program’s mixer as a virtual
instrument or effect (there are different versions of the KORE 2
plug-in for these tasks). But also note that the KORE 2 plug-in is a VST/AU
host in itself. This allows KORE 2 to organize, mix, and control multiple
plug-ins within the host.
When you have multiple KORE 2 plug-in instances running in your host
software you can easily navigate them via your KORE 2 Controller (see
chapter 3.9).
There are three different versions of the KORE 2 plug-in:
Kore 2 is the normal VSTi instrument
►
Kore 2 FX is the effects version providing signal input
►
Kore 2 2x16 provides 16 stero outputs for using KoreSounds with
►
multiple outs. Please be aware that multiple outputs also lead to a
higher CPU load.
KORE 2 – 22
Page 23

3.1.2 SingleSounds, MultiSounds, Performances and Nesting
The edit area of a Performance containing nested Sounds.
It can be a time- consuming task to nd the sound that exactly ts
into the music you are working on. Following the paradigm described
above, you need to load different plug-ins into your host, and you
need to handle each of them differently in order to nd an adequate
sound; tweaking the sound again requires a plug-in-specic procedure.
KORE 2 allows you to abstract from the plug-ins’ particularities. Instead,
you can focus on the sound. KORE 2 provides a concise interface to
handle your different plug-ins’ parameters in a standardized way (this is
the KORE 2 Controller’s function), and the database contains all sounds
of all plug-ins installed on your system, tagged with musical attributes for
quick access.
Each entry in the database is a so-called KoreSound. It holds the mentioned
a
ttriButeS
as well as additional information, for instance the sound’s author,
If you are familiar with
If you are familiar with
%
%
can think of a KoreSound as being
can think of a KoreSound as being
similar to a sample. The only differ-
similar to a sample. The only differ-
ence is that a sample is the record-
ence is that a sample is the record-
ing of a sound, while the KoreSound
ing of a sound, while the KoreSound
is a “reco rding ” of the str ucture
is a “reco rding ” of the str ucture
which generates a sound. This al-
which generates a sound. This al-
lows the reproduction of the sound
lows the reproduction of the sound
at any time but it also provides ex-
at any time but it also provides ex-
tensive editing capacities impossi-
tensive editing capacities impossi-
ble with samples.
ble with samples.
sampling techniques, you
sampling techniques, you
KORE 2 – 23
Page 24

the location on the hard disk or arbitrary comments. Technically, it tells
KORE 2 which plug-in is used to generate the sound, and which settings
are required within the plug-in in order to produce exactly the sound the
KoreSound was saved for. While the KoreSound takes care of the technical
details, you can concentrate on making music.
A KORE 2 SingleSound on the edit area.
A KoreSound referencing only one plug-in is called a SingleSound.
MultiSounds, on the other hand, differ from SingleSounds in one important
aspect: It can hold any number of plug-ins to generate a sound, connected
to each other in arbitrary ways. However, as with a SingleSound, you don’t
need to care about the way the plug-ins are handled.
The MultiSound’s technical structure is encapsulated (of course you can
edit all the details if you want).
KORE 2 – 24
Page 25

This is a MultiSound with its Sound Matrix expanded.
The KoreSound concept also explains why KORE 2 is a sub-host. On one
hand it is used as an instrument: You can load it as a plug-in with a wide
variety of sounds at hand – the KoreSound database with each entry
representing one possible sound of the KORE 2 instrument. On the other
hand KORE 2 provides this variety by hosting plug-ins as dened within
the loaded KoreSounds. The sub-host idea is taken to the extreme by the
fact that a MultiSound can hold any other KoreSound instead of a plug-in.
Referring to the compari-
Referring to the compari-
%
%
and samples again, SingleSounds
and samples again, SingleSounds
can be seen as recordings of single
can be seen as recordings of single
instruments, while MultiSounds are
instruments, while MultiSounds are
recordin gs of whole band s or or-
recordin gs of whole band s or or-
chestr as, often including the ar-
chestr as, often including the ar-
rangement and a conductor – tech-
rangement and a conductor – tech-
nically: a s tep sequencer or an ar-
nically: a s tep sequencer or an ar-
peggiator.
peggiator.
son between KoreSounds
son between KoreSounds
KORE 2 – 25
Page 26

The concept of KoreSounds within a KoreSound is called nesting within
this manual.
Nesting allows two things: On a basic level it provides the possibility to
easily combine not only SingleSounds, but also MultiSounds into a new
MultiSound. This bridges the gap between both types as you don’t need
to care which type you are working with (unless you want to change the
inner workings of a KoreSound). On an advanced level, you can create any
signal ow you can think of: Even feedback loops are possible.
With the nesting concept in mind it is also obvious that the top level of
KORE 2 – the Performance, lled with KoreSounds via the BrowSer – is
not very different from a MultiSound. You can, for example, save the
whole Performance as MultiSound (using the F
ile Menu
) and load it as
part of another Performance. The only difference between Performances
and MultiSounds lies in non-structural information: A Performance saves
the global clock’s BPM value, for instance, while a MultiSound adapts its
speed to the global value.
Again, the building blocks of KORE 2’s sound engine are (from the bottom
to the top of the hierarchy):
The Single Sound
►
The Multi Sound
►
The Performance
►
Except for the Performance, everything on this array of Sounds is
interchangeable and you can recombine it via drag and drop or convert
and save parts of the structure as self-contained KoreSounds.
KORE 2 – 26
Page 27

Another important idea to get when working with the Sound Matrix is the
focus. There is always one component of the matrix currently focused. This
can be a C
Hannel inSert
, a channel (click its C
Hannel Header
), the a
udio
taB, the Midi taB, and so on. The components can be focused with
a singleclick of your mouse or by navigating the S
ound Matrix
with your
KORE 2 Controller (see chapter 3.9)
3.1.3 Integrated Engines and VST/AU-plug-ins
Similar to a hardware mixer, in most cases host applications don’t generate
sound by themselves. This task is left to the plug-ins. The host only
provides the environment for the plug-ins in terms of routing, control and
hardware access.
KORE 2, however, is an instrument, and therefore it features six soundgenerating integrated engineS:
ABSYNTH
►
FM8
►
GUITAR RIG
►
KONTAKT
►
MASSIVE
►
REAKTOR
►
These engines are derived from six products by NATIVE INSTRUMENTS
and bring their full functionality except for the fact that integrated engineS
don’t have a graphical user interface. The way you can interact with them
is described in the following chapter.
KORE 2 – 27
Page 28

When installing KORE 2, its factory content automatically is installed,
too. You can access it with the BrowSer. These sounds use the integrated
e
ngineS
, so you don’t need any other plug-in to make music with Kore
2. If you own a license for one of the in tegrated engineS and have it
installed, KORE 2 will automatically substitute the integrated engine with
the full version and also integrates the additional factory content into the
database.
Beside the integrated engineS, VST- and AU-plug-ins of any origin can be
loaded into KORE 2. However, KORE 2 cannot provide KoreSounds for
them directly. There is a convenient batch process to convert all patches
of a loaded plug-in into KoreSounds automatically. Each resulting
KoreSound represents one of the plug-in’s sounds, and they are fully
integrated into KORE 2’s database. Please note that the KoreSounds only
reference the plug-ins, they don’t contain them. You can copy any
KoreSound from one computer to another – this is even possible between
Mac OS X and Windows computers – but, the KoreSound won’t work unless
the same plug-in is also installed on the second machine.
KORE 2 and plug-in parameters
It is important to note, that the interaction between KORE 2 and the plugins yields different results, depending on the way the respective plug-in
handles automatable parameters. KORE 2 can only use and control those
parameters that are exposed by the plug-in via the VST- or AU-interface.
Depending on the design of the respective plug-in, this can lead to some
confusion. With some modular virtual instruments, like KONTAKT and
REAKTOR, it is impossible to design a stable set of parameters that gets
The conversion of a plug-
The conversion of a plug-
%
%
KoreSounds has already taken place
KoreSounds has already taken place
fo r t h e p rodu c t s o f NAT I V E
fo r t h e p rodu c t s o f NAT I V E
INSTRUMENTS, and you can install
INSTRUMENTS, and you can install
manually rened KoreSo unds for
manually rened KoreSo unds for
those you own. Check your KORE 2
those you own. Check your KORE 2
Inst allation DVD for a dedicated
Inst allation DVD for a dedicated
installe r, and consult the Service
installe r, and consult the Service
Center’s Update Manager for recent
Center’s Update Manager for recent
additions.
additions.
i n ’ s pa t ch es i n t o
i n ’ s p a tc h es i n t o
KORE 2 – 28
Page 29

exposed to the host software. As the setup of a REAKTOR Ensemble
or a KONTAKT Multi can be arbitrarily complex, the creators of the
respective patches have to decide and manually program the parameter set.
Please be aware of this when you create your own REAKTOR Ensembles
or KONTAKT Instruments and refer to the documentation of the respective
plug-in if you are unsure how to manage this. For the Native Instruments
KOMPLETE 4 series of virtual instruments, the complete library of patches
has been prepared for the use in KORE 2. Please refer to Appendix A
for more information about the special behavior of some KOMPLETE 4
plug-ins. Appendix A is also a good read if you want to integrate your own
REAKTOR Ensembles in KORE 2. It contains a dedicated section about
REAKTOR in KORE 2.
KORE 2 and sample libraries
KORE 2 acts as a host for VST-/AU-plug-ins. This means it directly handles
the parameters that are exposed by the various plug-ins. But plug-ins do
not only consist of parameter settings, they also bring along other content,
like samples. KORE 2 only loads the plug-in and the sample content is
handled on the plug-in level without control by KORE 2. This leads to some
pitfalls when handling sample libraries. The basic rule is that the respective
plug-in has to know where to nd its content so that it loads correctly in
KORE 2. If the plug-in alone doesn’t even know where to nd its content,
it won’t know it in KORE 2, either. If you ever experience problems with
samples not loading in KORE 2, be sure to rst check the settings inside
of the respective plug-in and do not look for the problem in KORE 2.
Some rules of thumb:
KORE 2 – 29
Page 30

If you want to use the factory content of a plug-in, make sure that the
►
structure of the factory libraries remains unaltered.
If you move the factory library around on your le system, you have
►
to set the new location inside the respective plug-in and not in KORE
2.
You can add folders to a factory library, as long as the original content
►
remains untouched.
Be aware of the fact that modication of non-integrated engine factory
►
content will change the behavior of KoreSounds in KORE 2’s factory
library, so always save your modied patches in your own le structure
and do not overwrite the original.
3.1.4 Hardware and Software: The Control Page system and Sound Variations
Any KoreSound provides C
ontrol PageS
. A Control Page is a set of controls
– eight buttons and eight knobs – that remote-control a user-dened set
of the KoreSound’s parameters. This unies the handling of KoreSounds
and of underlying plug-ins to large extend. All KoreSounds coming with
KORE 2 provide dedicated Pages that use all capacities of the system.
One knob or button of a Cont rol Page often remote-controls several
parameters at once, each with a particular range, some of them inverted
– the possibilities are endless. You can easily create similar Pages for
your own usage as the C
ontrol Page
system sports a l
earn
mechanism:
Enable the le arn mode, arm a Page’s Con troller KnoB by clicking on
it, and alter a parameter of the KoreSound the Page belongs to – for
instance the underlying plug-in’s cutoff control. After disabling the learn
KORE 2 – 30
Page 31

mode, you can conveniently remote-control the cutoff from the KORE 2
interface directly and don’t need to open the plug-in’s editor separately.
Easy access to parameters is taken to the next level by the KORE 2
hardware offering you a physical representation of the Control PageS.
By selecting a KoreSound within KORE 2, its Pages are automatically
mapped onto the KORE 2 Controller. As the Pages are available for all
KoreSound, you can now “touch” any plug-in you use in KORE 2, and you
can modify even advanced MultiSounds with a twist of your ngers. KORE 2
is a tightly intergrated and highly interactive package of software and
hardware for sound design, studio work and live performance.
Besides that, Control PageS also form the basis for Sound VariationS,
another property of every KoreSound. A S
the KoreSound’s Control Page settings. This means that you can tweak a
KoreSound via its Pages (and the hardware), until it ts your needs and
save these settings as a Sound Variation. You can alter it further and save
the new result as another S
to eight them.
You can recall any of them instantaneously. KORE 2 even allows you to
MorPH
between S
sets all parameters of the KoreSound’s C
morphing gradually transforms the settings from the old to the new settings.
Depending on the parameters that are remote-controlled by the Pages,
this can create completely new, previously unheard sounds.
ound VariationS
ound Variation
. While loading a S
ound Variation
. Each KoreSound can hold up
ontrol PageS
is a snapshot of
ound Variation
to specic values,
simply
Each KoreSound of the
Each KoreSound of the
%
%
al re a dy pr ov ide s eig ht So un d
al re a dy pr ov ide s eig ht So un d
Variations.
Variations.
KORE 2 factory content
KORE 2 factory content
KORE 2 – 31
Page 32

3.2 A user interface overview
On the following pages we will introduce KORE 2’s interface by explaining
the different elements in a broader, functional way. In this section you
will also learn the names of the most important controls to help you while
reading this manual.
The KORE 2 interface with the gloBal Header on top, the uPPer Pane below, the
lower Pane displaying the Browser and the inFo Pane on the bottom.
KORE 2 – 32
Page 33

KORE 2 has four main interface areas. This chapter will give you an
overview of KORE 2’s functionality.
The interface is very exible and various elements can be hidden via
switches found on the gloBal Header to suit the situation at hand.
The four areas are called:
gloBal Header
►
uPPer Pane
►
lower Pane
►
inFo Pane
►
The gloBal Header is always visible and contains buttons for toggling
the display of the main interface elements (gloBal Controller, edit area/
S
ound Manager
, B
rowSer
, and i
nFo Pane
) plus the t
ranSPort area
and the
aCtiVity area. The uPPer Pane is the area just below the gloBal Header.
Depending on the settings of the V
iew ButtonS
, it can either display the
gloBal Controller and the edit area (which shows the Sound Matrix) or
the g
loBal Controller
and the S
ound Manager
(which deals with Keyboard
Mapping and Automation).
The lower Pane contains the BrowSer.
The i
nFo Pane
can be hidden via a switch on the g
loBal Header
. It displays
small helpful explanations if you mouse over the various elements of KORE
2’s interface.
The KORE s tan d-alon e
The KORE s tan d-alon e
%
%
tical in this re spect. The plug-in
tical in this re spect. The plug-in
only la cks th e menu bar of th e
only la cks th e menu bar of th e
stand-alone application. You can
stand-alone application. You can
reach the commands applying to
reach the commands applying to
the plug-in via an extra menu of the
the plug-in via an extra menu of the
plug-in’s Global Header.Global Header..
plug-in’s Global Header.Global Header..
and the plug-in are iden-
and the plug-in are iden-
KORE 2 – 33
Page 34

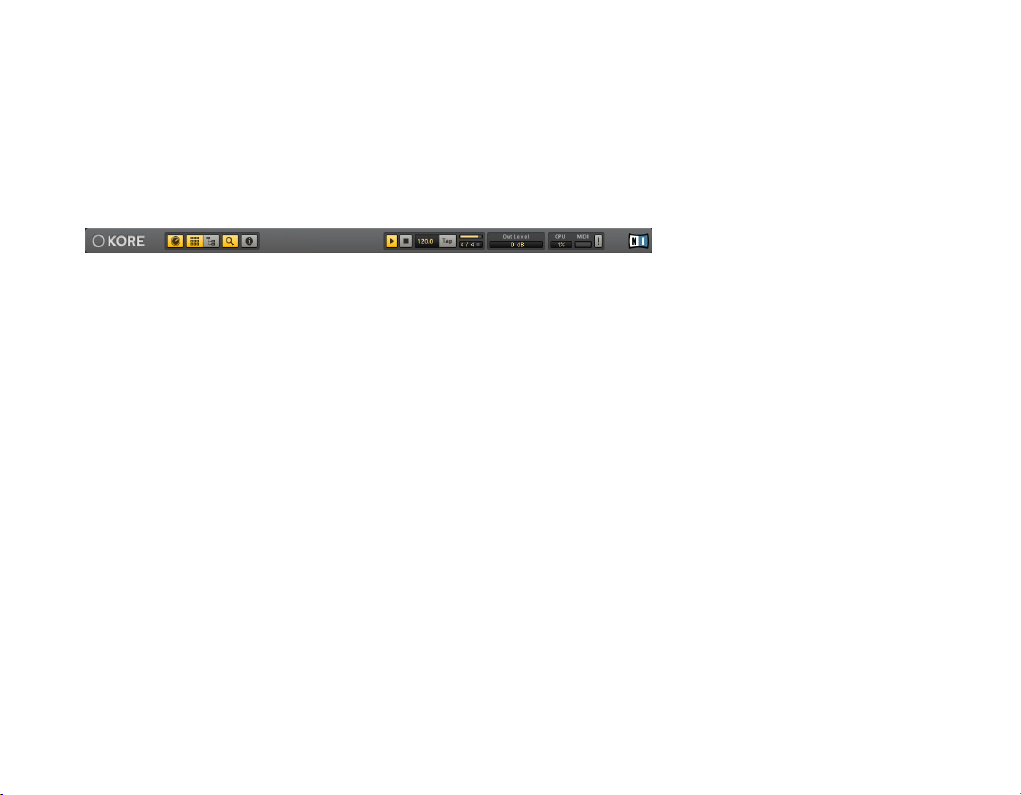
3.2.1 Global Header
The topmost strip of controls is called the g
and you can think of it as the central control of KORE 2’s interface. Its
main purpose is to change KORE 2’s interface to match the situation at
hand and provide direct control of global parameters. The V
are your cockpit for switching between the various views of KORE 2.
Depending on the task – and on the available screen estate – you will
quickly nd the best conguration. You can toggle between the edit area
with the Sound Matrix and the Sound Manager via the dedicated buttons.
If the BrowSer is active, the Sound Matrix or Sound Manager, respectively,
can be hidden to maximize the BrowSer.
loBal Header
. It is always visible
iew ButtonS
Use this interface exibil-
Use this interface exibil-
%
%
hiding the Edit Area when you want
hiding the Edit Area when you want
to load and play sounds, only; or by
to load and play sounds, only; or by
having only the Glob al C ontroller
having only the Glob al C ontroller
and the Sound Matrix (quick focus-
and the Sound Matrix (quick focus-
ing of sounds) visible when p er-
ing of sounds) visible when p er-
forming.
forming.
ity to your advantage by
ity to your advantage by
KORE 2 – 34
Page 35

Two different views on KORE 2. On top you see a minimal KORE 2 with the top level of the
Sound Matrix, only. Below there is a full-edged view with Global Controller, Sound Matrix
and Browser.
The t
ranSPort area
KORE 2 has an internal clock that can be used to synchronize all time-
deals with all time and measure related functions.
When using KORE 2 as a
When using KORE 2 as a
%
%
is provided by the host software and
is provided by the host software and
cannot be inuenced from within
cannot be inuenced from within
KORE 2. It will run synchro nized
KORE 2. It will run synchro nized
automatically.
automatically.
plug-in the global clock
plug-in the global clock
KORE 2 – 35
Page 36

dependent parameters inside the instruments and effects. It also controls
the tempo of possible sequencers, MIDI players and arpeggiators. Use
those controls to start and stop the clock, dial in a new tempo with the
t
eMPo edit
or tap the tempo to synchronize with your musical partners. The
tiMe Signature of KORE 2’s clock can also be edited here.
The Ba r diSPl ay gives you a visual clue of your position in the current
bar. The last section of the gloBal Hea der displays the aC tiVit y area,
which displays vital KORE 2 information such as the names and values
of the parameters you are editing, the Midi a
u
Sage diSPlay
. It also contains a handy Midi P
CtiVit y
led and the CPu
aniC
button and the S
aVe
PerForManCe button. Please read chapter 3.3 for a detailed description of
the global controls.
KORE 2 – 36
Page 37

3.2.2 Global Controller
The g
loBal Controller
system. You can learn more about this system in the dedicated chapter
(chapter 3.5) further down. You will see that every sound and every channel
in KORE 2 has its own set of Control PageS. There is a set of pre-dened
Pages, which can also be tailored to your own needs. The g
helps to organize the many Pages of the channels containing the various
Sounds that sit in the Sound Matrix.
Normally, the g
or channel currently in focus on KORE 2’s software interface or on the
KORE 2 Controller hardware. On the software interface you can focus a
channel by clicking on its CHannel Header and a sound by clicking on the
CHannel in Sert it resides in. However, you can also lock the glo Bal
Controller to keep the current component in focus regardless of
Controller status. Click on the loCK button to do this.
is a context-sensitive view on KORE 2’s C
loBal Controller
displays the C
ontrol PageS
ontrol Page
loBal Controller
of the sound
KORE 2
You can tog gle the view of
You can tog gle the view of
the Global Controller by clicking on
the Global Controller by clicking on
the dedicated Global Controller but-
the dedicated Global Controller but-
ton on the Global Header.
ton on the Global Header.
A nice peformance setup
A nice peformance setup
%
%
por tant p ara met ers on a locked
por tant p ara met ers on a locked
User Page for fast control via the
User Page for fast control via the
hardware. Use the interface to con-
hardware. Use the interface to con-
trol the more detailed stuff, when
trol the more detailed stuff, when
necessary.
necessary.
could have the mo st im-
could have the mo st im-
KORE 2 – 37
Page 38

3.2.3 Edit Area and Sound Matrix
The areas of KORE 2 that actually produce and process sounds are found
in the channels of the S
of CHannel inSertS (the slots of the matrix), each of which can hold a
KoreSound. This can be a SingleSound or a MultiSound, leading to a
exible workow.
There are three different channel types available:
Source Channels hold sounds without signal inputs.
►
Input Channels are used for audio input from external hardware or
►
parental Sound Matrix levels.
Group Channels sum and process the output of channels of the same
►
Sound Matrix Level.
The channels change their form according the entry chosen on their inPut
Source menu. Signals – be they audio or MIDI – are sent through the Matrix
from top to bottom, from the parental mixer level to the child and from
the higher C
Hannel inSert
controlled via the a
Sound Matrix levels. These two Tabs are displayed alternatively, just click
on “audio” or “Midi”, respectively, to display their parameters. Via the aux
ound Matrix
. A channel is a hierarchical system
to the lower. Input and output parameters are
udio
and Midi t
aBS
placed right below the respective
KORE 2 – 38
Page 39

sends, audio signals can ow horizontally within one mixer level. MIDI data
can also be distributed within a S
of sends on the Midi taB. The display of the e
ound Matrix
level via a dedicated system
dit area
and S
ound Manager
is mutually exclusive, as they both sit on the same space of the interface.
Please note that you can completely hide those two views, which can come
in very handy for navigating large lists of Sounds in the B
rowSer
. Details
about the Sound Matrix can be found in chapter 3.4.
3.2.4 Sound Manager
In the Sound Manager you work on the keyboard ranges of the KoreSounds,
manage the C
are published to the host software when KORE 2 is running as a plug-in.
The parameters can then be remote-controlled by the facilities of the
host software (e.g. by “drawing” curves on the sequencer’s automation
tracks).
The reCall function of the Page liSt decides if the Controllers of the
respective Page can be part of Sound VariationS.
ontrol PageS
and the list of automatable parameters that
If toggled on by clicking on the
If toggled on by clicking on the
Sound Manager button on the
Sound Manager button on the
Global Header it replaces the Edit
Global Header it replaces the Edit
Area on the screen.
Area on the screen.
KORE 2 – 39
Page 40

The CHannel MaPPing taB provides an easy to use editor for setting up the
key ranges of all the channels in a Performance. The ranges are displayed
on a concise graphical window that can be directly manipulated via the
mouse.
Please read more on the Sound Manager in chapter 3.6.
This can be used to eas-
This can be used to eas-
%
%
but unique and creative sound de-
but unique and creative sound de-
sign.
sign.
ily layer sounds for fas t
ily layer sounds for fas t
KORE 2 – 40
Page 41

3.2.5 Browser
The Brow Ser is your tool for searching, nding, loading, tagging and
saving KoreSounds. It can be switched to display different views in the
KoreSound database, e.g. only showing instrumental sounds or only effects,
or direct browsing of plug-ins. You can customize its appearance to suit
your needs by showing or hiding columns or sorting your search hits in
different ways.
3.2.6 Info Pane
Activate the Browser with a click on
Activate the Browser with a click on
the dedicated Browser but ton on
the dedicated Browser but ton on
KORE 2’s Global Header. It always
KORE 2’s Global Header. It always
appears at the bottom of the inter-
appears at the bottom of the inter-
face and its size can be altered with
face and its size can be altered with
a handle. You can maximize the
a handle. You can maximize the
Browser by hiding the Sound Matrix
Browser by hiding the Sound Matrix
or Sound Manager from the
or Sound Manager from the
u
PPer Pane
u
PPer Pane
on the
on the
be found in chapter 3.7.
be found in chapter 3.7.
.
A detailed rundown
.
A detailed rundown
B
rowSer
B
’s functionality can
rowSer
’s functionality can
By activating the inF o Pane, which appears at the very bottom of the
interface, you are kept informed about the functions of the various interface
elements in KORE 2. Just hover with your mouse over an element you are
interested in, and the i
nFo Pane
will show an explanation. You can change
the info Pane’s language settings within the Options dialog along with the
application’s menu language.
You can switch the
You can switch the
%
%
the
the
the application’s menu language.
the application’s menu language.
Pane’s language within
Pane’s language within
o
PtionS
dialog, together with
o
PtionS
dialog, together with
inFo
inFo
KORE 2 – 41
Page 42

3.3 Global controls
Some parts of KORE 2’s interface are of a global nature and independent
of the KoreSounds that currently sit in the Sound Matrix.
These are, for example, the stand-alone version’s application menu, the
g
loBal Plug-in Menu
the tranSPort area, and so on.
The following sections deal with these global controls in detail.
3.3.1 Stand-alone menu
In stand-alone mode, i.e. when KORE 2 is not running as a plug-in in a
host environment, there are some additional menus that you won’t nd
in the plug-in.
In this manual we show the PC versions. On a Mac the menus look a tad
different but contain the same set of commands.
The File Menu
The File Menu provides functions to create, load, and save Performances
and KoreSounds:
New Performance creates an empty Performance.
►
Open Performance opens a dialog, letting you navigate your le system
►
to choose and load a Performance File (.kpe).”
Save Performance writes the current Performance to disk. If it has
►
been saved previously, the new version overwrites the old one. If it is a
previously unsaved Performance, KORE 2 presents a dialog to choose
the new Performance File’s location and name.
of the plug-in, the g
loBal Header
with its V
iew
buttons,
The inFo Pane is activated via a
The inFo Pane is activated via a
dedicated button on the gloBal
dedicated button on the gloBal
Header of KORE 2.
Header of KORE 2.
The items of this menu
The items of this menu
%
%
plug-in, can be found on the Global
plug-in, can be found on the Global
Plug-in Menu of the plug-in.
Plug-in Menu of the plug-in.
that apply to the KORE
that apply to the KORE
KORE 2 – 42
Page 43

Save Performance As… is for writing the Performance to disk with a
►
new name, and to a location of your choice.
Save Performance As Sound… “converts” the current Performance to
►
a KORE 2 MultiSound. The B
can edit the M
eta inForMation
rowSer
will come up in Save mode, you
, tag it with a
ttriButeS
and save it into
the database. Please read chapter 3.7 for details about the B
and about saving KoreSounds.
Load Sound… opens a dialog for loading a single KoreSound from your
►
le system. This can of course be a Multi Sound or a SingleSound.
Recent Performances presents a list of the most recently opened les,
►
making it easy to return to les used in recent projects.
Options… opens KORE 2’s maintenance pages. The oPtionS consist of
►
for tabs dealing with the database, plug-ins and the conguration of
your KORE 2 Controller and they are explained in chapter 3.3.5.
Please have a look at the separate NATIVE INSTRUMENTS Setup Guide
►
for details about the Audio and MIDI Settings for your system.
If External MIDI Sync is activated, KORE 2 listens on the congured
►
MIDI ports for a MIDI clock stream. If there is one, KORE 2’s Central
Clock runs synchronously to the incoming clock – it runs as a clock
slave. Use this to synchronize KORE 2 to other application running on
your computer or to external hardware that is producing MIDI clock
signals.
Exit closes stand-alone KORE 2.
►
►
rowSer
KORE 2 – 43
Page 44

The Edit Menu
The edit Menu comes with a handy undo system. Please note the keyboard
shortcuts (written out on the menu) for the different commands.
Undo rolls back your work to the previous step. If you accidentally
►
deleted a channel or simply decide that you would like to do something
differently, use Undo to return the state before your most recent
command. There is an unlimited number of undo steps. The keyboard
shortcut is Ctrl+z.
Redo returns your work to the state it was in before issuing an u
►
ndo
command. The keyboard shortcut is Ctrl+y.
Find opens the BrowSer with the focus on the QuiCK SearCH eld. The
►
keyboard shortcut is Ctrl+f.
Pre-Listen activates the Pre-liSten mode (see chapter 3.7). The
►
keyboard shortcut is Ctrl+p.
The View Menu
The V
iew Menu
g
loBal Header
of the stand-alone simply mirrors the V
iew
buttons of the
. See chapter 3.3.3 for details. Try to memorize the keyboard
shortcuts for the different views. They can make you navigate KORE 2 a
lot quicker.
The Help Menu
The entries of the HelP Menu get you up and running if KORE 2’s internal
help system (the i
nFo Pane
) doesn’t cut it for you. It also contains some
items dealing with authorization and version information.
KORE 2 – 44
Page 45

Launch Service Center… does exactly what it says. It starts the NATIVE
INSTRUMENTS Service Center where you can authorize your NATIVE
INSTRUMENTS products and review the status of our licenses. Please
refer to the separate documentation for more details.
Open Manual opens the PDF version of this manual from your hard
►
disk.
Visit KORE 2 on the web opens your default web browser pointing you
►
to the KORE 2 pages of the NATIVE INSTRUMENTS website where you
nd a host of additional information and content to enhance you KORE
2 experience. The KORE 2 User Forum on the NATIVE INSTRUMENTS
web site keeps you up to speed with the latest developments in KORE
2. You can discuss all matters KORE 2 within an active community of
fellow users. The KORE 2 website also includes free tutorials, special
KORE 2 events that might be of interest and information about wellknown artists using KORE 2.
About… opens the About Screen which displays the Version number
►
and installation type of your KORE 2 installation. Here you also nd
the names of all the people involved in the creation of KORE 2.
3.3.2 Global Plug-in Menu
As the KORE 2 plug-in is no independent application it lacks the menus
of the stand-alone. However, there are some commands in those menus
that are also applicable to the plug-in. That’s why you get a gloBal Plug-
in Menu
on the g
environment.
loBal Header
when using KORE 2 as a plug-in in a host
KORE 2 – 45
Page 46

The g
loBal Plug-in Menu
of the plug-in combines some commands you
nd on the File and View menus of the stand-alone:
New Performance creates an empty Performance.
►
Open Performance opens a dialog, letting you navigate through your
►
le system to choose and load a Performance File (.kpe).
Save Performance writes the current Performance to disk. If it has
►
been saved previously, the new version overwrites the old one. If it is a
previously unsaved Performance, KORE 2 presents a dialog to choose
the new Performance File’s location and name.
Save Performance As… is for writing the Performance to disk with a
►
new name, and to a location of your choice.
Save Performance As Sound… “converts” the current Performance to
►
a KORE 2 MultiSound. The Browser will come up in Save mode, you
can edit the Meta Information, tag it with a
ttriButeS
and save it into
the database. Please read chapter 3.7 for details about the B
and about saving KoreSounds.
When Auto Compact Window is activated, KORE 2 automatically resizes
►
its plug-in window depending on the elements displayed. For instance,
opening the Browser with the B
rowSer
button in the g
loBal Header
increase the window size instead of hiding other elements. You can
specify the maximum window height within the Options dialog.
With the command Options you open KORE 2’s preferences window.
►
Please read chapter 3.3.5 below to learn more about the oPtionS.
rowSer
will
KORE 2 – 46
Page 47
When using KORE 2 as a plug-in, multiple instances of KORE 2 can be
active simultaneously – one for each channel of the host application,
for example. You can identiy each instance of KORE 2 by its individual
number shown in the gloBal Header.
3.3.3 Global Header
The top-most strip of controls is called the gloBal Header. It is used
for switching around KORE 2’s interface to t the situation at hand and
provides access to some global functions that are independent of the
respective KoreSounds in the Performance.
It holds the following controls:
The Kore 2 l
►
right), when clicked, opens the a
number and installation type of your KORE 2 installation. Here you also
nd the names of all the people involved in the creation of KORE 2.
The gloBal Controller switch toggles the display of KORE 2’s gloBal
►
C
ontroller
this command is F1.
The e
►
dit area
can only be visible alternatively to the S
computer keyboard as a shortcut.
ogo
(and the NATIVE INSTRUMENTS logo to the far
on the u
PPer Pane
switch displays the S
Bout SCreen
. This displays the version
on and off. The keyboard shortcut for
ound Matrix
on the u
ound Manager
PPer Pane
. This
. Use F2 on your
To assign th e KORE 2
To assign th e KORE 2
%
%
click into the a rea be side th e in-
click into the a rea be side th e in-
stance number. Refer to chapter
stance number. Refer to chapter
3.9.1 fo r informatio n on how to
3.9.1 fo r informatio n on how to
change the hardware focus with the
change the hardware focus with the
KORE 2 Controller itself.
KORE 2 Controller itself.
Controller to any instance,
Controller to any instance,
KORE 2 – 47
Page 48

The S
►
ound Manager
switch invokes the S
ound Manager
on the u
Pane, providing control over keyboard mappings of Performances and
Sounds and the management of C
only be visible alternatively to the S
ontrol PageS
ound Matrix
for automation. This can
. This command can also
be invoked with the F3 key on your computer keyboard.
The B
rowSer
►
switch opens the B
rowSer
in the l
ower Pane
of KORE 2’s
interface. Mine the KORE 2 Library for Sounds, effects, Performances,
MIDI-les and plug-ins. The keyboard shortcut is F3.
The inFo Pane button opens the inFo Pane at the bottom of the
►
application window. If you hover with your mouse cursor over any
element of KORE 2, the i
nFo Pane
will show you a short explanation of
that feature. The keyboard shortcut for the inFo Pane is F8.
PPer
If the Browser is displayed,
If the Browser is displayed,
%
%
the Sound Manager or Sound Matrix,
the Sound Manager or Sound Matrix,
res pec tively, for max imizing the
res pec tively, for max imizing the
Browser.
Browser.
you can completely hide
you can completely hide
You will quickly learn how valuable the V
iew
buttons are when managing
screen real-estate. Working with KORE 2 in a host environment poses
limitations in terms of space and with the different views you will always
come up with the perfect conguration by activating needed components
and hiding the stuff you don’t need. One thing to mention is the contextsensitivity of the uPPer Pane. If the BrowSer is closed, you always have
the e
dit area
or the S
ound Manager
open. When the B
rowSer
is opened
you can hide the edit area or Sound Manager, respectively, by clicking on
the respective View button. This leaves you with a maximized BrowSer for
working with the database.
KORE 2 – 48
Page 49

The Transport Area
The next part of the g
loBal ControlS
contains the t
ranSPort area
. If not
synchronized via an external MIDI clock (see File Menu of the standalone) or running as a plug-in in a host environment, KORE 2 produces
its own timing information that gets propagated to the KoreSounds for
synchronization and control of sequencers, arpeggiators or any timedepending parameters.
The clock does not only control the tempo but also has facilities for dening
the measure and keeps track of the position in the current bar. This can be
nice when dealing with step sequencers, as the bar position is an important
thing when it comes to resets for sequences of different lenghts.
When running as a plug-in, all things time are controlled by the host clock
of the sequencer. That’s why the plug-in lacks the tranSPort area.
The tranSPort area sports the following elements:
StoP (the square button) stops the central clock and resets it to beat one
►
of the bar. The KORE 2 Controller S
toP
button duplicates this function.
Use Ctrl+Space as keyboard shortcut (Mac: command-space).
P
lay
►
(the arrow button) starts KORE 2’s central timing clock. It is also
the master control for starting any MIDI-plug-ins sitting in C
Hannel
inSertS. This button works as a toggle; the rst click starts the clock,
the next stops it. Hitting it again continues at the last bar position. The
Play hardware button on your KORE 2 Controller provides the same
function. Use the space bar as a keyboard shortcut.
t
►
eMPo edit
shows the current tempo in beats per minute (BPM). You
can change the tempo by clicking the value and dragging with your
mouse, or double-clicking on it and typing in a new value.
KORE 2 – 49
Page 50

taP provides another convenient way to dene the tempo; just click on
►
this button in quarter beats. KORE 2 averages the frequency of your
clicks, and uses this to derive a tempo. Please note that you can assign
the Tap button to a uSer Page, like any other button in KORE 2.
The M
►
eaSure edit
shows the current measure of KORE 2’s clock in
measures and beats. You can change the measure by clicking in the
values and dragging your mouse up or down. The MeaSure edit sports
an integrated Bar d
iSPlay
, displaying the current position in the measure
with a resolution of one beat. Directly to the right of the Bar d
you nd the Beat indiCator, ashing at every beat.
When using a Midi P
for the player to play the MIDI le. This is not the case for S
layer
(see chapter 3.8.34) the central clock has to run
teP SeQuenCerS
or arPeggiator, as they can also be triggered by note events.
The Activity Area
The aCtiVity area holds some informational displays and two buttons:
The Value Display always displays the name, value and unit for the
►
parameter you are altering, no matter if you do it with your mouse or
via the KORE 2 Controller hardware.
Watch the CPu uSage diSPlay and always be informed about the load
►
your KORE 2 performance imposes on your processor.
The Midi aCtiVity led displays the data density of all incoming MIDI
►
channel messages. (channel messages are all MIDI messages that
can be directed to a single MIDI channel; this excludes, for example,
system exclusive messages and clock messages).
iSPlay
KORE 2 – 50
Page 51

The Midi PaniC button (the exclamation mark) sends an “all notes
►
off” message to all plug-ins, which turns off any “stuck” notes and
often solves other MIDI quirks. Furthermore, it resets KORE 2’s audio
engine. Use this if you are experiencing quirky note behavior or if you
“overloaded” a KoreSound with MIDI data. The keyboard shortcut for
this command is the 0 on your numeric pad.
3.3.4 Global Controller
The gloBal Control ler is your one-stop interface to the Co ntrol Page
system in KORE 2. There is a dedicated chapter about controlling
KoreSounds in this manual (chapter 3.5). The gloBal Cont roller also
mirrors the status of your KORE 2 Controller in terms of displayed
Pages and parameter values.Toggle display of the gloB al Con trol ler
on or off via the dedicated button on the gloBal He ader (see chapter
3.2.1). It is always displayed in the upper-most region of the uPPer Pane.
With an inactive l
oCK
button the g
loBal Controller
is context sensitive. This
means that it displays control elements related to the KORE 2 component
in focus. You can set the focus with your mouse by clicking on a CHannel
inSert that holds a sound or a plug-in.
KORE 2 – 51
Page 52

If the u
Ser Page
►
of the Performance or of any Single or Multi Sound currently focused
in the Sound Matrix.
If you have selected a MultiSound in the Sound Matrix, you can display
►
its CHannel PageS by activating the CHannel Page button on the gloBal
Controller.
The same goes for a focus on a channel (click its C
►
select it).
When there is a Single Sound currently selected in the Sound Matrix,
►
the CHannel Page button is replaced by the Plug-in Page button which
provides access to the Plug-in PageS of the Single Sound.
button is active, the displayed Pages can be u
Hannel Header
Ser PageS
to
You can also focus KORE
You can also focus KORE
%
%
KORE Controller
KORE Controller
components via your
components via your
To rephrase it: When the l
always provides access to the Contr ol PageS of the Performance, or
the currently selected Multi Sound or Single Sound (which can be an
Instrument, an audio effect or even a MIDI effect).
At any time you can hit the l
on the Controller. This is also depicted by a Lock Icon on the focused
component on the Sound Matrix. With an active loCK button you can still
navigate all available Pages via your KORE 2 Controller.
If you want to know more about Con trol PageS and how to create and
manage them, refer to the dedicated section further down the text (chapter
3.5). There you will also learn about the d
the Sound VariationS.
oCK
button is inactive, the Global Controller
oCK
button to keep the currently focused slot
iSPlay
, a
SSign
and e
dit
tabs, and
KORE 2 – 52
Page 53

3.3.5 Options
General Options
On the general oPtionS tab you nd the entry reload laSt PerForManCe at
StartuP
. It toggles KORE 2’s starting behavior. If checked, the Performance
you had open the last time when you closed the application automatically
comes up again. If this option is off, KORE 2 star ts with an empty
Performance. KORE 2’s inFo Pane is available in a variety of languages.
You can change the language in the l
chooses the language according to the setting of your operating system.
Please note that it is necessary to restart KORE 2 for the change to take
effect.
When you are using KORE 2 as a plug-in, there is another option displayed:
The MaxiMuM Plug-in HeigH t value species to which degree the Auto
Compact Mode can resize the plug-in window according to the elements
displayed. This value prevents that the KORE 2 window grows larger than
your screen. Refer to chapter 3.3.2 for information on how to enable the
Auto Compact Mode.
By clicking oK you acknowledge any changes you made and the options
window closes.
Database Options
The database maintenance commands are for managing the contents of
the KoreSound database and for integrating any additional content in to
KORE 2.
anguage
menu. The setting Automatic
KORE 2 – 53
Page 54

Any content you generate yourself by using KORE 2 will be saved in subfolders of the NATIVE INSTRUMENTS S
in a folder on your le system called the S
Hared Content
tandard uSer PatH
folder. It is located
. Normally you
don’t have to change its location. If, however, the conguration of your le
system demands a different location, you can change it by clicking the Set
button. A dialog window will pop up for you to navigate to a different folder
on your le system. Please note that this will not move the les you placed
within the old location, it only changes the place KORE 2 looks for it.
KORE 2 automatically splits up the difernet content-types into dedicated
folders for Performances, Sounds and MIDI Files. The folders for this
content are sub-folders of the S
tandard uSer PatH
.The C
ontent tyPe
tabs
are for selecting the type of content from the PatHS liSt. You can choose
between P
erForManCeS
, S
oundS
and Midi
FileS
. The u
Ser SoundS Folder
eld
is just for your reference. Click on the three tabs to see where the default
locations for the KORE 2 content are.
However, you can dene additional folders on your le system to be
monitored by KORE 2. Any content placed there, will be automatically
added to the database when a Rescan (see below) is initiated. These
folders are listed as additional FolderS.
By clicking add you open a dialog window for navigating to the folder on
your le system, which you want to add to the list of monitored folders.
delete removes the currently selected entry from the list. The two buttons
below the Standard uSer PatH provide means for database maintenance:
S
Can uSer FolderS
►
the database. Use this if you moved KoreSounds into your u
looks for new KoreSounds and integrates them into
Ser SoundS
FolderS.
Th e Res ca n of single
Th e Res ca n of single
%
%
als o be trigger ed via naviga ting
als o be trigger ed via naviga ting
them in Path view with the Browser.Path view with the Browser. view with the Browser.Browser..
them in Path view with the Browser.Path view with the Browser. view with the Browser.Browser..
See chapter 3.7 for more.
See chapter 3.7 for more.
User Sound Folders cancan
User Sound Folders cancan
KORE 2 – 54
Page 55

F
►
ull SCan
completely re-reads all available KoreSounds on your system
and rebuilds the database accordingly. This also rescans the complete
factory content and is only necessary if you have installed new NATIVE
INSTRUMENTS products.
When you activate the option H
►
ide unaVailaBle SoundS
, sounds from
missing plug-ins will not be displayed. If this option is unchecked, you
will see the unavailable sounds but they will be greyed out and you
will not be able to open them. For more information please refer to
chapter 3.1.2 (“Important Concepts”) where the relationship between
KoreSounds and plug-ins is explained.
By clicking oK you acknowledge any changes you made and close the
options window.
Plug-ins Options
The Plug-ins section offers several options regarding the handling of your
VST- and/or AU-plug-ins. This screen varies for PCs and Macs, mainly
because Macs support Audio Unit plug-ins, and allocate them differently
in the le system. On a PC it looks as follows:
If e
naBle Plug-in SCan at StartuP
►
is active, KORE 2 will scan the content
of your plug-in folder for new additions every time it starts.
u
Pdate Plug-inS
►
does the same but KORE 2 has to be started manually.
Use this if you have just installed a new product, which you want to
KORE 2 to recognise.
r
eSCan Plug-inS
►
completely re-scans the plug-in folder. Use this function
if you have made major changes to your plug-in content.
KORE 2 – 55
Page 56

In the PatH field you will find the path to the folder on your
►
system containing the VST-plug- ins. Click on the Se t but ton
to open a file dialog window. In this dialog you can navigate
to a dif ferent fold er to set it as your new PlugIn directory.
Of course you can also type the path directly into the Path eld. For
example, C:/Steinberg/VSTPlugs is a likely path on PCs.
On a Mac the Plug-ins options look a little different. Here the options
are:
If e
naBle Plug-in SCan at StartuP
►
is active, KORE 2 will scan the content
of your PlugIn folder for additions every time it starts
Validate Plug -inS durin g SCan will run a technical check for every
►
scanned plug-in to ensure proper functioning.
If checked, the command i
►
gnore Built-in audiounitS
discards the plugins that come with your Apple Mac OS X installation.
The ignore SySteM VStS command should be used if you only want to
►
work with AudioUnits. Note that KoreSounds using AUs will not work
on PCs.
ignore SySteM auS works the other way around: All AudioUnit plug-ins
►
will be ignored. This assures full cross-platform compatibility for your
sound design.
The reSCan and uPdate button works as described for the PC options.
KORE 2 – 56
Page 57

Hardware Options
The Hardware Options screen mirrors the parameters from the KORE 2
Controller’s Options Menu.
t
ouCH SenSitiVity
►
allows you to adjust the sensitivity of the eight touch-
sensitive knobs. If set to zero the touch sensor is inactive.
S
►
MootHing
integrates (from a mathematical standpoint) the data created
by knob movements for a “smoother” feel.
C
ontraSt
►
sets the ratio of light to dark in the display to compensate for
different lighting conditions.
BaCKligHt controls the display’s brightness.
►
reFreSH rate determines how often the state of the LEDs and the
►
display’s contents are updated.
inVert diSPlay changes the default red on black lettering to black
►
lettering on a red background.
led B
►
rigHtneSS low
adjusts the brightness of the LED ring around
the knobs for the off/untouched state. Note that for unassigned or
deactivated controls the LED is switched off completely.
led B
►
rigHtneSS HigH
is the corresponding brightness control for the
on/touched state of the controls.
The P
►
edal reCaliBrate
command is for calibrating any connected pedals
(see below).
Calibration of pedals
If you get the feeling that your connected pedals start to act funny, use
the reCaliBrate command from the hardware options.
KORE 2 – 57
Page 58
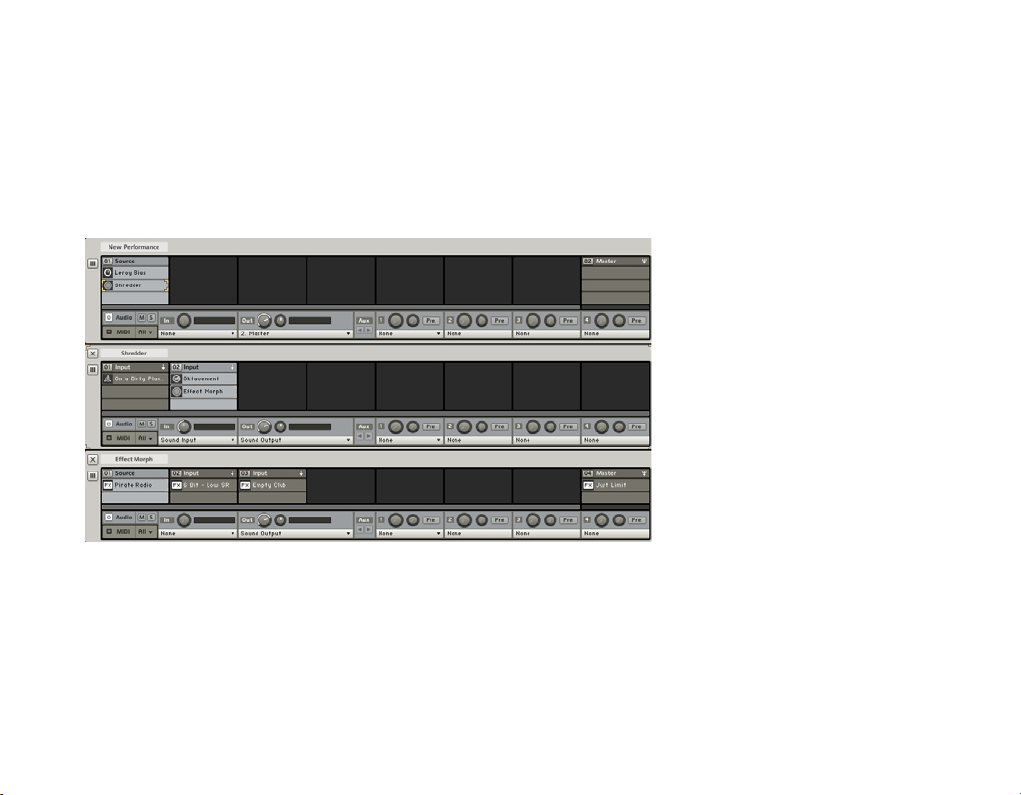
Hit the r
range once or twice. KORE 2 will automatically adapt itself to the pedal
inputs and everything should be smooth again.
eCaliBrate
button and move the pedals through their complete
3.4 Edit Area: Routing signals
This is a KoreSound with three mixer levels.
The edit area of KORE 2 is where sound is assembled, mixed and routed.
You can think of it as a hierarchically nested mixer structure for audio and
MIDI signals.
KORE 2 – 58
Page 59

It provides a roster of C
blocks of the KORE 2 Performance. These C
Hannel inSertS
(the slots) that hold the building
Hannel inSertS
form the S
ound
Matrix.
Please note, that the concept of a Performance is a rather articial one,
as you can at any time convert a Performance to a normal KoreSound (use
the Save Performance as Sound… command from the F
ile Menu
). Any
CHannel inSert can hold a complete MultiSound again containing another
hierarchical mixer structure.
Performances differ from MultiSounds onlyin that they contain additional
information, e.g. that they connect to physical in- and outputs and store
the tempo of Kore 2’S global clock.
3.4.1 Components and views of the Edit Area
Channels and Channel Inserts
Each level of the edit area is composed of a row of channels. Per default
the top level always has a M
right of the Sound Matrix. The MaSter CHannel is nothing else but a grouP
C
Hannel
with master function that sums all the signals in the mixer. If
you don’t need it on the top level, you can change the channel type of
the M
aSter CHannel
to something else and it will lose its function as a
MaSter CHannel. See the next chapter for more on channel types and
signal ow.
aSter CHannel
, which is displayed on the far
KORE 2 – 59
Page 60

A growing channel.
When you create a new sound, the S
row of C
Hannel inSertS
. As soon as you ll one of them, another row of
ound Matrix
will only show a single
Inserts will appear. You can pack as many components into a channel as
your computer can handle.
A channel displays its type on the C
Hannel Header
and the C
Hannel inSertS
display the names of the component residing inside them. The type of the
components is depicted by various symbols. If you ever see the following
symbol on your Sound Matrix it means KORE 2 is having problems in
nding or loading a plug-in:
Have a look if the plug-in has been moved on your le system or – if all
fails – re-install the offending plug-in.
Four channels on the Sound Matrix.
KORE 2 – 60
Page 61

Each channel holds a stack of CHannel inSert S that can be populated
with SingleSounds, MultiSounds, VST/AU-plug-ins (AU plug-ins are only
available on Macs) or MIDI-plug-ins.
This is the context menu of ane empt y CHannel inSert.
The empty C
Hannel inSertS
can be lled via drag-and-drop from the B
rowSer
(more about the BrowSer in Chapter 3.7) or from your le system, or
by right-clicking and working with the resulting context menu. An empty
CHannel inSert’s context menu displays three sections:
New Sound creates a new, empty KoreSound with its own Sound
►
Matrix.
The second section contains the i
►
nternal ModuleS
of KORE 2, namely
the internal MIDI modules and the audio FX.
In the third and lowest section you see a list of vendors for all installed
►
VST/AU-plug-ins. Click here to open sub-menus containing the plugins.
KORE 2 – 61
Page 62

For populated CHannel inSertS the context menu offers more choices.
If the CHannel inSert is already occupied, the context menu looks a little
different:
Replace provides access to the components menu tree to replace the
►
module or plug-in residing in the CHannel inSert with a different one.
For SingleSounds Edit will open the S
►
ound Header
of the respective
sound below the Sound Matrix
For MultiSounds Edit opens its level of the S
►
ound Matrix
to display the
channels of the MultiSound.
Save puts the browser into save mode allowing you to set a
►
ttriButeS
and save the sound to the user sound path.
Delete removes the currently focused module from the CH anne l
►
inSert.
KORE 2 – 62
Page 63

Bypass removes the respective component from the signal path. This
►
is called S
ound ByPaSS
in contrast to the C
Hannel ByPaSS
described
below.
The Open Plug-in Window command opens the interface of the
►
respective component. It is equivalent to a double-click. This is not
available for MultiSounds, as they can have multiple, nested plugins.
Import Plug-in Presets opens a system le dialog for navigating to a
►
presets folder where KORE 2 saves the imported KoreSounds. KORE
2 then loads all presets of the selected plug-in and saves them. After
this batch process, all new KoreSounds are selected and Edit Mode
is opened, so you can assign any attribute to all the sounds. Click on
d
one
, when you are nished. By default KORE 2 offers you to create
the folder in the uSer SoundS path. Change this, if you must.
Add Extra Output is only available for plug-ins that provide several
►
stereo outputs: Please read your plug-in’s manual for more information
on how to address these outputs inside the plug-in. For each additional
stereo output of your plug-in, you can create a linked C
Hannel inSert
in an adjacent channel, as seen in the illustration below. All inserts
link to the same plug-in, however you can now process each stereo
output individually. Use the CHannel inSert’s context menu to remove
the additional output again.
KORE 2 – 63
Page 64
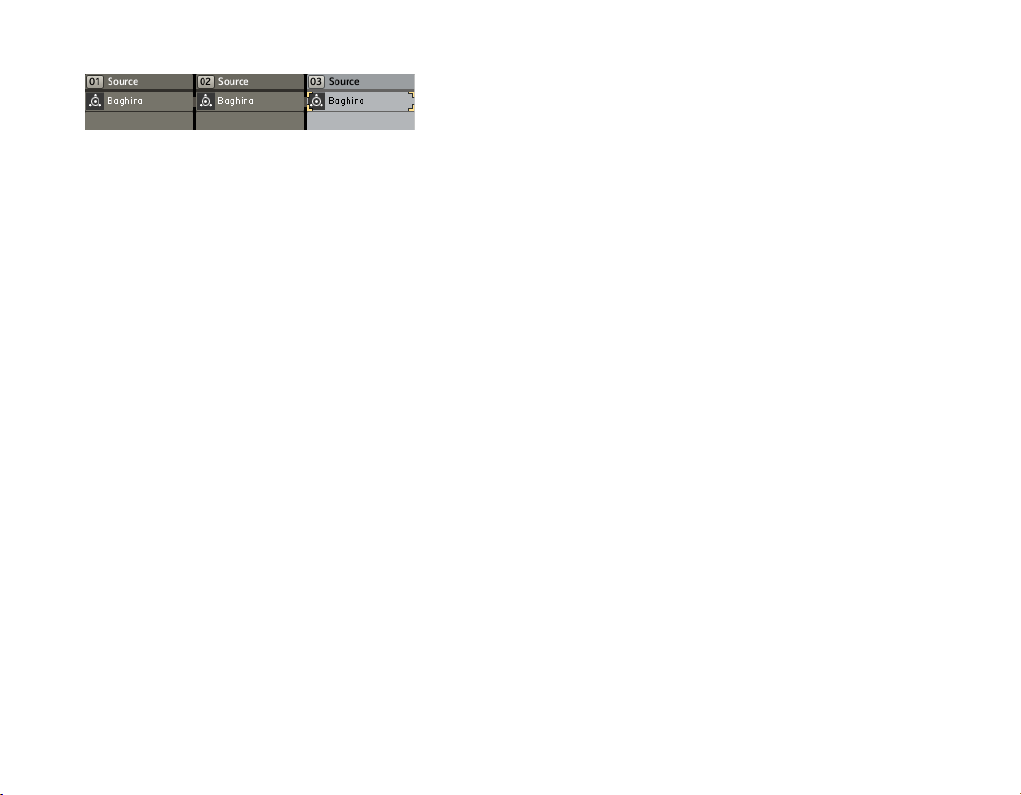
The contents of the C
M
atrix
. Just use your mouse to drag a component to another C
Hannel inSertS
can be moved around on the S
Hannel inSert
ound
anywhere on the Sound Matrix. You can:
Replace the existing component by dropping the moved one directly on
►
the CHannel inSert. The target-insert is depicted with a yellow bar.
Insert the moved component between or above the already populated
►
CHannel inSertS by dropping it on the dividing line between the Inserts.
The target spot is displayed with two yellow lines.
The same applies to changing channel positions, except that you can’t
replace existing ones. Take a channel by its C
Hannel Header
and move it to
its new place in the Sound Matrix. Again, the target is depicted by yellow
lines. Rename channels by double-clicking their C
in a new name via the keyboard of your computer. The C
shown on the C
Hannel Header
, also mirrors the function of the C
Hannel Header
Hannel nuMBer
and type
Hannel
on/oFF switch on the audio taB (see below). Click it and it will bypass the
complete channel. A bypassed channel is depicted with a yellow cross in
its header.
KORE 2 – 64
Page 65

The Channel Views
A Sound Matrix level can switch between two different views. These can
be toggled via the Mixer View button to the left of the CHannel inSertS of
the leftmost channel.
The Mixer View showing the CHannel inSertS, the Pan knob, CHannel Solo
and CHannel Mute buttons, the outPut leVel Meter and an optional inPut
and aux output section.
The Channel View, showing the
Channel Inserts and the Audio and
MIDI tabs.
KORE 2 – 65
Page 66

Click on the the i
nPutS
button below the M
ixer View
button to see the i
nPut
section in Mixer View. The same applies to the aux outPutS button for
displaying the output section.
Viewing Channel Insert content
A click or double-click on an occupied CHannel inSert both have different
outcomes depending on the KoreSound it holds:
In the case of a SingleSound, a single-click displays the interface of
►
the sound. Depending on the content of the SingleSound a double-click
opens the oating interface of the VST/AU-plug-in or the interface of
an internal KORE 2 Module which appears on the edit area.
KORE 2 – 66
Page 67

With MultiSounds, single-clicks recall the last display state of the
►
MultiSound: closed or opened. A MutliSound is opened with a doubleclick.
You can always close the component you recently opened by using the
CloSe button on the SideBar:
3.4.2 Channel types and signal routing
Signals – be they audio or MIDI – ow in the Matrix from top to bottom
elements, from the higher Sound Matrix level to the lower and from the
higher to the lower channel Insert. Via the aux sends, audio signals can
also ow horizontally within one Sound Matrix level.
Channel Types
KORE 2 Channels are exible things. Although there is such a thing as
channel types, any channel can at any time change its type by denition of
a different inPut SourCe for the channel. This is done via the inPut SourCe
menu on the audio taB (see next section).
There are three different channel types available:
S
ourCe CHannelS
►
menu).
hold sounds without signal inputs (n
one
on the Source
KORE 2 – 67
Page 68

inPut CHannelS are for audio input from external hardware or parental
►
Sound Matrix levels (inPut 1 – x or Sound inPut on the Source menu).
g
rouP CHannelS
►
are for summing and processing the output of Channels
of the same Sound Matrix level (grouP BuS on the Source Menu).
i
nPut CHannelS
and g
rouP CHannelS
display a special symbol in their C
Hannel
Header (see the picture above).
You can create new channels of any type by using the Insert Channel
commands on the context menu. You can also Duplicate a channel with
all its content and settings and, of course, Delete channels from the Sound
Matrix.
The entry Deactivate does the same as a click on the C
Hannel nuMBer
: it
bypasses the channel and takes it out of the processing loop, saving CPU
cycles. Bypassing channels can be automated and mapped to the KORE
2 Controller. This function allows quick management of KORE 2’s CPU
load.
The channel Mute func-
%
this section just mutes the channel
but does not take it out of the pro-
cession loop.
tion des cribed late r in
KORE 2 – 68
Page 69

Use as Master is explained next:
The MaSter CHannel is a bit special. Although it is basically nothing more
than a g
M
has a M
rouP CHannel
aSter CHannel
aSter CHannel
, it behaves slightly differently. There can be one
per S
ound Matrix
level. By default, the top level always
if a new sound is created. This can be adjusted to
your liking via the context sensitive Channel menu. Click on the Channel
Header to invoke it and choose uSe aS MaSter if you want to transform
an existing Channel into the Master. The Master Channel is the default
routing destination for newly created Channels of the respective S
ound
Matrix level and it is always visible, even if the Sound Matrix area is fully
occupied and you have to scroll to see all non-master Channels.Using
the two Tabs you can access the parameters related to audio- and MIDIrouting. The displayed tabs always relate to the Channel currently in focus.
If the MIDI Tab is visible, click on “Audio” to switch over to the controls
of the Audio Tab.
,
KORE 2 – 69
Page 70

The Audio Tab
The Audio and MIDI tabs of the Sound Matrix.
The rst element of the Audio Tab is the C
Hannel on/oFF
switch. Use it
to deactivate audio processing for the Channel. This will also take the
respective load from your CPU.
The Solo button switches the channel to solo mode. This mutes all
other channels, so only the soloed channel is audible.The M
ute
button
silences the channel. Please be aware, that signal processing still
affects a muted channel and will put the same load on your CPU as
if not muted. To the right you find the inP ut gain knob for leveling
out incoming signals. It ranges from -40 dB to 40 dB and comes in
ver y handy for avoiding clippings inside of your sound structures.
The current level of the input signal is displayed by the inPut leVel Meter
and you can choose the inPut SourCe via a dedicated menu below.
KORE 2 – 70
Page 71

The inPut SourCe Menu of a top-level SourCe CHannel.
When the channel sits on the top S
None, for no input, Group Bus, for input from possible g
ound Matrix
level, you can either choose
rouP CHannelS
(read on for more on this) or you can use the inputs of your audio hardware
that are presented as numbered inputs.
If the channel is part of a lower Sound Matrix level, the inPut Menu looks
slightly different. The rst two items are the same as the top level. However,
you don’t gain access to your hardware inputs. Instead, you can choose
Sound Input, which is the signals coming from the parental Sound Matrix
level.
Please note that if you do not choose Sound Input from the i
nPut Menu
the
channel cannot receive audio from its parental Sound Matrix level.
Next on the audio taB you nd the outPut section.
The ou tPut deStination menu denes where the audio signals of the
respective channels will be sent. On the top level of the S
ound Matrix
, you
can choose between:
This is the Input Menu of a channel
sit tin g on a lower so und Ma tri x
Level.
This is the Ouput section of a top
level Mixer.
KORE 2 – 71
Page 72

None, meaning no output.
►
Master, which routes the signal to the M
►
S
ound Matrix
level, should there be one. The number in front of the
aSter CHannel
of the respective
entry refers to the number of channels on that Sound Matrix level.
The numbered outputs of your audio hardware.
►
For channels sitting on lower levels of the Sound Matrix, the outPut Menu
doesn’t provide the possibility to select an output destination to the audio
hardware. Instead, use the menu entry S
ound outPut
, which allows you to
route the output to the sum of the respective Sound Matrix level.
KORE 2 – 72
Page 73

The top level receives the external input which is routed into two channels on the next level.
If you want to route external input to channels of lower hierarchy levels,
you have to use the top level to get the audio signal from your hardware
and channel it to the lower mixer Level.
The basic audio signal ow is as follows:
Signals run through the Sound Matrix from top to bottom. Each lower
►
level can receive its input from the parent mixer in the hierarchy, if it
has channels with active inputs.
KORE 2 – 73
Page 74

The output of each mixer level is summed and is routed back up to the
►
next higher mixer level. Note that every mixer level can have its own
MaSter CHannel for controlling the “horizontal” sum of its channels.
By using the aux sends of a mixer level, signals can also be distributed
►
horizontally within that mixer level.
External audio inputs can only be received on the highest level of the
►
structure. They also propagate down the mixer structure, if the C
i
nSertS
they pass provide the means for it (if there’s a sound without
dened input sitting somewhere in a C
Hannel inSert
it will block the
Hannel
path for the external audio)
As with audio signals, MIDI ows from higher C
►
Hannel inSertS
to lower
ones.
The Aux System
KORE 2 offers a exible system of auxiliary sends for routing audio signals
between channels of the same S
sends to the right of the channel’s o
ound Matrix
utPut
section. By default you have six
level. You nd the auxiliary
aux sends per channel that route the signals to possible other channels
within the same S
ound Matrix
volume. But it doesn’t end there. If you have
set up all available routings, KORE 2 automatically creates an additional
auxiliary send for you, so you never run out of routing possibilities.
The aux S
Croll
in front of the Sends is for browsing through the Aux sends
when there are more than six in use.
The logic behind the signal routing is as follows:
Every channel has its own set of sends.
►
KORE 2 – 74
Page 75

Every channel can be switched to receive audio signals via the aux
►
sends by choosing grouP BuS as its inPut SourCe.
Use the a
►
uxiliary deStination
menu to select a group destination. In
front of the Group bus entries, you can view the channel numbers of
the available grouP CHannelS.
If there is no other channel on the respective S
►
ound Matrix
level or
there is none that has the bus as its input, the only routing option is
the outPut to the next higher level of the Sound Matrix.
If there is any other channel on that level with the Group Bus dened
►
as its Input you can choose it from the menu and the new routing is
established.
Choosing Remove from the menu deletes the output assignment. All
►
other Sends sitting to the right are moved one step to the left.
The MIDI Tab
The MIDI Tab of a Sound Matrix Level.
The Midi taB focuses on receiving and routing MIDI signals owing through
KORE 2’s Sound Matrix. Every channel has its own Midi taB and the Tab
of the channel currently in focus is displayed. The audio and Midi taBS are
displayed alternatively. Click on the word “Midi” to display the controls
of the MIDI Tab.
KORE 2 – 75
Page 76

To the far left you will nd the Midi a
MIDI data. Next comes the MIDI C
CtiVity
led, displaying any incoming
Hannel SeleCt
for choosing the MIDI
channel, on which the Sound Matrix channel will receive its data. You can
either specify a MIDI channel from 1 to 16 or choose all, to receive MIDI
in omni mode.
Every channel has its own MIDI lter that can be used to restrict the note
and velocity ranges for the channel. Click with your mouse and drag up or
down to change the values of the H
igH and low note
and V
eloCity Filter
Everything between the two note- or velocity values is passed into the
channel, everything outside those borders is discarded. These settings are
identical with those of the C
Hannel MaPPing taB
of the S
ound Manager
(see
chapter 3.6.4) and are immediately reected there.
You can use the PitCH tranSPoSe Control to transpose incoming note
messages semitone wise. The range is four octaves up or down.
MIDI routing
In addition to the fact that MIDI signals run vertically through KORE 2’s
S
ound Matrix
of the same S
you see to the right of the MIDI Filter. By default you have six Midi o
, you can also route the data horizontally between channels
ound Matrix
level. This is accomplished by the Midi o
utPutS
utPutS
per channel that route the MIDI data into possible other channels. But it
doesn’t end there. If you have set up all available MIDI routings, KORE 2
automatically creates an additional Output for you, so you never run out
of routing paths.
The outPut SCroll to the right of the MIDI Filter is for browsing through
the MIDI Outputs, when there are more than six in use.
.
KORE 2 – 76
Page 77

The logic behind the MIDI routing is very simple:
Every channel has its own set of Outputs.
►
Set all available MIDI targets via the outPut menu.
►
If there is no other channel on the respective Sound Matrix level the
►
only routing option is the Output to the next lower level of the S
Matrix.
If there are any other channels that are not already assigned to an
►
Output, you can choose them from the menu and the new routing is
established.
Choose Remove from the menu to delete the output assignment. All
►
other MIDI Output ssitting to the right are moved one step to the
left.
3.4.3 Nesting sounds
ound
The Nesting of Sounds lies in the nature of the S
ound Matrix
. Any C
Hannel
inSertS can hold any kind of KoreSound, no matter if it is a SingleSound
or a MultiSound. Any C
S
ound Matrix
structure in itself, leading to a nested structure of S
Hannel inSert
can again hold an arbitrarily deep
ound
MatrizeS.
You can have a single channel with several CHannel inSer tS occupied
by MultiSounds consisting of a set of KoreSounds that again consist of
multiple components and so on. The only limits to this exibility are the
resources of your computer.
The S
ound Matrix
makes all this transparent and easy to use. Click on a
Sound sitting in a CHannel inSert and the adequate interface element will
open below the current S
ound Matrix
level. If it is a SingeSound you will see
KORE 2 – 77
Page 78

either a S
effect or MIDI plug-in). If it is a MultiSound another S
ound Header
or the interface of an internal KORE 2 Module (audio
ound Matrix
opens up
and shows the Sound Matrix for the MultiSound you just focused.
3.4.4 Examples
As with any exible system, there is always more than one way to handle a
task. We’d like to give some examples of how everyday solutions can look
and what the advantages and pitfalls of the different designs are.
One source, multiple destinations
A standard case you will encounter is the need to route audio signals to
several channels at once. There are two different approaches to do this.
You can use KORE 2’s system of auxiliary sends to distribute the signals
within one and the same level of the Sound Matrix:
In the picture above you can see an i
external hardware and two g
rouP CHannelS
nPut CHannel
receiving audio from
with effects that independently
receive their signal from the inPut CHannel via its aux sends. Note the aux
d
eStinationS
of the i
nPut CHannel
to the right. They are set to „2. Group”
and „3. Group“, respectively, addressing the two grouP CHannelS.
KORE 2 – 78
Page 79

This is a simple solution and perfectly suitable if this is all that your KORE
2 instance will be handling. If the setup exceeds this simple case, it may be
better to put the effects processing taking place in the two g
into a separate MultiSound:
In the picture above we have inserted the two effects into a separate
MultiSound that is nested inside the top-level channel. Both channels of
the new sound are inPut CHannelS and receive their signals from the parental
Sound Matrix level. By doing this, we can easily save the new sound as a
separate entity that can be re-used at a later stage in a different context.
rouP CHannelS
This is ideal for s aving
%
use in other Sounds.
FX- chains as presets for
KORE 2 – 79
Page 80

Also, it is easy to expand the top level of the S
ound Matrix
by adding more
components without clutter.
MultiSounds as songs
The MultiSound concept is very convenient when it comes to structuring
a live performance. Simply put all the stuff you need for a song into
one MultiSound and the elements for the next track into the next
MultiSound.
This has the advantage that you can take all but the current song out of
the processing loop with the C
Hannel ByPaSS
function. Always remember
that you can assign ByPaSS to buttons of your KORE 2 Controller.
By using this technique you can contain many different MultiSounds within
one Performance without overloading your CPU. Basically, your installed
memory is the limit, here.
KORE 2 – 80
Page 81

Morphing FX
The Sound VariationS provide an easy way for producing very smooth
pseudo-morphing effects if applied to the aux system.
Set up a variety of g
S
ourCe CHannelS
rouP CHannelS
with effects KoreSounds and route your
through them. Then you take a Performance u
Ser Page
and assign the aux leVel settings to the Controller knob.
If you invert one assignment (more on this in chapter 3.5.4) you can
seamlessly blend between the two effects signals with one Controller
element.
This is not true parameter morphing, but only a pseudo-morph. However,
it can lead to very organic transitions.
KORE 2 – 81
Page 82

3.5 Global Controller: Controlling sounds
In the above picture you can see the gloBal Controller displaying a uSer
P
age
of a SingleSound. The g
sensitive interface to the C
status of your KORE 2 Controller in terms of page display and parameter
values.
As with the KORE 2 Controller hardware you have eight Control Page
ButtonS and eight. Control Page ButtonS at your disposal. If a parameter
is assigned to the element, you can see the S
to the left of the Knob or Button.
The d
iSPlay taB
of the g
has been touched last with its long name and the P
value is also displayed with a white bar.
The l
ong ParaMeter naMe
mouse and type in a new name. This is the long, editable version of the
loBal Controller
ontrol Page
loBal Controller
system in KORE 2. It also mirrors the
is your one-stop, context-
Hort ParaMeter naMe
depicted
always displays the Controller that
araMeter Value
can be edited to your liking. Click it with your
. The
KORE 2 – 82
Page 83

parameter. Beside of the Controller element (Knob or Button) you can see
the SHort ParaMeter naMe which is not editable.
3.5.1 Pages and Sound Variations
Control Pages
The hardware and the gloBal Controller display
the same Control Page.
The C
ontrol Page
musical Super Instrument. A C
KORE 2 and / or plug-in parameters assigned to the hardware elements of
your KORE 2 Controller. There can be many Pages per Sound and of course
you can customize them to t your personal style. Whether it’s a KORE 2
mixer setting, the lter cutoff of a synth or the depth of a delay, simply
assign it to a Page and dene the values with your hardware.
system plays an important role in making KORE 2 a
ontrol Page
is nothing else but a set of
KORE 2 – 83
Page 84

The Pages belong to the KoreSounds sitting in the CHannel inSertS of
the Sound Matrix. Every component and every channel has its own set of
Pages. You can assign as many parameters as you want to a single knob
or button of your KORE 2 Controller – all with ne-grained control over the
data ranges. The hardware state is mirrored in the software.
The g
loBal Controller
displays the same Pages as the KORE 2 Controller,
providing effortless transitions between using you ngers and the mouse in
a context-sensitive way. Navigate to a Page on the Controller and the gloBal
C
ontroller
of the KORE 2 application or KORE 2 plug-in will automatically
display the same Page (unless you lock it to a specic component you
want to see all the time). Set a value and it will immediately update on
both systems.
The factory KoreSounds come with a ready-to-use set of C
ontrol PageS
that have the most important parameters of the sound assembled on one
or two Pages.
Last but not least, the parameters of the C
assemble the a
utoMation liSt
, i.e. the set of parameters that are published
ontrol PageS
are also used to
in the host when KORE 2 is running as a plug-in.
Please read the following sections and also the Chapter about the KORE
2 Controller (chapter 3.9) to learn more about the C
There is a dedicated chapter about the S
ound Manager
ontrol Page
system.
where you can learn
everything about the autoMation liSt (chapter 3.6.3).
KORE 2 – 84
Page 85

Sound Variations
The Sound VariationS are of similar importance to the Pages in demonstrating
KORE 2’s instrumental merits. Sound VariationS are roughly equivalent to
the presets for the u
Ser PageS
. The great thing about S
ound VariationS
is
that they are not discrete entities but can be morphed into each other.
This provides you with an organic eld of sound and ensures that you will
come up with fresh sounds all the time.
The concept is very easy: Specify a sound via the u
screen or with your KORE 2 Controller), hit the S
Ser PageS
aVe
button, click a slot
(be it on-
and you have your rst Variation. Go on to make some more (up to eight
can be saved). Now you can move the MorPH handle to seamlessly morph
between the different states of the Controller. Use this facility to breathe
new life into your performances. Please continue reading this chapter for
details about how to work with Sound VariationS.
KORE 2 – 85
Page 86

3.5.2 Plug-in Pages, Channel Pages and User Pages
A Channel Page, a Plug-in Page and a User Page of a KoreSound.
Control PageS can take three forms:
Plug-in Pages display the parameters published by a VST-/AU-plug-in.
1.
Depending on the complexity of the plug-in, there can be quite a
number of them. The Plug-in Pages are fixed, you cannot change them
manually.
C
Hannel PageS
2.
channel. Click on the CHannel Header to see its Channel Page or navi-
gate to it using your KORE 2 Controller (see chapter 3.9 for details).
display the mixer parameters of the currently focused
KORE 2 – 86
Page 87

They get populated automatically as you build your routing structures.
You cannot change them manually.
uSer PageS are your flexible tools for setting up your own interface. By
3.
default there are one or two pre-defined uSer PageS per KoreSound
offering the most important parameters. They can be adjusted to your
liking. You can create new uSer PageS to expand your control and
populate them with any parameter you want – no matter if it is is a
KORE 2 parameter or a plug-in parameter.
You can always see exactly which Page is being displayed. On the Header
row of the gloBal Controller there are two buttons.
The u
Ser Page
button switches to the u
Ser Page
of the component currently
in focus and provides access to the Page SeleCt menu. Here you can choose
which Page is displayed on the Controller. Of course you can always use
your KORE 2 Controller for navigation, too.
If you have focused a channel (by clicking its C
Hannel Header
or via the
KORE 2 Controller), KORE 2 automatically switches to the corresponding
CHan nel Page. The CH annel PageS assemble all Mixer controls of the
respective channel. If you set up new signal routings via the auxiliary sends,
the new controls will show up on the CHannel Page automatically.
KORE 2 – 87
Page 88

3.5.3 Creating Pages and assigning controls
The only Page type you can create from scratch is the u
you are also free to change any existing uSer PageS to t your needs.
Ser Page
. Of course
To create a new u
S
ound Matrix
Ser Page
you must rst decide on which level of your
you want to create it. Remember that you can have u
Ser PageS
for every component, be it a SingleSound containing a VST/AU-plug-in or
an internal Effect Component, a MultiSound or a Performance. Create the
Page by clicking the new Page icon beside the Page SeleCt menu
Once you have created a uSer Page you are ready to populate it by
assigning parameters to the Controls of the Page. This is a straightforward
process:
Click on the C
►
ontroller
you want to assign the parameter to (or touch it
on your KORE 2 Controller). It starts to blink in red within the software
and glows on the hardware.
Click on the l
►
The l
earn
earn
button on the a
SSign
or d
iSPlay
Tab of the Controller.
button as well as the selected Controller starts to blink. The
respective control of the hardware does the same.
Move the parameter you want to assign. It can sit anywhere in KORE 2.
►
A knob on a plug-in interface, a mixer parameter, anything goes.
Hit the learn button again to exit learn mode or continue assigning
►
KORE 2 – 88
Page 89

via the amount of range adjustment of the assigned parameter when
►
in learn mode. If you move it over a small range and deactivate learn
mode, the C
ontroller KnoB
on the C
ontrol Page
will control that small
range with its complete movement.
Please note that you can not only assign continuous dials to knobs and
buttons to switches but that it also works the other way around. If you
assign a switched, dual-state parameter to a C
ontrol Page KnoB
, the knob
switches the button at its extreme values (fully left and fully right). If you
assign a continuous parameter to a Control Page But ton it will toggle
the continuous parameter between the d
eStination range MininuM
and the
MaxiMun (see chapter 3.5.4 Advanced Assignments).
Managing User Pages
If you want to rename, delete or change the order of your uSer PageS
you can do this via the Sound Manager, which has its own chapter in this
manual (chapter 3.6).
3.5.4 Advanced assignments
Multiple Assignments
KORE 2 – 89
Page 90

KORE 2 also provides a means for assigning multiple parameters to a single
Controller on a Control Page. The Multi aSSign switch toggles the Learn
button to multi-assign-mode. If you then use the Learn function you can
assign multiple parameters. Just click them on the interface to add them
to the deStination laBel diSPlay on the right side of the Control taB.
The third button of the aSSign taB is the range aSSign. If active, KORE 2
will detect the lower and upper limit of you moving the destination
parameter during assignment. This will automatically be set as the control
range for the respective parameter. You can also alter this manually
afterwards (see below).
To delete unwanted destinations, simply click on the d
buttons to the right of the deStination laBelS.
The r
elatiVe aSSignMent
assigned parameters. This applies only if one of the parameters is moved
“directly” i.e. not via the C
the KORE 2/plug-in interface.
For example: You have two different parameters – cutoff and resonance of
the MASSIVE plug-in – assigned to the same Controller KnoB:
►
Without relatiVe mode, both parameters will always display the exact
position of the Controller Knob.
►
If the relatiVe mode is activated and you adjust the resonance on
Massive’s plug-in interface, the Contro ller Kn oB will not move the
resonance setting through its complete range but keep the difference
it has to the cutoff setting.
mode is for keeping the relative position of multiple
ontrol Page
but by using the parameter dial on
eStination reMoVe
Don’t be confused that
%
work for Pages other than the User
Pages. Channel and Plug-in Pages
are not editable.
the Assign Tab does not
KORE 2 – 90
Page 91
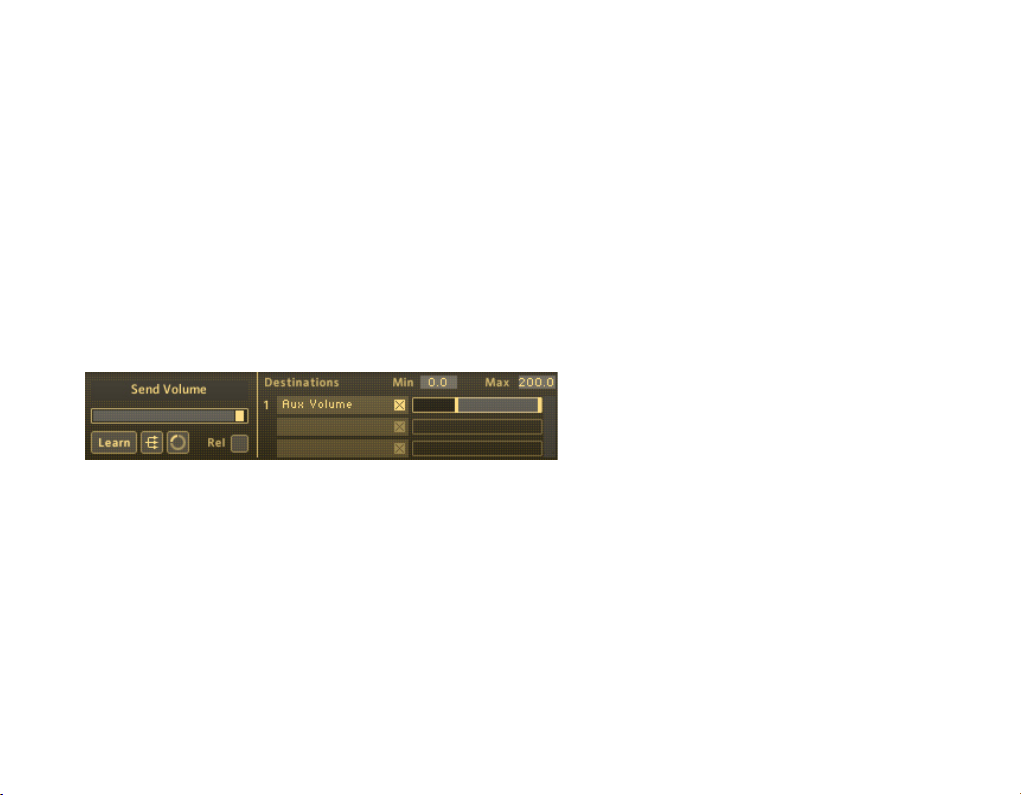
Controller ranges
For every Destination on the list you can dene a minimum and a maximum
setting for the control range. This can also be done interactively during
Learn (see above).
To change the range grab one of the yellow range limits and move your
mouse horizontally. This will change the d
eStination range Min
and Max
values. Also, you can click inside of the range to move both limits at the
same time.
There are more ways to do this:
Click with your mouse into the value elds and drag up or down.
►
Double-click on the value and type it in via the keyboard of your
►
computer.
An Example: If you have set deSt ination ra nge MiniMuM to 0 and the
MaxiMuM to 100, although the deStination parameter has a range from
-100 to +200, you can only reach 0 and 100 with the extreme positions
of your Controller.
KORE 2 – 91
Page 92

Sometimes you may have the feeling that a synth or effect has a parameter
inversed or you want to control two parameters with one knob in a way
similar to a crossfader. This is easily done in KORE 2 by setting the
d
eStination range Min
value to a higher value than the d
eStination Max
value. This inverse assignment is also displayed by a yellow arrow in the
deStination range diSPlay.
External control
The Control taB provides some utility parameters dealing with the KORE
2 Controller plus a facility for assigning external MIDI control. Please read
chapter 3.9 “The KORE 2 Controller” to learn more about the KORE 2
Controller.
The Kore C
and switches. In the above picture you see the Knob settings. S
ontrol SeCtion
of the C
ontrol taB
looks differently for knobs
enSitiVity
lets you dene the KORE 2 Controller sensitivity for the respective knob.
The value is displayed in degrees and it species the angle you have to
KORE 2 – 92
Page 93

turn the hardware knob to go through the complete range of values. The
lowest value is 30° and the highest is 3600°, meaning that you have to
make ten full cycles to go through all values.
In the Pedal menu you have the choice between:
None, for no Pedal input
►
Pedal 1 or Pedal 2 for controlling the respective Controller via one of
►
the two Pedals that may be connected to your KORE 2 Controller.
For the buttons of your KORE 2 Controller the Control taB has a few
parameters more than for the knobs.
The BeHaVior menu controls the mode of the button:
Toggle means the button switches state with every button hit.
►
Trigger only sends one message if you hit the button. Depending on
►
the aCtion on parameter, this can be “down” or “up”. Use this to get
buttons that can only switch on/off other buttons.
Gate leads to an on state while the button is being held down and
►
switches to off when it is released.
The aCtion on setting decides if the action of the button is happening on
the down or the up state of the button. This only works with the Toggle
and Trigger behaviors.
In the FootSwitCH menu you have the choice between:
None, for no Footswitch input
►
KORE 2 – 93
Page 94

FS 1 or FS 2 for controlling the respective Controller button via one
►
of the two Footswitches that may be connected to your KORE 2
Controller.
Of course you can also use external MIDI data to move the Controllers on
a P
age
, be it a u
Ser Page
, a C
Hannel Page
or a P
lug-in Page
. Just select the
desired Controller on the Page and specify a MIDI controller number (0 to
127) in the Midi CC aSSignMent eld.
The respective MIDI data will be received corresponding to the settings on
the Midi taB of the channel. Please see the chapter about the e
dit area
(chapter 3.4) for more on MIDI ports and channels.
3.5.5 Sound Variations and morphing
The last section on the gloBal Controller of KORE 2 is dedicated to
the Sound VariationS. Every KoreSound can store up to eight different
settings of its Control PageS. These can be recalled directly or you can
morph between the settings of the knobs (not the buttons) creating
seamless sound transitions.
Dene some Controllers on your uSer, CHannel or Plug-in PageS and click
the S
ound Variation SaVe
choose one of the eight Variations on the V
Button. It starts to blink in yellow and you can
ariation grid
. Click it and the
Variation is saved. The letter representing the different Variation changes
its color from white to black, denoting that it holds a Control Page state.
Please note that you can
%
ing saved in a Sound Variation by
usin g the Re call column on the
Page List of t he Sound Mana ger
(see below).
exclude Pa ges from be -
KORE 2 – 94
Page 95

The crosshair symbol below the Save button is called S
button. When activated (yellow) you can seamlessly move between the
different Sound VariationS with your mouse or your KORE 2 Controller.
If the S
Variations discretely, leading to jumps in the parameter values. This also
works when you use your KORE 2 Controller for changing Variations.
Furthermore, you can switch the Sound VariationS directly via the eight
buttons of your KORE 2 Controller. Please read the chapter about your
KORE 2 Controller to learn more about using the KORE 2 hardware.
ound Variation MorPH
button is inactive, you can only switch the
ound Variation MorPH
Please note that you can
%
th e S o und V ari a tio n G r id t o
Controller s of your Kore Controller
for hands-on sound Morphing.
assign the tw o axes of
KORE 2 – 95
Page 96

3.6 Sound Manager: Arranging Performancess
Use the Sound Manager to dene the Keyboard ranges of the various
elements of a Performance and manage the C
for parameter automation.
3.6.1 The Sound Tree
The Sound Tree displaying a KORE 2 Performance.
ontrol PageS
within the host
On the left side of the S
ound Manager
you have the S
ound tree
with all
available Sounds and Channels in the Performance, along with their
names. The underlying structure of the S
ound tree
can be summarized
as follows:
The highest node is always a MultiSound – the Performance. ►
KORE 2 – 96
Page 97

The child-nodes of a MultiSound are the channels of that MultiSound,
►
ordered by their CHannel nuMBer.
The child-nodes of a channel are KoreSounds – which can be Single
►
or MultiSounds – ordered by signal ow.
At the bottom of the hierarchy you can nd the plug-ins, which are the
►
child-nodes of Single Sounds.
The MaSter CHannel always has its own node.
►
There are four types of nodes in the Sound tree and each of them has its
own symbol:
Sounds are represented by a circle.
Channels are represented by a small Fader
as their symbol.
The MaSter CHannel has a shadowed Fader
as its symbol.
Plug-ins are represented by a plug-symbol.
Any element on the S
ound tree
can be compacted and expanded to hide or
show its child elements. To do this, click on the small symbols (plus/minus)
in front of the Sound and channel names.
For more information about the differences between MultiSound, Single
Sound, Channels and plug-ins, please refer to chapter 3.1.2.
To the right of the Sound tree you nd two tabs:
KORE 2 – 97
Page 98

The MaPPing editor and the
►
autoMation liSt
►
Both will be explained in the following sections.
3.6.2 Advanced Page Management
To the right of the S
ound tree
you nd the P
age liSt
. It always displays
the available Pages of the node you have currently selected on the Sound
tree. This could be the Plug-in PageS of a VST-plug-in, the uSer PageS of a
MultiSound, the C
P
age liSt
also displays the component name the Pages belong to. In the
picture above you can see the two pre-dened u
Hannel PageS
of a
CHannel
and so on.The Header of the
Ser Page
s of a SingleSound
named “Synthia”.
The list doubles as a general manager for your Pages and as a facility
to assemble the list of parameters that are published within the host for
automation. Please read the next chapter for more information on this.
Click on the name of a u
computer. You can also grab a u
Ser Page
to change it via the keyboard of your
Ser Page
with your mouse and drag it to
another position to re-arrange the list. Both actions are not possible with
the other Page types, as they are not editable.
Check the r
way you can dene C
eCall
box to store the respective Page in a S
ontroller
settings that are not inuenced by morphing
ound Variation
. This
KORE 2 – 98
Page 99

or by the recall of S
ound VariationS
. Please note that the settings of the
Pages are always saved into Sound VariationS, they just are not recalled if
the reCall ag is unchecked.
Below the P
age liSt
you nd some buttons. The add to a
utoMation liSt
button does just what it says: it adds the parameters of the currently
selected Page to the Automation List. This actually happens automatically
when a sound is loaded or created. Please read the next chapter for details
about host automation.
d
elete
is self-explanatory, too, as it deletes the currently selected Page.
To create a new Page, click on the new Page icon in the gloBal Controller
or use the learn button.
The two Page uP/down buttons step through the Pages on the list.
Use the button further down the Page liSt to add parameters representing
the horizontal (X) and vertical (Y) morphing within the Sound VariationSto
the a
utoMation liSt
do this for every component on the S
for automating S
ound MorPHing
ound tree
. These are the parameters
from the host. You can
that control the morphing movements on the Sound Variation grid.
KORE 2 – 99
Page 100

3.6.3 Pages and host automation
KORE 2’s list of automatable parameter s.
KORE 2 – 100
 Loading...