


TV • VIDEO • CAMCORDER • MECABLITZ
MECABLITZ 34 AF-3 N
Operating instructions

Foreword
Dear Customer,
We thank you for your confidence in our mecablitz MB 34 AF-3N.
The MB 34 AF-3N flashgun has been especially designed for Nikon AF system cameras. IMPORTANT: Never mount the flashgun in the accessory shoe of any other system camera, otherwise the flashgun’s foot or the camera’s accessory shoe can be destroyed! The dedicated contacts in the foot of the MB 34 AF-3N only support the controlling commands of Nikon AF system cameras.
The following pages give details for the correct operation of the mecablitz flashgun and summarize its fields of application.
Please read these operating instructions carefully, even if, at first sight, some points may not appear to be of interest. Our design work placed particular value on ensuring that operation of the mecablitz is as simple as possible, but it should be noted that the system cameras for which the flashgun is intended offer a great diversity of capabilities.
We wish you much pleasure with your new Metz flashgun in conjunction with a Nikon AF system camera to light up the darkest points, and for creative flash lighting.
Disposal of batteries
Do not dispose of spent batteries with domestic rubbish.
Please return spent batteries to collecting points should they exist in your country!
2

Contents
1. Safety instructions . . . . . . . . . . . . . . . . .24 2. Preparing the mecablitz for use . . . . . . .25
2.1 Power supply . . . . . . . . . . . . . . . . . . . . . .25 2.2 Loading and replacing the batteries . . . . . .25 2.3 Automatic flashgun cut-out circuit . . . . . . .26 2.4 Mounting/Removing the mecablitz . . . . . . .26
3. Setting the mecablitz into operation . . .27
3.1 Preconditions . . . . . . . . . . . . . . . . . . . . . .27 3.2 Switching the flashgun on and off . . . . . . .27
4. Flashgun instructions to the camera . . .28
4.1 Flash-ready indication . . . . . . . . . . . . . . . .28 4.2 Automatic flash sync speed control . . . . . .28 4.3 Correct-exposure indication . . . . . . . . . . .28 4.4 Information displayed in the
camera’s viewfinder . . . . . . . . . . . . . . . . .29
5. TTL flash control . . . . . . . . . . . . . . . . . . .30 6. Flash synchronisation . . . . . . . . . . . . . . .31
6.1 Normal synchronisation . . . . . . . . . . . . . . .31 6.2 Slow-synchronisation . . . . . . . . . . . . . . . .31 6.3 Second curtain synchronisation . . . . . . . . .32
7. Flash in the individual camera modes . .33
8. Autofocus measuring flash . . . . . . . . . . .34 9. Flash techniques and flash functions . .36
9.1 Automatic fill-in flash . . . . . . . . . . . . . . . .36 9.2 Exposure correction . . . . . . . . . . . . . . . . .36 9.3 Flash exposure sequences . . . . . . . . . . . .36
10. Lighting and wide-angle/telephoto attachment . .37
11.Care and maintenance - Manual firing button
Troubleshooting . . . . . . . . . . . . . . . . . . .38 12. Technical data . . . . . . . . . . . . . . . . . . . . .39 Lightning distances . . . . . . . . . . . . . . . .40
3

1. Safety instructions
•NEVER fire a flash in the immediate vicinity of the eyes! Flash fired directly in front of the eyes of a person or animal can damage the retina and lead to severe visual disorders - even blindness!
•Spent batteries should be immediately removed. Chemicals leaking out of spent batteries will damage the flashgun.
•Do not short-circuit batteries! DANGER OF EXPLOSION!
•Batteries should not be exposed to excessive heat, for instance sunshine, fire and the like!
•NEVER throw spent batteries in a fire!
•Do not expose the flashgun to dripping or splashing water!
•Protect the flashgun against excessive heat and high humidity levels! Do not keep the flashgun in the glove compartment of a car!
•In the event of flash shots with full light output observe an interval of at least 3 minutes after a series of 20 flashes. This will protect the flashgun against overload.
•NEVER place material that is impervious to light in front of, or directly on, the reflector screen. The reflector screen must be perfectly clean when a flash is fired. The high energy of the flash light will burn the material or damage the screen if this is not observed!
•NEVER dismantle the flashgun! DANGER: HIGH VOLTAGE! There are no components inside the flashgun that can be repaired by a layperson.
4

2. Preparing the mecablitz for use
2.1 Power supply
The flashgun can only be operated with 2 CR2type lithium batteries. This type of battery can be stored for many years with practically no loss of energy, thus making it ideal for occasional amateur flash photography.
Batteries have become discharged or spent when recycling takes more than 60 seconds. The batteries should be removed from the mecablitz if the flashgun is not going to be used for a prolonged period.
2.2Loading and exchanging batteries
•Turn off the flashgun with the main switch.
•Press the unlocking catch, slide the battery compartment lid to the right and fold open (see fig. 1).
•Insert the batteries according to the indicated battery symbols.
|
|
|
Fig. 1: Unlocking and exchanging batteries
The supplied lithium batteries are expendables and, as such, are not subject to our warranty provisions.
After the batteries have been inserted, fold down the battery compartment lid, and push to the left until it engages audible with the unlocking catch.
5
2. Preparing the mecablitz for use
When loading the batteries ensure correct polarity. Incorrectly loaded batteries can destroy the flashgun! All batteries must be of the same make and have the same charge level.
Exhausted batteries must not be thrown into the dustbin! Contribute to the protection of the environment and discard exhausted batteries at the appropriate disposal points.
2.3Automatic flashgun switch-off
To avoid accidental battery discharge the flashgun automatically switches itself off to save power approximately 8 minutes after
-the flashgun was switched on
-the last flash was fired
-tripping the camera release, or
-switching on the camera light metering system. The green flash-ready indicator is turned off.
To turn on the mecablitz again switch the main switch OFF and then ON. The flashgun should always be turned off if it is not being used.
2.4 Mounting/Removing the flashgun
•Turn off the mecablitz.
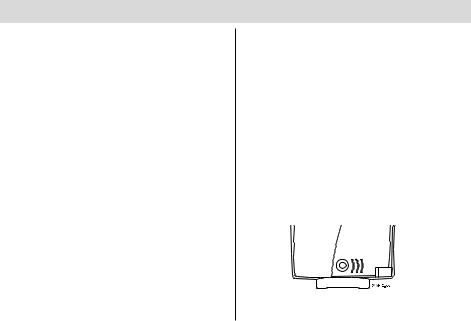
•Press the unlocking catch at the back of the mecablitz (see fig. 2).
•Slide the mounting foot into the camera’s mounting shoe.
•Always turn off the flashgun before it is removed.
•Press the unlocking catch at the back of the mecablitz (fig. 2) and withdraw from the camera.
Fig.2: Unlocking catch
6
 Loading...