


TV. VIDEO. AUDIO. MECABLITZ
Tiros |
63 TF 51 |
– 100 MT |
Crystal |
70 TF 53 |
– 100 MT |
Operating Instructions

Hints for use of the Operating Instructions
Do not be put off by the size of the Operating Instructions. Initial- |
We have made every effort to provide a detailed table of contents |
ly, it is sufficient to read the instructions in Sections 1.1, 2 and 4. |
and a comprehensive index to help you to find the information |
In order to familiarise yourself with the TV set and its many func- |
you need. The Section "Glossary" contains explanations of |
tions, we recommend that you read the Operating Instructions |
various technical terms used in the manual. |
step by step, carrying out the described actions on your TV set as |
In the descriptions of the various functions, the left-hand column |
you do so. |
shows which keys you must press in order to see the screen dis- |
This method, often called "learning by doing", is the easiest way |
play given in the centre column. Do not press the keys too quick- |
of learning how to execute the various functions. |
ly. It may occur that the TV set will not recognise the next key you |
Do not be afraid to change the settings in the various menus (the |
press and may therefore not display the menu shown in the cen- |
TV menu, the TV station table, programming of the function keys, |
tre column but something completely different. The right-hand |
etc.). If you make any changes to these settings, the TV set reac- |
column of the function description provides additional informati- |
ts immediately, but the changes are not yet stored. After each |
on which may be useful but is not absolutely necessary for exe- |
change in a menu, a red box is displayed at the bottom right of |
cution of the function. |
the screen, asking if you want to save the changes. |
|
• If you want to save the changes, press the OK key to do so. |
If you comply with these hints, you should have no problems in |
• If you are not sure, or if you do not want to save a changed set- |
the operation of your TV set. |
ting, press the MENU key and then the TV key to exit from the |
Your Metz-Werke |
menu without saving the new settings. |
|
Contents
|
Remote control handset RB 11 . . . . . . . . . . . . . . . |
. .3 |
1. |
Setting up and connecting . . . . . . . . . . . . . . . . . . |
. .4 |
1.1 |
Turning the TV on and off . . . . . . . . . . . . . . . . . . . . . |
. .5 |
2. |
Language selection in the TV menu . . . . . . . . . . . |
. .6 |
2.1 |
TV menu and operator help . . . . . . . . . . . . . . . . . . . |
. .6 |
2.2 |
Programme selection . . . . . . . . . . . . . . . . . . . . . . . . |
6, 7 |
3. |
Presetting TV stations . . . . . . . . . . . . . . . . . . . . . . |
. .8 |
|
Direct channel entry/station search . . . . . . . . . . . . . |
. .8 |
|
Autostore function . . . . . . . . . . . . . . . . . . . . . . . . . . |
. .9 |
3.1 |
Sorting stations . . . . . . . . . . . . . . . . . . . . . . . . . . . . |
.10 |
|
Move, exchange, copy, delete . . . . . . . . . . . . . . . . . |
.10 |
3.2 |
Fine tuning . . . . . . . . . . . . . . . . . . . . . . . . . . . . . . . . |
.11 |
3.3 |
Allocating a station logo . . . . . . . . . . . . . . . . . . . . . . |
.12 |
4. |
Changing individual picture settings . . . . . . . . . . |
.13 |
4.1 |
Changing individual sound settings . . . . . . . . . . . . . |
.13 |
4.2 |
Adjusting the video and audio standard values . . . . . |
.14 |
5. |
Equipment configuration . . . . . . . . . . . . . . . . . . . . |
.15 |
|
Assigning the function keys . . . . . . . . . . . . . . . . . . . |
.15 |
|
Setting for programme change . . . . . . . . . . . . . . . . . |
.17 |
|
Setting the RGB priority . . . . . . . . . . . . . . . . . . . . . . |
.18 |
|
Volume adaptation . . . . . . . . . . . . . . . . . . . . . . . . . . |
.18 |
6. |
Volume adjustment and forced mono . . . . . . . . . . |
.19 |
6.1 |
Correcting picture deviations . . . . . . . . . . . . . . . . . . |
.20 |
|
Noise reduction and CTI function . . . . . . . . . . . . . . . |
.20 |
|
Picture format . . . . . . . . . . . . . . . . . . . . . . . . . . . . . |
.21 |
7. |
AV recording . . . . . . . . . . . . . . . . . . . . . . . . . . . . . . |
.22 |
|
Camcorder video recorder . . . . . . . . . . . . . . . . . . |
.22 |
|
Video recorder video recorder . . . . . . . . . . . . . . . |
.23 |
8. |
Time settings . . . . . . . . . . . . . . . . . . . . . . . . . . . . . |
.24 |
|
Switch-on/off and reminder time . . . . . . . . . . . . . . . |
.24 |
8.1 |
Childlock . . . . . . . . . . . . . . . . . . . . . . . . . . . . . . . . . |
.26 |
|
Switching on . . . . . . . . . . . . . . . . . . . . . . . . . . . . . . |
.26 |
|
Permitted programmes . . . . . . . . . . . . . . . . . . . . . . |
.26 |
|
Personal code . . . . . . . . . . . . . . . . . . . . . . . . . . . . . |
.27 |
|
Beginning and end of viewing period . . . . . . . . . . . . |
.27 |
|
Switching off . . . . . . . . . . . . . . . . . . . . . . . . . . . . . . |
.27 |
8.2 |
Recording with the timer . . . . . . . . . . . . . . . . . . . . . |
.28 |
9. |
Connecting headphones . . . . . . . . . . . . . . . . . . . . . |
29 |
|
Adjusting the headphones volume . . . . . . . . . . . . . . . |
29 |
10. |
Megatext . . . . . . . . . . . . . . . . . . . . . . . . . . . . . . . . . |
30 |
|
Basic functions . . . . . . . . . . . . . . . . . . . . . . . . . . . . . |
30 |
|
Multiple pages . . . . . . . . . . . . . . . . . . . . . . . . . . . . . . |
32 |
|
Direct page selection . . . . . . . . . . . . . . . . . . . . . . . . . |
33 |
|
Return to last index page . . . . . . . . . . . . . . . . . . . . . . |
34 |
|
Doubling the font size . . . . . . . . . . . . . . . . . . . . . . . . . |
35 |
|
Setting marks . . . . . . . . . . . . . . . . . . . . . . . . . . . . . . |
36 |
|
Mark-by-mark advance . . . . . . . . . . . . . . . . . . . . . . . |
38 |
|
Erasing marks . . . . . . . . . . . . . . . . . . . . . . . . . . . . . . |
39 |
|
Subtitles . . . . . . . . . . . . . . . . . . . . . . . . . . . . . . . . . . . |
40 |
|
Riddle solutions key . . . . . . . . . . . . . . . . . . . . . . . . . . |
40 |
11. |
Special picture effects . . . . . . . . . . . . . . . . . . . . . . . |
41 |
|
Variable Zoom . . . . . . . . . . . . . . . . . . . . . . . . . . . . . . |
41 |
|
Frame freeze . . . . . . . . . . . . . . . . . . . . . . . . . . . . . . . |
42 |
12. |
Operation without remote control . . . . . . . . . . . . . . |
42 |
13. |
Connecting peripheral equipment . . . . . . . . . . . . . . |
43 |
|
Connecting a video recorder / camcorder . . . . . . . . . . |
43 |
|
Connecting external devices . . . . . . . . . . . . . . . . . . . . |
44 |
|
Connecting a video recorder . . . . . . . . . . . . . . . . . . . . |
45 |
|
Video recorders/video signal . . . . . . . . . . . . . . . . . . . |
46 |
|
Video recorders . . . . . . . . . . . . . . . . . . . . . . . . . . . . . |
47 |
|
Pay TV decoder (e.g. Premiere) . . . . . . . . . . . . . . . . . |
48 |
14. Technical data . . . . . . . . . . . . . . . . . . . . . . . . . . . . .50 14.1 Upgrade kits . . . . . . . . . . . . . . . . . . . . . . . . . . . . . . . .50 14.2 Maintenance and care . . . . . . . . . . . . . . . . . . . . . . . .50
15. Glossary . . . . . . . . . . . . . . . . . . . . . . . . . . . . . . . . . .51
16.Remote control handset for video recorders . . . . .52
17. Index . . . . . . . . . . . . . . . . . . . . . . . . . . . . . . . . . . . . .53
2
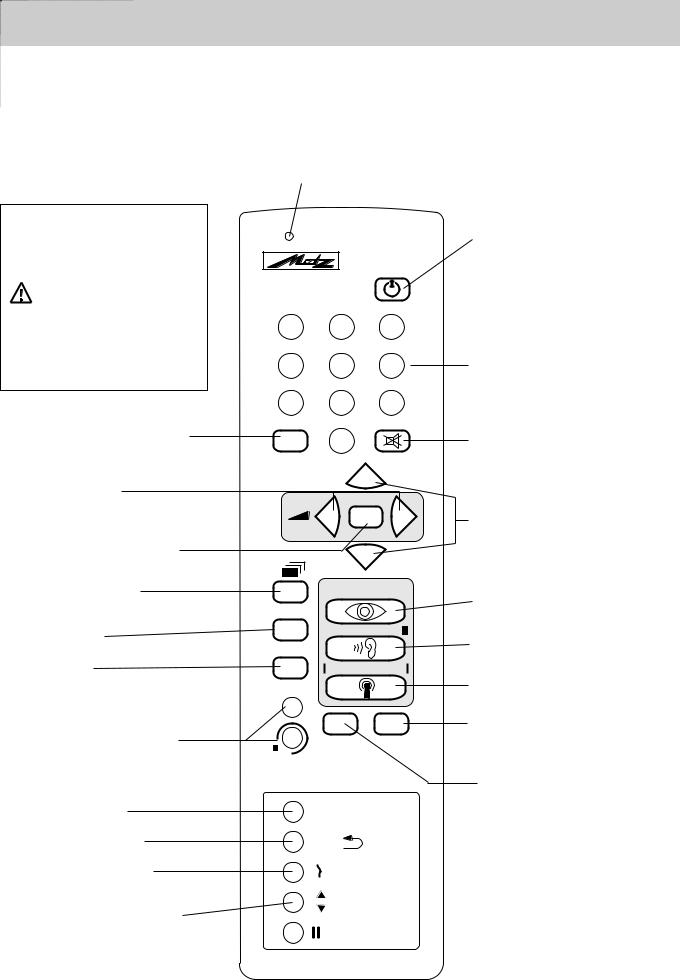
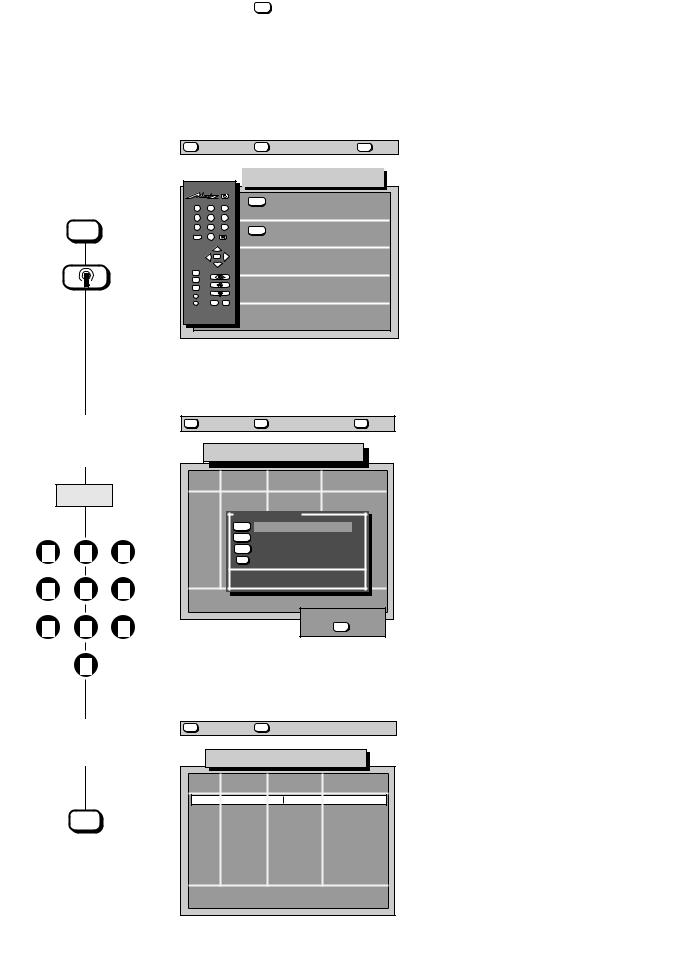
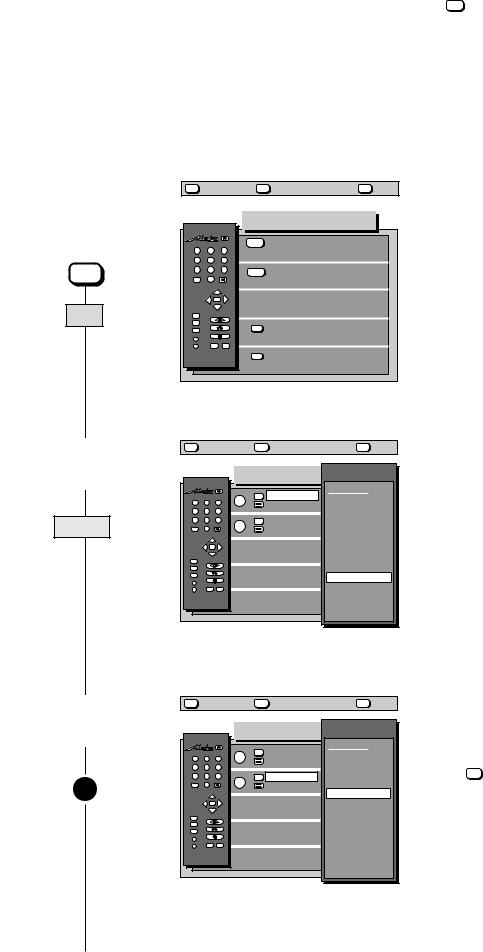
Remote control handset RB 11
The remote control sends commands to the TV set with the aid of infrared light. For this reason, you should always point the remote control at the TV set for reliable operation. Use of the remote control may interfere with the operation of other devices or systems controlled which use infrared light (such as infrared headphones).
If the TV set is exposed to direct sunlight, it may sometimes not function correctly because it cannot recognise the commands transmitted by remote control.
The television must be switched on or in standby mode (ON/OFF key depressed) when it is to be operated by remote control. Always point the remote control in the direction of the TV for operation. A pilot lamp starts to flash as soon as a key on the remote control handset is pressed.
Nota:
For explanation of the video level for the remote control of video recorders, please refer to Section 16, page 52.
Do not point the remote control unit into your eyes and press a key on it !
Do not use rechargeable batteries in the remote control unit.
RB 11
100 Hz
VTR
1 2 3
4 5 6
7 8 9
• Preselect with entry of two digits |
|
0 |
|
|
• Cursor page selection in Megatext mode |
-/-- |
|
||
|
|
|||
|
|
|
||
|
TIMER |
P+ |
|
|
• Changing the setting |
|
|
||
|
||||
|
- |
OK |
+ |
|
• Basic picture and sound settings |
|
P- |
|
|
|
|
|
•Call Megatext
•Return from menu and Megatext to TV picture
•Call TV menu
•Operator Help
•Function keys, depending upon programming
•IInfotext (select marks)
•Return to last programme
•Changeover from spoken to music broadcasts
•Change of format (variable zoom)
TV 


MENU 
? |
|
A |
REC AV |
B |
|
|
INFO |
|
PRG. |
|
|
|
|
• Still picture 
•ON - Set switches to last viewed programme
•OFF (standby setting)
•Numeric keys
•Mute
•Next programme
•Partial page selection with multiple pages in Megatext
•Select picture function
•Megatext - select subject
•Select sound function
•Megatext - select chapter
•Call station table
•Megatext - next page
•AV recording
•Megatext - skip to next mark
•Logo display (display of time, programme, and sound mode
•Megatext - set or delete mark
Batteries:
Insert the enclosed batteries in the remote control, observing the symbols on the cover of the battery compartment.
Remove exhausted batteries from the remote control and return them to your dealer or to an authorised battery collection point.
3
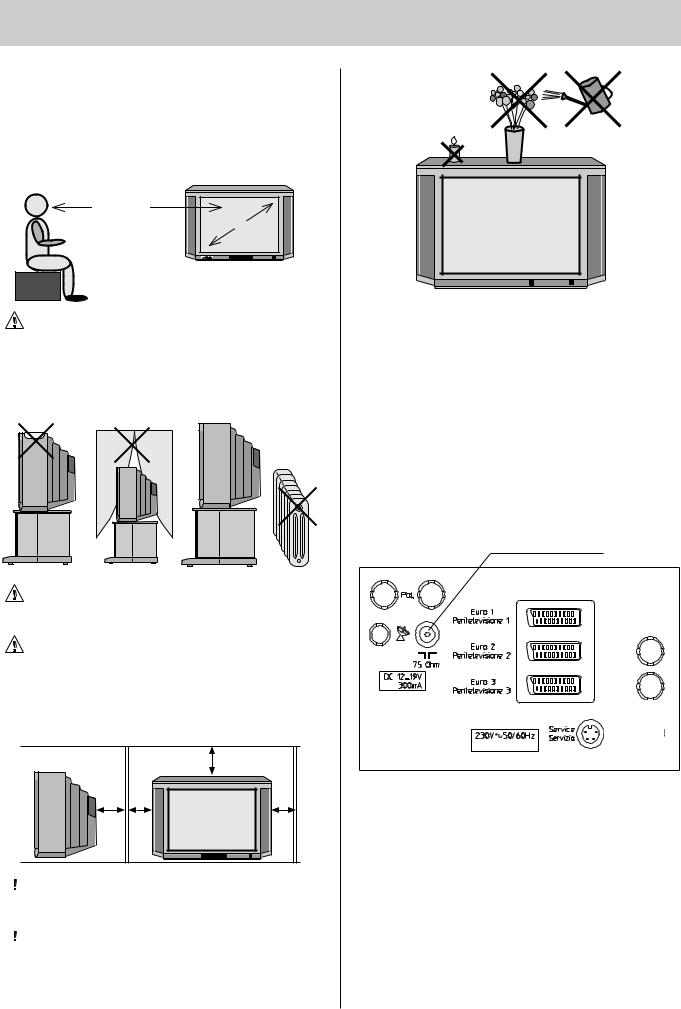
1. Setting up and connecting
Setting up
When selecting a suitable place for the TV, be sure that no bright light or sunlight falls on the screen. Light may cause reflections and impair the brilliance of the image.
The best viewing distance is five times the picture tube diagonal, e.g. about 3.5 m for TV sets with a 70 cm screen.
5x cm |
cm |
|
TV sets require adequate ventilation. The ventilation slots at the rear of the set should therefore never be covered by curtains, doilies, newspapers or similar objects. Likewise, all slots at the bottom of the set must be freely accessible so that the intake of air is not impaired in any way
Do not set up the TV near a radiator as this would impair adequate cooling.
Do not place
-burning candles or
-flower vases filled with water
on top of the TV set.
Hot wax and liquids destroy the electrical components and jeopardize the electrical safety of the set
|
 If you place the set in a wall unit, leave sufficient space on all sides so that the air can circulate freely.
 Your TV set is intended for use in dry rooms. If you wish to use it occasionally outdoors, be sure to protect it against any kind of moisture (rain, splashes, dew, etc.).

Connecting the aerial
Standard SAT and terrestrial station aerial sockets are fitted at the rear of the TV.
Thunderstorms represent a danger for all electrical appliances! If lightning strikes the power line or the aerial, the TV may be damaged even if it is switched off. Therefore, always unplug the mains lead AND aerial during thunderstorms. If the TV is not going to be used for an extended period of time, for instance when on holiday, then disconnect the set both from the mains and the aerial.
Aerial connection
698-3EURO
Mains voltage
Plug the mains lead into a wall outlet. The TV set is equipped for 230 V ac (Australia 240 V ac).
4

1.1 Turning the TV on and off
Turning on with the ON/OFF key
Before turning on a cold TV in a warm room, first allow any condensation mist that may have formed on the screen to evaporate.
Press the ON/OFF key.
Programme position 1 is then selected. Depending on the assignments made, the following information will appear in the screen box:
Terrestrial |
SAT programme position |
|||||
programme position |
|
(only with built-in |
||||
|
|
|
SAT upgrade module) |
|||
|
|
|
|
|
|
|
Pr 1 |
MONO |
|
|
PS 1 |
MONO |
|
ARD |
18:15:33 |
|
|
ARD |
18:15:33 |
|
Turning off with the ON/OFF key
Press the ON/OFF key. The television is now disconnected from the mains.
You are advised to turn off the TV with the ON/OFF key after station closedown and when it is not going to be used for an extended period of time.
Turning on with the remote control
The programmes can be directly selected with the 0-9 keys when the television is in standby mode.
Select single-digit programme numbers by pressing the corresponding numeric key.
Two-digit programme numbers are entered with the -/-- preselect key:
•The television is switched to the last watched programme.
•The preselect box is displayed on the screen.
Pr - -
•The 2-digit programme number can now be entered with the numeric keys.
The last programme watched before the television was switched off can be set with the  key.
key.
The television is automatically set to standby mode ten minutes after station closedown. However, this is not the case if the station starts to transmit a test card within these ten minutes.
Turning off with the remote control
Press the  key to switch the TV to standby mode.
The standby status is indicated by the red lamp.
2. Language selection in the TV menu
Press this key on the remote
control....
1.Call the Equipm. Configuration menu
MENU  red
red  green
green
2. Adjust the language
- |
+ |
3. Store the selected language
OK
The screen displays |
|
Explanation |
|
|
|
MENU |
return |
|
TV |
TV picture |
? |
Help |
||
|
|
|
|
Equipm. configuration |
|
|||
1 |
2 |
|
3 |
blue |
|
Function keys |
|
|
|
|
|
|
|
|
|||
4 |
5 |
|
6 |
|
|
|
|
|
7 |
8 |
|
9 |
yellow |
|
Device connection |
|
|
|
0 |
|
|
|
|
|||
--/- |
|
|
|
|
|
|
|
|
|
|
P+ |
|
white |
|
SAT settings |
|
|
|
- |
OK |
+ |
|
|
|
||
|
|
P- |
|
|
|
|
|
|
TV |
|
|
|
|
|
|
|
|
MENU |
|
|
|
|
|
Language: |
English |
|
? |
|
|
|
green |
|
|||
A |
|
|
|
|
|
|
|
|
B |
REC |
AV |
|
|
|
|
|
|
|
|
|
|
further |
|
|
||
|
|
|
|
red |
|
|
|
|
6 9 8 - 0 6 N - G B |
|
|
store? |
|
||||
|
|
|
|
|
|
|
OK |
|
The desired language for the entire TV menu is adjusted in the „Equipm.Configuration“ menu.
Select the desired language with the |
- |
+ |
keys when |
|
|
the submenu for the language is displayed on a green background.
Press the OK key to confirm and store the selection made. The complete text in the TV menu is then displayed in the selected language.
4. Return to TV picture
TV
TV picture
5
2.1 TV menu and operator help
Menu control of the TV, and the versatility of the system, ensure that supposed complicated settings and entries are made easily and clearly comprehensible for everyone. Operator Help can be called with the ? key when in TV mode. Operator Help indicates the functions of the individual keys.
All settings are entered by way of different submenus. Simply call Operator Help with the ? key should you encounter difficulties in entering the different equipment configurations or if problems arise in operating the TV. Operator Help is specifically matched to the corresponding menu and functions as a reminder when settings are entered or programmed.
Press this key on the remote |
|
The screen displays |
control.... |
|
|
|
|
|
|
|
|
? return
Operator Help: Call/exit
?
Operator help
1 |
2 |
|
3 |
4 |
5 |
|
6 |
7 |
8 |
|
9 |
--/- |
0 |
|
|
|
|
P+ |
|
|
- |
OK |
+ |
|
|
P- |
|
TV |
|
|
|
MENU |
|
|
|
? |
|
|
|
A |
|
|
|
B |
|
|
AV |
|
REC |
|
|
6 9 8 - H E L P 1 - G B |
|||
0 9
P+ P-
OK
- |
+ |
AV
TV
MENU
A
B
Switch set on/off
Prog select -/-- (2 dig.) Next programme
Basic video/audio settings Sound interrupt
Change vol./adj. function / Sel.video/audio funct.
Station table
AV recording
Program/time of day
Teletext/TV picture
TV-menu
M U T I N G - 1 2 D B
Z o o m 2 : 1
I n f o t e x t
PRG |
last program. |
|
Spch/mus. |
|
Var. format |
I I 1-2 |
Still |
TV menu: Call/exit
MENU
MENU return |
TV picture |
? Help |
|
|
|
|
|
TV-menu |
1 |
2 |
|
3 |
blue |
Video standard values |
|
|
|
|||
4 |
5 |
|
6 |
|
|
7 |
8 |
|
9 |
yellow |
Audio standard values |
--/- |
0 |
|
|
||
|
|
|
|
||
|
|
P+ |
|
|
|
|
- |
OK |
+ |
white |
Station settings |
|
|
P- |
|
||
|
|
|
|
|
|
TV |
|
|
|
|
|
MENU |
|
|
|
green |
Timer/childlock |
? |
|
|
|
||
|
|
|
|
||
A |
|
|
|
|
|
B |
|
|
AV |
|
|
|
REC |
|
red |
Equipm. configuration |
|
|
|
|
|
||
6 9 8 - 0 1 - G B |
|
|
|||
Explanation
Operator Help shows the functions of the individual keys when in TV mode.
The A and B function keys can be programmed by the user. Consequently their functions can differ to those shown in the adjoining picture.
The individual menu lines are selected with the coloured keys of the remote control, to open the corresponding submenu. Keys not enhanced in white or colour on the displayed menu have no function in the current operating state.
Settings in the submenus can be changed
with the |
- |
+ |
keys. |
Press the OK key to confirm and store the new setting.
Press the MENU key to move back by one step within the TV menu.
Operator Help in TV menu: Call/exit
?
MENU |
return |
TV |
picture |
? |
return |
|||
|
|
|
|
|
TV-menu |
|
|
|
|
|
|
|
Operator help |
||||
1 |
2 |
|
3 |
|
|
Change/store lumi- |
|
|
4 |
5 |
|
6 |
|
|
nance, contrast, etc. |
|
|
7 |
8 |
|
9 |
|
|
Change/store volume |
||
|
0 |
|
|
|
|
|||
--/- |
|
|
|
|
treble, etc. |
|
|
|
|
|
P+ |
|
|
|
Define program |
|
|
|
- |
OK |
+ |
|
|
|
|
|
|
|
P- |
|
|
|
assignments |
|
|
TV |
|
|
|
|
|
|
|
|
MENU |
|
|
|
|
|
Timer settings/ |
|
|
? |
|
|
|
AV |
|
|
||
|
|
|
childlock |
|
|
|||
|
|
|
|
|
|
|||
A |
|
|
|
|
|
|
|
|
|
|
|
|
|
|
|
|
|
B |
REC |
AV |
|
|
TV/SAT-configuration, |
|||
|
|
|
|
|||||
|
|
|
|
R E C |
settings function |
|
|
|
|
|
|
|
keys, menu language |
||||
6 9 8 - H E L P 2 - G B |
|
|
|
|
|
|||
Operator Help can be called for each menu displayed on the screen (Example: Operator Help with displayed TV menu).
6
Press this key on the remote
control....
1.Select the programme position (e.g. Prog number 10)
-/-- 1 0
2. Next programme
P+
P-
3. Last programme
PRG. 
2.2 Programme selection
The screen displays |
|
Explanation |
|
|
|
Pr - -
Pr 13 MONO
RTL 18:15:33
ZDF
BR3
RTL
SAT1
RTL2
PRO7 EUSPO NTV NORD3 MDR3 SWF3
Press the key when the TV is in standby mode. The TV then switches to the programme viewed before the receiver was turned off to standby.
Now enter the programme number with the numeric keys. The TV is changed over to the selected programme position as soon as the last digit has been entered.
With single-digit programme numbers it is only necessary to press the corresponding key, e.g. key 4 for programme position 4.
After the programme position has been selected an information box appears indicating the programme position number, the time, and the currently valid sound mode, e.g. stereo.
Press the P+ |
P- |
keys to run through the program- |
mes. Keeping the |
P+ or P- key depressed for more |
|
than 2 seconds will cause a programme box to be displayed on the screen for selection of the programme position. Release the P+ or P- key as soon as the desired logo is highlighted in white. The corresponding programme position will then be selected.
With this key, you can switch back and forth between the last two programme positions you selected.
Example:
You are watching a programme on ITN; during the commercials, you switch to BBC with the aid of the numeric keys . .
You can now switch back and forth between ITN and BBC by pressing the PRG.  key.
key.
7

3. Presetting TV stations |
|
Direct channel entry/ |
|
|
|
station search |
|
|
|
|
|
|
|
|
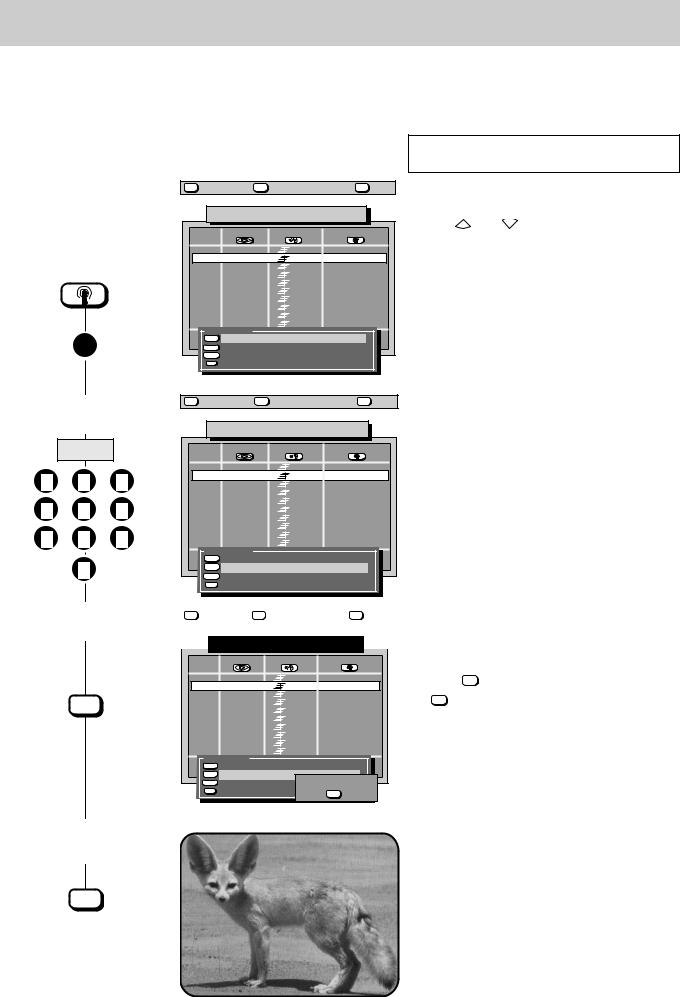
The TV is supplied with factory preprogrammed TV stations. However, if you can receive TV stations in your area that are not listed in the station table, then these transmitters can be entered and programmed at any time.
You can choose one of the following three programming possibilities:
a) Direct channel entry b) Station search c) Autostore function
Press this key on the remote |
|
The screen displays |
control.... |
|
|
|
|
|
|
|
|
MENU return TV picture ? Help
1. Call the station table and |
|
|
|
|
|
|
channel type survey |
|
|
Station table |
|
||
|
|
|
|
|||
|
Prog |
Logo |
Channel |
|
Signal |
|
|
▲▼ |
|
|
|
|
|
|
0 |
VTR1 |
00 |
Video Rec.1 |
||
|
1 |
ARD |
06 |
|
Aerial |
|
|
2 |
ZDF |
34 |
|
Aerial |
|
|
3 |
SAT 1 |
40 |
|
Aerial |
|
|
4 |
blue |
Std channel |
06 |
ARD |
|
|
5 |
|||||
|
yellow |
Spec. channel |
|
|
||
|
6 |
|
|
|||
yellow |
7 |
|
SAT-TV |
|
|
|
8 |
|
SAT-RADIO |
|
|
||
|
9 |
red |
Fine tuning |
|
|
|
|
|
>> weitere Einstellungen |
||||
|
|
|
Std., Pict., Sound |
|
||
|
6 9 8 - 0 3 A - G B |
|
|
|
|
|
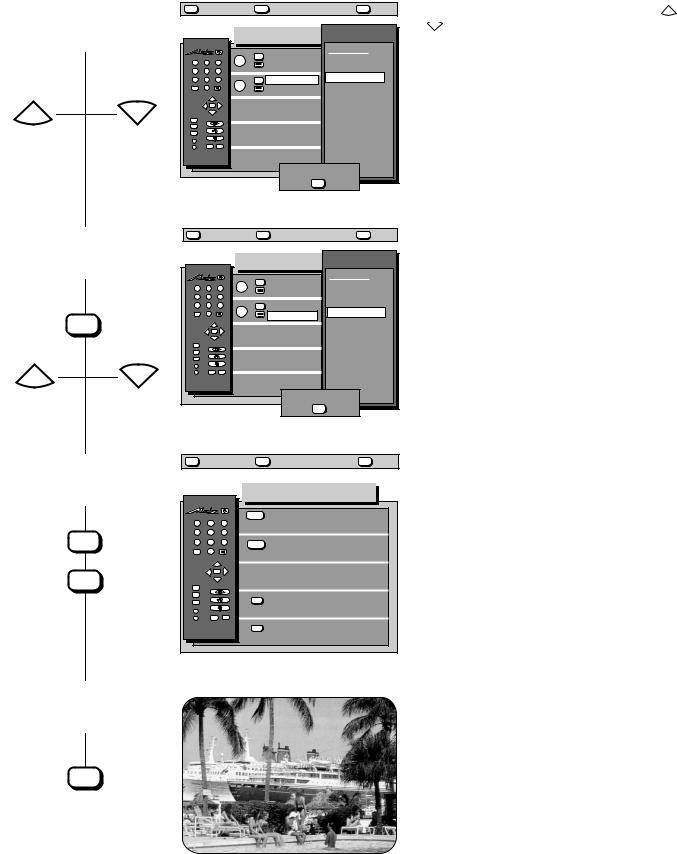
Explanation
With direct channel entry it is necessary to know the type of channel and the channel number.
If type and number of channel are not known, you can scan through the entire reception range with the search function to locate stations.
The station table lists all the preset stations.
These stations can be changed at any time.
The cursor always highlights the type of channel currently preset in the given programme position.
For the search function it is advisable to switch to a vacant programme position.
2.Select the type of channel (e.g. standard channel)
blue
3.Enter the channel number (Example: Standard channel 06) or start station search
0 |
6 |
|
or |
- |
+ |
4. Store the setting and return to TV picture
MENU return TV picture ? Help
Station table
Prog |
Logo |
Channel |
Signal |
||
▲▼ |
|
|
|
|
|
0 |
VTR1 |
00 |
Video Rec.1 |
||
1 |
ARD |
06 |
Aerial |
||
2 |
ZDF |
34 |
Aerial |
||
3 |
SAT 1 |
40 |
Aerial |
||
4 |
blue |
Std channel |
06 ARD |
||
5 |
|||||
yellow |
Spec. channel |
|
|||
6 |
|
||||
7 |
|
SAT-TV |
|
||
8 |
|
SAT-RADIO |
|
||
9 |
red |
Fine tuning |
|
||
|
>> weitere Einstellungen |
||||
|
|
Std., Pict., Sound |
|||
6 9 8 - 0 3 A - G B |
|
|
|
||
MENU return TV picture ? Help
Station table
Prog |
Logo |
Channel |
Signal |
||
▲▼ |
|
|
|
|
|
0 |
VTR1 |
00 |
Video Rec.1 |
||
1 |
ARD |
06 |
Aerial |
||
2 |
ZDF |
34 |
Aerial |
||
3 |
SAT 1 |
40 |
Aerial |
||
4 |
blue |
Std channel |
06 ARD |
||
5 |
|||||
yellow |
Spec. channel |
|
|||
6 |
|
||||
7 |
|
SAT-TV |
|
||
8 |
|
SAT-RADIO |
|
||
9 |
red |
Fine tuning |
|
||
|
>> weitere Einstellungen |
||||
|
|
Std., Pict., Sound |
|||
6 9 8 - 0 3 A - S T - G B |
|
|
store? |
||
|
|
|
|
||
|
|
|
|
OK |
|
OK |
TV |
TV picture |
The yellow framed field offers four types of channels. Select the channel type with the assigned coloured key.
After the channel type has been selected, a channel number is displayed in the bar when a station is stored in this programme position. Two lines are shown if this position is still vacant.
„SAT channel“ and „SAT radio channel“ can only be selected if a SAT upgrade module has been installed in the TV receiver.
With direct channel entry, the station table is briefly faded out when the channel number is entered, and the selected station is displayed.
The station search proceeds from the displayed
channel number in a forward sequence with the |
+ |
||
key, and in a reverse sequence with the |
|
|
|
- |
key. |
||
|
|
|
|
Search proceeds from the lower channel area upwards or downwards when two lines are displayed. The search stops when a station has been found.
Proceed as described in step 4 if the located station is to be stored.
Press the |
+ |
or |
- |
key if the located station is not to be |
|
|
|
stored so that the search can be continued.
Complete fine tuning if station reception is not clear (see Section 3.2).
8
3. Presetting TV stations |
Autostore function, |
sorted to countries |
|
|
|
The autostore function automatically scans through the entire reception range to locate stations. The located stations are presented in the station table and can then be stored by way of the OK key.
If you do not like the order in which the stations appear in the station table, you can sort the stations to match your own requirements as described on the next page.
Press this key on the remote |
|
The screen displays |
|
Explanation |
control.... |
|
|
||
|
|
|
|
|
|
|
|
|
|
1. Call the menu |
MENU |
return |
TV |
picture |
? |
Help |
||
|
|
|
|
|
|
|
|
|
„Station settings“ |
|
|
|
|
|
Station settings |
|
|
|
|
|
|
|
|
|
||
|
1 |
2 |
|
3 |
blue |
Station table |
|
|
|
|
|
|
|
|
|||
|
4 |
5 |
|
6 |
|
|
|
|
MENU |
7 |
8 |
|
9 |
yellow |
Autostore |
|
|
--/- |
0 |
|
|
|
|
|||
|
|
|
|
|
|
|
||
|
|
|
P+ |
|
|
SAT programming |
|
|
|
|
- |
OK |
+ |
|
|
|
|
|
|
|
|
|
|
|||
|
|
|
P- |
|
|
|
|
|
|
TV |
|
|
|
|
|
|
|
|
MENU |
|
|
|
|
|
|
|
|
? |
|
|
|
|
|
|
|
|
A |
|
|
|
|
|
|
|
|
B |
REC |
AV |
|
|
|
|
|
|
|
|
|
|
|
|
||
|
6 9 8 - 0 3 B - G B |
|
|
|
|
|||
2.Call the autostore function and enter a programme number (e.g. 01)
yellow
1 2 3
4 5 6
7 8 9
0
3. Start the autostore function
MENU return |
TV picture |
? Help |
Autostore
Prog Logo Channel Signal
sort for
blue Germany yellow Austria
white Switzerland green others
from nr. of progr. 01
6 9 8 - 0 3 C - S P - G B |
start ? |
OK
Press the yellow key to call the autostore function. Use the numeric keys to enter the two-digit programme number (e.g. 01) at which the station is to be stored.
After entry of this number, a red box with the text „Start ?“ is displayed.
MENU return |
TV picture |
Autostore
Prog Logo Channel Signal
ARD  06 Aerial
The TV now scans through the entire reception range.
The first „standard-channel“ station to be found is shown on the screen after all stations have been located. The channel number and an automatic logo are displayed. The auto logo only appears for stations which transmit a VPS signal.
Now proceed as described in Section 3.1 Sorting stations.
Searching for stations |
Ch06 |
6 9 8 - 0 3 D - G B
9
3.1 Sorting stations
In the „Sort“ submenu you can move, exchange, copy, or delete the stationss stored in the programme positions. The „Sort“ submenu is displayed automatically after the autostore function has found all available stations.
This menu can also be called at any time from the station table display for subsequent modification of the station programming.
Press this key on the remote |
|
The screen displays |
control.... |
|
|
|
|
|
|
|
|
MENU return |
TV picture |
? Help |
1. Call the „Sort“ submenu |
|
|
and move the station |
Station table |
|
either automatically after autostore or
|
Prog |
Logo |
Channel |
Signal |
|
▲▼ |
|
|
|
|
0 |
VTR2 |
02 |
Video Rec.2 |
|
1 |
ARD |
06 |
Aerial |
|
2 |
ZDF |
34 |
Aerial |
|
3 |
SAT 1 |
40 |
Aerial |
|
4 |
RTL |
36 |
Aerial |
|
5 |
BR 3 |
59 |
Aerial |
|
6 |
N 3 |
S23 |
Aerial |
|
7 |
MDR 3 |
12 |
Aerial |
G B |
8 |
SWF 3 |
45 |
Aerial |
9 |
MDR 3 |
S05 |
Aerial |
|
E - |
|
sort |
|
|
|
|
|
|
green Pr 1 delete
Explanation
When the „Sort“ submenu is displayed, the function „Move“ is preset.
Use the P+ and P- keys to select the programme position to be modified.
Select one of the functions „move“, „exchange“, „copy“ or „delete“ with the related coloured key.
If you inadvertently delete a programme position, you can restore it by pressing the B key.
2. Exchanging |
programme |
MENU return |
TV picture |
? Help |
|
|
|
||
positions |
|
|
Station table |
|
|
|
|
|
|
yellow |
|
|
Prog |
Logo |
Channel |
Signal |
|
|
|
|
|
|
|
|
|
|
1 |
2 |
3 |
|
0 |
VTR2 |
02 |
Video Rec.2 |
|
|
1 |
ARD |
|
06 |
Aerial |
|||
|
2 |
ZDF |
|
34 |
Aerial |
|||
|
|
|
|
3 |
SAT 1 |
40 |
Aerial |
|
4 |
5 |
6 |
|
4 |
RTL |
|
36 |
Aerial |
|
5 |
BR 3 |
59 |
Aerial |
||||
|
6 |
N 3 |
|
S23 |
Aerial |
|||
7 |
8 |
9 |
|
7 |
MDR 3 |
12 |
Aerial |
|
|
8 |
SWF 3 |
45 |
Aerial |
||||
-G B |
9 |
MDR 3 |
S05 |
Aerial |
||||
|
|
|
F |
sort |
|
|
|
|
|
0 |
|
0 3 |
blue |
move |
|
Pr1 Pr - - |
|
|
|
9 8 - |
yellow |
exchange |
Pr1 Pr - - |
|||
|
|
6 |
white |
copy |
Pr 1 Pr - - |
|
||
|
|
|
|
|||||
|
|
|
|
green |
Pr 1 |
delete |
|
|
When moving, exchanging or copying a programme position, the new programme position must be selected by entering two digits on the numeric keys.
The blinking hyphen on the right of the sub-menu now prompts you for input of a programme position number.
The selected function is executed as soon as you enter the new number.
3. Store the settings
OK
MENU return |
TV picture |
? Help |
After the contents of a programme position have been |
|||
|
|
|
|
|
|
moved, exchanged, copied or deleted, a red store box is |
|
|
Station table |
|
|
|
displayed to ask if you want to store the new settings. |
|
|
|
|
|
|
|
|
Prog |
Logo |
Channel |
Signal |
|
|
|
|
|
▲▼ |
|
|
|
|
|
|
|
|
0 |
VTR2 |
|
02 |
Video Rec.2 |
Press the OK |
key to store the new settings or press |
|
|
1 |
ARD |
|
06 |
Aerial |
|||
|
2 |
ZDF |
|
34 |
Aerial |
the TV |
key to abort the operation. |
|
|
3 |
SAT 1 |
|
40 |
Aerial |
|||
|
4 |
RTL |
|
36 |
Aerial |
|
|
|
|
5 |
BR 3 |
|
59 |
Aerial |
|
|
|
|
6 |
N 3 |
|
S23 |
Aerial |
|
|
|
B |
7 |
MDR 3 |
12 |
Aerial |
|
|
|
|
G |
8 |
SWF 3 |
45 |
Aerial |
|
|
|
|
S P - |
|
|
|
|||||
9 |
MDR 3 |
S05 |
Aerial |
|
|
|
||
F - |
sort |
|
|
|
|
|
|
|
0 3 |
blue |
move |
|
Pr1 Pr - - |
|
|
|
|
9 8 - |
yellow |
exchange |
Pr1 Pr - - |
|
|
|
||
6 |
white |
copy |
Pr 1 |
Pr - - |
store? |
|
|
|
|
|
|
|
|||||
green Pr 1 delete |
OK |
4. Return to TV picture
TV
10
3.2 Fine tuning
The individual channels are automatically tuned to channel centre for station tuning. As a rule, this automatic tuning will be sufficient. Apply manual fine tuning if automatic tuning does not produce satisfactory results.
Select the programme number at which fine tuning is to be completed.
Press this key on the remote |
|
|
The screen displays |
|
|||
control.... |
|
|
|
||||
|
|
|
|
|
|
||
MENU |
return |
|
TV picture |
|
? Help |
||
1. Select the fine tuning |
|
|
|
|
|
|
|
function |
|
|
Station table |
|
|||
|
|
|
|
||||
Prog |
Logo |
Channel |
Signal |
||||
▲▼ |
|
|
|
|
|
||
|
0 |
VTR1 |
00 |
Video Rec.1 |
|||
|
1 |
ARD |
06 |
|
Aerial |
||
|
2 |
ZDF |
34 |
|
Aerial |
||
|
3 |
SAT 1 |
40 |
|
Aerial |
||
|
4 |
blue |
Std channel |
06 |
ARD |
||
yellow |
5 |
||||||
yellow |
Spec. channel |
|
|
||||
6 |
|
|
|||||
|
7 |
|
SAT-TV |
|
|
||
|
8 |
|
SAT-RADIO |
|
|
||
red |
9 |
red |
Fine tuning |
|
|
||
|
|
|
|
||||
|
>> weitere Einstellungen |
|
|||||
|
|
|
Std, Pict., Sound |
|
|||
6 9 8 - 0 3 G - G B |
|
|
|
|
|||
Explanation
The „Fine tuning“ function is only activated when the red bar is displayed.
2. Adjust the fine tuning
- |
+ |
|
blue |
Std channel |
06 ARD |
yellow |
Spec. channel |
|
|
SAT-TV |
|
|
SAT-RADIO |
|
red |
Fine tuning |
|
>> weitere Einstell ngen
store? |
OK |
Adjust fine tuning within the range of -99 to +99 with
the |
- |
+ |
keys. |
|
|
The station table is blanked out for better picture assessment.
3.Store the fine tuning and return to TV picture
Once the station is correctly tuned, press the OK key to store the new setting.
OK
TV
11
3.3 Allocating a station logo
A logical logo consisting of up to 5 characters can be allocated to each station. The station RTL 2, for example, can be allocated the logo RTL 2.
Manual logo allocation is not necessary with most stations. The corresponding station logo appears a few seconds after the picture when a station is selected by direct channel entry. However, an automatic logo only appears for stations which transmit a VPS signal.
Press this key on the remote |
|
The screen displays |
control.... |
|
|
|
|
|
|
|
|
MENU return TV TV picture ? Help
1. Call the logo menu
|
|
|
TV station table |
|
||
|
Prog |
Logo |
Channel |
Signal |
||
|
▲▼ |
|
|
|
|
|
|
0 |
Logo: |
|
E1 FBAS |
||
white |
1 |
|
Antenne |
|||
2 |
|
|
|
|
Antenne |
|
|
3 |
A B C D E F G H I J K L M N O P Q R S T UAntenneV W |
||||
|
4 |
|
|
|
|
Antenne |
|
5 |
XYZ |
|
|
0123456789 |
Antenne!+ - |
blue |
6 |
|
|
P+ |
select |
Antenne |
7 |
|
|
Antenne |
|||
|
- |
+ |
||||
8 |
|
|
Antenne |
|||
|
9 |
|
|
P- |
|
Antenne |
|
|
|
|
next number |
||
|
|
|
|
|
|
|
|
6 9 8 + 0 3 H - G B |
|
|
|
|
|
Explanation
The logo is automatically displayed if the selected programme position already has a logo. The field remains blank if a logo has not yet been allocated.
Any existing logo will be overwritten.
2. Select the first character
|
P+ |
- |
+ |
|
P-
MENU return TV TV picture ? Help
TV station table
Prog Logo Channel Signal
▲▼
0 |
Logo: |
R |
E1 FBAS |
||
1 |
Antenne |
||||
2 |
|
|
|
Antenne |
|
3 |
A B C D E F G H I J K L M N O P Q R S T UAntenneV W |
||||
4 |
|
|
|
Antenne |
|
5 |
XYZ |
|
0123456789 |
Antenne!+ - |
|
6 |
|
P+ |
select |
Antenne |
|
7 |
|
Antenne |
|||
- |
+ |
||||
8 |
|
Antenne |
|||
|
P- |
|
|||
9 |
|
|
Antenne |
||
|
|
next number |
|||
|
|
|
|
||
6 9 8 + 0 3 I - G B |
|
store? |
|||
|
|
OK |
|||
|
|
|
|
||
Select the desired character (in our example the letter R) with the keys - + , P+ , P- .
This will overwrite any existing logo.
3.Move the cursor to the second position and select the second character
blue
|
P+ |
- |
+ |
|
P-
4. Store the setting and return to TV picture
MENU return |
TV TV picture |
? Help |
TV station table
Prog |
Logo |
Channel |
Signal |
||
▲▼ |
|
|
|
|
|
0 |
|
Logo: |
R T |
E1 FBAS |
|
1 |
|
Antenne |
|||
2 |
|
|
|
|
Antenne |
3 |
ABCDEFGHIJKLMNOPQRSTUVWAntenne |
||||
4 |
|
|
|
|
Antenne |
5 |
XYZ |
|
0123456789 |
Antenne!+ - |
|
6 |
|
|
P+ |
select |
Antenne |
7 |
|
|
Antenne |
||
|
- |
+ |
|||
8 |
|
|
Antenne |
||
|
|
P- |
|
||
9 |
|
|
|
Antenne |
|
|
|
|
next number |
||
|
|
|
|
|
|
6 9 8 + 0 3 J - G B
OK |
TV |
TV picture |
The cursor is moved within the logo field with the blue key.
Select the desired character (in our example the letter T) with the keys - + , P+ , P- .
Repeat this procedure to enter the entire logo.
After input of the desired logo, press the OK key to store it.
The programmed logo automatically appears in the station table.
12
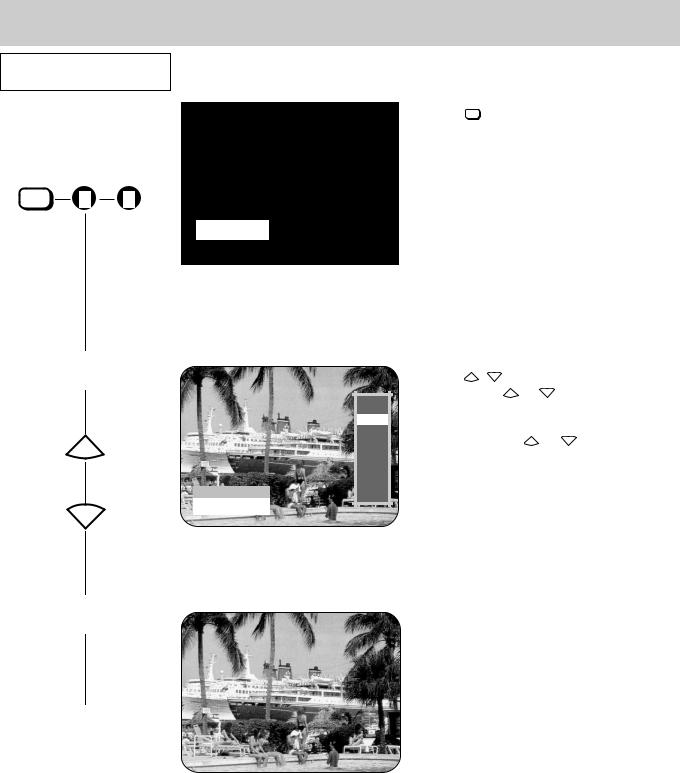
4. Changing individual picture settings
Press this key on the remote |
|
The screen displays |
|
Explanation |
control.... |
|
|
||
|
|
|
|
|
|
|
|
|
|
Luminance |
|
1. Adjusting the luminance |
change: - OK |
40 |
|
|
+ |
Contrast
40 |
change |
- |
OK |
+ |
|
- |
+ |
Chrominance |
|
|
+ 40 |
change |
- OK |
||
|
|
|
|
+ |
Press the  key to display the last adjusted function.
Continue pressing the  key until the picture setting value to be changed is displayed.
Adjust the required value with the |
- |
+ |
keys. |
|
|
2. Adjusting the contrast
- |
+ |
Sharpness
R 02 |
change |
- |
OK |
+ |
|
6 9 4 - 0 0 E - G B
Press the  key a number of times until the contrast field is displayed on the screen.
Adjust the required value with the |
- |
+ |
keys. |
|
|
Chrominance and sharpness are adjusted in the same manner.
4.1 Changing individual sound settings
Press this key on the remote |
|
The screen displays |
|
Explanation |
control.... |
|
|
||
|
|
|
|
|
|
|
|
|
|
Volume |
|
1. Adjusting the volume |
change: - OK |
30 |
|
|
+ |
Treble
- |
+ 25 |
change |
- |
OK |
+ |
|
- |
+ |
Bass |
|
|
|
|
|
|
|
|
- |
+ |
25 |
change - OK |
|
|
|
|
+ |
2. Adjusting the treble setting
|
Balance |
|
|
|
L |
R 00 |
change |
- OK |
+ |
|
- |
+ |
Sound effects |
|
|
||
Spatial sound |
On/Off |
change |
- |
+ |
||
Sound-mode speaker
Mono/Stereo/Chann.1/Chann.2 |
change |
- |
+ |
|
|||
|
|
6 9 5 - D - G B |
|
V o l u m e |
|
3. Sound mute |
- OK |
change |
|
|
+ |
6 9 5 - D X - G B |
|
Press the  key to display the last adjusted function.
Continue pressing the  key until the volume field is displayed on the screen.
Adjust the required value with the |
- |
+ |
keys. |
|
|
Press the  key a number of times until the treble field is displayed on the screen.
Adjust the required value with the |
- |
+ |
keys. |
|
|
Bass, balance, sound effects and speaker soundmode settings are adjusted in the same manner.
Press the  key to mute the sound.
Renewed depression of the  key resets the sound to the previously adjusted volume.
Note: All settings modified in this menu can be stored by calling the „Video standard values“ or „Audio standard values“ menu respectively and pressing the OK key. The stored values can be recalled at any time with the OK key.
13

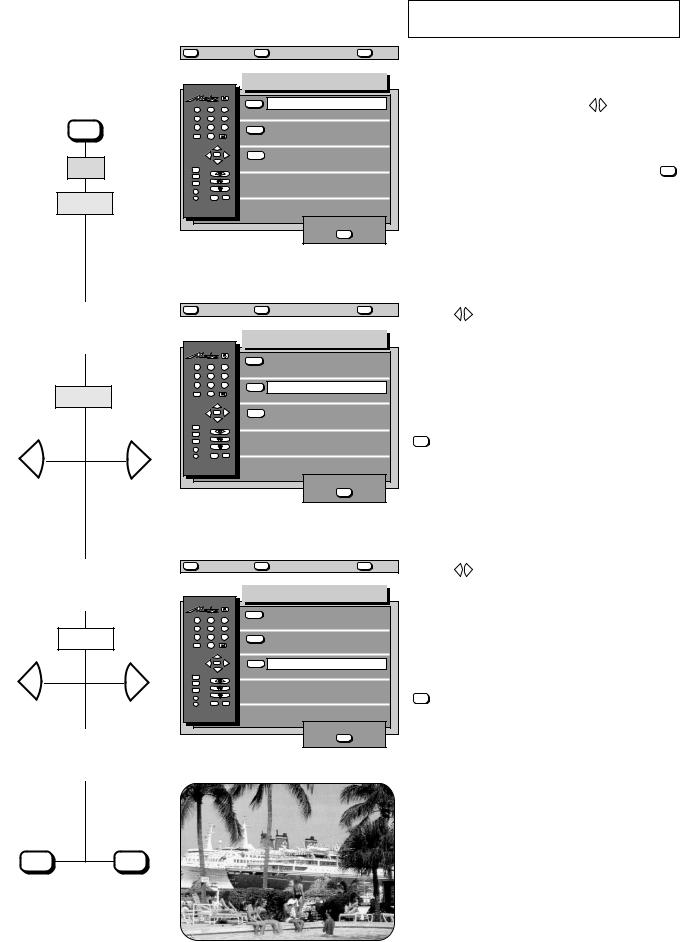
4.2 Adjusting the video and audio standard values
Press this key on the remote
control....
1. Call the TV menu
MENU
2.Example 1: Call the „Video standard values“ submenu. Adjust and store the luminance.
- |
+ |
OK
3.Example 2: Call the „Audio standard values“ submenu. Adjust and store the volume.
- |
+ |
OK
The screen displays |
|
Explanation |
|
|
|
MENU |
return |
TV |
picture |
? |
Help |
||
|
|
|
|
|
TV-menu |
|
|
1 |
2 |
|
3 |
blue |
Video standard values |
|
|
|
|
|
|
|
|||
4 |
5 |
|
6 |
|
|
|
|
7 |
8 |
|
9 |
yellow |
Audio standard values |
|
|
--/- |
0 |
|
|
|
|||
|
|
|
|
|
|
||
|
|
P+ |
|
|
|
|
|
|
- |
OK |
+ |
white |
Station settings |
|
|
|
|
P- |
|
|
|
||
|
|
|
|
|
|
|
|
TV |
|
|
|
|
|
|
|
MENU |
|
|
|
green |
Timer/childlock |
|
|
? |
|
|
|
|
|
||
|
|
|
|
|
|
||
A |
|
|
|
|
|
|
|
B |
|
|
AV |
|
|
|
|
|
REC |
|
red |
Equipm. configuration |
|
|
|
|
|
|
|
|
|
||
6 9 8 - 0 1 - G B |
|
|
|
|
|||
Press any coloured key to step through the submenus. Pressing the blue key selects the „Video standard values“ submenu, pressing the yellow key selects the „Audio standard values“ submenu
MENU |
return |
TV |
picture |
? |
Help |
||
|
|
|
|
Video standard values |
|||
1 |
2 |
|
3 |
blue |
Luminance |
|
|
|
|
|
|
40 |
|||
4 |
5 |
|
6 |
|
|
|
|
|
|
|
|
|
|||
7 |
8 |
|
9 |
yellow |
Contrast |
|
|
--/- |
0 |
|
|
|
|
|
50 |
|
|
|
|
|
|
|
|
|
|
P+ |
|
white |
Chrominance |
|
|
|
- |
OK |
+ |
|
|
||
|
|
P- |
|
|
|
|
36 |
TV |
|
|
|
|
|
|
|
|
|
|
|
|
|
|
|
MENU |
|
|
|
|
Tint |
|
|
? |
|
|
|
- |
+ 00 |
||
A |
|
|
|
|
|||
B |
|
|
AV |
red |
Sharpnes |
|
|
|
REC |
|
|
|
|||
|
|
|
|
|
|
|
02 |
6 9 8 - 0 4 A - G B |
|
|
store? |
|
|||
|
|
|
|
|
|
|
|
Luminance, contrast, chrominance and tint* can be adjusted in the „Video standard values“ submenu.
Select the menu line with the value to be changed by pressing the assigned colour keys.
*(only if a multi-standard upgrademodule has been installed)
The volume, treble, bass and balance settings, as well as the headphones volume, can be adjusted in a similar manner in the „Audio standard values“ submenu.
Adjust the desired value with the |
- |
+ |
keys. |
|
|
MENU |
return |
TV |
picture |
? Help |
||
|
|
|
|
Audio standard values |
||
1 |
2 |
|
3 |
blue |
Volume |
|
|
|
|
48 |
|||
4 |
5 |
|
6 |
|
|
|
|
|
|
|
|||
7 |
8 |
|
9 |
yellow |
Treble |
|
--/- |
0 |
|
|
- |
|
+ 23 |
|
|
|
|
|
||
|
|
P+ |
|
white |
Bass |
|
|
- |
OK |
+ |
|
||
|
|
P- |
|
- |
|
+ 42 |
TV |
|
|
|
|
||
|
|
|
|
|
|
|
MENU |
|
|
|
green |
Balance |
|
? |
|
|
|
|
||
A |
|
|
|
- |
|
+ 00 |
B |
|
|
AV |
red |
Volume headphones |
|
|
REC |
|
|
|||
|
|
|
|
|
|
65 |
6 9 8 - 0 4 B - G B |
|
store ? |
|
|||
|
|
|
|
|
|
|
|
|
|
|
|
OK |
|
If no other video standard values or audio standard values are to be changed, then press the OK key to store the new setting.
The red store box disappears when the OK key is pressed.
4. Return to TV picture
TV
14
5. Equipment configuration |
Assigning the |
function keys |
|
|
|
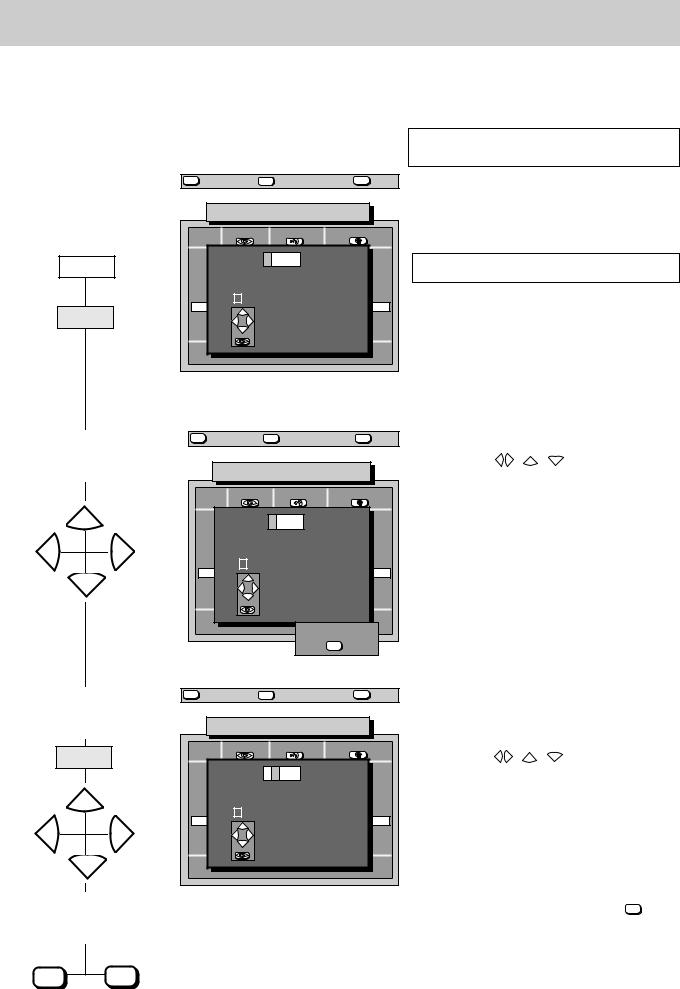
The remote control handset has two factory programmed function keys A and B. Press the ? key in normal television mode to reveal the factory programming. The displayed Operator Help text describes the current programming in the last-but-one paragraph. This programming can be changed according to your requirements in conformity with the displayed selection. This choice is described in the „Glossary“ chapter.
Example of programming function key B:
In TV mode, the B key is to activate the „subtitles“ function; in Megatext mode, you can use it for the „page stop“ function.
Press this key on the remote |
|
The screen displays |
|
Explanation |
control.... |
|
|
||
|
|
|
|
|
|
|
|
|
|
1. Call the „Equipment |
MENU |
return |
TV |
picture |
? |
Help |
||
|
|
|
|
|
|
|
|
|
configuration“ menu |
|
|
|
|
Equipm. configuration |
|
||
|
|
|
|
|
|
|||
|
1 |
2 |
|
3 |
blue |
Function keys |
|
|
|
|
|
|
|
|
|||
|
4 |
5 |
|
6 |
|
|
|
|
MENU |
7 |
8 |
|
9 |
yellow |
Device connection |
|
|
--/- |
0 |
|
|
|
||||
|
|
|
|
|
|
|
||
|
|
|
P+ |
|
|
SAT settings |
|
|
|
|
- |
OK |
+ |
|
|
|
|
red |
|
|
P- |
|
|
|
|
|
MENU |
|
|
|
|
|
|
|
|
|
TV |
|
|
|
|
|
|
|
|
? |
|
|
|
green |
Language: |
English |
|
|
A |
|
|
|
|
|
|
|
|
B |
|
|
AV |
|
|
|
|
|
|
REC |
|
red |
further |
|
|
|
|
|
|
|
|
|
|
||
|
6 9 8 - 0 5 A - G B |
|
|
|
|
|||
2. Call the „Function keys“ |
MENU |
return |
|
TV |
picture |
? |
Help |
||
|
|
|
|
|
|
|
|
|
|
menu |
|
|
|
|
|
Function keys |
Functions |
▲ |
|
|
|
|
|
|
▼ |
||||
|
|
|
|
|
|
|
Muting -12dB |
Television |
|
|
1 |
2 |
|
3 |
A |
TV |
|
|
|
|
|
|
Reveal text |
no function |
|||||
|
4 |
5 |
|
6 |
|
|
|||
|
|
|
|
|
Subtitles |
|
|||
blue |
7 |
8 |
|
9 |
B |
TV |
Pict. format |
|
|
|
Large subt. |
||||||||
--/- |
0 |
|
|
|
Large letters |
||||
|
|
|
P+ |
|
|
|
|
Pict. format |
|
|
|
- |
OK |
+ |
|
|
|
Zoom 2:1 |
|
|
|
|
P- |
|
|
|
|
Sound-effects |
|
|
TV |
|
|
|
|
|
|
||
|
|
|
|
|
|
|
Stereo/ch. 1-2 |
||
|
MENU |
|
|
|
|
|
|
||
|
? |
|
|
|
|
|
|
Muting -12dB |
|
|
A |
|
|
|
|
|
|
|
|
|
B |
|
|
AV |
|
|
|
|
|
|
|
REC |
|
|
|
|
|
|
|
|
6 0 0 - 0 5 M - G B |
|
|
|
|
|
|||
The left-hand side of this menu shows the currently valid programming of the function keys.
The window on the right-hand side indicates the selection that can be programmed.
The individual functions are explained in detail in the „Glossary“ on page 52.
3.Press the function key to be programmed (in this example: B key)
B
MENU |
return |
|
TV |
picture |
? |
Help |
||
|
|
|
|
|
Function keys |
Functions |
▲ |
|
|
|
|
|
|
▼ |
|||
|
|
|
|
|
|
Muting -12dB |
Television |
|
1 |
2 |
|
3 |
A |
TV |
|
|
|
|
|
Reveal text |
no function |
|||||
4 |
5 |
|
6 |
|
|
|||
|
|
|
|
Subtitles |
|
|||
7 |
8 |
|
9 |
B |
TV |
Pict. format |
|
|
|
Large subt. |
|||||||
--/- |
0 |
|
|
|
Large letters |
|||
|
|
|
|
|
|
Pict. format |
||
|
|
P+ |
|
|
|
|
||
|
- |
OK |
+ |
|
|
|
Zoom 2:1 |
|
|
|
P- |
|
|
|
|
Sound-effects |
|
TV |
|
|
|
|
|
|
||
MENU |
|
|
|
|
|
|
Stereo/ch. 1-2 |
|
? |
|
|
|
|
|
|
Muting -12dB |
|
A |
|
|
|
|
|
|
||
|
|
|
|
|
|
VTR operation |
||
B |
REC |
AV |
|
|
|
|||
|
|
|
|
|
|
|
||
6 0 0 - 0 5 N - G B |
|
|
|
|
|
|||
Two functions can be programmed for function key B. The upper line indicates the function programmed for TV mode, the lower line the function programmed for Megatext mode.
Press the TV key to switch between the two lines. Press the B key to display the currently programmed function.
15
|
5. Equipment configuration |
|
Assigning the |
|||
|
|
function keys |
||||
|
|
|
|
|
|
|
|
|
|
|
|
|
|
Press this key on the remote |
|
The screen displays |
|
|
|
Explanation |
control.... |
|
|
|
|||
|
|
|
|
|
|
|
|
|
|
|
|
|
|
4.Select the function for TV mode (in this example „Subtitles“)
P+ P-
MENU |
return |
|
TV |
picture |
? |
Help |
||
|
|
|
|
|
Function keys |
Functions |
▲ |
|
|
|
|
|
|
▼ |
|||
|
|
|
|
|
TV |
Muting -12dB |
Television |
|
1 |
2 |
|
3 |
A |
|
|
||
|
|
Reveal text |
no function |
|
||||
4 |
5 |
|
6 |
|
|
|
||
7 |
8 |
|
9 |
B |
TV |
Subtitles |
Subtitles |
|
--/- |
0 |
|
|
|
Large letters |
Large subt. |
|
|
|
|
P+ |
|
|
|
|
Logo |
|
|
- |
OK |
+ |
|
|
|
Pict. format |
|
|
|
P- |
|
|
|
|
Zoom 2:1 |
|
TV |
|
|
|
|
|
|
|
|
MENU |
|
|
|
|
|
|
Sound-effects |
|
? |
|
|
|
|
|
|
Stereo/ch. 1-2 |
|
A |
|
|
|
|
|
|
||
B |
|
|
AV |
|
|
|
Muting -12dB |
|
|
REC |
|
|
|
|
|
|
|
6 9 6 - 0 5 O - G B |
|
|
store ? |
|
||||
|
|
|
|
|
||||
|
|
|
|
|
|
OK |
|
|
Select the function in the right-hand field with the P+ or P- key. The text on the left-hand side changes as soon as the cursor (a white bar) is moved.
If the function „Subtitles“ has been programmed for key B, the subtitles will be displayed when the TV set is switched, if subtitles are actually transmitted with the programme.
5.Switch to Megatext mode and program the function keys
TV
P+ P-
MENU |
return |
|
TV |
picture |
? |
Help |
||
|
|
|
|
|
Function keys |
Functions |
▲ |
|
|
|
|
|
|
▼ |
|||
|
|
|
|
|
|
Muting -12dB |
Videotext |
|
1 |
2 |
|
3 |
A |
TV |
no function |
||
|
|
Reveal text |
||||||
4 |
5 |
|
6 |
|
|
Reveal text |
||
7 |
8 |
|
9 |
B |
TV |
Subtit. |
Large letters |
|
--/- |
0 |
|
|
|
Stop page |
Stop page |
|
|
|
|
|
|
|
|
|
|
|
|
|
P+ |
|
|
|
|
|
|
|
- |
OK |
+ |
|
|
|
|
|
|
|
P- |
|
|
|
|
|
|
TV |
|
|
|
|
|
|
|
|
MENU |
|
|
|
|
|
|
|
|
? |
|
|
|
|
|
|
|
|
A |
|
|
|
|
|
|
|
|
B |
|
|
AV |
|
|
|
|
|
|
REC |
|
|
|
|
|
|
|
6 9 8 - 0 5 P - G B |
|
|
store ? |
|
||||
|
|
|
|
|
||||
|
|
|
|
|
|
OK |
|
|
The cursor (a white bar) is now located in the second line, on the currently programmed function.
The desired Megatext functions can now be programmed in the sequence described in steps 3 and 4, above.
6.Store the assignments and return to the „Equipment Configuration“ menu
OK
MENU
MENU |
return |
TV |
picture |
? |
Help |
||
|
|
|
|
Equipm. configuration |
|
||
1 |
2 |
|
3 |
blue |
Function keys |
|
|
|
|
|
|
|
|||
4 |
5 |
|
6 |
|
|
|
|
7 |
8 |
|
9 |
yellow |
Device connection |
|
|
|
0 |
|
|
|
|||
--/- |
|
|
|
|
|
|
|
|
|
P+ |
|
|
SAT settings |
|
|
|
- |
OK |
+ |
|
|
|
|
|
|
P- |
|
|
|
|
|
TV |
|
|
|
|
|
|
|
MENU |
|
|
|
green |
Language: |
English |
|
? |
|
|
|
|
|||
A |
|
|
|
|
|
|
|
B |
|
|
AV |
|
|
|
|
|
REC |
|
red |
further |
|
|
|
|
|
|
|
|
|
||
6 9 8 - 0 5 A - G B |
|
|
|
|
|||
7. Return to TV picture
TV
16
5. Equipment configuration |
Settings for |
programme change |
|
|
|
Press this key on the remote |
|
The screen displays |
control.... |
|
|
|
|
|
|
|
|
MENU return TV picture ? Help
1. Call the settings for |
|
|
|
|
|
|
|
|
programme change |
|
|
|
|
Prog. change settings |
|||
|
|
1 |
2 |
|
3 |
blue |
No sound on PC : |
Yes |
|
|
|
|
|
|
|||
|
MENU |
4 |
5 |
|
6 |
yellow |
Spat. sound on PC : |
Off |
|
7 |
8 |
|
9 |
||||
|
|
--/- |
0 |
|
|
|
|
|
|
|
|
- |
P+ |
|
white |
Stereo wide on PC : |
Off |
2x |
|
|
OK |
+ |
||||
red |
|
|
P- |
|
|
|
|
|
MENU |
|
|
|
|
|
|
||
|
|
TV |
|
|
|
|
|
|
|
|
? |
|
|
|
|
|
|
2x |
blue |
A |
|
|
|
|
|
|
B |
|
|
AV |
|
|
|
||
|
|
|
REC |
|
|
|
|
|
|
|
6 9 8 - 0 5 C - G B |
|
store ? |
|
|||
|
|
|
OK |
|
||||
|
|
|
|
|
|
|
|
|
Explanation
In this menu you can define the sound functions for a programme change.
In the first line of the menu, use the |
- |
+ |
keys to select |
|
|
whether the mute function is to be retained („Yes“) or to be cancelled („No“) when you change programmes.
The new settings can be stored by pressing the OK key.
2.Set spatial sound when changing programmes
|
yellow |
- |
+ |
MENU return |
TV picture |
? Help |
|
|
|
|
Prog. change settings |
||
1 |
2 |
|
3 |
blue |
No sound on PC : |
Yes |
|
|
|
|
|||
4 |
5 |
|
6 |
|
|
|
7 |
8 |
|
9 |
yellow |
Spat. sound on PC : |
Off |
|
0 |
|
|
|||
--/- |
|
|
|
|
|
|
|
- |
P+ |
|
white |
Stereo wide on PC : |
Off |
|
OK |
+ |
||||
|
|
P- |
|
|
|
|
TV |
|
|
|
|
|
|
MENU |
|
|
|
|
|
|
? |
|
|
|
|
|
|
A |
|
|
|
|
|
|
B |
|
|
AV |
|
|
|
|
REC |
|
|
|
|
|
6 9 8 - 0 5 D - G B |
|
store ? |
|
|||
|
OK |
|
||||
|
|
|
|
|
|
|
Use the |
- |
+ |
keys in this menu line to define whether |
|
|
the spatial sound is to be switched on or off when the programme is changed to a monaural station.
When in mono mode, you can change over to spatial sound by pressing a self-defined function key (sound effects).
If no other values are to be changed, then press the OK key to store the new setting.
The term „spatial sound“ is explained in the section „Glossary“ on page 52.
3.Select stereo wide when changing program
|
white |
- |
+ |
4. Store the settings and return to TV picture
MENU return |
TV picture |
? Help |
|
|
|
|
Prog. change settings |
||
1 |
2 |
|
3 |
blue |
No sound on PC : |
Yes |
|
|
|
|
|||
4 |
5 |
|
6 |
|
|
|
7 |
8 |
|
9 |
yellow |
Spat. sound on PC : |
Off |
|
0 |
|
|
|||
--/- |
|
|
|
|
|
|
|
- |
P+ |
|
white |
Stereo wide on PC : |
Off |
|
OK |
+ |
||||
|
|
P- |
|
|
|
|
TV |
|
|
|
|
|
|
MENU |
|
|
|
|
|
|
? |
|
|
|
|
|
|
A |
|
|
|
|
|
|
B |
REC |
AV |
|
|
|
|
|
|
|
|
|
||
6 9 8 - 0 5 E - G B |
|
store ? |
|
|||
|
OK |
|
||||
|
|
|
|
|
|
|
Use the |
- |
+ |
keys in this menu line to select whether |
|
|
stereo wide is to be switched on or off when the programme is changed to a stereo station.
When in stereo mode you can change over to stereo wide by pressing a self-defined function key (sound effects).
If no other values are to be changed, then press the OK key to store the new setting.
The term „stereo wide“ is explained in the Section „Glossary“ on page 52.
OK TV
17
 Loading...