


OWNER'S MANUAL
MICROWAVE OVEN
PLEASE READ THIS OWNER’S MANUAL THOROUGHLY BEFORE OPERATING.
MH-6380SL
DEUTSCH FRANÇAIS NEDERLANDS ENGLISH
MFL41121907 |
www.lg.com |

Precautions
Precautions to avoid possible exposure to excessive microwave energy.
You cannot operate your oven with the door open due to the safety interlocks built into the door mechanism. These safety interlocks automatically switch off any cooking activity when the door is opened; which in the case of a microwave oven could result in harmful exposure to microwave energy.
It is important not to tamper with the safety interlocks.
Do not place any object between the oven front face and the door or allow food or cleaner residue to accumulate on sealing surfaces.
Do not operate your oven if it is damaged. It is particularly important that the oven door closes properly and that there is no damage to the: (1) door(bent),
(2) hinges and latches (broken or loosened), (3) door seals and sealing surfaces.
Your oven should not be adjusted or repaired by anyone except qualified service personnel.
Warning
Please ensure cooking times are correctly set as over cooking may result in the FOOD catching fire and subsequent damage to your oven.
When heating liquids, e.g. soups, sauces and beverages in your microwave oven, delayed eruptive boiling can occur without evidence of bubbling. This could result in a sudden boil over of the hot liquid. To prevent this possibility the following steps should be taken:
1Avoid using straight sided containers with narrow necks.
2Do not overheat.
3Stir the liquid before placing the container in the oven and again halfway through the heating time.
4After heating, allow to stand in the oven for a short time, stir or shake them(especially the contents of feeding bottles and baby food jars) again carefully and check the temperature of them before consumption to avoid burns (especially, contents of feeding bottles and baby food jars).
Be careful when handling the container.
Warning
Always allow food to stand after being cooked by microwaves and check the temperature of them before consumption. Especially contents of feeding bottles and baby food jars.
3

Contents
How the Microwave Oven Works
Microwaves are a form of energy similar to radio and television waves and ordinary daylight. Normally, microwaves spread outwards as they travel through the atmosphere and disappear without effect. Microwave ovens, however, have a magnetron which is designed to make use of the energy in microwaves. Electricity, supplied to the magnetron tube, is used to created microwave energy.
These microwaves enter the cooking area through openings inside the oven. A turntable or tray is located at the bottom of the oven. Microwaves cannot pass through metal walls of the oven, but they can penetrate such materials as glass, porcelain and paper, the materials out of which microwave-safe cooking dishes are constructed.
Microwaves do not heat cookware, though cooking vessels will eventually get hot from the heat generated by the food.
A very safe appliance
Your microwave oven is one of the safest of all home appliances. When the door is opened, the oven automatically stops producing microwaves. Microwave energy is converted completely to heat when it enters food, leaving no “left over” energy to harm you when you eat your food.
Precautions |
|
|
|
|
|
|
|
|
|
|
|
|
|
|
|
|
|
|
|
|
|
|
|
3 |
||||||
|
|
|
|
|
|
|
|
|
|
|
|
|
|
|
|
|
|
|
|
|
|
|
||||||||
Contents |
|
|
|
|
|
|
|
|
|
|
|
|
|
|
|
|
|
|
|
|
|
|
|
|
|
|
4 |
|||
|
|
|
|
|
|
|
|
|
|
|
|
|
|
|
|
|
|
|
|
|
|
|
|
|
|
|||||
Unpacking & Installing |
|
|
5~ 6 |
|||||||||||||||||||||||||||
Setting the Clock |
|
|
|
7 |
||||||||||||||||||||||||||
|
|
|
||||||||||||||||||||||||||||
Child Lock |
|
|
|
|
|
|
|
|
|
|
|
|
|
|
|
|
|
|
|
|
|
|
|
8 |
||||||
|
|
|
|
|
|
|
|
|
|
|
|
|
|
|
|
|
|
|
|
|
|
|
||||||||
Micro Power Cooking |
9 |
|||||||||||||||||||||||||||||
Micro Power Level |
|
|
|
|
|
|
|
|
|
|
|
|
|
|
|
|
|
10 |
||||||||||||
|
|
|
|
|
||||||||||||||||||||||||||
Two Stage Cooking |
|
|
|
|
|
|
|
|
|
|
|
|
|
|
11 |
|||||||||||||||
|
|
|
|
|
|
|
|
|
|
|
|
|
|
|||||||||||||||||
Quick Start |
|
|
|
|
|
|
|
|
|
12 |
||||||||||||||||||||
|
|
|
|
|
|
|
|
|
||||||||||||||||||||||
Grill Cooking |
|
|
|
|
|
|
|
|
13 |
|||||||||||||||||||||
|
|
|
|
|
|
|
|
|||||||||||||||||||||||
Combinaion Cooking |
|
|
|
|
|
|
|
|
|
|
|
|
14 |
|||||||||||||||||
|
|
|
|
|
|
|
|
|
|
|
|
|||||||||||||||||||
Auto Cook |
|
|
|
|
|
|
|
|
|
|
|
|
|
|
|
|
|
|
|
|
|
15 ~ 16 |
||||||||
|
|
|
|
|
|
|
|
|
|
|
|
|
|
|
|
|
|
|
|
|
||||||||||
Auto Defrost |
|
|
|
|
|
|
|
|
|
|
|
|
|
|
|
|
|
|
17 ~ 18 |
|||||||||||
|
|
|
|
|
|
|
|
|
|
|
|
|
|
|
|
|
|
|||||||||||||
Quick Defrost |
|
|
|
|
|
|
|
|
|
|
|
|
|
|
|
|
19 ~ 20 |
|||||||||||||
|
|
|
|
|
|
|
|
|
|
|
|
|
|
|
|
|||||||||||||||
Crispy Reheat |
|
|
21 ~ 22 |
|||||||||||||||||||||||||||
|
|
|||||||||||||||||||||||||||||
Defrost & Grill |
|
|
23 ~ 24 |
|||||||||||||||||||||||||||
|
|
|||||||||||||||||||||||||||||
Taste Saver |
|
|
|
|
|
|
|
|
|
|
|
|
|
|
|
|
|
25 |
||||||||||||
|
|
|
|
|
|
|
|
|
|
|
|
|
|
|
|
|
||||||||||||||
Heating or Reheating Guide |
|
|
|
|
|
|
26 |
|||||||||||||||||||||||
|
|
|
|
|
|
|||||||||||||||||||||||||
Fresh Vegetable Guide |
|
|
27 |
|||||||||||||||||||||||||||
|
||||||||||||||||||||||||||||||
Grill Cooking Guide |
|
|
|
|
|
28 |
||||||||||||||||||||||||
|
|
|
|
|||||||||||||||||||||||||||
Important safety instructions |
|
|
|
29 ~ 30 |
||||||||||||||||||||||||||
|
||||||||||||||||||||||||||||||
Microwave - safe Utensils |
|
|
|
|
|
|
|
31 |
||||||||||||||||||||||
|
|
|
|
|
|
|
||||||||||||||||||||||||
Food characteristics & Microwave cooking |
|
|
|
|
|
32 ~ 33 |
||||||||||||||||||||||||
|
|
|
|
|
||||||||||||||||||||||||||
Questions & Answers |
|
|
|
|
|
|
|
|
34 |
|||||||||||||||||||||
|
|
|
|
|
|
|
|
|||||||||||||||||||||||
Plug Wiring Information/Technical Specifications |
|
|
|
|
35 |
|||||||||||||||||||||||||
|
|
|
|
|||||||||||||||||||||||||||
4

By following the basic steps on these two pages you will be able to quickly check that your oven is operating correctly. Please pay particular attention to the guidance on where to install your oven. When unpacking your oven make sure you remove all accessories and packing. Check to make sure that your oven has not been damaged during delivery.
Unpacking &
Installing
Unpack your oven and place it on a flat level surface.
HIGH RACK |
LOW RACK |
GLASS TRAY |
|
Place the oven in the level location of your choice with more than 85cm height but make sure there is at least
30cm of space on the top and 10cm at the rear for proper ventilation. The front of the oven should be at least 8cm from the edge of the surface to prevent tipping.
An exhaust outlet is located on top or side of the oven. Blocking the outlet can damage the oven.
THIS OVEN SHOULD NOT BE USED FOR COMMERCIAL CATERING PURPOSES
ROTATING RING
5
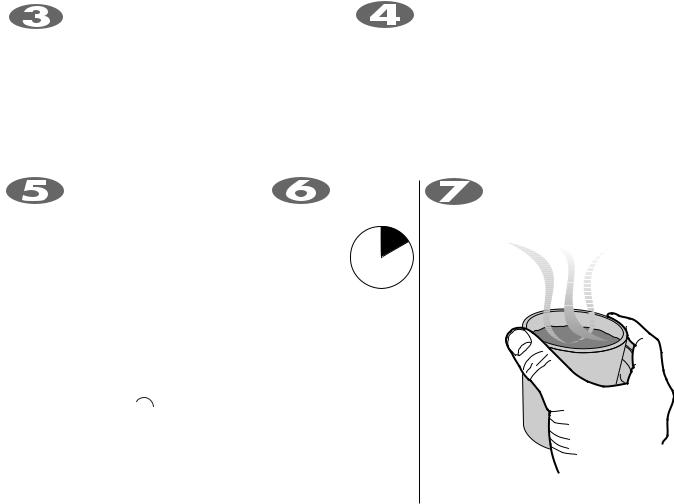
Plug your oven into a standard household socket. Make sure your oven is the only appliance
connected to the socket. If your oven does not operate properly, unplug it from the electrical socket and then plug it back in.
Open your oven door by pulling the DOOR HANDLE. Place the ROLLER REST inside the oven and place the
GLASS TRAY on top.
Fill a microwave safe container with |
|
Press the START |
300 ml (1/2 pint) of water. Place on |
|
button once |
|
||
the GLASS TRAY and close the oven door. If you |
to set 30 seconds |
|
have any doubts about what type of container to |
of cooking |
30 |
use please refer to page 31. |
time. |
Seconds |
|
|
|
The DISPLAY will count down from 30 seconds When it reaches 0, BEEP sounds. Open the
oven door and test the temperature of the water. If your oven is operating the water should be warm. Be careful
when removing the container it may be hot.
YOUR OVEN IS NOW INSTALLED
6

You can set either 12 hour clock or 24 hour clock.
In the following example I will show you how to set the time for 14:35 when using the 24 clock. Make sure that you have removed all packaging from your oven.
Setting the
Clock
When your oven isplugged in for the first time or when power resumesafter a power cut, a ‘24H’ will be shown in the display; you can reset theclock.
If theclock (or display) showsany strange looking symbols, unplug your oven from the electrical socket and plug it back in and reset theclock.
Make sure that you have correctly installed your oven asdescribed earlier in thisbook.
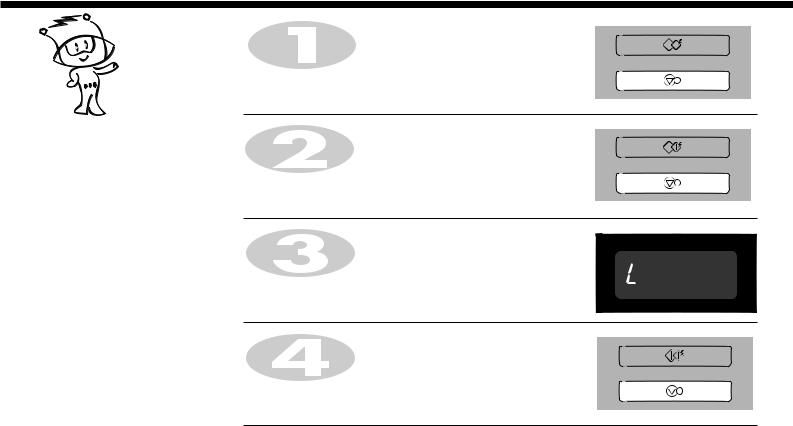
Plug in your oven for the first time. "24H" appears on the display.
(If you want to use different option,Press taste saver . If you want to change different option after setting clock, you have to unplug and plug it back in.)
Turn DIAL until display shows “14: ”.
Press START for hour confirmation.
Turn DIAL until display shows “14:35”.
Press START .
The clock starts counting.
7
Child
Lock
Press STOP/CLEAR.
Your oven has a safety feature that prevents accidental running of the oven. Once the child lock is set, you will be unable to use any functions and no cooking can take place.
However your child can still open the oven door.
Press and hold STOP/CLEAR until “L” appears on the display and BEEP sounds.
The CHILD LOCK is now set.
The time will disappear on the display if you have set the clock.
“L” remains on the display to let you know that CHILD LOCK is set.
To cancel CHILD LOCK press and hold STOP/CLEAR until “L” disappears. You will hear BEEP when it’s released.
8
In the following example I will show you how to cook some food on 80% power for 5 minutes and 30 seconds.
Micro Power
Cooking
Your oven has five microwave Power settings.
Make sure that you have correctly installed your oven as described earlier in this book.
Press STOP/CLEAR.
Press MICRO twice to select 640 power. “640” appears on the display.
POWER |
% |
Power Output |
HIGH |
100% |
800W |
|
MAX |
|||
|
|
||
MEDIUM |
80% |
640W |
|
HIGH |
|||
|
|
||
MEDIUM |
60% |
480W |
|
|
|
|
|
DEFROST |
40% |
320W |
|
MEDIUM LOW |
|||
|
|
||
|
|
|
|
LOW |
20% |
160W |
Turn DIAL until display shows “5:30”.
Press START.
9

Micro Power
Level
Your microwave oven is equipped with 5 power levels to give you maximum flexibility and control over cooking. The table below shows the examples of food and their recommended cooking power levels for use with this microwave oven.
POWER LEVEL |
USE |
POWER LEVEL |
POW ER OUTPUT |
|
(%) |
||||
|
|
|
||
|
|
|
|
|
HIGH |
* Boil Water |
100% |
800W |
|
|
* Brown minced beef |
|
|
|
|
* Cook poultry pieces, fish, vegetables |
|
|
|
|
* Cook tender cuts of meat |
|
|
|
|
|
|
|
|
MEDIUM HIGH |
* All reheating |
80% |
640W |
|
|
* Roast meat and poultry |
|
|
|
|
* Cook mushrooms and shellfish |
|
|
|
|
* Cook foods containing cheese and eggs |
|
|
|
|
|
|
|
|
MEDIUM |
* Bake cakes and scones |
60% |
480W |
|
|
* Prepare eggs |
|
|
|
|
* Cook custard |
|
|
|
|
* Prepare rice, soup |
|
|
|
|
|
|
|
|
DEFROST/ |
* All thawing |
40% |
320W |
|
MEDIUM LOW |
* Melt butter and chocolate |
|
|
|
|
* Cook less tender cuts of meat |
|
|
|
|
|
|
|
|
LOW |
* Soften butter & cheese |
20% |
160W |
|
|
* Soften ice cream |
|
|
|
|
* Raise yeast dough |
|
|
|
|
|
|
|
10
In the following example I will show you how to cook some food in two stages. The first stages will cook your food for 11 minutes on HIGH; the second will cook for 35 minutes on 320.
Two stage
Cooking
Press STOP/CLEAR.
During two stage cooking the oven door can be opened and food checked. Close the oven door and press START and the cooking stage will continue.
At the end of stage1, BEEP sounds and stage 2 commences.
Should you wish to clear the programme press STOP/CLEAR twice.
Set the power and the cooking time for stage1.
Press MICRO once to select HIGH power.
Turn DIAL until display shows “11:00”.
Set the power and the cooking time for stage2.
Press MICRO four times to select 320 power.
Turn DIAL until display shows “35:00”.
Press START.
11
Quick
Start
In the following example I will show you how to set 2 minutes of cooking on high power.
Press STOP/CLEAR .
The QUICK START feature allows you to set 30 seconds intervals of HIGH power cooking with a touch of the START button.
Press START four times to select 2 minutes on HIGH power. Your oven will start before you have finished the fourth press.
During QUICK START cooking, you can extend the cooking time by repeatedly pressing the START button.
12
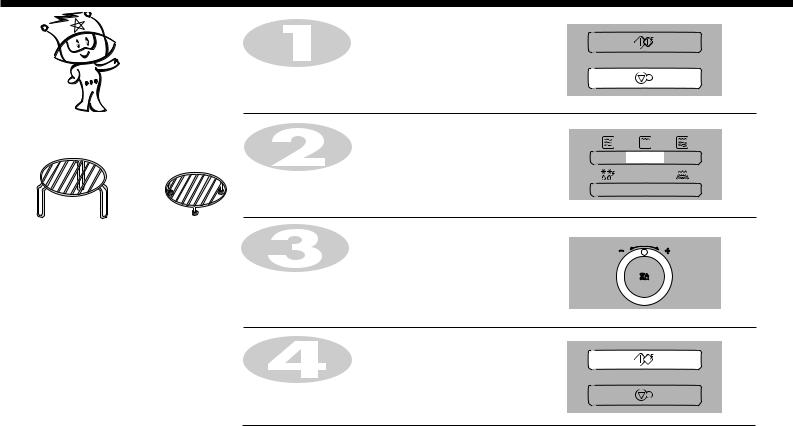
In the following example I will show you how to use the grill to cook some food for 12 minutes and 30 seconds.
Grill
Cooking
Press STOP/CLEAR.
This feature will allow you to brown and |
Press GRILL. |
crisp food quickly. |
|
Set the cooking time.
Turn DIAL until display shows “12:30”.
Press START.
13

Combination
Cooking
In the following example I will show you how to programme your oven with combi mode Co-3 for a cooking time of 25 minutes.
Your oven has a combination cooking feature which allows you to cook food with heater and microwave at the same time or alternately. This generally means it takes less time to cook your food.
The sheath heater grills the surface of the food while microwave heats inside. Moreover, preheating your oven is not necessary.
Press STOP/CLEAR .
Press Combi three times. “Co-3” appears on the display.
Set the cooking time.
Turn DIAL until display shows “25:00”.
Press START.
Be careful when removing your food because the container will be hot!
Combination Cooking Mode
|
CATEGORY |
MICRO POWER (%) |
HEATER POWER (%) |
|
|
Co-1 |
20 |
80 |
|
|
Co-2 |
40 |
60 |
|
|
Co-3 |
60 |
40 |
|
|
|
|
|
|
14
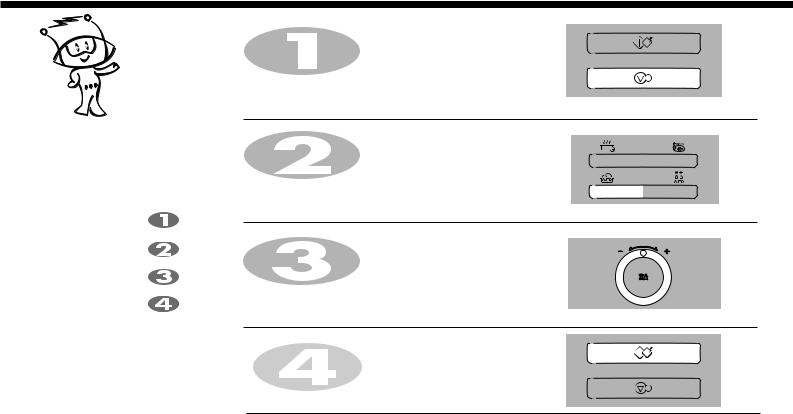
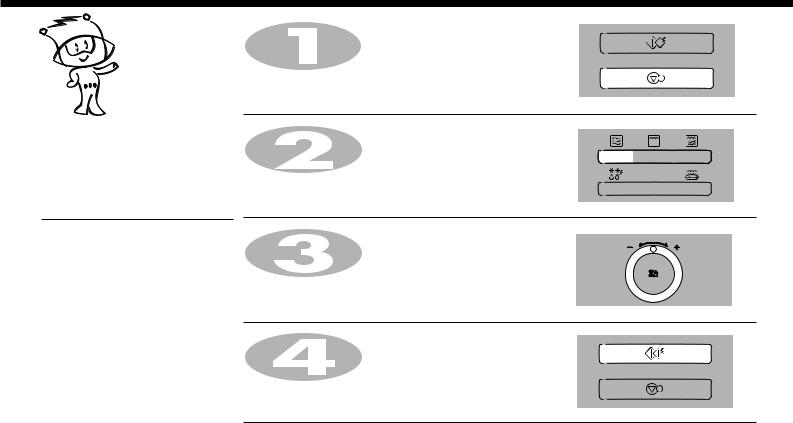
In the following example I will show you how to cook 0.6kg of fresh vegetable.
Press STOP/CLEAR .
Auto
Cook
AUTO COOK allows you to cook most of your favorite food easily by selecting the food type and entering the weight of the food.
Category |
|
Press |
||
AUTO COOK |
||||
|
|
|
|
|
Jacket potato |
|
time |
||
|
|
|
||
|
|
|
|
|
Fresh vegetable |
|
times |
||
|
|
|
|
|
Frozen vegetable |
times |
|||
|
|
|
|
|
Rice |
|
times |
||
|
|
|
|
|
Press AUTO COOK twice to select Fresh vegetable.
Turn DIAL until display shows “0.6”.
Press START.
15

|
FOOD CATEGORY |
FOOD TEMP. |
UTENSILS |
WEIGHT LIMIT |
|
|
|
INSTRUCTIONS |
|
|||
|
|
|
|
|
|
|
|
|
|
|||
|
1. Jacket patato |
Room |
On Glass tray |
0.2 kg ~ 1.0 kg |
Choose medium sized potatoes 170-200g . |
|
|
|
||||
|
|
|
|
|
Wash and dry potatoes. Pierce the potatoes several times with fork. Place |
|
||||||
|
|
|
|
|
the potatoes on the glass try. Adjust weight and press start. After cooking, |
|
||||||
|
|
|
|
|
remove the potatoes from the oven. Let stand covered with foil for 5 min- |
|
||||||
|
|
|
|
|
utes. |
|
|
|
|
|
|
|
|
|
|
|
|
|
|
|
|
||||
|
2. Fresh vegetable |
Room |
Microwave- |
0.2 kg ~ 0.8 kg |
Place vegetables in a microwave-safe bowl. Add water. |
|
||||||
|
|
|
safe bowl |
|
Cover with wrap. After cooking, stir and allow to stand for 2 minutes. |
|
||||||
|
|
|
|
|
Add amount of water according to the quantity. |
|
|
|
||||
|
|
|
|
|
** 0.2kg - 0.4kg : 2 Tablespoon |
|
|
|
|
|||
|
|
|
|
|
** 0.5kg - 0.8kg : 4 Tablespoon |
|
|
|
|
|||
|
|
|
|
|
|
|
|
|
||||
|
3. Frozen |
Frozen |
Microwave- |
0.2 kg ~ 0.8 kg |
Place vegetables in a microwave-safe bowl. Add water. |
|
||||||
|
Cover with wrap. After cooking, stir and allow to stand for 2 minutes. |
|
||||||||||
|
vegetable |
|
safe bowl |
|
|
|||||||
|
|
|
Add amount of water according to the quantity. |
|
|
|
||||||
|
|
|
|
|
|
|
|
|||||
|
|
|
|
|
** 0.2kg - 0.4kg : 2 Tablespoon |
|
|
|
|
|||
|
|
|
|
|
** 0.5kg - 0.8kg : 4 Tablespoon |
|
|
|
|
|||
|
|
|
|
|
|
|
|
|
|
|
|
|
|
4. Rice |
Room |
Microwave- |
0.1 kg ~ 0.3 kg |
Wash rice. Darin water. |
|
|
|
|
|
||
|
|
|
safe bowl |
|
Plase rice & boiling water in a deep and large bowl. |
|
||||||
|
|
|
|
|
|
|
|
|
|
|
|
|
|
|
|
|
|
|
Weight |
100g |
200g |
300g |
Cover |
|
|
|
|
|
|
|
|
|
|
|
|
|
|
|
|
|
|
|
|
|
Boiling water |
200ml |
400ml |
600ml |
Yes/Vent corner |
|
|
|
|
|
|
|
|
|
|
|
||||
|
|
|
|
|
** Rice -- After cooking, stand covered for 5 minutes or until water is |
|
||||||
|
|
|
|
|
absorbed. |
|
|
|
|
|
|
|
|
|
|
|
|
|
|
|
|
|
|
|
|
16
The temperature and density of food varies, I would recommend that the food is checked before cooking commences. Pay particular attention to large joints of meat and chicken, some foods should not be completely thawed before cooking. The BREAD programme is suitable for defrosting small items such as rolls or a small loaf. These will require a standing time to allow the centre to thaw. In the following example I will show you how to defrost 1.4 Kg of frozen poultry.
Auto
Defrost
Your oven has four microwave defrost settings:- MEAT, POULTRY, FISH and
BREAD; each defrost category has different power settings. Repeated presses of the AUTO DEFROST button will select a different setting.
Category Press
DEFROST
Press STOP/CLEAR.
Weight the food that you are about to defrost. Be certain to remove any metallic ties or wraps; then place the food in your oven and close the oven door.
Press AUTO DEFROST twice to select the POULTRY defrosting programme.
Enter the weight of the frozen food that you are about to defrost.
Turn DIAL until display shows “1.4”.
MEAT |
time |
||
|
|
|
|
POULTRY |
times |
||
|
|
|
|
FISH |
times |
||
|
|
|
|
BREAD |
times |
||
Press START.
During defrosting your oven will “BEEP”, at which point open the oven door, turn food over and separate to ensure even thawing. Remove any portions that have thawed or shield them to help slow down thawing. After checking close the oven door and press START to resume defrosting.
Your oven will not stop defrosting (even when the beep sounded) unless the door is opened.
17

AUTO W EIGHT DEFROST GUIDE
*Food to be defrosted should be in a suitable microwave proof container and place uncovered on the glass turntable.
*If necessary, shield small areas of meat or poultry with flat pieces of aluminum foil. This will prevent thin areas becoming warm during defrosting. Ensure the
foil does not touch the oven walls.
* Separate items like minced meat, chops, sausages and bacon as soon as possible.
W hen BEEP, at this piont remove the food fromthe microwave oven,turn the food over and return to the microwave oven. Press start to continue. At the end of the program, remove the food from the microwave oven, cover with foil and allow to stand until completely thawed.
To thaw completely, for example joints of meat and whole chickens should STAN D for a minimum of 1 hour before cooking.
Category |
Weight Limit |
Utensil |
Food |
|
|
|
|
Meat |
0.1 ~ 4.0 kg |
Microwave ware |
Meat |
Poultry |
|
(Flat plate) |
Minced beef, Fillet steak, Cubes for stew, Sirloin steak, Pot roast, Rump roast, Beef burger |
|
Pork chops, Lamp chops, Rolled roast, Sausage, Cutlets(.2cm) |
||
Fish |
|
|
|
|
|
Turn food over at beep. |
|
|
|
|
|
|
|
|
After defrosting, let stand for 5-15 minutes. |
|
|
|
Poultry |
|
|
|
Whole chicken, Legs, Breasts, Turkey breasts(under 2.0kg) |
|
|
|
Turn food over at beep. |
|
|
|
After defrosting, let stand for 20-30 minutes. |
|
|
|
Fish |
|
|
|
Fillets, Steaks, Whole fish, Sea foods |
|
|
|
Turn food over at beep. |
|
|
|
After defrosting, let stand for 10-20 minutes. |
|
|
|
|
Bread |
0.1 ~ 0.5 kg |
Paper towel |
Sliced bread, Buns, Baguette, etc. |
|
|
or flat plate |
Separate slices and place between paper towel or flat plate. |
|
|
|
Turn food over at beep. |
|
|
|
After defrosting, let stand for 1-2 minutes. |
|
|
|
|
18
Use this function to thaw only 0.5kg of Minced meat very quickly.
This will require a standing time to allow the center to thaw. In the following example will show you how to defrost 0.5kg of frozen minced meat.
Quick
Defrost
Your oven has a microwave quick defrost setting (MEAT).
Press STOP/CLEAR.
Weight the food that you are about to defrost. Be certain to remove any metallic ties or wraps; then place the food in your oven and close the oven door.
Press QUICK DEFROST.
The oven will start automatically.
During defrosting your oven will “BEEP”, at which point open the oven door, turn food over and separate to ensure even thawing. Remove any portions that have thawed or shield them to help slow down thawing. After checking close the oven door and press START to resume defrosting.
Your oven will not stop defrosting (even when the beep sounded) unless the door is opened.
19

AUTO W EIGHT DEFROST GUIDE
Use this function to defrost quickly for minced meat.
Remove the meat completely from it's wrapping. Place the mince onto a microwave-safe plate. When BEEP, at this point remove the mince from the microwave oven, turn the mince over and return to the microwave oven . Press start to continue. At the end of the program remove the mince from the microwave oven , cover with foil and allow to stand 5-15 minutes or until completely thawed.
CATEGORY |
WEIGHT |
UTENSIL |
INSTRUCTIONS |
|
|
|
|
Minced meat |
0.5kg |
Microwave ware |
Minced meat |
|
|||
|
|
(Flat plate) |
Turn food over at beep |
|
|
|
|
|
|
|
After defrosting, let stand for 5-15 minutes |
|
|
|
|
20
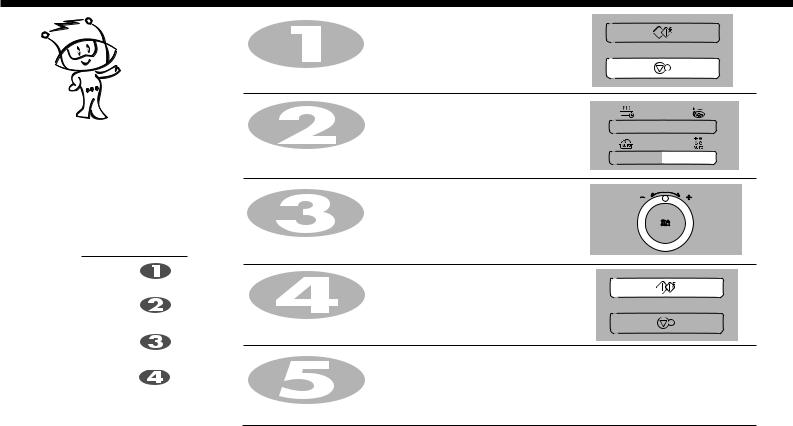
In the following example I will show you how to cook 0.3kg of "Roasted Meat ".
Press STOP/CLEAR.
Press Crispy Reheat once.
Crispy reheat allows you to cook your favorite food easily by selecting the food type and entering the weight of food by turn the wheel dial.
Category |
Press |
|
|
Crispy reheat |
|
||
|
|
|
|
|
Roasted Meat |
time |
|
|
|
|
|
|
Lasagna |
times |
|
|
|
|
|
|
Bread |
times |
|
|
|
|
|
|
Pie |
times |
|
Turn DIAL until display shows "0.3kg".
Press START.
Crispy
Reheat
21

Category |
Quantity |
Utensil |
FOOD |
Instructions |
TEMP. |
||||
Roasted Meat |
0.2-0.6kg |
|
Refrigerated |
Slice each of roasted meat under 2.5cm |
|
thickness. Place food on the grill rack. |
|||
|
|
|
|
|
|
|
|
|
And do same as above. |
|
|
|
|
|
Lasagna |
0.2-0.6kg |
Rack |
Refrigerated |
Place leftover lasagna on the grill rack. |
|
||||
|
And do same as above. |
|||
|
|
|
|
|
|
|
|
|
|
Bread |
0.1-0.3kg |
|
Frozen |
Place frozen baguette or croissant on the |
|
grill rack. Brush baguettes with |
|||
|
|
|
|
milk or water. |
|
|
|
|
And do same as above. |
|
|
|
|
|
Pie |
0.2-0.4kg |
|
Refrigerated |
Place leftover pie on the grill rack. |
|
|
|||
|
|
|
|
And do same as above. |
|
|
|
|
|
|
|
|
|
|
22

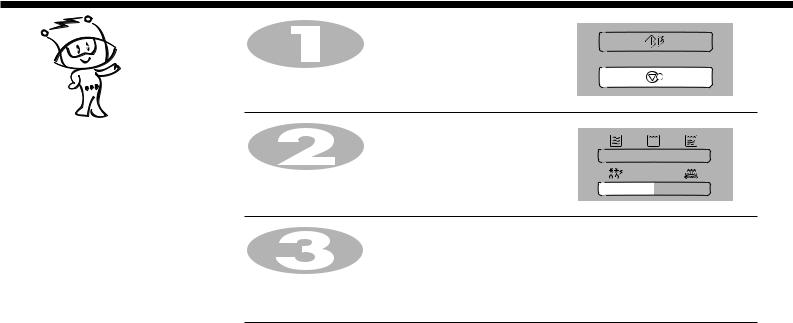
In the following example I will show you how to cook 0.3kg of "Salmon Fillet".
Defrost & Grill
Defrost & Grill allows you to cook most of your favorite food easily by selecting the food type and entering the weight of food by turn the wheel dial.
Category |
Press |
|
|
Defrost & Grill |
|
||
|
|
|
|
|
Salmon Fillet |
time |
|
|
|
|
|
|
Shrimp |
times |
|
|
|
|
|
|
Hamburger Patties |
times |
|
|
Sausage |
times |
|
|
|
|
|
Press STOP/CLEAR.
Press Defrost & Grill once.
Turn DIAL until display shows "0.3kg".
Press START.
23

|
Category |
Quantity |
Utensil |
FOOD |
Instructions |
|
|
TEMP. |
|||||
|
|
|
|
|
|
|
|
|
|
|
|
Choose salmon fillet of 200g weight and 2.5cm |
|
|
|
|
|
|
thickness each. Frozen it. Place food on the grill |
|
|
Salmon fillet |
0.2-0.6kg |
|
Frozen |
rack. Choose the menu and weight, |
|
|
|
|
|
|
press start. After cooking, remove from the oven |
|
|
|
|
|
|
and stand. |
|
|
|
|
|
|
|
|
|
|
|
|
|
1.Clean and de-vein shrimps. Place on the rack. |
|
|
Shrimp |
0.1-0.4kg |
|
Frozen |
2.When beep, turn food over. |
|
|
|
|
Rack |
|
|
|
|
|
|
|
Place hamburger Patties on the grill rack. |
||
|
|
|
|
|
||
|
Hamburger |
1-4 piece |
|
Frozen |
Choose the menu and weight, press start. |
|
|
Patties |
|
|
|
After cooking, remove from the oven and stand. |
|
|
|
|
|
|
|
|
|
|
|
|
|
1.Remove all packages and slit on the surface. |
|
|
Sausage |
0.2-0.6kg |
|
Frozen |
Place on the rack. |
|
|
|
|
|
|
2.When beep, turn food over. |
|
|
|
|
|
|
|
|
|
|
|
|
|
|
|
24
In the following example I will show you how to use the taste saver function to warm food at high level in 90 min.
Taste saver
If you want to warm your food when using the AUTO COOK programme,you can get the warming food by pressing the key.
Whenthe food without Auto function need warming you can set warming at any point by pressing the key.
Taste saver function has only one time level-90 minutes. But the function will stop when you open the door.
LEVEL |
Press |
Display |
||
Taste saver |
||||
Low level |
|
|
||
time |
|——| |——|——|—— |
|||
|
|
| | |——| | |
||
High level |
times |
|——| |——|——|——| |
||
|
|
| | |——| | | |
|
|
Taste saver manually
Put some food into the micro-wave oven,press
“taste saver ” two times, “HO-H”appears on the display.
Press“start”.
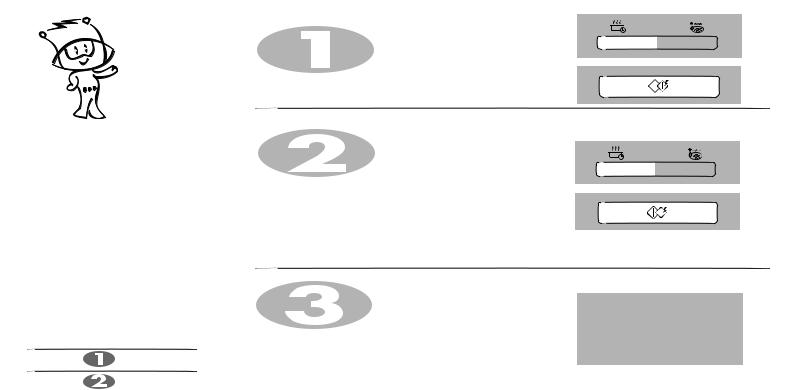
Taste saver after AUTO COOK
1.Set the required AUTO COOK programme.
Press“start”. And after the AUTO COOK programme,it will automatically run Taste saver function when five minutes later after AUTO COOK is over.
2.When the AUTO COOK is over,you can also press “taste saver ”, and“HO-H”appears on the display.
Press“start”.
*TIME display
When Taste saver is running,it will display |
|-----| |
|
| |
| |
|
-----
And then you press “taste saver” again,left time of
Taste saver will appear on the display.
25

Heating or Reheating Guide
To heat or reheat successfully in the microwave, it is important to follow several guidelines. Measure the amount of food in order to determine the time needed to reheat. Arrange the food in a circular pattern for best results. Room temperature food will heat faster than refrigerated food. Canned foods should be taken out of the can and placed in a microwavable container. The food will be heated more evenly if covered with a microwavable lid or vented plastic wrap. Remove cover carefully to prevent steam burns. Use the following chart as a guide for reheating cooked food.
Item |
Cook time |
Special Instructions |
|
(at HIGH) |
|||
|
|
||
Sliced meat |
1~2 minutes |
Place sliced meat on microwavable plate. |
|
3 slices |
|
Cover with plastic wrap and vent. |
|
(0.5cm thick) |
|
¥Note: Gravy or sauce helps to keep meat juicy. |
|
|
|
|
|
Chicken pieces |
|
|
|
1 breast |
2~3 minutes |
Place chicken pieces on microwavable plate. |
|
1 leg and thigh |
3~31/ 2 minutes |
Cover with plastic wrap and vent. |
|
Fish fillet |
1~2 minutes |
Place fish on microwavable plate. |
|
(170-230g) |
|
Cover with plastic wrap and vent. |
|
|
|
|
|
Lasagne |
4~6 minutes |
Place lasagne on microwavable plate. |
|
1 serving(300g) |
|
Cover with plastic wrap and vent. |
|
|
|
|
|
Casserole |
11/ 2~3 minutes |
COOK covered in microwavable casserole dish. |
|
1 cup |
41/ 2~7minutes |
Stir once halfway through cooking. |
|
4 cups |
|
|
|
|
|
|
|
Casserole |
|
|
|
cream or cheese |
|
|
|
1 cup |
1~21/ 2 minutes |
COOK covered in microwavable casserole dish. |
|
4 cups |
31/ 2~6 minutes |
Stir once halfway through cooking. |
|
Sloppy Joe or |
|
|
|
Barbecued beef |
1~21/ 2 minutes |
Reheat filling and bun separately. |
|
1 sandwich |
|
COOK covered in microwavable casserole dish. |
|
(1/ 2 cup meat filling) |
|
Stir once. Heat bun as directed in chart below. |
|
without bun |
|
|
Item |
Cook time |
Special Instructions |
|
(at HIGH) |
|||
|
|
||
Mashed potatoes |
|
COOK covered in microwavable casserole dish. |
|
1 cup |
21/2~31/2 minutes |
Stir once halfway through cooking. |
|
4 cups |
6~9 minutes |
|
|
|
|
|
|
Baked beans |
|
|
|
1 cup |
11/2~3 minutes |
COOK covered in microwavable casserole dish. |
|
|
|
Stir once halfway through cooking. |
|
|
|
|
|
Ravioli or pasta in sauce |
|
|
|
1 cup |
21/2~4 minutes |
COOK covered in microwavable casserole dish. |
|
4 cups |
71/2~11minutes |
Stir once halfway through cooking. |
|
Rice |
|
|
|
1 cup |
1~11/2 minutes |
COOK covered in microwavable casserole dish. |
|
4 cups |
31/2~5 minutes |
Stir once halfway through cooking. |
|
Sandwich roll or bun |
|
|
|
1 roll |
15~30 seconds |
Wrap in paper towel and place on glass tray. |
|
|
|
|
|
Vegetables |
|
|
|
1 cup |
11/2~21/2 minutes |
COOK covered in microwavable casserole dish. |
|
4 cups |
31/2~51/2 minutes |
Stir once halfway through cooking. |
|
Soup |
|
|
|
1 serving (8 oz.) |
11/2~2 minutes |
COOK covered in microwavable casserole dish. |
|
|
|
Stir once halfway through cooking. |
|
|
|
|
26

Fresh Vegetable
Guide
Vegetable |
Amount |
Cook time |
Instructions |
Standing |
||
(at HIGH) |
Time |
|||||
|
|
|
||||
Artichokes |
2 medium |
41/2 ~ 7 |
Trim. Add 2 tsp water and 2 tsp juice. |
2~3 minutes |
||
(230g each) |
4 medium |
10 |
~ 12 |
Cover. |
|
|
|
|
|
|
|
||
Asparagus, |
450g |
21/2 ~ 6 |
Add 1 cup water. Cover. |
2~3 minutes |
||
Fresh, Spears |
|
|
|
|
|
|
|
|
|
|
|
||
Green Beans |
450g |
7 ~ 11 |
Add 1/2 cup water in 1.5 litre casserole |
2~3 minutes |
||
|
|
|
|
dish. Stir halfway through cooking. |
|
|
|
|
|
|
|
|
|
Beats, Fresh |
450g |
11 |
~ 16 |
Add 1/2 cup water in 1.5 litre covered |
2~3 minutes |
|
|
|
|
|
casserole dish. Rearrange halfway |
|
|
|
|
|
|
through cooking. |
|
|
|
|
|
|
|
|
|
Broccoli, Fresh, |
450g |
5 |
~ 8 |
Place broccoli in baking dish. |
2~3 minutes |
|
Spears |
|
|
|
Add 1/2 cup water. |
|
|
Cabbage, Fresh, |
450g |
51/2~71/2 |
Add 1/2 cup water in 1.5 litre covered |
2~3 minutes |
||
Chopped |
|
|
|
casserole dish. Stir halfway through |
|
|
|
|
|
|
cooking. |
|
|
|
|
|
|
|
|
|
Carrots, Fresh, |
200g |
2 |
~ 3 |
Add 1/4 cup water in 1.5 litre covered |
2~3 minutes |
|
Sliced |
|
|
|
casserole dish. Stir halfway through |
|
|
|
|
|
|
cooking. |
|
|
|
|
|
|
|
|
|
Cauliflower, |
450g |
5 |
~ 7 |
Trim. Add 1/4 cup water in 1.5 litre |
2~3 minutes |
|
Fresh, Whole |
|
|
|
covered casserole dish. Stir halfway |
|
|
|
|
|
|
through cooking. |
|
|
|
|
|
|
|
|
|
Fresh, Flowerettes |
2 cups |
11 |
~ 16 |
Slice. Add 1/2 cup water in 1.5 litre |
2~3 minutes |
|
Celery, Fresh, |
4 cups |
|
|
covered casserole dish. Stir halfway |
|
|
Sliced |
|
|
|
through cooking. |
|
|
|
|
|
|
|
|
|
Vegetable |
Amount |
Cook time |
Instructions |
Standing |
|
(at HIGH) |
Time |
||||
|
|
|
|||
Corn, Fresh |
2 ears |
4 ~ 8 |
Husk. Add 2 tbsp water in 1.5 litre |
2~3 minutes |
|
|
|
|
baking dish. Cover. |
|
|
|
|
|
|
|
|
Mushrooms, |
230g |
11/2 ~ 21/2 |
Place mushrooms in 1.5 litre covered |
2~3 minutes |
|
Fresh, Sliced |
|
|
casserole dish. Stir halfway through |
|
|
|
|
|
cooking. |
|
|
|
|
|
|
|
|
Parsnips, Fresh, |
450g |
4 ~ 7 |
Add 1/2 cup water in 1.5 litre covered |
2~3 minutes |
|
Sliced |
|
|
casserole dish. Stir halfway through |
|
|
|
|
|
cooking. |
|
|
|
|
|
|
|
|
Peas, Green, |
4 cups |
6 ~ 9 |
Add 1/2 cup water in 1.5 litre covered |
2~3 minutes |
|
Fresh |
|
|
casserole dish. Stir halfway through |
|
|
|
|
|
cooking. |
|
|
|
|
|
|
|
|
Sweet Potatoes |
2 medium |
4 ~ 9 |
Pierce potatoes several times with fork. |
2~3 minutes |
|
Whole Baking |
4 medium |
6~ 12 |
Place on 2 paper towels. |
|
|
(170~230g each) |
|
|
Turn over halfway through cooking. |
|
|
|
|
|
|
|
|
White potatoes, |
2 potatoes |
51/2 ~ 71/2 |
Pierce potatoes several times with fork. |
2~3 minutes |
|
Whole Baking |
4 potatoes |
91/2 ~ 14 |
Place on 2 paper towels. |
|
|
(170~230g each) |
|
|
Turn over halfway through cooking. |
|
|
|
|
|
|
|
|
Spinach, Fresh, |
450g |
41/2 ~ 71/2 |
Add 1/2 cup water in 2 litre covered |
2~3 minutes |
|
Leaf |
|
|
casserole dish. |
|
|
|
|
|
|
|
|
Courgette, Fresh, |
450g |
41/2 ~ 71/2 |
Add 1/2 cup water in 1.5 litre covered |
|
|
Sliced |
|
|
casserole dish. Stir halfway through |
2~3 minutes |
|
|
|
|
cooking. |
|
|
|
|
|
|
|
|
Courgette, Fresh, |
450g |
6 ~ 9 |
Pierce. Place on 2 paper towels. |
2~3 minutes |
|
Whole |
|
|
Turn courgette over and rearrange |
|
|
|
|
|
halfway through cooking. |
|
27

Grill Cooking
Guide
Directions for grilling meat on grill
•Trim excess fat from meat. Cut fat, making sure you do not cut into the lean. (This will stop the fat curling.)
•Arrange on the rack. Brush with melted butter or oil.
•Halfway through, turn the meat over.
Item |
Weight |
Approx. cooking time |
Hints |
|
( in minutes) |
||||
|
|
|
||
Lamb chops |
|
|
Baste with oil or melted |
|
(2.5cm (1”) thick) |
230g x 2 |
25-32 |
butter. Thin items should |
|
|
|
|
be placed on the grill rack. |
|
|
|
|
||
Sausages |
|
|
Thick items can be placed |
|
(2.5cm (1”) thick) |
230g |
13-16 |
on to a drip tray. Turn |
|
|
|
|
food over after half the |
|
|
|
|
cooking time. |
|
|
|
|
Turn frequently. |
|
|
|
|
|
|
Fish fillets |
|
|
Brush with melted butter |
|
1 cm (1/2”) thick |
230g |
17-21 |
and turn over halfway |
|
1.5cm (1/2”) thick |
230g |
20-24 |
through cooking. |
|
|
|
|
|
Directions for grilling fish and seafood
Place fish and seafood on the rack. Whole fish should be scored diagonally on both sides before grilling. Brush fish and seafood with melted butter, margarine or oil before and during cooking. This helps stop the fish drying out. Grill for times recommended in the chart. Whole fish and fish steaks should be carefully turned over halfway through grilling time. If desired thick fillets can also be turned halfway.
Item |
Weight |
Approx. cooking time |
Hints |
|
( in minutes) |
|
|||
|
|
|
|
|
Fish steaks |
|
|
Brush with melted butter |
|
2.5 cm (1”) thick |
230g |
24-28 |
and turn over halfway |
|
|
|
|
through cooking. |
|
|
|
|
|
|
Whole fish |
225-350g each |
16-20 |
Allow extra time for thick |
|
|
450g |
24-28 |
and oily fish. |
|
|
|
|
|
|
Scallops |
450g |
16-20 |
Baste well during cooking. |
|
Prawns uncooked |
450g |
16-20 |
|
|
|
|
|
|
|
28

 WARNING
Please ensure cooking times are correctly set as over cooking may result in FIRE and subsequent DAMAGE to the OVEN.
Important safety instructions
Read carefully and keep for future reference
1Do not attempt to tamper with, or make any adjustments or repairs to the door, control panel, safety interlock switches or any other part of the oven. It is hazardous for anyone to carry out any service or repair operation which involves the removal of any cover which gives protection against exposure to microwave energy. Repairs should only be undertaken by a qualified service technician.
2Do not operate the oven when empty. It is best to leave a glass of water in the oven when not in use. The water will safely absorb all microwave energy, if the oven is accidentally started.
3Do not use the oven for the purpose of dehumidification. It can be the cause of serious damage of safety. (ex. Operating the microwave oven with the wet newspapers, clothes, toys, pet or portable electric devices, etc.)
4Do not cook food wrapped in paper towels, unless your cook book contains instructions, for the food you are cooking.
5Do not use newspaper in place of paper towels for cooking.
6Do not use wooden containers. They may heat-up and char. Do not use ceramic containers which have metallic (e.g. gold or silver) inlays. Always remove metal twist ties. Metal objects in the oven may arc, which can cause serious damage.
7Do not operate the oven with a kitchen towel, a napkin or any other obstruction between the door and the front edges of the oven, which may cause microwave energy leakage.
8Do not use recycled paper products since they may contain impurities which may cause sparks and/or fires when used in cooking.
9Do not rinse the turntable by placing it in water just after cooking. This may cause breakage or damage.
10Small amounts of food require shorter cooking or heating time. If normal times are allowed they may overheat and burn.
11Be certain to place the oven so the front of the door is 8 cm or more behind the edge of the surface on which it is placed, to avoid accidental
tipping of the appliance. |
29 |
12Before cooking, pierce the skin of potatoes, apples or any such fruit or vegetable.
13Do not cook eggs in their shell. Pressure will build up inside the egg which will burst.
14Do not attempt deep fat frying in your oven.
15Remove the plastic wrapping from food before cooking or defrosting. Note though that in some cases food should be covered with plastic film, for heating or cooking.
16If the oven door or door seals are damaged, the oven must not be operated until it has been repaired by a qualified service technician.
17If smoke is observed, switch off or disconnect the oven from the power supply and keep the oven door closed in order to stifle any flames.
18When food is heated or cooked in disposable containers of plastic, paper or other combustible materials, check the oven frequently due to the possibility of the food container is deteriorating.
19Only allow children to use the oven without supervision when adequate instructions have been given so that the child is able to use the oven in a safe way and understands the hazards of improper use.
20Liquids or other foods must not be heated in sealed containers since they are liable to explode.
21Do not operate the oven, if the door seals and adjacent parts of the microwave oven are faulty, until the oven has been repaired by a qualified service technician.
22Check the utensils are suitable for use in microwave ovens before use.
23Do not touch the oven door, outer cabinet, rear cabinet, oven cavity, accessories and dishes during grill mode, convection mode and auto cook operations, unless wearing thick oven gloves, as they will become hot. Before clearing make sure they are not hot.

Important safety instructions
Read carefully and keep for future reference
24Only use utensils that are suitable for use in microwave ovens.
25When heating food in plastic or paper containers, keep an eye on the oven due to the possibility of ignition.
26If smoke is observed, switch off or unplug the appliance and keep the door closed in order to stifle any flames.
27Microwave heating of beverages can result in delayed eruptive boiling, therefore care must be taken when handing the container.
28The contents of feeding bottles and baby food jars shall be stirred or shaken and the temperature checked before consumption, in order to avoid burns.
29Eggs in their shell and whole hard-boiled eggs should not be heated in microwave ovens since they may explode, even after microwave heating has ended.
30Details for cleaning door seals, cavities and adjacent parts.
31The oven should be cleaned regularly and any food deposits removed.
32Failure to maintain the oven in a clean condition could lead to deterioration of the surface that could adversely affect the life of the appliance and possibly result in a hazardous situation.
33Only use the temperature probe recommended for this oven (for appliances having a facility to use a temperature-sensing probe).
34If heating elements are provided, during use the appliance becomes hot. Care should be taken to avoid touching heating elements inside the oven.
35The appliance is not intended for use by young children or infirm persons without supervision.
36The microwave oven must be operated with the decorative door open.
37This connection may be achieved by having the plug accessible or by incorporation a switch in the fixed wiring in accordance with the wiring rules.
38Do not use harsh abrasive cleaners or sharp metal scrapers to clean the oven door glass since they can scratch the surface, which may result in shattering of the glass.
39This appliance is not intended for use by persons (including children) with reduced physical, sensory or mental capabilities, or lack of experience and knowledge, unless they have been given supervision or instruction concerning use of the appliance by a person responsible for their safety.
WARNING: If the door or door seals are damaged, the oven must not
be operated until it has been repaired by a competent person.
WARNING: It is hazardous for anyone other than a competent person to carry out any service or repair operation that involves
the removal of a cover which gives protection against exposure to microwave energy.
WARNING: Liquids and other foods must not be heated in sealed containers since they are liable to explode.
WARNING: Only allow children to use the oven without supervision when adequate instructions have been given so that the
child is able to use the oven in a safe way and understands the hazards of improper use.
WARNING: When the appliance is operated in the combination mode, children should only use the oven under adult supervision due to the temperatures generated.
WARNING: Accessible parts may become hot during use. Young children should be kept away.
WARNING: Should be monitored to ensure that children do not play
with the device.
WARNING: The devices are not intended to be operated by an external timer or by a separate control.
30
 Loading...