

Page 1
QUICKSTART
B 95 RS
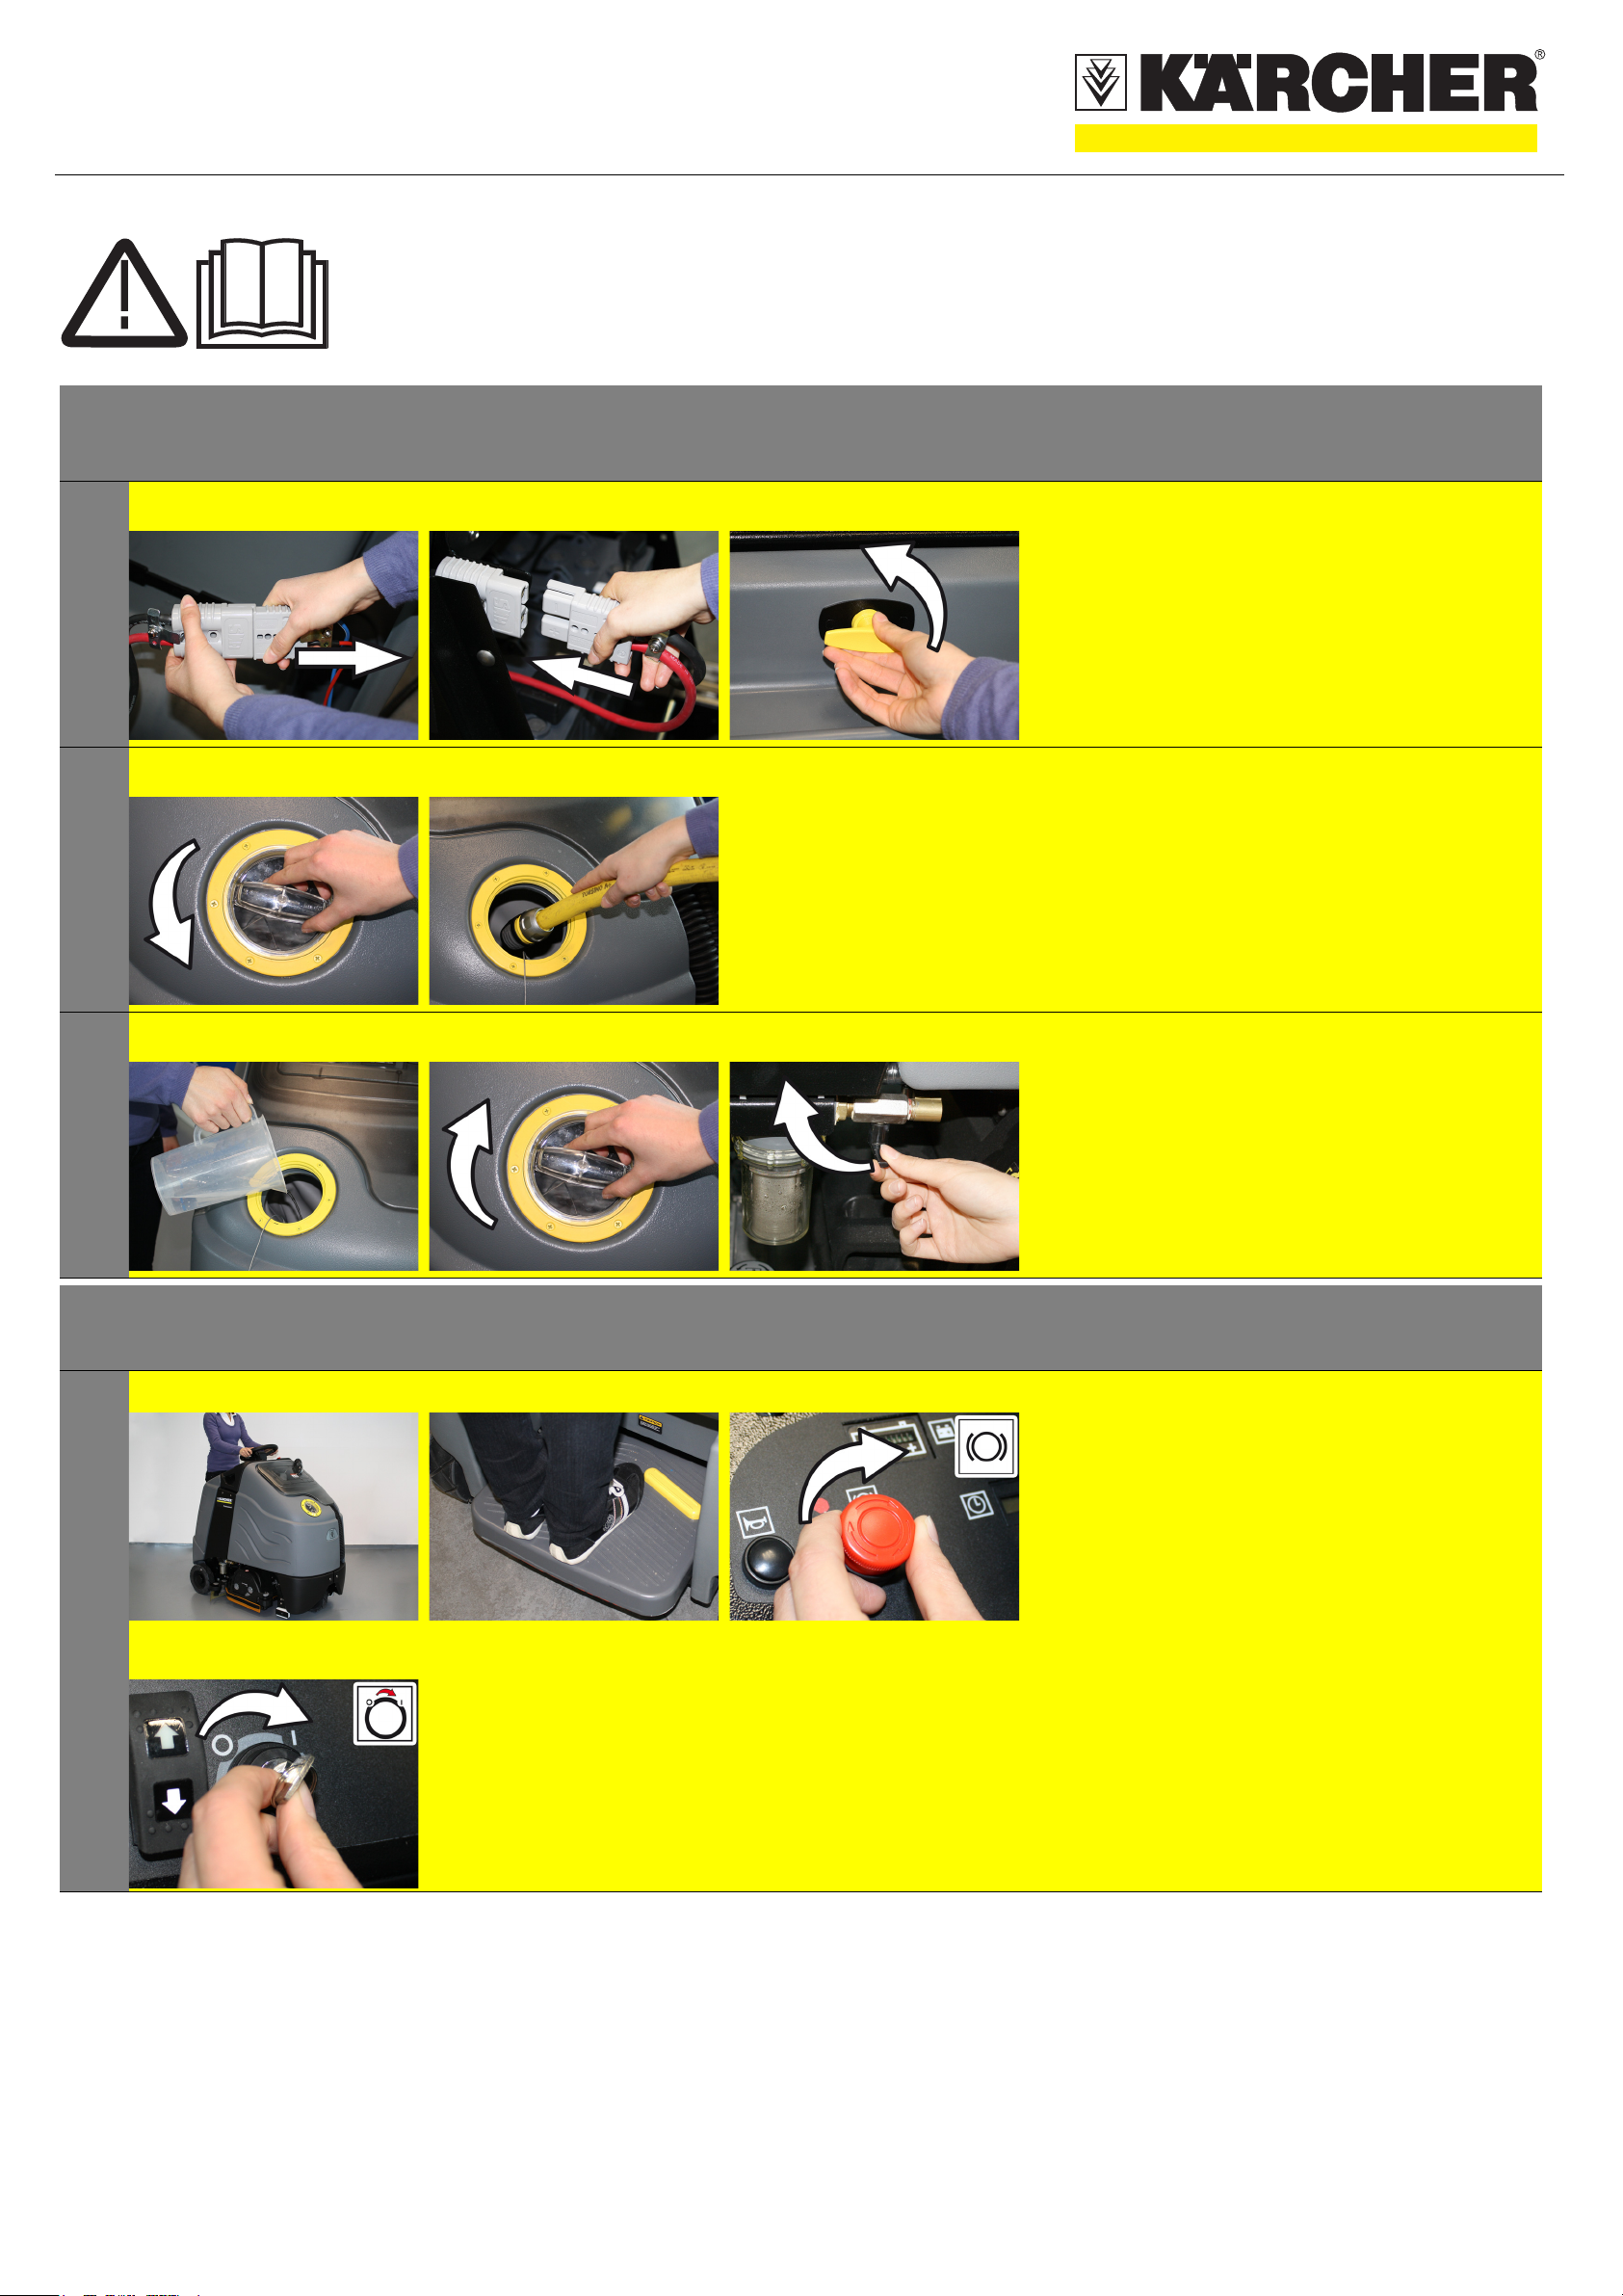
Start up
A B A Pull the battery cable from the charger cable
1
Warning
These are only brief instructions! Please read and comply with these instructions prior to using or servicing your appliance.
The non-compliance of the operating and safety instructions may lead to damages of the appliance and to dangers for the operator and other persons.
and connect it to the appliance plug.
B Tilt the battery cover towards the front and
tighten the locking screw.
2
3
A A Open the cover of the fresh water reservoir.
Fill in fresh water (maximum 60 °C). Leave sufficient space for the detergent.
A B A Pour in detergent.
Close the cover of the fresh water reservoir.
B Open fresh water valve.
1
Operation
A
C
B Starting the machine
A Step on the standing platform.
Do not press the accelerator pedal.
B Release emergency-stop button by turning.
C Set main switch to “1”.
5.964-040.0 02/11
Page 2

QUICKSTART
Operation
2
3
A
C
A
B Drive forward
A Set the forward drive direction using the drive
direction button at the operator console.
B Set the speed range on the programme
selection switch.
C Press accelerator pedal down slowly.
Release the accelerator pedal, the machine
brakes automatically and stops.
B Reverse drive
A Set the drive direction to backwards using the
drive direction button at the operator console.
B Set the speed range on the programme selec-
tion switch.
C Press accelerator pedal down slowly.
Release the accelerator pedal, the machine
brakes automatically and stops.
4
5
C
A
A
Scrubbing vacuum Eco mode
A Light cleaning intensity
Wet clean the floor and vacuum up dirt water.
Scrubbing suction
A Medium cleaning intensity
Wet clean the floor and vacuum up dirt water.
A
6
Scrubbing suction
A High cleaning intensity
Wet clean the floor and vacuum up dirt water.
5.964-040.0 02/11
Page 3
QUICKSTART
7
8
Operation
A Vacuuming
A Vacuum the wastewater.
A Apply detergent solution
A Apply detergent solution to the severelyk
contaminated surface and let it soak in.
1
2
3
4
5
Finish operation
A B Turn off the appliance
A Set programme switch to step 1 (driving).
B Turn key to "0" and remove it.
A
A B Emptying the Dirt Water Reservoir
A Emptying the Fresh Water Tank
A Emptying waste container
Turn off the water supply
A Close the fresh water valve.
몇 Warning
Please observe the local provisions regarding the wastewater treatment.
A Take the water discharge hose from the
support and lower above a suited collection
device.
B Then rinse the dirt water tank with clear
water.
몇 Warning
Please observe the local provisions regarding the wastewater treatment.
A Take the water discharge hose from the
support and lower above a suited collection
device.
Rinse the fresh water tank with clear water
(max. 60°C).
A Empty the waste container and rinse with
water.
5.964-040.0 02/11
Page 4

QUICKSTART
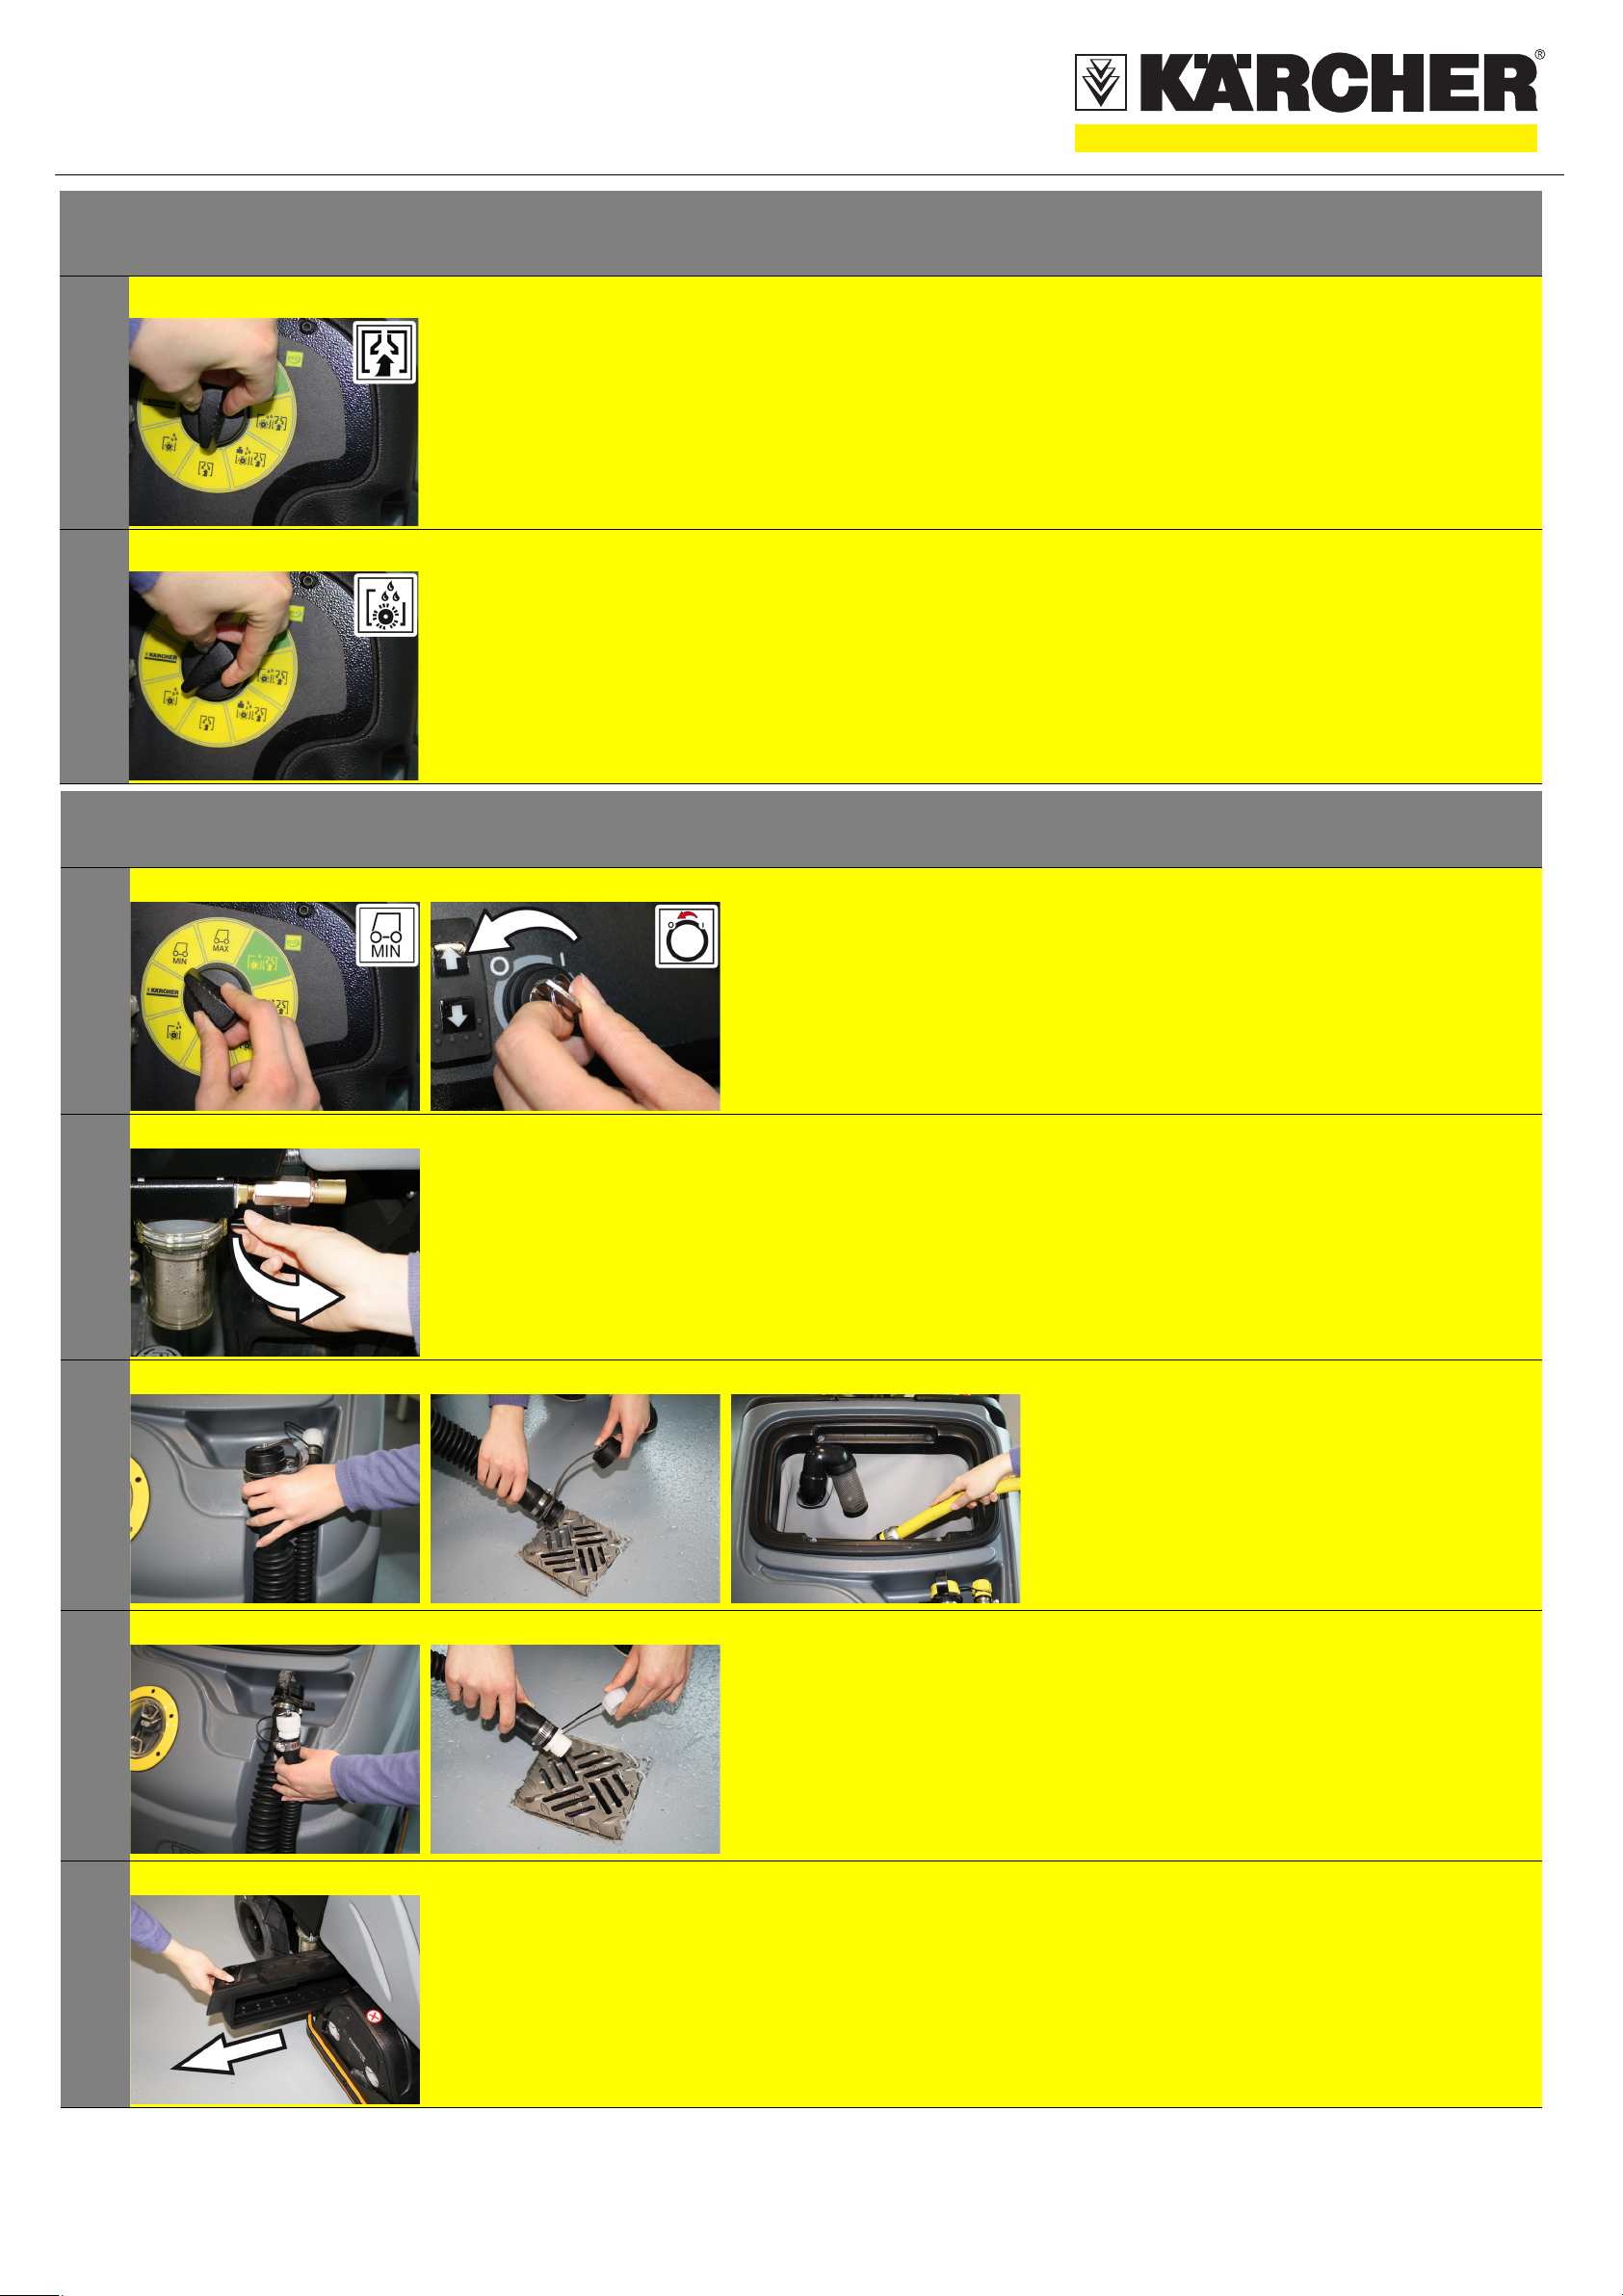
Maintenance and care
1
A
B
몇 Warning
Please observe the local provisions regarding the wastewater treatment.
A Take the water discharge hose
from the support and lower above a
suited collection device.
B Then rinse the dirt water tank with
clear water.
daily
weekly
Kärcher Customer Service
2
3
A
A
C
B
D
몇 Warning
Please observe the local provisions regarding the wastewater treatment.
A Take the water discharge hose
from the support and lower above a
suited collection device.
Rinse the fresh water reservoir with clear water (max. 60°C).
A Pull off the suction hose.
B Remove the cover from the waste
water reservoir.
C Clean the sieve in the lid of the dirt
water tank.
D Check the lid of the dirt water tank
for tightness.
A A Check and clean the waste water
4
reservoir sieve.
5.964-040.0 02/11
Page 5

QUICKSTART
Maintenance and care
5
A A Check fresh water filter; clean if
required.
daily
weekly
Kärcher Customer Service
6
7
8
A A Empty the waste container and
rinse with water.
A A A Check the brushes for wear (bristle
length at least 10 mm), replace if
required.
Check brushes for wear and tear, clean.
A B A Clean vacuum lips in the vacuum
bar and check for wear.
B Clean the suction channel.
A A Clean the outside of the appliance
9
with a damp cloth which has been
soaked in mild detergent.
5.964-040.0 02/11
Page 6

QUICKSTART
Maintenance and care
1
0
A B A Charge battery.
Open the lock.
Tilt the battery cover backwards.
B Remove battery plug and join it to
the charging cable.
Connect the charger to the mains
and turn it on.
daily
weekly
Kärcher Customer Service
1
1
A A Maintenance to be carried out eve-
ry 200 operating hours
5.964-040.0 02/11
Page 7

QUICKSTART
Troubleshooting
1
2
A
D
A Device does not drive or drives only slowly
B
E
C
F
Appliance cannot be started
A Step on the standing platform.
Do not press the accelerator pedal.
B Insert the battery plug on the device.
C Release emergency-stop button by turning.
D Set main switch to “1”.
E Battery depleted.
Charge battery.
F Close the solenoid brake. To do this, press
the lever of the solenoid brake all the way up
to the stop.
A Release accelerator pedal, turn the key
switch to "0", turn the key switch to "1".
Set the travel direction switch to "forward" or
"reverse".
Actuate the accelerator pedal.
3
A
D
B
E
G
C
F
No or inadequate suction power
A Empty the dirt water reservoir.
B Check the setting of the vacuum bar.
C Clean the seals between dirt water reservoir
and top of the appliance and check for leaks,
replace if required.
D Clean the vacuum lips on the vacuum bar,
turn or replace if required
E Check suction hose for blockages; clean if re-
quired.
Check connection between suction hose and
suction bar and suction hose and wastewater
tank.
F Check and clean the waste water reservoir
sieve.
G Install a cover onto the wastewater drain
hose.
5.964-040.0 02/11
Page 8

QUICKSTART
4
5
Troubleshooting
A Insufficient cleaning result
A Check the brushes for wear (bristle length at
least 10 mm), replace if required.
Check brushes for wear and tear, clean.
A Brushes do not turn
A Reset fuse of brush drive.
Check the brushes for blockage due to for-
eign particles, remove them if found.
6
7
A B No or very little detergent solution gets added
A Open fresh water valve.
B Check level of detergent solution in the fresh
water tank; refill, if required.
a The cleaning head does not remain lowered.
A Install the brushes.
5.964-040.0 02/11
 Loading...