

Page 1

QUICKSTART
B 60 W Bp
Start up
A B A Unplug the charger from the mains.
1
Warning
These are only brief instructions! Please read and comply with these instructions prior to using or servicing your appliance.
The non-compliance of the operating and safety instructions may lead to damages of the appliance and to dangers for the operator and other persons.
B Place the mains cable into the storage com-
partment.
2
3
A A Open the cover of the fresh water reservoir.
Fill in fresh water (maximum 60 °C).
Close the cover of the dirt water reservoir.
A Model with dosing equipment "Dose"
A Place the bottle with the detergent in the hold-
er behind the operator console.
Close the bottle lid.
Insert the suction hose of the dosaging equipment into the bottle.
Model without dosing equipment "Dose"
A Add the detergent to the fresh water
reservoir.
1
2
Operation
A B Starting the machine
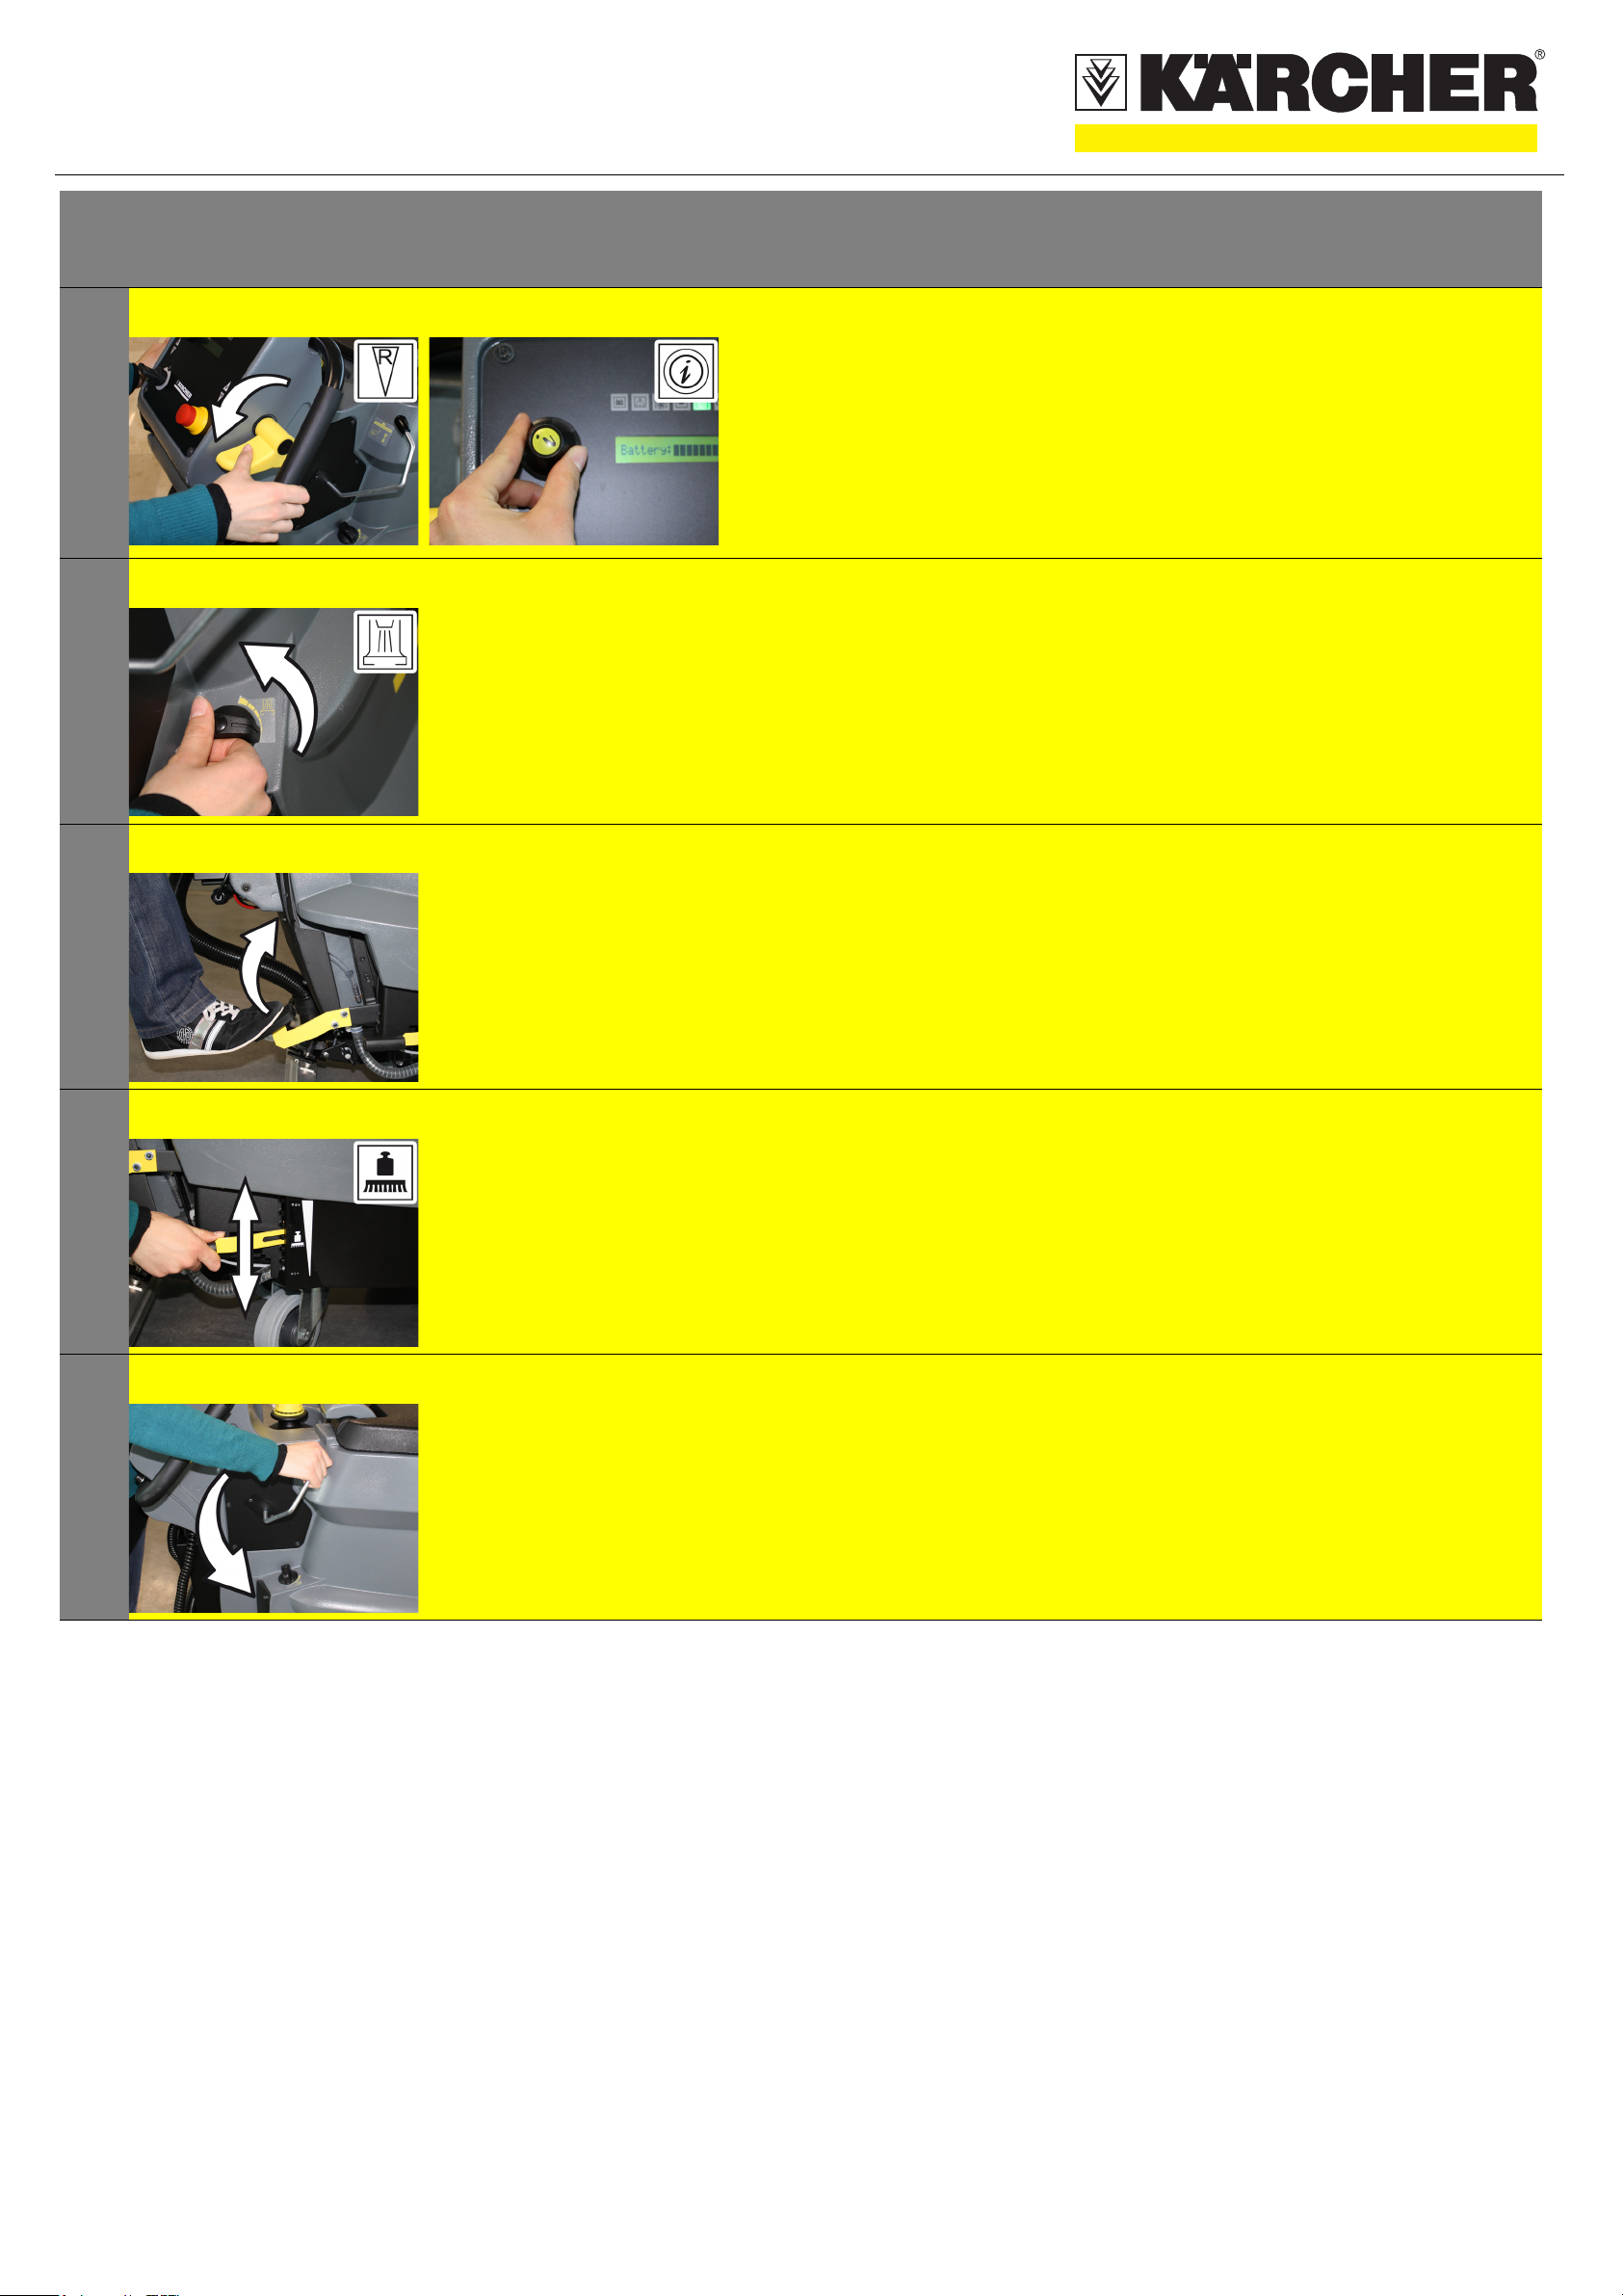
A Release emergency-stop button by turning.
B Set main switch to “1”.
A B Drive forward
A Press the driving lever to the front.
Stop the machine: Release driving lever.
B You can use the info button to set the working
speed.
5.964-036.0 02/11
Page 2
QUICKSTART
3
4
Operation
A B Reverse drive
A Press the driving lever to the rear.
Stop the machine: Release driving lever.
B You can use the info button to set the working
speed.
A Setting the water quantity
A Adjust the water quantity using the regulating
button according to the dirt on the floor
covering.
5
6
7
A Switching on the cleaning head
A Press the pedal downwards; move it to the
left and release it upward. The cleaning head
is lowered and the brush motor starts automatically.
A Contact pressure adjustment
A The desired brush contact pressure is
adjusted by means of the lever.
A Lower the vacuum bar
A Turn the lever downwards; the vacuum bar is
lowered and the suction turbine is switched
on.
5.964-036.0 02/11
Page 3

QUICKSTART
Finish operation
1
2
A
D
A B Emptying the Dirt Water Reservoir
B
E
C
F
Turn off the appliance
A Close the regulatory button for setting the
water quantity.
B Release driving lever.
C Lift the cleaning head.
D Briefly drive forward and suck of the
remaining water.
E Raise the vacuum bar.
The suction turbine will continue to run for 5
more seconds to suck off residual water from
the vacuum bar and the vacuum hose.
F Set the key switch at the operator console to
"0" and remove the key.
몇 Warning
Please observe the local provisions regarding the wastewater treatment.
A Take the water discharge hose from the
support and lower above a suited collection
device.
B Then rinse the dirt water tank with clear
water.
3
4
A Emptying the Fresh Water Tank
몇 Warning
Please observe the local provisions regarding the wastewater treatment.
A Loosen the lid for emptying the fresh
water - do not remove it fully. Drain water.
Remove the lid with washer fully to rinse off
the fresh water tank.
A Charging battery
A Charge battery, if required.
Insert the plug of the connecting cable into
the socket.
5.964-036.0 02/11
Page 4

QUICKSTART
Maintenance and care
1
A
B
몇 Warning
Please observe the local provisions regarding the wastewater treatment.
A Take the water discharge hose
from the support and lower above a
suited collection device.
B Then rinse the dirt water tank with
clear water.
daily
monthly
Kärcher Customer Service
2
3
4
A
A A Check fresh water filter; clean if
A A Check brush for wear and tear and
몇 Warning
Please observe the local provisions regarding the wastewater treatment.
A Loosen the lid for emptying the
fresh water - do not remove it fully.
Drain water.
Remove the lid with washer fully to rinse off the fresh water tank.
required.
clean it.
Check the brushes for wear (bristle
length at least 10 mm), replace if
required.
A B A Clean the vacuum lips on the vacu-
5
um bar, turn or replace if required
B Clean the suction channel.
5.964-036.0 02/11
Page 5
QUICKSTART
Maintenance and care
6
7
A A Clean the outside of the appliance
with a damp cloth which has been
soaked in mild detergent.
A A Clean the seals between dirt water
reservoir and cover and check for
tightness, replace if required.
A A annual
daily
monthly
Kärcher Customer Service
8
5.964-036.0 02/11
Page 6

QUICKSTART
Troubleshooting
1
2
A
C
A B C No or inadequate suction power
B Appliance cannot be started
A Stand-by, turn key switch to "0", then set it
back to "1".
B Release emergency-stop button by turning.
C Battery depleted.
Charge battery.
A Clean the seals between dirt water reservoir
and cover and check for tightness, replace if
required.
B Clean the vacuum lips on the vacuum bar,
turn or replace if required
C Check suction hose for blockages; clean if
required.
Check connection between suction hose and
suction bar and suction hose and wastewater
tank.
3
4
5
A B Insufficient cleaning result
A Set/ adjust contact pressure.
B Check brush for wear and tear and clean it.
Check the brushes for wear (bristle length at
least 10 mm), replace if required.
A b Brushes do not turn
A Set/ adjust contact pressure.
B If over-current switch in the electronics
system has been triggered, turn key switch
to "0", then set it back to "1".
C Check the brushes for blockage due to for-
eign particles, remove them if found.
A B No or very little detergent solution gets added
A Increase the water volume to activate the
dosing pump.
B Check level of detergent solution in the fresh
water tank; refill, if required.
5.964-036.0 02/11
 Loading...