

Page 1

EJECT
VM9224
Operating Instructions
160
watts peak
40W x 4
Page 2

VM9224
CONTENTS
Thank you for choosing a Jensen product. We hope you will find the instructions in this owner’s
manual clear and easy to follow. If you take a few minutes to look through it, you’ll learn how to
use all the features of your new Jensen VM9224 Mobile Multimedia Re ceiver for maximum
enjoyment.
Features................................................................................................................................ 1
Controls and Indicators ......................................................................................................... 4
Remote Control..................................................................................................................... 6
Operating Instructions................. ... ... ........................................ ... ....................................... 14
Setup Menu......................................................................................................................... 18
Tuner Operation.................................................................................................................. 24
DVD/VCD Video Operation................................................................................................. 28
DVD/CD Audio Operation .............................. .... ... ... .... ... ... ... .... ... ... .... ... ... .... ...................... 35
MP3/WMA Operation .......................................................................................................... 38
iPod Operation .................................................................................................................... 43
Bluetooth Operation ........................................... ... ........................................ ...................... 47
Troubleshooting .................................................................................................................. 54
Specifications...................................................................................................................... 58
iii
Page 3

VM9224
iv
Page 4

VM9224
FEATURES
Congratulations on your purchase of the Jensen VM9224 Mobile Multimedia
Receiver.
It’s a good idea to read all of the instructions before beginning the installation.
We recommend having your Jensen VM9224 installed by a reputable
installation shop.
DVD
• Aspect Ratio - Full and Normal
• Fast Forward - 2X, 4X, 8X and 20X
• Slow Motion - 2X, 4X, 8X and 20X
• Play, Pause, Stop, Next Chapter and Previous Chapter
CD / MP3 / WMA
• CD-Text Compatible
• ID3 Tag Compatible
• Directory Search (MP3 / WMA Only)
• Direct Track Access via Remote Control
• Burn up to 1500 MP3 and WMA Files onto a DVD+
• Audible Forward / Reverse Track Search (CD-DA Only)
• Random, Repeat and Intro
• Play, Pause, Stop, Next Track and Previous Track
AM-FM
• USA / Europe / Latin America / Asia Frequency Spacing
• 30 Station Presets (18 FM / 12 AM)
• Auto Stereo / Mono
• Local / Distance
• Auto Store / Preview Scan
iPod
• iPod via USB
• High Speed Direct Connect Interface to Access iPod Playlists, Artists,
Albums and Songs. Play music and view video/photo* files from your iPod.
*Video/photo playback requires jLink-USB iPod interface cable (sold
separately).
• Power Management Charges iPod while Connected
Chassis
• 2.0 DIN (Import / ISO-DIN Mountable)
• Fixed Front Panel
• 6.2" High Definition TFT LCD
• 1,152,000 Sub Pixels (800x3 X 480)
• Beep Tone Confirmation (ON-OFF Option)
• Heat Management System - Forced Air-Cooling To Keep The Chip-Sets
Operating at Nominal Temperatures
1
R / RW
Page 5

VM9224
General
• Navigation Ready (NAV102)
• Bluetooth Ready (with purchase of BTM10) providing hands-free profile fo r
safety / convenience and A2DP profile for streaming music from a PDA /
PMP
• 44-Key Infrared Remote Control
• One Composite Video Output for Additional Screens
• Front Panel Audio/Video Input
• Three-Band Tone control (Bass, Mid and Treble) with Eight Preset EQ
Curves
• Front Panel A/V Aux Input for Portable Media Devices
• Front, Rear and Subwoofer Line Output
• Programmable Volume Control
• Rear Camera Input (Normal and Mirror Image View)
• Touch Screen Calibration Mode
• 2VRMS Line Output - All Channels
• Rotary Encoder Audio Control
• SWC Interface – Compatible with PAC adapter SWI-PS Steering Wheel
Control Interface, sold separately
Optional Equipment
• NAV102
The VM9224 is "navigation ready." Before accessing any navigation
features, you must purchase and install the navigation module (NAV102).
All installation and operating instructions will be included with the
navigation module.
Once the navigation module is connected and operating proper ly, the NAV
source mode will become active. While the navigation module is not
installed, the NAV option appears gray, indicating the function is not
available.
• BTM10
Before you can connect to a Bluetooth enabled device, you must purchase
and install the Jensen BTM10.
• Bluetooth Phone
See “Bluetooth Operation” on page 47.
• Rear Camera
The VM9224 is "camera ready." Before accessing any camera features,
you must purchase and install a rear video camera. Once the rear camera
is connected and operating properly, the CAMERA source mode will
become active. While the camera is not installed, the CAMERA option
appears gray, indicating the function is not available.
2
Page 6

VM9224
WARNING! Never install this unit where operation and viewing could
interfere with safe driving conditions.
WARNING! T o reduce the risk of a traf fic accide nt (except when using for
rear view video camera) never use the video display function while
driving the vehicle. This is a violation of federal law.
WARNING! Never disassemble or adjust the unit.
WARNING! To prevent injur y from s hock or f ire, ne ver expose this uni t to
moisture or water.
WARNING! Never use irregular discs.
WARNING! To prevent damage to the mechanism inside this unit, avoid
impact to the TFT monitor.
WARNING! The monitor employs an automatic motorized mechanism. T o
prevent damage to the core mechanism, please do not push, pull or
swivel the monitor manually.
3
Page 7

VM9224
CONTROLS AND INDICATORS
1. Disc Slot
2. IR Remote Control Receiver
3. EJECT
Press to eject a disc.
Press and hold to reset core mechanism position.
4. SRC
Press to turn the unit on. Press and hold to turn the unit off.
When on, press once to select playing mode.
5. NAV
Press to display the navigation user interface.
6. TFT Display
7. Rotary Encoder
Rotate to adjust the volume. While in the audio menu, press and release to
enter and/or confirm audio settings.
Press to activate the MUTE function and silence the receiver. Press again to
resume sound.
Press and hold to activate the Local (LOC) setting. Press and hold again to
turn Local reception off.
8. USB/SD Interface Connector
Connect a USB device or insert an SD card for playback of music/video files.
9. A/V Input
Attach a compatible A/V device.
10. RESET
Press to reset system settings to factory default (except the password and
parental lock setting).
4
Page 8

EJECT
1
3
4
5
7
10
9
8
2
6
MUTE
OPEN
VM9224
5
Page 9

REMOTE CONTROL
3
4
5
9
6
7
26
27
15
16
34
33
19
32
23
24
31
30
8
35
1
2
10
13
28
25
11
12
14
20
18
17
22
21
29
MUSIC PHOTO VIDEO
iPod
See Table 1 for remote control functions.
VM9224
6
Page 10

VM9224
7
Page 11
Table 1: Remote Control Functions
Button Function
Name # DVD VCD TUNER
MENU 1 Enters the
TITLE 2 Enters the
MUTE 3 Toggles on/
POWER/4 Turns the
AUDIO 5 Changes
REPT
A-B
REPT 7 Repeats
SRC 8 Selects
SUBTITLE
main menu
of the disc
title menu of
the disc
off audio
output
power on/
off
the audio
language
for disc
playback
6 Setup to
repeat playback from
time frame
A to time
frame B
playback of
current
chapter
playing
mode
9 Language
selection for
subtitle
Turns on/off
PBC when
playing
VCD
Plays first
ten seconds
of each
chapter/title
Toggles on/
off audio
output
Turns the
power on/
off
Setup to
repeat playback from
time frame
A to time
frame B
Repeats
playback of
current
chapter
Selects
playing
mode
Toggles on/
off audio
output
Turns the
power on/
off
Selects
playing
mode
CD/MP3/
USB/SD
Toggles on/
off audio
output
Turns th e
power on/
off
Repeats
playback of
current
track
Selects
playing
mode
VM9224
iPod
Selects
Photo mode
Selects
Music mode
Toggles on/
off audio
output
Turns the
power on/off
Selects
Music mode
Repeats
playback of
current track
Selects
playing
mode
Selects
Photo mode
8
Page 12

VM9224
Table 1: Remote Control Functions
Button Function
Name # DVD VCD TUNER
DISP/
10 Displays
CLEAR
PRESET /\
PRESET \/
ANGLE 13 Plays back
>> 14 Fast for-
VOL - 15 Decreases
VOL + 16 Increases
|<< 17 Selects the
>/|| 18 Pauses
playing
information
Delete entry
or move
backwards
to correct
error in
Direct
Access
mode
11 Navigates
12 Navigates
disc in different angle
for a scene
wards the
disc content
volume
volume
previous
chapter for
playback
playback/
starts playback
Displays
playing
information
Delete entry
or move
backwards
to correct
error in
Direct
Access
mode
Plays back
Picture CD
with different angle of
picture displayed
Fast forwards the
disc content
Decreases
volume
Increases
volume
Selects the
previous
chapter for
playback
Pauses
playback/
starts playback
Displays
playing
information
Delete entry
or move
backwards
to correct
error in
Direct
Access
mode
the preset
station list
the preset
station list
Decreases
volume
Increases
volume
Searches
an available radio
station by
decreasing
tuning frequency
CD/MP3/
USB/SD
Display
playing
information
Delete entry
or move
backwards
to correct
error in
Direct
Access
mode
Fast forwards the
disc content
Decreases
volume
Increases
volume
Selects the
previous
track for
playback
Pauses
playback/
starts playback
iPod
Displays
playing
information
Delete entry
or move
backwards
to correct
error in
Direct
Access
mode
Selects
Video mode
Accesses
iPod Menu
Decreases
volume
Increases
volume
Pauses
playback/
starts playback
9
Page 13

Table 1: Remote Control Functions
Button Function
Name # DVD VCD TUNER
>>| 19 Selects the
/ 20 Stops play-
GOTO 21 Open direct
<< 22 Slow play-
ZOOM 23 Zooms in/
PIC 24 Displays
OPEN/
CLOSE
WIDE 28 Selects dis-
1, 2, 3,
4, 5, 6,
7, 8, 9,
0
(Numer
ic Keypad)
next chapter for playback
back
entry
search
screen
back/slow
rewind playback
out on an
image
set-up
parameters
25 No function No function No function No function No function
26 No function No function No function No function No function
27 No function No function No function No function No function
play mode:
FULL or
NORMAL
29 Directly
accesses
chapter
Selects the
next chapter for playback
Stops playback
Open direct
entry
search
screen
Slow playback/slow
rewind playback
Zooms in/
out on an
image
Displays
set-up
parameters
Selects display mode:
FULL or
NORMAL
Searches
an available radio
station by
increasing
tuning frequency
1-6 selects
preset for
current
band
CD/MP3/
USB/SD
Selects the
next track
for playback
Stops playback
Directly
accesses
track
VM9224
iPod
Selects the
next track
for playback
10
Page 14
VM9224
Table 1: Remote Control Functions
Button Function
Name # DVD VCD TUNER
||> /
30 Press
BAND
SETUP 31 Displays
EQ 32 Accesses
RDM 33 Plays all
INT 34 Plays the
EJECT 35 Ejects disc Ejects disc Ejects disc Ejects disc Ejects disc
repeatedly
for slow
motion forward/backward
Setup menu
equalizer
menu
chapters in
random
order
Press
repeatedly
for slow
motion forward/backward
Displays
Setup menu
Accesses
equalizer
menu
Selects FM/
AM band
Displays
Setup menu
Accesses
equalizer
menu
CD/MP3/
USB/SD
Displays
Setup menu
Accesses
equalizer
menu
Plays all
tracks in
random
order
first ten seconds of
each track
iPod
Displays
Setup menu
Accesses
equalizer
menu
Plays all
tracks in
random
order
11
Page 15
VM9224
FULL
The entire screen is extended
horizontally to the aspect ratio of 16
to 9. The extension ratio is the same
at any point.
NORMAL
The conventional display image has
a 4 to 3 ratio of horizontal to vertical,
leaving a blank area on the right and
left sides of the display.
STANDBY
Screen becomes black. Touch
screen to resume.
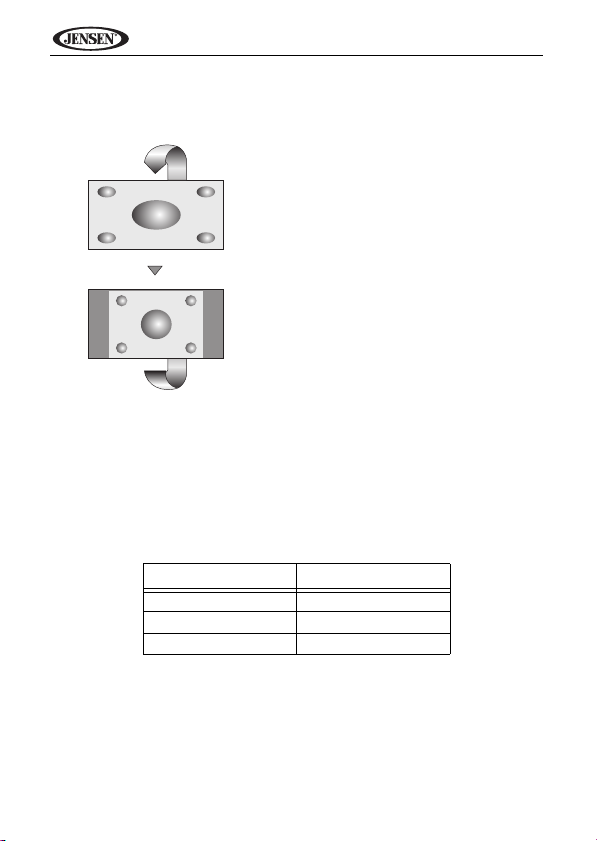
Aspect Ratio
Press the WIDE button (28) on the remote control to adjust the aspect ratio as
follows:
Image/Display Settings
Video Output Modes
Table 2 shows the video output mode for each playing source.
Table 2: Video Output Modes
Playing Source Video Output Modes
AM/FM TUNER RGB Mode
DVD RGB Mode
AUX IN CVBS Mode
*CVBS – Composite Video Baseband Signal
Picture Adjustment
To adjust monitor display settings, perform the floowing steps:
1. Press the PIC button (24) on the remote control repeatedly to move from
the “BRIGHT” setting to “CONTRAST”.
2. Turn the rotary encoder to adjust the setting level.
3. Press the PIC button (24) on the remote control 1-3 times to exit the
picture adjustment menu.
12
Page 16

VM9224
Parking Brake Inhibit
When the pink "Parking" wire is connected to the vehicle Parking Brake circuit,
the front TFT monitor will display video when the Parking Brake is engaged.
(When the pink wire is grounded via the Parking Brake circuit, video will be
displayed.)
13
Page 17
VM9224
SOURCE MENU
RADIO
RADIOBTDISC
NAV
USB1
AUX
USB2 SD
CAMERA
N
S
E
W
8GB
OPERATING INSTRUCTIONS
Power On / Off
Press the /SRC button (4) on the unit (or the button (4) on the remote
control) to turn the unit on. The buttons on the front of the unit light up and the
current mode status appears in the LCD (7).
Press and hold the button to power off the unit.
Audible Beep Confirmation
An audible beep tone confirms each function selection. The Beep tone can be
disabled through the Setup menu.
Mute/Line Mute
Press the rotary encoder button (7) on the front panel or the MUTE button (3)
on the remote to mute the volume from the unit. Press the rotary encoder
button again to restore the volume. “MUTE” is disp layed on th e LCD. Adjusting
the volume or using any of the audio setup features cancels the mute function.
If the “MUTE” wire is connected, audio output mutes when a telephone call is
received by the car phone (using optional BTM10) or when verbal navigation is
performed (using optional NAV102).
Playing Source Selection
When the monitor is closed, press the SRC button on the front panel (4) or
remote control (8) to change between available audio playing sources in the
following order: RADIO, DISC, USB1, USB2, SD, BT, NAV, AUX and
CAMERA.
Source Menu
You can also use the tou ch screen to change t he source through the SOURCE
MENU. To access the SOURCE MENU, touch the top left corner of the screen
or press the SRC button on the front panel (4) or remote control (8).
14
Page 18

VM9224
MUTE
3.5mm A/V Cable (not included)
Video
Left Audio
Right Audio
Ground
1
2
3
4
T ou ch the RADIO, DISC, USB1, US B2, SD, BT, NAV, AUX or CAMERA button
to select the corresponding source.
NOTE: If an iPod is attached to a USB1 port, “IPOD” appears instead of
the text “USB1.”
External Devices
External peripheral devices, including a game console, camcorder, navigation
unit, iPod, Zune, etc. can be connected to this unit via RCA output using an
A/V Media Adapter Cable (not included).
Connect the external device to the A/V Media Adapter Cable and then plug the
cable into the A/V INPUT connector (9) on the front of the radio. Select “AUX”
or “AUX IN” (when monitor is closed) mode to access auxiliary devices. You
cannot directly control external devices connected to the A/V INPUT. For
information regarding the use of USB devices, see “Inserting a USB De vice or
SD Card” on page 39.
Volume Adjustment
Volume Increase/Decrease
To increase or decrease the volume level, turn the rotary encoder (7) on the
front panel or press the VOL-/+ buttons (15, 16) on remote control. When the
volume level reaches “0” or “40”, a beep sounds, indicating that the adjustment
limit has been reached. The TFT screen displays the volume level for 3
seconds.
Programmable Turn-On Volume
This feature allows the user to select a turn-on volume setting regardless of
the volume setting prior to turning the unit off.
To program a specific turn-on volume level, turn the rotary encoder (7) to
adjust the volume to the desired turn-on volume. Push and hold the rotary
15
Page 19

VM9224
encoder while the speaker icon and level indication is displayed on the screen.
The unit will beep to confirm your turn-on volume setting.
Audio Control Menu
The Audio Control feature allows you to easily adjust your audio system to
meet the acoustical characteristics of your vehicle, which vary depending on
the type of vehicle and its measurements. Proper setting of the Fader and
Balance boosts the effects of the cabin equalizer.
Touch the EQ button on the left side of the screen or press the EQ button (32)
on the remote control to display the audio menu.
• Use the touch screen +/- buttons to adjust the settings for an audio
feature.
• To adjust an audio feature using the remote control, perform the following
steps:
a. Press the (>>|)/(|<<) buttons (19, 17) to highlight the audio feature to
be adjusted.
b. Press the >/|| button (18) to select the highlighted option.
c. Pre s s the |<<, >>|, >>, or << buttons (12, 15, 17, 20) on the remote
control to adjust the selected feature to the desired setting.
Table 3: Audio Adjustments
Audio Function Adjustable Range
EQ User
BASS -14 to +14
MID -14 to +14
TREBLE -14 to +14
SUB -14 to 0
FAD Grid
BAL Grid
Acoustic
Urban
Rave
Latin
Dance
Hip Hop
Rock
NOTE: The EQ mode will automatically change to “USER” when
individual audio functions are adjusted.
16
Page 20

VM9224
n
The Audio menu will automatically exit after a few seconds of inactivity. To exit
quickly, touch the top left corner of the screen.
System Reset
To correct a system halt or other illegal operation, use the
tip of a pen to press the reset button (10) located on the
front bottom-right corner of the unit. After a system reset,
the unit restores all factory default settings.
NOTE: If the unit is reset while a DVD is playing, the DVD resumes play
once the reset is complete.
[RESET] Butto
Steering Wheel Control (SWC)
The VM9224 is compatible with the PAC (Pacific Accessory Corporation)
steering wheel control adapter SWI-PS. A 3.5mm female connector (labeled
“SWC Interface”) on the back of the head unit allows connectivity to the PAC
adapter. Please refer to the instructions included with the PAC adapter for
detailed installation information.
SWC Functions
The following controls are available for most vehicles:
1. Vol Down
2. Vol Up
3. Mute
4. Seek Down / Previous Track / ** Preset Down
5. Seek Up / Next Track / ** Preset Up
6. SRC (Source)
7. ** Select
8. ** Select
9. Band
** If additional steering wheel control buttons are available on the vehicle,
function 7 / 8 may be assigned the "Select" feature. This feature / function m ay
not be available on some vehicles.
Select Operation
If "Select" (function 7 or 8) is held down and function 4 is pressed momentarily,
Preset Up will be selected. If "Select" (function 7 or 8) is held down and
function 5 is pressed momentarily, Preset Down will be selected.
17
Page 21

VM9224
Rating
Bluetooth
Hardware
P.VOL
TS Cal
General Language
Audio Back
DEMO
Clock Mode 12Hr
Clock 04 : 31 AM
Tuner Region USA
Beep On
SETUP MENU
RADIO
RDS
05:33 AM
DIRECTION BUTTONS
SETUP MENU
T o access system settings, p ress the SETUP butto n (29) on the r emote control
or touch the button on the screen to enter the “SETUP” menu. The
“GENERAL” sub-menu appears highlighted in blue.
Accessing Menu Items
Touch the sub-menu name, press the <<, >>, |<<, or >>| direction buttons (22,
14, 17, 19) on the remote control to select a sub-menu (Language, Audio,
RDS, etc.).
The features available for adjustment under the highlighted sub-menu option
will appear in the center of the screen.
Adjusting a Feature
1. Use the touchscreen to select the feature to be adjusted.
2. Enter the option field for the feature you want to adjust by using the
touchscreen or pressing the >/|| button (18) on the remote control. A
submenu appears in a second row with the selected option highlighted in
blue.
18
Page 22

VM9224
3. Select a new value by using the touchscreen or pressing the >> or <<
buttons (14, 22) on the remote control.
4. Use the touchscreen or press the >/|| button (18) on the remote control to
confirm setup.
General Sub-menu Features
Setting Options Function
Clock Mode 12Hr Clock displays 12 hour time using AM and PM.
Clock (HH:MM) Clock appears in the top right corner of the screen and
Tuner Region USA • AM Frequency Spacing - 10kHz
Beep Off No beep sounds
24Hr Clock displays 24 hour time up to 23:59.
on the LCD screen during certain operations. NOTE:
The AM/PM indication will change as you continue to
adjust the hour past 12.
• AM Frequency Band - 530kHz~1720kHz
• FM Frequency Spacing - 200kHz
S.Amer1 • AM Frequency Spacing - 10kHz
Arabia • AM Frequency Spacing - 9kHz
China • AM Frequency Spacing - 9kHz
S. Amer2 • AM Frequency Spacing - 5kHz
Europe • AM Frequency Spacing - 9kHz
Korea • AM Frequency Spacing - 9kHz
On When turned on, an audible beep tone confirms each
• FM Frequency Band - 87.5MHz~107.9MHz
• AM Frequency Band - 530kHz~1720kHz
• FM Frequency Spacing - 100kHz
• FM Frequency Band - 87.5MHz~108.0MHz
• AM Frequency Band - 531kHz~1620kHz
• FM Frequency Spacing - 100kHz
• FM Frequency Band - 87.5MHz~108.0MHz
• AM Frequency Band - 522kHz~1620kHz
• FM Frequency Spacing - 100kHz
• FM Frequency Band - 87.5MHz~108.0MHz
• AM Frequency Band - 520kHz~1600kHz
• FM Frequency Spacing - 100kHz
• FM Frequency Band - 87.5MHz~108.0MHz
• AM Frequency Band - 522kHz~1620kHz
• FM Frequency Spacing - 50kHz
• FM Frequency Band - 87.5MHz~108.0MHz
• AM Frequency Band - 531kHz~1602kHz
• FM Frequency Spacing - 200kHz
• FM Frequency Band - 88.1MHz~107.9MHz
function selection.
19
Page 23
VM9224
Language Sub-menu Features
If a DVD supports more than 1 Subtitle or Audio language, all the languages
are available for selection during playback. If the selected language is not
supported by the DVD, then the default language is used.
Setting Options Function
Language English On Screen Display appears in English.
Subtitle English DVD subtitles automatically appear in English when avail-
Auto DVD subtitles appear according to the default subtitle lan-
Audio English DVD Audio is heard in English when the option is available.
DVD
Menu
Off DVD subtitles do not appear automatically.
English DVD menu (if applicable) is displayed in English.
Audio Sub-menu Features
Setting Options Function
DRC Off Employ the Dynamic Range Control for better playback for
Loudness Off Turn bass boost on/off
Subwoofer
Sub Filter 80Hz Selecting a crossover frequency sets a cut-off frequency of
On
On
Off Turn the subwoofer on/off.
On
120Hz
160Hz
RDS Sub-menu Features
Setting Options Function
RDS Off
CT Off
On
On
able.
guage specified on the disc.
low volumes.
the subwoofer's LPF (low-pass filter).
20
Page 24

VM9224
Bluetooth Sub-menu Features
Setting Options Function
Bluetooth Off Disable Bluetooth function.
Connect Manual Connect the last active mobile phone by touching the CON-
Auto
Answer
Pairing
Code
Rating Sub-menu Features
The DVD system has a built-in parental lock feature to prevent unauthorized
persons from viewing restricted disc content. By default, the rating system is
unlocked. Once setup, the parental lock is released only by entering the
correct password. Once the password is entered, rating is available for setup.
Setting Options Function
Set
Password
Parental
Ctrl
Load
Factory
To reset the password, access the “RATING” menu and enter the current
password. Once the correct password is entered, you can access the
“Password” field and enter a new one.
On Enable Bluetooth function.
Auto Automatically connect when your paired phone is in range.
Manual Manually answer calls by touching the “call” button.
Auto The unit automatically answers all incoming calls.
_ _ _ _ Enter a 4-digit password to activate the “Rating” feature.
1. Kid
Safe
2. G
3. PG
4. PG-13
5. PG-R
6. R
7. NC-17
8. Adult
Reset Select “Reset” to restore the factory default settings for the
NECT icon when disconnected.
The default code is “1234”. Tou ch the keypad icon to open
the keypad and enter the pairing code or pass key required
for Bluetooth connection to your mobile phone. Not all
phones/devices require a pairing code. The default code is
“0000” for many models.
Select the appropriate rating level for the intended audience.
You may override higher ratings by using your password.
Rating system only.
21
Page 25

VM9224
NOTE: Record the password and keep it in a safe place for future
reference. The rating for each disc is marked on the disc, disc packing,
or documentation. If the rating is not available on the disc, the parental
lock feature is unavailable. Some discs restrict only portions of the disc
and the appropriate content will play. For det ail s, please refer to the disc
description.
Hardware Sub-menu Features
Setting Options Function
Camera In Normal
Video
Input
(Input circuitry
autodetects the
video signal from
the Aux In
source).
If the monitor is in display mode, the monitor automatically switches to
CAMERA mode upon reverse driving. When the reverse driving stops, the
monitor return to its original input mode.
Mirror Reverse the camera image as if looking through a rear-view
NTSC The color signals are output in the standard NTSC format.
PAL The color signals are output in the standard PAL format.
Auto The color signal output is switched automatically based on
mirror.
the current video input signal - NTSC or PAL.
22
Page 26

VM9224
P.VOL Sub-menu Features
Setting Options Function
Source RADIO Choose a source for which you would like to increase the rel-
DISC
USB1
USB2
SD
BT
NAV
AUX
CAMERA
Level 0-6 I ncrease relative volume for specified source up to 6 deci-
ative volume (LEVEL).
bels.
TS Cal (Screen Calibration)
To access the “Screen Calibration” function from the SETUP menu, select the
“TS CAL” option.
After entering calibration mode, a crosshair appears in a corner quadrant of
the screen. To begin calibration, press and hold the crosshair for one second
until it moves to the next quadrant. Continue for each quadrant until the
calibration is completed.
Demo Sub-Menu Features
You can stop/run demonstration mode or turn Demo Auto Run on/off by
chooing the “Demo” option from the SETUP MENU.
When Demo "Auto Run" is Off, you can select "Demo > Run" to start Demo
Mode. Demo scrolls through the various source screen s, simulating activity on
the display. “Demo” is discreetly displayed in blue text (below the clock), to
indicate the unit is in Demo Mode. To stop Demo Mode, press the upper-left
quadrant of the TFT (Source select).
When Demo “Auto Run” is On, the unit will automatically display Demo Mode
when powered on.
Exiting the System Setup Menu
To exit setup mode and resume normal playback, press the SETUP button
(31) on the remote control or touch the BACK button on the screen.
23
Page 27
TUN E R OP E RA TI O N
4
1
10
21
22
5
7
8
3
6
17
FM-1 P1 87.5 MHz
01:02 PM
E
Q
PS
PTY
BAND
AS
1/2
2/2
MEM
LOC
P1 87.5 MHz
P2 90.1 MHz
P3 98.1 MHz
P4 106.1MHz
P5 107.9MHz
P6 102.9MHz
PS:
ST
LOC PTY RDS
2
16
16
15
23
11
18
25
20
24
12
13
14
19
9
RADIO
Tuner TFT Display
VM9224
1. Current radio band indicator
2. Radio frequency indicator
3. Clock
4. Stereo broadcasting indicator
5. Strong Local signal broadcasting indicator
6. Preset radio stations: Touch to recall preset stations
7. Information about the current function
8. EQ: Touch for quick access to Equalizer level settings
9. : Touch to access the direct entry screen
10. Current preset station indicator
11. |<<: Touch to seek backward
12. >>|: Touch to seek forward
13. <<: Touch to tune backward one step
14. >>: Touch to tune forward one step
15. BAND: Touch to change between AM/FM bands
24
Page 28

VM9224
16. 1/2: Touch to view a second screen of menu choices
17. : Touch to view the SOURCE MENU and select a new playback source
18. MEM: View screen used to enter current channel into preset memory
19. : Touch to view the SETUP menu
20. PS (Preview Scan): Touch to scan all stations available, stopping for 5
seconds at each and continuing until a station is selected
21. PTY Indicator
22. RDS Indicator
23. AS: Touch to automatically store stations
24. PTY: Touch to activate the PTY function
25. LOC: Press to activate/deactivate the Local function
Switching to Radio Tuner Source
• Touch the top left corner of the screen (the RADIO circle) to view the
SOURCE MENU. Touch “Radio”.
• Press the SRC button (4) on the front panel or remote control (8) to switch
to the AM/FM or RADIO source.
Selecting FM/AM Band
Touch the BAND button (15) on the screen, or press the ||>/BAND button on
the remote control (30) to change between the following bands: FM1, FM2,
FM3, AM1, and AM2.
NOTE: The BAND button on the unit only works when the TFT is closed.
Seek Tuning
To seek the next higher station:
• Touch the >>| button on screen.
• Press the >>| button (19) on the remote control.
To seek the next lower station:
• Touch the |<< button on screen.
• Press the |<< button (17) on the remote control.
Manual Tuning
To increase or decrease the tuning frequency one step:
• Touch the >> or << buttons on screen.
• Press the >> or << buttons (14, 22) on the remote control.
25
Page 29
VM9224
FM:___._MHz
1
2
3
4
5
6
7
8
9
0
Clear
Exit
Enter
Preset: _
Exit
P1
P2
P3
P4
P5
P6
Direct Tuning
To enter a radio station directly, touch the button or press the GOTO button
(21) on the remote control to display the direct entry menu.
Enter the desired radio station using the on-screen number pad. Press the
Enter button to tune to the selected station. To exit the screen without
changing the station, touch Exit. To clear your entry and start over, touch
Clear.
Using Preset Stations
Six numbered preset buttons store and recall stations for each band. All six
stored stations (P1-P6) for the current band appear on the screen.
Storing a Station
1. Select a band (if needed), then select a station.
2. Touch the on-screen MEM button (18) to open the preset screen.
3. Touch the preset number in which you would like to store the current
station (or touch Exit to cancel and close the menu). The preset number
and station appears highlighted.
26
Page 30

VM9224
P1 87.5 MHz
P2 90.1 MHz
P3 98.1 MHz
P4 106.1MHz
P5 107.9MHz
P6 102.9MHz
Recalling a Station
1. Select a band (if needed).
2. Touch an on-screen preset button (6) to select the corresponding stored
station.
Auto Store/Preview Scan (AS/PS)
Auto Store (AS)
To select six strong stations and store them in the current band:
1. Select a band (if needed).
2. Touch the AS button (23) on page 2/2 of the on-screen con trols to a ctivate
the Auto Store function.
The new stations replace stations already stored in that band.
Preview Scan (PS)
To scan the AM or FM band for a preview of available stations in your
particular area, touch the PS button (20). Touch again to stop preview scan.
Local Radio Station Seeking (LOC)
When the Local function is on, only radio stations with a strong local radio
signal are played. To activate the Local function in AM/FM tuner mode, press
and hold the rotary encoder button (7) on the front panel. Press and hold the
rotary encoder again to turn Local off. When the Local function is active, the
LOC indicator at the top of the screen is illuminated.
27
Page 31
VM9224
DVD/VCD VIDEO OPERATION
NOTE: When properly installed, DVD video cannot be displayed on the
main TFT screen unless the parking brake is applied. If you attempt to
play a DVD while the vehicle is moving, the TFT screen displays
“PARKING” with a blue background. Rear video screens, if applicable,
will operate normally.
Inserting a Disc
Upon inserting a DVD disc, DVD mode is entered and disc play begins.
NOTE: If Parental Lock (Rating) is activated and the disc inserted is not
authorized, the 4-digit code must be entered and/or the disc must be
authorized (see “Rating Sub-menu Features” on page 21).
You cannot insert a disc if there is already a disc in the unit or if the power is
off.
NOTE: DVD-R and DVD-RW will not play unless the recording session is
finalized and the DVD is closed.
Ejecting a Disc
Press the button (3) on the unit or remote control (35) to eject the disc. The
unit automatically reverts to Tuner mode. You may eject a disc with the unit
powered off. The unit will remain off after the disc is ejected.
Resetting the Loading Mechanism
If the disc loads abnormally or an abnormal core mechanism operatio n occurs,
press and hold the button (3) on the unit or remote control (35) to reset the
loading mechanism. Normal operation resumes.
Accessing DVD Mode
To switch to DVD mode when a disc is already inserted, press the SRC button
(4) on the front panel or remote control (8).
28
Page 32

VM9224
1/2
MENU
2/2
DISP
AUDIO
A-B
TITLE
SUBTITLE
Controlling Playback
To access the on-screen controls, touch the bottom 1/3 of the screen while a
DVD is playing. Touch the 1/2 button to view a second page of controls
Stopping Playback
Touch the stop button ( ) on the screen or press the ||>/BAND button (20) on
the remote control to stop DVD play.
Pausing Playback
Touch the play/pause button (>) on the screen or press the >/|| button on the
remote control (18) to suspend or resume disc play.
Slow Motion Playback
Press the << button (22) on the remote control or the << button on the screen
to play the current title in slow motion. Keep pressing and releasing the button
to increase the rate from “x2” to “x4”, “x8”, and “x20”.
Press >/|| (16) on the remote control or touch the on-screen play button (>) to
resume normal play.
Fast Forward Playback
Press the >> button (14) on the remote control or the >> button on the screen
to fast forward. Keep pressing and releasing the button to increase the rate
from “x2” to “x4”, “x8”, and “x20”.
Press >/|| (18) on the remote control or touch the on-screen play button (>) to
resume normal play.
Repeat Playback
Press the RPT button (7) on the remote control or the button on screen to
alter repeat mode according to the following:
• DVD: Repeat Chapter, Repeat TItle, Repeat Off
• VCD (PBC Off): Repeat Single, Repeat Off
29
Page 33

VM9224
NOTE: For VCD play, the repeat function is not available if PBC is on.
Sectional Repeat Function (A-B)
Use the A-B function to define a specific area of a disc to repeat.
•Press the REPT A-B button (6) on the remote control (or the A-B button on
screen) to set the start point (A) of the repeated section.
• Press the REPT A-B button again once you reach the desired end point
(B) of the repeated section. The selected portion of the DVD will now
repeat continuously .
• Press the REPT A-B button again to cancel the A-B section setting and
stop repeat play.
Accessing the DVD Menu
Press the MENU button (1) on the remote control to recall the main DVD
menu. Use the directional (arrow ) buttons on th e remote control to se lect a title
from the menu or touch the title on screen.
Press the TITLE button (2) on the remote control or on screen to select a
different title for playback.
Press the >/|| button (18) on the remote control or pr ess the r ot ary encode r (7)
to confirm your selection and begin playback. You can also select a title using
the touch screen.
Moving Through Chapters
Press the >>| button (19) on the remote control or the >>| button on screen to
advance to the next chapter on the DVD.
Press the |<< button (17) on the remote control or the |<< button on screen to
move to the previous chapter.
Goto Search
During DVD or VCD playback, perform the following steps to use the GOTO
feature to access a specific location on a disc:
1. Press the GOTO button (21) on remote control to access the “Search”
screen.
2. Press the >> or << buttons (14, 22) on the remote control to select a
category.
30
Page 34

VM9224
Search
Title 20
Chapter 5
Time 00:00:00
DVD Search
Title – Go to specific
title
Chapter – Go to
specific chapter
Time – Go to specific
time in current title
Search
Time 00:00:00
VCD Track Search
Time – Go to specific
time in the current
track
• For DVD mode, you can choose Time or Title/Chapter search.
• For VCD mode, press the GOTO button to choose between Time
search.
3. Enter a time into the field using the numeric keypad (29) on the remote
control.
4. Press the >/|| button (18) on the remote control or press the rotary encoder
(7) to go to the specified location on the disc.
5. Press the GOTO button again to exit.
Direct Chapter / Track Selection
Remote Control Direct Entry
During DVD, VCD and CD playback, you can use the numeric keypad on the
remote control (29) to access a track directly.
31
Page 35

Touch Screen Direct Entry
Chapter: _ _
1
2
3
4
5
6
7
8
9
0
Clear
Exit
Enter
To select a chapter/track directly, touch the button on screen control to
display the direct entry menu.
Enter the desired chapter/track using the on-screen number pad. Press the
Enter button to tune to the selected station. To exit the screen without
changing the station, touch Exit. To clear your entry and start over, touch
Clear.
Viewing an Alternate Picture Angle (DVD Only)
Some DVDs contain scenes that have been shot simultaneously from dif ferent
angles. For discs recorded with multiple angles, press the ANGLE button (13)
on the remote control to toggle available angles of the on-screen image.
Zooming
Press the ZOOM button (23) on the remote control to enlarge and p an throu gh
the video image using the following options: “Q1”, “Q2”, “Q3” and “OFF”.
Multi-Language Discs (DVD Only)
Changing Audio Language
If you are watching a disc recorded in multiple languages, press the AUDIO
button (5) on the remote control to choose a language.
Changing Subtitle Language
If you are watching a disc recorded in multiple languages with subtitles, press
the SUBTITLE button (9) on the remote control to choose the language in
which you would like the subtitles to appear.
NOTE: During VCD playback, press the AUDIO button (5) on the remote
control to choose between Left Channel, Right Channel, and Stereo.
32
VM9224
Page 36

VM9224
PBC - Play Back Control (VCD Only)
For VCDs with play back functionality, play back control (PBC) provides
additional controls for VCD playback.
Press the MENU button (1) on the remote control to toggle the PBC function
“On”/”Off”. Once PBC is on, playback starts from track one of the play list.
NOTE: When PBC is activated, fast forward, slow playback, and
previous/next track are available. Repeat and direct track selection are
not available.
When PBC is activated, selecting random, scan, or search playback
automatically deactivates PBC.
Playback Information
During DVD and VCD playback, press the DISP button (10) on the remote
control to display playback information on the screen, including the media
playing and current playback time.
DVD Playback Information
• DVD Video – Format of current disc.
• Time 00:01:30/00:36:10 – Indicates the playback time of the cur rent track.
• Title 5/08 – Indicates the fifth of 8 titles on the DVD is currently playing.
• Chapter 2/16 – Indicates that the second of 16 titles on the DVD is
currently playing.
VCD Playback Information
• VCD2.0 – Format of current disc.
• Time 00:01:30/00:36:10 – Indicates the playback time of the cur rent track.
• PBC On/Off – Indocates whether Play Back Control is On or Off.
General Disc Information
Table 4: Disc Properties
Symbol 12cm Disc Properties Max Play Time
Single side single layer (DVD-5)
Single side double layer (DVD-9)
Double side single layer (DVD-10)
Double side double layer (DVD-18)
Single side single layer (VCD) (MPEG 1 Method)
Single side single layer 74 minutes
(MPEG 2 Method)
133 minutes
242 minutes
266 minutes
484 minutes
74 minutes
33
Page 37
Table 5: Disc Symbols
Symbol Meaning
Number of voice languages recorded. The number inside the icon indicates the number languages on the disc (maximum of 8).
Number of subtitle languages available on the disc (maximum of 32).
Number of angles provided (maximum of 9).
Aspect ratios available. “LB” stands for Letter Box and “PS” stands for
Pan/Scan. In the example on the left, the 16:9 video can be converted
to Letter Box video.
Indicates the region code where the disc can be played.
• Region 1: USA, Canada, East Pacific Ocean Islands
• Region 2: Japan, Western Europe, Northern Europe, Egypt, South
Africa, Middle East
• Region 3: Taiwan, Hong Kong, South Korea, Thailand, Indonesia,
South-East Asia
• Region 4: Australia, New Zealand, Middle and South America, South
Pacific Ocean Islands/Oceania
• Region 5: Russia, Mongolia, India, Middle Asia, Eastern Europe,
North Korea, North Africa, North-West Asia
• Region 6: Mainland China
• ALL: All regions
VM9224
34
Page 38

VM9224
15
1
7
2
13
5
16
12
3
CDDA 2/10 00:00:23
14
4
9
11
10
8
6
01:02 PM
DISC
17
E
Q
ROOT
1 Track 01
2 Track 02
3 Track 03
4 Track 04
5 Track 05
6 Track 06
DVD/CD AUDIO OPERATION
Instructions for TFT control and Insert/Eject are the same for DVD and CD
operation. Please see the DVD/Disc Video Operation section for information
about these topics.
The VM9224 will play music or other audio files from the following disc media:
•CD-DA
•CD-R/RW
•DVD
•DVD+R/RW
•DVD-R/RW
Upon inserting a disc with the TFT screen open, the disc and track title (if
available), along with the track number and playing time appear on the scree n.
CD Player User Interface
The on-screen indicators and touch key areas for CD playback are outlined
below.
1. Current track and total number of tracks on disc
2. Elapsed playing time
3. Current t i me
4. Track titles
5. Disc title
6. /||: Touch to play/pause disc playback
7. : Touch to stop disc playback
8. >>|: Touch to move to next track
9. |<<: Touch to move to previous track
10. >>: Touch to fast forward current track
35
Page 39

VM9224
11. <<: Touch to rewind current track
12. Touch to activate/deactivate Repeat play mode
13. Touch to activate/deactivate Random mode
14. : Touch to access the direct entry screen
15. : Touch to view the SETUP menu
16. Touch for quick access to Equalizer level settings
17. Touch to view the SOURCE MENU and select a new playback source
Controlling Playback
Stopping Playback
T ouch t he button on screen or press the ||>/BAND button (30) on the remote
control to stop disc play.
T o resu me playback, touch the /|| button on screen or press the >/|| button on
the remote control (18).
Pausing Playback
Touch the /|| button on screen or press the >/|| button on the remote control
(18) to suspend or resume disc play.
Moving Through Tracks
Press the >>| button (19) on the remote control or on screen to advance to the
next track on the disc.
Press the |<< button (17) on the remote control or on screen to move to the
previous track.
Repeat Playback
Touch the button on screen or press the RPT button (7) on the remote
control to alter repeat mode according to the following:
• DVD: Repeat Chapter, Repeat Title, Repeat Off
• CDDA: Repeat Single, Repeat Folder, Repeat Off
• CD-R/RW: Repeat Single, Repeat Off
• DVD-R/RW: Repeat Single, Repeat Off
Track Scan Select (CD-DA discs only)
During disc play, press the INT button (34) on the remote control to play the
first 10 seconds of each track. When a desired track is reached, press the INT
button again to cancel the function and play the selected track.
Random Play Select
While disc play is stopped, touch the button on screen or the RDM button
(33) on the remote control to play the tracks on the disc in a random, shuffled
order. Press the (RDM) button again to cancel Random Play mode.
36
Page 40

VM9224
Chapter: _ _
1
2
3
4
5
6
7
8
9
0
Clear
Exit
Enter
NOTE: CD-R and CD-RW will not play unless the recording session is
finalized.
Fast Forward
Touch the >> button on screen or press the >> button (14) on the remote
control to fast forward. Keep pressing and releasing the button to incr ease the
rate from “x2” to “x4”, “x8”, and “x20”. Press the >/|| button to resume normal
playback.
Direct Track Entry
To select a track directly, touch the button on screen control to display the
direct entry menu.
Enter the desired track using the on-screen number pad. Press the enter
button (arrow) to tune to the selected station. To exit the screen without
changing the station, touch Exit. To clear your entry and start over, touch
Clear.
37
Page 41

VM9224
MP3/WMA OPERATION
Instructions for TFT control and Insert/Eject are the same for DVD and MP3
operation. Please see the DVD/Disc Video Operation section for information
about these topics.
Media and File Requirements
This player allows you to play back MP3 and WMA files recorded onto CD-R/
RWs, DVD+R/RWs, and DVD-R/RWs. For CD-RW discs, please make sure it
is formatted using the full method and not the quick method to prevent illegal
disc operation.
Up to 1500 songs/files can be burned onto a disc for a DVD music mix. Do not
exceed this number of songs/files or disc readability problems may occur.
MP3 Format Compatibility
The file naming formats listed below are compatible with this unit:
• ISO 9660 – file name: 12 characters, file extension: 3 characters
• ISO 9660 – file name: 31 characters, file extension: 3 characters
• Joliet – 64 characters
If the file or folder name does not conform to ISO 9660 file system st andards, it
may not be displayed or played back correctly . Use the fo llowing settings when
compressing audio data for your MP3 disc:
• Transfer Bit Rate: 128kbps
• Sampling Frequency: 48kHz
When recording MP3 up to the maximum disc capacity, disable additional
writing. For recording on an empty disc up to maximum disc capacity, use the
"Disc at once" setting.
MP3 Playing Order
When selected for play , files and folders (Folder Search, File Search or Fold er
Select) are accessed in the order they were written by the CD writer. As a
result, the order in which they are expected to be played may not match the
order in which they are actually played. You may be able to set the order in
which MP3/WMA files are to be played by writing them onto a medium such as
a CD-R with their file names beginning with play sequence numbers such as
"01" to "99".
38
Page 42

VM9224
Type A USB
Connector
OPEN
MUTE
For example, a medium with the following folder/file hierarchy is subject to
Folder Search, File Search or Folder Select, as shown below.
The VM9224 player will only recognize three folder levels and does not display
folders containing only other folders. In the example above, the unit will display
folders 3, 4, 6, and 8, but not 2 and 7 since they do not contain any tracks
directly. Folder 5 is not recognized at all since it is at the fourth level.
Inserting a USB Device or SD Card
NOTE: The USB port will recognize most USB flash memory devices and
portable hard drives (hard drives must be formatted to FAT32, NTFS is
not supported).
1. Locate the USB/SD connector cover (8) on the front of the radio.
2. Lift the protective cover to reveal the connectors.
39
Page 43

3. Insert the USB device or SD card into the appropriate connector. The unit
DIR -
DIR -
1/2
2/2
DIR +
DIR +
1 Cherry Poppin Dad
2 Chris Isaak - Baby
3 Crazy Town - Butt
4 Phish - Birds Of A
5 Phish - Bouncin' R
6 Phish - Freebird (L
18
15
1
7
7
2
13
5
16
12
3
MP3 2/10 00:00:23
14
4
9
21
20
11
19
10
8
22
6
23
01:02 PM
DISC
17
E
Q
Artist: Cherry Poppin Daddys
ROOT
will read the audio/video files automatically.
To remove the USB device or SD card, press the SRC button (4) to switch to
another mode and then remove the device from the connector.
MP3 User Interface
The on-screen indicators and touch key areas for MP3 playback are outlined
below.
1. Current track and total number of tracks on disc
2. Elapsed playing time
3. Current time
4. Track titles
5. ID3 information
6. /||: Touch to play/pause disc playback
7. 1/2, 2/2: Touch to move between page 1 and 2 of the on-screen controls
8. >>|: Touch to move to next track
9. |<<: Touch to move to previous track
40
VM9224
Page 44

VM9224
10. >>: Touch to Fast Forward x2, x4, x8, x20
11. <<: Touch to Fast Backward x2, x4, x8, x20
12. DIR -: Touch to view the previous folder
13. DIR +: Touch to view the next folder
14. : Touch to access the direct entry screen
15. : Touch to view the SETUP menu
16. Touch for quick access to Equalizer level settings
17. Touch to view the SOURCE MENU and select a new playback source
18. Folder name
19. Page Up
20. Page Down
21. Random On > Random Off
22. Repeat Single > Repeat Folder > Repeat Off
23. : Touch to stop disc playback
Controlling Playback
Playing MP3/WMA Files
After inserting a MP3/WMA disc, files will play in the sequence of the “Root’
directory.
NOTE: When burning MP3 / WMA files onto a DVD disc, use the 2X or 4X
burning option, if available. This slower burning speed will help
eliminate buffer errors and increase disc reading reliability. Also, use
folders when burning large numbers of songs / files to a disc for easy
music navigation. Select the "Disc at Once” option and close your disc.
Stopping Playback
T ou ch the button on screen or press the ||>/BAND button (30) on the remote
control to stop disc play.
T o resume playback, to uch the /|| button on screen or press the >/|| button o n
the remote control (18).
Pausing Playback
Touch the /|| button on screen or press the >/|| button on the remote control
(18) to suspend or resume disc play.
Moving Through Tracks
Press the >>| button (19) on the remote control or on screen to advance to the
next track on the disc.
Press the |<< button (17) on the remote control or on screen to move to the
previous track.
41
Page 45

VM9224
Repeat Playback
Press the RPT button (7) on the remote control to alter repeat mode accordin g
to the following: Repeat Single, Folder Repeat, Repeat Off.
NOTE: CD-R and CD-RW will not play unless the recording session is
finalized.
Direct Track Entry
Use the numeric keypad (29) on the remote control to access files directly or
press the button (see “Direct Track Entry” on page 37).
42
Page 46
VM9224
1 Acrobat
2 Afterlife
3 Age of Consent
4 Alive
5 All Because of You
6 All the Pretty Faces
17
14
1
7
2
13
5
15
12
3
00:00:23 4/412
18
4
9
11
10
8
6
01:02 PM
iPod2
16
E
Q
Artist: New Order
Age of Consent
MENU
OK
iPod OPERATION
NOTE: Be sure your iPod has the latest Apple firmware installed to avoid
connectivity issues.
Accessing iPod Mode
This unit is Made for iPod. You can control your iPod via touch screen to
access Playlist, Artist, Album, Songs, etc. Supported models include, but are
not limited to, the following:
• iPod Classic
• iPod Touch 2G / 3G
• iPod Nano 3G / 4G / 5G
• iPhone 3G / 3GS
The unit will automatically switch to iPod mode when an iPod or iPhone is
plugged into the front or rear USB connector.
NOTE: For basic iPod connectivity, you can use the white 30-pin to USB
iPod cable that came with your Apple device . For iPod video or photo
playback, you must purchase the jLink-USB cable.
T o return to the iPod menu from any other source m enu, press the SRC but ton
(4) on the front panel or remote control (8) u ntil the iPod m enu appe ar s on the
screen. The on-screen indicators and touch key areas for iPod playback are
outlined below.
1. Elapsed playing time for current file
2. File number and total number of files on the disc
43
Page 47

VM9224
3. Current time
4. File titles
5. ID3 information (Artist/Album)
6. OK: Touch to “Enter”
7. Touch to play all files in random order
8. >>|: Touch to move to next file
9. |<<: Touch to move to previous file
10. MENU: Touch to view the iPod main menu
11. : Touch to play/pause disc playback
12. Touch for Repeat File > Repeat Folder
13. Touch to view the album art screen
14. : Touch to view the SETUP menu
15. Touch for quick access to Equalizer level settings
16. View SOURCE MENU and select a new source
17. Current file title
18. : Touch to access the direct entry screen
Controlling your iPod
Touch the MENU button or press the following remote control buttons to
access the main iPod menu.
Menu Remote Control
Music AUDIO
Photos SUBTITLE
Videos ANGLE
Use the touchscreen or the directional keys on the remote control to navigate
the iPod menus.
File Playback
To access files, touch the MENU button on screen until you return to the main
iPod menu and then select “MUSIC,” “VIDEO” or “PHOTO” or press the
remote control button indicated in the table above.
• Touch the >/|| button on screen to play/pause.
• Touch >>| on screen or press the >>| button (19) on the remote control to
move to the next item on the menu.
• Touch |<< on screen or press the |<< button (17) on the remote control to
move to the previous item on the menu.
• Use the touch screen or press the >/|| button (18) on the remote control to
select the highlighted menu option.
• Press the >> button (14) on the remote control or touch the MENU button
on screen, to return to the previous menu.
44
Page 48
VM9224
4/412
01:02 PM
E
Q
ALBUM ART
Ain't That A Shame
Dream Police
Cheap Trick
01:18 05:12
iPod2
Track: _
1
2
3
4
5
6
7
8
9
0
Clear
Exit
Enter
During music playback, the following screen is displayed:
• To return to the iPod music menu from the album art screen, press .
• To return to the Video or Photo menu while viewing video or photo, touch
the screen.
Fast Forward/Fast Reverse
Press and hold the |<< or >>| buttons on screen or on the remote control (17,
19) for 1 second and continue to hold for fast for ward or fast rever se. Release
to resume normal play.
Search Playlist/Artist/Album/Song
To search through Playlists, Artists, Albums and Songs, press the MENU
button (1) on the remote control while in one of the following directories:
Playlist, Artist, Album or Song. The selected directory will be accessed with
the number of pages and files in that directory displayed at the top o f the page .
To access the page or file, enter the page or file number directly from the
remote control keypad. Press the |<< or >>| button (17, 19) on the remote
control to select the desired song or file.
Direct Track Entry
To select a track directly, touch the button on
screen control to display the direct entry menu.
Enter the desired track using the on-screen number
pad. Press Enter to tune to the selected station. To
exit the screen without changing the station, touch
Exit. To clear your entry and start over, touch Clear.
45
Page 49

VM9224
NOTE: To transmit the video from your iPod to the VM9224 screen, you
must set the following options through the iPod video settings menu: TV
Out = On, TV Signal = NTSC, and Widescreen = On.
NOTE: After disconnecting your iPod, the VM9224 will always return to
the last mode accessed when the iPod is plugged back into the unit.
46
Page 50

VM9224
BLUETOOTH OPERATION
NOTE: Bluetooth operation requires optional BTM10 accessory.
About Bluetooth
Bluetooth is a short-range wireless radio connectivity technology that is
developed as a cable replacement for mobile phones, handheld PCs and
other devices. Bluetooth operates in 2.4 GHz frequency range and transmits
voice and data at speeds up to 1 megabit per second. Bluetoo th was launched
by a special interest group (SIG) comprised of Ericsson Inc., Intel Corp., Nokia
Corp., Toshiba and IBM in 1998, and it is currently developed by nearly 2,000
companies worldwide. The Bluetooth word mark and logos are owned by the
Bluetooth SIG, Inc. and any use of such marks by Audiovox Corporation is
under license. Other trademarks and trade names are those of their respective
owners.
NOTE: The line-of-sight distance between this unit and your cellular
phone must be 8 meters or less for sending and receiving voice and data
via Bluetooth wireless technology. However, the transmission distance
may become shorter than the estimated distance, depending on the
environment in use.
Before attempting to use the Bluetooth functions on the VM9224, you must
purchase and install the BTM10. When connected properly, the blue light
appears illuminated. Bluetooth features are only available when the BTM10 is
installed.
Please make sure your mobile phone supports Bluetooth functions (Headset
or Handsfree profiles or both). Adhere to the following guidelines for
successful operation.
• Before using Bluetooth functions, you must pair your mobile phone to the
VM9224 head unit (see “Pairing the Bluetooth System with Your Mobile
Phone and Head Unit”). To ensure the best reception for pairing and reconnection, please make sure the phone battery is fully charged before
you begin.
• Try to perform pairing within a few minutes of the phone being turned on.
• Once the unit has been paired with the phone, the unit’s model number,
“VM9224”, will be displayed on the mobile phone.
• To achieve the best performance, always keep the mobile phone within 3
meters of the head unit.
• Always keep a clear path between the mobile phone and the head unit.
Never place a metal object or any other obstacle between the mobile
phone and the head unit.
47
Page 51

VM9224
1
4
9
14
2
8
15
Disconnected
1 Missed Calls
2 Received Calls
3 Dialed Calls
4 Phone Book
3
16
13
17
Menu List
19
01:02 PM
E
Q
BT
MENU
7
10
11
5
6
12
PHONE INTERFACE MUSIC INTERFACE
9
8
13
17
MENU
MENU
7
10
1156
12
9
23
7
20
21
22
18
• Some mobile phones (like Sony Ericsson) may have a "Power Saving
Mode" option. PLEASE DO NOT use the power saving mode with the
VM9224.
• Before accepting or making a call, make sure your mobile phone's
“Bluetooth function” is turned on.
• To ensure the best conversation quality/performance, stay within one
meter of the BTM10 when talking.
• To “disconnect” the mobile phone from the head unit, turn the Bluetooth
connectivity off on the mobile phone or touch the button.
• Phone Book direct searching through the head unit is only available
if the mobile phone supports Phone Book Download. If the feature is
not supported, the head unit will display “Phone book not provided by this
phone” when an attempt is made to download a phone book.
Bluetooth User Interface
The on-screen indicators and touch key areas for Bluetooth operation are
outlined below.
48
Page 52

VM9224
1. Current connection status/device connected
2. Current t i me
3. Bluetooth menu
4. Current operation status
5. Toggle Music/Phone menu
6. Transfer active call back to handset
7. Pair your Bluetooth phone (first time use)
8. Exit call listing display
9. Connect/disconnect Bluetooth device (phone, PDA, personal music
player, etc.) with hand-free function
10. Mute/un-mute microphone during active call
11. Answer incoming call/make call
12. Reject incoming call/end call/quit pairing process/quit reading phone book
or call listing
13. : Touch to view the SETUP menu
14. Touch to view the equalizer
15. Touch to view the SOURCE MENU and select a new playback source
16. Status indicators (phone mode, music mode, mic mute)
17. : Touch to access the direct entry screen
18. : Touch to stop A2DP playback
19. Touch the scroll bar and arrows to view the previous/ next pa ge of choices
(only visible when needed)
20. Toggle Music/Phone menu/mode
21. >/||: Play/Pause selected file
22. |<<: Touch to move to the previous file
23. >>|: Touch to move to the next file
Hands Free Profile (HFP)
To use a phone wirelessly with this unit, it is necessary to first establish a
connection using Bluetooth wireless technology. Connection is normally
established using HFP (Hands Free Profile), which gives you full control of
functions available on the telephone source. However, depending on your
phone, the connection may be made using HSP (Head Set Profile), making
some functions unavailable. This is a limitation of your phone, not the
VM9224.
Since there are a number of Bluetooth mobile phone implementations
available on the market, operations with your Bluetooth mobile phone using
this unit vary greatly.
Please refer to the instruction manual that came with your Bluetooth mobile
phone along with this manual while operating your phone with this unit.
49
Page 53

VM9224
Pairing the Bluetooth System with Your Mobile
Phone and Head Unit
1. Press the button (7) to initiate the pairing process. Keep the mobile
phone within 2 meters of the head unit when pairing. (To terminate the
pairing process, press the button again.)
2. Select the Bluetooth setup option on the mobile phone to be paired
(please refer to the phone’s instruction manual to learn how to enter
Bluetooth setup, turn Bluetooth on/off, and perform pairing).
NOTE: Some phones require a “pass key” or pairing code to connect. If
your phone requires a pass key or pairing code, you will need to enter
this number in the Pairing Code field under the Bluetooth SETUP menu.
The default pairing code for many phones is “0000”. The default code for
the VM9224 is “1234”. See “Bluetooth Sub-menu Features” on page 21
for instructions on entering the pairing code.
3. Select “VM9224” from the pairing list on the mobile phone.
• If pairing is successful, the TFT will display the paired mobile phone
model number or name (as specified in your phone’s Bluetooth Setup
menu).
• If pairing fails, “Phone Pairing Fail” is displayed at the bottom of the
screen.
Reconnecting
Once the Bluetooth device has been paired, you can touch the connect
button (9) to reconnect.
NOTE: You can only connect to a phone using the buttons on the onscreen Phone interface.
Each time the button is pressed, the head unit will automatically reconnect
with the mobile phone once (only if the mobile phone was previously paired
with the head unit).
Managing Incoming Calls
When connected to a Bluetooth phone, the unit will mute audio output, pause
CD play, and change to the Bluetooth screen when a call is received. An
incoming phone number will appear at the top of the screen.
Answering an Incoming Call
To answer the call, touch the button (11).
50
Page 54
VM9224
Exit
Clear
1
23
4
5 6
7
8
9
0
#
*
NOTE: The TALK button on the BTM10 can be used to answer calls or
hang up.
For best reception, speak loudly and clearly.
To end the conversation, press the button (12). The screen will display the
call duration for 3 seconds, and then return to the previous mode.
Rejecting an Incoming Call
T ouch the button to reject an incoming call. The call will revert to your phon e
and can be answered directly or left for voice mail.
Volume Control
To increase or decrease the volume level, turn the rotary encoder (7) on the
front panel or press the VOL+/ VOL- buttons on the remote control (15, 16).
Microphone Mute
To mute the microphone, touch the button (10). Touch again to resume
microphone functionality.
Making an Outgoing Call
NOTE: Press the button from the main Bluetooth screen to
automatically dial the last call received.
1. Touch the button to open the direct dial screen.
2. Use the 0-9, *, and # buttons to input the phone number.
• Touch the CLEAR button to clear the last digit.
• Touch the button to clear the entire number and start over.
3. After entering the phone number, press the button to dial the call. The
direct dial screen will close once your call is connected.
To end the conversation, press the button.
51
Page 55

VM9224
Call Transfer
While talking, to transfer audio from the head unit back to the mobile phone,
touch the button (6). The TFT will display “Transfer”. You can only transfer a
call after it has been answered.
Menu List
The menu list appears on the left side of the scr een and can be accessed from
other modes by touching the MENU button on the right side of the screen.
NOTE: Not all phones allow access to missed, received or dialed calls
and some will not allow uploading of your phone’s address book.
Missed Calls
The Missed Calls list retrieves the list of Missed numbers from your phone.
The last missed number is the first number on the list. Touch the Missed Calls
menu option to view the list. To make a call from the Missed Calls list, touch
the number and then touch the button. The TFT will display “Cannot get
missed record” when the feature is not available.
Dialed Calls
The Dialed Calls list retrieves the list of dialed numbers from your phone. The
last dialed number is the first number on the list. Touch the Dialed Calls menu
option to view the list. To make a call from the Dialed Calls list, touch the
number and then touch the button. The TFT will display “Cannot get dialed
record” when the feature is not available.
Received Calls
Use the Received Calls list to view the last 10 received numbers stored on
your phone. To access the Received list, touch the Received Calls menu
option. The last received number is the first number on the list. To make a call
from the Received Calls list, touch the number and then touch the button.
The TFT will display “Cannot get received record” when the feature is not
available.
Phone Book
1. Touch the Phone Book menu option to display the phone book stored on
your mobile phone, if compatible. The screen will display “Ready...” while
the phone book is downloading.
2. Once the download is completed, you can use the arrow buttons and scroll
bar on the right side of the window to navigate the list. Since the unit
downloads one page of entries at a time, there may be a slight delay while
the next page of numbers is downloaded.
3. Touch to highlight the number you want to dial and then touch the
button.
52
Page 56

VM9224
NOTE: Some mobile phones do not support Phone Book upload through
Bluetooth. This is a limitation of the phone, not the VM9224.
Bluetooth Setup
Auto Answer
You can choose to have the VM9224 automatically answer incoming calls to
your paired Bluetooth phone. To turn “Auto answer” on:
1. Touch the button to view the SETUP menu.
2. Select the “Bluetooth” sub-menu.
3. Touch the area to the right of “Auto answer” to select “Auto”.
Auto Connect
The auto Connect option will allow the VM9224 to automatically connect to
your previously paired Bluetooth when it is in ran ge. When the Conne ct option
is set to “Manual”, you must press the button to re-establish a connection
with your phone. To turn auto “Connect” on:
1. Touch the button to view the SETUP menu.
2. Select the “Bluetooth” sub-menu.
3. Touch the area to the right of “Connect” to select “Auto”.
Advanced Audio Distribution Profile (A2DP)
The VM9224 allows you to play back audio files from your phone, PDA or
personal music player using a Bluetooth connection.
Before using an audio player, it may be necessary to ente r a PIN code into the
unit. Enter the PIN code referring to “Bluetooth Sub-menu Features” on
page 21.
NOTE: Please quit A2DP mode before attempting to make a phone call,
as unexpected results may occur depending on your mobile phone
model.
The VM9224 can control a Bluetooth audio player via Advanced Audio
Distribution Profile (A2DP) or Audio/Video Remote Control Profile (AVRCP).
Bluetooth audio players (or Bluetooth adapters) compatible with these pro file s
can be connected to this unit. Functionality varies depending on the profile
used.
53
Page 57

TROUBLESHOOTING
Table 6: Troubleshooting
Problem Cause Corrective Action
GENERAL
Unit will not
power on
Remote control does not
function
No/low audio
output
Poor sound
quality or distortion
Unit resets
itself when
engine is off
TFT MONITOR
No image Incorrect connection to
Flashing
image or interference
appears on
screen
Radio Fuse blown Install new fuse with correct rating
Car battery fuse blown Install new fuse with correct rating
Illegal operation Press the RESET button located in the
Battery depleted Replace battery with new one
Battery installed incor-
rectly
Improper audio output
connection
Volume set too low Increase volume level
Improper “MUTE” connec-
tion
Speakers damaged Replace speaker s
Heavily biased volume
balance
Speaker wiring is in con-
tact with metal part of car
Pirated disc is in use Use original copy
Speaker power rating not
compatible with unit
Speaker is shorted Check speaker contact
Incorrect connection
between ACC and positive battery wire
parking brake wire
Parking brake is not
engaged
DVD is not compatible
with current TV system
settings
Improper video signal
connections
bottom right corner of the front panel
Remove battery and install correctly
Check wiring and correct
Review wiring diagram and check
“MUTE” connection
Adjust the channel balance to the center position
Insulate all speaker wiring connections
Connect proper speakers
Check wiring and correct
Check wiring and correct
Stop vehicle in safe place and apply
parking brake
Change setup to accommodate disc
Check wiring and correct
VM9224
54
Page 58
VM9224
Table 6: Troubleshooting
Problem Cause Corrective Action
Prolonged
image or
improper
height/width
ratio display
TUNER
Weak station
searching
Cannot insert
disc
Image blurred,
distorted, or
dark
Disc does not
play back
PBC cannot be
used during
VCD playback
No repeat or
searching
while playing
VCD
MP3
Interruption
occurred during playback
Improper aspect ratio
setup
Auto antenna is not fully
extended
Auto antenna not properly
connected
LOCAL function is activated
Disc already inside unit Eject cu rre nt disc and insert new one
Disc is illegally copied Use original disc
Disc is warped or
scratched
Disc is dirty or wet Clean disc with soft cloth
Laser pickup is dirty Clean laser pickup with cleaning disc
Incompatible disc is used Use compatible disc
Disc rating exceeds
Parental Lock rating limit
Disc region code is not
compatible with unit
Disc is inserted upside
down
PCB is not available on
the disc
PCB is on Turn PCB off
Disc is dirty or scratched Clean disc or replace
File is damaged/bad
recording
Use correct aspect ratio setting
Connect the auto antenna control cable
properly
Connect the auto antenna control cable
properly
Turn LOCAL function off
Use disc in good condition
Change Parental Lock settings to lower
restriction
Use disc with proper region code
Insert disc with label side up
Recreate disc with good files
55
Page 59

VM9224
Error Messages
Table 7: Error Messages
Message
Displayed
Loading Disc is being read
No Disc Disc is dirty Clean disc with soft cloth
Disc is upside down Insert disc with label side up
Disc not present in loading
compartment
Bad Disc Disc is dirty Clean disc with soft cloth
Disc is upside down Insert disc with label side up
Unknown
disc
Region Error DVD is not compatible with
Error Illegal mechanism operation Press EJECT key for 5 seconds to
Disc format is not compatible
with this unit
region code of unit
Cause Corrective Action
Insert disc
reset loading mechanism
56
Page 60

VM9224
Care and Maintenance
1. Use only a clean silicone cloth and neutral detergent to clean the front
panel or monitor. A rough cloth and non-neutral detergent (such as alcohol) may result in scratching or discoloration.
2. Do not get water or cleaning fluids on the unit.
3. If the temperature inside the player gets too hot, a protective circuit
automatically stops play of the disc. If this occurs, allow the unit to cool
before operating the player again.
4. Never insert anything other than a 5” (12 cm) compact disc into the player
as the mechanism can be damaged by foreign objects.
5. Do not attempt to use a 3” (8 cm) CD-Single disc in this unit, either with or
without an adaptor, as damage to the player and/or disc may occur. Such
damage is not covered by the Warranty on this product.
6. The CD player may not operate properly in extreme hot or cold. If such
conditions occur, allow the interior of the vehicle to reach a normal
temperature before using player.
7. When the vehicle warms up during cold weather or under damp
conditions, condensation may appear on the LCD panel. Should this
occur, the screen will not operate properly until the moisture has
evaporated.
8. We suggest you use a cleaning disc in this unit more frequently than in the
unit in your home due to the environmental conditions of the vehicle.
57
Page 61

VM9224
SPECIFICATIONS
DVD/CD Player
Compatible Disc Media: DVD +
RW
Compatible Media Formats: CD-DA, MP3, WMA, VCD, SVCD, Xvid, AVI,
MPEG1 / 2
Signal to Noise Ratio: >95dBA
Dynamic Range: >95dB
Frequency Response: 20Hz to 20 kHz, -3dB
Channel Separation: > 60dB @ 1 kHz
D/A Converter: High performance 24-bit / 192 kHz sample rate, Multi-Bit
Sigma-Delta Modulator
Video
Format: NTSC, PAL (auto-detection)
Output: 1Vp-p (75-ohm)
Input: 1Vp-p (75-ohm)
FM Tuner
Tuning Range: 87.5MHz - 107.9MHz
Mono Sensitivity (-30dB): 9dBf
Quieting Sensitivity (-50dB): 15dBf
Alternate Channel Selectivity: 70dB
Signal to Noise Ratio @ 1 kHz: 58dB
Image Rejection: 80dB
Stereo Separation @ 1 kHz: >30dB
Frequency Response: 30Hz - 15 kHz, -3d
AM Tuner
Tuning Range: 530 kHz - 1720 kHz
Sensitivity (-20dB): 15uV
Signal to Noise Ratio @ 1 kHz: 50dB
Image Rejection: 60dB
Frequency Response: 50Hz - 2 kHz, -3dB
Monitor
Screen Size: 6.2" (Measured diagonally), 16:9 Widescreen
Screen Type: High Definition TFT Liquid Crystal Display (LCD)
Resolution: 1,152,000 sub pixels, 800x3 (W) X 480 (H)
General
Auxiliary Input impedance: 10k
Power Supply: 11 to 16VDC, negative ground
Power Antenna (Blue): 500mA max, current limited protection
Amplifier Remote (Blue/White): 500mA max, current limited protection
Operating Temperature: -20C ~ 65C
R / RW (Single and Dual Layer) and CD-R /
58
Page 62

VM9224
Fuse: 15-amp, mini ATM type
DIN chassis dimensions: 7" X 7" X 4" (178mm x 178mm x 50mm)
CEA Power Ratings
Power Output: 13 Watts RMS x 4 channels into 4-Ohms @ <
1% THD+N
Signal to Noise Ratio: 70dBA below reference (Reference: 1
Watt, 4-Ohms)
Frequency Response: 20 Hz - 20 kHz, -3dB. (Aux Input used
as reference input)
Reference Supply Voltage: 14.4VDC
*Specifications subject to change without notice.
59
Page 63

VM9224
60
Page 64

Audiovox Electronics Corporation
Hauppauge, NY 11788
Technical Assistance: 1-800-323-4815
www.jensen.com
© 2010 Audiovox
Ver. 020510
Printed in China
Page 65

EJECT
VM9224
Instruccionnes de Operación
Instructions d’opération
160
vatios el máximo
watts maximim
40W x 4
Page 66

VM9224
CONTENIDO
Gracias por elegir los prod uctos Jens en. Esper amos que encue ntre en es te man ual in stru ccio nes
claras y fáciles de seguir. Si se toma unos pocos minutos para leerlo, aprenderá cómo utilizar
todas las funciones de su nuevo radio Jensen VM9224 para su máximo entretenimiento.
Características ...................................................................................................................... 1
Controles e Indicadores ........................................................................................................ 4
Control Remoto..................................................................................................................... 6
Instrucciones de Funcionamiento ....................................................................................... 13
Menú de Configuración............... ... ... .... ... ... ........................................ ................................ 18
Operación de Sintonizador ......... ... ... ........................................ ... ....................................... 26
Operación de Video de DVD/VCD ........................................ .... ... ... .... ... ............................. 30
Operación de Audio de DVD/CD ............. ... ... .... ... ... ........................................... ... .... ... ... ... 37
Operación de MP3/WMA ......................... ... ........................................ ................................ 40
Operación de iPod ................................... ... ... ........................................ ............................. 45
Operación de Bluetooth ........................... ... ... ........................................ ............................. 49
Resolución de Problemas . ... ........................................... ... ... .... ... ... .................................... 57
Especificaciones ................................................................................................................. 61
Caractéristiques .................................................................................................................. 63
TABLE DES MATIÈRES
Merci d'avoir choisi un pr oduit Jensen. Nous espé rons qu e vous al lez tr ouver l es inst ructio ns dans
ce guide de propriétaire claires et faciles à suivre. Prenez quelques minutes à le consulter, vous
apprendrez à utiliser toutes les fonctions de votre nouvelle radio Jensen VM9224 pour en tirer une
jouissance maximum.
Commandes et indicateurs ............................................................. .... ................................ 66
Telecommande ................................................................................................................... 68
Instructions d’operation....................................................................................................... 75
Menu configuration ........... ... ... ........................................ ... ........................................ ......... 80
Operation tuner ....... ... .... ... ... ... ........................................ ....................................... ............. 87
Operation video DVD/VCD ............ ... .... ... ... ... .... ... ... .... ... ... ... .... ... ....................................... 91
Operation audio DVD/CD............................... .... ... ........................................ ...................... 98
Opération MP3/WMA ..................................... ........................................ ........................... 101
Opération iPod ............................................ ........................................ ... ........................... 106
Operation Bluetooth ... .... ... ... ... .... ....................................... ........................................ ....... 110
Depannage ....................................................................................................................... 118
Specifications.................................................................................................................... 123
iii
Page 67

VM9224
iv
Page 68

VM9224
CARACTERÍSTICAS
Felicitaciones por su compra del Jensen VM9224 Mobile Multimedia Receiver.
Es una buena idea leer todas las instrucciones antes de comenzar la
instalación. Recomendamos hacer instalar su Jensen VM9224 por un talle r de
instalación confiable.
DVD
• Proporción Dimensional - Completa y Normal
• Avance Rápido - 2X, 4X, 8X y 20X
• Cámara Lenta - 2X, 4X, 8X y 20X
• Reproducir, Pausar, Detener, Capítulo Próximo y Capítulo Previo
CD / MP3 / WMA
• Compatible CD-Texto
• Compatible Etiqueta ID3
• Búsqueda de Directorio (Sólo MP3 / WMA)
• Acceso a Pista Directa vía Control Remoto
• Graba hasta 1500 Archivos MP3 y WMA en un DVD+
• Búsqueda audible de pista hacia Adelante / Atrás (sólo CD-DA)
• Aleatorio, Repetir e Intro
• Reproducir, Pausar, Detener, Capítulo Próximo y Capítulo Previo
AM-FM
• Espaciado de frecuencia EE.UU. / Europa / América Latina / Asia
• Prefijado de 30 Estaciones (18 FM / 12 AM)
• Auto Estéreo / Mono
• Local / Distante
• Almacenamiento Automático / Vista previa de búsqueda
iPod
• Escuche iPod usando la conexión del USB.
• Interfaz de Conexión Directa de Alta Velocidad para acceder a las Listas
de Canciones del iPod, Artistas, Albums y Canciones. Reproduce
archivos de música y de video desde su iPod.
• El Administrador de Energía carga el iPod mientras está conectado.
Chasis
• 2,0 DIN (Importar / ISO-DIN Montable)
• Panel de Delante Puesto
• LCD de Alta Definición (TFT) de 6,2"
• 1.152.000 Sub Pixeles (800x3 X 480)
• Tono bip de Confirmación (Opción On-OFF)
• Sistema de Administración de Calor - Aire de refrigeración forzada para
mantener el conjunto de Chip funcionando a Temperaturas Nominales
General
• Listo para Navegación (NAV102)
1
R / RW
Page 69

VM9224
• Listo para Bluetooth (con la compra del BTM10) que provee perfil de
manos libres para seguridad / comodidad y perfil A2DP para r eproducción
continua de música de un PDA / PMP
• Control Remoto Infrarrojo de 44 Teclas
• Una salida de Video Compuesto para Pantallas Adicionales
• Entrada en Panel Frontal de Audio/Video
• Control de tonos de tres bandas (Graves, Medios y Agudos) con 8 Curvas
de EQ prefijadas
• Entrada de A/V Auxiliar en el Panel Frontal pa ra Dispo sitivos Portátiles de
Medios
• Salida de Línea Frontal, Trasera y Subwoofer
• Control de Volumen Programable
• Entrada de Cámara Trasera (Vista de Imagen Normal y Espejo)
• Modo de Calibración de Pantalla Táctil
• Salida de Línea 2VRMS - Todos los Canales
• Codificador Giratorio de Control de Audio
• Interfaz SWC – Compatible con adaptador PAC de Interfaz de Control de
Volante SWI-PS, vendido por separado
Equipo Opcional
• NAV102
El VM9224 está "Listo para navegación." Antes de acceder a cualquier
función de navegación, debe comprar e instalar el módulo de navegación
(NAV102). Todas las instrucciones de instalación y uso se incluirán con el
módulo de navegación.
Una vez que el módulo está adecuadamente conectado y funcionando , se
activará el modo de fuente NAV. Mientras el módulo de navegación no
está instalado, la opción NAV aparece grisada, indicando que la función
no está disponible.
• BTM10
Antes que pueda conectarse a un dispositivo Bluetooth activado, debe
comprar e instalar el Jensen BTM10.
• Teléfono Bluetooth
See “Operación de Bluetooth” on page49.
• Cámara Trasera
El VM9224 está "listo para cámara." Antes de acceder cualquier función
de cámara, debe comprar e instalar una cámara de video trasera. Una vez
que la cámara está adecuadamente conect ada y funcionando, se activará
el modo de fuente CÁMARA. Mientras la cámara no está instalada, la
opción CÁMARA aparece grisada, indicando que la función no está
disponible.
2
Page 70

VM9224
¡ADVERTENCIA! Nunca instale esta unidad donde la operación y la vista
pudiera interferir con condiciones seguras de conducción.
¡ADVERTENCIA! Para reducir el riesgo de accidente de transito (excepto
cuando usa la cámara de video de visión trasera) nunca use la función
de mostrar video mientras conduce el vehículo. Esto es una violación de
la ley federal.
¡ADVERTENCIA! Nunca desarme o ajuste la unidad.
¡ADVERTENCIA! Para evitar lesiones por choque o incendio, nunca
exponga esta unidad al agua o la humedad.
¡ADVERTENCIA! Nunca use discos irregulares.
¡ADVERTENCIA! Para evitar el daño al mecanismo dentro de la unidad,
evitar el impacto del monitor TFT.
¡ADVERTENCIA! El usar un fusible inadecuado podría producir un daño
a la unidad y llevar a un incendio.
¡ADVERTENCIA! El monitor emplea un mecanismo motorizado
automático. Para evitar daños al mecanismo principal, por favor no
empuje, tire, o gire manualmente al monitor.
3
Page 71

VM9224
CONTROLES E INDICADORES
1. Ranura de Disco
2. Receptor IR de Control Remoto
3. EJECT
Presione para expulsar el disco.
Presione y mantenga para restaurar la posición central del mecanismo.
4. SRC
Presione para encender la unidad. Presione y mantenga para apagar la
unidad.
Cuando está encendida, presione una vez para seleccionar el modo de
reproducción.
5. NAV
Presione para mostrar la interfaz de usuario de navegación.
6. Pantalla TFT
7. Codificador Giratorio
Gire para ajustar el volumen. Presione y suelte para ingresar y/o confirmar las
preferencias de audio.
Pulse para activar la función MUTE y silenciar el receiver. Pulse nuevamente
para reanudar el sonido.
Presione y mantenga para activar la preferencia local (LOC). Presione y
mantenga para apagar la recepción Local.
8. Conector de Interfaz USB/SD
Conecta un dispositivo USB o carte SD para reproducción de archivos de
música/video.
9. Entrada A/V
Adjunte un dispositivo A/V compatible.
10. RESET (Restaurar)
Presione para restaurar las especificaciones del sistema a las fijadas de
fábrica (excepto la contraseña y la fijación de bloqueo parental).
4
Page 72

EJECT
1
3
4
5
7
10
9
8
2
6
MUTE
OPEN
VM9224
5
Page 73

CONTROL REMOTO
3
4
5
9
6
7
26
27
15
16
34
33
19
32
23
24
31
30
8
35
1
2
10
13
28
25
11
12
14
20
18
17
22
21
29
MUSIC PHOTO VIDEO
iPod
Vea Table 1 para funciones de control remoto.
VM9224
6
Page 74

VM9224
Tabla 1: Remote Control Functions
Botón Función
Nombr
# DVD VCD
e
MENÚ 1 Ingresa al
TÍTULO2 Ingresa al
MUTE 3 Silencia la
POWER/4 Cambia el
AUDIO 5 Cambia el
REPT
A-B
REPT 7 Repite la
SRC 8 Selecciona
menú principal del
disco
menú Títulos del
disco
salida de
audio activado/desactivado
encendido
on/off
idioma de
audio para
reproducción de
disco
6 Fija la
repetición
de reproducción
desde el
momento A
al momento
B
reproducción del
capítulo
actual
el modo de
reproducción
Enciende/
Apaga PBC
cuando
reproduce
VCD
Reproduce
los primeros diez
segundos
de cada
capítulo/
pista
Silencia la
salida de
audio activado/desactivado
Cambia el
encendido
on/off
Fija la
repetición
de reproducción
desde el
momento A
al momento
B
Repite la
reproducción del
capítulo
actual
Selecciona
el modo de
reproducción
SINTONIZA
DOR
Silencia la
salida de
audio activado/desactivado
Cambia el
encendido
on/off
Selecciona
el modo de
reproducción
CD/MP3/
USB/SD
Silencia la
salida de
audio activado/desactivado
Cambia el
encendido
on/off
Repite la
reproducción de la
pista actual
Selecciona
el modo de
reproducción
iPod
Selecciona
el modo de
Photo.
Selecciona
el modo de
Música
Silencia la
salida de
audio activado/desactivado
Cambia el
encendido
on/off
Selecciona
el modo de
Música
Repite la
reproducción de la
pista actual
Selecciona
el modo de
reproducción
7
Page 75
Tabla 1: Remote Control Functions
Botón Función
Nombr
# DVD VCD
e
SUBTI-
9 Selección
TLE
DISP/
CLEAR
PREFIJADA /\
PREFIJADA V
ÁNGULO13 Reproduce
>> 14 Avance
VOL - 15 Disminuye
VOL + 16 Aumenta el
de idioma
para subtítulo
10 Muestra
información de
reproducción
Borra la
entrada o
mueva
hacia atrás
para corregir errores
en modo de
Acceso
Directo
11 Navega la
12 Navega la
nuevamente el
disco en
distinto
ángulo para
una escena
rápido del
contenido
del disco
el volumen
volumen
Muestra
información de
reproducción
Borra la
entrada o
mueva
hacia atrás
para corregir errores
en modo de
Acceso
Directo
Reproduce
CD de imagen con un
ángulo distinto de la
imagen
mostrada
Avance
rápido del
contenido
del disco
Disminuye
el volumen
Aumenta el
volumen
SINTONIZA
Muestra
información de
reproducción
Borra la
entrada o
mueva
hacia atrás
para corregir errores
en modo de
Acceso
Directo
lista de estaciones
prefijadas
lista de estaciones
prefijadas
Disminuye
el volumen
Aumenta el
volumen
DOR
CD/MP3/
USB/SD
Muestra
información de
reproducción
Borra la
entrada o
mueva
hacia atrás
para corregir errores
en modo de
Acceso
Directo
Avance
rápido del
contenido
del disco
Disminuye
el volumen
Aumenta el
volumen
VM9224
iPod
Selecciona
el modo de
Foto.
Muestra
información
de reproducción
Borra la
entrada o
mueva hacia
atrás para
corregir
errores en
modo de
Acceso
Directo
Selecciona
el modo de
Video
Accede al
Menú del
iPod
Disminuye
el volumen
Aumenta el
volumen
8
Page 76

VM9224
Tabla 1: Remote Control Functions
Botón Función
Nombr
# DVD VCD
e
|<< 17 Selecc iona
>/|| 18 Pausa la
>>| 19 Selecciona
/ 20 Detiene la
GOTO 21 Abre la pan-
<< 22 Reproduc-
ZOOM 23 Acerca/
PIC 24 Muestra los
el capítulo
anterior
para reproducción
reproducción/inicia
la reproducción
el capítulo
siguiente
para reproducción
reproducción
talla de
ingreso de
datos para
búsqueda
directa.
ción lenta/
reproducción lenta
hacia atrás
aleja una
imagen
parámetros
de
preparación
Selecciona
el capítulo
anterior
para reproducción
Pausa la
reproducción/inicia
la reproducción
Selecciona
el capítulo
siguiente
para reproducción
Detiene la
reproducción
Abre la pantalla de
ingreso de
datos para
búsqueda
directa.
Reproducción lenta/
reproducción lenta
hacia atrás
Acerca/
aleja una
imagen
Muestra los
parámetros
de
preparación
SINTONIZA
DOR
Busca una
estación de
radio disponible disminuyendo
la frecuencia de sintonización.
Busca una
estación de
radio disponible
aumentand
o la frecuencia de
sintonización.
CD/MP3/
USB/SD
Selecciona
la pista
anterior
para reproducción
Pausa la
reproducción/inicia
la reproducción
Selecciona
la pista
siguiente
para reproducción
Detiene la
reproducción
iPod
Pausa la
reproducción/inicia la
reproducción
Selecciona
la pista siguiente para
reproducción
9
Page 77

Tabla 1: Remote Control Functions
Botón Función
Nombr
# DVD VCD
e
ABRIR/
25 No utilizado No utilizado No utilizado No utilizado No utilizado
CERRAR
26 No utilizado No utilizado No utilizado No utilizado No utilizado
27 No utilizado No utilizado No utilizado No utilizado No utilizado
WIDE 28 Selecciona
1, 2, 3,
4, 5, 6,
7, 8, 9,
0,
(Teclad
o
Numéri
co)
||>/
BAND
CONFIGURACIÓ
N
EQ 32 Accede al
RDM 33 Reproduce
el modo de
pantalla
COMPLETO o
NORMAL.
29 Accede
Directamente el
capítulo
30 Presione
repetidamente para
avance/retroceso en
cámara
lenta
31 Muestra el
menú de
preferencias
menú de
ecualizador
todos los
Capítulos
en Orden
Aleatorio
Selecciona
el modo de
pantalla
COMPLETO o
NORMAL.
Presione
repetidamente para
avance/retroceso en
cámara
lenta
Muestra el
menú de
preferencias
Accede al
menú de
ecualizador
SINTONIZA
DOR
1-6 selecciona las
prefijadas
para la
banda
actual
Selecciona
la Banda
AM/FM
Muestra el
menú de
preferencias
Accede al
menú de
ecualizador
CD/MP3/
USB/SD
Accede
Directamente la
pista
Muestra el
menú de
preferencias
Accede al
menú de
ecualizador
Reproduce
todas las
pistas en
Orden Aleatorio
VM9224
iPod
Muestra el
menú de
preferencias
Accede al
menú de
ecualizador
Reproduce
todas las
pistas en
Orden Aleatorio
10
Page 78

VM9224
FULL
Toda la pantalla se extiende
horizontalmente a la prop. de
aspecto de 16 a 9. La proporción de
extensión es la misma en cualquier
punto.
NORMAL
La imagen de pantalla convencional
tiene una proporción de 4 a 3 de
horizontal a vertical, dejando un
área negra en los lados derechos e
izquierdo de la pantalla.
STANDBY
La pantalla se vuelve negra. Toque
la pantalla para volver
Tabla 1: Remote Control Functions
Botón Función
Nombr
# DVD VCD
e
INT 34 Reproduce
EJECT 35 Expulsa el
Disco
Expulsa el
Disco
SINTONIZA
DOR
Expulsa el
Disco
CD/MP3/
USB/SD
los primeros diez
segundos
de cada
pista
Expulsa el
Disco
iPod
Expulsa el
Disco
Proporción de Aspecto
Presione el botón WIDE (28) en el control remoto para ajustar la proporción
de aspecto como sigue:
11
Page 79

VM9224
Configuración de la Imagen/Pantalla
Modos de Salida de Video
Table 2 muestra el modo de salida de video para cada fuente de
reproducción.
Tabla 2: Modos de Salida de Video
Fuente de Reproducción Modos de Salida de Video
SINTONIZADOR AM/FM Modo RGB
DVD Modo RGB
AUX IN Modo CVBS
*CVBS – Señal de Banda Base de Video Compuesta
Ajuste de la Imagen
Para ajustar la configuración del monitor, siga los siguientes pasos:
1. Pulse el botón PIC (24) en el control remoto repetidamente para mover
entre los valores de “BRIGHT” (BRILLO) y “CONTRAST" (CONTRASTE).
2. Girar el codificador giratorio para ajustar la variable.
3. Pulse el botón PIC (24) en el control remoto 1-3 veces para salir del menú
de ajuste de la imagen.
Inhibición de Freno de Estacionamiento
Cuando el cable rosa de "Estacionamiento" está conectado al interruptor del
freno del vehículo, el monitor frontal TFT mostrará video sólo cuando el freno
de estacionamiento está aplicado. (Cuando el cable rosa está a tierra vía el
circuito de Freno de Estacionamiento, se mostrará el video.)
12
Page 80

VM9224
INSTRUCCIONES DE FUNCIONAMIENTO
Encendido / Apagado
Presione el botón /SRC (4) en la unidad (o el botón en el control remoto)
para encender la unidad. Los botones en el frente de la unidad se iluminan y
el estado del modo actual aparece e n el TFT (6).
Presione y mantenga el botón para apagar la unidad.
Bip Audible de Confirmación
Un tono bip audible confirma cada selección de función. El tono bip puede
desactivarse a través del menú de Configuración.
Silenciar/Silenciar Línea
Presione el botón (7) en el codificador giratorio en el panel frontal o el botón
MUTE (3) en el control remoto para silenciar el volumen de la unidad.
Presione el botón del codificador giratorio nuevamente para restaurar el
volumen. Se muestra “MUTE” en el LCD. El ajustar el volumen o usando
cualquiera de las funciones de configuración de audio cancela la función de
silenciar.
Si el cable “MUTE” está conectado, la salida de audio se silencia cuando se
recibe un llamado telefónico (usando el dispositivo opcional BTM10) en el
teléfono del automóvil o cuando se realiza una navegación verbal (usando el
dispositivo opcional NAV102).
Selección de Fuente de Reproducción
Con el monitor cerrado, presione el botón SRC en el panel frontal (4) o el
botón (8) en el control remoto para cambiar en tre las fuentes de reproducción
disponibles en el siguiente orden: RADIO, DISC, USB1, USB2, SD, BT, NAV,
AUX y CAMERA.
Source Menu
Puede también usar la pantalla táctil para cambiar la fuente a través del
SOURCE MENU. Para acceder al SOURCE MENU (MENU DE FUENTE),
13
Page 81

VM9224
SOURCE MENU
RADIO
RADIOBTDISC
NAV
USB1
AUX
USB2 SD
CAMERA
N
S
E
W
8GB
MUTE
1
2
3
4
Video
Audio Izquierdo
Audio Derecho
Tierra
Cable 3.5mm A/V (no incluido)
toque la esquina superior izquierda de la pantalla (o presione el botón (4 ) SRC
en el panel frontal o el control remoto (8).
Toque el botón RADIO, DISC, USB1, USB2, SD, BT, NAV, AUX o CAMERA
para seleccionar la fuente correspondiente.
NOTA: Si hay un iPod conectado al puerto USB1, aparecerá "IPOD en vez
del texto "USB1".
Dispositivos Externos
Pueden conectarse dispositivos periféricos externos, incluyendo consolas de
juegos, camcorders, unidad de navegación, iPod, Zune, etc. a esta unidad vía
salidas RCA usando el cable adaptador de medios A/V (no incluido).
Conectar el dispositivo externo al Cable de Medios A/V y luego enchufar el
cable dentro del conector de ENTRADA A/V (9) en el frente de la radio.
Seleccionar los modos de “AUX” o “AUX IN” (con el monitor cerrado) para
acceder a los dispositivos auxiliares. Para información sobre los dispositivos
USB, vea “Cómo insertar un Dispositivo USB o USB” on page 41.
14
Page 82

VM9224
Ajuste de Volumen
Subir/Bajar el Volumen
Para aumentar o disminuir el nivel de volumen, gire el codificador giratorio (7)
en el panel frontal o presione los botones VOL-/+ (15, 16) en el control
remoto. Cuando el nivel de volumen alcanza “0” o “40”, suena un bip,
indicando que se ha alcanzado los límites del ajuste. La pantalla TFT muestra
el nivel de volumen por 3 segundos.
Volumen de encendido Programable
Esta función le permite al usuario seleccionar el volumen de encendido sin
importar el volumen anterior al apagado de la unidad.
Para programar un nivel específico de encendido, gire el codificador giratorio
(7) para ajustar el volumen al volumen de encendido deseado. Presione y
mantenga el codificador giratorio mientras el icono de parlante y la indicación
de nivel se muestra en la pantalla. La unidad tocará un bip para confirmar su
preferencia de volumen de encendido.
Menú Control de Audio
La función menú Control de Audio le per mi te ajust ar fácilmente su sistema de
audio para cubrir las características acústicas de su vehículo, las cuales
varían dependiendo del tipo de vehículo y su tamaño. El valor adecuado del
Fader y Balance refuerza los efectos del ecualizador de cabina.
T oq ue el botón EQ en el lado izq uierdo d e la p ant alla o p ulse el botón EQ (3 2)
en el control remoto para mostrar el menú de audio.
• Utilice los botones de la pantalla táctil +/- para ajustar el valor para una
función de audio.
• Para ajustar la función de audio utilice el control remoto, realice los
siguientes pasos:
a. Pulse los botones (>>|)/(|<<) (19, 17) para resaltar la función de audio
a ser ajustada.
b. Presione el botón >/|| (18) para seleccionar la opción resaltada.
15
Page 83

VM9224
n
c. Toque los botones |<<, >>|, >>, o << (12, 15, 17, 20) en el control
remoto para ajustar la función seleccionada a la preferencia deseada.
Tabla 3: Ajustes de Audio
Función de Audio Rango Ajustable
EQ Usuario
BASS (Graves) -14 a +14
MID -14 a +14
TREBLE (Agudos) -14 a +14
SUB -14 a 0
FAD Grilla
BAL Grilla
NOTA: El modo EQ cambiará automáticamente a “USER” cuando son
ajustadas funciones individuales de audio.
Acústica
Urbano
Rave
Latino
Dance
Hip Hop
Rock
El menú de audio saldrá automáticamente después de unos segundos de
inactividad. Para salir rápidamente, toque la esquina superior izquierda de la
pantalla o presione y mantenga el codificador giratorio (7).
Restauración del Sistema
Para corregir una falla de sistema u otra operación
impropia, use la punta de una pluma para presionar el
botón de restaurar (10) ubicado en la esquina inferior
derecha frontal de la unidad. Después de restaurar el sistema, la unidad
restablece todas las características especificadas de fábrica.
[RESET] Butto
NOTA: Si la unidad es restaurada mientras se reproduce un DVD, el DVD
vuelve a reproducción una vez que la restauración se completa.
16
Page 84

VM9224
Control de Volante (SWC)
El VM9224 es compatible con el adaptador SWI-PS de control de volante PAC
(Pacific Accessory Corporation). Un conector hembra de 3.5mm (marcado
“SWC Interface”) en la parte trasera de la unidad principal permite
conectividad al adaptador PAC. Por favor refiérase a las instrucciones
incluidas en el adaptador PAC para información detallada de instalación.
Funciones SWC
Los siguiente controles están disponibles en la mayoría de los vehículos.
1. Bajar Volumen
2. Subir Volumen
3. Silenciar
4. Buscar Hacia Abajo / Pista Previa/**Prefijada Hacia Abajo
5. Buscar Hacia Arriba / Pista Próxima/**Prefijada Hacia Arriba
6. SRC (Fuente)
7. ** Seleccionar
8. ** Seleccionar
9. Banda
** Si hay botones adicionales de control de volante en el vehículo, podrían
asignarse las funciones 7 / 8 a la función "Seleccionar". Esta función/
característica podría no estar disponible en algunos vehículos.
Seleccionar operación
Si "Seleccionar" (función 7 u 8) se mantiene presionada y función 4 se
presiona momentáneamente. se seleccionará Prefijadas Hacia Arriba. Si
"Seleccionar" (función 7 u 8) se mantiene presionada y función 5 se presiona
momentáneamente se seleccionará Prefijadas Hacia Abajo.
17
Page 85

VM9224
Rating
Bluetooth
Hardware
P.VOL
TS Cal
General Language
Audio Back
DEMO
Clock Mode 12Hr
Clock 04 : 31 AM
Tuner Region USA
Beep On
SETUP MENU
RADIO
RDS
05:33 AM
BOTONES DE DIRECCIONES
MENÚ DE CONFIGURACIÓN
Para acceder a las preferencias del sistema, presione el botón SETUP (29) en
el control remoto o toque el botón en la pantalla para ingresar al menú
“SETUP”. El sub-menú “GENERAL” aparece resaltado en azul.
Cómo Acceder a los Ítems del Menú
Toque el nombre del sub-menú, presione los botones de direcciones <<, >>,
|<<, o >>| (22, 14, 17, 19) en el control remoto para seleccionar un sub-menú
(Idioma, Audio, RDS, etc.).
Los dispositivos disponibles para ajustes bajo la opción de sub-menú
resaltada aparecerán en el centro de la pantalla.
18
Page 86

VM9224
Cómo ajustar una función
1. Use la pantalla táctil para seleccionar la función a ser ajustada.
2. Ingrese el campo de opción para la función que desea ajustar usando la
pantalla táctil o presionar el botón >/|| (18) en el control remoto. Aparece
un submenú en una segunda línea con la opción seleccionada resaltada
en azul.
3. Seleccione un nuevo valor usando la pantalla táctil o presionando los
botones >> o << (14, 22) en el control remoto.
4. Use la pantalla táctil o presione el botón >/|| (18) en el control remoto para
confirmar la fijación.
19
Page 87

VM9224
Funciones de Sub-menú General
Preferencias Opciones Función
Clock Mode
(Modo Reloj):
Clock
(Reloj)
Tuner Region
(Región de
Sintonizador)
Beep On Cuando está activado, Un tono bip audible confirma
12Hr El reloj muestra 12 horas usando AM y PM.
24Hr El reloj muestra 24 horas hasta las 23:59.
(HH:MM) El reloj aparece en la esquina superior derecha de la
USA
(EE.UU)
S.Amer1 • Espaciado de Frecuencia AM - 10KHz
Arabia • Espaciado de Frecuencia AM - 9KHz
China • Espaciado de Frecuencia AM - 9KHz
S. Amer2 • Espaciado de Frecuencia AM - 5KHz
Europe
(Europa)
Korea
(Corea)
Off Sin sonido bip
pantalla y en la pantalla LCD durante determinadas
operaciones. NOTA: La indicación AM/PM cambiará a
medida que continúa ajustando la hora pasadas las 12.
• Espaciado de Frecuencia AM - 10KHz
• Banda de Frecuencia AM - 530kHz~1720kHz
• Espaciado de Frecuencia FM - 200kHz
• Banda de Frecuencia FM - 87.5MHz~107.9MHz
• Banda de Frecuencia AM - 530kHz~1720kHz
• Espaciado de Frecuencia FM - 100kHz
• Banda de Frecuencia FM - 87.5MHz~108.0MHz
• Banda de Frecuencia AM - 531kHz~1620kHz
• Espaciado de Frecuencia FM - 100kHz
• Banda de Frecuencia FM - 87.5MHz~108.0MHz
• Banda de Frecuencia AM - 522kHz~1620kHz
• Espaciado de Frecuencia FM - 100kHz
• Banda de Frecuencia FM - 87.5MHz~108.0MHz
• Banda de Frecuencia AM - 530kHz~1600kHz
• Espaciado de Frecuencia FM - 100kHz
• Banda de Frecuencia FM - 87.5MHz~108.0MHz
• Espaciado de Frecuencia AM - 9KHz
• Banda de Frecuencia AM - 522kHz~1620kHz
• Espaciado de Frecuencia FM - 50kHz
• Banda de Frecuencia FM - 87.5MHz~108.0MHz
• Espaciado de Frecuencia AM - 9KHz
• Banda de Frecuencia AM - 531kHz~1602kHz
• Espaciado de Frecuencia FM - 200kHz
• Banda de Frecuencia FM -88.1MHz~107.9MHz
cada selección de función.
20
Page 88

VM9224
Funciones de Sub-menú Idioma
Si un DVD soporta más de 1 Subtítulo o Idioma de Audio, todos los idiomas
están disponibles para la selección durante la reproducción. Si el idioma
seleccionado no está soportado por el DVD, entonces es usado el idioma
predeterminado
Preferencias Opciones Función
Language
(Idioma)
Subtitle
(Subtítulo)
Audio Inglés El Audio del DVD se escucha en Inglés cuando la
DVD Menu
(Menú DVD)
Funciones de Sub-menú de Audio
Preferencias Opciones Función
DRC Off Emplee el Control Dinámico de Rango para mejor
Loudness
(Sonoridad)
Subwoofer Off Enciende/apaga el
Sub Filter
(Sub Filtro)
Inglés La pantalla se muestra en Inglés.
Inglés Los subtítulos de DVD aparecen automáticamente
Auto Los subtítulos del DVD aparecen de acuerdo al idi-
Off Los subtítulos de DVD no aparecen automática-
Inglés El Menú de DVD (si corresponde) se muestra en
On
Off Activar/Desactivar Refuerzos de Graves
On
On
80Hz Seleccionando una frecuencia de fusión fija una fre120Hz
160Hz
en Inglés cuando está disponible.
oma de subtítulo predeterminado especificado en el
disco.
mente.
opción está disponible.
Inglés.
reproducción en bajos volúmenes.
cuencia de corte para los LPF del subwoofer (Filtro
de graves).
21
Page 89

Funciones de Sub-menú RDS
Preferencias Opciones Función
RDS Off
CT Off
On
On
Funciones de Sub-menú de Bluetooth
Preferencias Opciones Función
Bluetooth Off Desactivar función Bluetooth.
Connect
(Conectar)
Auto Answer
(Respuesta
Automática)
Pairing Code
(Código de Apareamiento)
On Activar función Bluetooth.
Manual Conectar el último teléfono móvil activo tocando el
Auto Conectar Automáticamente cuando el teléfono
Manual Responda manualmente llamadas tocando el
Auto La unidad responde automáticamente todas las
icono CONECTAR cuando se desconecta.
apareado está en rango.
botón "llamada"
llamadas entrantes.
El código predeterminado es “1234”. Toque el
icono de teclado para abrir un teclado e ingresar
un código de apareamiento o clave de acceso
requerido para la conexión Bluetooth a su teléfono
móvil. No todos los teléfonos/dispositivos
requieren un código de apareamiento. El código
predeterminado es “0000” para muchos modelos.
VM9224
22
Page 90

VM9224
Funciones de Sub-menú Calificación
El sistema de DVD tiene incorporado una función de bloqueo parental para
evitar que personas no autorizadas vean un disco con contenido restringido.
Como predeterminado, el sistema de calificación está desbloqueado. Una vez
fijado, el bloqueo parental es liberado sólo al ingresar la contraseña correcta.
Una vez ingresada la contraseña, la calificación está disponible para ser
fijada.
Preferencias Opciones Función
Password
(Contraseña)
Parental Ctrl
(Ctrl Parental)
Load Factory
(Carga de
Fábrica)
Para restaurar la contraseña, acceda al menú “RATING” e ingrese la
contraseña actual. Una vez ingresada la contraseña correcta, puede acceder
al campo “Password (contraseña)” e ingresar una nueva.
NOTA: Registre la contraseña y guárdela en un lugar seguro para
referencias futuras. La calificación para cada disco está marcada en
cada disco, empaque del disco o documentación. Si la calificación no
está disponible en el disco, la función de bloqueo parental no está
disponible. Algunos discos sólo restringen porciones del disco y el
contenido adecuado se reproducirá. Para detalles, por favor refiérase a
la descripción del disco.
_ _ _ _ Ingrese una contraseña de 4 dígitos para activar el
1. Kid Safe
(1. Niño
seguro)
2. G
3. PG
4. PG-13
5. PG-R
6. R
7. NC-17
8. Adult
(8. Adulto)
Reset
(Restaurar)
dispositivo “Calificación”.
Seleccione el nivel de calificación adecuado para la
audiencia deseada.
Podría pasar por encima de calificaciones mayores
usando su contraseña.
Seleccione “Reset” para restaurar la configuración
predeterminada de fábrica sólo para el sistema de
calificación.
23
Page 91

VM9224
Funciones de Sub-menú de Hardware
Preferencias Opciones Función
Camera In
(Cámara Ent)
Video Input
(Input circuitry autodetects the video signal from
the Aux In source).
(Entrada de Video
(El circuito de entrada
detecta automá ticamente
la señal de video de la
fuente de entrada Auxiliar).
Si el monitor está en modo pantalla, el monitor automáticamente cambia al
modo CÁMARA cuando conduce en reversa. Cuando detiene la conducción
en reversa, el monitor vuelve a su modo de entrada original.
Funciones de Sub-menú P.VOL
Preferenc
Source
(Fuente)
Level
(Nivel)
Opcione
ias
s
RADIO Elija una fuente para la cual desea aumentar el volumen relDISC
USB1
USB2
SD
BT
NAV
AUX
CAMERA
0-6 Aumenta el volumen relativo para la fuente especificada
S Cal (Calibración de pantalla)
Para acceder la función de "Calibración de Pantalla" desde el menú SETUP,
seleccione la opción “TS CAL”.
Después de ingresar al modo de calibración, aparece un cruz en una
esquina de cuadrante de la pa ntalla. Para comenzar la calibración, presione y
Normal
Mirror
(Espejo)
NTSC Las señales de color están en el formato
PAL Las señales de color están en el formato
Auto La señal de colo r cambia automáticamente
ativo (NIVEL).
hasta 6 decibeles.
Invierte la imagen de la cámara como si
mirara por el espejo retro-visor.
NTSC estándar.
PAL estándar.
basada en la señal de entrada de video
actual - NTSC o PAL.
Función
24
Page 92

VM9224
mantenga la cruz por un segundo hasta que se mueva al cuadrante siguiente.
Continúe con cada cuadrante hasta completar la calibración.
Funciones de Sub-menú DEMO
Puede detener/reproducir el modo demostración o activar/apagar el Modo
Demo eligiendo la opción "Demo" desde el MENÚ SETUP.
Cuando Demo "Auto Run" (Auto Reproducción) está Off, puede seleccionar
"Demo > Run" (Demo > Reproducción) para iniciar el Modo Demo. La
Demostración navega por distintas pantallas de fuente, simulando actividad
en la pantalla. El “Demo” es directamente mostrado en texto azul (abajo del
reloj), para indicar que la unidad está en Modo Demo. Para detener el Modo
Demo, presione el cuadrante superior izquierdo del TFT (seleccionar Fuente).
Cuando “Demo Auto Run” está en On, la unidad automáticamente mostrará
Modo Demo cuando se enciende.
Cómo salir del Menú de Configuración del Sistema
Para salir del modo preferencias y volver a la reproducción normal presione el
botón SETUP (31) en el control remoto o toque el botón BACK en la pantalla.
25
Page 93

OPERACIÓN DE SINTONIZADOR
4
1
10
21
22
5
7
8
3
6
17
FM-1 P1 87.5 MHz
01:02 PM
E
Q
PS
PTY
BAND
AS
1/2
2/2
MEM
LOC
P1 87.5 MHz
P2 90.1 MHz
P3 98.1 MHz
P4 106.1MHz
P5 107.9MHz
P6 102.9MHz
PS:
ST
LOC PTY RDS
2
16
16
15
23
11
18
25
20
24
12
13
14
19
9
RADIO
Pantalla TFT de Sintonizador
VM9224
1. Indicador de banda actual de radio
2. Indicador de frecuencia de Radio
3. Reloj
4. Indicador de Transmisión Estéreo
5. Indicador de señal de transmisión local fuerte
6. Estaciones de radio prefijadas: Toque para activar las estaciones
prefijadas
7. Información relativa a la función actual
8. EQ: Toque para acceso rápido a fijaciones de nivel de ecualizador
9. : Toque para acceder el ingreso directo a pantalla.
10. Indicador de estación prefijada actual
11. |<<: Toque para buscar hacia atrás
12. >>|: Toque para buscar hacia adelante
13. <<: Toque para sintonizar un paso hacia atrás
14. >>: Toque para sintonizar un paso hacia adelante
26
Page 94

VM9224
15. BANDA: Toque para cambiar entre las bandas AM/FM
16. 1/2: Toque para ver la segunda pantalla del menú de opciones
17. : Toque para ver el MENU SOURCE y seleccione una nueva fuente de
reproducción
18. MEM: Ver pantalla usada para ingresar el canal actual dentro de una
memoria prefijada
19. : Toque para ver el menú SETUP
20. PS (Buscar Prefijadas): Toque para buscar todas las estaciones
disponibles, deteniéndose por 5 segundos en cada una y continuando
hasta que sea seleccionada una estación
21. Indicador PTY
22. Indicador RDS
23. AS: Toque para almacenar automáticamente estaciones
24. PTY: Toque pa ra activar las funciones PTY.
25. LOC: Presione para activar/desactivar la función Local
Cómo Cambiar a Fuente de Sintonizador de Radio
• Para la esquina superior izquierda de la pantalla (círculo de RADIO) para
ver el MENU SOURCE. Toque “Radio”.
• Presione el botón (4) SRC en el panel frontal o el control remoto (8) para
cambiar a la AM/FM o fuente RADIO.
Cómo seleccionar la Banda AM/FM
Toque el botón BAND (15) en la pantalla, o presione el botón ||>/BAND en el
control remoto (30) para cambiar entre las siguientes bandas: FM1, FM2,
FM3, AM1, y AM2.
NOTA: El botón BAND en la unidad sólo funciona cuando el TFT está
cerrado.
Buscar Sintonización
Para buscar la siguiente estación más alta:
• Toque el botón >>| en la pantalla.
• Presione el botón >>| (19) en el control remoto.
Para buscar la siguiente estación más baja:
• Toque el botón |<< en la pantalla.
• Presione el botón |<< (17) en el control remoto.
Sintonizado Manual
Para aumentar o disminuir un paso la frecuencia de sintonización:
• Toque los botones >> o << en la pantalla.
• Presione los botones >> o << (14, 22) en el control remoto.
27
Page 95

VM9224
FM:___._MHz
1
2
3
4
5
6
7
8
9
0
Clear
Exit
Enter
Preset: _
Exit
P1
P2
P3
P4
P5
P6
Sintonía Directa
Para ingresar directamente una estación de radio, toque el botón o
presione el botón GOTO (21) en el control remoto para mostrar el menú de
ingreso directo.
Ingrese la estación de radio deseada usando el teclado numérico en pantalla.
Presione el botón Enter (Intro) para sintonizar la estación seleccionada. Para
salir de la pantalla sin cambiar de estación, toque Exit (Salir). Para limpiar su
ingreso y comenzar de nuevo, toque Clear (Limpiar).
Cómo usar Estaciones Prefijadas
Seis botones numerados de prefijado almacenan y activan estaciones para
cada banda. Las seis estaciones almacenadas (P1-P6) para la banda actual
aparecen en la pantalla.
Cómo almacenar una Estación
1. Seleccione una banda (si es necesario), luego seleccione una estación.
2. Toque el botón en pantalla MEM (18) para abrir la pantalla de prefijados
3. Toque el número de prefijado donde desea almacenar la estación actual
(o presione Exit para cancelar y cerrar el menú). El número prefijado y la
estación aparecen resaltados.
28
Page 96

VM9224
P1 87.5 MHz
P2 90.1 MHz
P3 98.1 MHz
P4 106.1MHz
P5 107.9MHz
P6 102.9MHz
Cómo activar una Estación
1. Seleccione una banda (si es necesario).
2. Toque un botón (6) de prefijado en pantalla para seleccionar la estación
almacenada correspondiente.
Almacenamiento Automático / Vista previa de
búsqueda (AS/PS)
Almacenamiento Automático (AS)
Para seleccionar seis estaciones fuertes y almacenarlas en la banda actual:
1. Seleccione una banda (si es necesario).
2. Toque el botón AS (23) en la página 2/2 de los controles en pantalla para
activar la función Auto Almacenar.
Las nuevas estaciones reemplazan las estaciones ya almacenadas en esa
banda.
Buscar Prefijadas (PS)
Para explorar la banda AM o FM para vista previa de estaciones disponibles
en un área en particular, toque el botón PS (20). Toque nuevamente para
detener la exploración de vista previa.
Búsqueda de Estación de Radio Local (LOC)
Cuando la función local está activada, sólo se reproducen señales de radios
locales fuertes. Para activar la función Local en modo de sintonización AM/
FM, presione y mantenga el codificador giratorio botón (7) en el panel frontal.
Presione y mantenga el codificador giratorio nuevamente para desactivar la
función Local. Cuando la función Local está activa, el indicador LOC en la
parte superior de la pantalla se ilumina.
29
Page 97

VM9224
OPERACIÓN DE VIDEO DE DVD/
VCD
NOTA: Cuando está instalado correctamente, no puede mostrarse video
de DVD en la pantalla principal TFT a menos que esté aplicado el freno
de estacionamiento. Si intenta reproducir un DVD mientras el vehículo
está en movimiento, la pantalla TFT muestra "PARKING" sobre un fondo
azul. Las pantallas de video traseras, si las hay, funcionarán
normalmente.
Cómo Insertar un Disco
Luego de insertar un disco DVD, se ingresa al modo DVD y comienza la
reproducción del disco.
NOTA: Si el Bloqueo de Padres (calificación) está activado y el disco
insertado no está autorizado, debe ingresarse el código de 4 dígitos y/o
el disco debe autorizarse (ver “Funciones de Sub-menú Calificación” on
page 23).
No puede insertar un disco si ya hay un disco en la unidad o si está apagada.
NOTA: DVD-R y DVD-RW no se reproducirán a menos que la sesión de
grabación esté finalizada y el DVD esté cerrado.
Cómo Expulsar un Disco
Presione el botón (3) en la unidad o el control remoto (35) para expulsar el
disco. La unidad vuelve automáticamente al modo Sintonizador. Puede
expulsar un disco con la unidad apagada. La unidad permanecerá apagada
luego de expulsar el disco.
Cómo restaurar el Mecanismo de Carga
Si el disco carga anormalmente o se produce un funcionamiento anormal del
mecanismo principal, presione y mantenga el botón (3) en la unidad o el
control remoto (35) para restaurar el mecanismo de carga. Se vuelve a la
operación normal.
Cómo Acceder el Modo DVD
Para cambiar al modo DVD cuando el disco ya está insertado, presione el
botón (4) SRC en el panel frontal o el control remoto (8).
30
Page 98

VM9224
1/2
MENU
2/2
DISP
AUDIO
A-B
TITLE
SUBTITLE
Cómo Controlar la Reproducción
Para acceder los controles en pantalla, toque el tercio inferior de la pantalla
mientras se está reproduciendo un DVD. Toque el botón 1/2 para ver una
segunda página de los controles.
Cómo Detener la Reproducción
Toque el botón stop "detener" ( ) en la pantalla o presione el botón ||>/BAND
(20) en el control remoto para detener la reproducción del DVD.
Cómo Pausar la Reproducción
Toque el botón reproducir/pausar (>) en la pantalla o pulse el botón >/|| en el
control remoto (18) para suspender o reanudar la reproducción del disco.
Reproducción Lenta
Presione el botón << (22) en el control remoto o el botón << en la pantalla
para reproducir el título actual en cámara lenta. Mantenga presionando y
liberando el botón para aumentar el índice de “2X” a “4X”, “8X”, y “20X”.
Presione >/|| (16) en el control remoto o el botón reproducir de pantalla táctil
(>) para volver a la reproducción normal.
Reproducción Avance Rápido
Presione el botón >> (14) en el control remoto o el botón >> en la pantalla
para avance rápido. Mantenga presionando y liberando el botón para
aumentar el índice de “2X” a “4X”, “8X”, y “20X”.
Repetir Reproducción
Presione el botón RPT (7) en el control remoto o el botón en pantalla para
alternar el modo repetición de acuerdo a lo siguiente:
• DVD: Repetir Capítulo, Repetir Título, Repetición Desactivada
• VCD (PBC Off): Repetir una, Repetición desactivada
31
Page 99

VM9224
NOTA: Para reproducir VCD, la función repetir no está disponible si PBC
está activado.
Función de Repetir Sección (A-B)
Use la función A-B para definir un área específica de un disco a repetir.
• Presione el botón REPT A-B (6) en el control remoto (o el botón A-B en
pantalla) para fijar el punto de inicio (A) de la sección repetida.
• Presione nuevamente el botón REPT A-B una vez que alcanza el punto
final (B) deseado de la sección repetida. La porción seleccionada del DVD
se repetirá ahora continuamente.
• Presione nuevamente el botón REPT A-B para cancelar la fijación de
sección A-B y detener la repetición de reproducción.
Cómo acceder el Menú DVD
Presione el botón MENÚ (1) en el control remoto para llamar al menú DVD
principal. Use los botones direccionales (flechas) en el control remoto para
seleccionar un título del menú o toque el título en pantalla.
Presione el botón TÍTULO (2) en el control remoto o en la pantalla para
seleccionar un título distinto para reproducción.
Presione el botón >/|| (18) en el control remoto o pulse el codificador giratorio
(7) para confirmar su selección y comenzar la reproducción. También puede
seleccionar un título usando la pantalla táctil.
Cómo moverse por los capítulos
Presione el botón >>| (19) en el control remoto o el botón >>| en pantalla para
avanzar al próximo capítulo en el DVD.
Presione el botón |<< (17) en el control remoto o el botón |<< en pantalla para
moverse al capítulo anterior.
Búsqueda Goto (Ir A)
Durante la reproducción de DVD o VCD, realice los siguientes pasos para
usar la función GOTO para acceder a una ubicación específica en el disco:
1. Presione el botón GOTO (21) en el control remoto para ingresar a la pantalla de “Búsqueda”.
2. Presione los botones >> o << (14, 22) en el control remoto para
seleccionar una categoría.
32
Page 100

VM9224
Search
Title 20
Chapter 5
Time 00:00:00
Búsqueda de DVD
Track – Va a una pista
específica
Chapter – Va a un capíto
especifico
Time – Va a un momento
específico en el título actual
Search
Time 00:00:00
Búsqueda de Pista VCD
Time – Va a un momento
específico en la pista actual
• Para el modo DVD, puede elegir búsqueda de tiempo o Título/
Capítulo.
• Para el modo VCD, pulse el botón GOTO para camb iar en tre el mo do
de búsqueda por Tiempo
3. Ingrese un momento dentro del campo usando el teclado numérico (29)
en el control remoto.
4. Presione el botón >/|| (18) en el control remoto o presione el codificador
giratorio (7) para ir a una ubicación específica en el disco.
5. Presione el botón GOTO nuevamente para salir.
Selección directa de Capítulo / Pista
Ingreso Directo en el Control Remoto
Durante la reproducción de DVD, VCD y CD, puede usar el teclado numérico
en el control remoto (29) para acceder directamente una pista
33
 Loading...