

Page 1
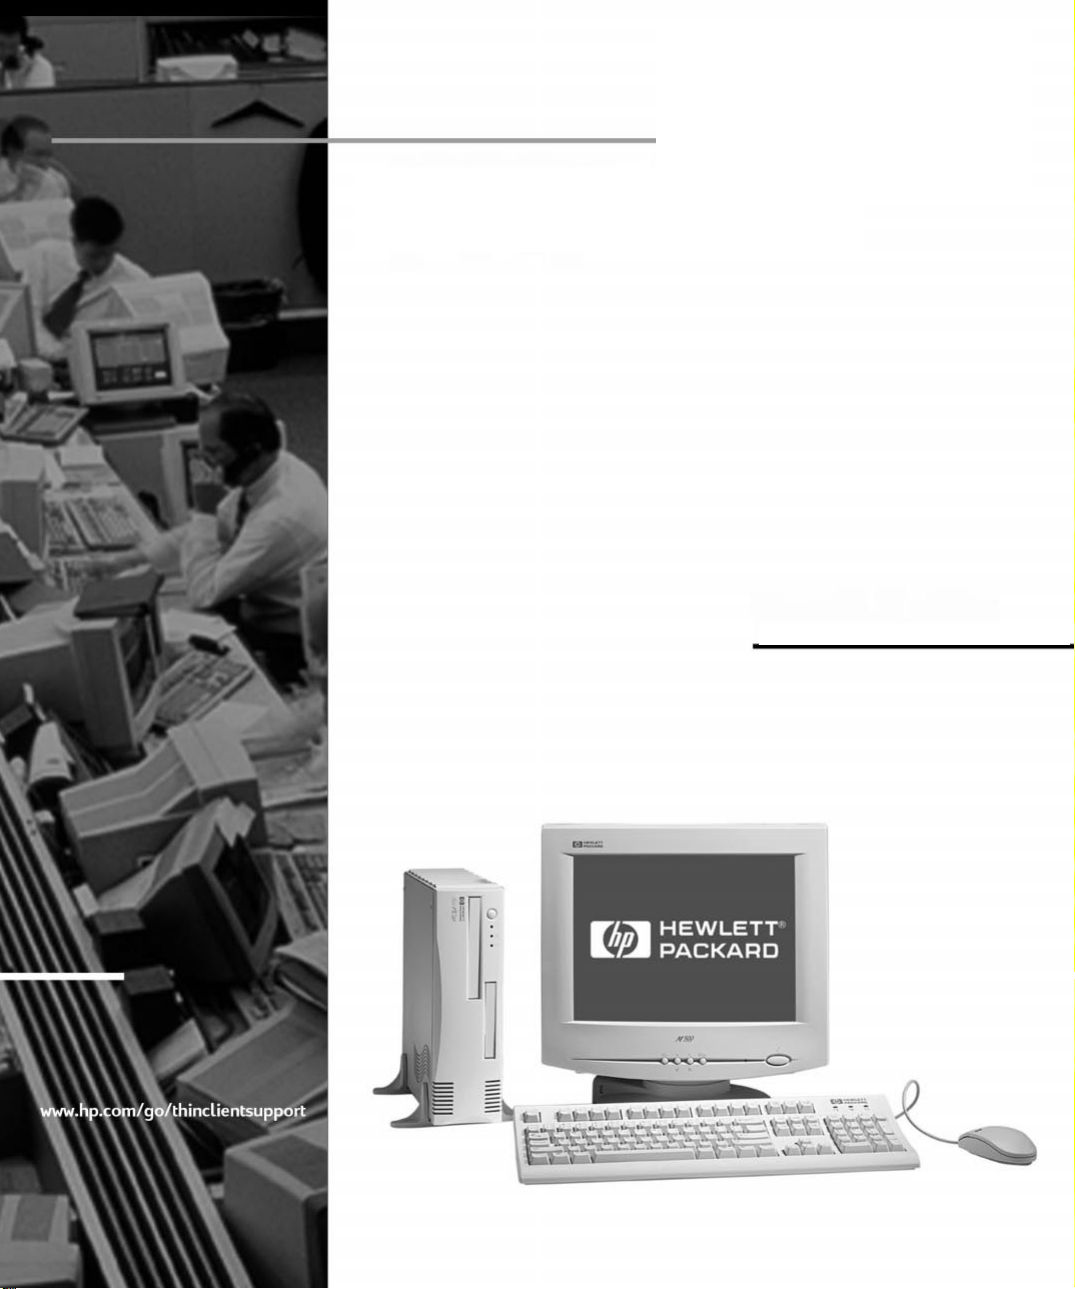
HP NetPC, HP SmallPC
& HP NetVectra
Troubleshooting Guide
Page 2

Notice
The information contained in this document is subject to change
without notice.
Hewlett-Packard makes no warranty of any kind with regard to this
material, including, but not limited to, the implied warranties of
merchantability and fitness for a particular purpose. Hewlett-Packard
shall not be liable for errors contained herein or for incidental or
consequential damages in connection with the furnishing, performance,
or use of this material.
This document contains proprietary information that is protected by
copyright. All rights are reserved. No part of this document may be
photocopied, reproduced, or translated to another language without the
prior written consent of Hewlett-Packard Company.
Matrox
Adobe
Microsoft
registered trademarks of Microsoft Corporation.
Hewlett-Packard France
Thin Client Operation
38053 Grenoble Cedex 9
France
is a registered trademark of Matrox Graphics Inc.
®
TM
and AcrobatTM are trademarks of Adobe Systems Incorporated.
®, MS®
, MS-DOS
1999 Hewlett-Packard Company
®, Windows and Windows NT®
are U.S.
Page 3

Who this Manual is For
This manual is for anyone who wants to troubleshoot problems on their
HP NetPC, SmallPC and NetVectra PC and find out where to get more
information and support.
Important Ergonomic Information
It is strongly recommended that you read the ergonomic information
before using your PC. To view this information you can connect to HP’s
ergonomic web site at
Important Safety Information
http://www.hp.com/ergo.
WARNING
For your safety, never remove the PC's cover without first removing the power
cord and any connection to a telecommunication network. Always replace the
cover before switching the PC on again.
There is a danger of explosion if the battery is incorrectly installed. For your
safety, never attempt to recharge, disassemble, or burn the old battery.
Replace only with the same or equivalent type recommended by the
manufacturer. The battery in this PC is a lithium battery that does not contain
heavy metals. Nevertheless, in order to protect the environment, do not
dispose of batteries in household waste. Please return used batteries to the
shop from which you bought them, to the dealer from whom you purchased
your PC, or to HP so they can either be recycled or disposed of in a sound way.
Returned used batteries will be accepted free of charge.
If you have a modem:
Do not attempt to connect this product to the phone line during a lightning
storm. Never install telephone jacks in wet locations unless the telephone line
has been disconnected at the network interface. Never touch uninsulated
telephone wires or terminals unless the telephone line has been disconnected
at the network interface. Use caution when installing or modifying telephone
lines. Avoid using a telephone (other than a cordless type) during an lightning
storm. There may be a risk from lightning.
Do not use the telephone to report a gas leak in the vicinity of the leak.
Never touch or remove the Communications board without first removing the
connection to the telephone network.
English iii
Page 4

Contents
Problems with Your PC . . . . . . . . . . . . . . . . . . . . . . . . . . . . . . . 7
If There Is No Power . . . . . . . . . . . . . . . . . . . . . . . . . . . . . . . . . 8
If There Is Nothing Displayed on the Screen . . . . . . . . . . . . . . 9
If There Is a Memory Test Error . . . . . . . . . . . . . . . . . . . . . . . 10
If There Is a Keyboard or Mouse Test Error . . . . . . . . . . . . . 11
If There Is a Floppy Disk Drive Test Error . . . . . . . . . . . . . . 12
If There Is a Hard Disk or CD-ROM Drive Test Error . . . . . . 13
If There Is a CMOS Test Error . . . . . . . . . . . . . . . . . . . . . . . . 14
If There Is a Serial or Parallel Port Test Error . . . . . . . . . . . 15
Other Configuration Problems . . . . . . . . . . . . . . . . . . . . . . . . 16
Replacing the Internal Battery . . . . . . . . . . . . . . . . . . . . . . . . 17
If You Cannot Turn Off Your PC . . . . . . . . . . . . . . . . . . . . . . . 18
iv
English
Page 5

If You Have Forgotten Your Password . . . . . . . . . . . . . . . . . . .19
If the Wake On LAN Feature Does Not Work . . . . . . . . . . . . .20
If There Is an IRQ Problem . . . . . . . . . . . . . . . . . . . . . . . . . . . . 21
If Your PC Has an Audio (Sound) Problem . . . . . . . . . . . . . . . 22
If Your PC Has a Software Problem . . . . . . . . . . . . . . . . . . . . . 23
Recovering Hard Disk Contents . . . . . . . . . . . . . . . . . . . . . . . . 24
HP Setup Program . . . . . . . . . . . . . . . . . . . . . . . . . . . . . . . . . . . 25
Further Troubleshooting for Hardware Problems . . . . . . . . .26
Hewlett Packard Support and Information Services . . . . . . .30
English v
Page 6

1
Troubleshooting Your PC
Page 7
1 Troubleshooting Your PC
Problems with Your PC
Problems with Your PC
Problem Cause and Solution
If there is no power Refer to page 8
If there is nothing displayed on the screen Refer to page 9
If there is a memory test error Refer to page 10
If there is a keyboard or mouse test error Refer to page 11
If there is a floppy disk drive test error Refer to page 12
If there is a hard disk or CD-ROM drive test error Refer to page 13
If there is a CMOS test error Refer to page 14
If there is a serial or parallel port test error Refer to page 15
Other configuration problems Refer to page 16
You cannot turn off the PC The PC is frozen in power
saving mode
You have forgotten your password Refer to page 19
The Wake On LAN feature does not work Refer to page 20
There is an IRQ problem when you install an accessory board The IRQ used by the
accessory board is
conflicting with the IRQ used
by another device
The PC has an audio problem Refer to page 22
The PC has a software problem Refer to page 23
You want to recover the contents of your hard disk Refer to page 24
You want to verify your PC’s configuration Refer to page 25
You want to solve problems with your disk drives and accessory
boards
You want to know how to get more information and support Refer to page 30
Refer to page 26
Refer to
page 18
Refer to
page 21
7 English
Page 8
If There Is No Power
Problem Check that... How
PC does not start – the
PC’s power-on indicator
is not illuminated.
If the PC still does not start
WARNING: For your
safety, never remove
the PC’s cover without
first removing the
power cord from the
power outlet, and any
connection to a
telecommunication
network. Always
replace the cover
before switching the
PC on again.
If the PC still does not start
WARNING: To avoid
electric shock, do not
open the power
supply. There are no
user serviceable parts
inside.
If the problem persists, contact HP Support or your authorized dealer
The PC’s power cord is
correctly connected.
The PC’s power outlet is
working.
None of the internal
devices are causing the
problem.
It is not the power
supply unit that is
causing the problem.
Connect the power cord to a grounded
power outlet and the PC.
Plug a light into the grounded power outlet
and check it illuminates.
• Disconnect the PC’s power cord.
• Open the PC.
• Remove internal power connectors from
all internal devices.
• Reconnect the PC’s power cord.
• Reconnect the power connectors one by
one to the internal devices to see which
device is defective.
• Contact HP Support or your authorized
dealer.
• Replace the power supply unit by a
known working power supply from
another similar PC.
• If the PC starts, contact HP Support or
your authorized dealer; the power supply
unit might need replacing.
1 Troubleshooting Your PC
If There Is No Power
English 8
Page 9
1 Troubleshooting Your PC
If There Is Nothing Displayed on the Screen
If There Is Nothing Displayed on the Screen
Problem Check that... How
PC’s power indicator
light and hard disk
activity light work but
the screen remains
blank.
If the monitor still does not work
If the monitor still does not work
If the monitor still does not work
The monitor is switched
ON (LED is on).
The monitor’s power
cord is correctly
connected.
The monitor’s power
outlet is working.
The monitor’s
brightness and contrast
settings are correct.
The video cable pins are
not damaged.
The monitor itself is not
faulty.
Refer to the monitor manual for an explanation of the LED
signals (green, orange, or blinking).
Connect the power cord – ensure it is plugged into a
grounded power outlet and into the monitor.
Plug a light into the grounded power outlet and check it
illuminates.
Refer to the monitor manual if necessary.
• Switch off and unplug the monitor.
• Disconnect the video cable and straighten any bent pins.
• Reconnect the video cable.
• Switch on the monitor and see if it works.
• Replace the monitor by a known working monitor from
another similar PC.
• If the monitor starts, contact HP Support or your
authorized dealer. The monitor may need to be replaced.
9 English
Page 10

If There Is a Memory Test Error
Problem Check that... How
Power-On-Self-Test displays a
memory test error.
WARNING: For your safety,
never remove the PC’s cover
without first removing the
power cord from the power
outlet, and any connection to
a telecommunication
network. Always replace the
cover before switching the PC
on again.
If the PC still does not boot
If the PC still does not boot
If the problem persists, contact HP Support or your authorized dealer
The PC’s memory
modules are correctly
installed.
The PC’s memory
modules are working.
The system board is
working.
• Disconnect the power cord.
• Open the PC.
• Check the memory modules are of the
• Close the PC, reconnect the power cord
• Refer to the Accessories Guide for more
• Disconnect the power cord.
• Open the PC.
• Replace the memory modules by known
• Close the PC, reconnect the power cord
• Refer to the Accessories Guide for more
• Disconnect the power cord.
• Open the PC.
• Replace the system board by a known
• Close the PC, reconnect the power cord
• If the PC works, contact HP Support or
1 Troubleshooting Your PC
If There Is a Memory Test Error
correct type and in the correct sockets.
and check that the PC boots (starts).
information.
good memory modules from a similar
PC.
and check that the PC boots (starts).
information.
good board from a similar PC.
and check that the PC boots (starts).
your authorized dealer for further
troubleshooting information.
English 10
Page 11

1 Troubleshooting Your PC
If There Is a Keyboard or Mouse Test Error
If There Is a Keyboard or Mouse Test Error
Problem Check that... How
Power-On-Self-Test displays a
keyboard or mouse test error.
If the keyboard / mouse still do not work
.
The keyboard and mouse cables are
correctly connected.
The keyboard is clean and no keys are
stuck down.
The mouse is clean.
• Switch off the PC.
• Plug the cables into the correct connectors on the back of
the PC.
• Check all keys are at the same height, and none are stuck
(keyboard).
• Clean the mouse ball as shown below.
If the keyboard / mouse still do not work
The keyboard / mouse are working. • Switch off the PC.
If the keyboard / mouse still do not work
WARNING: For your safety,
never remove the PC’s cover
without first removing the
power cord from the power
outlet, and any connection
to a telecommunication
network. Always replace
the cover before switching
the PC on again.
If the PC boots but you still have a problem...
The system board is working. • Disconnect the power cord.
If the keyboard works under MS-DOS,
check you have correctly configured
the keyboard for Windows.
11 English
• Replace the keyboard / mouse by known good units.
• Switch on the PC, and check it works.
• Open the PC.
• Replace the system board by a known good board from a
similar PC.
• Close the PC, reconnect the power cord and check that the
PC boots (starts).
• If the keyboard/mouse works, contact HP Support or your
authorized dealer for further troubleshooting information.
Run Windows Setup and check you chose the correct keyboard.
(Refer to your Operating System documentation for details.)
Page 12

If There Is a Floppy Disk Drive Test Error
Problem Check that... How
Power-On-Self-Test
displays floppy drive test
error.
If the drive still does not work
WARNING: For your
safety, never remove the
PC’s cover without first
removing the power cord
from the power outlet,
and any connection to a
telecommunication
network. Always replace
the cover before
switching the PC on
again.
If the drive still does not work
If the problem persists, contact HP Support or your authorized dealer
The drive is correctly
configured in the PC’s
Setup program. Refer
to page 26.
The drive cables are
correctly connected.
The drive cable is
working.
The floppy is working. Insert a known good floppy disk and see if it works.
The drive is working. • Disconnect the power cord.
The system board is
working.
• Switch the PC OFF then ON.
• Press Delete or F2 during startup to enter the Setup program.
• Check the floppy disk drive is enabled and the correct type is selected.
• Disconnect the power cord.
• Open the PC.
• Check the slim floppy drive’s ribbon cable is correctly
connected
Refer to the Accessories Guide for more information.
• Close the PC then switch it on and check it works.
• Disconnect the power cord.
• Open the PC.
• Replace the floppy drive cable by a known good cable from a similar PC (refer
to the Accessories Guide for more information).
• Close the PC then switch it on and check it works.
• Open the PC.
• Replace the floppy drive by a known good drive from a similar PC (refer to the
Accessories Guide for more information).
• Close the PC then switch it on and check it works.
• If the drive works, replace the defective drive.
• Disconnect the power cord.
• Open the PC.
• Replace the system board by a known good board from a similar PC.
• Close the PC, reconnect the power cord and check that the PC and drive work.
1 Troubleshooting Your PC
If There Is a Floppy Disk Drive Test Error
Transparent plastic side
facing this way
English 12
Page 13

1 Troubleshooting Your PC
If There Is a Hard Disk or CD-ROM Drive Test Error
If There Is a Hard Disk or CD-ROM Drive Test Error
Problem Check that... How
Power-On-Self-Test displays hard
disk or CD-ROM drive test error
If the drive still does not work
WARNING: For your safety,
never remove the PC’s cover
without first removing the power
cord from the power outlet, and
any connection to a
telecommunication network.
Always replace the cover before
switching the PC on again.
If the drive still does not work
WARNING: To avoid electrical
shock and harm to your eyes by
laser, do not open the laser
module. The laser module should
be serviced by service personnel
only. Do not attempt to make
any adjustment to the laser unit.
Refer to the label on the CDROM for power requirements
and wavelength. This product is
a class 1 laser product.
If the problem persists, contact HP Support or your authorized dealer
The drive is correctly
configured in the PC’s
Setup program. Refer
to page 27.
The drive cables are
correctly connected.
The drive cable is
working.
The drive is working. • Disconnect the power cord.
The system board is
working.
• Switch the PC OFF then ON.
• Press Delete or F2 during startup to enter the Setup program.
• Check the drive is enabled and the correct type is selected.
• Disconnect the power cord.
• Open the PC.
• Check the drive cables are correctly connected (refer to the Accessories Guide
• Close the PC then switch it on and check it works.
• Disconnect the power cord.
• Open the PC.
• Replace the drive cable by a known good cable from a similar PC (refer to the
• Close the PC then switch it on and check it works.
• Open the PC.
• Replace the drive by a known good drive from a similar PC (refer to the
• Close the PC then switch it on and check it works.
• Disconnect the power cord.
• Open the PC.
• Replace the system board by a known good board from a similar PC.
• Close the PC, reconnect the power cord and check that the PC and drive work.
• If the drive works, contact HP Support or your authorized dealer for further
for more information).
Accessories Guide for more information).
Accessories Guide for more information).
troubleshooting information.
13 English
Page 14

If There Is a CMOS Test Error
Problem Check that... How
Power-On-Self-Test displays
CMOS test error.
WARNING: For your safety,
never remove the PC’s cover
without first removing the
power cord from the power
outlet, and any connection
to a telecommunication
network. Always replace
the cover before switching
the PC on again.
If the PC still has a problem
If the problem persists, contact HP Support or your authorized dealer
Power is correctly
connected to the
system board.
The internal battery is
working.
Check the system
board is working.
• Disconnect the power cord.
• Open the PC.
• Check the power connector is correctly
• Close the PC, reconnect the power cord and
You may need to restore the default
configuration settings. Refer to page 16
• Set the PC to the correct time (refer to the
• Switch off and unplug the PC for an hour.
• Restart the PC and check the time is
• If the time is incorrect, replace the PC’s
• Disconnect the power cord.
• Open the PC.
• Replace the system board by a known good
• Close the PC, reconnect the power cord and
1 Troubleshooting Your PC
If There Is a CMOS Test Error
attached to the system board.
check that the PC boots (starts).
operating system manual).
correct.
battery with a new one (refer to page 17).
board from a similar PC.
check that the PC works.
English 14
Page 15

1 Troubleshooting Your PC
If There Is a Serial or Parallel Port Test Error
If There Is a Serial or Parallel Port Test Error
Problem Check that... How
Power-On-Self-Test displays
a port test error.
If the PC still has a problem
WARNING: For your
safety, never remove the
PC’s cover without first
removing the power cord
from the power outlet, and
any connection to a
telecommunication
network. Always replace
the cover before switching
the PC on again.
If the problem persists, contact HP Support or your authorized dealer
The port is correctly
configured in the PC’s
Setup program.
All connected devices are
correctly connected and
switched on.
The correct device drivers
are installed.
The system board is
working.
• Switch the PC OFF then ON.
• Press Delete or F2 during startup to enter
the Setup program.
• Check the port is enabled and the correct
type is selected.
• Switch off the PC.
• Plug the cables into the correct connectors
on the back of the PC.
• Switch on the PC and the external devices.
Refer to the device documentation.
• Disconnect the power cord.
• Open the PC.
• Replace the system board by a known good
board from a similar PC.
• Close the PC, reconnect the power cord and
check that the PC works.
• If the port works, contact HP Support or
your authorized dealer for further
troubleshooting information.
15 English
Page 16

Other Configuration Problems
Problem Check... How
1 Troubleshooting Your PC
Other Configuration Problems
Power-On-Self-Test
displays an error (one
that is not covered by an
earlier section in this
chapter).
If the PC still displays an error
This means the configuration settings are
corrupted. Restore the default values.
WARNING:
remove the PC’s cover without first
removing the power cord from the power
outlet, and any connection to a
telecommunication network. Always
replace the cover before switching the
PC on again.
CAUTION for NetVectra
N30 NetPCs only:
If system board switches SW5 and SW6
are set to ON and the PC is restarted,
this will initiate the Boot Recovery
option.
For your safety, never
The Setup
program
settings.
Turn on or restart the PC.
1
Press
2
or F2 during startup to enter the Setup program.
Delete
HP NetPC 20 NetVectra N30 NetPC
Turn off the PC and disconnect the
•
power cord.
Remove the cover.
•
To clear the configuration, set the
•
system board jumper CMOS_CLR to
.
To re-enable the configuration, set the
•
system board jumper CMOS CLR to
.
Replace the cover, and reconnect the
•
power cord.
Switch on the PC. The PC may start
•
more slowly than usual because it will
load the default configuration values.
When the HP Logo appears during
•
startup, press
Setup program. Update the necessary
fields, such as the date and time, then
press
to save and exit the Setup
F10
program. The PC will restart with the
new configuration.
Delete
to enter the
Turn off the PC and disconnect the
•
power cord.
Remove the cover.
•
To clear the configuration, set the
•
system board switch SW5 to ON.
Replace the cover, and reconnect the
•
power cord.
Turn on the PC. This will erase the
•
CMOS memory.
Turn off the PC, disconnect the power
•
cord, and remove the cover.
To re-enable the configuration, set the
•
system board switch SW5 to OFF.
Replace the cover, and reconnect the
•
power cord.
Switch on the PC. The PC may start
•
more slowly than usual because it will
load the default configuration values.
Press
•
during startup to enter the
F2
Setup program. Update the necessary
fields, such as the date and time, then
press F3 to save and exit the Setup
program. The PC will restart with the
new configuration.
English 16
Page 17

1 Troubleshooting Your PC
Replacing the Internal Battery
Replacing the Internal Battery
WARNING
Battery clip
There is a danger of explosion if the battery is incorrectly installed. For your
safety, never attempt to recharge, disassemble, or burn the old battery.
Replace the battery only with the same or equivalent type recommended by
the manufacturer. The battery in this PC is a lithium battery which does not
contain heavy metals, nevertheless, in order to protect the environment, do
not dispose of batteries in household waste. Please return used batteries to
the shop from which you bought them, or to the dealer from which you
purchased your PC, or to HP, so that they can either be recycled or disposed
of in an environmentally sound way. Returned used batteries will be accepted
free of charge.
1 Remove the PC’s cover.
2 Remove the old battery by pressing the clip and then lifting the
battery clear of the battery holder with a screwdriver (note the
position of the cross).
Battery clip
This picture shows two possible
locations for the internal battery.
3 Place the new battery in the battery holder, with the cross in the
same position as the old battery, and ensure that it is properly
seated.
NOTE You should order replacement battery HP 1420-0356 from your local
Sales and Service office, or a “CR2032 type” battery, which is available
from most local stores.
17 English
Page 18

If You Cannot Turn Off Your PC
Problem Check... How
1 Troubleshooting Your PC
If You Cannot Turn Off Your PC
PC makes a buzzing
or beeping sound
when you press the
power button.
PC does not make a
buzzing or beeping
sound when you
press the power
button, but you are
still unable to turn it
off.
Whether the PC is in
suspend/sleep mode, in which
case a “power off” would risk loss
of information/data.
That you have saved all data and
exited all programs.
• Move the mouse or press a key to
try to wake up the PC.
If you cannot wake up the PC, and
you still cannot turn it off using the
power button, unplug the PC from the
power supply.
• Save all data and exit all programs
(if you can).
• Press the power button and keep
it pressed for 5 seconds. The PC
will turn off.
English 18
Page 19

1 Troubleshooting Your PC
If You Have Forgotten Your Password
If You Have Forgotten Your Password
NOTE Use these instructions if the passwords were set with the Setup
program.
Problem Solution
You have forgotten the
User password.
You have forgotten the
Supervisor or Administrator
password.
WARNING: For your safety,
never remove the PC’s cover
without first removing the
power cord from the power
outlet, and any connection to a
telecommunication network.
Always replace the cover
before switching the PC on
again.
CAUTION:
NetVectra N30 NetPCs
CAUTION for
only:
If system board switches SW5
and SW6 are set to ON and the
PC is restarted, this will
initiate the Boot Recovery
option.
• Switch off the PC.
• Restart the PC. If you are prompted for a password, enter the Supervisor
password.
• Press Delete or F2 during startup to enter the Setup program.
• Enter the Supervisor or Administrator Password to access the Setup program.
• Go to the
Password
User Password or Security > User
menu.
• Set a new User Password. This will replace the old password
which you had forgotten.
or F3 to save the new Password and exit Setup.
• Press
F10
HP NetPC 20 NetVectra N30 NetPC
• Switch off the PC and remove the
power cord.
• Remove the computer’s cover.
• Set the system board jumper
CMOS_CLR to .
• Reset the system board jumper
CMOS CLR to .
• Replace the computer’s cover.
• Switch on the PC and allow it to
complete its startup routine.
• When the HP Logo appears during
to enter the
startup, press
Delete
Setup program.
• Set new User and Supervisor
Passwords.
• Press F10 to save the new
passwords and exit Setup.
• Switch off the PC and remove the
power cord.
• Remove the PC’s cover.
• Set the system board switch SW6
to ON.
• Switch on the PC’s.
• Switch off the PC.
• Reset the system board switch
SW6 to OFF.
• Replace the PC’s cover.
• Switch on the PC and allow it to
complete its startup routine.
• Press
during startup
F2
to enter the
Setup program.
• Set new User and Supervisor
Passwords.
• Press F3 to save the new
passwords and exit Setup.
19 English
Page 20

1 Troubleshooting Your PC
If the Wake On LAN Feature Does Not Work
If the Wake On LAN Feature Does Not Work
Problem Solution
The Wake On LAN feature does not work. • Check that the
by LAN
Setup
field in the
menu is enabled in the Setup program,
accessed by pressing Delete or
Wake On LAN
Power Management
or
during start up.
F2
Resume
English 20
Page 21

1 Troubleshooting Your PC
If There Is an IRQ Problem
If There Is an IRQ Problem
Problem Solution
You have installed an accessory board
and you get a message telling you that
there is no IRQ (Interrupt Request)
available for it.
If there is still a problem
Check that you have followed the installation instructions provided
with the accessory board.
• Restart the PC.
• Press Delete or F2 during startup to enter the Setup
program.
• Reserve an IRQ for the ISA board. You can reserve IRQ 5, IRQ
9, IRQ 10 or IRQ 11 for this purpose. To do this, go to the
or
PNP O/S
or
Plug
PNP\PCI Configuration Setup
and Play Setup
PNP O/S Installed
Also, set
Aware to NO.
• Press the
F10
or F3 to save the changes and quit the Setup
menu and select the chosen IRQ.
program.
• Redo the Windows NT installation procedure for the board.
21 English
Page 22

1 Troubleshooting Your PC
If Your PC Has an Audio (Sound) Problem
If Your PC Has an Audio (Sound) Problem
Problem Solution
WARNING: If your PC is a multimedia PC or if you add a sound card to your PC, always turn the volume down before
connecting headphones or speakers, to avoid discomfort from unexpected noise or static. Listening to loud sounds for
prolonged periods of time may permanently damage your hearing. Before putting on headphones, place them around your
neck and turn the volume down. When you put on the headphones, slowly increase the volume until you find a comfortable
listening level. When you can hear comfortably and clearly, without distortion, leave the volume control in that position.
No sound when
running any
applications.
No output from the
8-bit or 16-bit
digitized sounds.
Audio input from the
microphone is too
low, or no audio at
all.
Humming noise. If the power grounding of your audio components is inadequate, a humming noise may be generated. Plug
Occasional crackles
when playing back
sounds.
The PC hangs while
recording.
If you are using Windows NT 4.0, check the volume, mute, and balance settings. Refer to the operating
system documentation for more information.
Absence of sound can also be caused by a hardware conflict. Hardware conflicts occur when two or more
peripheral devices compete for the same signal lines or channels. Conflicts between your audio interface
and another peripheral device might be due to the settings of the I/O addresses, IRQ channel, or DMA
channel. To resolve the conflict, change the settings either of the audio interface or of any other ISA
accessory in your system (refer to page 21).
This might be due to the DMA channel selected or to an interrupt conflict. Use your operating system’s
audio control software to change the audio interface’s DMA channel or IRQ setting (refer to page 21).
Check that the microphone specifications meet the requirements of the 16-bit sound components. The
microphone should be a 600-ohm electret type.
all devices into adjacent power outlets (outlets within 5 cm / 2 inches of each other), or use line filters.
These crackles are usually the result of your PC being unable to transfer audio samples within the required
time. A solution is to use a lower sampling rate. Recording and playing back at 22 kHz is less demanding
upon system resources than recording audio at 44 kHz.
Uncompressed digital audio can eventually fill your hard disk. For example, one minute of stereo sound
recorded at a resolution of 44 kHz will occupy about 10.5 MB. Before recording, check that there is enough
free space on your hard disk.
Data compression can reduce the space required. The A-law and µ-law hardware compression used by the
audio interface enables the sampling of sound at a resolution of 16-bits, but it generates the same quantity
of data as an 8-bit sample.
English 22
Page 23

1 Troubleshooting Your PC
If Your PC Has a Software Problem
If Your PC Has a Software Problem
Problem Solution
Power indicator light is
illuminated, but some
software won’t run.
Date and time are wrong. The date and time can be incorrect for the following reasons:
Refer to the application software documentation and/or the operating
system documentation for guidance.
• The time has changed to or from Daylight Saving Time.
• The PC has been unplugged from the power too long, and the
battery is discharged.
To change the date and time, use your operating system utilities or the
Setup program.
23 English
Page 24

1 Troubleshooting Your PC
Recovering Hard Disk Contents
Recovering Hard Disk Contents
In the unlikely event of a hard disk drive crash, you can reinstall your
PC’s preloaded operating system using the Windows NT4 and Service
Pack CD-ROMs supplied with your PC.
NOTE Any software that has been installed on the PC after it was
manufactured, and any personal data that has been generated by
applications installed on the PC, are not covered by the recovery
process.
Changing the Hard Disk
If the hard disk is corrupted and you can no longer use it, you should
replace it with a new hard disk drive. Refer to the Accessories Guide
for information on installing hard disk drives.
If the replacement hard disk drive is brand new, you will need to
partition and format the drive. Refer to your operating system
documentation for information about how to do this.
English 24
Page 25

1 Troubleshooting Your PC
HP Setup Program
HP Setup Program
Follow these instructions to check your PC’s configuration when you
first use the PC:
First, Turn On or Restart
Your PC
Then, go to the Setup
Program
If your PC is off, turn on the display and then the PC.
If the PC is already turned on, save your data, exit all programs and
restart your PC. For Windows NT 4.0, use the
your computer
command in the
Start menu. This command will
Shut Down – Restart
automatically exit the operating system and restart the PC.
To go immediately to the Setup program, press
Delete
or F2 during
system startup.
The Setup program allows you to view and change the configuration of
your PC, such as the passwords and standby (power saving) mode. For
for information, refer to the Setup program’s online help.
25 English
Page 26

1 Troubleshooting Your PC
Further Troubleshooting for Hardware Problems
Further Troubleshooting for Hardware Problems
This section provides more detailed information on how to solve
problems with your disk drives or accessory boards.
If the Floppy Drive Does Not Work
1 Ensure you are using a formatted diskette and it is inserted
correctly.
2 Make sure that the Floppy Disk Controller option in the Setup
program is enabled
3 Clean the floppy drive using a diskette cleaning kit.
4 Check that the floppy drive has been recognized in the Setup
program, accessed by pressing
5 Check that the slim cable is correctly connected.
Delete or F2 at startup.
English 26
Page 27

1 Troubleshooting Your PC
Further Troubleshooting for Hardware Problems
If the IDE Hard Disk Does Not Work
WARNING For your safety, never remove the PC’s cover without first removing the power
cord from the power outlet, and any connection to a telecommunication
network. Always replace the cover before switching the PC on again.
1 Check that the disk power and data cables are correctly connected.
2 Check that the hard disk drive has been enabled in
Power Management Setup
menu in the HP Setup program,
Advanced >
accessed by pressing Delete or F2 during startup.
3 Check that the on-board Bus IDE is given boot priority in the Setup
program, accessed by pressing Delete or F2 during startup.
If the Hard Disk
Activity Light Does
Not Work
If the hard disk activity light does not flicker when the PC is accessing
the hard disk drive:
1 Check that the control panel connector is firmly attached to the
system board.
2 Check that the disk power and data cables are correctly connected.
NOTE If you are using a hard disk drive with a controller board (a SCSI hard
disk, for example), the activity light does will flicker when the PC is
accessing the hard disk drive.
If the CD-ROM Drive Has a Problem
WARNING For your safety, never remove the PC’s cover without first removing the power
cord from the power outlet, and any connection to a telecommunication
network. Always replace the cover before switching the PC on again.
To avoid electric shock and harm to your eyes by laser light, do not open the
CD-ROM drive enclosure. The CD-ROM drive should be serviced by service
personnel only. Refer to the label on the CD-ROM for power requirements and
wavelength. This PC is a class 1 laser product. Do not attempt to make any
adjustment of the laser unit.
27 English
Page 28

1 Troubleshooting Your PC
Further Troubleshooting for Hardware Problems
CD-ROM Drive Does Not Work
1 Check that the slim cable is properly connected.
2 Check that a CD-ROM is inserted in the drive.
3 If you intend to boot on the CD-ROM, verify that it is selected in the
Setup program, accessed by pressing Delete or F2 during startup).
4 For further information refer to the manual supplied with the
CD-ROM.
CD-ROM Drive is Idle
If the CD-ROM drive does not appear to be working, try accessing the
disk by clicking on the CD-ROM drive icon or drive letter assigned to
the CD-ROM drive by your operating system.
CD-ROM Drive Door Does Not Open
If you have difficulty removing a CD-ROM disk from the CD-ROM drive
(during a power failure for example), you can use the manual eject
button.
To eject a CD-ROM disk using the manual eject button:
1 With a thin, solid rod, such as the end of a paper clip, push the
CD-ROM’s manual eject button.
Using the manual eject feature.
English 28
Page 29

1 Troubleshooting Your PC
Further Troubleshooting for Hardware Problems
2 The CD-ROM drive door will be released, opening slightly. Carefully
pull it open fully and retrieve the disk.
3 To close the CD-ROM drive door, push it gently closed without
forcing it. The CD-ROM drive door may not close completely until it
is fully functional (for example, when the power comes back on).
CAUTION To avoid damage when operating the CD-ROM drive, do not touch the
lens.
If an Accessory Board Does Not Work
1 Ensure the board has been firmly installed in the slot.
2 Check that the board has been correctly configured.
3 Ensure the board is not using memory, I/O addresses, an IRQ, or
DMA already used by the PC. Refer to the board’s manual for further
details.
29 English
Page 30

1 Troubleshooting Your PC
Hewlett Packard Support and Information Services
Hewlett Packard Support and Information Services
Hewlett Packard computers are engineered for quality and reliability to
give you many years of trouble-free service. To ensure that your
computer system maintains its reliability and to keep you up-to-date
with the latest developments, HP and a worldwide network of trained
and authorized resellers provide comprehensive service and support.
To learn more about HP service and support, please connect to the HP
World Wide Web site at:
http://www.hp.com/go/thinclient
or go directly to support at:
http://www.hp.com/go/thinclientsupport.
HP’s web site has a vast range of information about HP products,
services and support, including:
Description of HP’s services and support options.
•
Support documentation for your PC in HTML format.
•
The downloadable documentation, which contains the full set of
•
documentation for your PC.
Drivers and software for your PC.
•
English 30
Page 31

1 Troubleshooting Your PC
Hewlett Packard Support and Information Services
31 English
Page 32

drac-bc.fb4 Page 32 Thursday, March 4, 1999 3:47 PM
Troubleshooting Quick Reference
PC won’t start
PC starts but there is no
display
PC starts but there is a
configuration error
If there is a
memory error
If there is a mouse
or keyboard error
If there is a floppy
disk error
If there is a hard disk
or CD-ROM error
Check power cord is correctly connected
•
• Check voltage switch is correctly set
• Check the display is correctly connected and switched ON
• Check the display’s brightness and contrast settings
Run the HP Setup program to correct the configuration problem
•
Check memory modules are of the correct type, HP-supported and in the
•
correct sockets
• Check power cord is correctly connected
Check the device driver is correctly installed
•
• Check the device configuration in Setup
Clean the mouse ball
•
• Try using a known working floppy disk
Check the floppy drive configuration in Setup
•
• Check the drive cable is correctly connected
Check the drive configuration in Setup
•
• Check the drive cable is correctly connected
Ensure the OS and drivers are installed
•
If there is a CMOS error
If there is a serial or
parallel port error
Check the power cord is connected
•
• Check power cables to system board are correctly connected
Ensure the OS and drivers are installed
•
Check the devices are connected and on line
•
• Check device drivers are installed
• Check the device configuration in Setup
Try using a known working device
•
D8041-TRB-ABA
Created in France 1/99
 Loading...