

Page 1

HP NetRAID Series
User Guide
HP Part Number 5969-5983
February 2000
Page 2

Notice
The in formation contained in this document is subject to change without noti ce.
Hewlett-Packard makes no warranty of any kind with regard to this
material, including, but not limited to, the implied warranties of
merchantability and fitness for a particular purpose. Hewlett-Packard shall not
be liable for errors contained herein or for incidental or consequential damages in
connection with the furnishing, performance, or use of this material.
Hewlett-Packard assumes no responsibility for the use or reliability of its software
on equipment that is not furnished by Hewlett-Packard.
This document con tains proprietary informati on th at is protect ed by copyrigh t.
All rights are reserved. No part of this document may be photocopied,
repr odu ced, or translated to another language without the pri or written cons ent
of Hewlett-Packard Company.
®
Novell NetWare
®
is a registered trademark of the Int ernational Busin ess Mach ines
OS/2
Corporation.
®
SCO
, SCO OpenServer®, and UnixWare® are regi stered trademarks of Th e S an ta
Cruz Operation, Inc.
Windows
®
in the U.S. and other countries.
is a registered tra d emark of Novell , Inc.
and Win d ows NT® are registered trademarks of Microsoft Corporation
Hewlett-Packard Company
Network Server Divisi on
Technical Communications/MS 45SLE
10955 Tantau Avenue
Cupertino, CA 95014 USA
© Copyright 2000, Hewlett-Packard Company.
Audience Assumptions
This HP NetRA I D Series User Guide is for the person who installs, administers,
and troubleshoots LAN servers. Hewlett-Packard Compan y assumes you are
quali fied in the s er vi cing of comput er equipment and trained in recogn izing
hazards in products with hazardous energy levels.
ii
Page 3

Contents
Introduction ..................................................................................................... 1
1 Overview of HP NetRAID Utilit ies................................................................ 3
HP NetRAID Assistant...................................................................................4
HP NetRAID Assistant Menus.................................................................... 5
HP NetRAID Config....................................................................................... 6
HP NetRAID Config Menus........................................................................ 7
HP NetRAID Express Tools........................................................................... 8
HP NetRAID Express Tools Menus............................................................ 9
HP NetRAID Utility Com pari son Chart.......................................................... 10
HP NetRAID Drivers and Utili ties................................................................. 13
2 HP NetRAID Assistant............................................................................... 15
Overview..................................................................................................... 15
A HP NetRAID Assistant Main Wi ndow....................................................... 15
B HP NetRAID Assistant Menu................................................................... 18
Configuration M enu ................................................................................. 19
Adapter Menu.......................................................................................... 20
Physical Drive Menu................................................................................ 21
Logical Driv e Menu.................................................................................. 23
Progress Menu........................................................................................ 25
Help Menu............................................................................................... 25
C Configuring Arrays and Logic al Dr ives..................................................... 25
Select the Adapt er to Configure............................................................... 27
Clear Configuration (if necessary)............................................................ 27
Check Rebuild Rate................................................................................. 27
Assign Global Hot Spar es........................................................................ 28
Select Wiza r d.......................................................................................... 28
Define Physical Arrays and Dedicated Hot Spares................................... 30
Assign Dedicated Hot S par es .................................................................. 31
Define Logic al Drives............................................................................... 32
Preview Configur ation.............................................................................. 35
Save Your Configurat ion and Initialize ..................................................... 37
D Managing RAID with HP NetRAID Assistant............................................ 39
Rebuildi ng a Failed Phy si c al Drive........................................................... 39
iii
Page 4

Contents
Adding a Hot Spare................................................................................. 39
Adding a New Logical Drive..................................................................... 39
Changing Logical Drives Currently in Use................................................ 40
Reclaiming a Hot Spare........................................................................... 43
Changing Logical Drive Parameters......................................................... 43
Taking a Drive Offline/Online................................................................... 43
E Managing Servers Over the Net work ....................................................... 44
Before Starting HP NetRAID Assistant..................................................... 44
Start HP NetRAID Assistant..................................................................... 45
Select Another S erver-Adapter Pair......................................................... 46
Exit HP NetRAID Assistant...................................................................... 47
F Windows NT Monitor Servic e for HP NetRAID ......................................... 47
3 HP NetRAID Config.................................................................................... 49
Overview..................................................................................................... 49
A Starting and Exiting HP NetRA ID Config.................................................. 50
B HP NetRAID Config Management Menu Opti ons..................................... 50
Configure Menu....................................................................................... 51
Initiali ze Op tion........................................................................................ 51
Objects Menu.......................................................................................... 51
Format Option......................................................................................... 56
Rebuild Option......................................................................................... 56
Check Consistency Opt ion....................................................................... 56
Advanced Menu...................................................................................... 57
C Configuring Arrays and Logic al Dr ives..................................................... 57
Configuration M ethods............................................................................. 57
Using Auto Configuration......................................................................... 58
Using Easy Confi gur ation........................................................................ 60
Using New Configurati on ......................................................................... 62
Using View/Add Configuration ................................................................. 65
D Designating Drives as Hot Spares........................................................... 67
E Initializi ng Logic al Drives ......................................................................... 68
Batch Initialization.................................................................................... 68
Individual Initialization.............................................................................. 69
F Changing Logical Drives Currently in Use................................................ 69
Changing the RAID Lev el of a Logical Dr ive ............................................ 70
Removing a Physic al Drive from a Logical Drive...................................... 71
Reclaiming a Hot Spare........................................................................... 72
iv
Page 5

Contents
G Formatting Physical Drives...................................................................... 72
Media Errors............................................................................................ 72
Formatt ing Op tions.................................................................................. 73
4 HP NetRAID Express Tool s....................................................................... 75
Overview ..................................................................................................... 75
A Starting and Exiting HP NetRA ID Express Tools ...................................... 76
To start HP NetRAID Express Tools........................................................ 76
To exit HP NetRAID Express Tools.......................................................... 77
B HP NetRAID Express Tools Management Menu...................................... 77
Configure Menu....................................................................................... 78
Initiali ze Op tion........................................................................................ 78
Objects Menu.......................................................................................... 79
Format Option......................................................................................... 83
Rebuild Option......................................................................................... 84
Check Consistency Opt ion....................................................................... 84
Disable/Enable BIOS Option.................................................................... 85
Change Adapters Opti on ......................................................................... 85
Alarm Control Option............................................................................... 85
C Configuring Arrays and Logic al Dr ives..................................................... 85
Designating Drives as Global Hot Spares ................................................ 85
Creating Arrays Using Available Physical Drives...................................... 86
Initializing Logical Drives.......................................................................... 94
D Formatting Physical Drives...................................................................... 95
Media Errors............................................................................................ 95
Formatting Drives.................................................................................... 96
E Changing the HP NetRAID Series Adapt er .............................................. 96
5 Reconstructing and Rebuilding Drives..................................................... 99
Reconstructing Data.................................................................................... 99
Power Fail Safeguard Feature................................................................. 99
Rebuildi ng Data..........................................................................................102
The Autorebuil d Feat ur e.........................................................................102
Changing the Rebuild Rate.....................................................................103
Rebuildi ng Drives Manually ....................................................................104
6 Capacity Expansion..................................................................................107
Capacity Expansion under NetWare 4.2......................................................107
About Online Capaci ty Expansion under NetWare 4.2 ............................108
v
Page 6

Contents
Planning for Onli ne Capac ity Expansion under NetWare 4.2...................110
Preparation Steps for NetWare 4.2.........................................................110
Expanding Capaci ty Online under NetWare 4.2 ......................................114
Expanding Capaci ty under NetWare 4.2 with Virtual Sizing Disabled.......116
Capacity Expansion under NetWare 5 ........................................................116
About Online Capaci ty Expansion under NetWare 5 ...............................117
Planning for Onli ne Capac ity Expansion under NetWare 5......................117
Preparation Steps for NetWare 5............................................................118
Expanding Capaci ty Online under NetWare 5.........................................120
Expanding Capaci ty under NetWare 5 with Virtual Sizing Enabl ed ..........123
Capacity Expansion under Windows NT .....................................................123
About Online Capaci ty Expansion under Windows NT ............................124
Preparation Steps for Windows NT.........................................................125
Expanding Capaci ty Online under Windows NT......................................128
Expanding Capaci ty under Windows NT with Virtual Sizing Disabl ed ......129
Capacity Expansion under Windows 2000 ..................................................130
About Online Capaci ty Expansion under Windows 2000 .........................130
Preparation Steps for Windows 2000......................................................131
Expanding Capaci ty Online under Windows 2000...................................133
Expanding Capaci ty under Windows 2000 with Virtual Sizi ng Enabl ed....135
7 Monitor Alert List......................................................................................137
Microsoft Windows NT and W indows 2000 .................................................137
Novell NetWar e Monitor Messages.............................................................137
IBM OS/2 Monitor Messages......................................................................138
SCO OpenServer and UnixW ar e Monitor M essages ...................................139
8 Alarm Control and Audible Warnings ......................................................141
Glossary........................................................................................................143
HP NetRAID Terms and Technology...........................................................143
Index..............................................................................................................151
vi
Page 7

Introduction
The HP NetRAID-1Si and HP NetRAID-3Si adapters and the integrated
HP NetRAID controllers built into certain HP NetServers let you link multiple
hard disk drives together to write data across them as if they were one large drive
You configure your linked drives in a RAID (redundant array of independent
disks) subsystem.
Initial installation and configuration of HP NetRAID Series adapters is described
in the HP NetRAID Series Installation and Configuration Guide. Initial
configuration of the integrated HP NetRAID controller is described in the HP
NetServer Integrated NetRAID Controller Configuration Guide.
This HP NetRAID Series User Guide contains information on the HP NetRAID
utilities that let you manage and make changes to an existing RAID system. This
guide covers the following topics:
• Overview of HP NetRAID Utilities
• HP NetRAID Assistant (for Windows NT and Windows 2000)
• HP NetRAID Config (for Novell NetWare, IBM OS/2, and SCO
OpenS erver and UnixWare)
• HP NetRAID Express Tools (use with all supported network operating
systems)
• Reconstructing and Rebuilding Drives
• Capacity Expansion
• Monitor Alert List
• Alarm Control and Au dible Warnings
• Glossary
1
Page 8

Page 9

1 Overview of HP NetRA ID Utilities
Three HP NetRAID utilities can configure and manage HP NetRAID Series
subsystems. Integrated HP NetRAID controllers and HP NetRAID Series adapters
(HP NetRAID-1Si and HP NetRAID-3Si) use the same utilities. However, all
utilities are not available to all network operating systems.
• HP NetRAID Assistant is used only with Microsoft Windows NT and
Windows 2000. (This utility is similar to the one that you ran from the
HP NetServer Navigator CD-ROM to initially configure your
HP NetRAID subsystem. )
• HP NetRAID Config is a text-based RAID configuration utility that runs
under Novell NetWare, IBM OS/2, SCO OpenServer, and SCO UnixWare.
• HP NetRAID Express Tools is a text-based RAID configuration utility
available to all operating systems. HP NetRAID Express Tools has some
advanced features not available in the other utilities.
Table 1-1. HP NetRAID Management Utilities and Network Operating Systems
Network O perating
System
Microsoft Windows 2000 X X
Microsoft Windows N T X X
Novell NetWare X X
IBM OS/2 X X
SCO OpenServer X X
SCO UnixWare X X
HP NetRAID
Assistant
HP NetRAID
Config
HP NetRAID
Express Tools
NOTE Consult the Hewlett-Packard World Wide Web site
(http://www.hp.com/go/netserver) or your local HP deal e r for
compatibility of your adapter with the most current versions of
the net wor k operating systems listed in th e preceding ta ble.
3
Page 10

Chapter 1 Overview of HP NetR AI D Utilitie s
HP NetRAID Assistant
HP NetRAID Assistant is an object-or iented GUI management utility. It runs
under Microsoft Windows NT and Windows 2000, and it allows you to
reconfigure and manage your HP NetRAID subsystem and to monitor its status.
For complete instructions on using this utility, see Chapter 2, "HP NetRAID
Assistant," in this guide.
NOTE Users of al l operating systems run HP NetRAID Assistant from
the HP NetServer Navigator CD-ROM to configure their
systems during initial installation.
4
Page 11

Chapter 1 Overview of HP NetR AI D Utilitie s
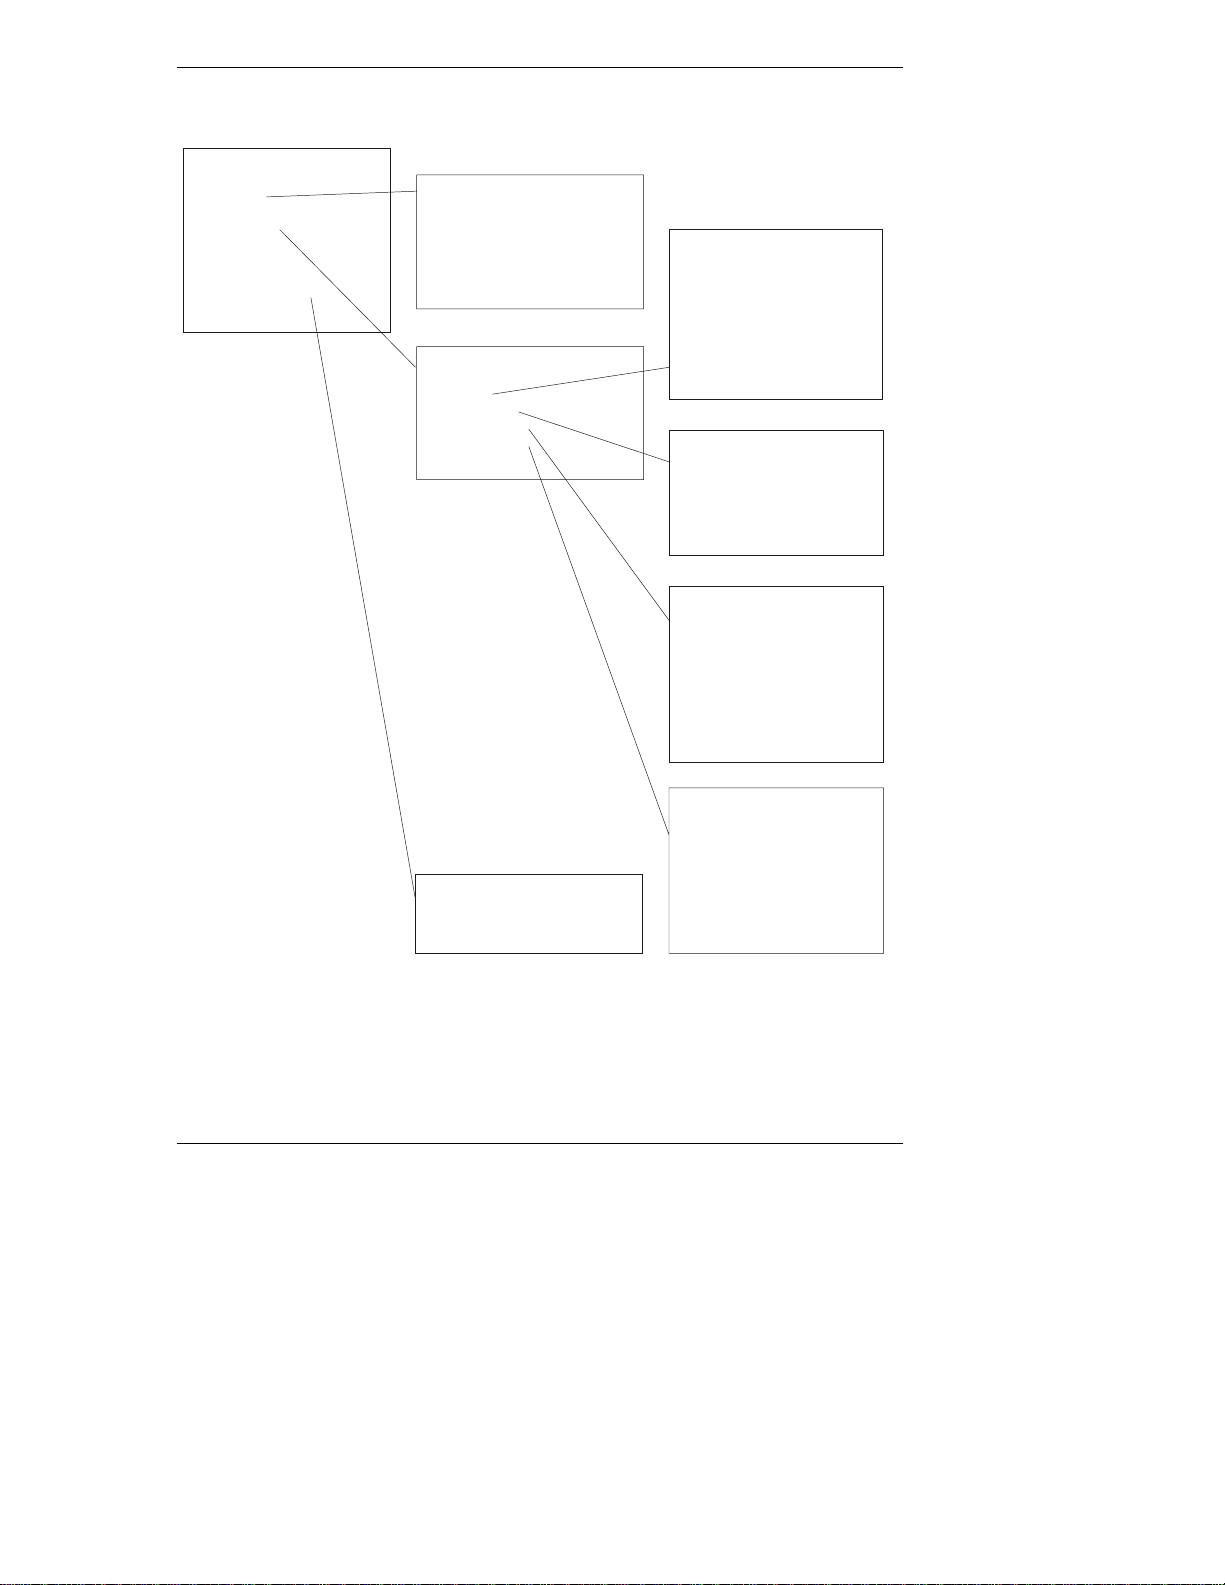
HP NetRA ID A ssistant M enus
Main Menu
Configuration
Adapter
Physical Drive
Logical Drive
Progress
Help
Configuration Menu
Wizard
Display
Print
Save
Load
Clear Configuration
Exit
Adapter Menu
Update Firmware
Flush Cach e
Performan c e M onit or On/Off
Properties
Rebuild Ra te
Rescan
View Log
Alarm Control
Alarm Control Menu
Disable/Enable Alarm
Silence Alarm
Physical Drive Menu
Rebuild
Format
Update Drive Firmware
Change Status
Properties
Logical Drive Menu
Initialize
Chec k C onsiste ncy
Properties
Change Co nf ig
Progress Menu
Rebuild Progress
Diagnostic s Progress
Initialize Progress
Chec k C onsiste ncy
Reconstru c tion Progress
Performan c e M onit or
Help Menu
Help
About...
Change Stat us Menu
Make Online
Make Offline
Spin Up
Spin Down
Make Hot Spare
Change Config Menu
Cache
Read
Write
RAID Level
Virtual Size
Add Capacity
Figure 1-1. HP NetRAID Assistant Menus
(Alarm Control menu is not available for integrated HP NetRAID.)
5
Page 12

Chapter 1 Overview of HP NetR AI D Utilitie s
HP NetRAID Config
HP NetRAID Config is a character-based, non-GUI utility that runs under all
supported operating systems other than Microsoft Windows NT and
Windows 2000. HP NetRAID Config allows you to reconfigure and manage your
HP NetRAID subsystem and to monitor its status.
HP NetRAID Config performs most of the same functions as HP NetRAID
Assistant a s well as some addit ional ones, but it runs under Novell NetWar e,
IBM OS/2, SCO OpenServer, and SCO UnixWare.
The command you use to start the HP NetRAID Config utility depends on which
NOS you are using.
• For Novell Netware, type
• For IBM OS/2, type
• For SCO OpenServer, type
• For SCO UnixWare, type
For instructions on using this utility, see Chapter 3, "HP NetRAID Config," in this
guide.
load megamgr
megaconf
megamgr
megamgr
6
Page 13
Chapter 1 Overview of HP NetR AI D Utilitie s
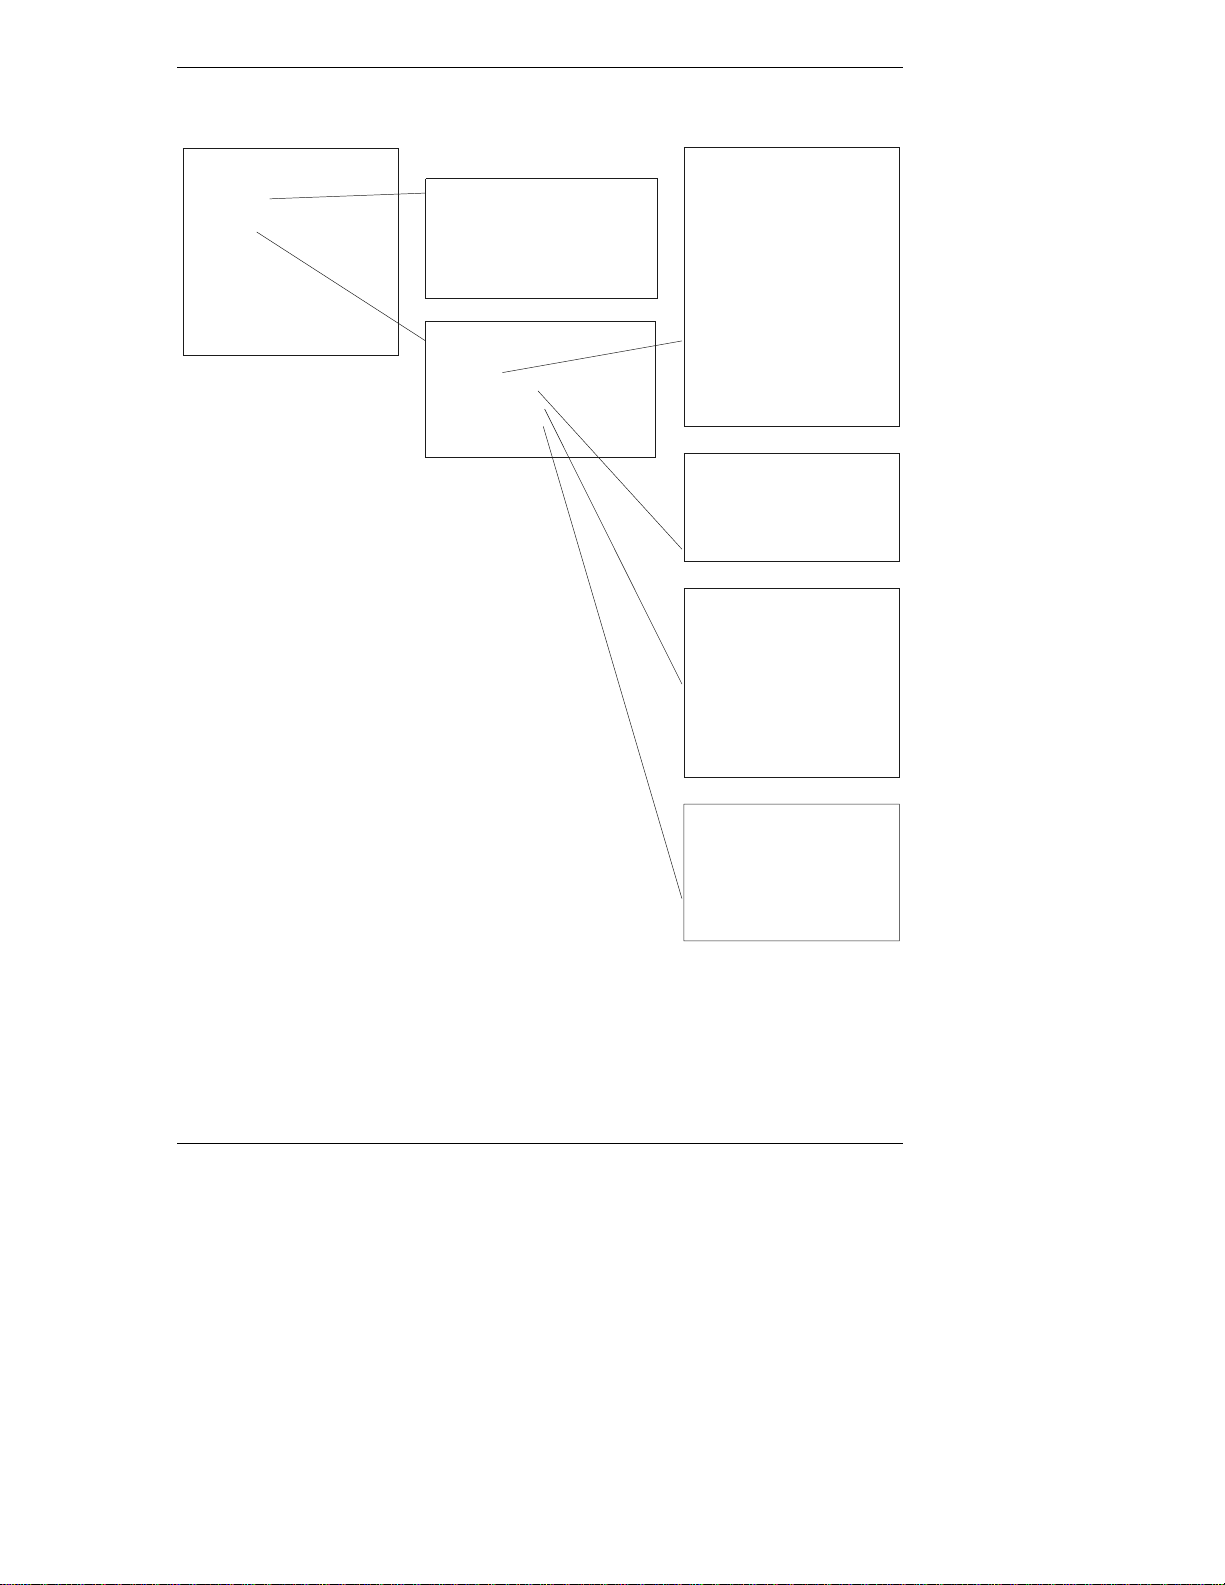
HP NetRAID Config Menus
Management Menu
Configure
Initialize
Objects
Format
Rebuild
Check Consistency
Advanced Menu
Select Adapter
Configure Menu
Automa tic Configur a tion
Easy Configuration
New Configuration
View/Add/Delete Configuration
Clear Configuration
Objects Menu
Adapter
Logical Drive
Physical Drive
SCSI Channel
Battery Backup
Adapter Menu
Clear Configuration
View Adapter Performance
Power Fail Safeguard
Disk Spin-up Timings
View/Update Parameters
Adapter Type
Alarm Control
Logical Drive Menu
Initialize
Check Consistency
View Performance
Properties
Physical Drive Menu
Rebuild
Format
Make Onlin e
Fail Drive
Make Hot Spare
Properties
View Rebuild Progress
SCSI Channel Menu
Deactivate Channel
Activate Channel
Terminate High 8 Bits
Advanced Menu
Reconstruct Logical Drive
Terminate Wide Channel
Disable Termination
View Parameters
Figure 1-2. HP NetRAID Configuration Menus
(Alarm Control menu is not available for integrated HP NetRAID. Battery
Backup menu is not available for HP NetRAID-1Si or for integrated
HP NetRAID if Battery Backup Module is not present.)
7
Page 14

Chapter 1 Overview of HP NetR AI D Utilitie s
HP NetRAID Express Tools
HP NetRAID Express Tools is available to all network operating systems because
this utility is contained in the firmware. HP NetRAID Express Tools contains
some adv anc ed management and diagnostic utilities that are not available with
HP NetRAID Assistant or HP NetRAID Config.
NOTE To access HP NetRAID Express Tools you must restar t the
HP N e tServer.
To start HP NetRAID Express Tools:
1. Log off all users, close all applications, and power down the HP NetServer.
2. Restart the HP NetServer.
3. When th e following pr om p t appears, press <Ctrl> <M>.
Option: Experienced users may press <Ctrl> <M> for
HP NetRAID Express Tools now.
Firmware Initializing
For complete information on this utility, see Chapter 4, "HP NetRAID Express
Tools," in this guide.
8
Page 15
Chapter 1 Overview of HP NetR AI D Utilitie s
HP NetRA ID E xpress Tools Menu s
T ools Manage me nt Menu
Configure
Initialize
Objects
Format
Rebuild
Check Consistency
Disable BIOS
Change Ad apters
Alarm Control
Configure Menu
Easy Configuration
New Configuration
View/Add/Delete Configuration
Clear Configuration
Objects Menu
Adapter
Logical Drive
Physical Drive
SCSI Channel
Battery Backup
Adapter Menu
Reset to Default Settings
Power Fail Safeguard
Memory Type
Read Modify Write Mode
Change Disk Geometry
Disk Spin-up Timings
Cache Flush T imings
View/Update Rebuild Rate
Diagnostics
Adapter Type
Emulation
Auto Rebuild
Initiator ID
Logical Drive Menu
Initialize
Check Consistency
Properties
Physical Drive Menu
Rebuild
Format
Make Online
Fail Drive
Make Hot Spare
Properties
Synchronous Negotiation
SCSI-2 Command Tagging
SCSI Channel Menu
Terminate High 8 Bits
Terminate Wide Channel
Disable T ermination
Automatic Termination
SCSI Transfer Rate
Figure 1-3. HP NetRAID Express Tools Menus
(Alarm Control menu is not available for integrated HP NetRAID. Battery
Backup menu is not available for HP NetRAID-1Si or for integrated
HP NetRAID if Battery Backup Module is not present.)
9
Page 16

Chapter 1 Overview of HP NetR AI D Utilitie s
HP NetRAID Utility C ompa ris on C ha rt
The three HP NetRAID utiliti es (HP NetRAID Assistant, HP NetRAID Config,
and HP NetRAID Express Tools) perform many of the same fun cti on s, but they
are not identical.
Parameters with default values and functions that are not shared by each of these
utilities are listed in the Table 1-2. (Most functions common to all three utilities
are not listed.)
Table 1-2. Comparison of Available Functions of HP NetRAID Utilities
HP
Defaults*
(if
Function/Selection
Ada pter Typ e X X
Add Capacity X X
Alarm Control
HP NetRAID-1Si &
HP NetRAID-3Si
Integrated HP NetRAID
Autorebuild Enabled* X
Battery Backup (HP NetRAID-3Si &
with Battery Backup Module in
HP NetServer LH 3000/3000r,
LH 6000/6000r & LT6000r)
Cache Flush Timings 4 seconds* X
Cache Policy Cached* X X X
Change Disk Geome try 8 GB* X X X
Channel Activate/Deactivate Activated* X
Diagnostics X
Disable BIOS NO* X
Disk Spin-Up Timings Automatic* X X
Emulation (Sets PCI Class Code to
O or M ass Storage m ode)
I
2
Initiator ID 7* X
applicable)
Enable*
Not Available
Mass
Storage*
HP
NetRAID
Assistant
XXX
HP
NetRAID
Config
XX
NetRAID
Express
Tools
X
10
Page 17

Chapter 1 Overview of HP NetR AI D Utilitie s
Memory Type
HP NetRAID-1Si
HP NetRAID-3Si & integrated
EDO*
Not Available
HP NetRAID
Power Fail Safeguard Enabled* X X
Print Config X
RAID Level X
Read Modify Write Mode OFF* X
Read Policy Adaptive* X X X
Rebuild Rate 50%* X X X
Reset to Default Settings X
Save/Load Config from File X
SCSI-2 Command Tagging
Enhanced
Qtag
Scheduling*
SCSI Termination
HP NetRAID-3Si & HP NetS er ver
LH 3000/3000r, LH 6000/6000r
& LT 6000r
HP NetRAID-1Si & HP NetS er ver
Terminate
Wide
Channel*
Not Available
XX
LH 3/3r & 4/4r
SCSI Transfer Rate Ultra-2* X
Span NOSPAN* X
Spin Down/Spin Up X
Synch ronous Negotiation Ena bled* X
Stripe Size 64 KB* X X X
Update Drive Firmware X
View/Add/Delete Config X X
View Log X
Virtual Sizing Disabled* X
Write Policy
HP NetRAID-1Si & HP NetServer
LH 3/3r & LH 4/4r
HP NetRAID-3Si & HP NetS er ver
LH 3000/3000r, LH 6000/6000r
& LT 6000r
Write-
Through*
Write-Back*
(See note
below table.)
XXX
X
X
11
Page 18

Chapter 1 Overview of HP NetR AI D Utilitie s
NOTE Write-Back means that data is written to disk only when it is
forced out of the ca ch e. Write-Back is efficient because an
entry may be written many times in the cache without a disk
access. While thi s setting in cr eases performance, da ta can be
lost if power fails.
Write- Back is NOT recom mended un less one of the fol lowing
is true:
• The HP NetRAID adapter is an HP NetRAID-3Si, which
has a Battery Backup Unit.
• Your system is equipped with a UPS (uninterruptible
power supply).
• Your system is an HP NetServer LH 3000/3000r,
LH 6000/6000r, or LT 6000r that is equipped with a
charged accessory Battery Backup Module.
Write-Back is not certified for any logical drive used as a
Novell NetWare volume.
12
Page 19

Chapter 1 Overview of HP NetR AI D Utilitie s
HP NetRAID Drivers and Utilities
Table 1-3 lists the filenames of drivers and utilities specific to your network
operating system (NOS). For information on installing drivers and configuration
utilities for HP NetRAID, see the HP NetRAID Installation and Configuration
Guide or the HP NetServer Integrated NetR AID Controller Configuration Guide.
Table 1-3. HP NetRAID Drivers and Utility Files for Network Operating Systems
Network Operating
System
Drivers
Microsoft Windows 2000 mraid35x.sys megaserv.exe
Monitor
Utilities
Configuration
Utilities
nraid.exe
megactrl.exe
Micr oso ft Windows NT mraidnt.sys megas erv.exe
nraid.exe
megactrl.exe
Novell NetWare 4.2 and 5
(Conventional, non-I
O)
2
Novell NetWare 4.2 and 5
O support)
(I
2
Mega4_xx.ham
Mega4_xx.ddi
HP NetRAID I
mril4_xx.ham
O OSM
2
Megamon.nlm Megamgr.nlm
Megamon.nlm Megamgr.nlm
IBM OS/2 mraid.add monitor.cmd megaconf.exe
SCO OpenServer amird amirdmon megamgr
SCO UnixWare mega amirdmon megamgr
13
Page 20

Page 21

2 HP NetRAID Assistant
Overview
HP NetRAID Assistant is an object-or iented, graphical user int erface (GUI)
management utility that runs under Microsoft Windows NT or Windows 2000.
HP NetRAID Assistant allows you to control an d monitor the status of hard disk
drives on t he local HP NetSer ve r or over a network with s eve ral servers.
This section provides the following information:
A. HP NetRAID Assistant Main Window
B. HP NetRAID Assistant Menu Options
C. Using the Wizard to Configure Arrays and Logical Drives
D. Managing RAID with HP NetRAID Assistant
E. Managing Servers Over th e Network
F. Windows NT Monitor Service for HP NetRAID (also for Windows 2000)
A HP NetRA ID Assistant Main Window
Start HP NetRAID Assistan t.
• To start HP NetRAID Assistan t un d er Windows 95 or 98, click the
NetRAID Assistant icon in the NetRAID pr ogram gr oup (or group you
specified).
• To start HP NetRAID Assistant under Windows NT or Windows 2000,
click the Start button, p oint to Programs, point t o NetRAID in the
Programs menu, and click NetRAID Assistant.
Figure 2-1 shows an example of th e main window of HP NetRAID Assistan t.
NOTE Since HP NetRAID-1Si is a single-channel adapter, the
HP NetRAID Assistant Main win d ow for HP NetRAID-1Si
contains only Channel 0 information. In HP NetServer LH 3/3r
and LH 4/4r, the integrated HP NetRAID controller can show
either one or two channels depending upon h ow many channel s
you enabled for HP NetRAID. Integrated HP NetRAID
controllers in other HP NetServers show two channels.
15
Page 22
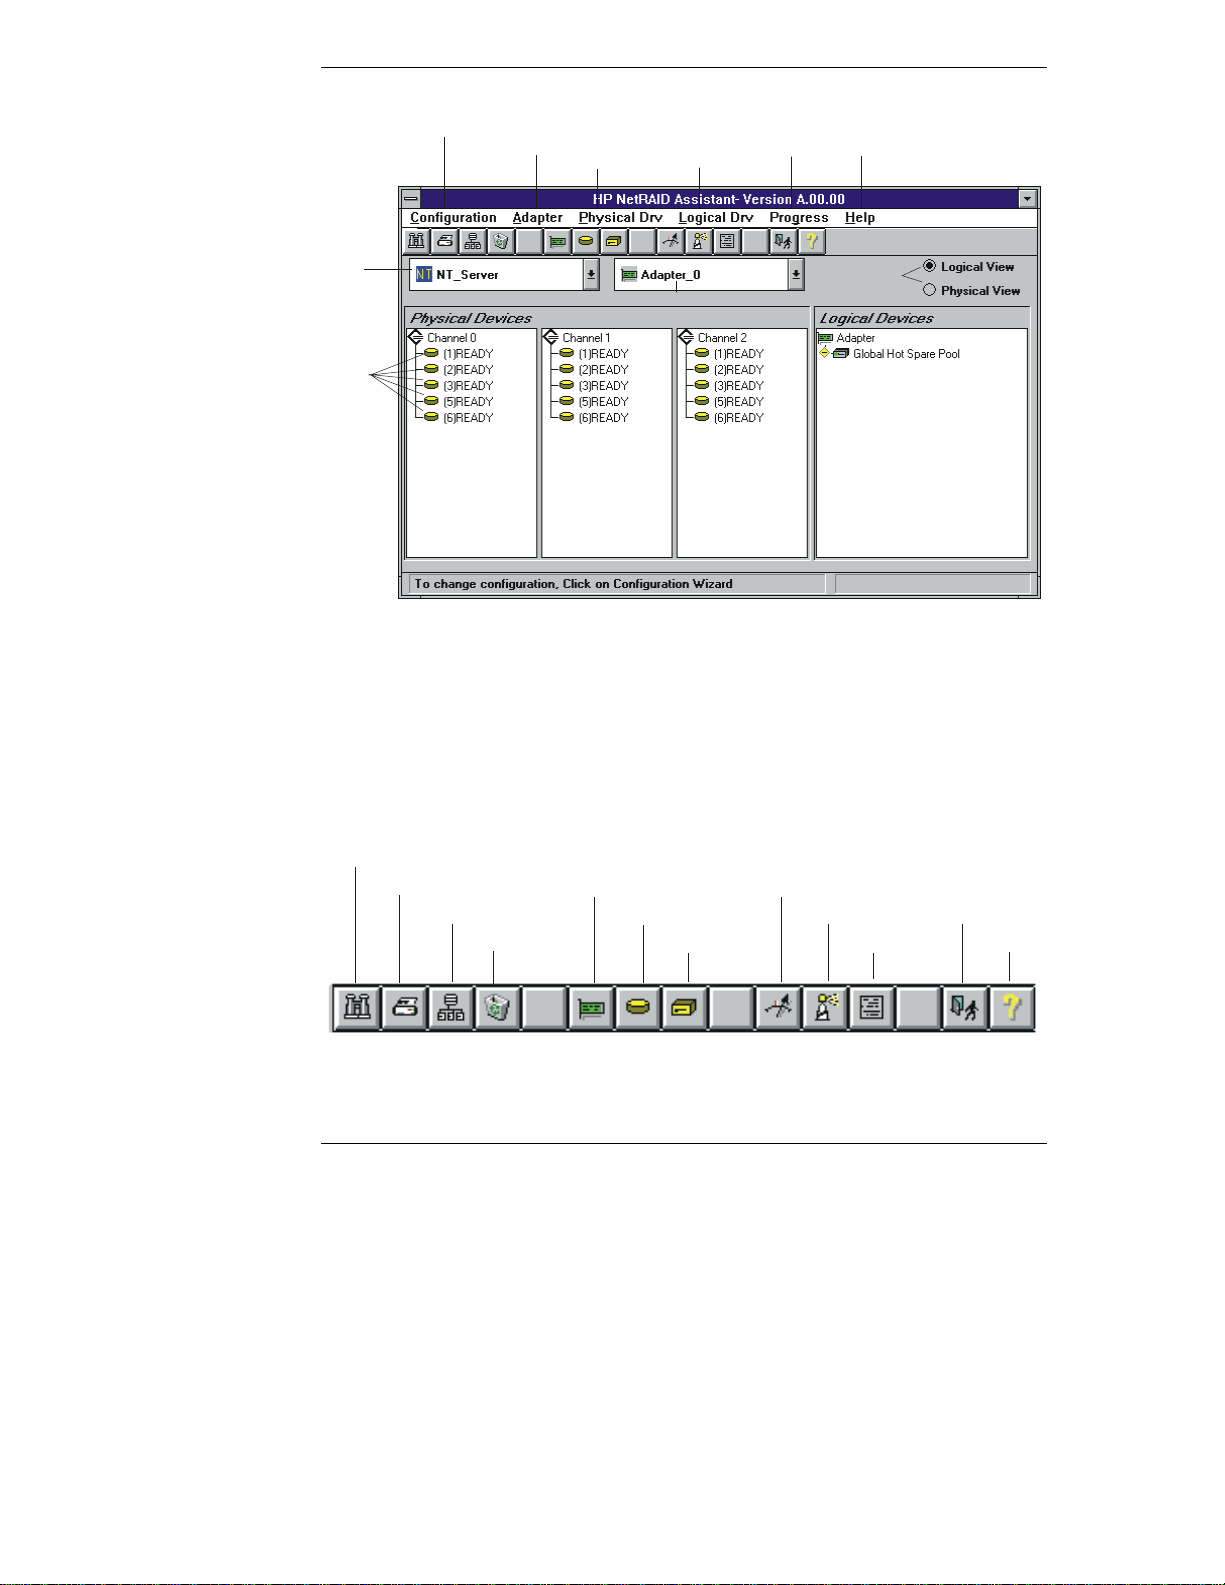
Chapter 2 HP NetRA I D Assi stant
Help
MISCELLANEO US
Configuration
Menu
Server
Selector
Physical
Drives
Adapter
Menu
Physical
Drive
Menu
Logical
Drive
Menu
Adapter Selector
Progress
Menu
Figure 2-1. HP NetRAID Assistant Main Window
The HP NetRAID Assistant win dow contains the following elements:
Menu
Toggle
Between
Views
• Menu bar: The menu bar activates pull-down menus for Configuration,
Adapter, Physical Drives, Logical Drives, Progress, and Help.
• Toolbar: The toolbar icons, which are shown in Figure 2-2, are separated
into four categories of functions: Configuration, Properties, Miscellaneous,
and Oth er . They provide shortcut s to a ccess the menu op tions.
Display
Print
Wizard
Clear
CONFIGURATION
Figure 2-2. HP NetRAID Assistant Main Menu Toolbar Options
16
Adapter
Physical Drv
Logical Dr v
PROPERTIES
Rebuil d Ra te
Rescan
View Log
Exit
Help
OTHER
Page 23

Chapter 2 HP NetRA I D Assi stant
• Server Selector box: The Server Select or box shows the name of the
current server . If HP NetRAID Assistant is started on a client or server
over the network, you must select the server you want to access from the
pull-down list.
• Adapter box: The Adapter box shows the number of the current adapter. If
the HP NetServer con tains mor e than one adapter , you can chan g e the
current adapter by using the Adapter box pull-down list.
• Physical Devices box: The Physical Devices box contains either one
channel column (for an HP NetRAID-1Si adapter), one or two channel
columns (for an integrated HP NetRAID controller), or three channel
columns (for an HP NetRAID-3Si adapter), which show the physical
drives on the SCSI channels of the current adapter. The number in
parentheses to the right of each physical drive icon is its SCSI ID (Target)
on th e chan nel.
NOTE For internal mass storage in HP NetServer LH 3000/3000r,
LH 6000/6000r, and LT 6000r, SCSI ID 5 is reserved for the
SAF-TE processor that manages the hot-swap mass storage
cage.
For an external mass st orag e encl osure with a SAF-TE
processor, a SCSI I D i s reserved for that process or. The
number of the reser ved S C SI ID varies with the type of
external enclosu re.
The SAF-TE processor is displ ayed in the Physical Devices
box with the rectangular green icon that is used for adapters.
The sta te of each physical drive appears to the right of the SCSI ID or arra y
designation. The possible states of a physical drive are as follows:
◊ Onln: The physical drive is online, functioning normally, and part of a
conf igu re d logical d riv e.
◊ Ready: The physical drive is functioning normally, but is not part of a
configured logical drive, nor configured as a hot spare.
◊ HotSp: Th e dr ive is config ured as a hot spare, and is powered up and
ready for use as a spare in case an online drive fails.
◊ Failed: The physical drive failed and is out of service.
◊ Rebuilding: The drive is in t he proce ss of being rebuilt with data from
a failed drive.
17
Page 24

Chapter 2 HP NetRA I D Assi stant
• Logical Devices box: The Logical Devices box shows the current adapter
and its global hot spare pool. When arrays, logical drives, and hot spares
have been defined, they are displayed here. Clicking on Logical View or
Physical View switches between showing logical drives and physical
drives. Clicking on the + sign in the yellow diamond expands the view if it
is collapsed (physical or logical drives, or hot spares are hidden).
The possible states of a logical drive are as follows:
◊ Online: All participating physical disks are online.
◊ Degraded: (Critical) A single physical disk in a redundant array (not
RAID 0) in not online. Data loss may result if a second physical disk
fails.
◊ Offline: Two or more physical disks in a redundant array (not RAID 0)
or one or more physical disks i n a RAID 0 a rray are not online.
• Status line: The status line at the bottom of the window shows the
pr ogress of the s c a n requ i red to build the di s plays on the HP NetRAI D
Assistant window. It also suggests possible actions.
B HP NetRAID A ssistant Menu
HP NetRAID Assistant offers several menu options to assist you in configuring
and monitoring RAID systems. The menu options are listed below in the order
they appear on the HP NetRAID Assistan t menu bar:
• The Config urat i on menu lets you create, display, print, clear, and save
your configuration of arrays and logical drives.
• The Adapter menu lets you view and change settings specific to each
adapter or integrated HP NetRAID controller.
• The Physical Drive menu lets you rebuild, format, view properties, or
change the status of a physical drive.
• The Logical Drive menu lets you initialize, check consistency, view
properties, and change the status of a logical drive.
• The Progre ss menu lets you view various utility monitors.
• The Help menu provides additional instructions about HP NetRAID
Assistant.
18
Page 25

Chapter 2 HP NetRA I D Assi stant
Configuration Menu
The following Configuration menu options assist you in configuring your
HP NetRAID system.
• Wizard: Lets you configure the arrays, logical drives, and parameters of
your s ystem . For comp lete inform ation on the Wi zard, see Part C of this
chapter, "Using the Wizard to Configure Arrays and Logical Drives."
• Display: Displays the current configuration properties:
◊ Logical drive properties include State, RAID Type, Write Policy, Read
Policy, Cache Policy, Stripe Size, Number of Stripes, Size (in MB)
◊ Physical drives properties include Rank, Channel, and Target (SCSI)
• Print: Prints a hardcopy of the current configuration display.
• Save: Saves the current configuration to a binary file. A dialogue box
prompts you to give your configuration a file name with a
Clicking an X in the Read Only box makes the file read only. This option
is not an alternative to saving your configuration by using the Wizard.
NOTE You should always save your current configuration to a file.
This file is essential if you ever have to replace a failed
adapter.
.cfg
extension.
• Load: Loads a configuration from a previously saved binary file. A
dialogue box pr ompts you to ch oose your configuration from amon g
files in the directory. Use this option if you are replacing a failed adapter.
This selection does not cause a reconstruction to occur.
.cfg
• Clear Configuration: Select this option to erase the current configuration
information from the selected adapter’s non-volatile memory. The current
RAID configuration becomes invalid after you select this option. This
option should be used only when configuring a new system.
NOTE If you have i nadvertently er ased you r configuration, you can
recover it by immediately loading a previously saved
configuration. If you do not have a file copy of the previous
configu ration, you ca n reconfig u re the physica l drives into the
exact same array and logical drive structure in which they had
been, and save the configuration. Do not select the Initialize
menu selection.
19
Page 26

Chapter 2 HP NetRA I D Assi stant
• Exit: Select this option to quit HP NetRAID Assistant. You cannot exit if
disk operations are ongoing.
NOTE New con fi g u rations are not saved when exiting unless you
saved them by using the Wizard.
Adapter Menu
The options on the HP NetRAID Assistan t Adapter menu are described below.
• Update Firmware : This selection is not available.
• Fl ush Ca c he : Writes all data in cache to physical drives. The
HP NetRAID system allows logical drives to be configured in write-back
mode. If configured in this mode, data is retained in cache and is not
immediately written to the physical drives. If your system is configured for
write-back mode, and if the adapter must be powered down rapidly, you
must flush the contents of the cache memory to preserve data integrity.
• Performance Monitor On /Of f: Displays a graphic representation of the
performance of the logical drive you select. To use this selection, first click
the left mouse button on a drive icon and then select Performance Monitor.
Performance for each logical drive is displayed in two ways: as the data
tran s fer rate and a s the number of I/O operations per second. Y ou can
choose different logical drives, the type of graph (bar or line), and the
window arrangement from the Performance Monitor menus.
• Properties: Displays the adapter properties, including the firmware and
BIOS ve rsions, the rebuild rate, and cache memory size.
• Rebuild Rate: Sets the rebuild rate for rebuilding a failed drive. The
rebuild rate determines the percentage of IOP (input/output processor)
resources devoted to the rebuild. A 100% rebuild rate means that 100% of
the IOP’s resources are applied to the rebuild, leaving no re s ources
available for other tasks until the rebuild is complete. The default rebuild
rate is 50 %.
• Rescan: Reads the current configuration for the currently selected adapter.
It displays the updated configuration on the main window of HP NetRAID
Assistant. Use this selecti on if any physical drives were moved, added,
removed, changed, or whose state changed after HP NetRAID Assistant
was started.
20
Page 27

Chapter 2 HP NetRA I D Assi stant
• View Lo g: Displays the contents of the View Log File, which records
adapter activities and conditions such as battery backup charge, logical
drive properties, and changes to configurations along with the date and
time changes are made.
• Al a r m Control: Changes the onboard tone generator settings as described
below. (This option is not available with the integrated HP NetRAID
controller.)
◊ Enable/Disable Alarm: Enables or dis ables the onboard t one
generator. The default setting is Enabled.
◊ Silence Alarm: Stops the alarm when it goes off. To silence a
sound ing alarm, ch oos e Al a r m Control and Silence Alarm.
For complete information, see Chapter 8, "Alarm Control and Audible
Warnings."
Physical Dr ive M enu
The Physical Drive menu options are described below.
• Rebuild: Rebu ilds one or m ore fai led disk dri ve s . Cli c k Cance l to stop the
rebuild process at any time. The drive returns to its original status before
the rebuild beg an. A config urati on of RAID level 1, 3, 5 , 10, 30 or 50 has
built-in redundancy. If a drive in one of these RAID groups fails, the RAID
subsystem continues to work but no additional redundancy is provided.
Another drive failure will take the logical drive offline. Rebuilding the
failed drive replaces and adds it into the RAID system. The rebuild process
can take place while the RAID system is still running, although
performance may be affected.
• Format: Low-level formats one or more physical drives. You can format a
drive only if it is in the Fail or Ready state and is not part of any
configuration.
Since most SCSI disk drives are low-level formatted at the factory, this
step is usually not necessary. You must format a disk only if:
◊ The disk drive was not low-level formatted at the factory.
◊ Ther e is an exces s ive number of media errors detect ed on the disk
drive.
NOTE You do not need to use the Format option if you simply want to
erase existing information on your hard drives, such as a DOS
partition. That information is erased when you choose Initialize
from the Logical Drive menu to initialize the logical drive(s).
Hewlett-Packard drives are factory- formatted .
21
Page 28

Chapter 2 HP NetRA I D Assi stant
• Update Drv Firmware: This se lection is no t available.
• Change Status: Changes the status of the ph ysical drive:
◊ Make Online: Puts the drive online and available to the adapter.
◊ Make Offline: Puts the drive offline and unavailable to the adapter.
◊ Spin Up: Sets the method and timing for spinning up the hard disk
drives.
◊ Spin Down: Sets the method and timing for spinning down the hard
disk drives.
◊ Make Hot Spare: Makes a hot spare of the drive you selected. To use
this selection, first click on the drive icon, then select Make Hot Spare.
• Properties: Displays the physical drive properties of a selected drive. The
properties include Device Identification, Device Attributes, and Device
Error.
Physical Drive Right Mouse Button Menu
To access this menu, select (and highlight) a physical drive in the Physical
Devices box, then click the right mouse button. The following popup menu
options appear :
• Rebuild
• Abort Rebuild
• Format
• Tools
◊ Make Online
◊ Make Hot Spare
◊ Fail Drive
◊ Spin Down (used to spin down the motor of a disk drive)
◊ Spin Up (used to spin up the motor of a disk drive)
• Firmware Download (not available)
• Remove (not available)
• Properties
22
Page 29

Chapter 2 HP NetRA I D Assi stant
Logical Dr iv e Men u
The Logical Drive menu options are described below.
• Initialize: Initializes one or more logical drives. To initialize one or more
drives, first select the logical drive(s) to be initialized, then choose
Initialize.
After configuration, a logical drive must be initialized before it can be
used. This option initializes the logical drives by writing zeros to the data
fields and generating corresponding parity fields on drives with RAID
levels 3, 5, 10, 30, or 50.
CAUTION HP NetRAID Assistant all ows you to initi al ize a drive at any
time. Make sure that the drive being initialized does not hold
active data. All data will be lost when you choose the
Initialize menu selection.
• Che ck Consistency: Ensures that parity or mirroring is correct for the
selected d rives. C lick on the drive to be checked ( LD 0 - LD 7 ) . RAID levels
3, 5, 30, and 50 use an extra drive to store parity data blocks; parity is
checked between these parity da t a blocks an d the selected dr ives. RAID
levels 1 and 10 use duplicate data drives (mirroring); the duplicate data is
verified.
Check Consistency should be run if the system shuts down irregularly,
such as after a power failure. I t is also rec ommended that yo u run
consis t ency checks e very two to four weeks to ensu re that bad bl ocks on
the disk drive are mapped out. Check Consistency always remedies
inconsistencies. Check Consistency will fail only if the firmware could not
complete parity and data writes due to a power-failure or a system hang, or
because the logical drive degraded or failed when a physical drive went
offline.
You can use a Windows NT Monitor Service for HP NetRAID Series
adapters to schedule and perform Consistency Checks automatically. For
more information, see Part F of this chapter, "Windows NT Monitor
Service for HP NetRAID."
• Properties: Displa ys the logical drive properties of the selected logical
drive. Each logical drive can be displayed by selecting the Previous or
Next buttons.
23
Page 30

Chapter 2 HP NetRA I D Assi stant
• Change Config: Changes the parameters of a logical drive. To use this
option, first select the logical drive or drives to change, then click Change
Config.
◊ Cache: There are two Cache policies :
∗ Direct I/O specifies that only repeated reads to same locations are
cached.
∗ Cached I/O specifi es that all r ead s are cached.
◊ Read: There are three Read policies:
∗ Read Ahea d tells the adapter to read sequentially ahead of
requ ested data and cache the fur ther data in m emory, anticipatin g
that the further data will be requested.
∗ Normal specifies that the controller does not use Read-Ahead for
the cur rent logica l drive.
∗ Adapti ve Read Ahead specifies that the adapter begins u s ing
Read-Ahead if th e two most recent d isk accesses occurred in
sequential sector s.
◊ Write: There are two Write policies:
∗ Write-Back specifies that data is written to disk only when it is
forced out of the ca ch e. Write-back is efficient, because an entr y
may be written many times in the cache without a disk access.
∗ Write-Through specifies that data is written to disk at the same
time as it is cached. Write-Through caching has a data security
advan tage over Write-Back ca ch ing.
◊ RAID Level: This op t ion allows you to cha nge the RAID level.
◊ Virtual Size: This selection is not available. Use HP NetRAID Express
Tools to enable the Virtual Sizing parameter.
◊ Add Capacity: Use this option to add a physical disk to the logical
drive. HP NetRAID reconstructs your data to incorporate the new
physical drive into the array.
Logica l Dr iv e Ri g ht Mo use B ut ton Me nu
To access this menu, select (highlight) a logical drive in the Logical Devices box
and click the right mouse button. The following pop-up menu options appear:
• Delete (deletes the last array created, one at a time)
24
Page 31

Chapter 2 HP NetRA I D Assi stant
• Initialize
• Check Consistenc y
• Change Policy (changes Write, Read, and Cache Policies)
• Advanc e d Me nu
◊ Change Config (changes RAID level only)
◊ Add Drive
• Properties
Progress M enu
Using the Progress option, you can access and view the following utility monitors:
• Rebuild Progress
• Diagnostics Progress
• Ini t i a li ze Progress
• Check Consistency Progress
• Reconstruction Progress
• Performance Monitor
Help Menu
The Help M enu option yiel d s the followi ng choices:
• Help: Accesses the Help Menu for assistance.
• About: Provides information about the version of the adapter you are
running.
C Configur ing Arrays and L ogical Drives
You configure arra ys and logi cal dri ves by using the HP NetRAID Assistant Main
window as shown in Figure 2-3.
25
Page 32

Chapter 2 HP NetRA I D Assi stant
Help
Configuration
Menu
Server
Selector
Physical
Drives
Adapter
Menu
Physical
Drive
Menu
Logical
Drive
Menu
Adapter Selector
Progress
Menu
Menu
Toggle
Between
Views
Figure 2-3. HP NetRAID Assistant Main Window
NOTE Since HP NetRAID-1Si is a single-channel adapter, the
HP NetRAID Assistant Main win d ow for HP NetRAID-1Si
contains only Channel 0 information. In HP NetServer LH 3/3r
and LH 4/4r, the integrated HP NetRAID controller can show
either one or two channels depending upon h ow many channel s
you enabled for HP NetRAID. Integrated HP NetRAID
controllers in other HP NetServers show two channels.
To config u re arrays and logical drives, follow these steps:
• Select adapter to configure.
• Clear previous configuration, if necessary.
• Check the Rebuild Rate.
• Assi g n global hot spares.
• Select the Wizar d .
26
Page 33

Chapter 2 HP NetRA I D Assi stant
• De fine you r p hysical arrays.
• Assi gn d edi cated h ot spar es, if desired.
• Define logical drives.
• Preview configuration and save it to NVRAM (non-volatile memory).
• Save the configuration to a binary file.
• Print the configuration.
• Configure any other adapters.
• Initialize logical drives.
• Exit HP NetRAID Assistant.
Select the A dapter to Con figur e
Look in the Adapter box to see if the adapter you wish to configure is displayed. If
not, select it from the pull-down list.
Clear Confi guration (if n ecess ary )
If you want to set up a brand-new configuration, you should clear the existing
configuration.
To clear the existing configuration:
1. Select t he Configuration menu.
2. Choose Clear Config uration.
3. Click OK.
Check Rebuil d Ra te
During a rebuild, the contents of a complete physical drive is rewritten. Normal
operations can go on during a rebuild, but performance may be degraded. The
Rebuild Rate controls the rate at which a rebuild is done. A high Rebuild Rate
(over 50%) speeds up the rebuild, but slows system performance. A low Rebuild
Rate (under 50%) slows t he rebuil d process, but speeds up system perfor mance.
The default setting for the Rebuild Rate is 50%.
To check the Rebuild Rate from the HP NetRAID Assistant wi ndow:
1. Select the adapter for which you want to check the Rebuild Rate.
2. Select Rebuild Rate from the Adapter menu.
27
Page 34

Chapter 2 HP NetRA I D Assi stant
3. Reset the rate as necessary by dragging the slider with the mouse.
4. Click OK.
5. If you have more than one adapter, select the next adapter, and repeat this
procedure.
NOTE Clear ing the confi g uration d oes not affect the rebuild rate.
Assign Glo bal Hot S pares
To assign any physical drives to the global hot spare pool for the adapter:
1. Click on a Ready physical drive in the Physical Devices box.
You can select mor e th an on e Rea dy drive if you want to create more than
one global hot spare. Clicking on a Ready drive either selects it or
deselects it.
2. Drag th e s elected drives into the global hot spare pool.
Select Wizard
NOTE If any physical drives have been moved, added, removed,
changed, or changed in state since HP NetRAID Assistant was
started, rescan the drives by choosing the Adapter menu and
then selecting th e Re scan option.
To launch the HP NetRAID Assistant Wizar d:
1. Select t he Configuration menu.
2. Choose the Wizard. The Wizard starting window is displayed with a
choice of Custom and Automatic configuration modes, as shown in
Figure 2-4.
28
Page 35

Chapter 2 HP NetRA I D Assi stant
Figure 2-4. HP NetRAID Assistant Wizard Starting Window
3. Click one of the following configuration modes:
◊ Select Custom if you want to define the arrays and logical drives and
set their parameters.
◊ Select Automatic if you want the HP NetRAID Assistant Wizard to
defin e the arrays an d log ical dri ves and set their paramet er s for you
automatically.
When you select Autom atic mode, you can toggle the Redundancy
check box a t the bottom of the window. If t he Redund ancy box
contains a check mark, the arrays are automatically configured with
redundant logi cal drives if possible. They are assi gned RAID levels o f
0, 1, or 5, depending on the number and capacities of the physical
drives. If the Redundancy box is empty, all logical drives are
configured as RAID 0, which are not redundant. Automatic mode uses
the following rules to define arrays and logical drives.
∗ Automatic mode scans the physical drives, starting at SCSI ID 0 on
Channel 0, and groups the physical drives by capacity, with up to
five drives in an array.
∗ Each array is defined as a single logical drive, and array spanning is
not used.
∗ For each arra y, the system looks t o see if you ha ve a s k ed to
implement redundancy (checked the Redundancy box). If you are
not using redundancy, all logical drives are assigned RAID level 0.
29
Page 36

Chapter 2 HP NetRA I D Assi stant
∗ If an array conta ins two drives, and you checked Red u ndan cy, the
logical drive is assigned RAID level 1.
∗ If an array conta ins three to five drives, and you checked
Redundancy, the logical drive is assigned RAID level 5.
∗ If an array contains only one drive, the logical drive is assigned
RAID level 0. (No redundancy is possible on a logical drive
containing just one physical drive.)
∗ Automatic configuration does not creat e h ot s p ares.
4. Click the Next button.
5. If you chose Automatic mode, skip to "Preview Configuration" later in this
section.
Define Phy sical A rray s and D edicate d Hot S pare s
The HP NetRAID Assistant Wizar d Arra y Definition window appears, displaying
the Physical Devices and Logical Devices configured on your system. A sample is
shown in F igure 2-5. Th e "new array" in the Logical Devices box shows wher e a
new array can be defined.
30
Figure 2-5. HP NetRAID Assistant Wizard Array Definition Window
Page 37

Chapter 2 HP NetRA I D Assi stant
To assign physical drives to the new array:
1. Select all the Ready physical drives that you want to put into the new
arra y. C licking on a dr ive either selects or desel ects it.
2. Click the Add to Array button.
Physical drives show "A:new" to indicate the drive has been added to a
new arr ay, but has not been accepted yet .
3. If you want to remove a physical drive from a new array, select the drive in
the new array and cli ck the Reclaim button.
4. When the array is complete, click the Accept Array button.
All physical drives assigned to arrays display their array numbers to the
righ t of the SCSI ID. The numbering is zero-based . For exam p le, A0
designates a physical drive assigned to Array 0.
5. The next new array appears. Assign physical drives to it as descri bed
above. Be sure to click the Accept Array button to close the array.
To assign physical drives to an existing (not new) array:
1. Click one or more Ready physical drives to select (or deselect) them.
2. Drag th e dr ives into the existin g ar r ay. All select ed Rea dy drives are added
to the ar r ay.
Dri ves can not be removed s electively from an exi s ting arra y, but the entire array
can be undone. An array cannot be reclaimed if it has any logical drives defined.
To remove an entire array:
1. Select t he array. (Make sure that nothing el se is selected .)
2. Click the Reclaim button.
3. Click OK.
Assign Dedic ate d Hot S par es
Hot spares can be ass igned to the global hot spare pool for th e adapter, or they can
be dedica t ed to a specifi c a rray. Onl y one hot spare can be dedicated to a given
arra y.
To assign a dedicated hot spare:
1. Select a Ready physical drive. Be sure nothing else is selected.
2. Click the Add Spare button. The Hot Spare Target window appears.
31
Page 38

Chapter 2 HP NetRA I D Assi stant
3. Click the Dedicated to button, and then click the down arrow to pull down
a list of valid arrays.
4. Click the array to whi ch you want to dedicate the h ot sp are.
5. Click OK.
6. Continue defining arrays and hot spares.
To reclaim (undo) one or more hot spares:
1. Select one or more hot spares.
2. Click the Reclaim button to convert the hot spares to Ready physical
drives.
When you are finished defini ng arra y s and hot spares:
Click the Next button.
Define Logical Drives
After you finish defining arrays and hot spares, and click Next, the HP NetRAID
Assistant Wizar d Logical Drive Definition window appears. A sample wind ow is
shown in Figure 2-6.
32
Figure 2-6. HP NetRAID Assistant Wizard Logical Drive Definition Window
Page 39

Chapter 2 HP NetRA I D Assi stant
• The Logical Drive Parameters box shows the number of the logical drive
being defined and has boxes to set its RAID level and size.
• The Advanced button leads to more parameters, which are preset but can
be chan g ed .
• The Spa n Arra y s check box turns array spanning on or off.
• The Logical Devices box depicts the arrays on the current adapter, the
logical drives on each array, and the global hot spare pool for the adapter.
Logical drives are labeled as "new" and as LD0 through LD7. Click the +
sign in the yellow diamond if the view is collapsed (logical drives are
hidden).
The HP NetRAID Assistant Wizar d is ready for you to set the paramet ers of the
new logical drive.
To define a logical drive that does not span:
1. Make sure that the Span Arrays box does not have a check mark in it; if it
does, click the box t o remove the check mark.
2. Set th e RAI D level by clicking the arrow and selecting the RAI D level
from the pull-down menu.
3. Set th e size by either acceptin g the default in the box, or by clicking in the
Size box and typing a smaller size. Setting a smaller size leaves space for
another logica l drive on the same array.
4. Set the stripe size, read policy, write policy, or cache policy, by clicking
the Advanced button to display the Advanced Parameter window. Click
the arrows to view the choices, and select the ones you want. Disregar d the
Virt ua l Sizing ch eck box. Click OK to return to the Logical Drive
Definition window.
5. When th e logical dri ve p arameters are set, click the Accept button.
The nex t logical dri ve t o be defined is displayed. I f there is still space in
the current array, the new logical drive is on it.
6. Define any other l ogical drives on the curr en t array that will not span.
HP NetRAID Assistant Wizard k eeps creat ing logica l drives on the same
array until its capacity is used fully, or until there are eight logical drives
on the adapter.
33
Page 40

Chapter 2 HP NetRA I D Assi stant
To create a logical drive that spans two or more arrays:
NOTE The arrays to be spanned must have sequential array numbers
and must contain the same number of physical drives.
HP NetRAID Assistant will att em pt to span up to four arra ys.
Array spanning stops when:
• It has created a logical drive of the size you specify in
Step 2 belo w.
• The next sequentially n um bered arra y has a di fferent
number of drives.
Spann ed arrays must contain the same number of drives in
each array.
1. Click the Span Arrays box to mark it with a check. An array labeled with
a hyphenated number, such as A0-1 or A0-3, appears in the Logical
Devices box.
2. If you know the exact size of the logical drive you want, enter it in the Size
(MB) box.
If you don’t identify the size of the logical drive, the default size reflects
the maximum number of arrays that can be spanned.
3. Define the logical drive as described above.
To remove the last logical drive that was added:
1. Click the Undo button.
2. You can continue undoing logical drives by clicking Undo.
When you are done defining logical drives:
• When all the logical drives are defined for the adapter and you have
clicked the Accept button for the last one, click the Next button.
The Next button does not operate until one of the following conditions has
been satisfied:
◊ All capacity has been assigned to logical drives.
◊ Eight logical drives have been defined.
34
Page 41

Chapter 2 HP NetRA I D Assi stant
Preview Configur ation
The HP NetRAID Assistant Wizar d Confi gura ti on Pr eview window, shown in
Figure 2-7, displays the configuration proposed for the physical and logical drives.
Figure 2-7. HP NetRAID Assistant Wizard Configuration Preview Window
NOTE The RAID level of a logical drive that spans arrays lacks the
terminal zero. Mentally add it to make RAID 1 into RAID 10,
RAID 3 into RAID 30, and RAID 5 into RAID 50.
To switch between showing logi cal dr i ves and physi cal dr i ves:
Click Logical View or Physical View.
To expand a view that has been collapsed (physical or logical drives, or hot
spares are hidden) :
Click the + sign in the yellow diamond.
To display the properties of a logical drive:
Double-click the logical drive in the Logical Devices box.
35
Page 42

Chapter 2 HP NetRA I D Assi stant
To display the properties of a physical drive:
Double-click the physical drive in the Physical Devices box.
To change a logical drive:
1. Click the Back button to back up to the previous window.
2. Delete t he last logi cal drive defi ned (accept ed) by clicki ng the Undo
button. Keep clicking Undo until you have removed the logical drive you
want t o change.
3. Configure the logical drives again, or click Back to back up an d ch ange
array definitions.
To correct the assignment of physical drives:
1. Undo any logical drives that are defined on the array by clicking the Back
button, then click Undo as necessary to delete the last logical drive.
2. Click the Back button to go to the Array Definition window.
3. Select the array to be reclaimed, and click the Reclaim button.
4. Configure the physical drives and logical drives again.
To start the configuration over again:
Click the Cancel button.
To accept the final configuration:
Click the Finish button on the Configuration Preview window.
To save your configuration and initialize logical drives:
1. Click OK at the message asking if you want to save the configuration.
A "Writing Configuration" message appears briefly, indicating that the
configuration information is being written to the adapter’s NVRAM. This
is not a binary file that can be loaded to restore the configuration.
HP NetRAID Assistant ask s if you want to initia li z e your logica l drives
now. Logi cal drives must be in itializ ed bef ore they can be u s ed . If you
have other adapters to configure, you may wish to do that first and then
initialize all the logical drives.
2. Click the Cancel button to defer initialization of the logical drives until
later, or click OK to initial ize logical drives no w.
36
Page 43

Chapter 2 HP NetRA I D Assi stant
Save Your Configu ration and In itialize
In this step you will do the following:
• Save the configuration to a binary file.
• P rint a copy of the configuration.
• Initialize the logic al drives.
Save the Configuration to a File
To save the configuration to a binary file:
1. Choose Save from the Configuration menu. The Save Configuration dialog
box appears.
2. Type the file name and directories to be used to save the configuration. The
file type should be
3. Click Save to save the configuration to the designated file.
NOTE Be sure to save your adapter configuration to a file. This
*.cfg
.
information is essential when replacing a failed adapter.
Print C on fi gurat io n
To print a copy of the configuration:
1. Choose Print from the Configuration menu.
2. File the printed copy of your configuration file in a safe place. It will help
you understand your configuration, replace a failed adapter, or
communicate with HP Customer Support.
Confi gure A ny Ot he r A da pter s
To configure another adapter from the H P NetRAID Assi sta nt window:
1. Click the Adapter pull-down list and select the adapter.
2. Clear its configuration by choosing Clear Configuration fr om the
Configuration menu. Click OK to the warning prompts.
3. Check th e Rebuild Rat e b y choo sing Rebuild Rate from the Adapter men u
and reset the rate if necessary .
4. If global hot spares ar e n eeded, drag the desired Rea dy physical drives into
the gl oba l hot spare p ool .
37
Page 44

Chapter 2 HP NetRA I D Assi stant
5. Launch the HP NetRAID Assistant Wizard b y selecting Wizard from the
Configuration menu.
6. Use the Wizard to configure the adapter’s arrays and logical drives.
7. Save the configuration and print it.
Initia lize Lo gica l D r ive s
All logical drives must be initialized.
CAUTION Initializing a logical drive by using the Initialize menu
selection destroys all data currently on the disk modules.
To initialize the logica l drives y ou define d f or t he adapter in the HP NetRAID
Assistant Wizard:
1. If you have more than one adapter, click the Adapter pull-down list and
select the adapter.
2. Select the logical drives to be initialized.
3. Choose Initialize from the Logical Drive menu and click OK.
The Ini tialize screen appears with separ ate windows for each logical drive.
The ba r gra ph for each log ical drive shows the prog ress of the
initialization.
4. Click the Abort button if you need to stop the initia lization of th at logical
drive.
5. To rearrange individual windows, click the Arrange menu and make a
selection.
6. Repeat the initialization process for other logical drives and adapters as
necessary.
Exit HP NetRAID Assistant
To exit HP NetRAID Assistant, select Exit from the Configuration menu. You
cann ot ex it if disk operations are still occurring.
38
Page 45

Chapter 2 HP NetRA I D Assi stant
D Managing RA ID with HP NetRA ID Assistant
Procedures for performing some of the most common RAID management
functions are described in this section. Many of the adapter’s management
functions can be performed by using the drag-and-drop feature of the
HP NetRAID Assistant wind ow.
Rebuilding a Fail ed Physical Dr ive
For complete information, see Chapter 5, "Reconstructing and Rebuilding
Drives."
Adding a H ot Spar e
Hot spares can be global or dedicated. A global hot spare is available to every
array controlled by the adapter, while a dedicated hot spare is available only to a
specific arra y.
• To make a global hot spare, you can use the drag-and-drop method or use
the menus.
• To make a dedicated hot spare, you must use the menus.
Making a Global Hot Spare by Using the Drag-and-Drop Method
With at least one drive in the Ready state, drag a Ready drive icon to the Global
Hot Spare Pool icon.
Making a Hot Spare by Using the Menus
Follow these step s:
1. Select (highlight) the Ready drive.
2. Choose Change Status from the Physical Drive menu.
3. Select Make Hot Spare.
4. Click Global or Dedicated.
5. To make a dedicated hot spare, select the array to which you want to
dedicate the hot spare from the pull-down menu. Click OK.
Adding a New Logical Drive
If one or more of your physical drives are in the Ready state, you can use the
Wizard on the Configuration menu to add new logical drives to an existing
configuration.
39
Page 46

Chapter 2 HP NetRA I D Assi stant
Changing Logical Drives Cu rren tly in Use
You can ma k e s everal kind s of changes to l ogical dri ves that are currently in u se.
You can:
• Change the RAID level.
• Remove a physical drive.
• Add a physical drive. See Chapter 6, "Capacity Expansion," in this guide
for complete instructions.
All su ch ch anges to existing logical drives require reconstr u cting the data.
Recons tructio n is the process of reorganizing t he da ta to corres p ond to a chan g e
in the HP Net RAI D system. Reconstru ction occurs in the backgr ound, so the
HP NetServer and the affected logical drive remain available throughout the
reconstruction process.
NOTE Once st arted, th e reconstru ction process can not be stopp ed .
The Power Fail Safeguard feature protects logical drives against data loss during
the reconstruction process should a power failure occur. For complete
information, see "Power Fail Safeguard Feature" in Chapter 5 in this guide.
Changing the RAID Level of a Logical Drive
To make RAID level changes, refer to the valid RAID level changes listed in the
following table when altering a logical drive.
NOTE You cannot change the RAID level of any logical drive that
spans arrays (RAID levels 10, 30, or 50).
40
Page 47

Chapter 2 HP NetRA I D Assi stant
Table 2-1. Valid HP NetRAID Configuration Changes
Existing RAID
Configuration
Valid RAID
Configuration Change
Config ur a tion Event
RAID 3 or RAID 5 Optimal RAID 3 or RAID 5 Optimal Expanding capacity
RAID 3 or RAID 5 Optimal RAID 0 Stopping parity
RAID 3 or RAID 5 Optimal RAID 0 Deleting a drive , or
adding drives
RAID 3 or RAID 5 Optimal
or De grad e d
RAID 0 Reconfiguring as
Optimal RAID 0
RAID 1 Optimal RAID 3 or RAID 5 Optimal Adding drives
RAID 1 Optimal RAID 0 Deleting a drive
RAID 1 Degraded RAID 0 Reconfiguring as
Optimal RAID 0
RAID 0 Optimal RAID 3 or RAID 5 Optimal Adding drives
RAID 0 Optimal (with one
RAID 1 Optimal Adding a drive
drive)
RAID 0 Optimal RAID 0 Adding drives
You can change RAID levels by using the Logical Drive Menu of the
HP NetRAID Assistant .
1. Select t he Logical View button.
2. Highlight the log ical drive you want to change from th e Logical Devices
box on the r ight side of the window.
3. Choose Logical Drv from the main menu, then select Change Config.
4. Choose RAID Level from the Change Config menu. A dialog box opens.
5. Select your new RAID Level from the levels available for the new logical
drive configuration.
6. Select Apply. Reconstruction starts immediately. The Reconstruction
Progres s of t he logica l drive rebuild is displa ye d in a me ssage box and in
the Logi cal Devices box.
NOTE Once st arted, recon s tructi on cannot be stopped.
41
Page 48

Chapter 2 HP NetRA I D Assi stant
Removing a Physical Drive from a Logical Drive
The procedures for removing a physical drive from a logical drive vary depending
on the RAID level of the logical drive.
RAID Level 0
There is no data redundancy i n a RAID 0 system , so you cannot remove a physical
drive while the HP NetServer is available. To remove a physical drive from a
RAID 0 logical dri ve, you must back u p your data, reconfigure the logical drive,
then restore the data.
RAID Levels 1, 3, or 5
RAID levels 3 and 5 use parity to provide data redundancy. RAID level 1
provides data redundancy through mirroring. In either case, follow these
procedures to remove a physical drive from any logical drive of RAID levels 1, 3,
or 5.
1. Change to "Fail" the status of the drive you want to remove following these
steps:
a. Choose Physical Drv from the main menu of HP NetRAID Assistan t .
b. Choose Change Status from the Physical Drive menu.
c. Select Make Offline. An au dible wa rnin g sounds if th e drive i s
controlled by an HP NetRAID Series adapter. (For an integrated
HP NetRAID controller, there is no audible wa rning.)
d. Turn off the audible warning by selecting the Adapter menu, then
choosing Alarm Control, then Silence Alarm.
e. Return to the main menu of HP NetRAID Assistant.
2. Change the RAID level of the logical drive to RAID 0 by using the
instructions in "Changing the RAID Level of a Log ical Drive" in this
chapter. The logical drive will be rebuilt as a RAID 0 and will not include
the drive you just took offline (now in the Fail state).
3. If you want to convert the logical drive to a RAID level with redundancy,
change the RAID level once again t o RA ID 3 or 5.
4. Change the status of the drive you removed back to the Ready state by
using these instructions:
a. Choose Physical Drv from the main menu of HP NetRAID Assistan t .
b. Choose Change Status from the Physical Drive menu.
c. Select Make Online.
42
Page 49

Chapter 2 HP NetRA I D Assi stant
d. Return to the main menu of HP NetRAID Assistant.
5. Configure this Ready disk by using the Configuration Wizard.
Reclaiming a Hot Spare
If a physical dri ve has been config ured as a Hot Spare, you can r eclaim it and
convert it to the Ready state at any time.
1. Select Configure from the main menu of HP NetRAID Assistan t .
2. Select Wizard.
3. Select ( h ighligh t) the hot spar e in the Logical D evi ces b ox .
4. Click the Reclaim box.
5. Use th e Wizard to reconfigure th is drive or accep t the chang es an d sa ve t he
new configuration.
Changin g Logic al Dr iv e Para meters
You can change the following logical drive parameters at any time:
• Cache
• Read
• Write
Changing any of these parameters does not require reconstruction of your data.
To chan g e these logi cal drive parameters:
1. Click the Logical View button.
2. Select ( h ighligh t) the logical drive you want to chang e.
3. Choose Logical Drv from HP NetRAID Assistant’s main menu.
4. Select Chang e Confi g .
5. Change the logical drive parameters. As long as you do not change the
RAID level , your data will not be reconstr ucted .
Taking a Drive Of fline/Onlin e
An HP Ne tSer ve r ph ysical drive ca n be ta ken offlin e or put online in one of t w o
ways:
• You c an remove or insert the disk dr ive by ha nd from an HP N etServer
hot-swap bay.
43
Page 50

Chapter 2 HP NetRA I D Assi stant
• From the main menu, you can choose Physical Drv, then Change Status.
You can change the drive status by using the Make Offline or Make Online
selection.
◊ When you select Make Offline, the physical drive is changed to the
Fail state. An audible warning sounds if the drive is controlled by an
HP NetRAID Series adapter. (For an integrated HP NetRAID
controller, there is no audible warning.)
The logical drive state also changes. With just one physical drive
offline, logical drives of RAID 1, 3, 5, 10, 30, and 50 change to
Degraded. Logical drives with RAID level 0 change to Offline.
◊ When you select Make Online, you can change a dr ive from th e Failed
state to the Ready state. (Do not use this option on a Ready drive. To
bring a Ready drive online, use th e C onfiguration Wiz a rd.)
E Managing Servers Over the Network
The HP NetRAID Series Installation and Configuration Guide and the HP
NetServer Integrated NetRAID Controller Configuration Guide list the
requirements for clients and servers that manage HP NetRAID over the network.
They also tell how to install the softwar e necessary for HP NetRAID Assistant to
manage HP NetRAID over the network.
Before Star ting HP NetR AI D Assistan t
The Regi stration S erver must be r unn ing before any other servers are st ar ted.
• If the Registration Server is a NetWare server, it must be running
reg_serv.nlm
• If the Registration Server is a Windows NT or Windows 2000 server, it
must be running the NetRAID Registr at i on Server i con (un der the
NetRAID program group).
To access an HP NetRAID Series adapter in a server from the network, the three
services listed below must be running. Start them in the order listed. You may set
them for automatic start, if desired.
1. NobleNet Portmapper: It should have been installed by the HP NetRAID
software and set for automatic start in Windows NT or Windows 2000. In
NetWare 4.x, load
because sockets are used ins tead.
44
.
rpcstart.nlm
. In NetWare 5, it is not n eed ed
Page 51

Chapter 2 HP NetRA I D Assi stant
2. HP NetRAID Registration Server: Start it before the others by
double-clicking on its Windows icon or by loading NetWare module
reg_serv.nlm
3. HP NetRAID Access Service: Start it by double-clicking on its Windows
icon or by loading NetWare module
NOTE To change the password for a server using Windows NT or
.
raidserv.nlm
Windows 2000, run
\netraid\dll\
To chan g e the password for a server u sing NetWar e, r einstall
the HP NetRAID management software, as described in the
HP NetRAID Series Installation and Configuration Guide or in
the HP NetServer Integrated NetRAID Controller
Configuration Guide, with the new password.
setpass.exe
.
.
under
Start HP NetR AI D A ssistant
Run HP NetRAID Assistant fr om a client or server in which the HP NetRAID
Assistant utili t y was insta ll ed.
• To start HP NetRAID Assistan t un d er Windows 95 or 98, click the
NetRAID Assistant icon in the NetRAID pr ogram gr oup (or group you
specified).
• To start HP NetRAID Assistant under Windows NT or Windows 2000,
click the Start button, p oint to Programs, point t o NetRAID in the
Programs menu, and click NetRAID Assistant.
If HP NetRAID Assistant is start ed on a standal one server, the main window
(shown in Figures 2-1 and 2-3) is displayed immediately.
If HP NetRAID Assist ant is started on a cl ient or server tha t can a ccess integrat ed
HP NetRAID controllers (or HP NetRAID Series adapters) over the network, you
must select the ser ver you want to access. Th e HP NetRAID Assistant Main
window has a Server pull-down list next to the Adapter pull-down list.
When you select a server from the server sel ector box on HP NetRAID Assistant,
a window ap p ears with the choice of access modes: Full Access and View Only.
Select one.
• Full Access mode requires that auth ori zed users enter a password. The
password is case-sensitive. The password must be given before full access
can be establish ed to a server, an d ea ch server can require a u n iq u e
45
Page 52

Chapter 2 HP NetRA I D Assi stant
password . Fu ll Access mode activat es fea t ures that let you ch ange the
HP NetRAID configuration and the states of physical and logical drives.
For exa mp le, in Full A ccess mode, you can initiate recovery from a disk
failure, or make a new hot spare.
• View Only mode does not require a password, and does not permit users to
change the configuration. All menu selections that would change the
configuration are inactive. Examples of operations that you can perform in
View Only mode are displaying the properties of physical and logical
drives and viewing the configuration.
NOTE You cannot enter Fu ll A cces s mode on a server if it is already
being mana g ed by HP NetRAID Assistant in Full Access
mode, or by another HP NetRAID utility. However, View Only
mode can always be entered.
The only distincti on th e Main Screen shows between the Full Access and View
Only modes is that in View Only mode various actions are inoperative and the
related menu options are grayed out.
To change to another adapter within the server, use the Adapter pull-down list.
Select An other S erv er-A dapter Pair
Use these pull-d own list s on the HP NetRAID Assistan t Mai n Screen t o select the
next server-adapter pair to be viewed or modified.
NOTE You can not leave the current s er ver-adapt er p air if any
operations--such as Performance Monitor or the rebuilding or
reconstruction of a drive--are running in Full Access mode.
You cannot change from View Onl y mode to Full Access
mode. Instead, exit HP NetRAID Assistan t and rest art . Ch oose
the server and Full A cces s mode. Th en enter the pa ss wor d .
When selecting a new server in Fu ll Access mode, a d ialog box app ears. Enter the
new ser ver’s password, whi ch is case-sen sitive. Th e new server can not be
accessed if it is already being managed by a system in Full Access mode, or if
either of the following utilities is running on the new server:
• HP Net RAID Assi st ant
• HP NetRAID Config
46
Page 53

Chapter 2 HP NetRA I D Assi stant
Exit HP NetRA ID Assistan t
Exit HP NetRAID Assistant by choosin g Exit from the Configuration menu, or by
clicki ng the Exit button in the toolbar, or by double-clicking the upper-left corner
of the main window.
F Windows NT Monitor Se rvice for HP NetRA ID
NOTE HP NetRAID NT monitor service for HP NetRAID supports
Windows NT and Windows 2000.
The HP NetRAID NT monitor service tra cks the stat u s chang es of HP NetRAID
Series adapters, integrated HP NetRAID controllers, and all of their logical drives
and physical drives. It also performs consistency checks for all optimal, redundant
logical drives at scheduled intervals. (Redundant logical drives include all drives
of RAID levels 1, 3, 5, 10, 30, and 50.) All status changes are logged in the
Wind ows NT Event Viewer Ap plication Log.
The two ways of controlling the HP NetRAID NT monitor service are:
• Through the Control Panel Service
• Through a DOS utility
To display the DOS utility options, type
megactrl ?
To start, stop, pause, re sume, or delete the H P NetRAID NT monitor servic e
use one of the following comman ds:
megactrl -start
megactrl -stop
megactrl -pause
megactrl -resume
megactrl -del
The default consistency check happens every Sunday at midnight starting from
the date of installation.
To specify a different consistency check schedule, type the following at the
DOS shell of Windows NT or Windows 2000:
megactrl -cons -w# -d# -h# -datemm/dd/yyyy
47
Page 54

Chapter 2 HP NetRA I D Assi stant
The options are defined as follows:
-cons Perfor m consistency check.
-w# Scheduled intervals. Valid options are:
-w0 = daily
-w1 = every week
-w2 = biweekly
-w4 = every mon th
-w12 = every three month s
-w24 = every six m on ths
-d# Day of the week. Valid options are -d1( Sunday) through
-d7 (Saturday)
-h# Hour in 24-hour format. Valid options are -d0 (12:00
a.m.) through -d23 (11:00 p.m.)
-date Start date in mm/dd/yyyy format. The consistency check
starts from this date on. Valid years are 1900 through
2038.
-enChkCon Do consistency check at the next scheduled time. This is
the default.
-disChkCon Do not do the consistency ch eck at the next s ch ed u led
time.
Examples:
• megactrl -cons -w2 -d0 -h1 -date05/01/1998
The con sistenc y check s tarts after 05/01/1 998 and happens every other
Sunday at 1:00 a.m.
• megactrl -cons -w4 -d6 -h0 -date04/01/2001
The con sistenc y check s tarts after 04/01/2 001 and happens on Saturday
every month at midnight.
• megactrl -cons -w0 -d3 -h1
The con sistenc y check happens every day at 1:00 a.m.
To stop a consistency check in progress, a nd t o prevent f uture scheduled
consistency checks, type:
megactrl -cons -abort
48
Page 55

3 HP NetRAID Config
Overview
HP NetRAID Config is a character-based, non-GUI utility that configures and
monitors RAID systems. HP NetRAID Config runs under the following operating
systems:
• Novell NetWare
• I BM OS/2
• SCO OpenServer
• SCO UnixWar e
NOTE The instructions in this section on using HP NetRAID Config
refer specifically to the Novell NetWare network operating
system. Specific features may not be available in all network
operating systems, and the exact location of specific menu
options m ay vary.
This section describes the following functions:
A. Starting and Exitin g HP NetRAID Config
B. HP NetRAID Con fig Mana g em ent Menu Opti ons
C. Configuring Arrays and Logical Drives
D. Designating Drives as Hot Spares
E. Initializing Logical Drives
F. Changing Logical Drives Currently in Use
G. Formatting Physical Drives
49
Page 56

Chapter 3 HP NetRAID Config
A Starting and Ex iting HP NetRAID Config
You do not need to restart your HP NetServer t o use HP NetRAID Config.
To start HP NetRAID Config, make sure the program file is in your file path and
type the command appropriate for your network operating system, as follows:
• For Novel l Net War e, t ype load megamgr
• For SCO UnixWare, type megamgr
• For SCO OpenServer, type megamgr
• For IBM OS/2, type megaconf
NOTE For internal mass storage in HP NetServer LH 3000/3000r,
LH 6000/6000r, and LT 6000r, SCSI ID 5 is reserved for the
SAF-TE processor that manages the hot-swap mass storage
cage.
For an external mass st orag e encl osure with a SAF-TE
processor, a SCSI I D i s reserved for that process or. The
number of the reser ved S C SI ID varies with the type of
external enclosu re.
The SAF-TE processor is displ ayed as PROC.
To exit HP NetRAID Config, press Esc at the Management m enu an d choose Yes
at the prompt. A message appears if there are uninitialized logical drives in the
system.
B HP NetRAID Config Manage ment Menu O ptions
HP NetRAID Config offers several menu options to assist you in configuring and
monit or ing RAID system s. The menu options are li s ted below in th e order they
appear on the HP NetRAID Config Main menu:
• The Config urat i on menu lets you create, display, and save your
configu ration of arrays and log ical dri ves.
• The Initialize option lets you initialize your logical drives.
• The Objects menu lets access the adapters, logical drives, physical drives,
and SCSI channels individually.
50
Page 57

Chapter 3 HP NetRAID Config
• The Format option lets your format physical drives.
• The Rebuild option lets you rebuild a logical drive in which one physical
drive has failed.
• The Check Consist e ncy option lets you verify the data in your logical
drives.
• The Advanced menu lets you reconstruct a logical drive.
Configure Menu
Choose the Configure option to select a method for configuring arrays and logical
drives. Refer to "Configuring Arrays and Logical Drives" in this chapter for
instructions.
Initialize O ption
You must initialize your logical drives before they can be used. This option
initializes the logical drives by writing zeros to the data fields and generating
corresponding parity fields on drives with RAID levels 3, 5, 30, or 50. This option
can initialize one or more logical drives.
When you choose Initialize from the Management menu, a window appears listing
your physi cal drives. Use the a rrow keys to h ighli ght the drive you wan t to
initialize, th en press the Spa cebar. You can s elect more than one drive. T o select
all the drives, press F2. To initialize the selected drive(s), press F10.
To cancel initialization once you have started it, press Esc.
CAUTION When you initialize logical drives by using the Initialize menu
selection, all data on the physical drives is erased.
Objects Menu
Choose the Objects option to access the adapters, logical drives, physical drives,
and SC S I channels ind ividually. You can als o change certain setting s for each
object.
51
Page 58

Chapter 3 HP NetRAID Config
Adapter
Choose Adapter from the Objects m enu to select an integrat ed HP Net RAID
controller or HP NetRAID Series adapter (if your HP NetServer has more than
one) and to modify parameters.
• Clear Configuration: Erases the current configuration from the adapter’s
nonvolatile memory.
• View Adapter Performance: Displays the selected adapter's read/write
performance.
• Power Fail Safeguard: Lets you enable or disable the Power Fail
Safeguard feature. This feature allows users to protect a disk array during
the reconstruction process should a power failure occur. If Power Fail
Safeguard is enabled, reconstruction takes longer, but your data is
protected against loss. The default setting is Enabled.
For complete information about the Power Fail Safeguard feature, see
"Power Fail Safeguard Feature" in Chapter 5 of this guide.
• Di sk Spin-Up Timings: Sets th e method and timing for sp inning up the
hard disk drives in the HP NetServer. The default setting is Automatic.
• Al a r m Control: For HP NetRAID Seri es adapt ers there are two onboard
tone generator settings, described below. (This option is not available for
integrated HP NetRAID controllers.)
◊ Enable/Disable Alarm: Choose this option to ena ble or disable the
onboard tone generator. The default setting is Enabled.
◊ Silence Alarm: Thi s s etting stop s the alarm when it goes off.
For complete information, see Chapter 8, "Alarm Control and Audible
Warnings."
• View/Update Paramet ers: Displays the proper ties of the selected adapter:
Rebuild Rate (default is 50%), Firmware Version, BIOS Version, DRAM
Size, and logical drive properties. The only parameter you can change is
the Rebuild Rate. (For complete information on the Rebuild Rate, see
"Changing the Rebuild Rate" in Chapter 5 in this guide.)
52
Page 59

Chapter 3 HP NetRAID Config
Logica l Dr iv e
Choose this option to perform the listed actions. You must first select the logical
drive on which you want to perform these op tions.
• Initialize: After configuration, a logical drive must be initialized before it
can be used. This option initializes the logical drives by writing zeros to
the data fields and generating corresponding parity fields on drives with
RAID levels 3, 5, 30, or 50.
• Check Consistenc y: Ensures that parity or mirroring is correct for the
selected drives. RAID levels 3, 5, 30, and 50 use parity data blocks to
provide redundancy; parity is checked between these parity data blocks and
the sel ected drives. RAID levels 1 and 10 use dupl icate data dr ives
(mirroring); the duplicate data is verified.
If Check Consistency finds any errors, it fixes the inconsistencies. This
selection both identifies problems and takes corrective action.
Check Consistency should be run if the system shuts down irregularly,
such as if the system hangs or suffers a power failure. It is also
recomm ended that you run consi s t ency checks every two to four weeks to
ens ure that bad blocks on the d isk drive are mapped out.
NOTE Check Consistency might fail if the firmware could not
complete parity and data writes due to a power-failure or a
system hang, or if the logical drive degraded or failed when a
physical drive went offline.
• View Performance: Displays the read/write performance of the selected
adapter.
• Properties: Displays the following properties of the selected logical drive:
RAID level, Size of the logical drive, Stripe Size, Write Policy, Read
Policy, Cache Policy, Virtual Sizing, Number of Stripes, and State.
53
Page 60

Chapter 3 HP NetRAID Config
Physical Drive
Choose this option to select a physical device and to perform the operations listed
below. When you choose this option, a selection menu is displayed showing the
physica l drives in the HP NetServer. Move th e cursor to th e d es ired disk drive and
press Enter. The following menu options become available:
• Rebuild: Choose this option to rebuild the selected disk drive.
• Format: Choose this option to low-level format the selected hard disk
drive.
• Make Online: Choose this option to change th e status of a Fa i led drive
back to Online.
• Fail Drive: Choose this option to change the state of the selected disk
drive to Fail. Changing a drive to the status of Fail also changes the status
of the logical drive in these ways:
◊ Optimal logical drives of RAID level 1, 3, 5, 10, 30, or 50 change to
Degraded.
◊ Degraded logical drives of RAID level 1, 3, 5, 10, 30, or 50 change to
Offline.
◊ Optimal logical drives of RAID level 0 change to Offline.
• Make Hot Spare: Choose this option to designate the selected disk drive
as a hot spare.
• Properties: Displays the following properties of the selected physical
drive: Device Type, Capacity, Vendor ID, Product ID, Revision, SCSI
Standard, Queue Tags, predictive failures, and device errors.
• View Rebuild Progress: Disp l ays th e Re build progress.
SCSI Channe l
Choose this option to select a SCSI channel on the currently selected adapter. You
can per for m the following opera tions on the selected channel.
• Deactivate Cha nnel : Deactivates the selected channel.
• Activate Channel: Act ivates the s el ected channel. Be sur e th at TermPWR
is provided for all active channels.
• Terminate High 8 Bits: Enables termination on the selected channel for
the upper eight bits and disables termination on the adapter for the lower
54
Page 61

Chapter 3 HP NetRAID Config
eight bits. This setting is required if the selected SCSI channel is
terminated with 8-bit devices at both ends.
• Terminate Wide Channe l: Enables Wide termination for the selected
channel. This is required if the HP NetRAID Series adapter is at one end of
the SCS I bus for the selected chann el. The default s etting is Wid e
Termination.
• Disable Termination: Disables termination on the adapter for the selected
channel. This option should be used if the selected SCSI channel is
terminated with Wide devices at both ends.
• View Parameters: Displays the termination and active status of the
selected channel.
Battery Backup (HP NetRAID-3Si Adapters and Optional for Integrated HP NetRAID
in HP NetServer LH 3000/3000r, LH 6000/6000r, and LT 6000r Only)
View the Battery Backup properties from this option. The properties of your
Battery Backup Unit (in HP NetRAID-3Si) or Battery Backup Module (optional
for integrated HP NetRAID in HP NetServer LH 3000/3000r, LH 6000/6000r, and
LT 6000r) should be identical or similar to the following properties:
• Battery Card Present
• Battery Pack Present
• Temperature Good
• Voltage Good
• Fast Charging Completed
• Char ge Counter 1
◊ Reset Charge Count Cycles
∗ Yes
∗ No
This menu item produces an error message (missing battery) if accessed with the
HP NetRAID-1Si adapter or with an integrated HP NetRAID controller without
battery backup. Disregard the message for these cases.
55
Page 62

Chapter 3 HP NetRAID Config
Format O ption
Choose the Format option to low-level format one or more physical drives.
Since most SCSI disk drives, including all HP drives, are low-level formatted at
the factory, this step is usually not necessary. You typically must format a disk
only if:
• The disk drive was not low-level formatted at the factory.
• There is an exces sive nu mber of media errors detected on the di sk dr ive.
You do not need to use the Format option if you simply want to erase existing
information on your SCSI disks, such as a DOS partition. That information is
erased when you choose the Initialize menu selection to initialize the logical
drive(s).
You cannot format a drive that is online.
Rebuild Option
Choose the Rebuild option to rebuild one or more failed disk drives. For complete
information on rebuilding drives, see "Rebuilding Data" in Chapter 5 in this guide.
Check Consis tency Op tion
Ensures that parity or mirroring is correct for the selected drives. RAID levels 3,
5, 30, and 50 use parity data blocks to ensure redundancy; parity is checked
between these par ity data blocks and the sel ected drives. RAID levels 1 and 10
use dup l icate data dr i ves (mirr oring); the dup licate data is verifi ed . I f Check
Consistency finds any errors, it fixes the inconsistencies. This selection both
identifies problems and takes corrective action.
Check Consistency should be run if the system shuts down irregularly, such as if
the system hangs or suffers a power failure. It is also recommended that you run
consis t ency checks e very two to four weeks to ensu re that bad bl ocks on the disk
drive are mapped out.
When you choose Check C onsistency, the para meters of th e ex isting logical dri ves
on th e current adapter appear. The logical drives are listed by number.
1. Press the arrow keys to highlight the desired logical drives.
2. Press the Spacebar to select or desel ect a drive for consistency checking.
Press F2 to select or deselect all the logical drives.
3. Press F10 to begi n the cons istency check. A progress indicat or for each
selected logical drive app ear s .
56
Page 63

Chapter 3 HP NetRAID Config
4. When th e consisten cy check is fin ished, pr ess an y ke y to clear th e pr ogress
display and press Esc to return to t he Ma n ag ement me nu .
NOTE Check Consistency might fail if the firmware could not
complete parity and data writes due to a power failure or a
system hang, or if the logical drive degraded or failed when a
physical drives went offline.
Advan ced Men u
Reconst r uct Log ica l D rive
Use this option if you want to add a physical drive or change a RAID level. For
complete information on adding a physical drive, see Chapter 6, "Capacity
Expansion," in this guide. For information on changing RAID levels, see
"Changing the RAID Level of a Logical Drive" in part F of this chapter,
"Changing Logical Drives Currently in Use."
C Configur ing Arrays and L ogical Drives
Each configuration method requires a different level of user input. However, the
general flow of operations for array and logical drive configuration is outlined
below.
1. Choose a configuration method.
2. Designate hot spares (optional).
3. Config ure the logi cal drives.
4. Initialize the logical d riv es.
Configuration Methods
HP NetRAID Config has five configuration options:
• Aut o Configuration examines the physical drives and automatically
configu res them in to arrays an d logical dri ves. It does not disturb existing
configuration information. For instructions on using this selection, see
"Using Auto Configuration" in this chapter.
• Easy Configuration lets you create arra ys, h ot spares, an d log ical dri ves,
but it does not modify an existing configuration. This selection does not
permi t ar ray spanning. If there are already logical dr ives configured, their
57
Page 64

Chapter 3 HP NetRAID Config
configuration information is not disturbed. For instructions on using this
selection, see "Using Easy Configuration" in this chapter.
• Ne w Confi g uration also lets you create arrays and hot spares, but this
selection lets you configure spanned arrays. If you select New
Configuration, the existing configuration information on the selected
adapter is destroyed when the new configuration is saved. For instructions
on using this selection, see "Using New Configuration" in this chapter.
• Vi ew/Add/Delete Configurati on lets you view an existing configuration
or configure new arrays. This selection does not disturb existing
configuration information. It does not allow you to delete configuration
information. For instr uction s on using this selecti on, see "Using View/Add
Configuration" in this chapter.
• Clear Configuration deletes the existing configuration.
Using Auto Confi guration
Auto Configuration creates a configuration by following these steps:
1. Gathers drives with the same capacity into groups of five, four, or three.
These groups become arrays with RAID level 5 logical drives.
2. Gathers pairs of drives with the same capacity together. These pairs
become arrays with RAID 1 logical drives.
3. Configures any remaining single disk drives as arrays with RAID 0 logical
drives.
Auto Configurat ion does not create any hot spares. If you want to config u re hot
spares, use the Easy Configuration or New Configuration selections.
58
Page 65

Chapter 3 HP NetRAID Config
Logica l Dr iv e Se tt ings
Auto Configuration uses the following defaults to configure your drives:
Table 3-1. HP NetRAID Config Automatic Settings for Logical Drives
Parameter Setting
Stripe size 64 KB
Write Policy Write-Back in HP NetRAID-3Si and integrated
HP NetRAID in HP NetServer LH 3000/3000r,
LH 6000/6000r, and LT 6000r (See note below
table.)
Write-Through in HP NetRAID-1Si and integrated
HP NetRAID in HP NetServer LH 3/3r and LH 4/4r
Read Policy Adaptive
Cache Policy Cached I/O
Spanning NoSpan
NOTE Write-Back means that data is written to disk only when it is
forced out of the ca ch e. Write-Back is efficient because an
entry may be written many times in the cache without a disk
access. While thi s setting in cr eases performance, da ta can be
lost if power fails.
Write- Back is NOT recom mended un less one of the fol lowing
is true:
• The HP NetRAID adapter is an HP NetRAID-3Si, which
has a Battery Backup Unit.
• Your system is equipped with a UPS (uninterruptible
power supply).
• Your system is an HP NetServer LH 3000/3000r,
LH 6000/6000r, or LT 6000r that is equipped with a
charged accessory Battery Backup Module.
Write-Back is not certified for any logical drive used as a
Novell NetWare volume.
59
Page 66

Chapter 3 HP NetRAID Config
You can change the wr ite policy, r ead policy, an d cache policy after th e
configuration is complete. Choose Objects, then Logical Drive, then Properties
to change this information.
User Actions
Perform the following steps when using Auto Configuration.
1. Choose Configure from the HP NetRAID Config Management menu.
2. Designate hot spares if desired by using the Easy Configuration selection.
(Auto Configur ation does not create any hot spares.)
3. Choose Auto Configuration from t he Config ure men u and res pond to the
confirmation prompt. The logical drives that result from Auto
Configuration are displayed with a save prompt. Choose Yes to save the
configuration.
4. Initialize the logical drives you have just configured. See "Initializing
Logical Drives" in this chapter for more information.
Using Easy Confi guration
Easy Configuration does not permit you to create spanned arrays; however, you
can cr eate more than one logical dr ive per array. F ol low the step s bel o w t o create
arrays by using Easy Configuration.
1. Choose Configure fr om the HP NetRAID Config Man a g ement m enu.
2. Choose Easy Configuration from the Configur e menu. The arr ay selection
menu appe ars. The ho t key information appears at the bottom of the
window. The hot key functions are:
Space Selec t or deselec t the highlighted drive.
Enter Stop a d ding drives t o the current ar ray, and con fi g ure the
logical drive.
F2 Display drive information for the highlighted drive.
F3 Display the logical drives that have been configured.
F4 Designate the highlighted drive as a hot spare.
3. Press the arrow keys to highlight specific physical drives.
4. Press F4 to configure a highlighted drive as a hot spare.
60
Page 67

Chapter 3 HP NetRAID Config
5. Press the Spacebar to add the highlighted physical drive to the current
arra y. The indicator for the sel ected drive changes fr om Rea d y to Onlin A
[array number]-[drive number]. For example, Onlin A2-3 refers to array 2
drive 3.
Add physical drives to the current array as needed. Try to use drives of the
same capacity in the same array. If you use drives with different capacities
in an array, all the drives in the array are treated as though they have the
capacity of the smallest drive.
The num ber of physical drives in a specific arr ay determin es which RAID
levels can be implemented with the array.
6. Press Enter when you are finished creating the current array. The logical
drive configuration window appears.
The window shows the logical drive that is currently being configured as
well as any existing logical drives. The column headings are:
LD The logical drive number
RAID Th e RA ID level
Size The logical drive size
#Stripes The number of stripes (physical drives) in the array
StrpSz The stripe size
Drive-StateThe state of the logical drive
7. Set the size of the logical drive. If you want to create more than one logical
drive in an array, set a size of less than t he actual capacity.
8. To set the RAID level for the logical drive, highlight RAID and press
Enter. The available RAID levels for the current logical drive are
displayed. Select a RAID level and press Enter to confirm.
9. Select Advance d to set the stripe size, Write policy, Read policy, and
Cache po licy.
• Stripe size: This parameter identifies the size of the segment written to
each di s k in a l og ical drive.
• Write policy: This parameter identifies the cache write policy. You
can set the write policy to Write-Back or Write-Through.
• Read policy: This parameter identifies the read policy for the logical
drive. You can set this parameter to Normal, Read-Ahead, or Adaptive.
61
Page 68

Chapter 3 HP NetRAID Config
• Cache policy: This parameter identifies the read cache mode during
data transfers involving the current logical drive.
(For definitions of the Write policy, Read policy, Cache policy, and their
options, see the "Glossary" in this guide.)
Press Esc to exit the Advanced menu.
10. When you are finished defining the current logical drive, highlight Accept
and press Enter. The array selection window appears if there are any
unconfigured di s k dr ives left.
11. Repeat Steps 3 through 10 to configure another array and logical drive.
HP NetRAID supports up to eight logical drives per adapter.
12. When you are finished config uring logica l drives, press Esc to exit Easy
Configuration. A list of the currently configured logical drives appears.
13. Save your con figuration, an d you return to the Con figure men u.
14. Initialize the logical drives you have just configured. See "Initializing
Logical Drives" in this chapter for more information.
Using New Configu ration
The New Configuration option allows you to create arrays with just one logical
drive, arrays with multiple logical drives, spanned arrays, and hot spares.
NOTE The New Configuration option erases the existing
configuration information for the selected adapter.
1. Choose Configure from the HP NetRAID Config Management menu.
2. Choose New Configuration from the Configure menu. An array selection
window is displayed showing the devices connected to the current adapter.
Hot key information appears at the bottom of the window. The hot key
functions are:
Space Selec t or deselec t the highlighted drive.
Enter Stop a d ding drives t o the current ar ray, and con fi g ure the
logical drive.
F2 Display the manufacturer data and the adapter error
count for t he highlighted drive.
F3 Display the logical drives that have been configured.
F4 Designate the highlighted drive as a hot spare.
F10 Display the logical drive configuration window.
62
Page 69

Chapter 3 HP NetRAID Config
3. Press the arrow keys to highlight specific physical drives.
4. Press F4 to configure the highlighted drive as a hot spare.
5. Press the Spacebar to add the highlighted physical drive to the current
arra y. The status of the selected d rive chang es from Ready to On lin A
[array number]-[drive number]. For example, Onlin A2-3 means array 2,
disk drive 3.
Add physical drives to the current array as needed. Try to use drives of the
same capacity in the same array. If you use drives with different capacities
in an array, all the drives in the array are treated as though they have the
capacity of the smallest drive. The number of physical drives in an array
determines the RAID levels that can be implemented with the array.
6. Press Enter when you are finished creating the current array. To continue
defining arrays, repeat Steps 3 through 5. To configure your logical drives,
go to Step 7.
7. Press F10 to configure logical drives. The logical drive configuration
window appears. The window shows the logical drive that is currently
being configured as well as any existing logical drives.
8. To set the RAID level for the logical drive, highlight RAID and press
Enter. The available RAID levels for the current logical drives are listed.
Selec t a RAID level and press Enter to confirm.
9. If you wan t to create a sp an ned array, highlight Span and press Enter. The
choices are:
• CanSpan: Array spanning is enabled for the current logical drive. The
drive can occupy space in up to four arrays.
• NoSpan: Array spanning is disabled for the current logical drive. The
drive ca n occupy space in only one array.
The default setting is NoSpan.
63
Page 70

Chapter 3 HP NetRAID Config
NOTE The arrays to be spanned must have sequential array numbers
and must contain the same number of physical drives.
If you sel ect CanSpan, HP NetRAID Assistant will attempt to
span up to four arrays. Array spanning stops when:
• It has created a logical drive of the size you specify in
Step 10 below.
• The nex t s eq u entially numbered ar ray has a different
number of drives.
Spann ed arrays must contain the same number of drives in
each array.
10. To set the logical drive size, move the cursor to Size and press Enter. By
default, the logical drive size is set to use all available space in the array(s)
associated with the current logical drive. If you set the Span parameter to
CanSp an in Step 9, the current logical dri ve us es all space in the current
arra y, and all spa ce in up to th ree subsequent arrays with the same number
of drives.
• If you wan t to create m ore than one logical drive in an ar ray, set a siz e
of less than the actual capacity.
• If you want to span only two or three arrays, rather than the four-array
maximum, set a size that reflects the number of arrays you want to
span.
11. Choose the Advanced menu to set the following options.
• Stripe size: This parameter specifies the size of the segment written to
each di s k in a l og ical drive.
• Write Policy: This parameter identifies the cache write policy. You
can set the write policy to Write-Back or Write-Through.
• Read Policy: This parameter identifies the read policy for the logical
drive. You can set this parameter to Normal, Read-Ahead, or Adaptive.
• Cache Policy: This parameter identifies the cache policy for the
selected logical drive.
(For definitions of the Write policy, Read policy, Cache policy, and
their options, see the "Glossary" in this guide.)
Press Esc to exi t the Advanced Menu.
64
Page 71

Chapter 3 HP NetRAID Config
12. When you are finished defining the current logical drive, highlight Accept
and press Enter. If there is space remaining in the arrays, the next logical
drive to be configured appears. Repeat Steps 8 to 11 to configure another
logical drive. If the array space has been used up, a list of the existing
logical drives appears.
13. Save your configuration by responding to the save prompt.
14. Initialize the logical drives you have just configured. See "Initializing
Logical Drives" in this chapter for more information.
Using View/Add Confi guration
View/Add Configuration leaves the existing configuration intact, so you can use it
to view the current configuration or add new arrays to the current configuration.
1. Choose Configure from the HP NetRAID Config Management menu.
2. Choose View/Add Config uration from the Configure menu. An array
selection window is displayed showing the devices connected to the
current adapter. Hot key information appears at the bottom of the window.
The hot key functio ns are:
Space Selec t or deselec t the highlighted drive.
Enter Stop a d ding drives t o the current ar ray, and con fi g ure the
logical drive.
F2 Display the manufacturer data and the adapter error
count for t he highlighted drive.
F3 Display the logical drives that have been configured.
F4 Designate the highlighted drive as a hot spare.
F10 Display the logical drive configuration window. (This
selection is valid only if you have added a new array and
pressed Enter.)
3. Press the arrow keys to highlight a drive with the status of Ready. You
cann ot ch ange the con fi g uration of a dr ive with any other status.
4. Press F4 to confi gure the Ready drive as a hot s pare.
5. Press the Spacebar to add the Ready drive to a new array. The status of the
selected d rive chan ges from Read y to Onlin A [array number]-[drive
number]. For example, Onlin A2-3 means array 2, disk drive 3.
Add physical drives to the current array as needed. Try to use drives of the
same capacity in the same array. If you use drives with different capacities
65
Page 72

Chapter 3 HP NetRAID Config
in an array, all the drives in the array are treated as though they have the
capacity of the smallest drive. The number of physical drives in an array
determines the RAID levels that can be implemented with the array.
6. Press Enter when you are finished creating the current array. To continue
defining arrays, repeat Steps 3 through 5. To configure your logical drives,
go to Step 7.
7. Press F10 to configure logical drives. The logical drive configuration
window appears. The window shows the logical drive that is currently
being configured as well as any existing logical drives.
8. To set the RAID level for the logical drive, highlight RAID and press
Enter. The available RAID levels for the current logical drives are listed.
Selec t a RAID level and press Enter to confirm.
9. If you wan t to create a sp an ned array, highlight Span and press Enter. The
choices are:
• CanSpan: Array spanning is enabled for the current logical drive. The
drive ca n occupy space in more than one array.
• NoSpan: Array spanning is disabled for the current logical drive. The
drive ca n occupy space in only one array.
The default setting is NoSpan.
NOTE The arrays to be spanned must have sequential array numbers
and must contain the same number of physical drives.
If you sel ect CanSpan, HP NetRAID Assistant will attempt to
span up to four arrays. Array spanning stops when:
• It has created a logical drive of the size you specify in
Step 10 below.
• The nex t s eq u entially numbered ar ray has a different
number of drives.
Spann ed arrays must contain the same number of drives in
each array.
10. To set the logical drive size, move the cursor to Size and press Enter. By
default, the logical drive size is set to use all available space in the array(s)
associated with the current logical drive. If you set the Span parameter to
CanSp an in Step 9, the current logical dri ve us es all space in the current
arra y, and all spa ce in up to th ree subsequent arrays with the same number
of drives.
66
Page 73

Chapter 3 HP NetRAID Config
• If you wan t to create m or e th an one logical drive in an arr ay, set a size
of less than the actual capacity.
• If you want to span only two or three arrays, rather than the four-array
maximum, set a size that reflects the number of arrays you want to
span.
11. Choose the Advanced menu to set the following options.
• Stripe size: This parameter specifies the size of the segment written to
each di s k in a l og ical drive.
• Write Policy: This parameter identifies the Write policy for the logical
drive. You c a n set the write pol icy to Write-Back or Writ e -Through.
• Read Policy: This parameter identifies the Read policy for the logical
drive. You can set this parameter to Normal, Read-Ahead, or Adaptive.
• Cache Policy: This parameter identifies the Cache policy for the
logical drive.
(For definitions of the Write policy, Read policy, Cache policy, and
their options, see the "Glossary" in this guide.)
Press Esc to exi t the Advanced Menu.
12. When you are finished defining the current logical drive, highlight Accept
and press Enter. If there is space remaining in the arrays, the next logical
drive to be configured appears. Repeat Steps 8 to 11 to configure another
logical drive. If the array space has been used up, a list of the existing
logical drives appears.
13. Save your configuration by responding to the save prompt.
14. Initialize the logical drives you have just configured. See "Initializing
Logical Drives" in this chapter for more information.
D Designating Drives as Hot Spares
HP NetRAID Config lets you create global hot spares. Users with Microsoft
Windows NT and Windows 2000 can use HP NetRAID Assistant to create a hot
spare that is dedicated to one specific logical drive. Users with other operating
systems do not have the ability to create hot spares that are dedicated to one
logical drive.
There are two methods for designating physical drives as hot spares:
67
Page 74

Chapter 3 HP NetRAID Config
• Configuration Menu. You can create a hot spare by using th e Easy, New,
or View/Add Configuration mode. When you choose any of these
configuration options in the Configure menu, a window listing all physical
devices connected to the current adapter is displayed. Press the arrow keys
to highlight a disk drive that has a Ready indicator and press F4 to
design ate it as a hot sp are. The indicator changes to HotSp.
or
• Objects Men u. Choose Obje cts from the Configure menu, then s elect
Physical Drive. A physical drive selection window appears. Highlight the
drive and press Enter to display the action menu for the drive. Select Make
Hot Spare and press Enter. The indi cator for the selected dr ive changes to
HotSp.
E Init ial izi ng Lo gic al D r ives
You must initialize each new logical drive you configure. The Initialize menu
selection initializes the logical drives by writing zeros to the data fields and
generating corresponding parity fields on drives with RAID levels 3, 5, 30, or 50.
You can in itialize t he logical d riv es in two ways:
• Batch Initialization lets you initialize up to eight logical drives
simultaneously.
• Individual Initiali zat i on lets you initialize an individual logical drive.
CAUTION When you choose the Initialize menu selection, initialization
destroys all existing data on the physical disk drive.
Batch Initializa tion
To initialize multiple logical drives, perform the following steps:
1. Choose Initialize from the HP NetRAID Config Manag em ent Menu. A li st
of the current logical drives appears.
2. To select all logical drives to be initialized, do one of the following:
◊ Press F2.
or
◊ Use the arrow keys to highlight the first drive to be initialized. Press
the Spacebar to select the highlighted logical drive for initialization.
Cont in u e to select dr ives by using the arrow keys an d the Spacebar.
68
Page 75

Chapter 3 HP NetRAID Config
3. When you have selected the logical drives you want to initialize, press F10
and ch oose Yes at the confi rmat ion pr ompt. The prog ress of the
initialization for each drive is shown in bar graph format.
4. When initialization is complete, press any key to continue. Press Esc to
return to the Management menu.
Individual In itialization
To initialize one logical dr ive, per form the foll owing step s :
1. Choose Objects from the HP NetRAID Config Mana gem en t menu.
2. Choose Logical Drive from the Objects m enu.
3. Select the logical drive to be initialized.
4. Choose Initialize from the Action menu. The progress of the initialization
appears as a b ar graph.
5. When initialization completes, press any key to return to the previous
menu.
F Changing Logical Dr ives Current ly in Use
You can ma k e s everal kind s of changes to l ogical dri ves that are currently in u se.
You can:
• Change the RAID level.
• Remove a physical drive.
• Add a physical drive. See Chapter 6, "Capacity Expansion," in this guide
for complete instructions.
All su ch ch anges to existing logical drives require reconstr u cting the data.
Reconstruction is the process of reorganizing the data to correspond to a change in
the HP N e tRAID syste m. Reconstruction occ urs in the background, s o t he
HP NetServer and the affected logical drive remain available throughout the
reconstruction process.
NOTE Once st arted, th e reconstru ction process can not be stopp ed .
The Power Fail Safeguard feature protects logical drives against data loss during
the reconstruction process should a power failure occur. For complete
information, see "Power Fail Safeguard Feature" in Chapter 5 in this guide.
69
Page 76

Chapter 3 HP NetRAID Config
Changin g the RA I D Level of a L ogical D riv e
To make RAID level changes, refer to the valid RAID level changes listed in
Table 3-1 before altering a logical drive.
NOTE You cannot change the RAID level of any logical drive that
spans arrays (RAID levels 10, 30, or 50).
Table 3-1. Valid HP NetRAID Configuration Changes
Existing RAID
Configuration
Valid RAID
Configuration Change
Config ur a tion Event
RAID 3 or RAID 5 Optimal RAID 3 or RAID 5 Optimal Expanding capacity
RAID 3 or RAID 5 Optimal RAID 0 Stopping parity
RAID 3 or RAID 5 Optimal RAID 0 Deleting a drive , or
adding drives
RAID 3 or RAID 5 Optimal
or De grad e d
RAID 0 Reconfiguring as
Optimal RAID 0
RAID 1 Optimal RAID 3 or RAID 5 Optimal Adding drives
RAID 1 Optimal RAID 0 Deleting a drive
RAID 1 Degraded RAID 0 Reconfiguring as
Optimal RAID 0
RAID 0 Optimal RAID 3 or RAID 5 Optimal Adding drives
RAID 0 Optimal (with one
RAID 1 Optimal Adding a drive
drive)
RAID 0 Optimal RAID 0 Adding drives
To change the RAID level of a logical drive that is currently in use, the logical
drive must be reconstructed. Follow these steps:
1. Choose Advanced Menu from the HP NetRAID Config Managem ent
menu.
2. Select Reconstruct Logical Drive.
3. Select the logical drive to be changed. A Reconstruct window is displayed.
4. Press Enter to see the Reconstruct menu.
5. Select RAID level.
6. Choose the new RAID level.
70
Page 77

Chapter 3 HP NetRAID Config
Removing a Phy sical Driv e from a Lo gical Driv e
The procedures for removing a physical drive from a logical drive vary depending
on the RAID level of the logical drive.
RAID Level 0
Ther e is n o da ta redundancy in a RAID 0 system, so you cannot reconstruct this
data while the HP NetServer is available. To remove a physical drive from a
RAID 0 logical dri ve, you must back u p your data, reconfigure the logical drive,
then restore the data.
RAID Levels 1, 3, or 5
RAID levels 3 and 5 use parity to provide data redundancy. RAID level 1
provides data redundancy through mirroring. In either case, follow these
procedures to remove a physical drive from any logical drive of RAID level 1, 3,
or 5.
1. Change the status of the drive you want to remove to Fail by following
these st eps:
a. Choose Objects from the HP NetRAID Config Management menu.
b. Select Physical Drive from the Objects men u.
c. Use the arr ow ke ys to highli ght the drive you want to remove.
d. Press Enter. An action me nu app ears.
e. Select Fail Drive.
f. Press Esc repeatedly to return to the HP NetRAID Config Management
menu.
2. Change the RAID level of the logical drive to RAID 0 by using the
instructions in "Changing the RAID Level of a Log ical Drive" in this
chapter. The logical drive will be rebuilt as a RAID 0 without the drive put
in the Fail state.
3. If you want to convert the logical drive to a RAID level with redundancy,
change the RAID level once again t o RA ID 3 or 5.
4. Change the status of the drive you removed back to the Ready state by
using these instructions:
a. Choose Objects from the HP NetRAID Config Mana g emen t menu.
b. Choose Physical Drive from the Objects menu.
71
Page 78

Chapter 3 HP NetRAID Config
c. Use the arrow keys to highlight the Failed drive that you want to make
available.
d. Press Enter. An action menu appears.
e. Select Make Online.
f. Press Esc repeatedly to return to the HP NetRAID Config Management
menu.
5. Configure this Ready disk by using the Easy Configuration or View/Add
Configuration option from the Configure menu.
Reclaiming a Hot Spare
To chan g e a h ot s pare into a Ready drive:
1. Choose Objects from the HP NetRAID Config Managemen t menu.
2. Select Physical Drive.
3. Use the arrow keys to select the physical drive that is configured as a hot
spare an d press Enter.
4. Select Fail Drive and press Enter. Th e st at us of the drive changes to
Ready.
G Formatting Phy sical Drives
Since most SCSI disk drives are low-level formatted at the factory, this step is
usually not necessary. Hewlett-Packard drives do not require formatting. You
typically must format a disk if:
• The disk drive was not low-level formatted at the factory.
• A n ex ces sive num ber of media errors is detected on the di s k drive.
CAUTION Formatting a physical drive erases all information on the disk.
Media Errors
Check th e Properties window for the drive you wish to format. You can check this
window by choosing Objects from the Physical Drive men u , pressing the arrow
keys to highlight the selected drive, and pressing F2.
The error count ap p ears at the bottom of t he Propert ies window. If you f eel that
the num ber of errors is excessive, you can forma t th e disk drive.
72
Page 79

Chapter 3 HP NetRAID Config
You do not have to use the Format option to erase existing information on your
SCSI disks, such as a DOS partition. That information is erased when you choose
the Initialize menu selection to initialize logical drives.
Format ting O pti ons
Since most SCSI disk drives are low-level formatted at the factory, this step is
usually not necessary.
You can format the physical drives by using one of HP NetRAID Config’s two
formatting options:
• Batch Formatting lets you format up to eight disk drives simultaneously.
• Indi vid ual Formatting lets you format a single disk drive.
Batch Formatting
1. Choose Format from the HP NetRAID Config Management menu. A
device selection window is displayed showing the devices connected to the
current adapter.
2. Press the arrow keys to highlight the first drive to be formatted. Press the
Spacebar to select the highlighted physical drive for formatting. The
selected d rive flas hes.
3. Continue selecting drives to be formatted by using the arrow keys and the
Spacebar.
4. When you have selected the physical drives, press F10 and choose Yes at
the confirmation prompt to begin formatting. The indicators for the
selected d rives ch an g e to FRMT[number], where the number r efl ects the
drive selection order. Formatting can take some time, depending on the
number of drives you have selected and the dr ive capacit i es .
5. When formatting is complete, press any key to continue. Press Esc to
return to the Management menu.
Individual Formatting
1. Choose Objects from the HP NetRAID Config Management menu.
Choose Physical Drive from the Objects m enu. A device sel ection
window is displayed showing the devices connected to the current adapter.
2. Press the arrow keys to highlight the physical drive to be formatted and
press Enter. An action menu appears.
3. Choose Format from the action men u and respon d to the confir mation
prompt. Formatting can take some time, depending on the drive capacity.
4. When formatting is complete, press any key to return to the previous menu.
73
Page 80

Page 81

4 HP NetRAID Express Tools
Overview
HP NetRAID Express Tools resi d es in the HP NetRAID BIOS, and is therefore
available to all supported operating systems. This utility duplicates many of the
management fun ction s foun d in HP NetRAID Assistan t and HP NetRAID Config.
Because you must restar t th e HP NetServer to start HP NetRAID Expr ess T ools, it
is recommended that you use HP NetRAID Assista nt or HP NetRAID Config
whenever possible.
However, HP NetRAID Expr ess Tools conta ins several options that are not
available with HP NetRAID Assista n t or HP NetRAID Con fig. Use HP NetRAID
Express Tools to view or change the following parameters:
• Adapter Type (also available with HP NetRAID Config)
• Autorebuild
• Battery Functions Status (also available with HP NetRAID Config)
• BIOS Enable/Disable
• Ca ch e Flush Timings
• Diagnostics
◊ On-bo ard memory test
◊ NVRAM test
◊ Parity check
◊ DMA test
◊ Timer test
◊ Interrupt test
◊ Hardwa re regist er te st
• Disk Spin-Up Timings (also available with HP NetRAID Config)
• Emulation
• Initiator ID
75
Page 82

Chapter 4 HP NetRAID Express Tools
• Memory Type (for HP NetRAID-1Si)
• Power Fail Safeguard Parameter (also available with HP NetRAID Config)
• Read Modify Write Mode
• Reset to Default Settings
• SCSI-2 Command Tagging
• SCSI Termination (for HP NetRAID-3Si and integrated HP NetRAID in
HP NetServer LH 3000/3000r, LH 6000/6000r, and LT 6000r; also
available with HP NetRAID Config)
• SC SI Transfer Rate
• Span
• Synchronous Negotiation
• View/Add/Delete Config (also available with HP NetRAID Config)
• Vi r t ual Si zing
This section describes the following topics:
A. Starting and Exiting HP NetRAID Express T ools
B. HP NetRAID Man agement Menu
C. Configuring Arrays and Logical Drives
D. Formatting Physical Drives
E. Changing the HP NetRAID Series Adapter
F. Swapping Physical Drives
A Starting and Ex iting HP NetRAID Express Tools
To start H P NetRA I D Expr ess Too ls
1. Log off all users, close all applications, and power down the HP NetServer.
2. Restart the HP NetServer.
3. When th e following pr om p t appears, press <Ctrl> <M>.
76
Page 83

Chapter 4 HP NetRAID Express Tools
Option: Experienced users may press <Ctrl> <M> for
HP NetRAID Express Tools now.
Firmware Initializing
When the system stops scanning, HP NetRAID Express Tools starts
immediately.
To exit HP NetRA ID Express Tools
1. Press Esc at the Tools Management menu.
2. Choose Yes at the prompt .
3. Restart the HP NetServer.
B HP NetRAID Express T ools Manage ment Menu
The HP NetRAID Express Tools Mana gement menu options are described below.
• The Config ure m enu provides several options for configuring physical
arrays and logical drives.
• The Initialize option initializes one or more logical d r ives.
• The Objects menu individually accesses adapters, logical dri ves, and
physical drives.
• The Format option low-level formats selected hard disk drives.
• The Rebuild option rebuilds failed disk drives.
• The Check Consiste nc y option ensures that parity or mirroring is correct
for the selected logical drive and remedies inconsistencies as necessary.
• The Disable/Enable BIOS option disables the BIOS to boot off th e
embedded SCSI instead of the adapter. The default setting is Enabled.
• The Change Adapter s option lets you select an adapter if more than one is
installed.
• The Alarm Control option is available for HP NetRAID-1Si and
HP NetRAID-3Si. It lets you enable/disable the onboard tone generator or
silence it.
77
Page 84

Chapter 4 HP NetRAID Express Tools
NOTE For internal mass storage in HP NetServer LH 3000/3000r,
LH 6000/6000r, and LT 6000r, SCSI ID 5 is reserved for the
SAF-TE processor that manages the hot-swap mass storage
cage.
For an external mass st orag e encl osure with a SAF-TE
processor, a SCSI I D i s reserved for that process or. The
number of the reser ved S C SI ID varies with the type of
external enclosu re.
The SAF-TE processor is displ ayed as PROC.
Configure Menu
For information on configuring, refer to "Configuring Arrays and Logical Drives"
in this ch ap ter.
Initialize O ption
You must initialize your logical drives before they can be used. This option
initializes the logical drives by writing zeros to the data fields and generating
corresponding parity fields on drives with RAID levels 3, 5, 30, or 50.
Choosing Initialize from the Tools Management menu opens the Logical Drives
Configured box, which states the properties for the logical drives configured. The
hot key options available at the bottom of the window are:
SPACE-(De)Select, F2-(De)Select All Drives,
F10-Initialize
Select the logical drive(s) you want to initialize with the Spacebar or F2 button,
then press F10 to initialize the logical drives. You are asked to confirm that you
want to initialize the logical drives. Choosing Yes begins initialization. The
Initialize Logical Drives in Progress box opens to report on the progress of the
initialization process.
If you want to cancel the initialization process once you have started it, press the
Esc key. You are asked to confirm that you want to abort initialization.
CAUTION When you initialize logical drives by using the Initialize menu
selection, all data on the physical drives is erased.
78
Page 85

Chapter 4 HP NetRAID Express Tools
Objects Menu
Choose the Objects option fr om the HP Expr ess Tools Mana g ement Menu to
access the adapters, logical drives, physical drives, and SCSI channels
individually. You can also change settings for each object. The Objects submenu
options a re described below.
Adapter
To modify parameters of an HP NetRAID Series adapter or an integrated
HP NetRAID controller, choose Adapter from the Objects menu. After selecting
your adapter, the following submenu is displayed.
• Reset to Default Settings: Resets all user-defined parameters of the
selected adapter to the factory default settings.
• PowerFail Safeguard: If enabled, this feature prevents data loss if the
power fails durin g a re construc tion. T he default setting is Enab led. For a
complete discussion of this feature, see "Power Fail Safeguard Feature" in
Chapter 5, "Reconstructing and Rebuilding the Drive," in this guide.
• Memory Type: Displays the type of memory installed for HP NetRAID.
• Read Modify Write Mode: Selects between Read Modify Write Mode
and Rea d Peer Mode.
◊
The default sett ing is OFF, which selects Read Peer Mode. This is
appropriate if there are three physical drives in the arrays supporting
RAID 5 logical drives.
◊
When set to ON, Read Modify Write Mode is selected. This improves
perform a nce in RA ID 5 log ical dr ives only if the number of physical
drives in the array is four or greater.
∗ Read Modify Write Mode set to ON requires complete initialization
of new logical drives controlled by the adapter.
NOTE The complete initialization required for Read Modify Write
Mode can take up to several hours for a large logical drive.
∗ Changing the Read Modify Write Mode setting to ON immediately
forces consistency checks of all existing logical drives controlled
by the adapter.
79
Page 86

Chapter 4 HP NetRAID Express Tools
◊
For optimal performance of RAID 5 logical drives, use separate
adapters to control arrays with three physical drives and arrays with
four or more physical drives.
• Cha nge Disk Geometry: Changes the layout of logical drives presented to
the NOS. The default set ting is 8 GB, and the alternative is 2 GB. Different
operating systems use d i fferent disk geometri es. Your NOS docum ent at ion
may indicate the disk geometry it uses.
NOTE Changing the disk geometry setting only changes the geometry
of logical drives created after the change. It does not change
the geom etry of exist ing logica l drives.
• Disk Spin-Up Timings: Sets the method and ti ming for spinning up th e
hard disk drives in the HP NetServer. The default setting is Automatic.
• Ca c he Flush Timing s: Sets th e cache flush int erval to on ce every 2, 4, 6,
8, or 10 seconds. The default setting is 4 seconds.
• View/Update Rebuild Rat e: Vi ew or ch ange the Rebuild Rate for the
adapter.
• Diagnostics: The hardw are diagno s tic tool pe rf orms the following
hardware tests:
◊ On-board memory test
◊ NVRAM test
◊ Parity check
◊ DMA test
◊ Timer test
◊ Interrupt test
◊ Hardware register test
• Adapter Type: Displays the adapter type: HP NetRAID-1Si,
HP NetRAID-3Si, or integrated HP NetRAID.
• Emulation: Sets PCI class code to I2O (for I
Storage (for conventional non-I
O mass storage). The d e fault setting is
2
O operation) or Mass
2
Mass Storage.
• Autorebuild: Enables or disables the Autorebuild parameter. For complete
information, s ee " Rebui lding Data" in Chapt er 5 in this guid e.
80
Page 87

Chapter 4 HP NetRAID Express Tools
• Initiator ID: Changes the Initiator ID assumed by the HP NetRAID
controller (adapter) at system boot-up. The default setting is SCSI ID 7.
Logica l Dr iv e
To per for m a logical drive procedure, choose Log ical Drive from the Objects
menu. The logical drive options are:
• Initialize: Initia lizes th e selected logical drive. See " Initial izing Logical
Drives" in this chapter for more information.
• Che ck Consistency: Ensures that parity or mirroring is correct for the
selected d rives. C lick on the logical drive to be checked. RAID levels 3, 5 ,
30, an d 50 u s e an ex tr a drive to store parity data blocks; parity is ch eck ed
between these par ity data blocks and the sel ected drives. RAID levels 1
and 10 use duplicate data drives (mirroring); the duplicate data is verified.
Check Consistency should be run if the system shuts down irregularly,
such as if the system hangs or suffers a power failure. It is also
recomm ended that you run consi s t ency checks every two to four weeks to
ens ure that bad blocks on the d isk drive are mapped out. Check
Consistency always remedies inconsistencies. Check Consistency will fail
only if the firmware could not complete parity and data writes due to a
power-failure or a system hang, or if the logical drive degraded or failed
when the physical drives went offline.
• Properties: Displays the selected logical drive properties of RAID level,
size of the logical disk, stripe size, Write Policy, Read Policy, Cache
Policy, Virtual Sizing, power-on rights, number of stripes, and state.
Physical Drive
Selecting Physical Drive opens the Physical Drive Selection menu. The hard disk
drives in the HP NetServer are listed. Hot key functions are displayed at the
bottom of the window. To access drive information, press F2, and view logical
drives by pressing F3. Use th e ar row keys to move the cursor to the desired
device, and pr e s s Enter to display the following options.
• Rebuild: Rebuild s the selected disk drive.
• Format: Low-level formats the selected disk drive. Choose the Format
option only if:
◊ The disk drive was not low-level formatted at the factory
◊ Ther e is an exces s ive number of media errors detect ed on the disk dri ve
81
Page 88

Chapter 4 HP NetRAID Express Tools
NOTE You do not need to use the Format option if you simply want to
erase existing information on your hard drives, such as a DOS
partition. Choosing the Intialize menu selection, and
initializing the logical drive(s) erases that information.
• Make Online: Chang es the stat e of th e s elected di s k dr ive to Online.
• Fail Drive: Changes the state of the selected d isk drive to Fail. One Fail ed
physical drive changes the logical drive as follows:
◊ Optimal RAID 1, 3, 5, 10, 30, or 50 logical drives change to Degraded.
◊ Degraded RAID 1, 3, 5, 10, 30, or 50 logical drives change to Offline.
◊ Optimal RAID 0 logical drives change to Offline.
• Make Hot Spare: Designates the selected disk drive as a hot spare.
• Properties: Displays the selected physical drive properties of Device
Type, Ca pacit y, V e ndor ID, Product ID, Revision , SCSI Standard, and
Device Errors.
• Sy nc hr onous Ne g otia t i on: Disables synchronous negotiation for the
selected physical device. The default is Enabled.
• SCSI-2 Command Tagging: Sets the number of queue tags per target
device to 2, 3, 4, or Enhanced Qtag Scheduling, or it disables command
tagging. The default setting is Enhanced Qtag Scheduling, which allows
the firmware to automatically adjust itself to each target device’s queuing
capabilities and to use this optimized value for the queue depth.
SCSI Channe l
The SCSI Channel option allows you to select a SCSI channel on the currently
selected adapt er . S elect a channel to perform the operati ons descri bed bel o w.
• Terminat e Hig h 8 Bits: Available for HP NetRAID-3Si and integrated
HP NetRAID in HP NetServer LH 3000/3000r, LH 6000/6000r, and
LT 6000r. Enables termination on the selected channel for the upper eight
bits and disable termination on the adapter for the lower eight bits. Use this
setting if the selected SCSI channel is terminated with 8-bit devices at both
ends.
• Terminate Wide Channe l: Available for HP NetRAID-3Si and integrated
HP NetRAID in HP NetServer LH 3000/3000r, LH 6000/6000r, and
LT 6000r. Enables Wide termination for the selected channel. If the
82
Page 89

Chapter 4 HP NetRAID Express Tools
adapt er is at one end of the S C S I bu s for the selected channel, you must
use this option. This is the default set ting.
• Disable Ter minat i on: Available for HP NetRAID-3Si and integrated
HP NetRAID in HP NetServer LH 3000/3000r, LH 6000/6000r, and
LT 600 0r. Disables termina tion on the adap ter for the sel ected channel.
Use this option if the selected SCSI channel is terminated with Wide
devices at both ends.
• Automatic Termination: Available for HP NetRAID-3Si and integrated
HP NetRAID in HP NetServer LH 3000/3000r, LH 6000/6000r, and
LT 6000r. Enables Automatic Termination on the adapter for the selected
channel.
• SCSI Transfer Ra te: I dentifies the SCSI tran s fer rate of the channel. Th e
options are Fast, Ultra, and Ultra2. New parameters become effective on
the next system restart.
Battery Backup
Available for HP NetRAID-3Si, as well as for integrated HP NetRAID in
HP NetServer LH 3000/3000r, LH 6000/6000r, and LT 6000r if accessory Battery
Backup Module is installed. Displays the battery status.
This menu item produces an error message (missing battery) if accessed with the
HP NetRAID-1Si adapter or integrated HP NetRAID without a Battery Backup
Module. Disregard the message for these cases, because they do not have battery
backup.
Format O ption
Since most SCSI disk drives are low-level formatted at the factory, this step is
usually not necessary.
Formatting a hard drive destroys all data on the drive. Choose the Format option
to low-level format one or more physical drives only if:
• The disk drive was not low-level formatted at the factory.
• There is an exces sive nu mber of media errors detected on the di sk dr ive.
NOTE You do not n eed to use the Format option to erase exist in g
informati on on your SC SI di sk s, such as a DOS partiti on.
Choosing the Initialize menu selection, and initializing your
logical drives erases existing data on the physical drives.
83
Page 90

Chapter 4 HP NetRAID Express Tools
To format a physical drive, it must be in the Fail state. (You can change it to the
Fail state by choosing Objects, then Physical Drive, then Fail Drive.)
To format a hard drive, select Format, then select the drive you want to format
from the drives listed. Press F10 to start the format.
Rebuild Option
Ch oos e the Re build option fr om t he HP NetRAID Expr e s s Tools Managemen t
menu to rebuild one or more failed disk drives. When the Physical Drives
Selection menu opens, choose the drive you want to rebuild by highlighting it.
Press the Spacebar to sel ect the dri ve, F1 0 to start the Rebuild, F2 to vie w d rive
info rmation, and F3 to view logical drives. See "Rebuilding Data" in Chapter 5 for
fu rthe r information.
Check Consis tency Op tion
Choose this option to verify the redundancy data in logical drives using RAID
levels 1, 3, 5, 10, 30, or 50. RAID levels 3, 5, 30, and 50 use an extra drive to
store parity data blocks; parity is checked between these parity data blocks and the
selected drives. RAID levels 1 and 10 use duplicate data drives (mirroring); the
dupl icate data is verified.
When you choose Check C onsistency, the para meters app ear of the existing
logical drives on the current adapter and a selection menu listing the logical drives
by number is displayed.
1. Press the arrow keys to highlight the desired logical drives.
2. Press the Spacebar to select or desel ect a drive for consistency checking.
3. Press F2 to select or deselect all the logical drives.
4. Press F10 to begi n the cons istency check. A progress indicat or for each
selected logical drive is displayed.
5. You may cancel a consistency check in progres s by pressing Esc.
6. When th e consisten cy check is fin ished, pr ess an y ke y to clear th e pr ogress
display and press Esc to return to the Tools Management menu.
Check Consistency should be run if the system shuts down irregularly, such as if
the system hangs or suffers a power failure. It is also recommended to run
consis t ency checks e very two to four weeks to ensu re that bad bl ocks on the disk
drive are mapped out. Check Consistency always remedies inconsistencies. Check
Consistency will only fail if the firmware could not complete parity and data
writes due to a power-failure or a system hang, or if the logical drive degraded or
failed when a physical drive went offline. In an inconsistent stripe, firmware
alway s updates the pa ri ty stripe to restore consistency.
84
Page 91

Chapter 4 HP NetRAID Express Tools
Disable/Enable BI OS Option
This option disables or enables the BIOS firmware. The default setting is Enabled.
If the BIOS is disabled , DOS can not read logical drives , an d you cannot boot from
RAID. You might disable the BIOS in order to boot off the embedded SCSI
inst ead of the adapter.
Change A dapters Option
If you have m ore tha n one HP N e tRAID S e ries a dapte r inst a lled , or if you h ave an
integrated HP NetRAID controller with one or more HP NetRAID Series adapters
installed, use this selection to choose which adapter you want to affect.
Alarm Control Option
This option is available for HP NetRAID-1Si and HP NetRAID-3Si. The two
settings for the onboard tone generator are described below.
◊ Enable/Disable Alarm: Ch oose this opt ion to e nable or dis able the
onboard tone generator. The default setting is Enabled.
◊ Silence Alarm: Thi s s etting stop s the alarm when it goes off.
For complete information, see Chapter 8, "Alarm Control and Audible
Warnings."
C Configur ing Arrays and L ogical Drives
Each configuration method requires a different level of user input. The general
flow of operations for array and logical drive configuration is described below.
1. Designate global hot spares (optional).
2. Create arrays using the available physical drives.
3. Initialize the new logical drives.
Designatin g Driv es as Gl obal H ot Spar es
Global hot spares ar e physical dr ives that ar e p ower ed up along wi th the RAID
drives and remain in a standby state. If a disk drive used in any logical drive fails,
a hot spare can autom atically ta k e its place. Th e da ta on the failed drive is
recon structed onto the hot spare. Hot spares can be used for RAI D levels 1, 3, 5,
10, 30, and 50. Each adapter supports up to eight hot spares.
HP NetRAID Express Tools lets you crea t e global hot spares. Users with
Microsoft Windows NT and Windows 2000 can use HP NetRAID Assistant to
85
Page 92

Chapter 4 HP NetRAID Express Tools
create a hot spare that is dedicated to one specific logical drive. Users with other
opera ting systems d o not have the ability to cr eate hot spares that are d ed icated to
one logical dri ve.
Use one of the two methods described below to designate physical drives as
glob al ho t spares.
• Y ou can creat e a global hot sp are by using the Objects sele ction from the
Management menu.
1. Choose Objects from th e Tools Ma nagement m enu.
2. Select Physical Drive. After scanning devices, the Physical Drive
selection window appears.
3. Use the arrow keys to select a Ready disk drive, and press Enter to
display the acti on menu for the s elected drive.
4. Press the arrow keys t o sel ect Make Hot Spare and press Enter. The
indi cator for th e selected drive changes t o HotSp .
• You can create a gl obal hot spare while creating arrays in Easy
Configuration, New Configuration, or View/Add Configuration mode by
pressing F4.
Creating Arr ays Using Av ailable Ph ysical Driv es
HP NetRAID Express Tools has four configuration options to create arrays and
logical drives:
• Easy Configuration lets you crea te arrays and h ot sp ares, but does n ot
modify an existing configuration. This selection lets you set the following
parameters: RAID level, size of logical drive, stripe size, Write policy,
Read policy, and Cache policy.
NOTE Easy Configuration does not permit array spanning. To do
array spanning, use the "New Configuration" selection.
• Ne w Confi g uration clears the existing configuration on the adapter you
select and lets you create a new configuration. It does permit array
spann in g. For each l ogical drive, you ca n modify these parameters: RAID
level, size of logical drive, stripe size, Write policy, Read policy, Cache
policy, and spanning of arrays.
• Vi ew/Add/Delete Configuration lets you view or add new logical drives
to an existing configuration.
• Clear Configuration deletes all existing configuration information for the
adapter you select.
86
Page 93

Chapter 4 HP NetRAID Express Tools
Creating Arrays by Using Easy Configuration
In Easy Configuration, each array is associated with exactly one logical drive. (It
does not permit array spanning.) Follow the steps described below to create arrays
by using Easy Configuration.
1. Choose Configure fr om the HP NetRAID Expr ess T ools Manag ement
menu.
2. Choose Easy Configuration from the Configur e menu, and th e arr ay
selection menu appears. Hot key information is displayed at the bottom of
the window. The hot key functions are:
Space Add the highlighted drive to the current array.
Enter Stop a d ding drives t o the current ar ray, and con fi g ure the
current logical drive.
F2 Display drive information.
F3 Display the logical drives that have been configured so far.
F4 Designate the highlighted drive as a hot spare.
3. Press the arrow keys to highlight sp ecific ph ysical dr i ves. Press the
Spacebar to add the highlighted physical drive to the current array. The
indi cator for th e selected drive changes from Ready to On lin A[arra y
number]-[drive number]. For example, Onlin A2-3 means array 2, disk
drive 3. Add physical drives to the current array as desired.
NOTE Try to use drives of th e s ame capacit y in a sp ecific arr ay. If you
use drives with different capacities in an array, all drives in the
arra y ar e treated as i f they have the capacity of th e s mallest
drive in the array.
The num ber of physical drives in a specific arr ay determin es the RAID
levels that can be implemented with the array.
4. Press Enter when you have finished adding drives to the current array. The
Logical Drive Configuration window appears, prompting you to confirm
the configuration settings. The window shows the logical drive that is
currently being configured as well as any existing logical drives. The
column he ad ings are, from left to right:
LD The log ical drive n um ber
RAID The RAID level
Size The logical drive size
87
Page 94

Chapter 4 HP NetRAID Express Tools
#Stripes The number of stripes (physical drives) in the associated
physical array
StrpSz The stripe size
DriveState The state of the logical drive
5. To set the RAID level for the logical drive, highlight RAID and press
Enter. The available RAID levels for the current logical drive are
displayed. Select a RAID level and press Enter to confirm.
6. Set the stripe size, Write policy, Read policy, and Cache policy from the
Advanced Menu.
• Stripe size: This parameter specifies the size of the segments written to
each di s k in a RAID logical dr ive.
• Write Policy: This option sets the caching method to Write-Back or
Write-Through.
• Read-Ahead: This option enables the SCSI Read-Ahead feature for the
logical drive. You can set this parameter to Normal, Read-Ahead, or
Adaptive.
• Cache Policy: This parameter sets read cache operation during data
tran s fers involving the selected logical drive.
(For definitions of the Write policy, Read policy, Cache policy, and their
options, see the "Glossary.")
Press Esc to exi t the Advanced Menu.
7. When you have defined the current logical drive, highlight Accept and
press Enter. The array selection window ap pears if th er e are any
unconfigured di s k dr ives left.
8. Rep e at Steps 3 th rough 7 to configure another ar ray and logical drive. Y ou
can configure up to eight logical drives per adapter. When you finish
configuring logical drives, press Esc to exit Easy Configuration. A list of
the cur rently config u red logical drives appears.
After you respond to the Save p rompt, you return to the Confi gure menu.
9. Initialize the logical drives you have just configured. See "Initializing
Logical Drives" in this chapter for more information.
Creating Arrays by Using New Configuration
The New Configuration option allows you to associate logical drives with partial
arrays and/or multiple physical arrays (array spanning).
88
Page 95

Chapter 4 HP NetRAID Express Tools
NOTE The New Configuration option erases the existing
configuration information on the selected adapter.
To create arrays by using New Configuration:
1. Choose Configure from the HP NetRAID Express Tools Management
menu.
2. Choose New Configuration from the Configure menu. An array selection
window is displayed showing the devices connected to the current adapter.
Hot key information appears at the bottom of the window. The hot key
functions are:
Space Add the highlighted drive to the current array.
Enter Stop a d ding drives t o the current ar ray, and con fi g ure the
logical drive.
F10 Display the logical drive configuration window.
F2 Display drive information.
F3 Display the logical drives that have been configured so far.
F4 Designate the highlighted drive as a hot spare.
3. Press the arrow keys to highlight sp ecific ph ysical dr i ves. Press the
Spacebar to add the highlighted physical drive to the current array. The
indi cator for th e selected drive changes from Ready to On lin A[arra y
number]-[drive number]. For example, Onlin A2-3 means array 2, disk
drive 3. Add physical drives to the current array as desired.
NOTE Try to use drives of th e s ame capacit y in a sp ecific arr ay. If you
use drives with different capacities in an array, all the drives in
the arr ay are treated as though they have the ca pa city of the
smallest drive in the array.
The num ber of physical drives in a specific arr ay determin es the RAID
levels that can be implemented with the array.
4. Press Enter when you fin ish creating the current array. To con tinue
defining arrays, repeat Step 3. To begin logical drive configuration, go to
Step 5.
NOTE Before you press F10 to start the configuration of the logical
drive, you must press Enter to end configuration of the array.
89
Page 96

Chapter 4 HP NetRAID Express Tools
5. Press F10 to configure logical drives. The logical drive configuration
window appears, as shown below:
The window shows the logical drive that is currently being configured as
well as any existing logical drives. The column headings are, from left to
right:
LD The log ical drive n um ber
RAID The RAID level
Size The logical drive size
#Stripes The number of stripes (physical drives) in the associated
physical array
StrpSz The stripe size
Drive-StateThe state of the logical drive
6. To set the RAID level for the logical drive, highlight RAID and press
Enter. A list of the available RAID levels for the current logical drive
appears. Select a RAI D level and pr es s Enter to confirm.
7. To set the logical drive size, move the cursor to Size and press Enter. By
default, the logical drive size is set to all available space in the array(s)
being associated with the current logical drive.
• I f you want to create more th an one logical dr ive in an array, set a size
of less than the actual capacity.
• If you want the logical drive to span arrays, but you want it to span
only two or three arrays, rather than the four-array maximum, set a size
that r eflects the n um ber of arra ys you want to span.
8. Open the Advanced menu to set the remaining options.
• Stripe Size: This parameter specifies the size of the segments written
to each di s k in a RAI D logical drive.
• Write Policy: This option sets the caching method to Write-Back or
Write-Through.
• Read-Ahead: This option enables the SCSI Read-Ahead feature for the
logical drive. You can set this parameter to Normal, Read-Ahead, or
Adaptive.
• Cache Policy: This parameter sets read cache operation during data
tran s fers involving the selected logical drive. Y ou can set this
parameter to Cached IO or Direct IO.
90
Page 97

Chapter 4 HP NetRAID Express Tools
(For definitions of the Write policy, Read policy, Cache policy, and their
options, see the "Glossary.")
Press Esc to exi t the Advanced Menu.
9. Highlight Span and press Enter to set the spanning mode for the current
logical drive. The options are:
• CanSpan: Array spanning is enabled for the current logical drive. The
logical drive can occupy space in up to four arrays.
• NoSpan: Array spanning is disabled for the current logical drive. The
logica l drive can occupy space in only one arra y.
If you select CanSpan, HP NetRAID Express Tools attempts to span up to
four arrays. Array spanning stops when:
• It has created a logical dri ve of the size you s peci fy in Step 7 above .
• The next sequentially numbered array has a different number of drives.
(Spanned arrays must contain the same number of drives in each array.)
For example, assume Array 1 contains four disk drives. Also assume that
Arrays 2 and 3 have four disk drives, but Array 4 has three disk drives.
HP NetRAID Express Tools will span Arrays 1, 2, and 3 but not Array 4.
10. When you are finished defining the current logical drive, highlight Accept
and press Enter. If there is space remaining in the arrays, the next logical
drive to be configured appears. To configure another logical drive, repeat
Steps 6 t o 9. If the array spa ce h as been used up , a list of the existing
logical drives appears. Press any key to continue and respond to the Save
prompt.
11. Initialize the logical drives you have just configured. See "Initializing
Logical Drives" for more information.
Creating Arrays by Using View/Add/Delete Configuration
View/Add/Delete Configuration allows you to add new arrays to an existing
configu ration. The new arrays you create can use array spanning. Th e existing
configuration is left intact, so you can use this selection simply to look at the
current configuration.
1. Choose Configure fr om the HP NetRAID Expr ess T ools Manag ement
Menu.
2. Choose View/Add/Del e te Configuration from the Configure menu. An
array selection window is displayed showing the devices connected to the
91
Page 98

Chapter 4 HP NetRAID Express Tools
current adapter. Hot key information appears at the bottom of the window.
The hot key functio ns are:
Space Add the highlighted drive to the current array.
Enter Stop a d ding drives t o the current ar ray, and con fi g ure the
logical drive.
F2 Dis p lay the manufacturer da ta and the adap ter error coun t
for t he highlighted drive.
F3 Display the logical drives that have been configured.
F4 Designate the highlighted drive as a hot spare.
F10 Display the logical drive configuration window for the
current array.
3. Press the arrow keys to highlight Ready physical drives. Press the
Spacebar to associate the highlighted physical drive with the current array.
The ind icator for the selected drive chan g es from Ready to On lin A[array
number]-[drive number]. For example, Onlin A2 -3 means ar r ay 2, disk
drive 3.
Add physical drives to the current array as desired.
NOTE Try to use drives of th e s ame capacit y in a sp ecific arr ay. If you
use drives with different capacities in an array, all the drives in
the arr ay are treated as if they ha ve the capacity of the smallest
drive in the array.
The num ber of physical drives in a specific arr ay determin es the RAID
levels that can be implemented with the array.
4. Press Enter when you are finished creating the current array. To continue
defining arrays, repeat Step 3. To begin logical drive configuration, go to
Step 5.
NOTE Before you press F10 to start the configuration of the logical
drive, you must press Enter to end configuration of the array.
5. Press F10 to configure logical drives. The logical drive configuration
window appears, as shown below:
The window shows the logical drive that is currently being configured as
well as any existing logical drives. The column headings are, from left to
right:
92
Page 99

Chapter 4 HP NetRAID Express Tools
LD The log ical drive n um ber
RAID The RAID level
Size The logical drive size
#Stripes The number of stripes (physical drives) in the associated
physical array
StrpSz The stripe size
Drive-StateThe state of the logical drive
6. To set the RAID level for the logical drive, highlight RAID and press
Enter. The available RAID levels for the current logical drive appear.
Selec t a RAID level and press Enter to confirm.
7. Set th e s pan ning mode for the curren t logical drive. Highlight Span and
press Enter. The ch oi ces are:
• CanSpan: Array spanning is enabled for the current logical drive. The
logica l drive can occupy space in more than one array.
• NoSpan: Array spanning is disabled for the current logical drive. The
logica l drive can occupy space in only one arra y.
If you select CanSpan, HP NetRAID Express Tools will attempt to span up
to four arrays. Array spanning stops when:
• It has created a logical drive of the size you specify in Step 8 below.
• Th e next sequentially numbered array has a different number of drives.
(Spanned arrays must contain the same number of drives in each array.)
For example, assume Array 1 contains four disk drives. Also assume that
Arrays 2 and 3 have four disk drives, but Array 4 has three disk drives.
HP NetRAID Express Tools spans Arrays 1, 2, and 3 but not Array 4.
8. To set the logical drive size, move the cursor to Size and press Enter. By
default, the logical drive size is set to all available space in the array(s)
being associated with the current logical drive. If you set the Span
parameter to CanSpan in Step 7, the current logical drive will use all space
in the current arra y, and all spa ce in the spanned arr ays.
• If you want to creat e more than one log ical dri ve in an array, set a size
of less than the actual capacity.
• If you want the logical drive to span arrays, but you want it to span
only two or three arrays, rather than the four-array maximum, set a size
of less that reflect s the number of arrays you wan t to span.
93
Page 100

Chapter 4 HP NetRAID Express Tools
9. Open th e A d vanced menu t o set the remaining options.
• Stripe Size: This parameter specifies the size of the segment written to
each di s k in a RAID logical dr ive.
• Write Policy: This param eter specifi es the cache write policy. You can
set the write policy to Write-Back or Write-Through.
• Read-Ahead: This parameter enables the SCSI Read-Ahead feature for
the logical drive. You can set this parameter to Normal, Read-Ahead,
or Adap t ive.
• Cache Policy: This parameter sets read cache operation during data
tran s fers involving the curr en t logical dr ive.
(For definitions of the Write policy, Read policy, Cache policy, and their
options, see the "Glossary.")
Press Esc to exi t the Advanced Menu.
10. When you are finished defining the current logical drive, highlight Accept
and press Enter. If there is space remaining in the arrays, the next logical
drive ready to be configured appears. Repeat Steps 6 to 9 to configure
another logica l drive. If the ar ray space has been used up, a li st of t he
existing logical drives appears. Press any key to continue and respond to
the Save prompt.
11. Initialize the logical drives you have just configured. See "Initializing
Logical Drives" in this chapter for more information.
Initializing Log ical Driv es
You must initialize each new logical drive you configure. The Initialize menu
selection initializes the logical drives by writing zeros to the data fields and
generating corresponding parity fields on drives with RAID levels 3, 5, 30, or 50.
You can in itialize t he logical d riv es in two ways:
• Batch Initialization: The Initialize option in the Tools Management menu
lets you initialize up to eight logical drives simultaneously.
• Indi vidual Initialization: The Objects/Logical Drive action menu for an
individual logical drive has an Initialize option.
Batch In itiali zati on
To initialize logical drives by using the batch initialization procedure, following
these st eps:
94
 Loading...