

Page 1

EN
HP Designjet T1120 SD-MF P
Quick reference guide
TR
HP Designjet T1120 SD-MF P
Hızlı başvuru kılavuzu
CS
HP Designjet T1120 SD-MF P
Stručná referenční příručka
HU
HP Designjet T1120 SD-MF P
Felhasználói gyorska lau z
Page 2

EN
You can nd legal and warranty information on the CD. Further information is available at HP’s support Web
site (http://www.hp.com/go/knowledge_center/).
Legal notices
The information contained herein is subject to change without notice. The only warranties for HP Products and
services are set forth in the express warranty statement accompanying such products and services. Nothing herein
should be construed as constituting an additional warranty. HP shall not be liable for technical or editorial errors or
omissions contained herein.
TR
CD'de yasal ve garanti ile ilgili bilgiler mevcuttur. Diğer bilgiler HP’nin destek web sitesinde
(http://www.hp.com/go/knowledge_center/) bulunmaktadır.
Yasal bildirimler
Burada yer alan bilgiler önceden bildirilmeden değiştirilebilir. HP ürün ve hizmetleri için yalnızca söz konusu ürün
ve hizmetlere eşlik eden açık garanti belgelerinde belirtilen garantiler geçerlidir. Burada kullanılan hiçbir ifade ek
garanti olarak yorumlanamaz. HP, bu belgedeki teknik hatalardan veya yazım hatalarından ya da eksikliklerden
sorumlu tutulamaz.
CS
Na disku CD naleznete právní ujednání a informace o záruce. Další informace jsou k dispozici
na webu podpory společnosti HP (http://www.hp.com/go/knowledge_center/).
Právní informace
Informace v tomto dokumentu mohou být změněny bez předchozího upozornění. Jediné záruky poskytované
k produktům a službám HP jsou výslovně uvedeny v prohlášení o záruce, které se dodává společně s těmito
produkty a službami. Žádné z informací uvedených v tomto dokumentu nemohou sloužit jako podklad pro
vyvození dalších záruk. Společnost HP nenese odpovědnost za případné technické či redakční chyby ani
opomenutí v tomto dokumentu.
HU
A CD-lemezen jogi tudnivalókat és a jótállással kapcsolatos információkat találhat. További információ
a HP terméktámogatási webhelyén található (http://www.hp.com/go/knowledge_center/).
Jogi kitételek
Az itt található információk előzetes értesítés nélkül megváltozhatnak. A HP termékekre és szolgáltatásokra
vonatkozó garanciákat kizárólag az ilyen termékek és szolgáltatások kifejezett garancianyilatkozatában rögzítettek
szerint vállaljuk. Az itt talált információk semmilyen módon nem tekinthetők további garanciának. A HP nem felelős
az itt található semmilyen technikai vagy szerkesztési hibáért vagy kihagyásért.
Page 3

Table of conten ts
1 Introduction
Using this guide .............................................................................................. 1
Scanner software ............................................................................................ 2
Scanner .......................................................................................................... 3
Documentation and help ............................. ............ .......... .............................. 3
2 Basic operations
Turn the scanner on or off .............................................................................. 4
Load and eject documents ...................... ........................................................ 5
Set a destination folder for scans ................................................................... 6
Copy a document ............................................................................................ 8
Scan to a file ................................................................................................... 9
Batch scan and batch copy ............................ ............................................... 10
Specify the original type and make image adjustments ................................ 11
Set input and output sizes ............................................................................ 13
Preview copies and scans ............................................................................ 15
Set the output quality .................................................................................... 17
Create a media profile .................................................................................. 19
View, move, rename or delete scanned files ................................................ 21
System setup and options ............................................................................ 22
EN
3 Maintenance
Clean the glass plate and the scanning area ................................................ 25
Calibrate the scanner ........................ ....... ..................................................... 27
Calibrate the touch screen pointer ............................. ............. ............ .......... 29
Replace the scanner glass plate .................... ............................................... 29
4 Troubleshooting
The system reports an error ......................................................................... 30
There is a paper jam ........................................................... .......... .......... .. .... 30
Streaks in the scanned image ...................................................................... 32
Lines in the scanned image appear too thin or discontinuous ...................... 33
Cannot connect or scan to a destination folder on the LAN ......................... 33
Image cropped—not whole image scanned ................................................. 34
A media profile cannot be generated ............................................................ 34
My color matching results are not optimal .................................................... 35
I need to update or recover the system ........................................................ 35
ENWW
Page 4

The system software is in the wrong language ............................................. 36
Install new system software .......................................................................... 37
Index ............................................................................................................................... 39
ENWW
Page 5
1Introduction
Using this guide
This guide is organized into the following chapt ers.
1. Introduction: This chapter provides a brief introduction to the software,
scanner device and available documentation.
2. Basic operations: This chapter helps you to carry out various common
procedures.
3. Maintenance: This chapter helps you to carry out various calibration and
maintenance procedures.
4. Troubleshooting: This chapter helps you to solve probl ems that may occur
while scanning.
5. Index: In addition to the table of contents, there is an alpha betic al inde x to
help you to find topics quickly.
Warnings and cautions
Symbols are used in this manual to ensure the proper use of the printer and to
prevent printer damage. Follow the instructions that are marke d with these symbols.
WARNING! Failure to follow the guidelines that are ma rked with this symbol could
result in serious personal injury or death.
CAUTION: Failure to follow the guidelines that are marked with this symbol could
result in minor personal injury or damage to the product.
Introduction
ENWW
Using this guide
1
Page 6

Scanner software
Introduction
The scanner software runs automatically w hen you turn on the touch sc reen. The
main screen is divided into the following sections:
Main menu area
●
Right bar, top: the task buttons
●
Right bar, bottom: the function buttons
●
Task buttons
Press this button to set the program in the copy (scan to printer) task mode.
Press this button to set the program in the scan (scan to file) task mode.
Press this button to open progra m settings and preference menus.
Function buttons
File manager: Opens the File Manager dialog box.
Online help: Provides detailed information on many topics. Opens instructions related to
your current task.
Stop: Cancels the current activity.
Start scan/copy: Init i ate s the copy or scan, dep end i ng on whic h task bu tton has bee n
selected.
2 Chapter 1 Introduction ENWW
Page 7
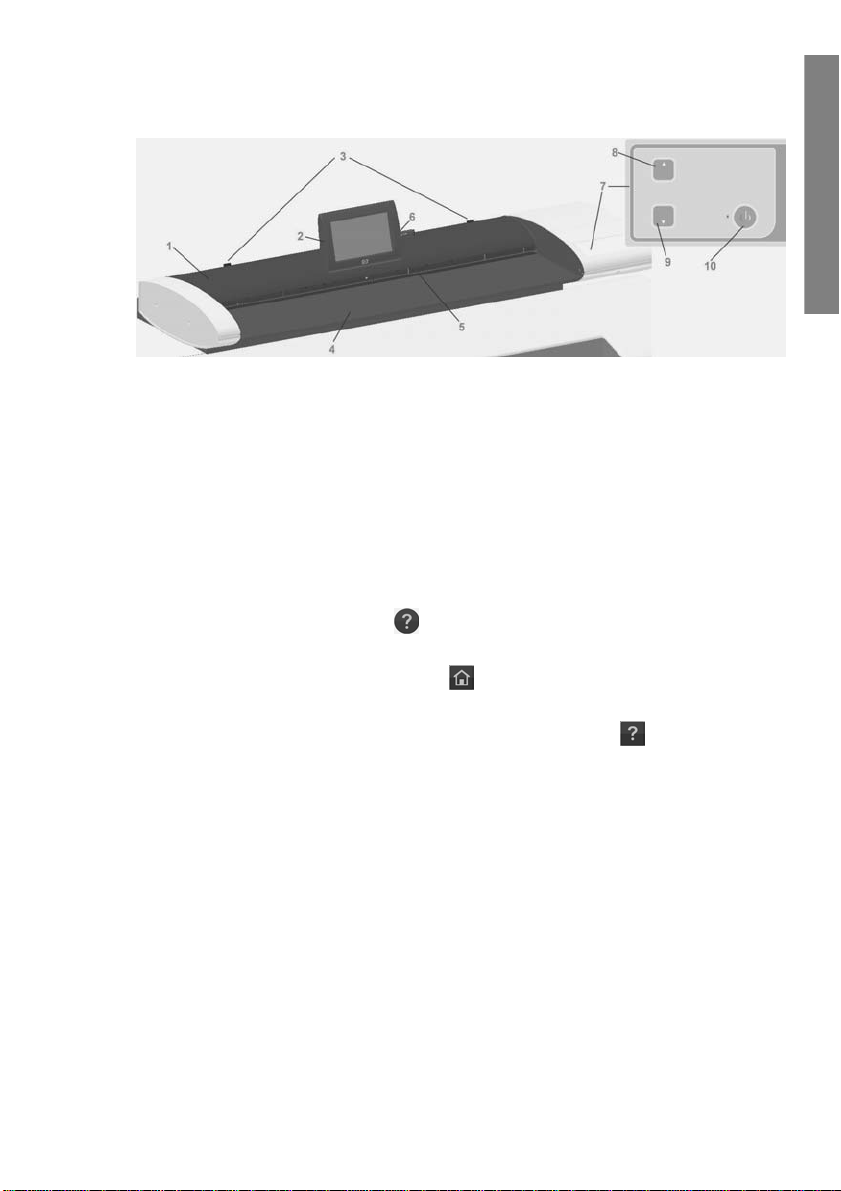
Scanner
Introduction
1. Scanner lid
2. Touch screen for scan/copy appl ication
3. Release buttons for opening scanner lid
4. Scanner bed: paper feed area
5. Insertion slot for document feeding
Documentation and help
This Quick Refere nce Guide pr ovides a brief overvie w of the sys tem an d softwa re.
The Online Help function button
general help on the current task (Scan, Copy, Options).
The online help window’s Home button
links to online help sections and topics .
In many dialogs you will find a Context-sensitive Help button
instructions specifically related to the current dialog and its options.
6. USB port
7. Operator's panel
8. Paper forward button
9. Paper backward button
10. Power button and indicator
opens the online help window and displays
will take you to a table of contents with
that will open
ENWW
Scanner
3
Page 8
2 Basic operations
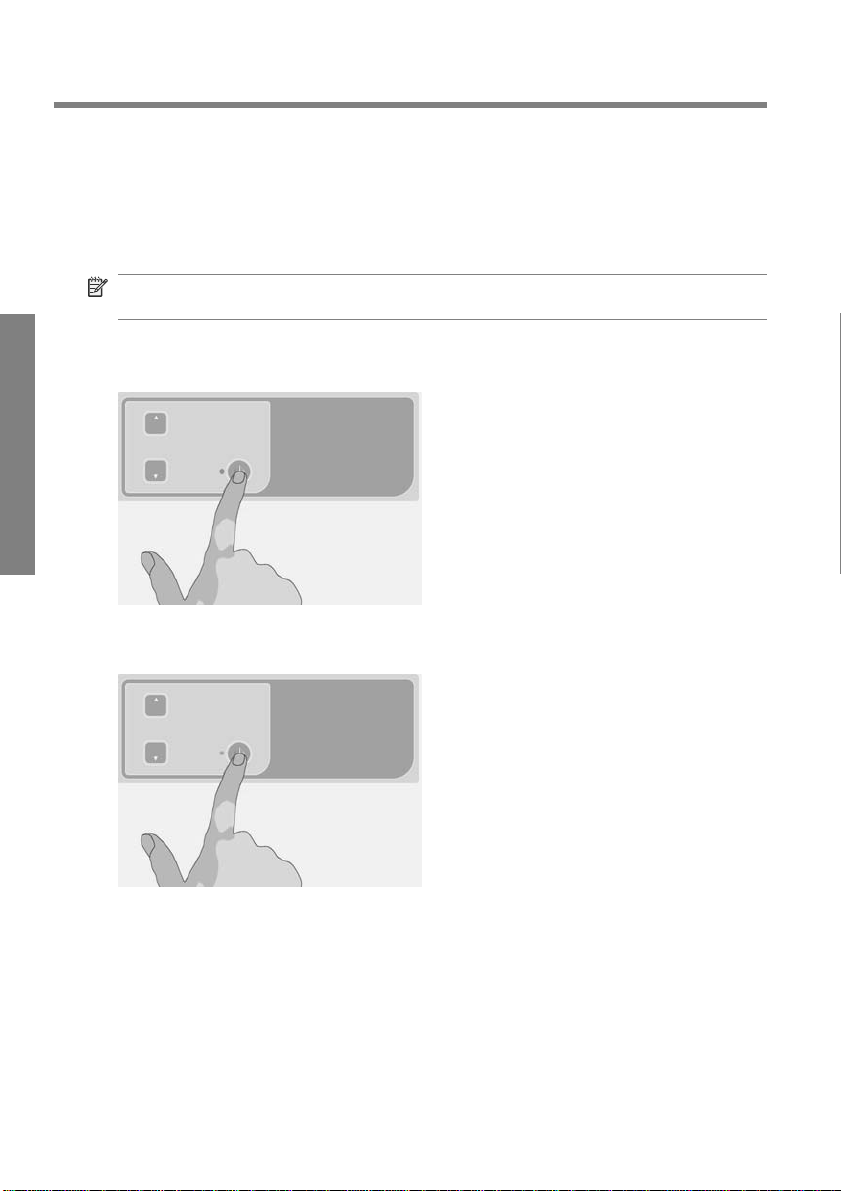
Turn the scanner on or off
The system (scanner, screen and software) can be turned on or off by pressi ng the
power button on the scanner operation panel.
NOTE: The printer has a separate power on/off button. Normally this button is
always left turned on and is not pressed in connection with restarting the system.
Turn on
Basic operations
Turn off
Press the power button. The power LED shows a green light.
Press the power button. The power LED blinks and then turns off.
Restart
Press the power button to turn the system off and then press it again to turn the
system on.
4 Chapter 2 Basic operations ENWW
Page 9

Load and eject documents
Load document
1. Load your document with the image side facing upwards. Align the center of
the document with the center arrow mark on and above the scanner bed.
2. Use the standard size markings to help align the docum ent for a straight sc an
path.
3. Push the original into the insertion slot until you feel it contact the rollers.
4. The scanner will automatically grab the original and move it into start-scan
position.
Eject document
Press the Paper Backward button to eject the original back to the scanner
●
feeding bed (towards you).
Basic operations
ENWW
Load and eject documents
5
Page 10
Press the Paper Forward button if you wish to eject the original out the back
●
of the scanner.
Set a destination folder for scans
Basic operations
The instructions below describe how to set up and select a destination folder in
which you will save your scan-to-fi le outpu t. Desti nations are folders on com puters
known to your system through the local network (LAN) or folders on a USB flash
drive inserted in the touch screen.
1. Make sure your system and any in tended destinati on computers are c orrectly
set up on your local network (LAN). Configurat ion of your system on the LAN
is carried out through the Options > Advanced Options > Network menu.
This is a system administrator option that may require a password.
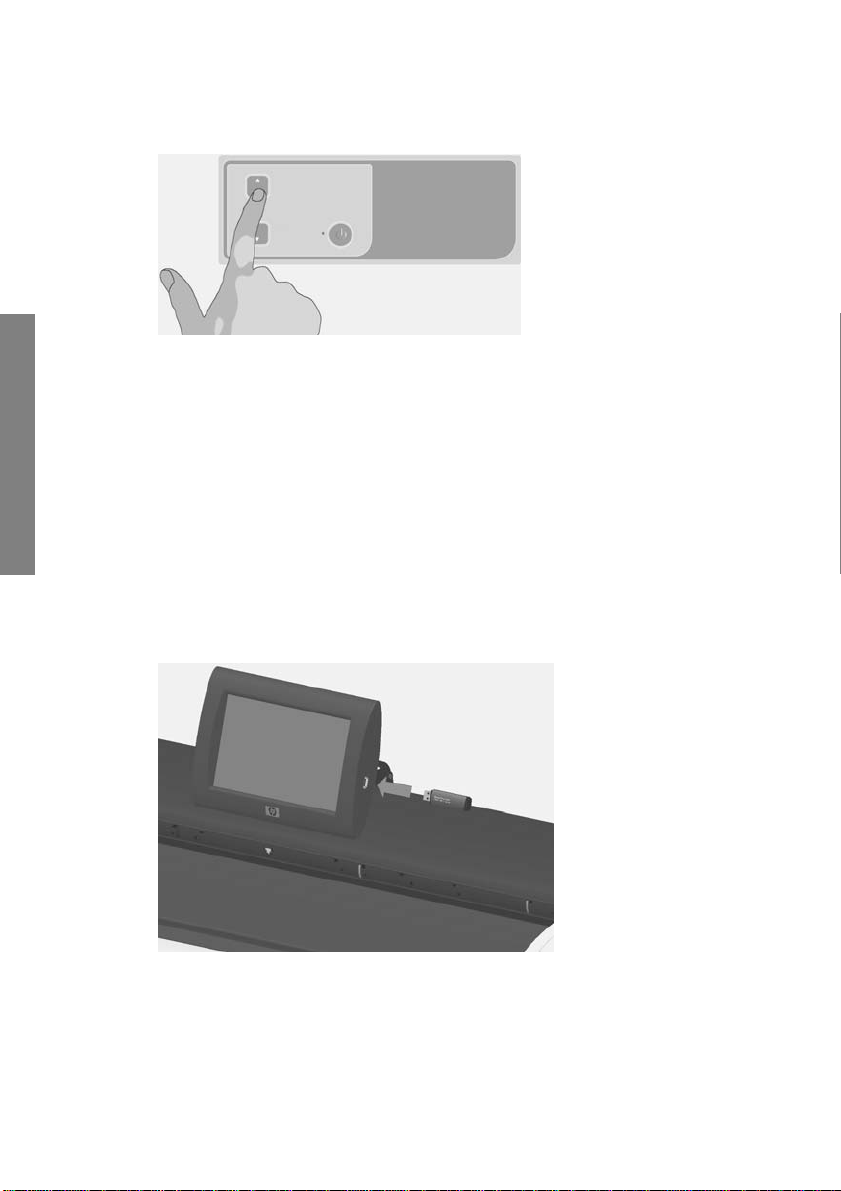
2. If you wish to save your scans on a USB flash drive, press the Scan button
and insert the drive into the USB port on the touch screen. The system will
detect the drive and enquire whether you want to set/change the destination
to USB.
3. To access the destination setup options, pres s Options > Advanced
Options > Manage Destinations. From there you can selec t, add and change
destinations.
6 Chapter 2 Basic operations ENWW
Page 11

Select a destination
Select a destination from the list of destinations previ ousl y creat ed and sa ved on
the system. If there are no destinations ava ilabl e, or y ou w ant to use a desti nation
that is not on the list, you will have to add a new destination. Press the USB
destination if you want to scan to an inserted USB flash drive.
Add a new destination
Press the Add button to enter desti nation details. Enter values in the Label, Network
Path, Domain, Username and Password fields. Select Remember if you want to
save the destination password in t he sy st em. Leave Remember unselected if you
want users to enter the password to connect to the destination. Press Test
Connection to check your settings.
Change (edit) a destination
Press the Change button and edit the Label, Network Path, Domain, Username
and Password fields. Select Remember if you want to save the destination
password in the system. Leave Remember unselected if you want users to enter
the password to connect to th e des tina tion. Press Test Connection to check your
settings.
Remove a destination
Select a destination from the Destinations list and press the Remove button.
Basic operations
ENWW
Set a destination folder for scans
7
Page 12
Copy a document
Follow the steps below to make a copy (scan to print).
1. Insert and feed your document into the scanner, with the side to be scanne d
facing upwards.
2. Make sure the printer is turned on and the intended media is loaded.
NOTE: To copy, you need a media profile fo r the loade d media. The sy stem
comes with a set of media pro f iles for the m os t co mm only - use d m edia. If y ou
need to create a new media profile, see
on page 19.
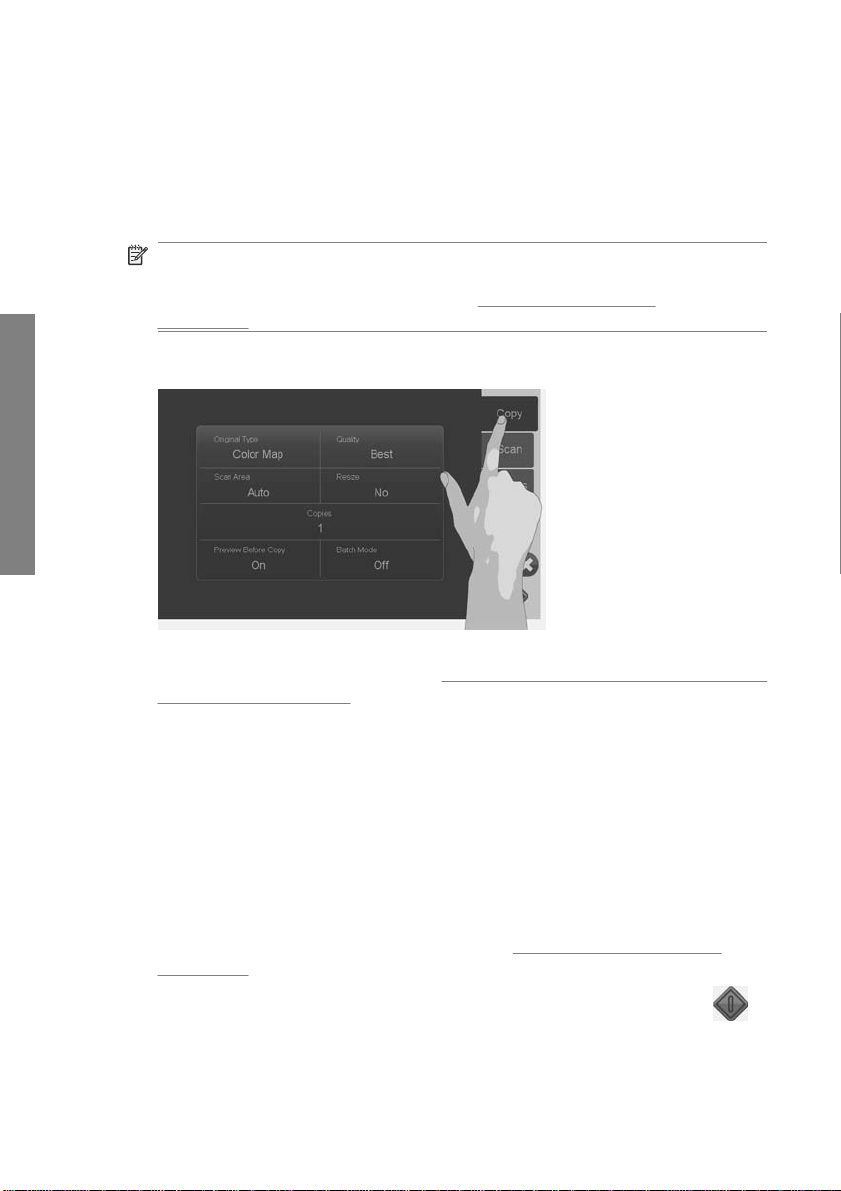
3. Press the Copy button to acc ess the copy (sc an to print) settings and bu ttons.
Basic operations
The Copy dialog is shown below.
4. Press the Original Type button and select the type that matches your
document and required output. See
adjustments on page 11.
5. Press the Quality button and select the desired quality of your output.
6. Press the Scan Area button to set the size of the image capture area. If you
wish to capture the whole image, select Auto and the system will mea sure
and set the size for you.
7. Press the Resize button to determine the size of the printed copy. Set to No
if you want a 1:1 copy.
8. Press the Copies button to select how many cop ies you want printed with the
job.
9. Toggle the Preview before Copy button to On if you want to control settings
before committing the job to the printer. See
on page 15.
10.
When you have made your settings, press the Start Sca n/Copy butt on
start copying.
Create a media profile
Specify the original type and make image
Preview copies and scans
to
8 Chapter 2 Basic operations ENWW
Page 13

See also:
Set and preview image adjustments on page 15
●
Set input and output sizes on page 13
●
Set the output quality on page 17
●
Scan to a file
Follow the steps below to scan to file.
1. Insert and feed your document into the scanner with the side to be scanned
facing upwards.
2. Press the Scan button to access the scan to file settings and buttons. The
Scan dialog is shown below.
3. Press the Original Type button and select the type that matches/describes
your document. See
on page 11.
4. Press the Quality button and select the scan resolution.
5. Press the Scan Area button to set the size of the image capture area. If you
wish to capture the whole image, select Auto and the system wi ll measure
and set the size for you.
6. Press the File Format button to determine the file form at, su ch as JPG or
TIFF.
7. Press the File Name button to enter a name for the destinat ion file.
8. The Destination button shows where your scan output file w ill be crea ted.
Press the Destination button if you want to select a different dest ination.
9. Toggle the Preview before Scan button to On if you want to control your
settings before saving to file. See
10.
When you have made your settings, p ress the Start Scan /Copy button
start scanning.
Basic operations
Specify the original type and make image adjustment s
Preview copies and scans on page 15.
to
ENWW
Scan to a file
9
Page 14
See also:
Set and preview image adjustments on page 15
●
Set input and output sizes on page 13
●
Set the output quality on page 17
●
Set a destination folder for scans on page 6
●
Batch scan and batch copy
With batch scanning and batch copying y ou can c ontin uous ly feed new originals
into the scanner and the system will start proc essing right away withou t waitin g for
you to press the Start Scan/ Copy button. Th e system will apply the current se ttings
Basic operations
to all documents. If you are scanning to file, your files will automatically be named
with increasing numbers.
1. Lay your originals face up, near the scanner so they are easily reached .
2. Make your scan or copy settings. These will apply for all the originals in the
batch.
3. Press the Batch Mode button to turn batch mode to On.
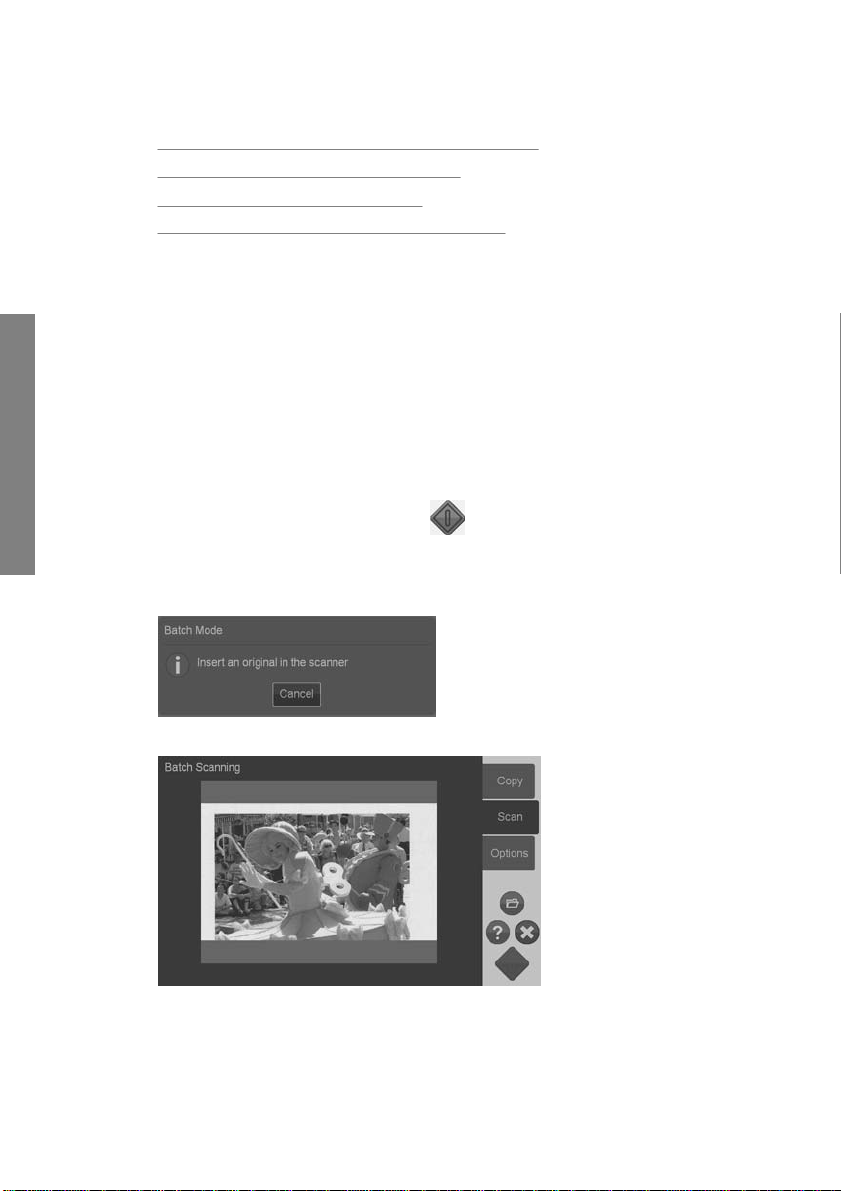
4.
Press the Start Scan/Copy button
5. If you have already loaded the first original, the syste m will sta r t scanning or
copying. If not, the Batch Mode dialog will ask you to insert the first origina l
into the scanner.
.
6. When you insert the first original, the system will star t scanning it right aw ay .
10 Chapter 2 Basic operations ENWW
Page 15
7. When an original is scanned, it is ejected. The Batch Mode dialog returns and
asks for the next original.
8. Remove the ejected original and feed the next one.
9. Continue to feed originals until finished wi th the bat ch.
10. Press the Batch Mode dialog’s Cancel button to abort batch mode.
NOTE: Previewing is disabled when in Batc h Mod e.
NOTE: To ensure fas t loading i n batch m ode, the scanner w ill automatic ally ejec t
each original after it is sc anned. The setting in Options > Basic Options > Rewind
after scan will determine the direction. If the option is s elec ted, s cann ed origin als
will be ejected towards the front and if the option is not selected, scanned orig inals
will be ejected out the back.
Specify the original type and make image adjustments
Basic capture parameters are set when you select Original Type. You can then
adjust specific factors such as imag e brightn ess , sharp ening and back groun d
cleaning level. The adjustments available will depend on the Original Type
selection.
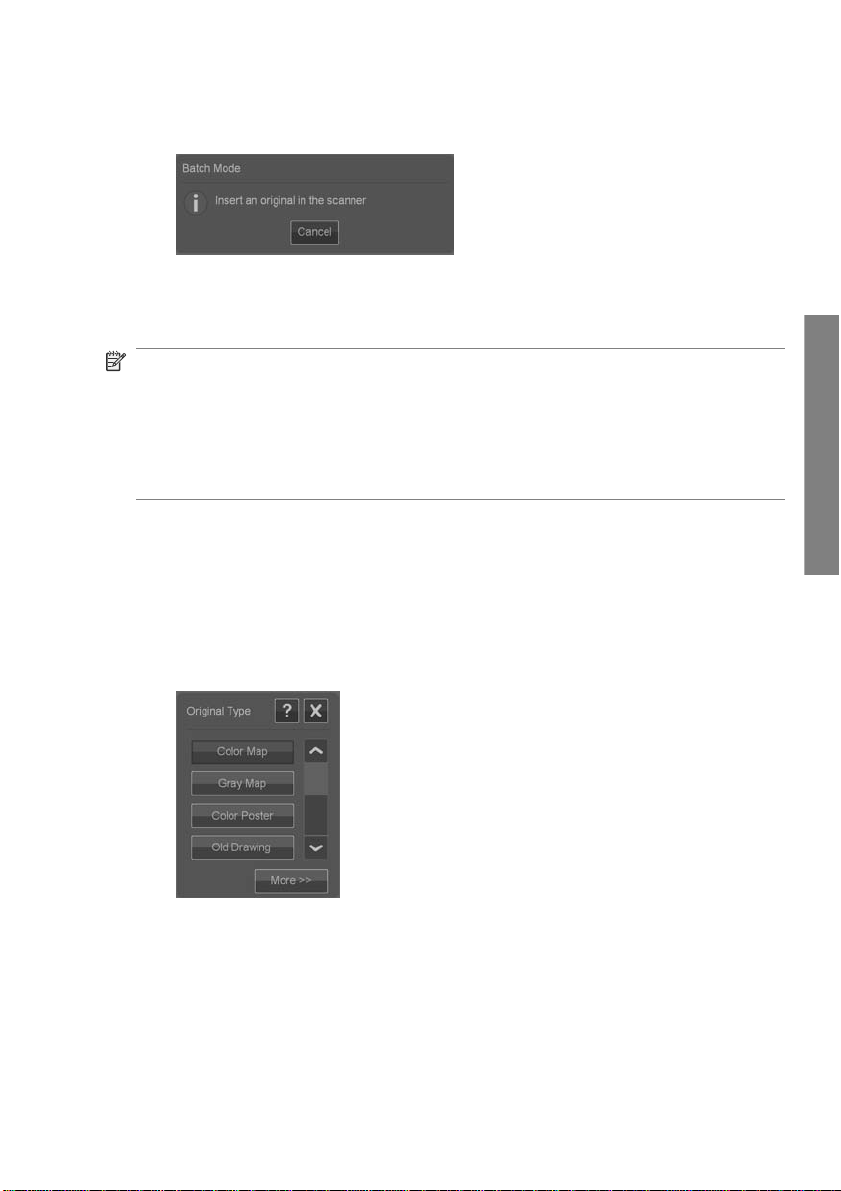
1. Press the Scan or Copy button and then the Original Type button to reac h
the Original Type selection list.
Basic operations
ENWW
2. Select an Original Type that best describ es yo ur origina l.
Specify the original type and make image adjustments
11
Page 16

Basic operations
Original Type Description
Color Lines Suitable for color CAD drawing s and gra phi cs wi th a hig h le vel of de tai l.
Applies image processin g to clea n t he ba ckgr oun d and sharp en l i ne s. 24- bi t
color scan.
Gray Lines Suitable for grayscale CAD drawings and graphics with a high level of detail.
Applies image processin g to clea n t he ba ckgr oun d and sharp en l i ne s. 8-b i t
grayscale scan.
B&W Lines Suitable for clean B&W CAD drawings and graphics with a high level of detail.
Especially useful for scan-to-file as file sizes are minimal compared to color
and gray original types. Minimal application of image processing for a neutral
and fast scan.1-bit B&W scan.
Color Map Suitable for color maps such as topogr aph i c map s, roa d maps or other
document types that contain fill areas and a high level of detail. Applies image
processing to sharpen details . 24 -bit color scan.
Gray Map Suitable for grayscale maps such as topograp hic maps, ro ad m aps or othe r
document types that contain fill areas and a high level of detail. Applies image
processing to sharpen details. 8-bit gr aysca le scan .
Color Poster Suitable for color photos and posters of good quality. Minimal application of
image processing for a neutral and fast scan. 24-bit color scan.
Old Drawing Suitable for faded and creased drawings with low contrast between the
foreground and background . Appl ies i m age processi ng to clean t he
background and sharpen lines. 8- bit gr aysca le scan .
12 Chapter 2 Basic operations ENWW
Page 17
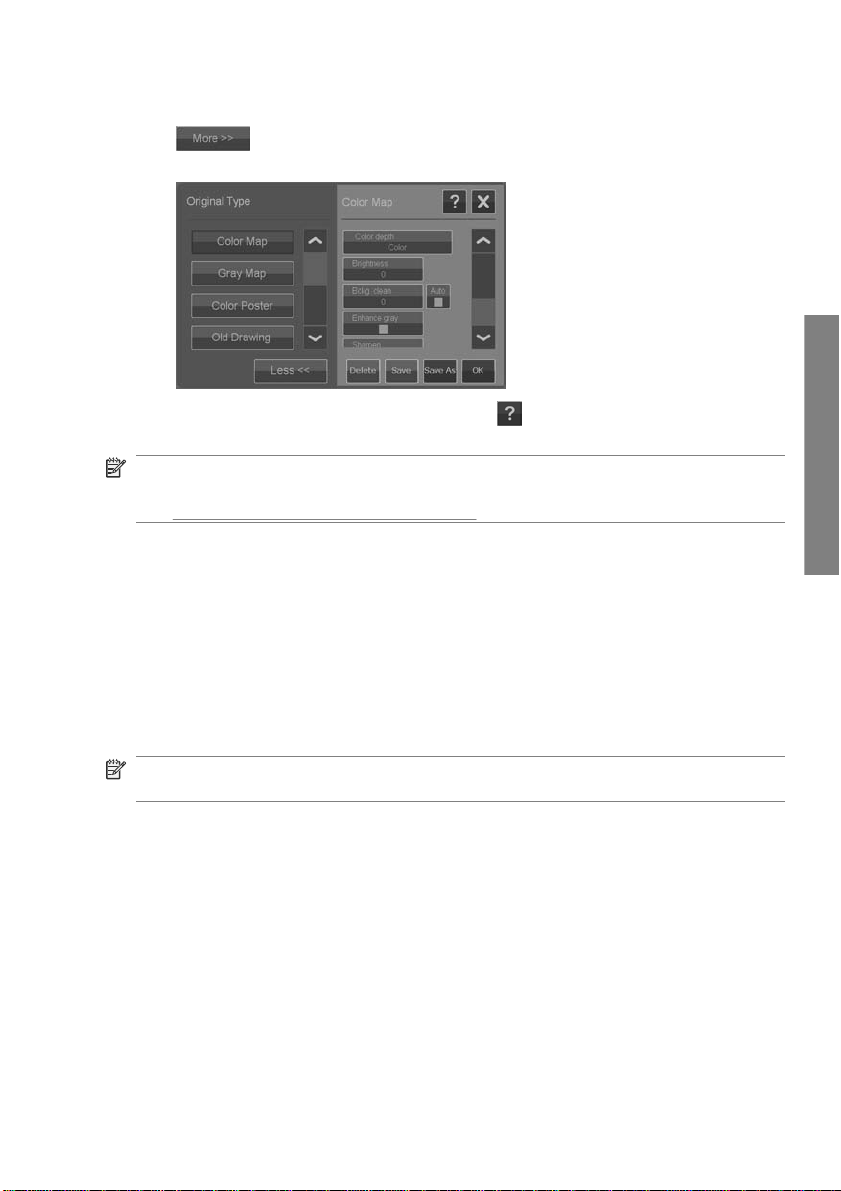
3. You can fine-tune the Original Type settings (optional): Press the More button
to expand the Original Type dialog and make adjustment options
relevant to the selected Original Type. Press OK when done.
4.
Press the Context-sensitive Help button
each setting and about saving your settings as a new custom Original Type.
NOTE: You can press the Preview Before Scan/Copy button and then the
Adjustment button to mak e image adjust ments and view the effects on yo ur screen.
Preview copies and scans on page 15.
See
for additional information about
Set input and output sizes
The "Scan Area" is your input s ize and defin es how much of the i mage is capture d.
Often, this will be equal to the total size of the orig inal. However, there may be cases
when you only want to scan a p ortion of the original or wish the capture area to be
equal to a certain standard size.
When copying, you can also determine the output size (the size of the ima ge in your
printed copy) through the Resize setting. You can choos e No resize to use the
current Scan Area size for a 1:1 copy, or you can select a different size in order to
reduce or enlarge the printed image in relation to the Scan Area size.
NOTE: When scanning, the image’s size in the output file is always equal to the
Scan Area size (1:1).
Set the Scan Area (input size) for Copy and Scan
When in the Scan or Copy screens, press the Scan Area button to view the Scan
Area size list.
Basic operations
ENWW
Set input and output sizes
13
Page 18
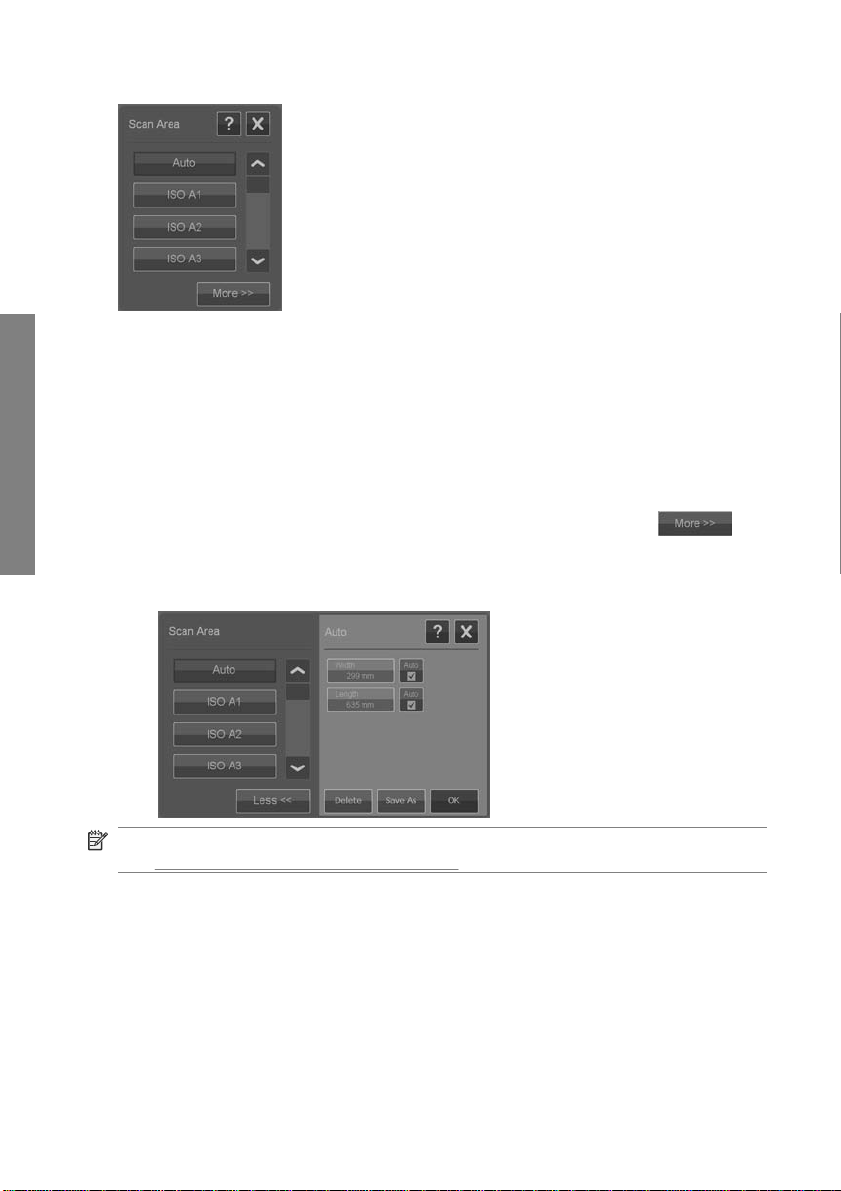
The list offers different methods you can use to determine the Scan Area siz e:
Auto: The program will automatically detect the size of the full docu men t
Basic operations
●
loaded in the scanner. You can use the preview to check that the scanner has
detected the size correctly.
Use a standard or custom size: The dialog c onta ins a l ist of standard sizes
●
and custom sizes saved on the system. Scroll through the lis t and selec t the
size you want to use. To create a new custom size, follow the ins truct ions
below.
●
Set size values for width and length: Press the More button
expand the Scan Area dialog. Make your wi dth and l ength siz e sett ings in the
fields or set Auto on width or length separately. You can save your changes
to create a new custom size or use them for the current job only.
NOTE: You can also set the Scan Area visually on th e screen through a preview.
Preview copies and scans on page 15.
See
Set the Resize value (output size) for Copy only
1. Press the Resize button.
2. Select No if you do not want to resize the image: that is, you want the end
result to be the same size as the Scan Area.
3. Press the Size button to select a st andard size (such as A2 or A4 ) fro m a lis t.
4. Select Scale to resize according to a scale factor (such as 50% or 32%).
to
14 Chapter 2 Basic operations ENWW
Page 19
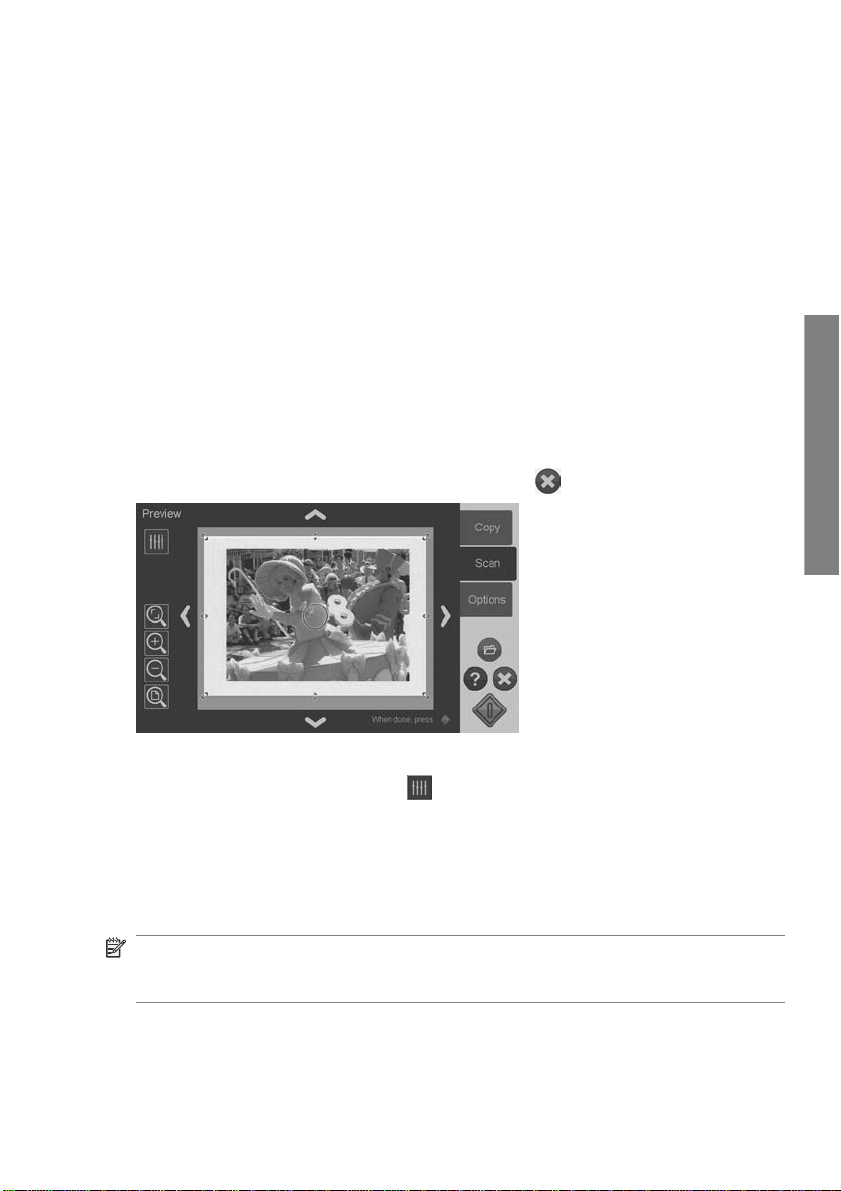
Preview copies and scans
You can preview your copies and scans before committing them to the printer or
file system. With previewing you can:
Make image adjustments that are relevant for your selected Original Type,
●
such as brightness and sharpening, and view the effec ts of thes e on your
screen.
Visually set the Scan Area (input size) using handles to drag and posit ion a
●
Scan Area frame on the image.
Zoom in and out to evaluate specific image areas and the effects of your
●
settings.
Load a preview scan or copy
1. Load your original and press the Preview Before Scan/Copy button to turn
preview mode to On.
2. Press the Scan or Copy button to load the preview.
3.
You can at any time press the Cancel button
to close the preview.
Basic operations
Set and preview image adjustments
1.
Press the Adjustment button
2. Make your settings in the adjustmen ts dia log.
3. Press the OK button to close the adjustments dialog and see the effects of
your settings on the p review. Use the zoom tools to inspect details and area s
of interest.
4. Repeat steps 1–3 if you need to readjust your settings.
NOTE: The effects of the image a djustment s ettings are a pplied and dis played in
the low-resolution preview and hence do not fully represent t he final imag e in the
destination file or printed copy.
ENWW
at the top left corner of the preview screen.
Preview copies and scans
15
Page 20
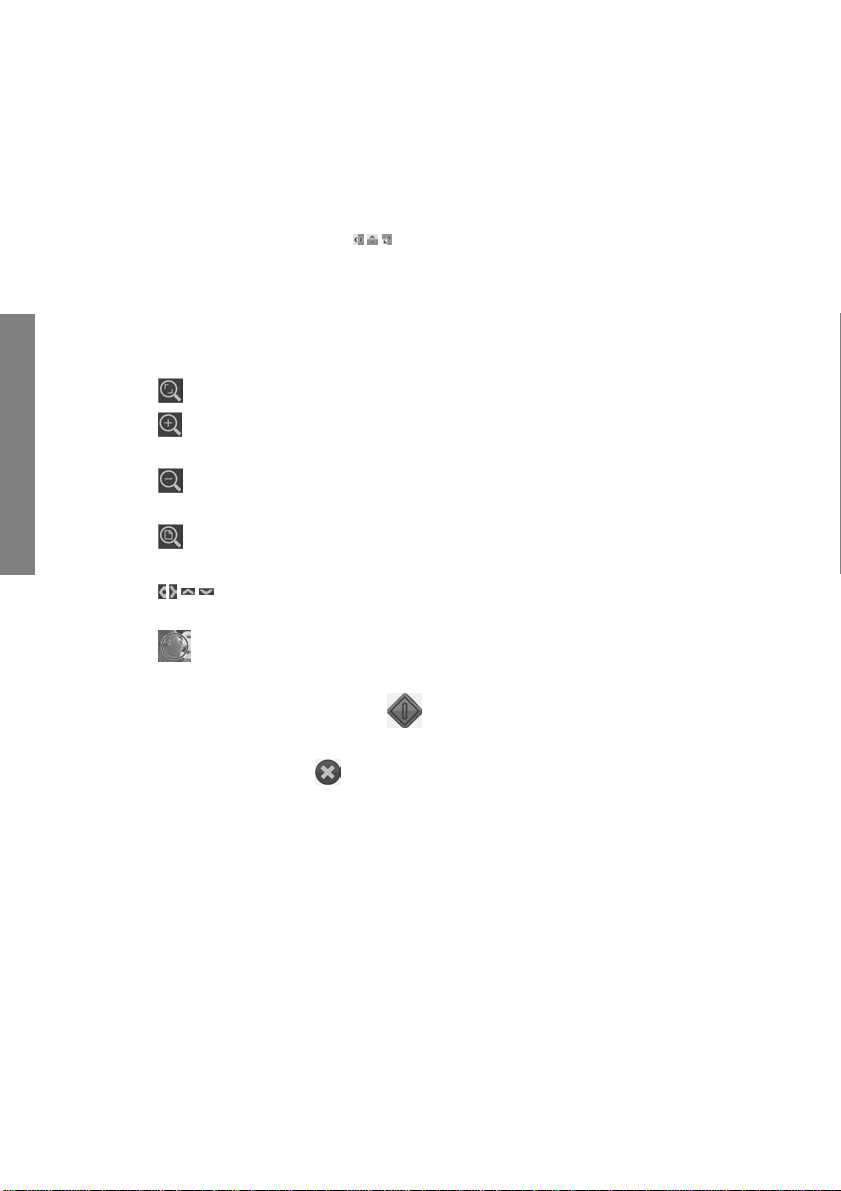
Set and preview the scan area
The preview shows the image inside a white frame. The frame represent s the
current Scan Area (input) size. Changing the frame’s size before sc anni ng w ill
change the Scan Area settings. The frame's size can be adjusted by moving its
borders and corners. To do so you can:
Drag the resize handles
●
Press with your finger on the place where you wish to reposition the neare st
●
border edge or corner. The border will jump to that place.
Use the image zoom and positioning tools to assist you in setting the frame
●
size and positioning the image inside of it. The image zoom and posi tion ing
Basic operations
tools are:
Zoom crop: Snaps to the image as cropped by the borders.
Zoom in: Enlarge the image size in the preview. Zooming is targeted on
the center of the window.
Zoom out: Reduce the image size in the preview. Zooming is targeted on
the center of the window.
Zoom all: Displays the whole capture area without cropping. The borders
positions are defined by the current Origin al siz e set ting.
Image panning tools: Use these arrows to center the captured image
in the window.
Frame center handle (blue circle): Use this to drag the whole size frame
and reposition it on the captured image.
on the frame’s sides and corners.
Press the Start Scan/Copy butt on
to commit the job.
Press the Cancel button
committing the job.
16 Chapter 2 Basic operations ENWW
if you want to abort the preview process without
when you are finished previewing and want
Page 21
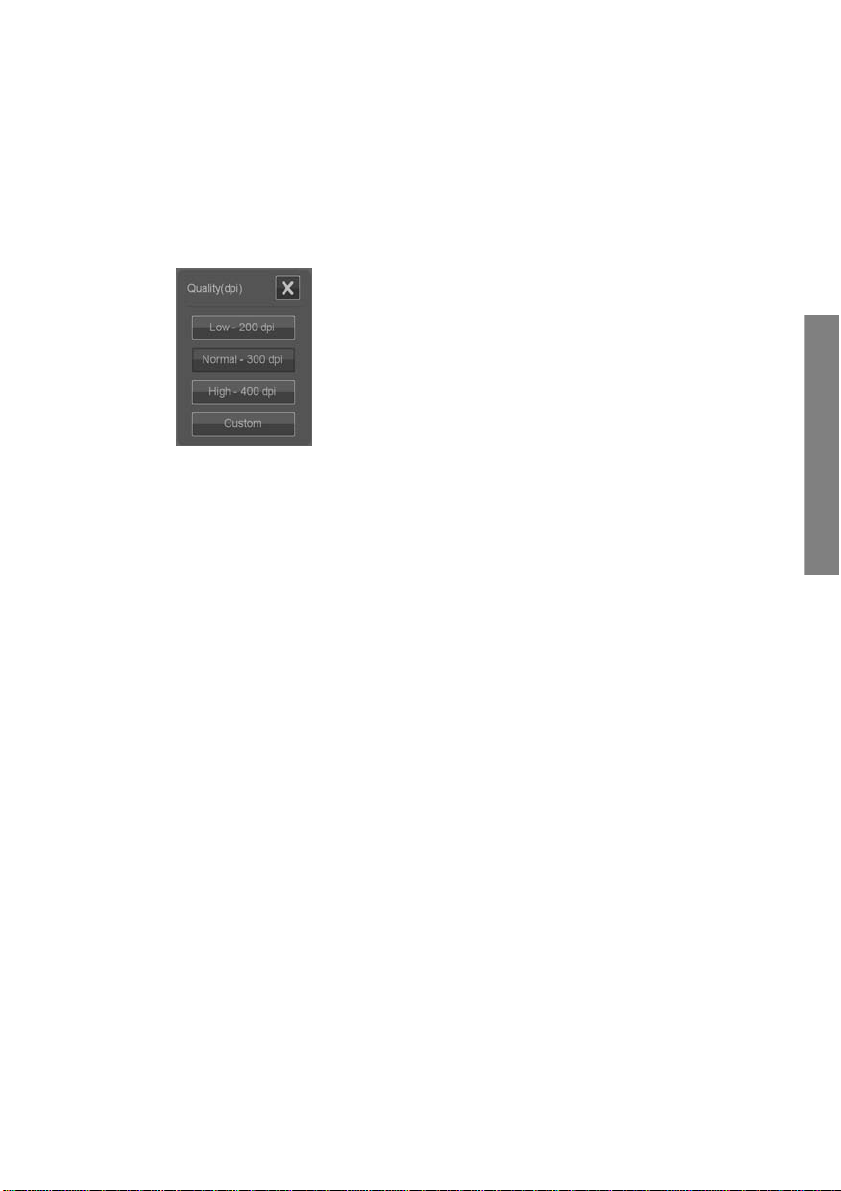
Set the output quality
Set quality when scanning to file
You apply quality settings to scanning (scan to file) in terms of the sc an reso luti on
measured in dots per inch (dpi).
1. Press the Scan button and then the Quality button to open the Quali ty(dp i)
dialog.
2. Use the scroll bar to view available resolutions.
3. Press the button displaying the scan resolution you want to use.
The Custom button opens a list with alternative reso luti ons.
Basic operations
ENWW
Set the output quality
17
Page 22
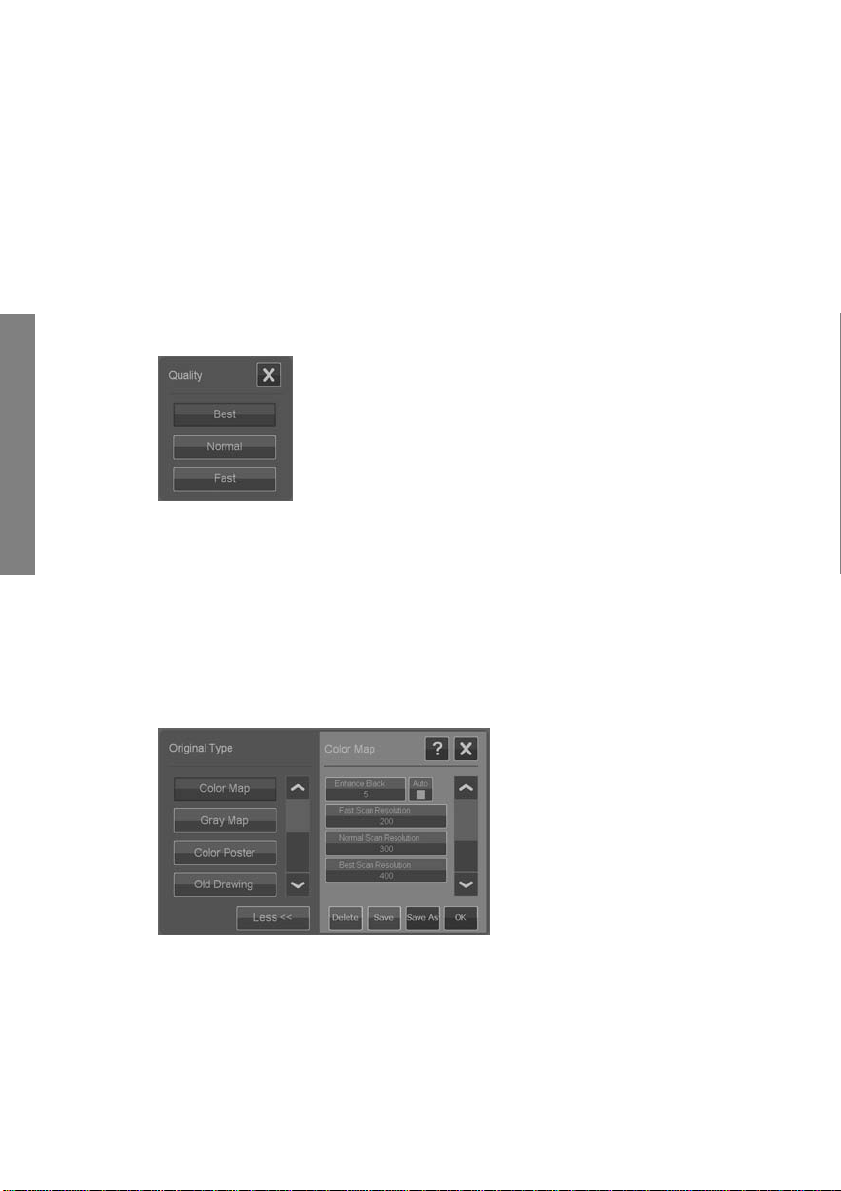
Set quality when scanning to print
When copying (scan-to-print), you set general print-q uality parameters (Fast,
Normal, Best) that apply for the whole copy process (scan and print).
The scan quality is defined by resolutio n (dpi). You can sel ect the scan
●
resolution you want tied to each quality setting (Fast, Normal, Best). This is
done through the Original Type adjustment options (see below).
The print quality parameters that are tied to a quality setting (Fast, Normal,
●
Best) are defined in the printer.
1. Press the Copy button and then the Quality button to open the print Quality
dialog.
Basic operations
2. Select the required quality setting from the list .
Fast is for making a quick draft with minimum use of ink.
●
Normal is good for most copy jobs that require an average quality leve l.
●
Best is for high-quality prints.
●
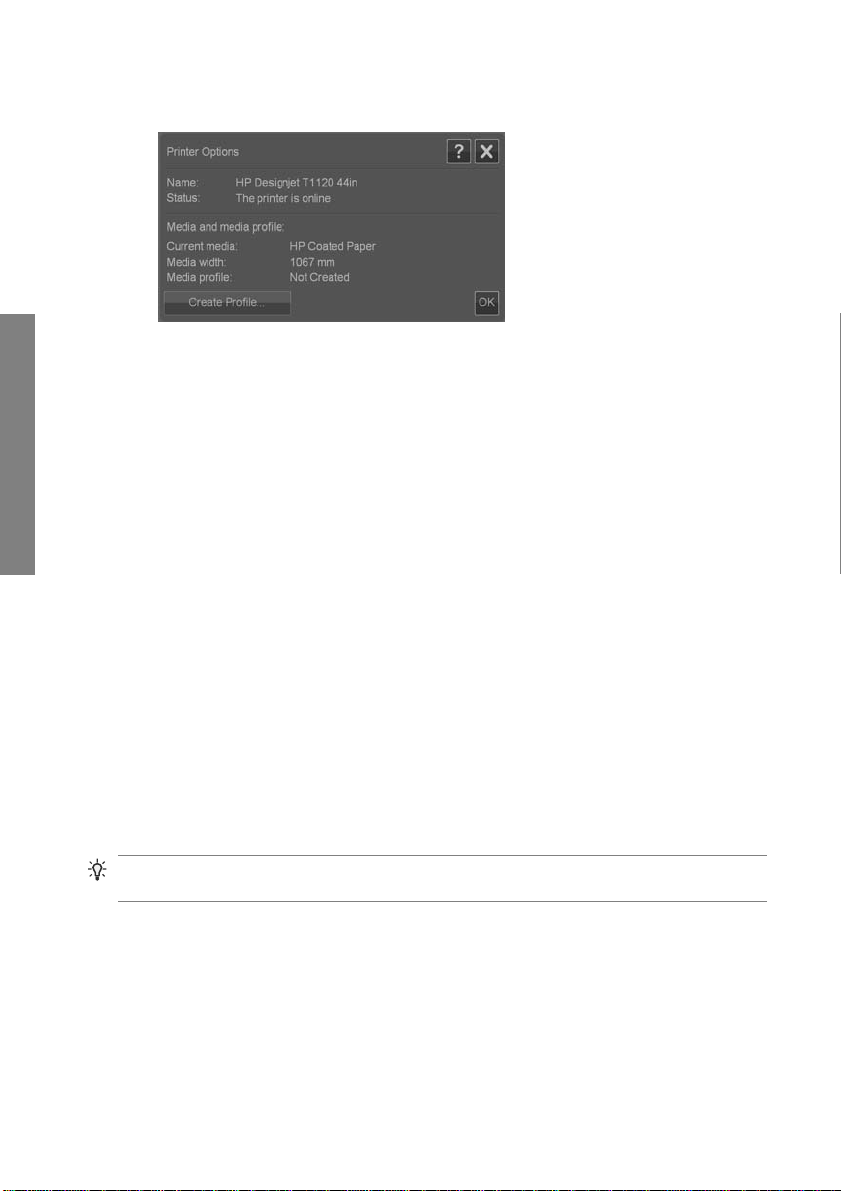
Tie scan resolutions to the Fast, Normal, Best quality settings (scanto-print)
1. Press the Original Type bu tton and then the More button to open t he Original
Type’s adjustment options.
2. Scroll down the list of adjustments to reach the buttons Fast Scan
Resolution, Normal Scan Resolution and Best Scan Resolution.
18 Chapter 2 Basic operations ENWW
Page 23

3. Press a button to open a list of resolution selections.
4. Select the scan resolution you want applied when you choose the named
quality setting (Fast, Normal, Best) with the current Original Type.
Example: Select the Color Poster original ty pe and press the More button to make
adjustments. Press the B est Scan Resolution button and then select 400 dpi. This
means that, thereafter, 400 dpi will be applied as the scan resolution whenever you
use the Color Poster original type and the quali ty s ettin g Copy > Quality > Best.
Create a media profile
Your system supports color matching between scanner, printer and media type
through media profiles. A media profile must exist for each media type (such as
glossy or coated paper) used with your printer.
In most cases, color matchi ng and m edi a profil es are adm inis trated by the system
and their application is transparent for t he user. R ight aft er you load new media on
your printer, you select the media type in the printer’s settings menus. If a media
profile for the media type exis ts, your syst em automatic ally loads it for optimal color
matching of your copy.
There are, however, two cases that will require your attention:
No media profile found: If the system does not already contain a media
●
profile for the current media, you will need to create one. A message dia log
will inform you when you need to create a media profile and display a button
that takes you to the Create Media Profile wizard (see below).
Colors not optimal: Some of the default media profiles supplied with the
●
system are generic and m ay not be optim al with all m edia types. Also, cu rrent
conditions may not be optimal for even specific media profi les . If your trial s
show the need for improved color matching, you should update (renew) the
current media profile through the Create Media Profile w iza rd (see bel ow).
Update (renew) the current media profile
1. Make sure your printer’s media type setting corre sponds t o the loaded m edia.
2. Make a trial copy with the current media profile to evaluate wheth er it needs
to be updated.
Basic operations
ENWW
Create a media profile
19
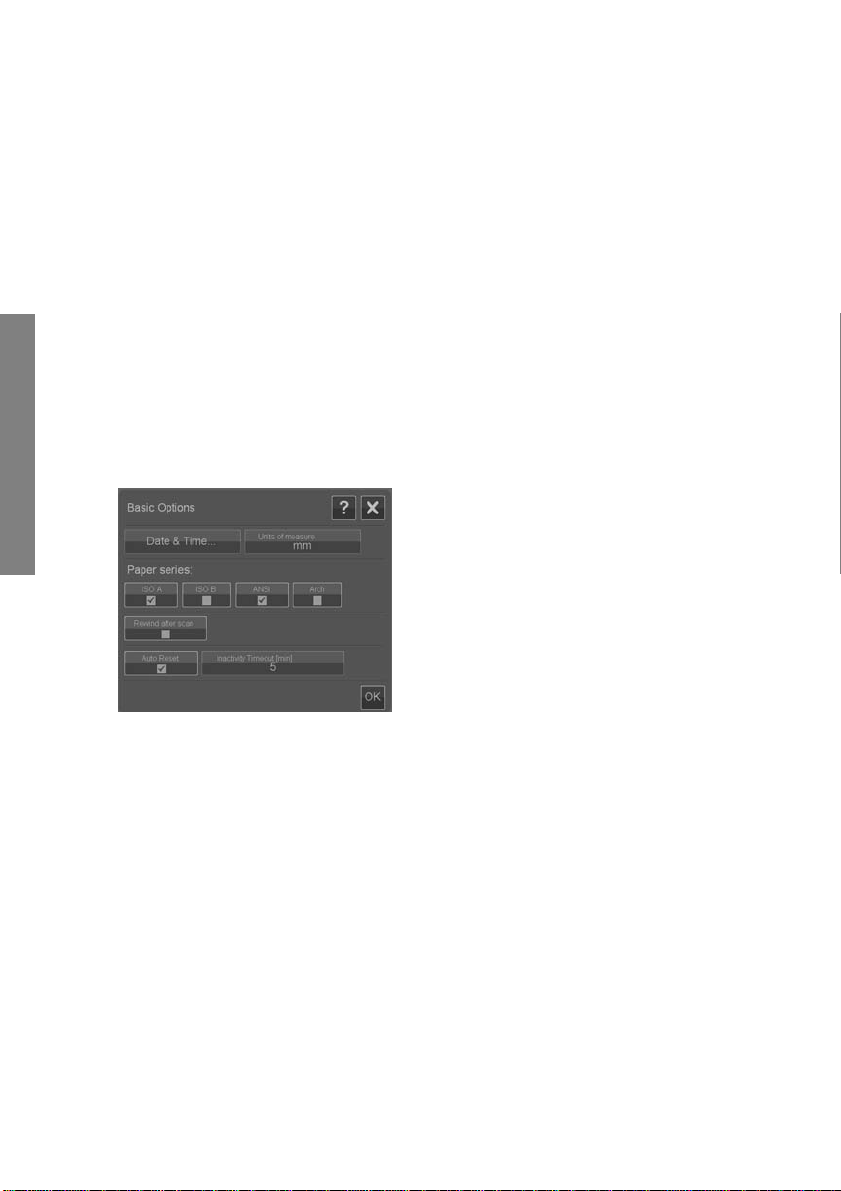
Page 24
3. Press Options > Printer Options.
4. The Printer Options dialog displa ys inform ation about your printer and shows
Basic operations
the Current media which is the media sett ing made on the printer’s main menu.
The Media profile value may show:
Default: The media profile for the current media was supplied with the
●
program and has not been updated.
Created dd-mm-yyyy: The current media profile has been created or
●
updated on the date specified.
Not Created: The system has not found a media profile for the current
●
media.
5. If you see the status Not Created, you need to create a media profi le in order
to make a copy. Press the C reate Pr ofile button to start the Create Media
Profile wizard.
6. If you are satisfied with the media profile status and color matc hing resu lts in
your trials, press OK to close the dialog.
7. If your colors are not optim al in y our trials , press the Update Profile b utton to
start the Create Media Profile wizard.
The Create Media Profile wizard
The wizard is both for creating a new media profi le and for updating an existing one.
Follow the wizard’s instructions on your screen.
The process will require that you print a system-stored color patch sheet and then
scan it. The system will take care of the rest.
TIP: The wizard prints two pages; you should discard the f irst pa ge and scan the
second.
The media profile creation date will be updated when you co mpl ete the proc es s.
20 Chapter 2 Basic operations ENWW
Page 25

View, move, rename or delete scanned files
Your system's scan destinations, on the LAN and on your USB drive, will contain
image files that you will need to access and manage. Access to your image files
takes place through the File Manager dialog.
Open the File Manager
Press the File Manager button .
Browse the file system
The File Manager is limi ted to folders that are defi ned on your system as scan
●
destinations. The file list def aults to the root of your current destin ation fol der.
The Folder Up button (marked ..) will move you up a level until you reach the
●
list of created destination folders.
Click a folder name to move onto its level.
●
Click an image name to display an image thumbnail and basic information
●
about the image.
Select image files for a file action (see below) by checking the box to the left
●
of the image file name.
Basic operations
ENWW
View, move, rename or delete scanned files
21
Page 26
File action buttons
To use the action buttons, check one or more boxes next to file names and then
press the relevant action button.
Copy: To copy one or more selected (check-marked) files to another folder.
●
Move: To move one or more selected (check-marked) files to another folder.
●
Rename: To change the name of a selected (check-marked) file.
●
Delete: To delete one or more selected (chec k-marked) files from the system.
●
New folder: To create a new subfolder in the current folder.
●
All / None: will toggle between chec king and un-checki ng the boxes to t he left
●
Basic operations
of all the file names in the current folder being viewed.
View: Opens a separate window with a larger view of the image file currentl y
●
displayed.
System setup and options
Basic options
Set date and time
Local date and time parameters are entered through the conf iguration program that
is run the first time the system is turne d on. If needed you can change the local date
and time settings through the Options menu.
1. Press Options > Basic Options > Date & Time.
2. Enter the correct local date and time values and time zone. The date and time
settings will be used with various program acti ons.
Units of measure
1. Press Options > Basic Options > Units of measu re.
2. Select the preferred unit (such as inch or mm) to use when defining document
sizes.
22 Chapter 2 Basic operations ENWW
Page 27
Paper series preference
1. Press Options > Basic Options.
2. Select/tick the Paper series fields that represent the paper series you wish
displayed in the size dialogs (Scan Area and Resize). You can s elec t one or
more paper series to display.
Rewind after scan
1. Press Options > Basic Options.
2. Select/tick the Rewind after scan option if you want the document to return
to the paper feed area after it is scanned so that you can eject it backwards
by pressing the paper backward button on the scanner’s panel. Leave the
option unselected if you want the document to hang behind the sc anner so
that you can eject towards the back with the paper forward button.
Auto reset and inactivity timeout
Press Options > Basic Options.
These two options tell the system to re turn automatic ally to default para meters after
a defined idle period—by default, five minutes—so that users will alway s start wi th
the system’s basic settings even if a previous user has changed the m. The system
returns to the saved system parameters: those set when the Options >
Advanced > Save Settings button was last pressed (see below).
Select/tick the Auto Reset option if you want to apply the function. Use Inactivity
Timeout to set the idle time before Auto Reset is triggered.
NOTE: New destinations and media profiles are not affected or lost when Auto
Reset is applied.
Basic operations
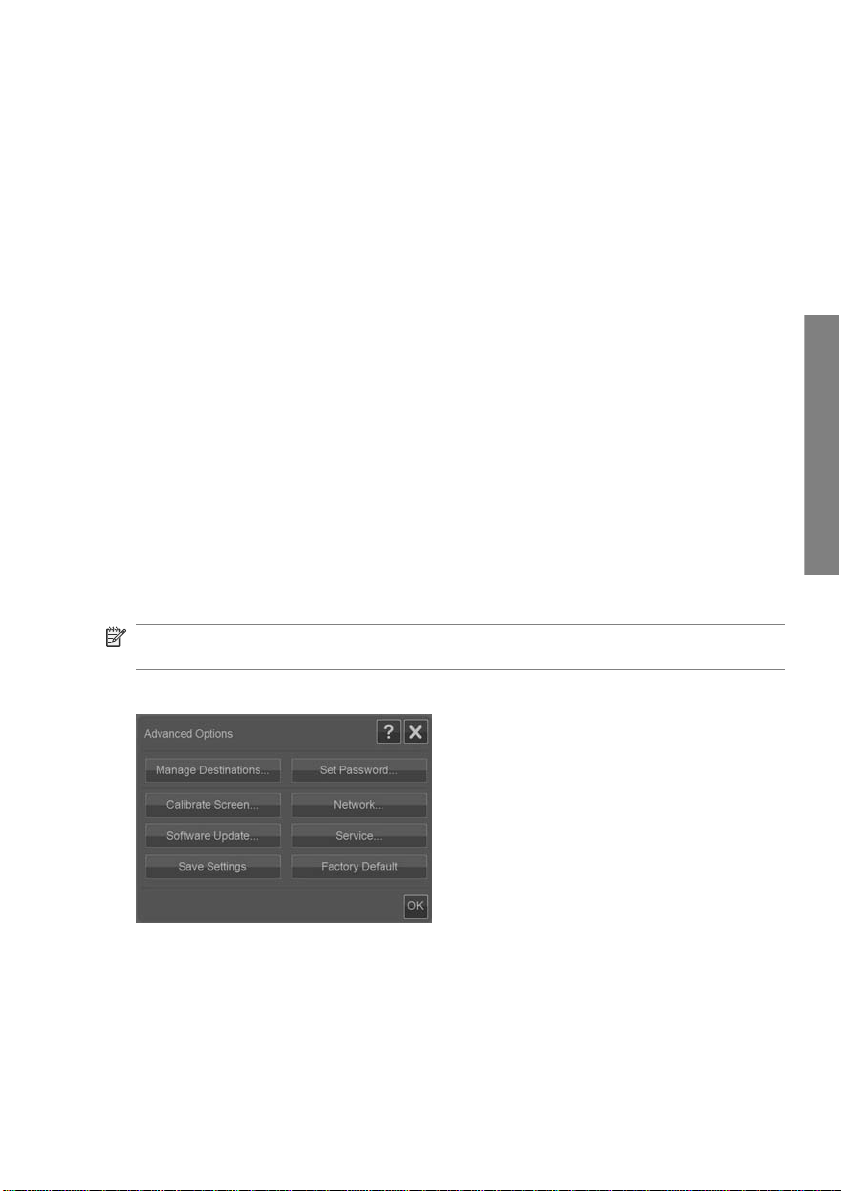
Advanced options
Set password for advanced options
Press Options > Advanced Options > Set Password to apply passw ordprotected access to the Advanced Options dialog.
ENWW
System setup and options
23
Page 28

Network settings
Network parameters are entered through the configuration program that is run the
first time the system is turne d on. If the sys tem is moved or th e network paramete rs
have changed, new network settings can be entered through the Options menu.
1. Press Options > Advanced Options > Network.
2. Select Auto IP address if you know tha t your network has a DHCP server and
thus your system can automatically retriev e its net w ork con nec tion
parameters. Otherwise, enter the IP address, sub net mas k and default
gateway manually.
Save settings
Basic operations
Press Options > Advanced Options > Sav e Settings.
This will save the current settings as the new system default settings. The saved
settings will be reapplied when an Auto Reset is triggered (see above).
Reset settings to the factory defaults
Press Options > Advanced Options > Fa ctor y Default.
This will restore all settings to their factory def aults . The st andard O rigin al Typ es
that came with the program are restored to their original settings. Resetting to
factory defaults is an administrator function and may require a password.
Other advanced options
Manage Destinations is described under
●
on page 6.
Calibrate Screen is described under
●
on page 29.
Software Update is described under
●
on page 37.
Service is an option for service technicians and not within the scope of this
●
guide.
Set a destination folder for scans
Calibrate the touch screen pointer
Install new system software
24 Chapter 2 Basic operations ENWW
Page 29
3 Maintenance
Clean the glass plate and the scanning area
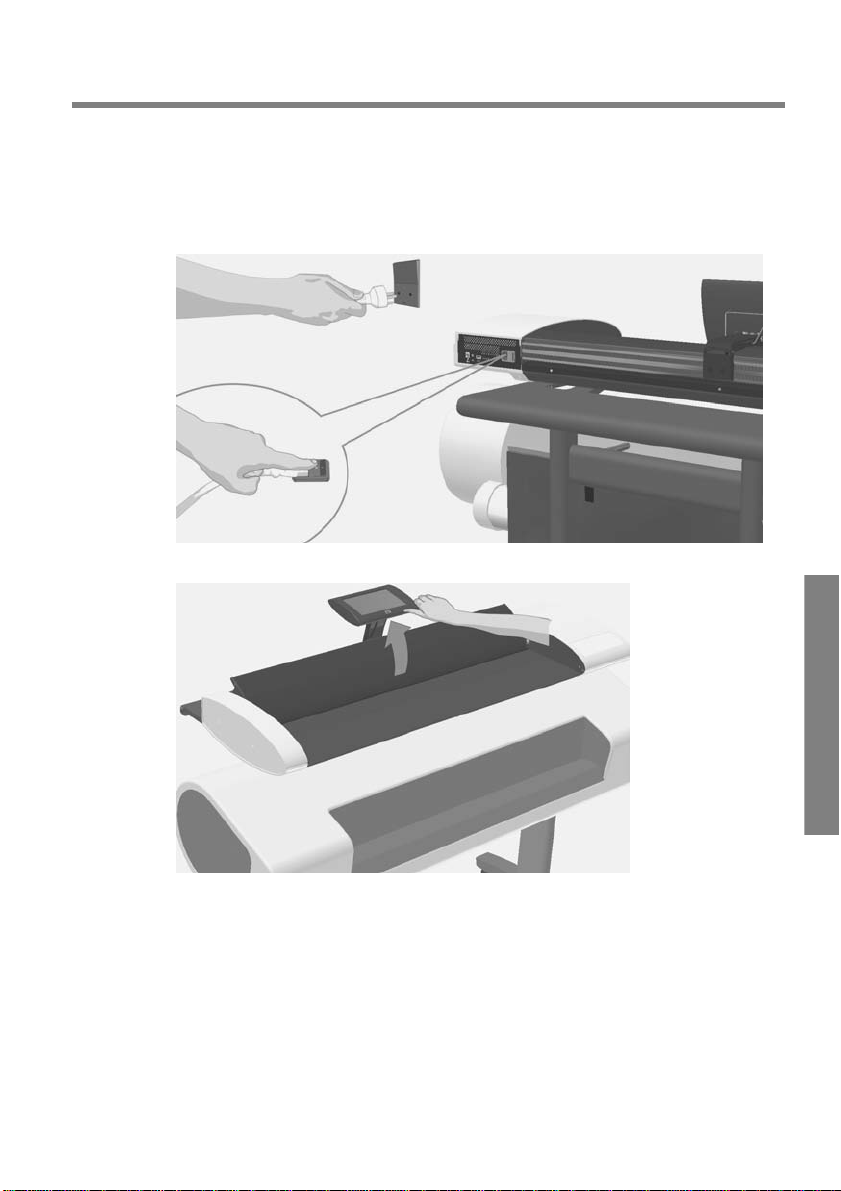
1. Turn off the scanner and disconnect the power cable.
2. Flip the touch screen backwards.
ENWW
Clean the glass plate and the scanning area
Maintenance
25
Page 30
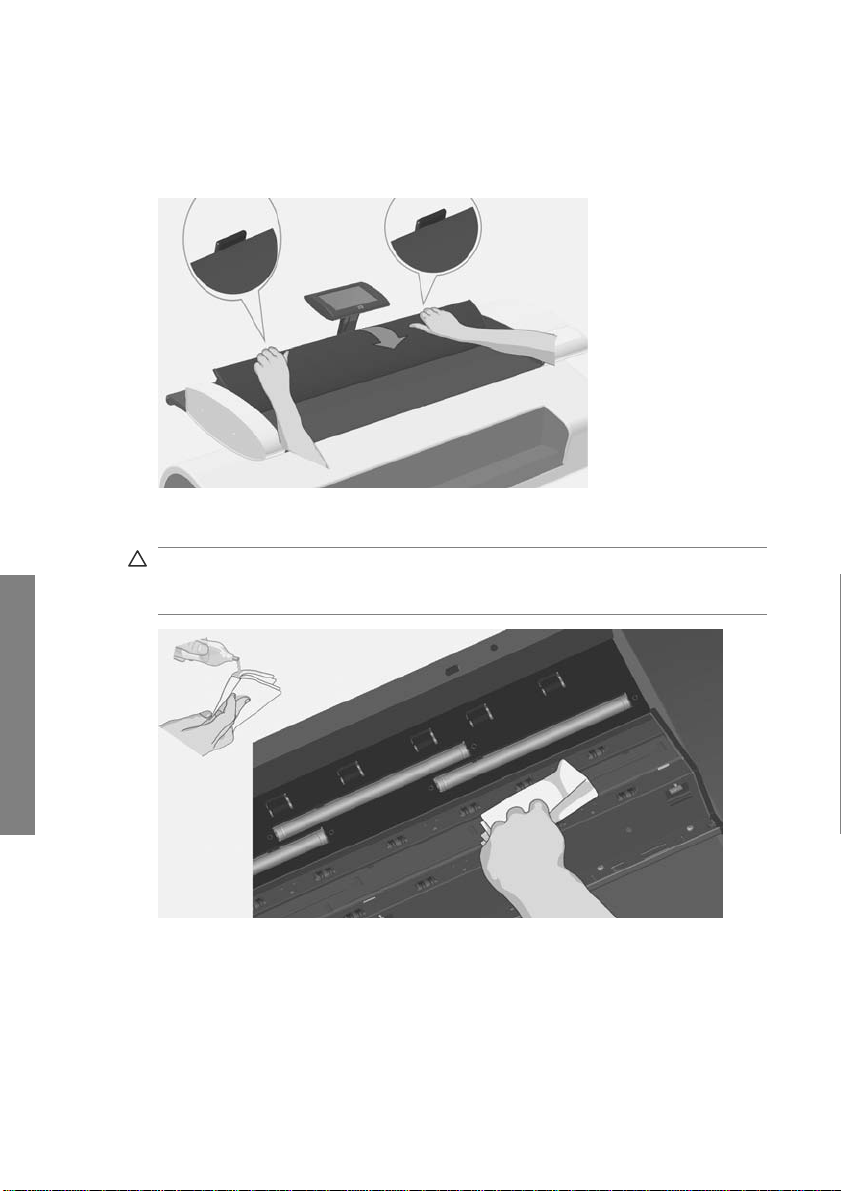
Maintenance
3. There are two lid release buttons on the backside of the scanne r.
Simultaneously slide t he lid release butto ns towards the sc anner's center un til
you feel them unlock, and pull the lid backw ards towards your bo dy. Open the
scanner lid all the way back.
4. Gently wipe the glass plate and the three rows of rollers with a lint-free cloth
dampened with a mild, streak-free glass cleane r.
CAUTION: Do not use abrasives, acetone, benzene or fluids that contain
these chemicals. Do not sp ray li quids directly onto the scanner glass plat e or
anywhere else in the scanner.
26 Chapter 3 Maintenance ENWW
Page 31

5. Dry the glass fully using a separate clean, dry lint-free cloth. When done, use
the cloth to dry the rollers.
6. Close the scanner lid and gently push it down to lock it into place. Ret urn the
touch screen to its normal position.
Calibrate the scanner
HP recommends that you calibrate the scanner if your output is not optimal and
cleaning the scan area does not remedy the problem. Calibration will renew the
scanner’s original color and BW precision.
ENWW
Calibrate the scanner
Maintenance
27
Page 32

Maintenance
NOTE: It is important that you clean the glass before calibrating the scanner.
1. Turn the scanner off and clean the scan area. Calibration works best with a
clean scanner.
2. When you have finished cleaning the scan area, turn the scann er on. The
scanner is ready for calibration when the power LED on the scanner’s panel
lights green.
3. Press Options > Calibrate Scanner to start the Scann er Calibrati on Wizard.
4. The Scanner Calibration Wizard guides you through the procedure for scanner
calibration. To calibrate the scanner, you need the maintenance sheet that
came with your scanner.
28 Chapter 3 Maintenance ENWW
Page 33

Calibrate the touch screen pointer
1. Press Options > Advanced Options > Calibrate Screen.
NOTE: Access to the Advanced Options may require the system’s
administrator password.
2. Follow the instructions on the screen. Cali bratio n is done by press ing targ et-
points that appear in different positions on the sc reen. Press the target-point s
until they no longer appear.
3. Press the OK button in the final dialog to confirm and conclude screen
calibration.
Replace the scanner glass plate
Over time, the condition of the glass plate can deteriorate. Smal l scrat ches on the
glass surface can reduce image quality. Call H P Support to order a new glass plate.
Step-by-step instructions on replacing the glass pla te are sup plied with the new
glass plate.
ENWW
Calibrate the touch screen pointer
Maintenance
29
Page 34

4 Troubleshooting
The system reports an error
The system will report an error mess age on your scree n when an error is detecte d.
Correcting common errors
The actual nature and cause of the error will be reported through a message on
your screen.
The information on your screen may inc lude instructions and actions to remedy the
error. If this is the case, follow the instructions on your screen.
If your screen does not display a solution, look for a description of the error and
remedy in the troubleshooting sections of this quick guide, or in the s ystem’s online-help. Follow the instructi ons p r ovid ed.
Most scan-quality errors can be resolved by cleaning and calibrating the scanner.
If your error is not resolved in that way:
Try restarting the system by turning the scanner off and then on.
●
Try resetting the system's factory defaults through Options > Advanced
●
Options > Factory Defaults.
Try to recover the last system im age k nown to work satisfactorily. See
●
to update or recover the system on page 35.
If the above actions fail to resolve the problem, contact technic al as sis tanc e (see
below).
Technical assistance
In some cases you may need technical assistance. You shoul d contact HP support
if one or more of the following cases is true:
The error cannot be remedied through the action suggest ed on you r touch
●
screen nor through any of the steps described above under "Correcting
common errors".
The error and its remedy is not de scribed in this guide and cannot be remedied
●
Troubleshooting
There is a paper jam
through any of the steps d escribed above un der "Correcti ng com mon errors".
The system fails to re port t he error on your screen and it cann ot b e re med ied
●
through any of the steps d escribed above un der "Correcti ng com mon errors".
You know a paper jam has occurred when the scanner stops scanning while the
document is still engaged in the drive system. Your system will report the paper
jam. To remedy this, try to eject the document from the scanner: press and hold
I need
30 Chapter 4 Troubleshooting ENWW
Page 35

down the Paper Backward or the Paper Forward key. If the document will not
respond to these keys, remove it manually in the following way.
1. Flip the touch screen backwards.
2. Simultaneously slide the li d release buttons t owards the sca nner's center until
you feel them unlock.
ENWW
There is a paper jam
Troubleshooting
31
Page 36

3. With one hand, pull the lid backwards to open and use the other hand to pull
out the document so it comes completely free of the sca nning area.
4. Close the lid.
5. Return the touch screen to its normal position.
When the scanner is ready again, reload the document to scan.
Streaks in the scanned image
Troubleshooting
32 Chapter 4 Troubleshooting ENWW
In most cases, streaks are caused by dust particles on the document and in the
scanner's environment. The scanner's v ery high precision and captu re of fine detail
means that even tiny dust particles c an be noticed. Cleanin g the document usuall y
remedies the problem. First, check the original document to make sure that it is
clean and free of creases or other impediments that may drag across the glass. If
the document is clean and in g ood c ondition, try cleaning the glass : s ee
glass plate and the scanning area on page 25. If the p roblem persists, try cal ibrating
Clean the
Page 37

the scanner: see Calibrate the scanner on page 27. If the problem still persists, you
may need to replace the glass: see
Replace the scanner glass plate on page 29.
Lines in the scanned image appear too thin or
discontinuous
When scanning documents w ith thin lines s uch as CAD drawin gs, a scan reso lution
setting of less than 300 dpi can result in disproporti onate ly thi n or disc ontin uous
lines. HP recommends that you set the scan resolution to a minimum of 300 dpi
when scanning CAD drawings and other documents with thin lines. Scanning with
higher resolution lengthens the overall scan time, but it ensures greater image
quality. This issue is not as noticeable when scanning pho tos and are a fills. For
more information on setting the scan resolution , see
on page 17.
The images below help to illustrate the issue:
Figure 4-1 CAD drawing scanned at 150 dpi
Figure 4-2 CAD drawing scanned at 300 dpi
Set the output quality
Cannot connect or scan to a destination folder on the LAN
Ensure that you have carried out all the foll owing steps in order to connect and scan
to a specific destination folder on the LAN:
ENWW
1. Make sure your system is set up on the LAN. See
options on page 22.
Lines in the scanned image appear too thin or discontinuous
System setup and
Troubleshooting
33
Page 38

2. Destination folder setup is carried out when you inst all the sys tem and
afterwards through Options > A dva nced O ptions > Manage Destinations
> Add or Change. Make sure you have entered the full network path correctly .
3. Make sure you have entered the correct login information – Domain
\Username and Password. Remember to enter the backslash character ‘\’
between the domain and username.
4. Press the Test Connection button to chec k that your pa rameters are c orrect.
If you have performed all of the above, and still cannot connect or scan to the
destination folder, contact your loc al network adm inis trator.
Image cropped—not whole image scanned
Your size settings may be wrong. Press the Scan Area button to check your
●
size settings. Your Scan Area should be set to either Auto for automatic
detection of the size, or to a standard or custom size that corresponds to the
size of the whole original loaded in the scanner.
Ensure that you are loading the original correctly. Be sure to align the center
●
of the original with the scanner’s center arrow marking.
A media profile cannot be generated
If the Create Media Profile wizard stops running or reports errors:
1. Ensure that the scanner and the printer are both turned on and ready for
normal operation.
2. Ensure that your scanner is functioning. Scan a small document (to file) to test
the scanner.
3. Ensure that media is loaded in the printer.
Troubleshooting
4. Ensure that the printer’s media type setting corresponds to the actual media
loaded.
5. Ensure that the color sheet you printed with the Create Media Profile wizard
is inserted and aligned correctly in the scanner.
34 Chapter 4 Troubleshooting ENWW
Page 39

6. Ensure that you scanned the second page p rinted by the Cr eate Media Profi le
wizard, and not the first.
7. Check that the scanner is clean and recently calibrated . If in doubt , clea n the
scanning area and calibrate the scanner: see
scanning area on page 25 and Calibrate the scanner on page 27.
Clean the glass plate and the
My color matching results are not optimal
1. Try using the Color Poster original type. This is a neutral original type that does
not apply special image processing that coul d affec t col or matc hin g.
2. Check your Original Type setti ngs in the Copy > Ori gi nal Ty pe di alog. Press
the More button to view and adjust the specific s ettings relevant to the Original
Type.
3. Press Options > Printer Options > Update Profile and follow the steps on
your screen to ensure your media profile is optimal for the current media and
printer conditions.
4. If the above does not help, check that the scanner is clean and recentl y
calibrated. If in doubt, clean the scanning area and calib rate the s canner:
Clean the glass plate and the scanni ng area on p age 25 and Calibrate the
see
scanner on page 27.
I need to update or recover the system
Perform a system recovery if the scanner hangs in boot mode and the system
cannot start normally, or if you want to return to an earlier or the initial program
version. System recovery will reforma t the syst em’s progra m partitio n and rein stall
a fresh program image.
To perform system recovery, you need to ac tivate the Software Updat e & Recovery
mode. There are two ways to activate the Software Update & Recovery mode:
1. If the program on your touch screen is running, press Options > Advanced
Options > Software Update.
2. If your system is hanging and the program interface on your touch screen
cannot be accessed, follow the instructio ns belo w to activate the Software
Update & Recovery menu on your screen.
a. Connect a USB-driven keyboard to the USB port on the side of the
system’s touch screen.
b. Turn off the scanner with the On/Off switch at the back of the scanner.
c. Turn on the scanner with the On/Off switch at the back of the scanner.
ENWW
My color matching results are not optimal
Troubleshooting
35
Page 40

d. Follow closely the messages that appear on your touch screen as the
system restarts. When the option for starting the system in Software
Update & Recovery mode appears, select the option with your keyboard.
e. The Software Update & Recovery screen will appear and can be
controlled from your touch screen.
Once in the Software Update & Recovery mode, you can recover your syste m by
reinstalling a complete image of the software. Follow the ins truc tions below:
1. Choose the System Update/Recover option in the Software Updat e &
Recovery menu.
2. Choose the program image to install from the list. The default image is the
initial version that was delivered with your system and the ac tive image is the
version currently installe d. Other listed ima ges are versions y ou installed prior
to the active version.
3. Confirm your selection when asked. The syst em w ill proc eed to updat e the
system with the selected program image. This take s about two minutes . Press
the OK button to return to the Software Update & Recovery menu.
4. Select the Return to normal scanner operation button and confirm. The
system will load and initializ e all its para met ers. Do not turn off the scanner
or interrupt the load process. This step can take up to ten minutes to
complete.
5. At the end of the system load process, you will be asked to calibra te the touch
screen. Press the arrows and OK button when prompted.
6. Select the language for your system software.
7. Accept the HP license agreement.
8. Your system will complete the recovery process and start up your scan and
copy program interface.
The system software is in the wrong language
Your system’s language is set up during installatio n; to cha nge the la nguage , you
must reinstall the software with a new language selection.
1. Press Options > Advanced Options > Software Update.
2. Choose the System Update/Recover option in the Software Updat e &
Troubleshooting
Recovery menu.
3. In the program version ima ge list, choose to install the “active” program image.
4. Confirm your selection when asked. The syst em w ill proc eed to updat e the
system with the program image. This takes about two minutes. Press the
OK button to return to the Software Update & Recovery menu.
5. Select the Return to normal scanner operation button and confirm. The
system will load and initializ e all its para met ers. Do not turn off the scanner
36 Chapter 4 Troubleshooting ENWW
Page 41

or interrupt the load process. This step can take up to ten minutes to
complete.
6. At the end of the system load process, you will be asked to calibrat e the touch
screen. Press the arrows and OK button when prompted.
7. Select the new language for your system software.
8. Accept the HP license agreement.
9. Your system will complete t he update process and s tart up your scan and copy
program interface in the new language you select ed in step 7.
Install new system software
A new software version for your system can be supplied in the following w ays :
On a USB flash memory
●
Through a network PC: Internet download, CD-ROM, other
●
To install a new software version from a USB flash memory
1. Press Options > Advanced Options > Software Update.
2. Be sure to wait for the Software Update & Recovery menu to appear before
proceeding with the next step.
3. Insert the USB flash memory into the USB port on the side of the touch screen.
4. Choose the System Update/Recover option in the Software Update &
Recovery menu.
5. The new program version image wil l appear in the program versi on image list.
It can be identified by the text “USB” in the list.
6. Select this image to install it.
7. Select the Return to normal scanner operation button and conf irm. The
system will load and initia lize all it s paramete rs. Do not turn off the scanner
or interrupt the load process. This step can take up to ten minutes to
complete.
8. At the end of the system load process, you will be asked to calibrat e the touch
screen. Press the arrows and OK button when prompted.
9. Select the language for your system software.
10. Accept the HP license agreement.
11. Your system will compl ete the installat ion process and sta rt up you r scan and
copy program interface.
ENWW
Install new syste m software
Troubleshooting
37
Page 42

To install a new software version from a PC
The following requirements must apply:
Your scan/copy system must be connecte d and set up (recog nize d) on the
●
local network.
You need access to a PC that is set up on the network.
●
A Web browser must be installed on the PC.
●
To install from the CD-ROM:
1. Write down your scan/copy system’ s IP address. The IP address ca n be seen
through the Options > Advanced Options > Network dialog.
2. Save the new software ins t alla tion file on the PC; either from an inserte d CD -
ROM, or downloaded from the Internet.
3. Open a Web browser on the PC and enter the scan/copy system IP in the
address field. This will open the scan/copy system’s network accessed
Upgrading Scanner Software interface.
4. Use the browse option to locate and se lect the installation fil e on the CD-ROM.
5. Install the software. This will upload the software to your scan/copy system.
You can now shut down the PC. The remai ning step s take pl ace on the scan/
copy system’s touch screen.
6. Press Options > Advanced Options > Software Update to start the Software
Update & Recovery menu.
7. Choose the System Update/Recover option in the Software Updat e &
Recovery menu.
8. The new program version image you uploaded from the CD -ROM will a ppear
in the program version image list.
9. Select this image to install it.
10. Select the Return to normal scanner operation button and confirm. The
system will load and initializ e all its para met ers. Do not turn off the scanner
or interrupt the load process. This step can take up to ten minutes to
complete.
11. At the end of the system load process, you will be asked to calibra te the touch
screen. Press the arrows and OK button when prompted.
Troubleshooting
12. Select the language for your system software.
13. Accept the HP license agreement.
14. Your system will complete the installation process and st art up yo ur scan and
copy program interface.
38 Chapter 4 Troubleshooting ENWW
Page 43

Index
A
adjustment button 15
advanced setup options 23
auto reset 23
B
basic setup options 22
batch copy documents 10
batch scan documents 10
C
calibrate
scanner 27
screen 29
clean
glass plate 25
scanning area 25
color matching problems 35
copy document 8
cropped image 34
D
date 22
destination folder
cannot connect 33
management 6
document
batch copy 10
batch scan 10
copy 8
eject 5
jammed in scanner 30
load 5
scan 9
size 13
E
eject document 5
error messages 30
F
factory default settings 24
file manager 21
function buttons 2
G
glass plate
clean 25
replace 29
H
help 3
I
image adjustments 15
image cropped 34
inactivity timeout 23
input size 13
L
language, changing 36
lines
discontinuous 33
too thin 33
load document 5
M
manage destinatio ns 6
media profile errors 34
media profiles 19
N
network settings 2 4
O
options
advanced 23
basic 22
original type 1 1
output quality 17
output size 13
P
paper backward button 3
paper forward button 3
paper jam 30
paper sizes 23
password 23
power button 3
preview 15
ENWW
Index
39
Page 44

print quality 17
Q
quality, print 17
R
recover software 35
restart 4
rewind after scan 2 3
S
save settings 24
scan area 13
scan document 9
scanner components 3
scanning area, clean 25
size
image 13
paper 23
software 2
software recovery 35
software update 35, 37
streaks in scanned image 32
system setup 22
T
task buttons 2
time 22
timeout, inactivity 23
touch screen 2
turn off 4
turn on 4
U
units of measure 22
update software 35
40 Index ENWW
Page 45

İçindekiler
1 Giriş
Bu kılavuzun kull anımı .................................................................................... 1
Tarayıcı yazılımı ............................................................................................. 2
Tarayıcı ........................................................................................................... 3
Belgeler ve yardım .......................................................................................... 3
2 Temel i şlemler
Tarayıcıyı açma veya kapama ........................................................................ 4
Belgeleri yükleme ve çıkarma ......................................................................... 5
Tarama işlemleri için hedef klasör belirleme ....... ............................................ 6
Belgeyi kopyalama ..................... ....... .............................................................. 8
Dosyaya tarama ................................ .. ..... ....... ....... ......................................... 9
Toplu tarama ve toplu kopyalama ................................................................. 11
Orijinal türünü belirtme ve görüntü ayarla mal arı yap ma ............................... 12
Giriş ve çıkış boyutlarını ayarlama ................................................................ 14
Kopyaları ve taramaları önizleme ................................................................. 16
Çıkış kalitesini ayarlama ............................................................................... 18
Ortam profili oluşturma ................................................................................. 20
Taranan dosyaları görüntüleme, taşıma, yeniden adlandırma veya
silme ............................................................................................................. 22
Sistem kurulumu ve seçenekler ........................ ............. ............................... 24
TR
3 Bakım
Cam plakayı ve tarama alanını temizleme .................................................... 27
Tarayıcıyı ayarlama ...................................................................................... 29
Dokunmatik ekran işaretçisini ayarlama ....................................................... 31
Tarayıcı cam plakasını değiştirme ................................................................ 31
4 Sorun Giderme
Sistem hata bildiriyor .................................................................................... 32
Kağıt sıkışması var ....................................................................................... 32
Taranan resimde lekeler var ......................................................................... 34
Taranan görüntüdeki çizgiler çok ince veya kesikli ....................................... 35
LAN üzerinde bir hedef klasöre bağlanılamıyor veya taranamıyor ............... 35
Resim kesildi—resmin tamamı taranmadı .................................................... 36
Ortam profili oluşturulamıyor ......................................................................... 36
Renk eşleme sonuçlar ımdan memnun değilim ............................................. 37
Sistemi güncellemem veya kurtarmam gerekiy or ......................................... 37
TRWW
Page 46

Sistem yazılımı yanlış dilde .......................................................................... 39
Yeni sistem yazılımı yükleme ....................................................................... 39
Dizin ................................................................................................................................ 42
TRWW
Page 47

1Giriş
Bu kılavuzun kullanımı
Bu kılavuz aşağıdaki bölümlerden oluşmaktadır.
1. Giriş: Bu bölüm yeni kullanıcılar için yazılıma, tarayıcı cihaz ına ve ürün le
gelen belgelere kısa bir giriş sağlar.
2. Temel işlemler: Bu bölüm çok say ıda ge nel işlemi yapmanıza yardımcı olur.
3. Bakım: Bu bölüm çeşitli ayar ve bakım işlemlerini yapmanıza yardımcı olur.
4. Sorun Giderme: Bu bölüm tarama sırasında oluşabilecek sorunları
çözmenize yardımcı olur.
5. Dizin: Konuları hızlı bir şekilde bulmanıza yardımcı olmak için içindekiler
tablosuna ek olarak alfabeti k bir dizin de bulunmaktadır.
Uyarılar ve dikkat edilmesi gereken hususlar
Bu kılavuzda, yazıcının doğru kullanımını sağlamak ve yazıcının zarar görmesini
önlemek üzere semboller kullanılmıştır. Bu sembollerle işaretlenmiş yönergeleri
yerine getirin.
UYARI! Bu sembolle işaretlenmiş yönergelerin yerine getiri lme mesi ciddi
yaralanmalar veya ölümle sonu çlanabilir.
DİKKAT: Bu sembolle işaretlenmiş yönergelerin yerine getiril me mesi hafif
yaralanmalara veya ürünün zarar görmesine neden olabilir.
Giriş
TRWW
Bu kılavuzun kullanımı
1
Page 48

Tarayıcı yazılımı
Giriş
Görev düğmeleri
Dokunmatik ekranı açtığınızda tarayıcı yazılımı otomatik olarak çalışır. Ana ekran,
aşağıdaki bölümlere ayrılmıştır:
●
●
●
Ana menü alanı
Sağ çubuk, üst: görev düğmeleri
Sağ çubuk, alt: işlev düğmeleri
Kopyala (yazıcıya tara) görev modunda programı ayarlamak için bu düğmeye basın.
Tara (dosyaya tara) görev modu nda programı ayarlamak için bu düğmeye basın.
Program ayarlarını ve tercih menülerini açmak içi n bu düğmeye basın.
İşlev düğmeleri
Dosya yöneticisi: Dosya Yöneticisi iletişim kutusunu açar.
Çevrimiçi yardım: Pek çok konuda ayrıntılı bilgi sağlar. Geçerli görevinizle ilgili
yönergeleri açar.
Durdur: Geçerli etkinliği iptal eder.
Taramayı/kopyalamayı başlat: Hangi görev düğmesinin seçildiğine bağlı olar ak
kopyalama veya tarama işlemini başlatır.
2 Bölüm 1 Gi riş TRWW
Page 49

Tarayıcı
Giriş
1. Tarayıcı kapağı
2. Tarama/k opyala ma u ygul amas ı için dokunmatik
ekran
3. Tarayıcı kapağını açmak için çıkarma düğmeleri
4. Tarayıcı yatağı: kağıt besleme alanı
5. Belge besleme için yerleştirme yuvası
Belgeler ve yardım
Bu Hızlı Başvuru Kılavuzu, sisteme ve yazılıma kısa bir genel bakış sağlar.
Çevrimiçi Yardım işlevi düğmesi,
görev (Tarama, Kopyalama, Seçenekler) hakkında genel yard ımı görüntü ler.
Çevrimiçi yardım penceresinin Giriş düğmesi
ve konuları için bağlantılar içeren bir içindekiler tablosuna götürür.
Pek çok iletişim kutusunda, açık iletişim kutusuyla ve o iletişim kutusunun içerdiği
seçeneklerle ilgili yönergeleri açacak , Bağlama duyarlı bir Yardım düğmesi
bulunur.
6. USB bağlantı noktası
7. Operatör paneli
8. Kağıt ileri düğmesi
9. Kağıt geri düğmesi
10. Güç düğmesi ve gösterge
çevrimiçi yardım penceresini açar v e geçerl i
, sizi, çevrimiçi yardım bölümleri
TRWW
Tarayıcı
3
Page 50

2Temel işlemler
Tarayıcıyı açma veya kapama
Tarayıcının işletim panelindeki güç düğmesine basar a k sis t em i (tar ayıcıyı, ekranı
ve yazılımı) açıp kapatabilirsini z.
NOT: Yazıcının ayrı bir açma/kapama düğmesi vardır. Normalde, bu düğme hep
basılı bırakılır ve sistem yeniden başlatılırken bu düğmeye basılmaz.
Açma
Temel işlemler
Kapatma
Güç düğmesine basın. Güç ışığı, yeşil renkte yanar.
Güç düğmesine basın. Güç ışığı yanıp söner ve ardından kapanır.
Yeniden başlatma
Sistemi kapatmak için güç düğmesine basın, ardından sistem i açm ak için güç
düğmesine tekrar basın.
4 Bölüm 2 T emel işlemler TRWW
Page 51

Belgeleri yükleme ve çıkarma
Belge yükleme
1. Belgenizi, görüntülü yüzü yukarı bakacak şekilde yükleyin. Belgenin
merkezini, tarayıcı yatağının üzerindeki merk ez ok işaretiyl e hiz alay ın.
2. Düz bir tarama yolu iç in b elgey i h iza lam anıza yardımcı olacak standart boyut
işaretlerini kullanın.
3. Silindirlerle temas ettiğini hiss edene kada r, oriji nali y erleştirme yuvasına itin.
4. Tarayıcı, orijinali otomatik olarak alır ve tarama başlangıç konumu na taşır.
Belgeyi çıkarma
Orijinali, tarayıcı besleme yatağına (ken dinize doğru) çıkarmak için Kağıt Geri
●
düğmesine basın.
Temel işlemler
TRWW
Belgeleri yükleme ve çıkarma
5
Page 52

Orijinali, tarayıcının arkasından çıkarmak istiyorsanız Kağıt İleri düğmesine
●
basın.
Tarama işlemleri için hedef klasör belirleme
Temel işlemler
Aşağıdaki yönergeler, dosyaya tara çıkışınızı kayd edebileceğiniz bir hedef klasörü
oluşturmak ve seçmek için yapılması gerekenleri belirtir. Hedefler, sisteminizin
yerel ağ (LAN) üzerinden algıladığı bilgisayarlarda ve ya dokunmatik ekrana takılan
bir USB flash sürücüsünde bulunan klasörlerdir.
1. Sisteminizin ve ilgili hedef bilgisayarların, yerel a ğınız (LAN) üzeri nde do ğru
bir şekilde ayarlandığından emin olun. Sist emi niz , LA N üzerind e Options
(Seçenekler) > Advanced Options (Gelişmiş Seçenekler) > Network (Ağ)
menüsünden yapılandırılır. Bu, parola gerek tireb ilec ek bi r sis tem yöne tic isi
seçeneğidir.
6 Bölüm 2 T emel işlemler TRWW
Page 53

2. Taramalarınızı bir USB flash sürücüsü ne kaydetmek ist iyorsanız, Scan (Tara)
düğmesine basın ve sürücüyü dokunma tik ekrandaki U SB bağlantı noktas ına
takın. Sistem, sürücüyü algılar ve hedefi USB olarak ayarla mak /değiştirmek
isteyip istemediğinizi sorar.
3. Hedef kurulum seçeneklerine erişme k için Options (Seçenekler) > Advanced
Options (Gelişmiş Seçenekler) > Manage Destinations (Hedefleri Yönet)
düğmelerine basın. Oradan hedef se çebi lir, ek ley ebilir ve değiştirebilirsiniz.
Temel işlemler
TRWW
Tarama işlemleri için hedef klasör belirleme
7
Page 54

Hedef seçme
Daha önce oluşturulan ve sisteme kaydedi len he defle r listesinden bir hedef seçin.
Hazırda hiç hedef yoksa veya listede bulunmaya n bir hedefi kullanmak istiyorsanız,
yeni hedef eklemeniz gereki r. Bağlı bi r USB flash sürücüs üne taram ak is tiyorsanız
USB Hedefine basın.
Yeni hedef ekleme
Hedef ayrıntılarını girmek için Add (Ekle) düğmesine basın. Etiket, Ağ Yolu, Etki
Alanı, Kullanıcı Adı ve Parola alanlarına değerleri girin. Hedef parolasını sisteme
kaydetmek istiyorsanız Remember (Anımsa) seçeneğini belirtin. Kul lanıcıların
hedefe bağlanmak için parola girmesini is tiy orsan ız Remember (Anımsa)
seçeneğini işaretlenmemiş olarak bırakın. Ayarlarınızı kontrol etmek için Test
Temel işlemler
Connection (Bağlantıyı Test Et) düğmesine basın.
Hedefi değiştirme (düzenleme)
Change (Değiştir) düğmesine basın ve Etiket, Ağ Yolu, Etki Al anı, Kullanıcı Adı ve
Parola alanlarını düzenleyin. Hedef parolasını sisteme kaydetmek istiyors anız
Remember (Anımsa) seçeneğini belirtin. Kullanıcıların hedefe bağlanm ak iç in
parola girmesini istiyorsanız Remember (Anımsa) seçeneğini işaretlenmemiş
olarak bırakın. Ayarlarınızı kontrol etmek için Test Connection (Bağlantıyı Test Et)
düğmesine basın.
Hedefi kaldırma
Hedefler listesinden bir hedef seçin ve Remove (Kaldır) düğmesine basın.
Belgeyi kopyalama
Kopya oluşturmak (yazdırmak için tara) için aşağıdaki adımları uygulayın.
1. Belgenizi, taranacak yüzü yukarı bakacak şekilde tarayıcıya yerleştirin.
2. Yazıcının açık olduğundan ve istediğiniz ort amın yüklü olduğundan emin olun.
NOT: Kopyalamak için, yüklenen ortam için bir ort am profil i gerekir. Si stem,
en sık kullanılan ortamlar için bir ortam profilleri seti içerir. Yen i bir ortam profili
oluşturmanız gerekiyorsa, bkz.
Ortam profili oluşturma sayfa 20.
8 Bölüm 2 T emel işlemler TRWW
Page 55

3. Kopya (yazdırmak için tara) ayarlarına ve düğmelerine erişmek için Copy
(Kopyala) düğmesine basın. Kopyala iletişim kutusu aşağıda gösterilmektedir.
4. Original Type (Orijinal Türü) düğmesine basın ve belgenizle ve istediğiniz
çıkışla eşleşen türü seçin. Bkz.
Orijinal türünü belirtme ve g örüntü ayarlamaları
yapma sayfa 12.
5. Quality (Kalite) düğmesine basın ve çıkışınız için istediğiniz kaliteyi seçin.
6. Görüntü yakalama alanının boyutunu ayarlamak için Scan Area (Tarama
Alanı) düğmesine basın. Görüntünün tam amını yakalamak istiyorsanız,
sistemin sizin için ölçüp boyutu ayarlaması için Auto (Otomatik) seçeneğini
belirtin.
7. Yazdırılan kopyanın boyutunu belirl em ek iç in Resize (Yeniden Boyutlandır)
düğmesine basın. 1:1 kopya istiyorsanız No (Hayır) seçeneğini belirtin.
8. İşle birlikte kaç kopya yazdırılmasını istediğinizi belirtmek için Copies (Kopya
Sayısı) düğmesine basın.
9. İşi yazıcıya göndermeden önce ayarları kontrol etmek istiyorsanız Preview
before Copy (Kopyalamadan Önce Önizle) düğmesini On (Açık) konumuna
getirin. Bkz.
Kopyaları ve taramaları önizleme sayfa 16.
10. Ayarlarınızı seçtikten sonra kopyalama işlemini başlatmak için Taramayı/
Temel işlemler
Kopyalamayı Başlat düğmesine
Ayrıca bkz.
Görüntü ayarlarını seçme ve önizleme sayfa 17
●
Giriş ve çıkış boyutlarını ayarlama sayfa 14
●
Çıkış kalitesini ayarlama sayfa 18
●
Dosyaya tarama
Dosyaya taramak için aşağıdaki adımları uygulayın.
1. Belgenizi, taranacak yüzü yukarı bakacak şekilde tarayıcıya yerleştirin.
TRWW
basın.
Dosyaya tarama
9
Page 56

2. Dosyaya tara ayarlarına ve düğmeleri ne erişmek için Scan (Tara) düğmesine
basın. Tarama iletişim kutusu aşağıda gösterilmektedir.
Temel işlemler
3. Original Type (Orijinal Türü) düğmesine basın ve belgenizle eşleşen veya
belgenizi anlatan türü seçin. Bkz.
Orijinal türünü belirtme ve görüntü
ayarlamaları yapma sayfa 12.
4. Quality (Kalite) düğmesine basın ve tarama çözünür lüğünü seç in.
5. Görüntü yakalama alanının boyu tunu ay arlam ak için Scan Area (Tarama
Alanı) düğmesine basın. Görüntünün tamam ını yakalamak istiyorsanız,
sistemin sizin için ölçüp boyutu ayarlaması için Auto (Otomatik) seçeneğini
belirtin.
6. JPG veya TIFF gibi d osya bi çimini belirlemek için File For mat (Dosya Biçimi)
düğmesine basın.
7. Hedef dosya için ad girmek üzere File Name (Dosya Adı) düğmesine basın.
8. Destination (Hedef) düğmesi, tarama çıkış dosyanızın oluşturulacağı
konumu gösterir. Farklı bir hedef seçmek istiyorsanız Destination (Hedef)
düğmesine basın.
9. Dosyaya kaydetmeden önce ayarlarınızı denetlemek istiyorsanız Preview
before Scan (Taramadan Önce Önizle) düğmesini On (Açık) konumuna
getirin. Bkz.
Kopyaları ve taramaları önizleme sayfa 16.
10. Ayarlarınızı seçtikten sonra tarama işlemini ba şlatmak için Taramayı/
Kopyalamayı Başlat düğmesine
basın.
Ayrıca bkz.
Görüntü ayarlarını seçme ve önizle me sayfa 17
●
Giriş ve çıkış boyutlarını ayarlama sayfa 14
●
Çıkış kalitesini ayarlama sayfa 18
●
Tarama işlemleri için hedef klasör belirl eme sayfa 6
●
10 Bölüm 2 Temel işlemler TRWW
Page 57

Toplu tarama ve toplu kopyalama
Toplu tarama ve toplu kopyalama ile tarayıcıya aralıksız olarak yeni orijinaller
yerleştirebilirsiniz. Sistem, Taramay ı/Kopyalamayı Başlat düğmesine basmanızı
beklemeden işlemi hemen başlatacaktır. Sistem, geçerli ayarları tüm belgelere
uygulayacaktır. Dosyaya tarıyorsanız, dosyalarınız, otomatik ola r ak art an
numaralarla adlandırılır.
1. Orijinallerinizi, kolayca ulaşabilm eni z iç in tarayıcının yanına, yüzleri yukarı
gelecek şekilde bırakın.
2. Tarama veya kopyalama ayarlarınızı seçin. Bu ayarlar, toplu işlemdeki
orijinaller için geçerli olaca ktır.
3. Toplu işlem modunu On (Açık) dur uma getirmek için Batch Mo de (Toplu İşlem
Modu) düğmesine basın.
4.
Taramayı/Kopyalamayı Başlat düğmesine
5. İlk orijinali zaten yerleştirdiyseni z, si stem , tarama veya kopyalama işlemini
başlatır. Henüz yerleştirmediyseniz, Toplu İşlem M odu iletişim kutusunda ilk
orijinali tarayıcıya yerleştirmeniz istenir.
6. İlk orijinali yerleştirdiğinizde, sistem, orijinali taramaya hemen başlar.
basın.
Temel işlemler
TRWW
Toplu tarama ve toplu kopyalama
11
Page 58

7. Bir orijinal, tarandıktan sonra çıkarılır. Toplu İşlem Modu iletişim kutusu tekrar
açılır ve sonraki orijinali yerleştirmeniz ist enir.
8. Çıkarılan orijinali alıp sonraki orijinali taray ıcıya yerleştirin.
9. Toplu işlem tamamlanıncaya dek orijinalleri yerleştirmeye devam edin.
10. Toplu işlem modundan çıkmak için Toplu İşlem Modu iletişim kutusundaki
Cancel (İptal) düğmesine basın.
Temel işlemler
NOT: Toplu İşlem Modunda önizleme devre dışıdır.
NOT: Tarayıcı, toplu iş modunda yük lemeyi hızlandırma k için taranan her orijinali
otomatik olarak çıkaracaktır. Çıkış yönünü, Options (Seçenekler) > Basic
Options (Temel Seçenekler) > Rewind after scan (Taramadan sonra geri sar)
bölümünde seçilen ayar belirl er. İlgili seçene k i şaretlenirse, taranan orij inaller, ö ne
doğru çıkarılır ve eğer söz konusu seçenek işaretle nme zs e, tarana n oriji naller
arkadan çıkarılır.
Orijinal türünü belirtme ve görüntü ayarlamaları yapma
Original Type (Orijinal Türü) seçeneğini belirttiğiniz de te mel yak alam a
parametreleri ayarlanır. Daha sonra görüntü parlakl ığı, netli k ve ark a plan
temizleme düzeyi gibi belir li fak törle ri ayarl ayab ilirs iniz . H angi ayarl ar ı
değiştirebileceğiniz, Original Type (Orijinal Türü) seçiminize bağlıdır.
1. Orijinal Türü seçim listesine gitmek için Scan (Tara) veya Copy (Kopyala)
düğmesine ve ardından Original Type (Orijinal Türü) düğmesine basın.
2. Orijinal belgenizi en uygun şekilde tan ım laya n Ori jinal Türünü s eçin.
12 Bölüm 2 Temel işlemler TRWW
Page 59

Orijinal Türü Açıklama
Renkli Çizgiler Renkli CAD çizimleri ve ayrıntı düzeyi yüksek grafikler için uygundur. Arka
planı temizlemek ve çizgileri netleştirmek için görüntü işlemi uygu lar . 24 bi tli k
renkli tarama.
Gri Çizgiler Gri tonlamalı CAD çizimleri ve ayrıntı düzeyi yüksek grafikler için uygund ur.
Arka planı temizlemek ve çizgileri netleşti rm ek iç in gör üntü işlemi uygular. 8
bitlik gri tonlamalı tarama.
S&B Çizgiler Temiz S&B CAD çizimleri ve ayrıntı düzeyi yüksek grafikler için uygu nd ur.
Renkli ve gri tonlamalı orijinal türlerine kıyasla dosya boyutları çok küçük
olduğundan özellikle dosyaya tarama için kullanışlıdır. Nötr ve hızlı bir tarama
için minimum gör ünt ü işl e mi uygulaması.1 bitlik S&B tarama.
Renkli Harita Topografik haritalar, yol haritaları veya dolgu alanlar ve büyük miktarda ayrıntı
içeren diğer belge türleri gibi renkli haritalar için uygundur. Ay rıntıları
netleştirmek için görüntü işlemi uygular. 24 bitlik renkli tarama.
Gri Harita Topografik haritalar, yol haritaları veya dolgu alanlar ve büyük miktarda ayrıntı
içeren diğer belge türleri gibi gri tonlamalı haritalar için uygundur. Ayrıntıları
netleştirmek için görüntü işlemi uygular. 8 bitlik gri tonlamalı tarama.
Renkli Poster Kaliteli renkli fotoğraflar ve posterler için uygundu r. Nötr ve hızlı bir tarama
için minimum gör ünt ü işl e mi uygulaması. 24 bitlik renkli tarama.
Eski Çizim Ön planla arka plan arasındaki kontrastın düşük olduğu soluk ve buruşuk
çizimler için uygundur. Arka pla nı temizlemek ve çizgileri netleştirmek için
görüntü işlemi uygular. 8 bit lik gri tonlamal ı tarama.
Temel işlemler
TRWW
Orijinal türünü belirtme ve görüntü ayarlamaları yapma
13
Page 60

3. Orijinal Türü ayarlarını hassaslaştırabi lirsi niz (isteğe bağlı): Orijinal Türü
iletişim kutusunu genişletmek ve seçili Orijinal Türü ile alakalı ayarlam a
seçenekleri belirtmek için More (Diğer) düğmesine
bittiğinde OK (Tamam) düğmesine basın.
Temel işlemler
4. Ayarların her biri ve ayarlarınızı yeni, özel bir Orijinal Türü olarak kayd etm e
konusunda daha fazla bilgi için
NOT: Görüntü ayarlamaları yapmak ve yeni ayarların e tkilerini ekranınızda
görmek için Preview Before Scan/Copy (Taramadan/Kopyalamadan Önce
Önizle) düğmesine ve ardından Ayar düğmesine basabilirsiniz. Bkz.
taramaları önizleme sayfa 16.
Giriş ve çıkış boyutlarını ayarlama
“Tarama Alanı”, giriş boyutunuzdur ve görüntünün ne kadarının yakalandığını
tanımlar. Bu, genellikle orijinalin toplam boyutuna eşittir. Ancak, bazı durumlarda
orijinalin yalnızca bir bölümünü ta ramak veya yak alama alanının belirli, standart bir
boyuta eşit olmasını isteyebilirsiniz.
Kopyalama sırasında, Resize (Yeniden boyutlandır) a yarını kullanarak çıkış
boyutunu da (basılı kopyadaki görünt ünün boy utu) bel irtebi lirsi niz . Bir 1:1 k opya
için geçerli Tarama Alanı boyutunu kullanm ak is tiy orsanız yeniden boyutlandırma
için No (Hayır) seçeneğini işaretleyebilirsiniz veya basılı görüntüyü Tarama Alanı
boyutuna göre küçültmek veya büyütm ek iç in fark lı bir boyut seç ebilirsiniz.
NOT: Tarama s ırasında, görüntünün çıkış dosyas ındaki boyutu, her zaman
Tarama Alanı boyutuna (1:1) eşittir.
basın. İşiniz
Bağlama duyarlı Yardım düğmesine basın.
Kopyaları ve
Kopyalama ve Tarama için Tarama Alanını (giriş boyutu) belirleme
Tarama veya Kopyalama ekranlarındayk en, Taram a Alanı boyut listesini
görüntülemek için Scan Area (Taram a Alanı) düğmes ine bas ın.
14 Bölüm 2 Temel işlemler TRWW
Page 61

Listede, Tarama Alanı boyutunu belirlem ek için kull anabi lece ğiniz farklı yö ntem ler
sunulmaktadır:
Otomatik: Program, tarayıcıya yüklü tam belgenin boyutunu otom atik olarak
●
algılar. Tarayıcının boyutu doğru algıladığından emin olmak için önizlemeyi
kullanabilirsiniz.
Standart veya özel boyut kullanma: İletişim kutusunda, sistemde kayıtlı
●
standart boyutların ve özel boyutl arın listesi yer alır. List eye göz atın v e
kullanmak istediğiniz boyu tu seç in. Yeni bir özel bo yut ol uşturmak için
aşağıdaki talimatları uygulayın.
Genişlik ve uzunluk için boyut değerleri ayarlama: Tarama Alanı iletişim
●
kutusunu genişletmek için More (Diğer) düğmesine
basın. İlgili
alanlarda genişlik ve uzunluk boy utu ay arlarınızı yapın ya da genişlik veya
uzunluk için ayrı ayrı Auto (Otomatik) ayarını seçin. Değişikliklerinizi
kaydederek yeni bir özel boyut oluşturabilir veya değişikliklerinizi yalnızca
geçerli iş için kullanabilirsi niz.
Temel işlemler
TRWW
NOT: Ayrıca bir önizleme yoluyla Tarama Alanını ekranda sanal olarak da
ayarlayabilirsiniz. Bkz.
Kopyaları ve taramaları öni zlem e sayfa 16.
Giriş ve çıkış boyutlarını ayarlama
15
Page 62

Yalnızca Kopyalama için Yeniden Boyutlandırma değerini (çıkış
boyutu) ayarlama
1. Resize (Yeniden Boyutlandır) düğmesine basın.
2. Görüntüyü yeniden boyutlandırma k istem iyo rsanız No (Hayır) seçeneğini
belirtin: Bu durumda, sonuç, Tarama Alanıyla aynı boyutta olacaktır.
3. Listeden standart bir boyut seçmek için (A2 veya A4 gibi) Size (Boyut)
düğmesine basın.
4. Bir ölçek faktörüne göre (%50 veya %32 gibi) yeniden boyutlandırmak için
Scale (Ölçek) seçeneğini belirtin.
Kopyaları ve taramaları önizleme
Temel işlemler
Önizleme taraması veya kopyası yükleme
Kopyalarınızı ve taramalarınızı, yazıcıya veya dosya sistemine göndermeden önce
önizleyebilirsiniz. Önizleme ile:
Parlaklık ve netlik gibi, seçtiğiniz Oriji nal Türü il e alak alı görün tü ayarl ar ını
●
yapabilir ve bu ayarların etkilerini ekranınızda görebilirsiniz.
Bir Tarama Alanı çerçevesini görüntü üzerinde s ürükl eme k ve
●
konumlandırmak için tutamaçları kul lana ra k Taram a A lanını (giriş boyutu)
görsel olarak ayarlayabilirsiniz.
Belirli görüntü alanlarını ve ayarlarınızın etk ilerin i değerl endirm ek içi n
●
yakınlaştırabilir ve uzaklaştırabilirsiniz.
1. Orijinalinizi yükleyin ve önizleme modunu On (Açık) konumuna getirmek
için Preview Before Scan/Copy (Tarama dan/Ko pyal ama dan Ö nce Öni zle)
düğmesine basın.
2. Önizlemeyi yüklemek için Scan (Tara) veya Copy (Kopyala) düğmesine
basın.
3.
İstediğiniz zaman İptal düğmesine
basarak önizlemeyi kapatabilirs iniz .
16 Bölüm 2 Temel işlemler TRWW
Page 63

Görüntü ayarlarını seçme ve önizleme
1.
Önizleme ekranının sol üst köşesindeki Ayar düğmesine
2. Ayarlar iletişim kutusunda ayar larınızı seçin.
3. Ayarlar iletişim kutusunu kapatmak ve önizleme üzerinde ay arlarınızın etkisini
görmek için OK (Tamam) düğmesine basın. Ayarları ve ilginizi çeken alanları
incelemek için yakınlaştırm a araçl arını kulla nın.
4. Ayarlarınızı tekrar değiştirmeniz gerekiyorsa 1-3 arası adımları tekrarlayın.
NOT: Görüntü ayarlarının etkileri uygulanır ve düşük çözünürlüklü ö nizl emede
görüntülenir. Bu nedenle, hedef dosyadaki veya yazdırılmış kopyadaki son
görüntüyü tam olarak temsil etmez.
Tarama alanını ayarlama ve önizleme
Önizleme, görüntüyü beyaz bir çerçeve nin içinde gösterir. Çerçeve, geçerli Tarama
Alanını (giriş) boyutunu temsil eder. Taramadan önce ç erçev enin boyu tunun
değiştirilmesi, Tarama Alanı ayarlarının değiştirilmesine yol açar. Çerçeven in
boyutu, kenarlıkları ve köşeleri taşınarak ayarlanabilir. Bunun için:
Çerçevenin kenarlarında ve köşelerin de bulunan yeniden boyutlandırma
●
tutamaçlarını
En yakın kenarlığı veya köşeyi yeniden konumlandırmak istediğiniz yeri
●
parmağınızla bastırabilirsiniz. Kenarlık, o noktaya gelecektir.
Çerçeve boyutunu ayarlamanıza ve çerçevenin içindeki görüntüyü
●
konumlandırmanıza yardımcı olması için görüntü yakınlaştırma ve
konumlandırma araçlarını kullan abilirsiniz. Görüntü yakınlaştırma ve
konumlandırma araçları şunlardır:
sürükleyebilirsiniz.
basın.
Temel işlemler
TRWW
Kesik yakınlaştırma: Görüntüyü, kenarlıklarda n kes ilmiş haliyle
yakınlaştırır.
Yakınlaştır: Önizlemedeki görüntü boyutunu büyütür. Yakınlaştırmanın
hedefi, pencerenin merkezidir.
Uzaklaştır: Önizlemedeki görüntü boyutunu küçültür. Yakınlaştırmanın
hedefi, pencerenin merkezidir.
Tümünü yakınlaştır: Yakalama alanının tamam ını kırpmadan görün tüler.
Kenarlıkların konumları, geçerli O rijin al boy ut ay ar ıyla tanımlanır.
Görüntü paneli araçları: Yakalanan görüntüyü, pencerede ortalamak
için bu okları kullanın.
Kopyaları ve taramaları önizleme
17
Page 64

Çerçeve merkezi tutamacı (mavi daire): Tam boyutlu çerçeveyi
sürüklemek ve yakalanan görüntü üzerinde yeniden boyutlandırmak için bunu
kullanın.
Önizlemeyi tamamlayıp işi göndermek istediğiniz zaman Taram ayı/Kopyalamayı
Başlat düğmesine
İşi göndermeden önizlemeyi durdurmak istiyorsanız İptal dü ğmesine
basın.
Çıkış kalitesini ayarlama
Dosyaya tararken kaliteyi ayarlama
Temel işlemler
Tarama işlemine (dosyaya tara) ka lite ayarlar ını, tarama çözünürlüğünü nokta / in ç
(dpi) cinsinde belirterek uygula yabi lirsi niz .
1. Kalite (dpi) iletişim kutusunu açmak için Scan (Tara) düğmes ine ve
ardından Quality (Kalite) düğmesine basın.
2. Kullanılabilir çözünürlükleri görüntülemek için kaydırma çubuğunu kullanın.
3. Kullanmak istediğiniz tarama çözünürlüğünü görüntüleyen düğmeye basın.
Custom (Özel) düğmesine basıldığında, alternatif çözün ürlük leri içeren bir
liste açılır.
basın.
18 Bölüm 2 Temel işlemler TRWW
Page 65

Yazdırmak için tararken kaliteyi ayarlama
Kopyalama (yazdırmak için tara) sırasında, kopyal am a işleminin tamamı (tarama
ve yazdırma) için geçerli o lacak genel baskı k alitesi para metrelerin i (Hızlı, Normal,
En İyi) ayarlarsınız.
Tarama kalitesi, çözünürlük le (dpi) tanımlanır. Her kalite ayarı (Hızlı, Normal,
●
En İyi) için istediğiniz taram a çöz ünürlü ğünü s eçeb ilirs iniz . Bu, O rijina l Türü
ayar seçeneklerinden yapılır (aşağıya bakın).
Bir kalite ayarına (Hızlı, Normal, En İyi) atanan baskı kalites i parametreleri,
●
yazıcıda tanımlanır.
1. Baskı Kalitesi iletişim kutusunu açmak iç in Copy (Kopyala) düğmesine ve
ardından Quality (Kalite) düğmesine basın.
2. Listeden istediğiniz kalite ayar ını seç in.
Fast (Hızlı), olabildiğince az m ürekk ep kullanarak hızlı bir taslak
●
hazırlamak için uygundur.
Normal, ortalama kalite düzeyi gerektiren kopyalama işlerinin çoğu için
●
uygundur.
Best (En İyi), kaliteli baskıl ar için seçilmesi gereken ayardır.
●
Temel işlemler
TRWW
Çıkış kalitesini ayarlama
19
Page 66

Hızlı, Normal ve En İyi kalite ayarlarına (yazdırmak için tara) tarama
çözünürlükleri atama
1. Orijinal Türünün ayar seçenekleri ni açm ak için Original Type (Orijinal Türü)
düğmesine ve ardından More (Diğer) düğmesine basın.
Temel işlemler
2. Ayarlar listesinde aşağı inip Fast Scan Resolution (Hızlı Tarama
Çözünürlüğü), Normal Scan Resolution (Normal Tarama Çözünürlüğü) ve
Best Scan Resolution (En İyi Tarama Çözünürlüğü) düğmelerine ulaşın.
3. Çözünürlük seçimleri listesini açmak için bir düğmeye basın.
4. Geçerli Orijinal Türü ile istedi ğiniz kalite ayarını (Hızlı, Normal, En İyi) seçtik ten
sonra uygulanmasını istediğiniz tarama çözünürlüğünü belirtin.
Örnek: Color Poster (Renkli Poster) orijin al türün ü seçi n ve ay arları bel irtmek
için More (Diğer) düğmesine basın. Best Scan Resolution (En İyi Tarama
Çözünürlüğü) düğmesine basın ve 400 dpi seçeneğini belirtin. Bu, o andan
itibaren Color Poster (Renkli Poster) orijinal türünü ve Copy (Kopyala) > Quality
(Kalite) > Best (En İyi) kalite seç eneğini her kullandığınızda tarama
çözünürlüğünün 400 dpi olacağı anlamına geli r.
Ortam profili oluşturma
Sisteminiz, ortam profilleri aracılığıyla tarayıcı, yazıcı ve ortam türü arasında renk
eşlemesini desteklemektedir. Yazıcınızla kullanılan her ortam türü (parlak veya
kuşe kağıt gibi) için bir ortam profili olmalıdır.
Çoğu durumda, renk eşleme ve ortam profilleri, sistem tarafından yönetilir ve bu
profillerin uygulaması kullanıcı iç in şeffaftır. Yazıcınıza yeni ortam yerleştirdikten
hemen sonra, yazıcının ayarlar menüsünden ortam türünü seç ersin iz. Ortam türü
için zaten bir ortam profili varsa, sisteminiz, kopyanız için en iyi renk eşlemesini
sağlamak amacıyla otomatik olarak o ortam prof ilini yükler.
20 Bölüm 2 Temel işlemler TRWW
Page 67

Ancak, iki noktaya dikkat etmeniz gerek ir:
Ortam profili bulunamadı: Sistem, geçerli ortam için zaten bir ortam profili
●
içermiyo rsa sizin bir ortam profili oluşturmanız gerekir. Ortam profili
oluşturmanız gerektiğinde bunu belirten bir ileti ku tusu görünür ve kutuda, siz i
Ortam Profili Oluştur sihirbazına (aşağıya bakın) götürecek bir düğme
görüntülenir.
Renkler en iyi değil: Sistemle birlikte sağlanan varsayılan orta m profillerinden
●
bazıları geneldir ve bu pr ofiller, t üm ortam türlerine uygun o lmayab ilir. Ayrıca,
geçerli koşullar, belirli ortam profilleri için de en iy i ko şullar olmayabilir.
Denemeleriniz, renk eşleme sini geliştirmeniz gerektiğini gösteriyorsa, Ortam
Profili Oluştur sihirbazını (aşağıya bakın) kullanarak geç erli o rt am pr ofili ni
güncellemeniz (yenilemeni z) gerekir.
Geçerli ortam profilini güncelleme (yenileme)
1. Yazıcınızın ortam türü ayarının, yüklü olan ortamla eşleştiğinden emin olun.
2. Güncellenmesi gerekip ge rekm ediğini anlamak için geçerli o rtam profiliyle bir
deneme kopyası oluşturun.
3. Options (Seçenekler) > Printer Options (Yazıcı Seçenekleri) dü ğmelerine
basın.
Temel işlemler
TRWW
4. Yazıcı Seçenekleri iletişim kutusu, yazıcınız hakkında bilgi görüntüler ve
yazıcının ana menüsünde seçilen ortam ayarı olan Geçerli ortam ı gösterir.
Media profile (ortam profili) değerinin karşısında şunlardan biri görünebilir:
Default: (Varsayılan) Geçerli ortamın ortam profili, progra mla birlik te
●
sağlanmıştır ve güncellenmemiştir.
Created dd-mm-yyyy: (gg-aa-yyyy tarihi nde oluşturuldu) Geçerli ortam
●
profili, belirtilen tarihte oluşturuld u vey a güncellendi.
Not Created: (Oluşturulmadı) Sistem, geçerli ortam için bir ortam profili
●
bulamadı.
5. Durum, Not Created (Oluşturulmadı) ise, kopya oluşturmak için önce bir ortam
profili oluşturmanız gerekir. Ortam Profili Ol u ştur sihirbazını başlatmak için
Create Profile (Profil Oluştur) düğmesine basın.
Ortam profili oluşturma
21
Page 68

6. Ortam profili durumundan ve denemelerinizden elde ettiğiniz renk eşleme
sonuçlarından memnunsanız, il etişim kutusunu kapatmak için OK (Tamam)
düğmesine basın.
7. Denemelerinizde elde ettiğiniz renklerd en m emn un deği lse niz, Ortam Profili
Oluştur sihirbazını başlatmak için Update Profile (Profili Güncelle) düğmesine
basın.
Ortam Profili Oluştur sihirbazı
Bu sihirbaz, hem yeni bir ortam profili oluşturmak, hem de mevcut bir profili
güncellemek için kullanılabi lir. Ekranınızda görünen sihirbaz talimatlarını uygulayın.
Bu işlem, sistemde kayıtlı bir renk parçası sayfasını yazdırmanızı ve ardından
taramanızı gerektirir. Geri kalanını sistem halleder.
Temel işlemler
İPUCU: Sihirbaz, iki sayfa yazdırır; ilk sayfayı iptal edip ikinciy i taram alısınız.
İşlemi tamamladığınızda ortam profili oluşturma tarihi güncellenir.
Taranan dosyaları görüntüleme, taşıma, yeniden adlandırma
veya silme
LAN ve USB sürücünüz üzerindeki sisteminizin taram a hed efleri , erişmeniz ve
yönetmeniz gerekecek olan görüntü dosyalarını içerecektir. Resim dosyalarınıza,
Dosya Yöneticisi iletişim kutus undan erişilebilir.
Dosya Yöneticisini açma
Dosya Yöneticisi düğmesine basın.
22 Bölüm 2 Temel işlemler TRWW
Page 69

Dosya sistemine gitme
Dosya Yöneticisi, sisteminizde tarama hedefi olarak tanımlı klasörlerle
●
sınırlıdır. Dosya listesi, geçerli hedef klasörünüz ün kökünü varsayılan
kabul eder.
Klasör Yukarı düğmesi (.. işaretli), oluşturduğunuz hedef klas örlerin list esine
●
ulaşıncaya dek sizi her defasında bir düzey yukarı taşır.
Hangi klasörün düzeyine gitmek istiyorsanız o klasörün adını tıklatın.
●
Bir görüntü adını tıklatarak görüntü küçük resmini ve görüntü hak kın da tem el
●
bilgileri görebilirsiniz.
Görüntü dosyasının adının solunda yer al an kutu yu işaretle yerek bir dosy a
●
eylemi için (aşağıya bakın) görüntü dosyaları seçin.
Dosya eylemi düğmeleri
Eylem düğmelerini kullanmak için, dosya adlarının yanında bir veya daha fazla
kutuyu işaretleyin ve ardından alakalı eylem düğmesine basın.
Copy (Kopyala): Bir veya daha fazla seçili (onay işaretiyle işaretlenmiş)
●
dosyayı başka bir klasöre kopyalam ak içi ndir.
Move (Taşı): Bir veya daha fazla seçili (onay işaretiyle işaretlenmiş) dosyayı
●
başka bir klasöre taşımak içindir.
Rename (Yeniden Adlandır): Seçili (onay işaretiyle işaretlenmiş) bir dosyanın
●
adını değiştirmek içindir.
Delete (Sil): Seçili (onay işaretiyle işaretlenmiş) bir veya daha fazla dosyayı
●
sistemden silmek içindir.
New folder (Yeni klasör): Geçerli klasörde yeni bir alt klasö r oluşturmak içindir.
●
Temel işlemler
TRWW
Taranan dosyaları görüntüleme, taşıma, yeniden adlandırma veya silme
23
Page 70

All / None (Tümü / Hiçbiri): görüntülenmekte olan klasördeki tüm dos ya
●
adlarının solunda bulunan kutuların tümünü işaretlemek veya tümünün
işaretini kaldırmak içindir.
View (Görünüm): Görüntülenmekte olan görüntü dosyasının daha büy ük bir
●
görünümünü içeren ayrı bir pencere açar .
Sistem kurulumu ve seçenekler
Temel seçenekler
Temel işlemler
Tarihi ve saati ayarlama
Yerel tarih ve saat parametreleri, sist em ilk kez açıldığında çalıştırıl an yapılandırma
programı üzerinden girilir. Gerekirse, yerel tarih ve saat ayarlarını, Options
(Seçenekler) menüsünden değiştirebilirsiniz.
1. Options (Seçenekler) > Basic Options (Temel Seçenekler) > Date & Time
(Tarih ve Saat) düğmelerine basın.
2. Doğru yerel tarih ve saat değerlerini ve saat dilimini girin. Tarih ve saa t ayarları,
çeşitli program eylemleriyle kullanılacaktır.
Ölçü birimleri
1. Options (Seçenekler) > Basic Options (Temel Seçenekler) > Units of
measure (Ölçü birimleri) düğmelerine bas ın.
2. Belge boyutlarını tanımlarke n kull anm ak is tediğiniz birimi (inç veya mm gibi)
seçin.
Kağıt serisi tercihi
1. Options (Seçenekler) > Basic Options (Temel Seçenekler) düğmelerine
basın.
2. Boyut iletişim kutularında (Tarama Alanı ve Yeniden Boyutlandırma)
görüntülenmesini istediğiniz kağıt serilerini temsil eden Kağıt serisi alanlarını
seçin/işaretleyin. Görüntülenecek bir veya daha fazla kağıt serisi
seçebilirsiniz.
24 Bölüm 2 Temel işlemler TRWW
Page 71

Taramadan sonra geri sar
1. Options (Seçenekler) > Basic Options (Temel Seçenekler) düğmelerine
basın.
2. Tarama işleminin ardından tarayıcı panelinde ki kağıt geri düğmesi ne basarak
kağıdı geriye doğru çıkarabilmek için belgenin kağıt besleme alanına
dönmesini istiyorsanız Rewind after scan (Taramadan sonra geri sar)
seçeneğini belirtin/işaretleyin. Kağıt ileri düğmesiyle kağıdı geriye doğru
çıkarabilmek için belgenin tarayıcının arkasında kalmasını istiyorsanız
seçeneği işaretlemeden bırakın.
Otomatik sıfırlama ve eylemsizlik zaman aşımı
Options (Seçenekler) > Basic Options (Temel Seçenekler) düğmelerine basın.
Bu iki seçenek, tanımlı bir eylemsiz süresinin (v arsayılan süre beş dakikadır)
ardından sistemin otomatik olarak varsayılan parametrelere dönmesini sağlar.
Böylece, önceki kullanıcı ayarları değiştirmiş olsa bile, yeni bir kullanıcı sistemi
kullanmaya başladığında her zaman temel ayarla r geçerli olur. Sistem, kayıtlı
sistem parametrelerine, Options (Seçenekler) > Advanced (Gelişmiş) > Save
Settings (Ayarları Kaydet) düğm esine en son basıldığında (aşağı bakın) ayarlanan
parametrelere geri döner.
Bu işlevi uygulamak istiyorsanız Auto Reset (Otomatik Sıfırlama) seçeneğini
belirtin/işaretleyin. Otomati k Sıfırlam a tetiklen meden önce geç mesi gerek en boşta
kalma süresini ayarlamak için Inactivity Timeout (Eylemsizlik Zaman Aşımı)
seçeneğini kullanın.
NOT: Auto Reset (Otomatik Sıfırlama) seç eneğinin uygulanması, yeni hedeflerin
ve ortam profillerinin etkilenmesine veya kaybedilmesine yol açm az.
Temel işlemler
Gelişmiş seçenekler
Gelişmiş seçenekler için parola ayarlama
Gelişmiş Seçenekler iletişim kutus una parola korumalı erişim uygulamak için
Options (Seçenekler) > Advanced Options (Gelişmiş Seçenekler) > Set
Password (Parola Ayarla) düğmelerine basın.
TRWW
Sistem kurulumu ve seçenekler
25
Page 72

Ağ ayarları
Ağ parametreleri, sistem ilk kez açıldığında çalıştırılan yapılandıma program ı
üzerinden girilir. Sistem taşındıysa veya ağ parametreleri değiştiyse, yeni ağ
ayarları, Options (Seçenekle r) men üsü nden girilebilir.
1. Options (Seçenekler) > Advanced Options (Gelişmiş Seçenekler) >
Network (Ağ) düğmelerine basın.
2. Ağınızda bir DHCP sunucusu bulunduğunu biliyorsanız, sisteminizin ağ
bağlantısı parametrelerini otomatik olarak alabil mes i iç in Auto IP address
(Otomatik IP adresi) seçeneğini belirtin. Ya d a IP adresini, alt ağ mas kesini ve
varsayılan ağ geçidini el ile girin.
Ayarları kaydetme
Temel işlemler
Options (Seçenekler) > Advanced Options (Gelişmiş Seçenekler) > Save
Settings (Ayarları Kaydet) düğmelerine basın.
Bunu yaptığınızda, geçerli ayarlar, yeni sist em varsayılan ayarları olarak kaydedil ir.
Bir Otomatik Sıfırlama işlemi tetikl endi ğinde kayıtlı ayarlar tekrar uygulanır (yukarı
bakın).
Ayarları fabrika varsayılanlarına sıfırlama
Options (Seçenekler) > Advanced Options (Gelişmiş Seçenekler) > Factory
Default (Fabrika Varsayılanı) düğmelerine basın.
Bunu yaptığınızda, tüm ayarlar fabrika varsayılanlarına geri yüklenir. Programla
birlikte sağlanan Orijinal Türleri, başlangıçtaki ayarlarına geri yüklenir. Fabrika
varsayılanlarına sıfırlama, bir yönet ici i şlevidi r ve paro la gerektirebilir.
Diğer gelişmiş seçenekler
Manage Destinations (Hedefleri Yönet) se çeneği,
●
klasör belirleme sayfa 6 bölümünde açıklanmaktadır.
Calibrate Screen (Ekranı Ayarla) seçeneği,
●
ayarlama sayfa 31 bölü mün de aç ıklanmaktadır.
Software Update (Yazılım Güncelleme) seçeneği,
●
yükleme sayfa 39 bölümünde açıklanmaktadır.
Service (Hizmet), servis teknik personeline yönel ik bir se çene ktir v e bu
●
kılavuzda ele alınmamaktadır.
Tarama işlemleri için he def
Dokunmatik ekran işaretçisini
Yeni sistem yazılımı
26 Bölüm 2 Temel işlemler TRWW
Page 73

3Bakım
Cam plakayı ve tarama alanını temizleme
1. Tarayıcıyı kapatın ve güç kablosunu çıkarın.
2. Dokunmatik ekranı ters çevirin.
Bakım
TRWW
Cam plakayı ve tarama alanını temizleme
27
Page 74

3. Tarayıcının arka yüzünde, kapağı çıkarmak için iki düğme bulunur. Kapağı
çıkarma düğmelerini, açıldıklarını hissedinceye kadar aynı anda tarayıcının
ortasına doğru kaydırın ve kapağı geriye, kendinize doğru çekin. Ta rayıcı
kapağını geriye doğru tamamen açın.
4. Cam plakayı ve üç silindiri, yumuşak ve leke bırakmayan cam temizleyiciyle
ıslatılmış, tüy bırakmayan bir bezle yavaşça silin.
DİKKAT: Aşındırıcı, aseton, benzen veya bu kimyasalları içeren sıvılar
kullanmayın. Tarayıcının cam plakasına veya başka bir yerine doğrudan sıvı
püskürtmeyin.
Bakım
28 Bölüm 3 BakımTRWW
Page 75

5. Başka bir temiz, kuru ve tüy bırakmayan bez kullanarak cam ı tamamen
kurulayın. İşiniz bittiğinde, aynı bezle silindirleri kurulay ın.
6. Tarayıcı kapağını kapatın ve yerine oturması iç in aşağı doğru nazikçe bastırın.
Dokunmatik ekranı normal konumuna döndürün.
Tarayıcıyı ayarlama
HP, çıkışınız istediğiniz gibi değilse ve tarama alanını temizlem ek, sorunun uzu
çözmeye yetmediyse tarayıcıyı ayarlama n ızı önerir. Ayarlama işlemi, tarayıcının
orijinal rengini ve SB ayarını yeniler.
NOT: Tarayıcıyı ayarlamadan önce camı temizlemeniz önemlidir.
1. Tarayıcıyı kapatın ve tarama al anını temizleyin. Ayarlama işleminin en iyi
sonuçları vermesi için tarayıcı temiz olmalıdır.
2. Tarama alanını temizlemeyi bitirinc e taray ıcıyı açın. Tarayıcı panelindeki güç
ışığı yeşil renkte yanınca tarayıcı ayarlanmaya ha zırdır.
TRWW
Tarayıcıyı ayarlama
Bakım
29
Page 76

3. Tarayıcı Ayar Sihirbazı'nı başlatmak için Options (Seçenekler) > Calibrate
Scanner (Tarayıcıyı Ayarla) düğmelerine basın.
4. Tarayıcı Ayar Sihirbazı, tarayıcı ayarlama yordamında size yol gösterir.
Tarayıcıyı ayarlamak için tarayıcıyla birlikte verilen bakım sayfası gerekir.
Bakım
30 Bölüm 3 BakımTRWW
Page 77

Dokunmatik ekran işaretçisini ayarlama
1. Options (Seçenekler) > Advanced Options (Gelişmiş Seçenekler) >
Calibrate Screen (Ekranı Ayarla) düğmel erine basın.
NOT: Advanced Options (Gelişmiş Seçenekler) bölümüne erişmek için
sistemin yönetici parola sı g erekeb ilir.
2. Ekrandaki yönergeleri izleyin. Ayarlam a işlemi , ekra nda fark lı konum larda
görünen hedef noktalara basılarak yap ılır. Görünm ez ha le gelinceye dek
hedef noktalara basın.
3. Ekran ayarını doğrulamak ve kabul etmek için son iletişim kutusunda OK
(Tamam) düğmesine basın.
Tarayıcı cam plakasını değiştirme
Zamanla, cam plaka eski k alitesini yitirebilir . Cam yüzeydeki küçük çizik ler, görüntü
kalitesini düşürebilir. Yeni bir cam plaka sipariş etmek içi n HP D es tek’i arayın.
Yeni cam plakayla birlikte cam plakayı değiştirm ek iç in gerek en adım adım
yönergeler de verilir.
Bakım
TRWW
Dokunmatik ekran işaretçisini ayarlama
31
Page 78

4 Sorun Giderme
Sistem hata bildiriyor
Bir hata algılandığında sistem, ekranınızda bi r hata iletisi gösterir.
Yaygın hataları düzeltme
Hatanın yapısı ve nedeni, ekranınızda görüntülenen bir iletiyle bildirilir.
Ekranınızdaki bilgiler, hatayı d üzeltmek için çe şitli yönergeler ve eyleml er içerebilir.
Bu durumda, ekranınızdaki yönergeleri uygulayın.
Ekranınızda bir çözüm görüntülenmezse, bu hızlı kılavuzun soru n giderm e
bölümlerinde ya da sistemin çevrimiç i yardımında hatanın açıklamasını ve
çözümünü arayın. Verilen yönergeleri uy gula yın.
Tarama kalitesi hatalarının çoğu, tarayıcıyı temi zleyerek ve ayarlayarak giderilebilir.
Karşılaştığınız hatayı bu şekilde gideremezseniz:
Tarayıcıyı kapatıp tekrar açarak sistemi yenide n başlatmayı deneyin.
●
Options (Seçenekler) > Advanced Optio ns (Gelişmiş Seçenekler) > Factory
●
Defaults (Fabrika Varsayılanları) üzerinden sist emin fabrika varsayılanlarını
tekrar ayarlamayı deneyin.
Gerektiği gibi çalıştığını bildiğiniz son sistem görüntüsünü kurtarmayı deney in.
●
Sistemi güncellemem veya kurtarmam gerekiyor sayfa 37.
Bkz.
Yukarıdaki eylemler, sorunu çözmeye yetmezse, teknik destek ile bağlantı kur un
(aşağı bakın).
Teknik destek
Bazı durumlarda teknik desteğe ihtiyacınız olur. Aşağıdakilerden biri veya daha
fazlası doğruysa HP destek ile bağlantı kurmalısınız:
Dokunmatik ekranınızda önerilen eyl em i gerçekleştirmeniz veya yukarıda,
●
“Yaygın hataları düzeltme” bölümü altında anlatılan adımları uygulamanız
hatayı düzeltmiyor.
Hata ve hatanın çözümü bu kılavuzda açıklanmıyor ve yukarıda, “Yaygın
●
hataları düzeltme” bölümü altında anlatılan adımları uygulamanız hatayı
Sorun Giderme
Kağıt sıkışması var
düzeltmiyor.
Sistem, ekranınızdaki hatayı bildi remiyor ve yukarıda, “Yaygın hataları
●
düzeltme” bölümü altında anlatılan adımları uygulamanız hatayı düzeltmiyor.
Belge, hala sürücü sistemindeyken tarayıcı tarama işlemini bırakırsa, bu, bir kağıt
sıkışması olduğu anlamına gelir. Sisteminiz, kağıt sıkışması olduğunu bildirir. Bu
32 Bölüm 4 Sorun Giderme TRWW
Page 79

sorunu gidermek için, belgeyi tarayıcıdan çıkarmayı deneyin: Kağıt Geri veya Kağıt
İleri tuşunu basılı tutun. Bu tu şlara yanıt vermezse, be lgeyi aşağıda açıklandığı gibi
el ile çıkarın.
1. Dokunmatik ekranı ters çevirin.
2. Kapağı çıkarma düğmelerini, açıldıklarını hissedinceye kadar aynı anda
tarayıcının ortasına doğru kaydırın.
TRWW
Kağıt sıkışması var
Sorun Giderme
33
Page 80

3. Bir elinizle, kapağı açmak için geri doğru çekin ve diğer elinizle belgeyi tarama
alanının tamamen dışına çıkacak şekilde çekin.
4. Kapağı kapatın.
5. Dokunmatik ekranı normal konumuna döndürün.
Tarayıcı tekrar hazır olduğunda taranacak belge yi te krar y erleştirin.
Taranan resimde lekeler var
Sorun Giderme
34 Bölüm 4 Sorun Giderme TRWW
Çoğu durumda, lekelerin nedeni belge üze rinde v e ta rayıcı ortamında bulunan toz
parçalarıdır. Tarayıcı çok duyarlı olduğu ve en ince ayrıntıları yakaladığı için en
küçük toz parçaları bile fark edi lebil ir. Belgen in tem iz lenm es i genel lik le sorunu
çözer. Önce, orijinal belgede kırışıklık veya camda sürükl enm esi n e neden olaca k
başka bir oluşum olup olmadığını anlamak iç in orijinal belgeyi inceleyin. Belge temiz
ve iyi durumdaysa camı temizlemeyi deneyin: bkz.
temizleme sayfa 27. Sorun devam ediyorsa tarayıcıyı ayarlamayı deneyin: bkz.
Cam plakayı ve tarama alanını
Page 81

Tarayıcıyı ayarlama sayfa 29. Sorun yine devam ederse, camı değiştirmeniz
gerekebilir: bkz.
Tarayıcı cam plakasını değiştirme sayfa 31.
Taranan görüntüdeki çizgiler çok ince veya kesikli
CAD çizimleri gibi ince çizgilere sahip belg eler taran ırken, 300 dpi altındaki bir
tarama çözünürlüğü orantısız incelikte vey a kesikli çizgilere neden olabilir. HP, CAD
çizimlerini ve diğer ince çizgili belgeleri tararken tarama çözünürlüğünü en az 300
dpi olarak ayarlamanızı önerir. D aha yüksek çö zünürlükte ta rama süreyi uzatsa da
görüntü kalitesinin daha iyi olmasını sağlar. Fotoğraf ve alan dolguları taranırken
bu sorun fark edilemeyebilir. Tarama ç özünürlüğü ayarıyla ilgili daha fazla bilgi için,
Çıkış kalitesini ayarlama sayfa 18.
bkz.
Aşağıdaki resimler sorunun anlaşılmasına yardımcı olacaktır:
Şekil 4-1 150 dpi ile taranmış CAD çizimi
Şekil 4-2 300 dpi ile taranmış CAD çizimi
LAN üzerinde bir hedef klasöre bağlanılamıyor veya
taranamıyor
LAN üzerinde belirli bir hedef klasöre bağlanmak ve taramak iç in aşağıdaki
adımların tümünü uyguladığınızdan emin olun:
1. Sisteminizin LAN üzerinde kurulu olduğundan emin olun. Bkz.
kurulumu ve seçenekle r sayfa 24.
TRWW
Taranan görüntüdeki çizgiler çok ince veya kesikli
Sistem
Sorun Giderme
35
Page 82

2. Hedef klasör kurulumu, sistem i yük lediğiniz de ve sonras ında Options
(Seçenekler) > Advanced Options (Gelişmiş Seçenekler) > Manage
Destinations (Hedefleri Yönet) > Add (Ekle) veya Change (Değiştir)
seçenekleri üzerinden gerçekl eştirilir. Tam ağ yolunu doğru bir şekilde
girdiğinizden emin olun.
3. Doğru giriş bilgilerini girdiğinizden emin olun – Domain\Username
(Etki Alanı\Kullanıcı Adı) ve Password (Parola). Etki alanı ile kullanıcı adı
arasına ters eğik çizgi karakt erini ‘\ ’ girme yi unutmayın.
4. Parametrelerinizin doğru olup olmadığını ko ntrol etm ek için Test
Connection (Bağlantıyı Test Et) düğmesine basın.
Yukarıdaki işlemlerin tümünü gerçek leşt irdiy seni z v e hedef klasöre hala
bağlanamıyorsanız veya taray amıyorsanız, yerel ağ yöneticinizle bağlantı kurun.
Resim kesildi—resmin tamamı taranmadı
Boyut ayarlarınız yanlış olabilir. Boyut ayarlarınızı kontrol etmek için Scan
●
Area (Tarama Alanı) düğmesine basın. Boyutun otomatik olarak algılanması
için Tarama Alanınız Auto (Otomatik) se çeneğine veya tarayıcıda yüklü olan
tam orijinalin boyutuna karşılık gelen standart veya özel bir boyuta
ayarlanmalıdır.
Orijinali doğru şekilde yük ledi ğinizden emin olun. Orijinalin merkez ini,
●
tarayıcının merkez ok işaretiyle hizaladığınızdan emi n olun.
Ortam profili oluşturulamıyor
Ortam Profi l i Oluştur sihirbazı çalışmamaya başlarsa veya hata bildirirse:
1. Hem tarayıcının hem de yazıcının açık ve normal işlem için hazır olmasını
sağlayın.
Sorun Giderme
2. Tarayıcınızın çalıştığından emin olun. Tarayıcıyı test etmek için küçük bir
belgeyi (dosyaya) yazdırın.
3. Yazıcıda ortam yüklü olduğundan emin olun.
4. Yazıcınızın ortam türü ayarının, yüklü olan gerçek ortam la eşleştiğinden
emin olun.
36 Bölüm 4 Sorun Giderme TRWW
Page 83

5. Ortam Profili Oluştur sihirbazıyla yazdırdığınız renk sayfasının
yerleştirildiğinden ve tarayıcıda g erekt iği gi bi hiz alan dığından em in olun.
6. Birinci sayfayı değil, Ortam Profili Oluştur sihi rbazı tarafınd an yazdırılan ikinc i
sayfayı taradığınızdan emin olun.
7. Tarayıcının temiz olduğundan ve yakın zamanda ayarlandığından emi n ol un.
Emin olamıyorsanız, tarama alanını temi zley in ve ta ra yıcıyı ayarlayın: bkz.
Cam plakayı ve tarama alanını temizleme sayfa 27 ve Tarayıcıyı ayarlama
sayfa 29.
Renk eşleme sonuçlarımdan memnun değilim
1. Renkli Poster orijinal türünü kullanma yı deneyin. Bu, renkli eşlemeyi
etkileyebilecek özel bir görüntü işlemi uy gulamay an, nötr bir orijinal türüdür.
2. Copy (Kopyala) > Original Type (Orijinal Türü) iletişim kutusunda Orijinal
Türü ayarlarınızı kontrol edin. Orijinal Türüyle alak alı belirli ayarları
görüntülemek ve değiştirmek için More (Diğer) düğmesine basın.
3. Options (Seçenekler) > Printer Options (Yazıcı Seçenekleri) > Update
Profile (Profili Güncelle) düğmelerine basın ve geç erli orta m ve yazıcı
koşulları için en iyi profilin kullandığınız ortam profi li olduğundan emin olmak
için ekranınızdaki adımları uygulayın.
4. Yukarıdaki işlemler sorunu gidermenize yetmezse, tarayıcının temiz
olduğundan ve yakın zamanda ayar landığından emin olun. Emin
olamıyorsanız, tarama alanını temizleyin ve tarayıcıyı ayarlayın: bkz.
plakayı ve tarama alanını temizleme sayfa 27 ve Tarayıcıyı ayarlama
sayfa 29.
Sistemi güncellemem veya kurtarmam gerekiyor
Tarayıcı yeniden başlatma modunda kalırsa ve sistem norm al bir şekilde
başlayamazsa veya önceki ya da ilk program sürü mün e geri dönm ek istiy orsa nız
sistem kurtarma gerçekleştirin. Sistem kurtarma, sistemin program böl ümü nü
yeniden biçimlendirir ve tekrar yeni bir program görüntüsü yükler.
Cam
TRWW
Renk eşleme sonuçlarımdan memnun değilim
Sorun Giderme
37
Page 84

Sorun Giderme
Sistem kurtarma gerçekleştirmek için, Yazılım Güncelleme ve Kurtarma modunu
etkinleştirmeniz gerekir. Yazılım Güncell eme ve Kurtarma modunu etk inleştirmenin
iki yolu vardır:
1. Dokunmatik ekranınızdaki program çalışıyorsa, Options (Seçenekler) >
Advanced Options (Gelişmiş Seçenekler) > Software Update (Yazılım
Güncelleme) düğmelerine basın.
2. Sisteminiz takıldıysa ve dokun mat ik ek ranınızda ki pro gram a r abirimine
erişilemiyorsa, ekranınızda Yazılım Güncelleme ve Kurtarma menüsünü
etkinleştirmek için aşağıdaki yönerge leri u ygul ayın.
a. Sistemin dokunmatik ekranının kenarındaki USB bağlantı noktasına bir
USB klavye takın.
b. Tarayıcının arkasındaki Açma/Kapama düğmesi ni kullanarak tarayıcıyı
kapatın.
c. Tarayıcının arkasındaki Açma/Kapama düğmesini kullanarak
tarayıcıyı açın.
d. Sistem yeniden başlatılırken dokunmatik ekranınızda görünen iletileri
dikkatle takip edin. Yazılım Güncelleme ve Kurtarma modunda sistemi
başlatma seçeneği göründüğünde, klavyeniz le s eçeneği belirtin.
e. Yazılım Güncelleme ve Kurtarma ekranı görünür ve dokunmatik
ekranınızdan kontrol edilebilir.
Yazılım Güncelleme ve Kurtarma mod una geçtiğinizde, yazılımın tam görün tüsünü
yeniden yükleyerek sistemi nizi kurtarabilirsiniz. Aşağıdaki yönergele ri uy gulay ın:
1. Yazılım Güncelleme ve Kurtarma menüsünde System Update/ Recover
(Sistem Güncelleme/Kurtarma) seçe neğin i bel irtin.
2. Listeden yüklemek isted iğiniz prog ram gö rüntüs ünü s eçi n. Varsa y ılan
görüntü, sisteminizle birlikte sağlanan ilk sürümdür ve etkin görüntü, şu anda
yüklü olan sürümdür. Listelenen diğer görüntüler, etkin sürümden önce
yüklediğiniz sürümlerdir.
3. Sorulduğunda seçiminizi onayla yın. Sistem , s eçi len prog ram g örüntüs üy le
güncellenir. Bu işlem, yaklaşık iki dakika sürer. Yazılım Güncelleme ve
Kurtarma menüsüne geri dönmek için OK (Tam am) düğmes ine bas ın.
4. Return to normal scanner operation (Normal tarayıcı çalışmasına geri dön)
düğmesini seçin v e onay layın. Siste m yüklenir ve ilk parametre lerinin tümünü
başlatır. Tarayıcıyı kapatmaktan veya yükleme işlemini kesmekten
kaçının. Bu adımın tamamlanması on dakika kadar sürebilir.
5. Sistem yükleme işleminin sonun da, dokunmatik ekranı ayarlamanız istenir. Bu
istendiğinde, oklara ve OK (Tamam) düğmesine basın.
6. Sistem yazılımınızın dilini seçin.
38 Bölüm 4 Sorun Giderme TRWW
Page 85

7. HP lisans sözleşmesini kabul edin.
8. Sisteminiz, kurtarma işleml erini tam amlar ve tarama ve kopyalama program
arabiriminizi başlatır.
Sistem yazılımı yanlış dilde
Sisteminizin dili, kurulum sırasında seçilir; dili değiştirmek için, yazılımı yeni bir dil
seçimiyle tekrar yükle meniz gerekir.
1. Options (Seçenekler) > Advanced Options (Gelişmiş Seçenekler) >
Software Update (Yazılım Güncelleme) düğmele rine ba sın.
2. Yazılım Güncelleme ve Kurtarma menüsünde System Update/Recover
(Sistem Güncelleme/Kurtarma) seçe neğin i bel irtin.
3. Program sürümü görüntü listesinden, “etkin” prog ram görüntüsünü y üklemeyi
seçin.
4. Sorulduğunda seçiminizi onaylayın. Si stem , prog ram g örüntüs üy le
güncellenir. Bu işlem, yaklaşık iki dakika s ürer. Yazılım Güncelleme ve
Kurtarma menüsüne geri dönmek için OK (Tamam) düğmesine basın.
5. Return to normal scanner operation (Normal tarayıcı çal ışmasına geri dön)
düğmesini seçin ve onaylayın. Sistem yükleni r ve i lk param etrelerini n tümünü
başlatır. Tarayıcıyı kapatmaktan veya yükleme işlemini kesmekten
kaçının. Bu adımın tamamlanması on dakika kadar sürebilir.
6. Sistem yükleme işleminin sonunda, dokunmati k ekranı ayarlamanız istenir. Bu
istendiğinde, oklara ve OK (Tamam) düğmesine basın.
7. Sistem yazılımınızın yeni dilini seçin.
8. HP lisans sözleşmesini kabul edin.
9. Sisteminiz, güncelleme işlem lerini tamamlar ve tarama v e kopyalama program
arabiriminizi, 7. adımda seçtiğiniz yeni dilde başlatır.
Yeni sistem yazılımı yükleme
Sisteminiz için yeni yazılım sürümü, şu yöntemlerle sağlanabilir:
USB flash belleğinde
●
Bir ağ bilgisayarı üzerinden: Internet’ten in dirm e, CD-ROM , diğer
●
Bir USB flash belleğinden yeni bir yazılım sürümü yüklemek için
1. Options (Seçenekler) > Advanced Options (Gelişmiş Seçenekler) >
Software Update (Yazılım Güncelleme) düğmele rine ba sın.
2. Sonraki adıma geçmeden önce Yazılım G üncelleme ve Kurtarma me nüsünün
görünmesini bekleyin.
3. USB flash belleğini, dokunmatik ekranın kenarındaki USB bağlantı noktasına
bağlayın.
Sorun Giderme
TRWW
Sistem yazılımı yanlış dilde
39
Page 86

4. Yazılım Güncelleme ve Kurtarma menüsünde System Update/ Recove r
(Sistem Güncelleme/Kurtarma) seçe neğin i bel irtin.
5. Yeni program sürümü görüntüsü, program sürümü görüntü listesinde belirir.
Listede, “USB” metniyle yeni sürümü bulab ilirs iniz .
6. Yüklemek için bu görüntüyü seçin.
7. Return to normal scanner operation (Normal tarayıcı çalışmasına geri dön)
düğmesini seçin v e onay layın. Siste m yüklenir ve ilk parametre lerinin tümünü
başlatır. Tarayıcıyı kapatmaktan veya yükleme işlemini kesmekten
kaçının. Bu adımın tamamlanması on dakika kadar sürebilir.
8. Sistem yükleme işleminin sonun da, dokunmatik ekranı ayarlamanız istenir. Bu
istendiğinde, oklara ve OK (Tamam) düğmesine basın.
9. Sistem yazılımınızın dilini seçin.
10. HP lisans sözleşmesini kabu l edin.
11. Sisteminiz, yükleme işlemlerini tam aml ar ve tarama ve k opyalama program
arabiriminizi başlatır.
Bir PC’den yeni bir yazılım sürümü yüklemek için
Aşağıdaki gereksinimler karşılanmalıdır:
Tarama/kopyalama si stem ini z, ye re l ağa bağlı ve yer el ağ üze rinde
●
ayarlanmış olmalıdır (algılanmalıdır).
Ağ üzerinde kurulu bir PC’ye erişebilmeniz gerekir.
●
PC'de bir Web tarayıcısı yüklü olmalıdır.
●
CD-ROM’dan yüklemek içi n:
1. Tarama/kopyalama sistem ini zin IP adresini not ed in. IP adres ini Options
(Seçenekler) > Advanced Options (Gelişmiş Seçenekler) > Network (Ağ)
iletişim kutusunda görebilirsiniz.
2. Yeni yazılım yükleme dosyasını, takılan bir CD-ROM’dan veya Internet’ten
indirerek PC’ye kaydedin.
3. PC’de bir Web tarayıcısı açın ve adres alanına tarama/kopyalama sisteminin
IP’sini girin. Bu, tarama/kopyalama si stem in in ağınd an erişilen Upgrading
Scanner Software (Tarayıcı Yazılımını Yükseltme) arabirimini açar.
Sorun Giderme
4. CD-ROM üzerindeki yükleme dosyasını bulmak ve seçmek için göz at
seçeneğini kullanın.
5. Yazılımı yükleyin. Bu, yazılımın tarama/kopyalam a sis t em iniz e yü klen mes ini
sağlar. Artık PC’yi kapatabilirsiniz. Geri kala n adım lar, ta rama /kop yala ma
sisteminin dokunmatik ekranında gerçekleştirilir.
40 Bölüm 4 Sorun Giderme TRWW
Page 87

6. Yazılım Güncelleme ve Kurtarma menüsünü başlatm ak iç in Options
(Seçenekler) > Advanced Options (Gelişmiş Seçenekler) > Software
Update (Yazılım Güncelleme) düğmelerine bas ın.
7. Yazılım Güncelleme ve Kurtarma menüsünde System Update/Recover
(Sistem Güncelleme/Kurtarma) seçe neğin i bel irtin.
8. CD-ROM’dan yüklediğiniz yeni prog ram s ürüm ü görüntü sü, prog ram sü rümü
görüntü listesinde belirir.
9. Yüklemek için bu görüntüyü seçin.
10. Return to normal scanner operation (Normal tarayıcı çal ışmasına geri dön)
düğmesini seçin ve onaylayın. Sistem yükleni r ve i lk param etrelerini n tümünü
başlatır. Tarayıcıyı kapatmaktan veya yükleme işlemini kesmekten
kaçının. Bu adımın tamamlanması on dakika kadar sürebilir.
11. Sistem yükleme işleminin sonunda, dokunmati k ekranı ayarlamanız istenir. Bu
istendiğinde, oklara ve OK (Tamam) düğmesine basın.
12. Sistem yazılımınızın dilini seçin.
13. HP lisans sözleşmesini kabul edin.
14. Sisteminiz, yükleme işlem lerini tamamlar ve tarama ve kopyalam a pr ogram
arabiriminizi başlatır.
TRWW
Yeni sistem yazılımı yükleme
Sorun Giderme
41
Page 88

Dizin
A
açma 4
ağ ayarları 26
ayar düğmesi 17
ayarlama
ekran 31
tarayıcı 29
ayarları kaydetme 26
B
baskı kalitesi 18
belge
boyut 14
çıkarma 5
kopyalama 8
tarama 9
tarayıcıda sıkışma 32
toplu kopyalama 11
toplu tarama 1 1
yükleme 5
belge yükleme 5
belgeleri toplu kop yal am a 11
belgeleri toplu tar am a 11
belgeyi çıkarma 5
belgeyi kopyalama 8
belgeyi tarama 9
boyut
görüntü 14
kağıt24
C
cam plaka
değiştir 31
temizleme 27
Ç
çıkış boyutu 14
çıkış kalitesi 18
çizgiler
çok ince 35
kesikli 35
D
dil, değiştirme 39
dokunmatik ekran 2
dosya yöneticisi 2 2
E
eylemsizlik zaman aşımı 25
F
fabrika varsayıl an aya rları 26
G
gelişmiş kurulum seçenekleri 25
giriş boyutu 14
görev düğmeleri 2
görüntü ayarlar
güç düğmesi 3
H
hata iletileri 32
hedef klasör
bağlanılamıyor 35
yönetim 6
hedefleri yönetme 6
İ
işlev düğmeleri 2
K
kağıt boyutları 24
kağıt geri düğmesi 3
kağıt ileri düğmesi 3
kağıt sıkışması 32
kalite, baskı 18
kapatma 4
kesildi resim 36
O
orijinal türü 12
ortam profili hataları 36
ortam profilleri 20
otomatik sıfırlama 25
Ö
ölçü birimleri 24
önizleme 16
P
parola 25
ı 17
42 Dizin TRWW
Page 89

R
renk eşleme sorunları 37
resim kesildi 36
S
saat 24
seçenekler
gelişmiş 25
temel 24
sistem kurulumu 24
T
tarama alanı 14
tarama alanı, temizleme 27
taramadan sonra geri sar 25
taranan resimde lekeler 34
tarayıcı bileşenleri 3
tarih 24
temel kurulum seçenekleri 24
temizleme
cam plaka 27
tarama alanı 27
Y
yardım3
yazılım2
yazılım güncelleme 37, 39
yazılım kurtarma 37
yazılımı güncelleme 37
yazılımı kurtarma 37
yeniden başlatma 4
Z
zaman aşımı, eylemsizlik 25
TRWW
Dizin
43
Page 90

Page 91

Obsah
1 Úvod
Použití této příručky ........................................................................................ 1
Software skeneru ...................................................... ......... .......... ................... 2
Skener ............................................................................................................ 3
Dokumentace a nápověda .............................................................................. 3
2 Základní operace
Zapnutí nebo vypnutí skeneru ........................................................................ 4
Vkládání a vysouvání dokument ů ................................................................... 5
Nastavení cílové složky nas ken ovaných dokumentů ..................................... 6
Kopírování dokumentu ................................................................ .................... 8
Skenování do souboru .................................................................................... 9
Dávkové skenování a dávkové kopírov ání ................................................... 10
Určení typu předlohy a úpravy obrazu ..................................... ..................... 11
Nastavení velikosti vstupu a výstupu ............................................................ 13
Náhled kopií a skenovaných dokum entů ...................................................... 15
Nastavení kvality výstupu ............................................................................. 18
Vytvoření profilu m édia ................................................................................. 20
Zobrazení, přesunutí, přejmenování neb o ods tranění nask enov aný ch
souborů ......................................................................................................... 22
Nastavení a možnosti systému .................................. ................................... 24
CS
3 Údržba
Čištění skleněné desky a snímací plochy ..................................................... 27
Kalibrace skeneru ......................................................................................... 29
Kalibrace ukazovátka dotykové obraz ovk y ..................... .................. ............ 31
Výměna skleněné desky sken eru ................................................................. 31
4 Řešení potíží
Systém hlásí chybu ........................... ................................................ ............ 32
Uvíznutí papíru ............................................................................................. 32
Proužky v naskenovaném obraze .......... ........ ............................................... 34
Čáry v naskenovaném obraze jsou příliš slabé nebo nespojité .................... 35
Nelze se připojit k cílové složce v síti LAN nebo do ní skenovat .................. 35
Oříznutý obraz – není naskenován celý obraz ............................................. 36
Nelze vytvo řit profil média ............................................................................. 36
Výsledná shoda barev není optimální ............ ....... ........................................ 37
Potřebuji aktualizovat nebo zot avi t sy stém ................................................... 37
CSWW
Page 92

Software systému používá nesprávný jazyk ................................................. 39
Instalace nového softwaru systému ...... ....... ................................................. 39
Rejstřík ........................................................................................................................... 42
CSWW
Page 93

1Úvod
Použití této příručky
Tato příručka je uspořádána do následujíc í ch k apit ol.
1. Úvod: Tato kapitola obsahuje stručné úvodní informace o softwaru, skeneru
a dostupné dokumentaci.
2. Základní operace: Tato kapitol a vám pomůž e zvládnout m nož stv í běžných
postupů.
3. Údržba: Tato kapitola vám pomůže zvládnout množství postupů kalibrace
a údržby.
4. Řešení potíží: Tato kapitola pomáhá řešit potíže, které mohou nastat při
skenování.
5. Rejstřík: Kromě obsahu je k dispozici abecední rejs třík, který umožňuje rychlé
vyhledávání témat.
Upozornění a varování
V této příručce jsou použity symboly, které slouží k zajištění nálež itého používání
tiskárny a chrání tiskárn u p řed pošk ozením . Postupujt e podle pokynů označených
těmito symboly.
VAROVÁNÍ! V případě nedodržení pokynů označených tímto symbolem může
dojít k těžkým úrazům či ke smrti.
UPOZORNĚNÍ: V případě nedodržení pokynů označených tímto symbolem
může dojít k lehčím úrazům či k poškození výrobku.
Úvod
CSWW
Použití této příručky
1
Page 94

Software skeneru
Úvod
Tlačítka úkolů
Software skeneru se spouští automaticky po zapnutí dotykové obrazovky. Hlavní
obrazovka je rozdělena do těchto částí:
Oblast hlavní nabídky
●
Panel vpravo, horní část: tlačítka úkolů
●
Panel vpravo, dolní část: funkční tlačítka
●
Stisknutím tohoto tlačít ka na staví te pr ogram do režimu kopírování (skenován í na
tiskárnu).
Stisknutím tohoto tlačítka nastavíte program do režimu skenování (skenování na
souboru).
Stisknutím tohoto tlačítka otev řete nastavení programu a nabídky předvoleb.
Funkční tlačítka
Správce souborů: Ot evře dialogové okno File Manager (Správce souborů).
Nápověda online: Zobrazí podrobné informace o mnoha tématech. Otevře pokyny
související s právě pr ová děn ým úkolem.
Zastavit: Zruší právě prováděnou činnost.
Spustit skenování/kop ír ován í: Zahájí kopírování nebo skenování v závislosti na tom,
které tlačítko úkolu bylo stisknuto.
2 Kapitola 1 Úvod CSWW
Page 95

Skener
Úvod
1. Víko skeneru
2. Dotyková obrazovka aplikace skenování/
kopírování
3. Tlačítka pro uvolnění víka skeneru
4. Plocha skeneru: oblast podávání papíru
5. Vstupní štěrbina pro podáván í doku me nt ů
Dokumentace a nápověda
Tato stručná referenční příručka obsahuje stručný přehled systému a softwaru.
Funkční tlačítko Nápověda online
a zobrazení všeobecné nápovědy k právě prováděnému úkolu (skenování,
kopírování, možnosti) .
Tlačítko Domů v okně nápovědy online
části a témata nápovědy online.
V mnoha dialogových oknec h se zobrazuje tlačítko kontextové nápo vědy
slouží k zobrazení pokynů souvisejícíc h s aktuálním dialogovým oknem a jeho
možnostmi.
6. Port USB
7. Ovládací panel
8. Tlačítko posunu papí ru vpřed
9. Tlačítko posunu papí ru vzad
10. Tlačítko a indikátor napájení
slouží k otevření okna s nápovědou onli ne
slouží k zobrazení seznamu odkaz ů na
, které
CSWW
Skener
3
Page 96

2 Základní operace
Zapnutí nebo vypnutí skeneru
Systém (skener, obrazovka a software) lze zapnout nebo vypnout stisknutím
tlačítka napájení na ovládacím panelu sken eru.
POZNÁMKA: Tiskárna má samostatné tlačí tko pro zapnutí a vy pnutí napájení.
Toto tlačítko zůstává za normálních okolností vždy zapnuté a neslouží
k restartování systému.
Zapnutí
Základní operace
Stiskněte tlačítko napájení. Kontrolka napáj ení se rozsvítí z eleně.
Vypnutí
Stiskněte tlačítko napájení. Kontrolka napáj ení bli ká a poto m zh asne .
Restart
Stisknutím tlačítka napájení vypněte systém a potom jej opět zapněte stisknutím
stejného tlačítka napájení.
4 Kapitola 2 Základní operace CSWW
Page 97

Vkládání a vysouvání dokumentů
Vložení dokumentu
1. Vložte dokument snímanou stranou nahoru. Nastavte střed dokumentu proti
šipce uprostřed na ploše a nad plochou skeneru.
2. Chcete-li zajistit rovný průchod skenovaného dokumentu, použijte standa rdní
značky velikosti.
3. Zasuňte předlohu do vstupní štěrbiny, dokud neucítíte, že s e d otý ká válečků.
4. Skener automaticky uchopí předlohu a přesune ji do polohy pro zahájení
skenování.
Vysunutí dokumentu
Stisknutím tlačítka posunu papíru vzad vysunete předlohu zpět na plochu
●
skeneru určenou k podávání (k sobě).
Základní operace
CSWW
Vkládání a vysouvání dokumentů
5
Page 98

Chcete-li vysunout předlohu ze zadní strany skeneru, stiskněte tlačítko
●
posunu papíru vpřed.
Nastavení cílové složky naskenovaných dokumentů
Základní operace
Následující pokyny popisují nastav ení a výběr cílové složky, do které se bude
ukládat výstup skenování do s ouboru. Cíle jsou s ložky v počítači, které systém zná
v místní síti (LAN), nebo složky na jednotce USB flash vložené do dotykové
obrazovky.
1. Dbejte na správné nastavení systém u a v eškerýc h cílov ých po čítačů v mís tní
síti (LAN). Konfigurace systému v síti LAN se provádí v nabídce Options
(Možnosti) > Advanced Options (Upřesnit možnosti) > Network (Síť). Tato
možnost je určena pro správce systému a může vyžadovat heslo.
2. Chcete-li naskenované dokumenty uložit na jednotku USB flash, stiskněte
tlačítko Scan (Skenovat) a vložte jednotku do portu USB na dotykové
obrazovce. Systém z jistí jednotku a z eptá se, zda chcete nastavit nebo z měnit
cíl na jednotku USB.
3. Chcete-li zobrazit možnosti nastavení cílů, stiskn ěte polo žk y Options
(Možnosti) > Advanced Options (Upřesnit možnosti) > Manage
6 Kapitola 2 Základní operace CSWW
Page 99

Destinations (Správa cílů). V této nabídce můžete vybírat, přidávat a měnit
cíle.
Výběr cíle
Vyberte cíl ze seznamu cílů, které byly předtím vytvořeny a uloženy v systému.
Pokud nejsou k dispozici žádné cíle nebo c hcete použít cíl, který není v sezn amu,
musíte přidat nový cíl. Chcete-li s kenovat do vložen é jednotky USB flas h, stiskněte
položku pro cíle USB.
Přidání nového cíle
Stiskněte tlačítko Add (Přidat ) a z adejte podrobnost i o cíli. Zadejte hodnot y do polí
Label (Název), Network Path (Cesta v síti), Domain (Domén a), Usernam e
(Uživatelské jméno) a Password (Heslo). Chcete-li ulož it hes lo cíl e v sy stém u,
vyberte možnost Remember (Zapamatovat). Pokud chcete, aby při připojování
k cíli museli uživatelé zadat heslo, nechte možnost Remember (Zapamatovat)
nezaškrtnutu. Stisknutím tlačítka Test Connection (Odzkoušet připojení)
zkontrolujte nastavení.
Změna (úprava) cíle
Stiskněte tlačítko Change (Změnit) a upravte po le Label (Název), Network Path
(Cesta v síti), Domain (Doména), Username (Uživatels ké jm éno) a Passw o rd
(Heslo). Chcete-li uložit heslo cíle v systému, vyberte možnost Remember
(Zapamatovat). Pokud chcete, aby při připojování k cíli museli uživatel é zadat
Základní operace
CSWW
Nastavení cílové složky naskenova ných dokumentů
7
Page 100

heslo, nechte možnost Remember (Zapamatovat) nezaškrtnut u. Stis knut ím
tlačítka Test Connection (Odzkoušet připojení) zkontrolujte nastav ení.
Odebrání cíle
Vyberte cíl ze seznamu Dest inations (Cí le) a stiskněte tlačítko Remove (Odebrat).
Kopírování dokumentu
K vytvoření kopie (skenování do tiskárny) použijte následující postup.
1. Vložte a podejte dokument do skeneru tak, aby st rana ur čená ke sk enov ání
směřovala vzhůru.
2. Zkontrolujte, zda je zapnutá tiskárna a je v ní vložené požadované médium.
Základní operace
POZNÁMKA: Chcete-li kopírovat, budete potřebovat profil média pro
vložené médium. Systém ob sahuje řadu profilů médií pro nejčastěji používaná
média. Pokud potřebujet e vyt vořit nový prof il média, postupuj te podle pokynů
Vytvoření profilu média na st ránce 20.
v části
3. Stisknutím tlačítka Copy (Kopírovat) zobrazte nas tavení a tlačít ka kopírování
(skenování do tiskárny). Dialogové okno kopírování je znázorněno níže.
4. Stiskněte tlačítko Original Type (Typ předlohy) a vyberte typ, který nejlépe
odpovídá dokumentu a požadovan ému výstupu. Viz část
a úpravy obrazu na stránce 11.
5. Stiskněte tlačítko Quality (Kvalita) a vyberte požadovanou kvalitu výstupu.
6. Stiskněte tlačítko Scan Area (Oblast skenování) a nastavte velikost oblasti
snímání obrazu. Chcete-li sejmout celý obraz , vyb erte mo žnos t Auto
(Automaticky). Systém změří a nastaví velik ost za vá s.
7. Chcete-li určit velikost tištěné kopie, stiskněte tl ačítko Resize (Změnit
velikost). Chcete-li kopii v poměru 1:1, nastavte hodnotu No (Ne).
8. Chcete-li vybrat počet kopií, které budou s úlo hou vy tiš t ěny, sti skněte
tlačítko Copies (Kopie).
8 Kapitola 2 Základní operace CSWW
Určení typu předlohy
 Loading...