


EN User instructions
®
DDY 062
DISHWASHER

CONTENTS
Safety advice |
pag. |
3 |
Setting up, installation |
pag. |
4 |
Water softener unit |
pag. |
8 |
Loading the salt |
pag. |
9 |
Adjusting the upper basket |
pag. |
10 |
Loading the dishes |
pag. |
11 |
Loading the detergent |
pag. |
14 |
Types of detergent |
pag. |
15 |
Loading the rinse aid |
pag. |
16 |
Cleaning the filters |
pag. |
17 |
Some practical hints |
pag. |
18 |
Routine cleaning and maintenance |
pag. |
19 |
Description of the control panel |
pag. |
20 |
Technical data |
pag. |
20 |
Programme selection and special functions |
pag. |
21 |
Programme guide |
pag. |
24 |
Identifying minor faults |
pag. |
26 |
|
Fig. A |
5 |
1 |
|
|
|
4 |
3 2
Please read the instructions in this booklet carefully because they contain important information on how to install, use and maintain your dishwasher safely as well as containing useful tips on how to make the most of it.
Keep this booklet safe for future reference.
2

SAFETY INSTRUCTIONS
There are certain basic safety rules which are valid for any domestic appliance.
Installation
■Make sure that the plug fitted to the machine is compatible with the power supply socket. If it is not, get a suitably qualified person to fit the correct type, and to make sure that the cables to the mains socket are able to cope with the power rating of the appliance.
■Ensure that the dishwasher does not crush power cables.
■Do not use this appliance with adaptors, power boards or extension cords.
■Should it be necessary to replace the supply cord, call the After Sales Service Centre.
Safety
■Never touch the appliance when your hands or feet are wet or damp.
■Do not use when your feet are bare.
■Do not remove the plug from the mains supply socket by pulling the mains cable or the machine itself.
■Do not leave the appliance exposed to the elements (rain, sun etc).
■This appliance is not intended for use by persons (including children) with reduced physical, sensory or mental capabilities, or lack of experience and knowledge, unless they have been given supervision or instruction concerning use of the appliance by a person responsible for their safety.
Children should be supervised to ensure that they do not play with the appliance.
■Water left in the machine or on the dishes at the end of the wash programme should not be swallowed.
■The door should not be left in the open position since this could present a potential hazard ( es. tripping ).
■Leaning or sitting on the open door of the dishwasher could cause it to tip over.
 WARNING !
Knives and other utensils with sharp points must be loaded in the basket with their points down or placed in a horizontal position.
Daily use
■This appliances is intended to be used in household and similar applications such as:
-staff kitchen areas in shops, offices and other working environments;
-farm houses;
-by clients in hotels, motels and other residential type environments;
-bed and breakfast type environments.
A different use of this appliance from household environment or from typical housekeeping functions, as commercial use by expert or trained users, is excluded even in the above applications.
If the appliance is used in a manner inconsistent with this it may reduce the life of the appliance and may void the manufacturer’s warranty.
Any damage to the appliance or other damage or loss arising through use that is not consistent with domestic or household use (even if located in a domestic or household environment) shall not be accepted by the manufacturer to the fullest extent permitted by law.
■The dishwasher is designed for normal kitchen utensils.
Objects that have been contamined by petrol, paint, traces of steel or iron, corrosive chemicals, acids or alkalis must not be washed in the dishwasher.
■If there is a water softening device installed in the home there is no need to add salt to the water softener fitted in the dishwasher.
3
■Cutlery is washed best if it is placed in the basket with the handles downwards.
■If the appliance breaks down or stops working properly, switch it off, turn off the water supply and do not tamper with it. Repair work should only be carried out by an approved service agent and only genuine spare parts should be fitted. Any failure to follow the above advice may have serious consequences for the safety of the appliance.
Disposal
■The dishwasher has been made from materials which can be recycled so that it can be disposed of in an environmentally friendly way.
■If you wish to dispose of an old dishwasher be careful to remove the door to eliminate the risk of children becoming trapped inside it.
INSTALLATION
(Technical notes)
■After unpacking, adjust the height of the dishwasher. For the dishwasher to work correctly it must be level. Adjust the feet so that the machine does not tilt by more than 2 degrees.
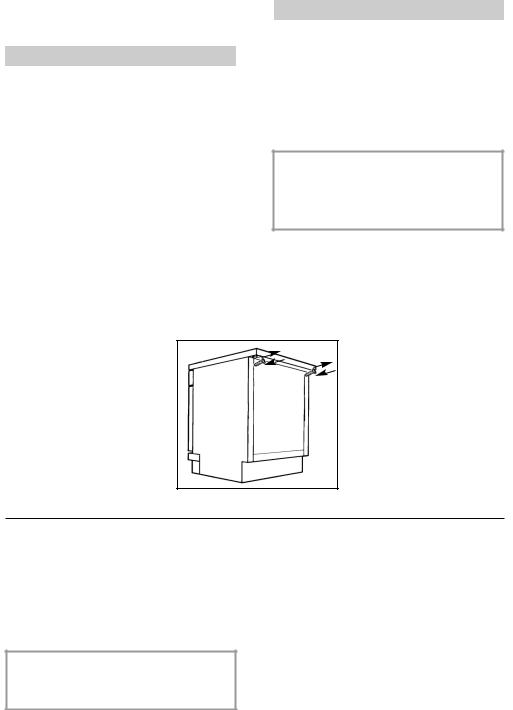
■If it you need to move the machine after removing the packaging, do not try to lift it by the bottom of the door. Follow the instructions in the figure below. Open the door slightly and lift the machine by holding on the top.
IMPORTANT
When the appliance is located on a carpet floor, attention must be paid to ensure that there is no obstruction to the bottom vents.
Make sure that the plug on the appliance remains accessible after installation.
Electrical connection
This appliance complies with international safety standards, and is fitted with a 3 pin plug with earth connection to ensure complete earthing of the product.
Before connecting the appliance to the mains supply it is important to ensure:
1.that the supply socket is properly earthed;
2.that your electricity supply is capable of meeting the consumption requirements listed on the rating plate of your appliance.
WARNING!
Ensure that your product is properly earthed.
In the absence of adequate earthing you will notice that when touching the metal parts of your appliance an electrical dispersion can be felt, due to the presence of a radio interference suppressor.
Manufacturer declines all responsibility for any damage due to non-earthing of the machine.
Appliance complies with European Directives 73/23/EEC and 89/336/EEC, replaced by 2006/95/EC and 2004/108/EC, and subsequent amendments.
4

Water connection
IMPORTANT
The appliance must be connected to the water mains using new hose-sets. The old hose-sets should not be reused.
■The inlet and drain hoses can be directed to left or right.
IMPORTANT
The dishwasher can be connected to either cold or hot water, as long as it is no hotter than 60 °C.
■ Water pressure must be between 80 kPa and 800 kPa. If the pressure is below the minimum consult our service department for advice.
■The inlet hose must be connected to a tap so that the water supply can be cut off when the machine is not in use
(fig. 1 B).
■The dishwasher is fitted with 3/4" threaded connector (fig. 2).
■Connect inlet hose “A” to water tap “B” with a 3/4" attachment making sure that it has been properly tightened.
■If it is necessary, the inlet pipe can be
lengthened up to 2,5 m. The extension pipe is available from the After Sales Service Centre.
■If limescale deposits or sand are present in the water, it is advisable to obtain the appropriate filter, art. 9226085, from the After Sales Service Centre (fig. 3). The filter “D” must be inserted between the tap “B” and the inlet hose “A”, remembering to fit the washer “C”.
■If the dishwasher is connected to new pipes or to pipes which have not been in use for a long time run water through for a few minutes before connecting the inlet hose. In this way no deposits of sand or rust will clog up the water inflow filter.
1
2
3
5

Connecting the outlet hose
■The outlet hose should disharge into a standpipe, making sure that there are no kinks (fig. 4).
■The standpipe must be at least 40 cm above floor level and it must have an internal diameter of at least 4 cm.
■It is advisable to fit an anti-odour air trap
(fig. 4X).
■If necessary the outlet hose can be extended up to 2,5 m, provided that it is kept at a maximum height of 85 cm above floor level. The extension pipe is available from the After Sales Service Centre.
4
■The hose can be hooked over the side of the sink, but it must not be immersed in water, in order to prevent water from being syphoned back to the machine when this is in operation (fig. 4Y).
■When installing the appliance under a worktop the hose pipe clamp must be attached to the wall in the highest possible position under the worktop (fig. 4Z).
■Check that there are no kinks in the inlet and outlet hoses.
6
INSTALLATION IN FITTED KITCHENS
Fitting between existing cabinets
■The height of the dishwasher, 85 cm, has been designed in order to allow the machine to be fitted between existing cabinets of the same height in modern fitted kitchens (fig. 5).
The feet can be adjusted so that correct height is reached.
Underneath existing work top
(when fitting beneath a work top)
■In most modern fitted kitchens there is only one single work top under which cabinets and electrical appliances are fitted. In this case remove the work top of the dishwasher by unscrewing the screws under the rear edge of the top
(fig. 6a).
IMPORTANT
After removing the work top, the screws MUST BE screwed again under the rear edge of the top (fig. 6b).
■The height will then be reduced to 82 cm, as scheduled by the International Regulations (ISO) and the dishwasher will fit perfectly under the kitchen working top (fig. 7).
5 |
6 |
a |
a |
7 |
b |
||||
|
|
|
|
|
|
|
|
b |
|
598
556/573
Opening the door |
|
Closing the door |
Put your hand into the recess and pull.
If the machine comes open while it is working, an electrical safety device automatically switches everything off.
IMPORTANT
For the machine to work properly, the door should not be opened while it is in operation.
Place the baskets in the machine.
Make sure that both the spray arms are free to rotate and are not obstructed by cutlery, crockery or pans. Close the door, pressing on it to make sure it is firmly shut.
7
WATER SOFTENER UNIT
Depending on the source of the supply, water contains varying amounts of limestone and minerals which are deposited on the dishes leaving whitish stains and marks.
The higher the level of these minerals present in the water, the harder the water is. The dishwasher is fitted with a water softener unit which, through the use of special regenerating salt, supplies softened water for washing the dishes.
The degree of hardness of your water can be obtained from your water supply company.
Regulating the water softener
The softener unit can treat water with a hardness of up to 90°fH (French grading) or 50°dH (German grading) through 6 different settings.
The table below lists different degrees of water hardness with the corresponding setting for the softener unit.
|
Water |
Use of regenerating salt |
|
|
Level |
hardness |
Water softener setting |
||
ºfH (French grading) |
ºdH (German grading) |
|||
|
|
|
|
|
0 |
0-5 |
0-3 |
NO |
No indicator |
lights |
||||
1 |
6-15 |
4-9 |
YES |
Indicator light |
1 |
||||
2 |
16-30 |
10-16 |
YES |
Indicator lights |
1,2 |
||||
*3 |
31-45 |
17-25 |
YES |
Indicator lights |
|
|
|
|
1,2,3 |
4 |
46-60 |
26-33 |
YES |
Indicator lights |
1,2,3,4 |
||||
5 |
61-90 |
34-50 |
YES |
Indicator lights |
1,2,3,4 |
||||
|
|
|
|
flashing |
*The water softener unit is set in the factory at level 3, as this is suitable for the majority of users.
According to the degree of hardness of your water, regulate the softener unit in the following way:
IMPORTANT
The dishwasher must be ALWAYS off before start this procedure.
1.Hold down the "PROGRAMME SELECTION" button and at the same time switch on the dishwasher by pressing the "ON/OFF" button (a brief audible signal will sound).
2.Keep the "PROGRAMME SELECTION" button pressed for at least 5 seconds, UNTIL an audible signal sounds. Some
"PROGRAMME SELECTION" indicator lights will come on to indicate the current water softener setting level.
3.Press the same button again to select the required water softener level: each time the button is pressed, one indicator light will come on (the water softener level is indicated by the number of lights on). For level 5, 4 lights will flash, for level 0 all lights will be off.
4.Turn off the dishwasher by pressing the "ON/OFF" button to confirm the new setting.
WARNING!
If any problem occurs, turn the dishwasher off by pressing the "ON/OFF" button and start the procedure again from the beginning (STEP 1).
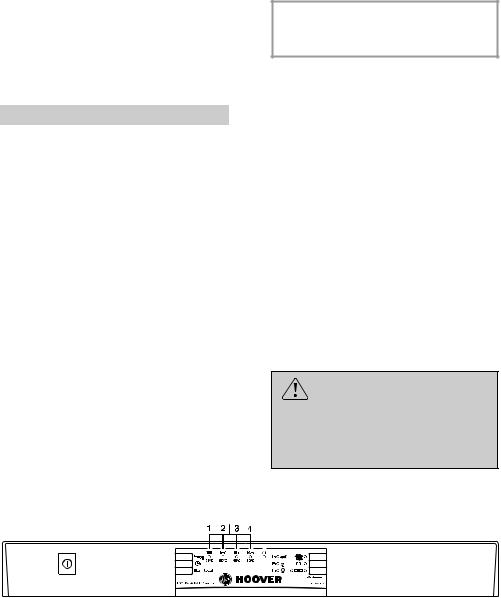
“PROGRAMME SELECTION” indicator lights
|
|
|
|
|
|
|
|
|
|
“ON/OFF” button |
|
|
“PROGRAMME SELECTION” button |
|
|
|
|||
8
LOADING THE SALT
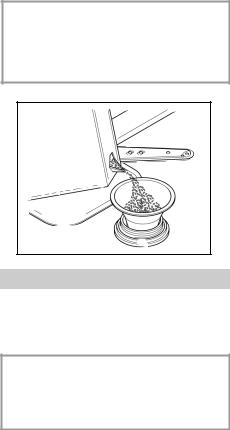
■On the bottom of the machine there is a container for the salt for regenerating the softener.
■It is important to use only a salt that is specifically designed for dishwasher. Other types of salt contain small quantities of insoluble particles which over a long period of time may affect and deteriorate the softener performance.
■To add salt, unscrew the cap of the container on the bottom and then refill the container.
■During this operation a little water will overflow; but keep adding salt until the container is full. When the container is full, clean the thread of salt residue and retighten the tap.
■After loading the salt, it is recommended running a complete washing cycle, or COLD RINSE programme. The salt dispenser has a capacity of between 1.5 and 1.8 kg and, for efficient use of the appliance, it should be refilled from time to time according to the regulation of the water softener unit.
IMPORTANT
(Only for first start up)
When the appliance is used for the first time, after completely filling the salt container, it is necessary to add water until the container overflows.
Salt loading indicator
This model is provided with an indicator light on the control panel which will light up when it is necessary to reload the salt container.
IMPORTANT
The appearance of white stains on dishes is generally an important sign that the salt container needs filling.
9
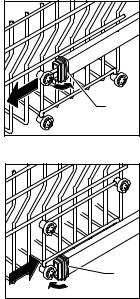
ADJUSTMENT OF THE UPPER BASKET
If 27 cm to 31 cm plates are normally used, load them onto the lower basket after the upper basket has been placed in its upper position and proceed as detailed below:
1.Turn the front stops “A” outwards;
2.Take out the basket and remount it in the upper position;
3.Replace the blocks “A” in their original position.
Dishes that are bigger than 20 cm in diameter can no longer be loaded onto the upper basket and the mobile supports cannot be used when the basket is in the upper position.
A |
A |
10
 Loading...