


©2015TechtronicFloorCareTechnology.LimitedTousdroits.réservés#961151012ID103222-R4
LAPRÉSENTE.GARANTIE L’UTILISATIONDECEPRODUITÀDESFINSCOMMERCIALESINVALIDE
lundiauvendredi,de8hà19h.(HNE) ceproduitaumagasin,veuillezappelerleserviceàlaclientèleau18009449200du Vousavezdesquestionsoudesinquiétudes?Pourobtenirdel’aideetavantderetourner
D’UTILISER.L’ASPIRATEUR IRECESINSTRUCTIONSIMPORTANTATTENTIVEMENTAVANT
com.hoover.www
Instructionsd’utilisationetd’entretien
GUIDED’UTILISATION
OWNER’S MANUAL
Operating and Servicing Instructions
Español - página E1
www.hoover.com
IMPORTANT: READ CAREFULLY BEFORE ASSEMBLY AND USE.
Questions or concerns? For assistance, please call Customer Service at 1-800-944-9200 Mon-Fri 8am-7pm EST before returning this product to the store.
THIS PRODUCT IS INTENDED FOR HOUSEHOLD USE ONLY. IF USED COMMERCIALLY WARRANTY IS VOID.
©2015 Techtronic Floor Care Technology Limited. All rights reserved. #961151012 ID103222-R4

Thank you for choosing a HOOVER® product.
Please enter the complete model and Manufacturing Code in the spaces provided.
MODEL
MFG. CODE
Hint: Attach your sales receipt to this owner’s manual. Verification of date of purchase may be required for warranty service of your HOOVER® product.
Be sure to register your product online at Hoover.com or call 1-800-263-6376 to register by phone.
MANUFACTURING CODE |
(Label located on bottom of cleaner) |
|
CONTENTS |
Important Safety Instructions |
................................................................................. 3 |
Cleaner Assembly..................................................................................................... |
5 |
How To Use................................................................................................................ |
7 |
Cleaner Description............................................................................................. |
7 |
The Tanks ............................................................................................................ |
8 |
Brush Speed Selector ......................................................................................... |
9 |
Brush Indicator ................................................................................................... |
9 |
How To Clean............................................................................................................. |
10 |
Before You Begin ................................................................................................ |
10 |
Cleaning Carpet ................................................................................................. |
10 |
Clean Surge® Button............................................................................................ |
11 |
Picking Up Spills.................................................................................................. |
11 |
Cleaning Bare Floors .......................................................................................... |
12 |
Tools........................................................................................................................... |
13 |
Using The Tools .................................................................................................. |
13 |
How To Attach...................................................................................................... |
14 |
Before Using Tool................................................................................................. |
14 |
Cleaning Carpeted Stairs.................................................................................... |
14 |
Cleaning Upholstery ........................................................................................... |
15 |
After Using Tool................................................................................................... |
16 |
After Cleaning...................................................................................................... |
16 |
Maintenance.............................................................................................................. |
17 |
Nozzle.................................................................................................................. |
17 |
Brushes................................................................................................................ |
17 |
Storage................................................................................................................ |
18 |
Lubrication........................................................................................................... |
18 |
Troubleshooting........................................................................................................ |
18 |
Helpful Reminders............................................................................................... |
19 |
Service....................................................................................................................... |
19 |
Cleaning Products.................................................................................................... |
20 |
Warranty..................................................................................................................... |
21 |
If you need assistance:
Visit our website at hoover.com. Follow the authorized dealer locator link to find the Hoover® authorized dealer nearest you or call 1-800-944-9200 for an automated referral of Hoover® authorized dealer locations (U.S. only) or to speak with a customer service representative; MonFri 8am7pm EST. Please do not return this product to the store.
2

2 Veuilleznepasretournerceproduitau.magasin
.vendredi) Seulement)oupourparleràunreprésentantduserviceàlaclientèle(de8hà19h,hne,dulundiau 9200pourécouterunmessageindiquantlesadressesdesmarchandsautorisésHooverMD.(é-.U autorisésHooverMDpourtrouverlemarchandleplusprèsdechezvous,oucomposezle1800944 visiteznotresitewebàl’adresse.ca.hoover.wwwCliquezsurleliendulocalisateurdemarchands
|
|
|
Pourobtenirdel’assistance: |
||
21 |
Garantie..................................................................................................................... |
||||
20 |
|
|
Produitsnettoyants............................................................................. |
||
19 |
Service....................................................................................................................... |
||||
19 |
........................Aide-mémoirepratique............................................................... |
||||
18 |
Dépannage................................................................................................................ |
||||
18 |
................................Lubrification............................................................... |
||||
18 |
................................Rangement............................................................... |
||||
17 |
................................................................ |
................................Brosses |
|||
17 |
................................Labuse:................................................................ |
||||
17 |
Entretien.................................................................................................................... |
||||
16 |
...............................Aprèslenettoyage............................................................... |
||||
16 |
........Aprèsl’utilisationd’unaccessoire............................................................... |
||||
15 |
........................Nettoyagedemeubles............................................................... |
||||
14 |
Nettoyaged’escaliersrecouvertsdemoquette................................................... |
||||
14 |
..............Avantd’utiliserunaccessoire................................................................ |
||||
14 |
......................Fixationdesaccessoires............................................................... |
||||
13 |
.................Utilisationdesaccessoires................................................................ |
||||
13 |
Accessoires.............................................................................................................. |
||||
12 |
.......................Nettoyagedeparquets................................................................ |
||||
11 |
.......Ramassagedeliquidesrenversés............................................................... |
||||
11 |
.......................BoutonCleanSurgeMC............................................................... |
||||
10 |
..................Nettoyagedelamoquette................................................................ |
||||
10 |
......Avantdecommencerlenettoyage................................................................ |
||||
10 |
Nettoyage.................................................................................................................. |
||||
9 |
.....Indicateurderotationdesbrosses................................................................ |
||||
9 |
.......Sélecteurdevitessedesbrosses............................................................... |
||||
8 |
................................Réservoirs................................................................. |
||||
7 |
...................Descriptiondel’aspirateur............................................................... |
||||
7 |
Utilisation.................................................................................................................. |
||||
5 |
|
|
Assemblagedel’aspirateur |
||
3 |
Consignesdesécuritéimportantes........................................................................ |
||||
|
|
CONTENU |
|
||
|
|
|
|
1800263-.6376 |
|
(Étiquettesituéesouslashampouineuse) |
l’adressecom,.Hooveroupartéléphone,au |
||||
N’oubliezpasd’enregistrervotreproduitenligne,à |
|||||
|
CODEDEFABRICATION |
|
|||
|
|
couverteparlagarantiedevotreproduitHOOVERMD. |
|||
|
|
|
|||
|
|
|
dated’achatpeutêtreeffectuéeavanttouteréparation |
||
|
|
|
caisseauguidedel’utilisateur,carunevérificationdela |
||
|
|
|
Conseil:Ilestrecommandédejoindrevotrereçude |
||
|
|
|
CODEDEFABRICATION |
||
|
|
|
|
MODÈLE |
|
|
|
|
COMPLETSdanslesespacesfournisàceteffet |
||
|
|
|
lesnumérosdemodèleetdesérie |
Veuillezinscrire |
|
|
Mercid’avoirchoisiunproduitHOOVERMD. |
|
|||
3 |
|
sans.surveillance |
|
ceux-.ciNepaspermettrequel’appareilsoitutilisécommeunjouetetnepaslelaisser |
|
Assurerunesupervisionétroitelorsquel’appareilestutilisépardesenfantsouprèsde |
• |
détaillantdeservicegarantiautoriséHooverMD. |
|
l’extérieur,ildoitêtreapportéàunCentredeventeetdeserviceHooverMDouchezun |
|
tionnemal,s’ilesttombéparterreoudansl’eau,s’ilestendommagéouaétélaisséà |
|
Nepasutiliserl’appareilsilaficheoulecordonest.endommagéSil’appareilfonc- |
• |
detoutesurface.chauffée |
|
oud’arêtes.vivesNepasfairepasserl’appareilsurle.cordonGarderlecordonàl’écart |
|
ousouleverl’appareil,fermeruneportesurlecordonoutirerlecordonautourdecoins |
|
Nepastirerl’appareilparlecordond’alimentation,utiliserlecordonpourtransporter |
• |
Nejamaismanipulerlaficheoul’appareilaveclesmains.mouillées |
• |
nonlecordonpourdébrancher.l’appareil |
|
Nepastirersurlecordond’alimentationpourdébrancher.l’appareilSaisirlaficheet |
• |
Toujoursdébrancherlashampouineuseavantd’eneffectuer.l’entretien |
• |
Débrancherl’appareilavantdeconnecterl’accessoireportatifà.turbine |
• |
avantdedébrancher.l’appareil |
|
Débrancherlashampouineusesiellen’estpas.utiliséeÉteindretouteslescommandes |
• |
de.l’appareil |
|
dotéd’unefichemiseàlaterretriphaséeetuneprisetripolairecompatibleaveclafiche |
|
nécessaired’utiliserunerallonge,utiliseruncordond’uncalibreminimalde16à3fils |
|
L’utilisationd’unerallongeélectriquen’estpas.recommandéeS’ilestabsolument |
• |
raientêtre.dangereux |
|
N’utiliserquelesaccessoires-recommandésparHooverMD;d’autresaccessoirespour |
• |
les.consignes |
|
N’utiliserlashampouineusequeconformémentàsonusageprévu,telquedécritdans |
• |
shampouineusesurles.escaliers |
|
Fairepreuved’unegrandeprudencependantlenettoyage.d’escaliersNepasplacerla |
• |
Nepasutiliserquandlesréservoirsnesontpasen.place |
• |
Nepasnettoyerau-dessusdeprisesélectriquessituéesau.sol |
• |
Consignesdemiseàlaterre.» |
|
Nebranchercetappareilqu’àuneprisecorrectementmiseàla.terreVoirlasection« |
• |
ramasserdepetitsdégâtsdeliquides.renversésNepasimmergerle.produit |
|
N’utiliserquesurdessurfacesrendueshumidesparleprocessusdenettoyageoupour |
• |
nettoyants»duprésent.Guide) |
|
antsdeHooverMDconçuspourêtreutilisésaveccet.appareil(Voirlasection«Produits |
|
Pouréviterd’endommagerlescomposantsinternes,n’utiliserquedesproduitsnettoy- |
• |
CHOCÉLECTRIQUEOUDEBLESSURES: |
|
MINIMUMLESRISQUESD’INCENDIE,DE |
|
AVERTISSEMENT:AFINDERÉDUIREAU |
|
LIRETOUTESLESINSTRUCTIONSAVANTD’UTILISERCET.APPAREIL |
|
élémentaires,ycomprislessuivantes: |
|
Durantl’utilisationd’unappareilélectrique,toujoursrespecterlesprécautions |
|
INSTRUCTIONS RANGERETCONSERVERCES CONSIGNESDESÉCURITÉIMPORTANTES
IMPORTANT SAFETY INSTRUCTIONS
SAVE THESE INSTRUCTIONS
When using an electrical appliance, basic precautions should always be
followed, including the following:
READ ALL INSTRUCTIONS BEFORE USING THIS APPLIANCE.
WARNING: TO REDUCE THE RISK OF FIRE, ELECTRIC SHOCK OR INJURY:
•To avoid internal component damage, use only Hoover® cleaning products intended for use with this Appliance. (See Cleaning Products section of this manual.)
•Use only on surfaces moistened by the cleaning process or small spills. Do not immerse product.
•Connect to a properly grounded outlet only. See “Grounding Instructions”.
•Do not clean over floor electrical outlets.
•Do not use without tanks in place.
•Use extra care when cleaning on stairs. Do not place carpet cleaner on stairs.
•Use carpet cleaner only for its intended use as described in the instructions.
•Use only attachments recommended by Hoover®; others may cause hazards.
•The use of an extension cord is not recommended. If an extension cord is absolutely necessary, use at least a 16 gauge 3-wire cord which has a 3-prong grounding type plug and a 3-pole receptacle that accepts the machine plug.
•Unplug carpet cleaner from outlet when not in use. Turn off all controls before unplugging.
•Unplug before connecting the powered hand tool (available on select models).
•Always disconnect cord from electrical outlet before servicing the carpet cleaner.
•Do not unplug by pulling on cord. To unplug, grasp the plug, not the cord.
•Never handle plug or appliance with wet hands.
•Do not pull or carry by cord, use cord as a handle, close door on cord or pull cord around sharp edges or corners. Do not run appliance over cord. Keep cord away from heated surfaces.
•Do not use with damaged cord or plug. If appliance is not working as it should, has been dropped, damaged, left outdoors, or dropped into water, take it to a Authorized Hoover® Warranty Service Dealer.
•Close supervision is necessary when any appliance is used by or near children. Do not allow carpet cleaner to be used as a toy or to run unattended at any time.
•Do not point tools toward people or pets.
•To assist in reducing drying time, be certain the area is well ventilated when using detergents and other cleaners with this machine.
•Keep detergents and other cleaners out of children’s reach.
•Do not use to pick up flammable or combustible liquids such as gasoline or use in areas where they may be present.
•Do not pick up chlorine bleach, drain cleaner, gasoline or any other toxic material with this appliance.
•Do not pick up anything that is burning or smoking, such as cigarettes, matches, or hot ashes.
3
•Avoid picking up hard, sharp objects with the carpet cleaner. They may damage the machine.
•Keep hair, loose clothing, fingers, feet and all parts of body away from openings and moving parts.
•Use indoors only.
•Do not put any object into openings. Do not use with any opening blocked; keep free of dust, lint, hair, and anything that may reduce air flow.
•To help prevent matting and resoiling, avoid contact with carpets until they are dry. Keep children and pets away from carpets until they are completely dry.
•Store in a dry place. Do not expose machine to freezing temperatures.
•Do not leave appliance unattended when plugged in.
•DO NOT USE THIS EXTRACTOR ON HARD FLOORS UNLESS YOU HAVE THE PROPER HARD FLOOR ATTACHMENT. USING THIS MACHINE ON HARD FLOORS WITHOUT PROPER ATTACHMENT MAY SCRATCH OR DAMAGE YOUR FLOOR.
GROUNDING INSTRUCTIONS
This appliance must be grounded. If it should malfunction or breakdown, grounding provides a path of least resistance for electrical current to reduce the risk of electric shock. This appliance is equipped with a cord having an equipment-grounding conductor (C) and grounding plug (A). The plug must be plugged into an appropriate outlet (B) that is properly installed and grounded in accordance with all local codes and ordinances.
DANGER: Improper connection of the equipment-grounding conductor can result in the risk of electric shock. Check with a qualified electrician or service person if you are in doubt as to whether the outlet is properly grounded. Do not modify the plug provided with the appliance - if it will not fit the outlet, have a proper outlet installed by a qualified electrician. This appliance is for use on a nominal 120 volt circuit and has a grounding plug that looks like the plug (A) illustrated in sketch (Fig. 1). A temporary adapter (D) may be used to connect this plug to a 2-pole receptacle (E) if a properly grounded outlet is not available (Fig. 2). The temporary adapter should be used only until a properly grounded outlet (B) can be installed by a qualified electrician (Fig. 1). The green colored rigid ear, lug, or the like (F) extending from the adapter must be connected to a permanent ground (G) such as a properly grounded outlet box cover (Fig. 2). Whenever the adapter is used, it must be held in place by a metal screw. NOTE: In Canada, the use of a temporary adapter is not permitted by the Canadian Electrical Code.
1 |
|
2 |
E |
A |
|
|
|
|
|
|
|
|
|
D |
F |
GROUNDING |
|
G |
|
OUTLETB |
BOX |
|
|
C
4
|
|
|
|
|
|
|
|
|
|
|
|
|
|
|
4 |
.l’électricité |
|
|
|
|
|
|
|
|
|
|
|
|
C |
|
|
paspermisparleCodecanadiende |
|||
|
|
|
|
|
B |
|
|
|
|
|
|
|
|
l’usaged’unadaptateurtemporairen’est |
|||
|
|
|
|
|
OUTLET BOX |
|
|
|
|
|
|
|
|
|
|
|
|
G |
|
|
|
|
GROUNDING |
|
|
|
|
|
|
|
|
|
|
|
|
|
|
|
|
|
|
|
|
|
|
|
|
|
unevisen.métalRemarque:AuCanada, |
||||
F |
|
D |
|
|
|
|
|
|
|
|
|
|
|
||||
|
|
|
|
|
|
|
|
|
|
|
|
utilisé,ildoitêtremaintenuenplacepar |
|||||
|
2 |
|
|
|
|
|
|
|
|
|
|
|
|||||
E |
|
|
|
|
|
|
|
|
A |
1 |
(Fig..2)Chaquefoisqu’unadaptateurest |
||||||
|
|
|
|
|
|
|
|
|
|
|
|
|
|
àprisesadéquatementmisàlaterre |
|||
l’adaptateurdoitêtrebranchéàunemassepermanente(G)commeuncouvercledeboîte |
|||||||||||||||||
(Fig.1)Lapatterigideouletaquetdecouleurverteouautreélémentsemblable(F)liéà |
|||||||||||||||||
cequ’unepriseadéquatementmiseàlaterre(B)soitinstalléeparunélectricienqualifié |
|||||||||||||||||
terren’estpasdisponible(Fig..2)L’adaptateurtemporairenedoitêtreutiliséquejusqu’à |
|||||||||||||||||
pourbranchercetteficheàuneprisebipolaire(E)siunepriseadéquatementmiseàla |
|||||||||||||||||
ressembleàlafiche(A)illustrée(Fig..1)Unadaptateurtemporaire(D)peutêtreutilisé |
|||||||||||||||||
uncircuitd’uncalibrenominalde120voltsetestdotéd’unefichedemiseàlaterrequi |
|||||||||||||||||
unepriseadéquateparunélectricien.qualifiéCetappareilestconçupourêtreutilisésur |
|||||||||||||||||
modifierlafichefournieavec.l’appareilSilaficheneconvientpasàlaprise,faitesinstaller |
|||||||||||||||||
estcorrectementmiseàlaterre,consulterunélectricienouuntechnicien.qualifiéNepas |
|||||||||||||||||
l’appareilpeutentraînerunrisquedechoc.électriqueSivousn’êtespascertainsilaprise |
|||||||||||||||||
Unbranchementinadéquatduconducteurdemiseàlaterrede |
|
DANGER: |
|||||||||||||||
|
|
|
|
|
|
|
|
|
|
|
|
|
|
|
|
||
|
|
|
|
|
|
|
conformémentàtouslescodesetordonnances.locaux |
||||||||||
êtrebranchéedansunepriseappropriée(B)adéquatementinstalléeetmiseàlaterre |
|||||||||||||||||
miseàlaterredel’équipement(C)etd’unefichedemiseàlaterre.(A)Lafichedoit |
|||||||||||||||||
risquedechoc.électriqueCetappareilestdotéd’uncordonmunid’unconducteurde |
|||||||||||||||||
terrefournitunespacedemoindrerésistanceaucourantélectriqueafinderéduirele |
|||||||||||||||||
Cetappareildoitêtremisàla.terreEncasdedéfectuositéoudebris,lamiseàla |
|||||||||||||||||
|
|
CONSIGNESDEMISEÀLATERRE |
|||||||||||||||
|
|
|
|
|
|
|
PEUTÉGRATIGNEROUENDOMMAGERLE.PLANCHER |
|
|||||||||
APPAREILSURDESPLANCHERSÀSURFACEDURESANSL’ACCESSOIREAPPROPRIÉ |
|
||||||||||||||||
DUREÀMOINSDEDISPOSERDEL’ACCESSOIRE.APPROPRIÉL’UTILISATIONDECET |
|
||||||||||||||||
NEPASUTILISERCETASPIRATEUREXTRACTEURSURLESPLANCHERSÀSURFACE |
• |
||||||||||||||||
|
|
Nepaslaisserl’appareilsanssurveillancequandilest.branché |
• |
||||||||||||||
Rangerdansunendroit.secNepasexposerl’appareilàdestempératuresde.gel |
• |
||||||||||||||||
|
decompagnieéloignésdelamoquettejusqu’àcequ’ellesoit.sèche |
|
|||||||||||||||
tactaveclamoquettejusqu’àcequ’ellesoit.sècheGarderlesenfantsetlesanimaux |
|
||||||||||||||||
Pouréviterd’aplatirlesfibresdelamoquetteoudelasalirdenouveau,évitertoutcon- |
• |
||||||||||||||||
|
|
|
|
|
|
detouteautrematièrequipourraitréduireledébit.d’air |
|
||||||||||
obstruée;garderlesouverturesexemptesdepoussière,depeluches,decheveuxou |
|
||||||||||||||||
Nepasintroduired’objetsdansles.ouverturesS’assurerqu’aucuneouverturen’est |
• |
||||||||||||||||
|
|
|
|
|
|
|
|
|
|
|
|
Utilisercetappareilàl’intérieur.seulement |
• |
||||
àbonnedistancedesouverturesetdesautrespiècesmobilesde.l’appareil |
|
||||||||||||||||
Garderlescheveux,lesvêtements,lesdoigts,lespiedsettouteautrepartieducorps |
• |
||||||||||||||||
|
|
|
|
|
|
|
|
|
|
|
|
|
|
peuventendommager.l’appareil |
|
||
Nepasramasserd’objetsdursouauxarêtestranchantesavecla.shampouineuseIls |
• |
||||||||||||||||
ouquibrûle,commedescigarettes,desallumettesoudescendresencore.chaudes |
|
||||||||||||||||
Nepasutiliserlashampouineusepourramassertoutematièrequidégagedelafumée |
• |
||||||||||||||||
|
|
|
|
|
|
|
|
|
outoutautrematériautoxiqueaveccet.appareil |
|
|||||||
Nepasramasserdeproduitàblanchirauchlore,deproduitdedébouchage,d’essence |
• |
||||||||||||||||
nepasutiliserl’appareildansdesendroitsoùdetellesmatièressont.présentes |
|
||||||||||||||||
Nepasramasserdeliquidesinflammablesoucombustiblescommedel’essence,et |
• |
||||||||||||||||
Garderlesdétergentsetlesautresproduitsnettoyantshorsdelaportéedes.enfants |
• |
||||||||||||||||
utilisezdesdétergentsoud’autresproduitsnettoyantsaveccet.appareil |
|
||||||||||||||||
Pourréduireletempsdeséchage,s’assurerdebienaérerl’espacenettoyéquandvous |
• |
||||||||||||||||
Nepaspointerlesaccessoiresversdespersonnesoudesanimauxde.compagnie |
• |
||||||||||||||||

celui.illustré |
5 |
Lemodèled’aspirateurpeutvarierde |
|
utiliseruntournevispourles.resserrer |
|||
|
l’arrièrede.l’appareilMettreenplacelesécrouset |
|||
|
3.1Faireglisserlesupportàtuyausurlesvisà |
|||
3.1 |
|
(surcertainsmodèles) |
||
FIXERLESUPPORTÀTUYAU |
||||
|
||||
lesquelslenettoyageàsecest.recommandé |
||||
N’utilisezpaslalaveusedetapissurdestapisoudescarpett |
||||
(ycomprislasoieetlalaine),destapisdouxetdestapisbe |
||||
recommandationsdenettoyagedestapisenfibresnaturelles |
||||
Avantl’utilisation,consultezlefabricantdevotretapisausujetdes |
||||
ATTENTION |
|
|
||
|
complètementenclenchéeen.position |
|||
|
àinsérerdanslestrous,lapoignéen’apasété |
|||
|
écroustoutde.suiteSilesboulonssontdifficiles |
|||
|
trousàl’avantdumanche,maisnepasajouterles |
|||
|
lapartie.inférieureInsérerlesboulonsdansles |
|||
|
puisenfoncerlapartiesupérieuredumanchedans |
|||
|
d’alimentation(A)setrouveàl’arrièredel’appareil, |
|||
2.1 |
crochetducordon |
le |
2.1S’assurerque |
|
ASSEMBLAGEDUMANCHE |
||||
|
||||
.com.hoover peuventêtreachetésséparémentsurlesite.www Lesaccessoiresnoncomprisavecvotremodèle
poureffectuer.l’assemblage NOTA:Utiliseruntourneviscruciforme(Philips)
.manque s’assurerqu’aucunedespiècesillustréesne Avantd’éliminerlesmatériauxd’emballage,
Retirertouteslespiècesde.l’emballage
*Seulementsurcertains.modèles .FPorte-accessoiresavecvis* .ETuyau* .DSupportàtuyau* .CBoulonsetécrouspourlemanche .BPoignéesupérieure .AShampouineuse
|
E |
|
|
F |
|
|
A |
|
|
|
|
D |
C |
B |
1.1 |
|
|
|
|
|
|
CONTENUDEL’EMBALLAGE |
|
.1ENSAMBLADODELAASPIRADORAN
1. CLEANER ASSEMBLY
CARTON CONTENTS
1.1
B C D
A F E
A.Carpet cleaner body
B.Upper handle
C.Handle bolts and nuts
D.Hose Holder*
E.Hose*
F.Tool Holder with Screw* *Available on select models only
Remove all parts from carton andidentify each item shown.
Make sure all parts are locatedbefore disposing of packing materials.
NOTE: Phillips screwdriver needed for assembly.
Accessories not included with your model may be purchased separately by visiting www.hoover.com.
ATTACH HANDLE |
1.2 |
|
1.2 With cord hook to back of carpet cleaner, push upper handle down onto lower handle. Push bolts into holes on front of handle, but do not add nuts yet. If bolts will not go through hole easily handle is not pushed completely down.
ATTENTION
Prior to use, consult with Carpet Manufacturer on cleaning recommendations for natural fiber carpeting (including silk and wool), soft carpeting, and loop Berber carpeting. Do not use on rugs or carpet when dry cleaning is recommended.
ATTACH HOSE HOLDER |
1.3 |
(Available on select models only) |
|
1.3 Slide hose holder onto screws in back of machine. Now puts nuts in place and use screw driver to fasten.
5 Actual model may vary from images shown.

ATTACH TOOL HOLDER |
1.4 |
(Available on select models only) |
|
1.4 Remove tool and taped screw from holder. Insert projections on holder into slots on back of cleaner. Insert screw and tighten with screw driver.
STORE HOSE
(Available on select models only)
1.5 Start with converter end of hose (H). Fit converter over tab near tool holder (I). Press converter firmly to snap in place. Press solution tube (G) into clip next to converter as shown.
1.5 |
G |
I |
|
|
H |
1.6 K
L 
 L
L
1.6 Wrap hose around hook on upper handle
(K). Press hose into clips on upper hose holder (L).
STORE TOOL
(Available on select models only)
Cleaning Tool |
1.7 |
1.7 To store cleaning tool, open tool door, place |
|
nozzle in bracket and fit it securely into position. To |
|
remove, reverse this procedure. |
|
Break-Away Door |
|
1.8 The tool cover is designed with a break-away |
|
feature which allows it to snap free if it is pushed |
|
open too far. To reattach, align hinges of cover with |
|
slots on sides of tools storage area. Push cover |
|
down to secure in place. |
|
1.8 |
Actual model may vary from images shown. |
6 |
8.1 |
|
celui.illustré |
6 |
Lemodèled’aspirateurpeutvarierde |
|
|
|
|
surlaportepourlafixeren.place |
|
|
|
rangementdes.accessoiresAppuyerfermement |
|
|
|
|
lesencochessurlescôtésducompartimentde |
|
|
|
|
nouveau,alignerlescharnièresducouvercleavec |
|
|
|
|
sielleestouvertetrop.grandePourlafixerde |
|
|
|
|
dedégagementquiluipermetdesedétacher |
|
|
|
|
8.1Laportedufiltreestdotéed’unmécanisme |
|
|
|
|
|
Porteàmécanismededégagement |
|
|
|
|
l’accessoire,faire.l’inverse |
|
|
|
retirer |
supportetlafixerbienen.placePour |
|
|
|
pourlesaccessoires,placerlabusedansle |
|
|
|
|
7.1Pourrangerl’accessoire,ouvrirlecouvercle |
|
|
.1 |
7 |
||
|
|
Accessoirepourlenettoyage |
||
|
|
|
|
(surcertainsmodèles) |
|
|
|
RANGEMENTDESACCESSOIRES |
|
L |
L |
|
K |
.1 |
|
gnéesupérieure.(L) lesupportdelapoiausurlesattachessur .(K)Enclencherletuylapoignéesupérieure autourducrochetsur 6.1Enroulerletuyau
|
|
|
|
|
tel.qu’illustré |
|
|
|
|
àcôtéduconnecteur, |
|||
|
|
|
tion(G)dansl’attache |
|||
|
|
|
Glisserletubedesolu- |
|||
|
|
|
l’enclencheren.place |
|||
|
|
|
surleconnecteurpour |
|||
|
|
|
fermement |
Appuyer |
||
|
|
|
.(I) |
porte-accessoires |
||
|
|
|
du |
près |
languette |
|
|
|
|
la |
sur |
leconnecteur |
|
|
|
|
place |
en |
.(H)Mettre |
|
|
H |
|
tuyau |
necteursurle |
||
|
|
con- |
du |
l’extrémité |
||
|
|
|
||||
G |
I |
|
par |
5.1Commencer |
||
6 |
|
.1 |
|
|
|
modèles) |
|
certains |
(sur |
||||
|
|
|
||||
|
|
RANGEMENTDUTUYAU |
||||
|
lavisetresserreravecun.tournevis |
|
|
encochesàl’arrièredela.shampouineuseInsérer |
|
|
du.supportInsérerlesboutonssaillantsdansles |
|
|
4.1Retirerl’outiletlavis(fixéeparunrubanadhésif) |
|
4.1 |
(surcertainsmodèles) |
|
FIXERLEPORTE-ACCESSOIRES |
||
|

celui.illustré |
|
Lemodèled’aspirateurpeutvarierde |
7 |
|
|
.qu’illustré |
|
|
tel |
nettoyante, |
solution |
|
de |
supérieur |
réservoir |
|
mainsouslapoignéedu |
||
|
ouineuseenplaçantune |
||
|
detransporterlashamp |
||
3.2 |
Ilestégalementpossible |
||
|
POIGNÉE |
||
|
|
||
SHAMPOUINEUSEPARLA |
|||
TRANSPORTDELA |
|||
|
lepousservers.l’avant |
|||
|
sesrouesarrière,puis |
|||
|
pourlefairereposersur |
|||
|
l’arrière |
vers |
l’appareil |
|
|
incliner |
|
verticale, |
|
- |
position |
en |
manche |
|
àl’autre,enclencherle |
||||
|
||||
2.2 |
pouineused’unepièce |
|||
Pourdéplacerlasham- |
||||
|
|
LESOL |
||
TRANSPORTDEL’APPAREILSUR |
||||
|
|
|
|
|
.PLANCHER |
|
|
||
APPROPRIÉPEUTÉGRATIGNEROUENDOMMAGERLE |
|
|
|||||||
SURDESPLANCHERSÀSURFACEDURESANSL’ACCESSOIRE |
.23Busepourescaliers/meubles* |
||||||||
L’ACCESSOIRE.APPROPRIÉL’UTILISATIONDECETAPPAREIL |
|||||||||
.22PédaleON/OFF(marche/arrêt) |
|||||||||
PLANCHERSÀSURFACEDUREÀMOINSDEDISPOSERDE |
|||||||||
récupération |
|||||||||
NEPASUTILISERCETASPIRATEUREXTRACTEURSURLES |
|||||||||
|
|
MISEENGARDE |
|
.20Attachepourcordon |
|||||
|
! |
|
|
|
|
! |
.21Languettesduréservoirde |
||
|
|
|
|
|
|
|
|||
|
|
|
|
*Surcertainsmodèles |
.19Supportàtuyau* |
||||
|
|
|
|
.18Crochetspourtuyau* |
|||||
|
|
|
|
|
|
|
|||
|
|
|
|
|
|
est.illustrée |
.17Crochetspourcordon |
||
|
|
|
|
|
|
solution |
|||
Unefoisassemblée,lashampouineuseressembleraàcellequi |
|||||||||
.16Gâchettepourl’applicationde |
|||||||||
|
surlaplaquesignalétiquesituéeaubasde.l’appareil |
||||||||
|
.15Buse |
||||||||
N’utiliserlashampouineusequ’àlatensionélectriquespécifiée |
.14Raccorddutubedesolution* |
||||||||
|
|
|
|
|
|
|
|||
|
|
|
15 |
|
|
|
.13Couvercle |
||
|
|
22 |
|
|
|
brossestournent |
|
||
|
|
|
|
|
|
|
|||
|
|
|
|
|
|
brosses:Tournoiequandles |
|
||
|
|
|
13 |
|
|
|
|
||
23 |
|
|
|
|
|
.12Indicateurderotationdes |
|||
|
|
12 |
|
|
14 |
ouOFF(arrêt) |
|
||
|
|
21 |
|
|
|
||||
|
|
11 |
|
|
10 |
brosses:HI(élevée),LO(basse) |
|
||
|
|
|
|
|
.11Sélecteurdevitessedes |
||||
|
|
|
|
|
|
||||
|
|
|
|
|
|
|
|||
|
|
|
9 |
|
|
|
che |
||
20 |
|
|
8 |
|
|
|
.10Pédalededéblocageduman- |
||
|
|
|
|
|
|
.9Réservoirderécupération |
|||
|
|
|
|
|
|
|
|||
|
|
19 |
7 |
|
|
|
récupération |
||
|
|
|
|
|
|
|
Couvercleduréservoirde |
.8 |
|
18 |
|
17 |
6 |
|
|
4 |
Réservoirdesolutionnettoyante |
.7 |
|
|
|
|
|
|
|
Poignéedetransport |
.6 |
||
|
|
|
5 |
|
|
|
|||
|
|
|
|
|
|
accessoires* |
|
||
|
|
|
|
|
|
|
Rangementavantpourles |
.5 |
|
|
|
|
3 |
|
|
1 |
nettoyante/tasseàmesurer |
|
|
|
|
|
|
|
Bouchonduréservoirdesolution |
.4 |
|||
|
|
16 |
|
2 |
|
|
Tuyau* |
.3 |
|
|
|
|
|
1.2 |
BoutonCleanSurgeMC* |
.2 |
|||
|
|
|
|
|
|
Poignée |
.1 |
||
|
|
|
|
|
|
|
|||
|
|
|
|
|
|
DESCRIPTIONDEL’ASPIRATEUR |
|||
.2UTILISATION

2. HOW TO USE
CLEANER DESCRIPTION
1.Hand Grip
2.Clean Surge® Button*
3.Hose*
4.Clean Water Solution Tank Cap/ Measuring Cup
5.Front Tool Storage*
6.Carry Handle
7.Clean Water Solution Tank
8.Dirty Water Tank Lid
9.Dirty Water Tank
10.Handle Release Pedal
11.Brush Speed Selector: HI, LO, or OFF
12.Brush Indicator: spins when brushes are rotating
13.Hood
14.Solution Tube Connection*
15.Nozzle
16.Solution Trigger
17.Cord Hooks
18.Hose Hooks*
19.Hose Holder*
20.Cord Clip
21.Dirty Water Tank Latches
22.ON/OFF Pedal
23.Stair/Upholstery Nozzle*
2.1 |
2 |
|
16 |
1 |
3 |
|
|
|
5 |
|
|
4 |
6 |
17 |
18 |
|
|||
|
7 |
19 |
|
|
8 |
|
20 |
|
|
|
|
|
9 |
|
|
10 |
11 |
21 |
|
|
|
||
14 |
12 |
23 |
|
|
13 |
|
|
|
|
|
|
|
15 |
22 |
|
|
|
|
Operate cleaner only at voltage specified on data plate on bottom of cleaner.
This cleaner is intended for household use.
*Available on select models only
! CAUTION !
DO NOT USE THIS EXTRACTOR ON HARD FLOORS UNLESS YOU HAVE THE PROPER HARD FLOOR ATTACHMENT. USING THIS MACHINE ON HARD FLOORS WITHOUT PROPER ATTACHMENT MAY SCRATCH OR DAMAGE YOUR FLOOR.
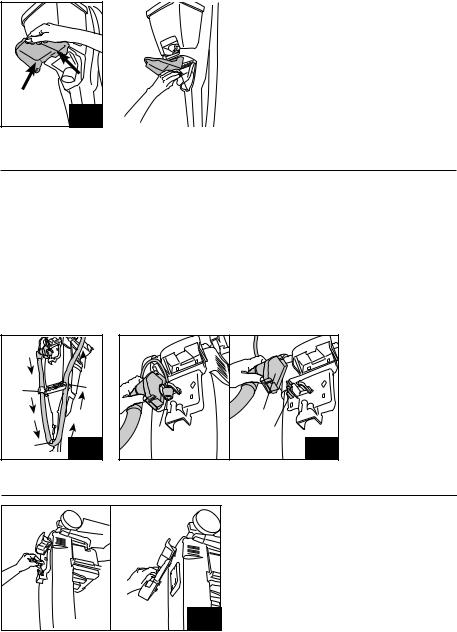
TRANSPORTING CLEANER
To move |
your carpet |
2.2 |
|||
cleaner |
from |
room |
to |
||
room put |
handle |
in |
|
||
upright |
and |
locked |
|
||
position |
|
tilt |
carpet |
|
|
cleaner back on wheels |
|
||||
and push forward. |
|
|
|||
CARRYING CLEANER
The carpet cleaner may
also be lifted by placing 2.3 a hand under the upper
Clean Water Solution Tank handle as shown.
7 Actual model may vary from images shown.
THE TANKS: (upper tank)
CLEAN WATER SOLUTION TANK
The Clean Water Solution Tank holds the cleaning solution that is to be dispersed onto the surface to be cleaned (see “Cleaning Products” on p.20 for details).
How to Fill
! CAUTION !
To reduce the risk of injury from moving parts, unplug cleaner.
Place carpet cleaner handle in the upright, locked position.
2.4 To remove tank, press down on handle and pull forward.
Carry tank to a sink.
2.5 Rotate tank cap counterclockwise and lift up to remove cap.
2.4 |
|
2.6 |
5 OUNCES/ |
150 ml |
A
2.5 |
|
2.7 |
B |
|
2.6 Turn cap (A) upside down to serve as a measuring cup.
Using cap, measure detergent following the chart below.
Tank Measuring Chart
For carpet, |
Fill cap to fill line (5 |
carpeted stairs and |
ounces) with HOOVER® |
upholstery: |
Carpet/Upholstery |
|
Detergent. |
|
|
For bare floors: |
Fill cap to fill line (5 |
|
ounces) with HOOVER® |
|
Hard Floor Cleaning |
|
Detergent. |
|
|
NOTE: If using concentrated detergent, be sure to follow directions on bottle.
2.7 Pour detergent into tank. Fill tank to fill line (B) (1 gallon) with hot tap water.
To assure proper performance, use only HOOVER® cleaning detergent (see “Cleaning Products” section for details.).
For Heavy Traffic Areas
Pre-treat with HOOVER® Spot and Stain Spray Cleaner.
If you do not have access to the Spot and Stain Spray Cleaner, double the amount of HOOVER® Detergent (use 2 capfuls or 10 ounces per 1 gallon
tank).
DIRTY WATER TANK (lower tank)
Automatic Shut Off
2.8 When the Dirty Water Tank (lower tank) is full the automatic shut off mechanism will shut off the carpet cleaner suction (suction will be noticeably reduced).
At that time the yellow float disk will rise to the top of the Dirty Water Tank lid. The cleaner will no longer pick up liquid and the motor sound will become noticeably higher in pitch. When this happens, turn off and unplug machine. Then empty Dirty Water Tank before continuing use.
How to Empty
Step on handle release pedal and lower handle until it rests on the floor.
If cleaning stairs or upholstery, remove hose (Available on select models only) by reversing procedure as shown on page 13.
2.9 Rotate Dirty Water Tank latches (E) outward (one on each side of tank).
Lift tank off of carpet cleaner and carry it to a sink or drain. To replace tank, do the opposite.
Actual model may vary from images shown. |
8 |
2.8 |
2.9 |
E |
|
|
lapage.13 |
|
cellequiestillustréeà |
|||
de |
inverse |
procédure |
|
modèles)ensuivantla |
|||
(surcertains |
tuyau |
||
le |
retirer |
meubles, |
|
de |
ou |
planchers |
|
de |
lenettoyage |
Pour |
|
|
reposesurle.sol |
||
manchejusqu’àcequ’il |
|||
mancheetabaisserle |
|||
du |
déblocage |
de |
|
Appuyersurlapédale |
|||
|
|
nettoyer |
|
|
Commentle |
||
8 |
8.2 |
|
|
celui.illustré |
Lemodèled’aspirateurpeutvarierde |
||
continueràutiliserla.shampouineuse |
||
ensuiteleréservoirderécupérationavantde |
||
untelcas,éteindreetdébrancher.l’appareilVider |
||
moteurémettraunsonnettementplus.aiguDans |
||
shampouineuseneramasseraplusleliquideetle |
||
jusqu’aucouvercleduréservoirde.récupérationLa |
||
Àcemoment,ledisqueflottantjauneremontera |
||
|
|
.réduite) |
shampouineuse(lasuccionseraconsidérablement |
||
automatiquearrêtel’actiondesucciondela |
||
mécanismed’arrêt |
le |
inférieur)estplein, |
8.2Quandleréservoirderécupération(réservoir |
||
Mécanismed’arrêtautomatique |
||
|
|
(réservoirinférieur) |
RÉSERVOIRDERÉCUPÉRATION |
||
assurerderespecterlesdirectivessurla.bouteille |
||
Sivousutilisezundétergentultra-concentré,vous |
||
bouchonsou10oncesparréservoird’un.gallon) |
||
laquantitédedétergentdeHOOVERMD(utiliser2 |
||
Sivousn’avezpasceproduitsouslamain,doubler |
||
tachesdeHOOVERMD. |
||
Prétraiteraveclenettoyantenvaporisateurpour |
||
Pourleszonestrèspassantes |
||
renseignements..) |
||
pourobtenirdeplusamples |
» |
nettoyants |
détergentdeHOOVERMD(voirlasection«Produits |
||
Pourassurerunbonrendement,n’utiliserqu’un |
||
gallon)avecdel’eauchaudedu.robinet |
||
réservoirjusqu’àlalignederemplissage(B)(1 |
||
7.2Verserledétergentdansle.réservoirRemplirle |
||
B |
.2 |
|
|
|
.2 |
A
7 |
150ml |
6.2 |
5OUNCES/ |
||
5 |
|
4.2 |
|
|
surle.contenant |
|
|
|
|
s’assurerdesuivrelesdirectivesindiquées |
|
|||
|
|
:SiundétergentNOTEconcentréestutilisé, |
|||
|
|
parquetsdeHOOVERMD. |
|
|
|
|
lasolutionnettoyantepour |
parquets: |
|||
|
remplissage(5onces)avec |
||||
|
Remplirjusqu’àlalignede |
Pourles |
|
||
|
|
|
meubles: |
||
|
|
HOOVERMD. |
moquetteetles |
||
|
pourmoquette/meublesde |
recouvertsde |
|||
|
|
onces)avecledétergent |
lesescaliers |
||
|
lalignederemplissage(5 |
moquettes, |
|||
|
Remplirlebouchonjusqu’à |
Pourles |
|||
|
Tableaudemesurepourleréservoir |
|
|||
|
|
bouchon,selonletableauci-.dessous |
|||
Mesurerunequantitédedétergentàl’aidedu |
|||||
|
|
commetasseà.mesurer |
|||
6.2Mettrelebouchon(A)àl’enverspours’enservir |
|||||
|
|
|
pourle.retirer |
||
|
contrairedesaiguillesd’unemontreetlesoulever |
||||
5.2Dévisserlebouchonduréservoirdanslesens |
|||||
|
|
Transporterleréservoirjusqu’àun.évier |
|||
|
|
etpousservers.l’avant |
|||
4.2Pourretirerleréservoir,appuyersurlemanche |
|||||
|
|
|
position.verticale |
||
Enclencherlemanchedelashampouineuseen |
|||||
|
|
l’appareilavantd’eneffectuer.l’entretien |
|
||
|
pardespiècesenmouvement,débrancher |
|
|||
|
Pourréduirelesrisquesdeblessurescausées |
|
|||
|
! |
MISEENGARDE |
! |
|
|
|
|
|
|
||
|
|
|
|
|
|
|
|
|
Remplissage |
||
|
pourobtenirdeplusamples.renseignements) |
||||
ànettoyer(voir«Produitsnettoyants»àlapage20 |
|||||
solutionnettoyantequiestdisperséesurlasurface |
|||||
Leréservoirdesolutionnettoyantecontientla |
|||||
|
|
(réservoirsupérieur) |
|||
RÉSERVOIRDESOLUTIONNETTOYANTE RÉSERVOIRS:

celui.illustré |
|
|
Lemodèled’aspirateurpeutvarierde |
9 |
|
|
|
Réenclencherlecouvercleen.place |
H |
Retirerlecouvercletransparentetessuyerl’écranavecunchiffon.humide |
|
|
laprisede.courant |
|
|
|
|
|
Pour.13.2nettoyerl’écran(H),éteindrelashampouineuseetladébrancherde |
|
|
.213 |
.3L’écrandel’indicateurderotationdesbrossesestsale. |
|
.2Letubedesolution.4.(Fig.5)estbranchéSur(certainsmodèles) |
|
|
|
|
|
G |
|
|
lasection.précédente) |
|
|
|
.1LesélecteurdevitessedesbrossesestrégléàlapositionOFF(arrêt)(voir |
|
|
|
|
|
|
|
|
|
|
Ilyatroisraisonspourlesquelleslesbrossespeuventnepastourner: |
|
|
|
|
shampouineuseestmiseenmarche(ON),lesbrossesnetournent.pas |
|
|
|
|
|
|
F |
|
|
Sil’indicateurnetournoieparetsilemotifestvisible(G)quandla |
|
|
|
|
estenmarcheetquelesbrosses.tournent |
|
|
.212 |
12.2L’indicateurderotationdesbrossestournoie(F)quandlashampouineuse |
|
|
|
INDICATEURDEROTATIONDESBROSSES |
||
|
|
|
|
|
HI |
LO |
|
Speed |
|
OFF |
|
Agitator |
|
|
|
Glisserleboutondusélecteurjusqu’auréglage.souhaité |
|
|
|
|
|
|
àlapage.11) |
|
|
|
|
|
|
|
|
|
|
rouleau-brosse(Parexemple,pourleramassagedeliquides.renversésVoir |
|
|
|
|
|
OFF(arrêt)-pournettoyerlamoquetteetlesparquetssansactiverle |
|
|
|
|
|
moquetteetdesparquets |
LOnettoyage(basse)délicatdela |
urun |
|
|
|
moquetteetdesparquets |
Hlnettoyage(élevée)régulierdela |
ourle |
|
|
|
|
rouleau-brosse.agitateur |
|
|
|
|
VotreshampouineuseSteamVacMCcomportetroisréglagesdevitessepourle |
|
|
|
|
|
YourSteamVac®carpetcleanerhasthreeagitatorbrush.settings |
|
|
|
.211 |
|
|
|||
SÉLECTEURDEVITESSEDESBROSSES |
|
|
|||
|
|
|
|
||
F
 G
G
.2
E
9.2
soitbienfixéenplaceavantle.nettoyage quelecouvercleduréservoirderécupération Pourunesuccionmaximale,ilestimportant
|
IMPORTANT |
|
|
||||||
|
|
|
|
|
|
.shampouineuse |
|||
touslescôtésavantdemettreleréservoirsurla |
|||||||||
àcequelecouvercleestbienfixéenplacepar |
|||||||||
couverclepourl’enclenchersurle.réservoirVeiller |
|||||||||
le |
.réservoirVisser |
du |
l’avant |
à |
(G) |
languettes |
|||
.charnièrePlacerl’avantducouverclecontreles |
|||||||||
commeune |
place |
en |
remet |
se |
couvercle |
Le |
|||
|
Verserl’eausaleparl’arrièreduréservoir.(F) |
||||||||
récupérationetretirerle.couvercleViderle.réservoir |
|||||||||
réservoirde |
du |
arrière |
partie |
la |
10.2Détacher |
||||
|
|
|
|
|
réservoir,faire.l’inverse |
||||
évierouun.lavaboPourremettreenplacele |
|||||||||
un |
shampouineuse,puisletransporterjusqu’à |
||||||||
la |
retirerde |
le |
et |
réservoir |
le |
Soulever |
|||
|
|
|
|
|
|
côtédu.réservoir) |
|||
récupération(E)versl’extérieur(unesurchaque |
|||||||||
de |
réservoir |
du |
languettes |
Tournerles |
9.2 |
||||

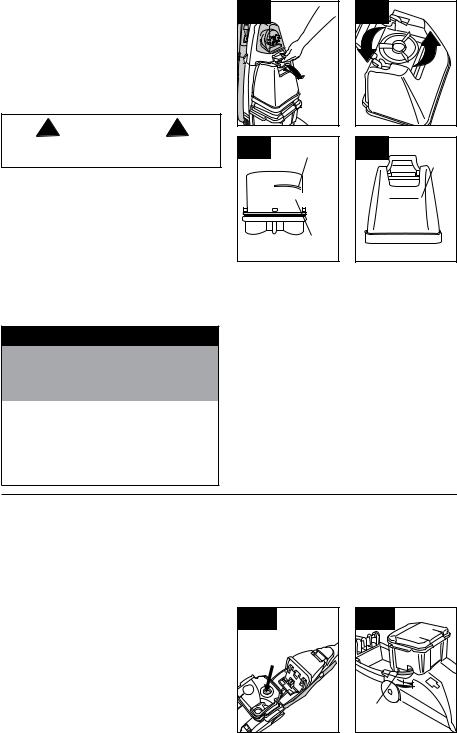
2.10 Unlatch back part of tank lid and remove lid. Empty tank. Pour dirty water out from the rear of the tank (F).
The lid replaces in a hinge-like manner. Positionthe front of lid under tabs (G) on front of tank. Rotate lid down onto tank. Make sure that the lid is secure on all sides before placing tank on cleaner.
 IMPORTANT
For full suction, it is important that the Dirty Water Tank lid is properly secured before cleaning.
2.10
 G
G
F
BRUSH SPEED SELECTOR
Your SteamVac® carpet cleaner has three agitator brush settings.
Hl - for normal cleaning of carpet and bare floors LO - for gentle cleaning of carpets and bare floors
OFF - for cleaning carpets and bare floors when brushing is not desired. (See “Picking Up Spills” section on page 11.)
Slide selector button to the desired setting before cleaning.
2.11 |
|
Agitator |
|
OFF |
Speed |
LO |
HI |
BRUSH INDICATOR |
|
|
|
2.12 |
|
|
|
2.12 The brush indicator will spin (F) when the |
|
|
|
|
|
|
|
carpet cleaner is turned ON and the brushes are |
|
|
|
rotating. |
|
F |
|
If the indicator does not spin and the pattern is |
|
|
|
visible (G) when the carpet cleaner is turned ON, |
|
|
|
the brushes are not rotating. |
|
|
|
There are three reasons why the brushes may not |
|
G |
|
be rotating: |
|
||
|
|
|
|
1. Brush speed selector set on OFF |
|
|
|
|
|
|
|
(see previous section). |
|
|
|
2. Solution tube connected (Available on select |
|
|
|
models only) (Fig. 4.5). |
|
|
|
3. Brush indicator screen dirty. |
|
|
|
2.13 To clean screen (H), turn carpet cleaner off |
|
|
|
and disconnect from electrical outlet. |
|
|
|
Remove clear cover and wipe off screen with a |
|
|
|
damp cloth. Snap cover back into position. |
|
|
|
2.13 |
H |
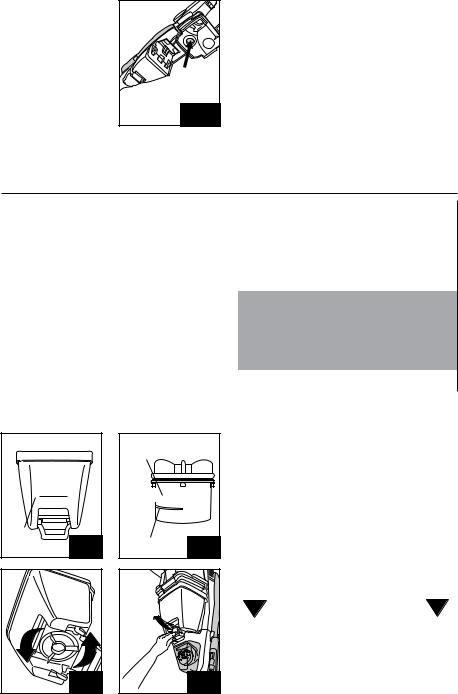
9 Actual model may vary from images shown.
3. HOW TO CLEAN
BEFORE YOU BEGIN CLEANING
A.Vacuum thoroughly - For carpet, use a Hoover® vacuum cleaner with an agitator for best results. Vacuum upholstery with a vacuum cleaner with cleaning tool attachments. Use a crevice tool to reach into tufts and folds. Do not use the SteamVac® carpet cleaner as a dry vacuum cleaner.
B.For upholstery, check cleaning code - Use your HOOVER® SteamVac® carpet cleaner only if the upholstery fabric is marked with a “W” (for “wet” clean) or “S/W” (for “solvent/dry” or “wet” clean). Do not clean fabric marked “S” (“solvent/dry” clean only). If your upholstery does not have a code, seek professional assistance.
C.Test for colorfastness - Mix detergent and water according to the instructions under “Fill Clean Water Solution Tank” on pages 8. Wet a white absorbent cloth with the solution. In a small, hidden area, gently rub the surface with the dampened cloth. Wait ten minutes and check for color removal or bleed with white paper towel or cloth. If surface has more than one color, check all colors.
D.When cleaning entire floor, move furniture out of area to be cleaned (may not be necessary if only high traffic areas are to be cleaned). For furniture too heavy to move, place aluminum foil or wax paper under legs. This will prevent wood finishes from staining carpet. Pin up furniture skirts and draperies.
E.Pretreat spots and heavy traffic areas with HOOVER® Spot and Stain Spray CleanerTest Spot and Stain Spray Cleaner for colorfastness by first spraying it on a hidden area; wait ten minutes and blot with white paper towels or cloth.
If no color change is visible, spray Spot and Stain Spray Cleaner onto spots and traffic areas. Wait at least ten minutes. Use your SteamVac® carpet cleaner to pick up Spot and Stain Spray Cleaner
and spot. Repeat until spot is removed; carefully scrub with a household scrub brush if necessary. Do not saturate carpet or upholstery with Spot and Stain Spray Cleaner.
No cleaning solution removes all stains from all carpets. Stain removal varies with the type of spill, time elapsed before removal, carpet material, and carpet type.
F.To prevent staining, use plastic or aluminum foil to protect wood or metal surfaces from possible water spray.
G.To avoid wetting and possible damage to wood floors underneath area rugs/carpet, either move area rugs/carpet to a non-wood hard floor surface or place waterproof material (e.g. plastic) underneath them before cleaning. If rinsing is desired, be careful not to over-wet the carpet or upholstery.
Allow time for carpet or upholstery to dry completely between cleaning and rinsing. To rinse, follow the same procedure for cleaning only using hot tap water with no detergent in the upper Clean Water Solution Tank.
H. Empty tanks, rinse with clear water and let air dry. Rinse the Clean Water Solution Tank cap and Dirty Water Tank lid and let air dry.
ATTENTION
Some Berber, Natural Fiber, and Soft Fiber carpets can fuzz with wear. Some vacuums & carpet cleaners can worsen this carpet wear. Test a hidden area before using on a full room & consult with your carpet manufacturer on
cleaning recommendations.
CARPET CLEANING
Fill Clean Water Solution Tank (upper tank) with HOOVER® Detergent according to instructions on page 8.
3.1 Move speed selector to LO for gentle cleaning or Hl for normal cleaning.
Dry hands and plug cord into a properly grounded outlet.
Do not clean over floor electrical outlets.
3.1 |
|
Agitator |
|
OFF |
Speed |
LO |
HI |
To avoid walking on damp carpet, start at the end of the room farthest from the door or path to sink where tanks will be emptied and filled.
Step on handle release pedal and lower handle to operating position; turn carpet cleaner ON.
3.2 Squeeze trigger to release cleaning solution and slowly push carpet cleaner forward (equals
one wet stroke). |
10 |
Actual model may vary from images shown. |
3.2 |
|
|
|
|
|
|
celui.illustré |
|
|
|
|
10 |
Lemodèled’aspirateurpeutvarierde |
|||
Continu>> |
|
|
|
|
|
||
|
|
Nepasnettoyerau-dessusdeprisesélectriquessituéesau.sol |
|||||
|
|
|
|
adéquatementmiseàla.terre |
|||
|
|
unepriseélectrique |
cordondans |
mainsetbrancherle |
Essuyervos |
||
HI |
LO |
|
ouàHl(élevée)pourunnettoyage.régulier |
||||
|
|
||||||
Speed OFF |
|
|
|
|
|
||
|
Agitator |
1.3Réglerlesélecteurdevitesse(A)àLO(basse)pourunnettoyagedélicat |
|||||
|
|
||||||
|
|
|
|
consignessurlespage.8 |
|||
|
|
moquette/meublesdeHOOVERMDconformémentaux |
détergentpour |
||||
|
|
Remplirleréservoirdesolutiondenettoyage(réservoirsupérieur)avecle1.3 |
|||||
|
|
|
NETTOYAGEDELAMOQUETTE |
||||
|
recommandationsde.nettoyage |
|
|
|
.blanc |
||
|
puisessuyeravecunessuie-toutouunchiffon |
||||||
fabricantdevotretapisausujetdes |
surunesurfacehorsdevue;attendredixminutes, |
||||||
detapisdanstoutelapièceetconsultezle |
couleursaveclenettoyantenvaporisantleproduit |
||||||
unesectioncachéeavantd’utiliserlalaveuse |
Testerdenouveaulasoliditédes |
HOOVERMD.- |
|||||
aveclenettoyantenvaporisateurpourtachesde |
|||||||
tapisrisquentd’aggravercette.usureTestez |
|||||||
.EPrétraiterlestachesetleszonestrèspassantes |
|||||||
.l’usureCertainsaspirateursetlaveusesde |
|||||||
|
|
|
.rideaux |
||||
naturellespeuventdevenirpelucheuxavec |
|
|
|
||||
Certainstapisdoux,berbèresouenfibres |
.moquetteÉpinglerlesvolantsdesmeublesetles |
||||||
Celaempêcheralesfinisdeboisdetacherla |
|||||||
|
ATTENTION |
||||||
|
pattesdesmeublestroplourdspourêtre.déplacés |
||||||
|
papierd’aluminiumoudupapiercirésousles |
||||||
|
|
|
passantesdoiventêtre.nettoyées)Placerdu |
||||
|
récupération,etlaissersécherà.l’air |
nepasêtrenécessairesiseulesleszonestrès |
|||||
desolutionetlecouvercleduréservoirde |
(celapeut |
lesmeubleshorsdelazoneànettoyer |
|||||
laissersécherà.l’airRincerlebouchonduréservoir |
.DPourlenettoyagedetoutleplancher,déplacer |
||||||
|
|
rinceràl’eauclaireet.HViderlesréservoirs, |
chacune.d’elle |
||||
|
|
|
|
|
|||
réservoirsupérieurpourlasolutionde.nettoyage |
plusd’unecouleur,fairecettevérificationpour |
||||||
l’eaudurobinetchaudesansdétergentdansle |
papieroud’unchiffon.blancSilasurfacecomporte |
||||||
procédurequepourlenettoyage,maisutiliserde |
decouleurseproduitàl’aided’unessuie-touten |
||||||
nettoyageetde.rinçagePourrincer,suivrelamême |
etvérifiersiunedécolorationouundégorgement |
||||||
meublessèchentcomplètemententrelesétapesde |
tissuaveclechiffon.mouilléAttendredixminutes |
||||||
moquetteoules |
assezdetempspourquela |
petitesurfacehorsdevue,frotterdoucementle |
|||||
mouillerletapisouletissudeLaisser.recouvrement derinçageestrequise,prendresoindenepastrop n’estpasenboisavantdela.nettoyerSiuneétape déplacerlestapisetlesposersurunesurfacequi lesplanchersdeboissouslestapis/lamoquette, .GPouréviterdedétremper
d’eau.éventuel lessurfacesdeboiscontreunéclaboussement deplastiqueoudupapieraluminiumpourprotéger .FPourprévenirlestaches,
moquetteetlematérieldontelleest.composée tempsécouléavantsonnettoyage,letypede détachagevarieselonlanaturedelatache,le lestachesdetoutesles.moquettesL’efficacitédu Aucunesolutionnettoyantenepeutéliminertoutes lemeublede.nettoyant Nepassaturerlamoquetteouletissuquirecouvre doucementavecunebrosseà.récurage latachesoitdisparue;sinécessaire,frotter etfairedisparaîtrela.tacheRépéterjusqu’àceque ramasserlenettoyantenvaporisateurpourtaches UtiliservotreshampouineuseSteamVacMCpour très.passantesAttendreaumoinsdix.minutes vaporiserleproduitsurlestachesetsurleszones Siaucunchangementdecouleurn’estvisible,
chiffonabsorbantblancavecla.solutionSurune |
||||
solutionnettoyanteȈlapage.8Humecterun |
||||
danslasection«Remplissageduréservoirde |
||||
détergentetl’eauconformémentauxconsignes |
||||
.CVérifierlasoliditédelacouleur-Mélangerle |
||||
|
consulterun.professionnel |
|||
etainsid’endommager |
|
|
|
|
meublesneportepasdecodedenettoyage, |
||||
auxsolvants/àsec.seulement)Siletissudevos |
||||
nettoyerlestissusportantlecode«S»(nettoyage |
||||
solvants/àsecounettoyage.humide)Nepas |
||||
utiliserunepellicule |
|
|
|
|
(nettoyagehumide)ou«S/W»(nettoyageaux |
||||
revêtementdesmeublesportelecode«W» |
||||
siletissude |
SteamVacMCque |
|
HOOVERMD |
|
shampouineuse |
votre |
N’utiliser |
- |
dutissu |
.BPourlesmeubles,vérifierlecodedenettoyage |
||||
SteamVacMCcommeaspirateurà.sec |
||||
capitonsetles.plisNepasutiliserlashampouineuse |
||||
.meublesUtiliserunsuceurplatpournettoyerles |
||||
dotéd’unebusepour |
aspirateur |
|
l’aided’un |
|
.possiblesPasserl’aspirateursurlesmeublesà |
||||
agitateurpourobtenirlesmeilleursrésultats |
||||
unaspirateurHooverMDdotéd’unrouleau-brosse |
||||
.ABienpasserl’aspirateur-Pourletapis,utiliser |
||||
|
|
NETTOYAGE |
||
AVANTDECOMMENCERLE |
||||
.3NETTOYAGE
 Loading...