


Hobart 2812CE Installation Manual

I
N
S
T
R
MODEL 2812 & 2912 SLICERS
MODELS
2812 SLICER
U
C
T
I
O
N
S
2812 ML-104958
2912 ML-104963
Previous models covered by this manual:
2812 ML-104615
ML-104827
2912 ML-104713
ML-104823
ML-104874
701 S. RIDGE AVENUE
TROY, OHIO 45374-0001
937 332-3000
www.hobartcorp.com
FORM 34454 (Feb. 2000)
Installation, Operation, and Care of
MODEL 2812 & 2912 SLICERS
SAVE THESE INSTRUCTIONS
GENERAL
The model 2812 and 2912 slicers are equipped with a 1⁄2 HP motor and are available for single-phase
electrical service. The slicer features the exclusive Hobart Stay-Sharp contoured cast solid stainless
steel knife. The slicer is furnished with a cord and plug as standard equipment. Other features and
options include:
The Power Interrupt feature, standard, requires the slicer to be manually re-started after a power
interruption.
The Gauge Plate and Carriage Interlock feature, standard, prevents the Carriage Tray from being
removed unless the Carriage is in the H
Plate is C
previously been turned O
be started and the Gauge Plate cannot be opened until the Carriage Tray is returned to its normal
operating position.
LOSED. When the Carriage Tray is tilted horizontally, the slicer will turn OFF if it has not
FF. Once the Carriage Tray is tilted horizontally or removed, the slicer cannot
OME position (pulled all the way to the front) and the Gauge
The HomeStart feature, standard, requires the carriage to be in the H
can be started.
If equipped with the AutoShutoff option, the slicer will turn off if a full stroke of the carriage has not
been made within a 10 second interval. The AutoShutoff option is factory installed only.
The 2912 slicer features automatic slicing with six adjustable speeds.
A tubular food chute, 4" leg set and slaw tray are other available accessories for 2812 and 2912. The
low carriage fence is an accessory on 2812; it is standard on 2912. A high carriage fence is an
accessory used with front mounted meat grips. The standard meat grip is front-mounted. Heavy frontmounted meat grip is an available accessory.
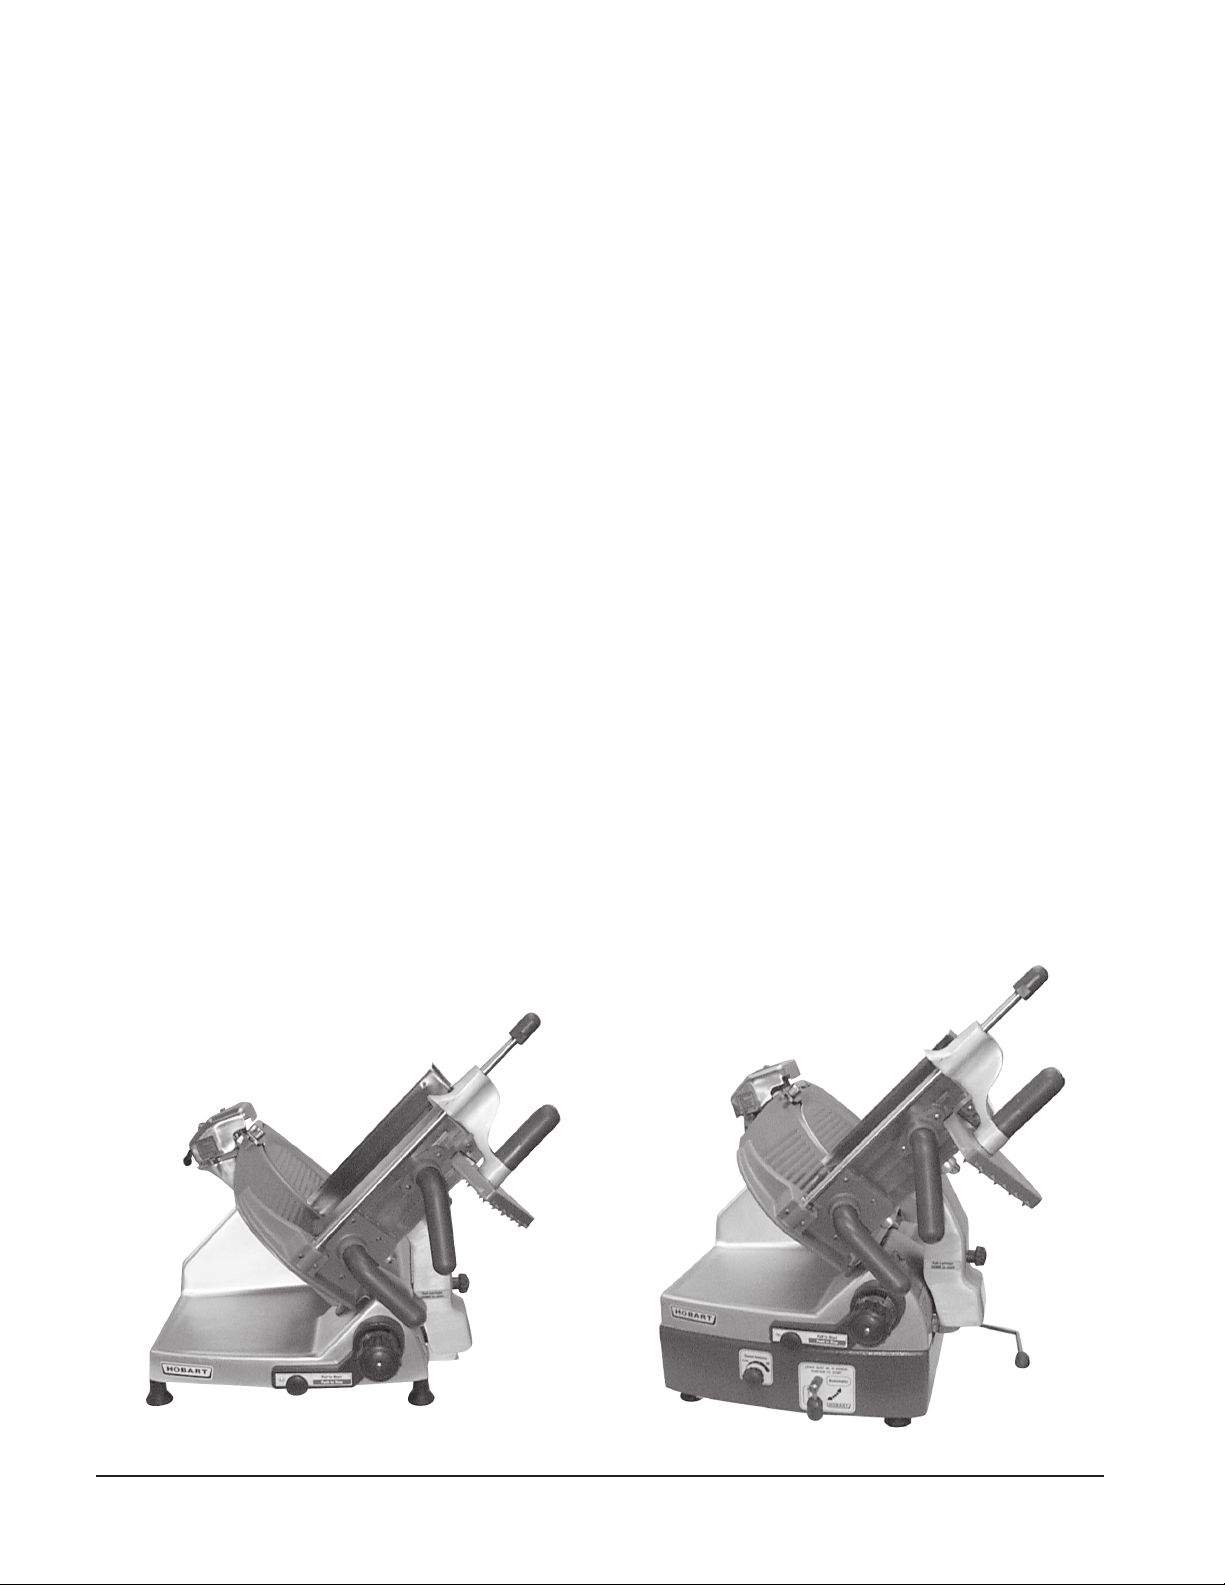
Model 2812 Slicer Model 2912 Slicer
OME position before the slicer
© HOBART CORPORATION, 1998
– 2 –

INSTALLATION
UNPACKING
Immediately after unpacking the slicer, check for possible shipping damage. If the slicer is found to be
damaged, save the packaging material and contact the carrier within 15 days of delivery.
Prior to installing the slicer, test the electrical service to assure it agrees with the specifications on the
machine data plate. The data plate is located on the right side of the slicer base.
CARRIAGE TRAY
The Carriage Tray is secured to the slicer when the knob on the Carriage Tray / Support Arm is turned
clockwise until snug (Fig. 1). Refer to page 7 for assembly information.
SHARPENER
The Sharpener should already be mounted on top of the slicer and locked to its bracket (Fig. 1).
TOP KNIFE COVER
The Top Knife Cover should already be in place and secured with its Latch Knob (Fig. 1).
DEFLECTOR
The Deflector should already be mounted below the knife (Fig. 1).
FENCE (Low and High Fences are used with front-mounted meat grip only.)
Either Fence (Fig. 1) can be clamped on the Carriage Tray to limit product movement during slicing.
Model 2812
SHARPENER
DEFLECTOR
TOP KNIFE COVER
FENCE
CARRIAGE TRAY
CARRIAGE TRAY /
SUPPORT ARM
Fig. 1
PL-41408-1
1. Back out Thumb Screw.
Lay Fence on Carriage Tray.
2. Rotate to Vertical.
3. Slide Fence Up. Tighten Screw.
ELECTRICAL
WARNING: THIS MACHINE IS PROVIDED WITH A THREE-PRONG GROUNDING PLUG. THE
OUTLET TO WHICH THIS PLUG IS CONNECTED MUST BE PROPERLY GROUNDED. IF THE
RECEPTACLE IS NOT THE PROPER GROUNDING TYPE, CONTACT AN ELECTRICIAN.
CLEAN BEFORE USING
The 2812 or 2912 slicer must be thoroughly cleaned and sanitized after installation and before being
used. Refer to Cleaning, page 6.
– 3 –
 Loading...