


 Loading...
Unique Features
BIOS Update Utilities..................................................................................................... |
2 |
|
1-1 |
Updating the BIOS with the Q-Flash Utility............................................................... |
2 |
1-2 |
Updating the BIOS with the @BIOS Utility................................................................ |
5 |
1-3 |
Using Q-Flash Plus................................................................................................... |
6 |
APP Center |
.................................................................................................................... |
7 |
2-1 |
3D OSD ..................................................................................................................... |
8 |
2-2 ................................................................................................................. |
AutoGreen |
9 |
2-3 ........................................................................................................... |
Cloud Station |
10 |
2-4 ................................................................................................................ |
EasyTune |
15 |
2-5 ................................................................................................................. |
Fast Boot |
16 |
2-6 ............................................................................................................ |
Game Boost |
17 |
2-7 .................................................................................. |
Platform Power Management |
18 |
2-8 ............................................................................................................. |
RGB Fusion |
19 |
2-9 ...................................................................................................... |
Smart TimeLock |
21 |
2-10 ...................................................................................................... |
Smart Keyboard |
22 |
2-11 .......................................................................................................... |
Smart Backup |
23 |
2-12 .............................................................................................................. |
Smart HUD |
25 |
2-13 ..................................................................................... |
System Information Viewer |
26 |
2-14 ............................................................................................................ |
USB Blocker |
27 |
2-15 ....................................................................................................... |
USB DAC - UP 2 |
28 |
2-16 .................................................................................................................... |
V - Tuner |
29 |

 Actual software supported may vary by motherboard model and OS verison. The software setup
  menus are for reference only.

BIOS Update Utilities
GIGABYTEmotherboardsprovidetwouniqueBIOSupdatetools,Q-Flash™ and @BIOS™. GIGABYTE Q-Flash and @BIOS are easy-to-use and allow you to update the BIOS without the need to enter MS-DOS mode.
Additionally, this motherboard features the DualBIOS™ design and supports Q-Flash Plus, providing multiple protection for the safety and stability of your computer.
What is DualBIOS™?
Motherboards that support DualBIOS have two BIOS onboard, a main BIOS and a backup BIOS. Normally, the system works on the main BIOS. However, if the main BIOS is corrupted or damaged, the backup BIOS will take over on the next system boot to ensure normal system operation. For the sake of system safety, users cannot update the backup BIOS manually.
What is Q-Flash Plus?
Q-Flash Plus is a new solution derived from DualBIOS™. When both the main and backup BIOS fail during system boot, Q-Flash Plus will be automatically launched and then recover BIOS data from the USB flash drive connected to a specific USB port.
What is Q-Flash™?
With Q-Flash you can update the system BIOS without having to enter operating systems like MS-DOS or
Window first. Embedded in the BIOS, the Q-Flash tool frees you from the hassles of going through complicated BIOS flashing process.
What is @BIOS™?
@BIOS allows you to update the system BIOS while in the Windows environment. @BIOS will download the latest BIOS file from the nearest @BIOS server site and update the BIOS.
1-1 Updating the BIOS with the Q-Flash Utility
A. Before You Begin
1.FromGIGABYTE'swebsite,downloadthelatestcompressedBIOSupdatefilethatmatchesyourmotherboard model.
2.Extract the file and save the new BIOS file (e.g. B360ORUSGaming3.F1) to your USB flash drive, or hard drive. Note: The USB flash drive or hard drive must use FAT32/16/12 file system.
3.Restart the system. During the POST, press the <End> key to enter Q-Flash. Note:You can access Q-Flash by either pressing the <End> key during the POSTor click the Q-Flash icon (or press the <F8> key) in BIOS Setup.However,iftheBIOSupdatefileissavedtoaharddriveinRAID/AHCImodeoraharddriveattached to an independent SATAcontroller, use the <End> key during the POST to access Q-Flash.
Because BIOS flashing is potentially risky, please do it with caution. Inadequate BIOS flashing may result in system malfunction.
- 2 -
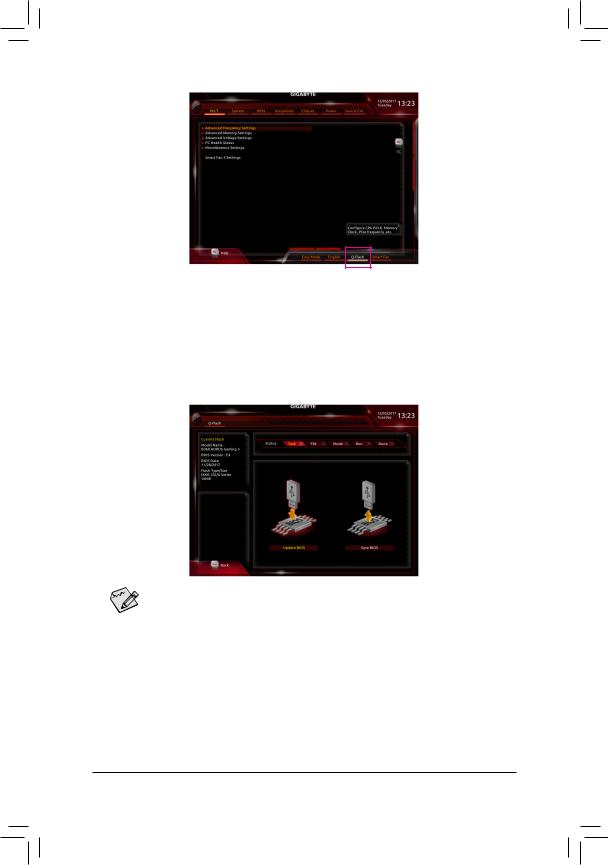
Select Q-Flash to access Q-Flash
B. Updating the BIOS
InthemainmenuofQ-Flash,usethekeyboardormousetoselectanitemtoexecute.WhenupdatingtheBIOS, choose the location where the BIOS file is saved. The following procedure assumes that you have saved the BIOS file to a USB flash drive.
Step 1:
1.Insert the USB flash drive containing the BIOS file into the computer. In the main screen of Q-Flash, select
Update BIOS.
•• The Save BIOS option allows you to save the current BIOS file.
 •• Q-Flash only supports USB flash drive or hard drives using FAT32/16/12 file system.
•• If the BIOS update file is saved to a hard drive in RAID/AHCI mode or a hard drive attached to an independent SATAcontroller, use the <End> key during the POST to access Q-Flash.
2. Select the BIOS update file.
 Make sure the BIOS update file matches your motherboard model.
- 3 -
Step 2:
The screen will show that the BIOS file is being read from your USB flash drive. Please select Fast or Intact to begin the BIOS update. The screen will then display the update process.
•• Do not turn off or restart the system when the system is reading/updating the BIOS.
•• Do not remove the USB flash drive or hard drive when the system is updating the BIOS.
Step 3:
The system will restart after the update process is complete.
Step 4:
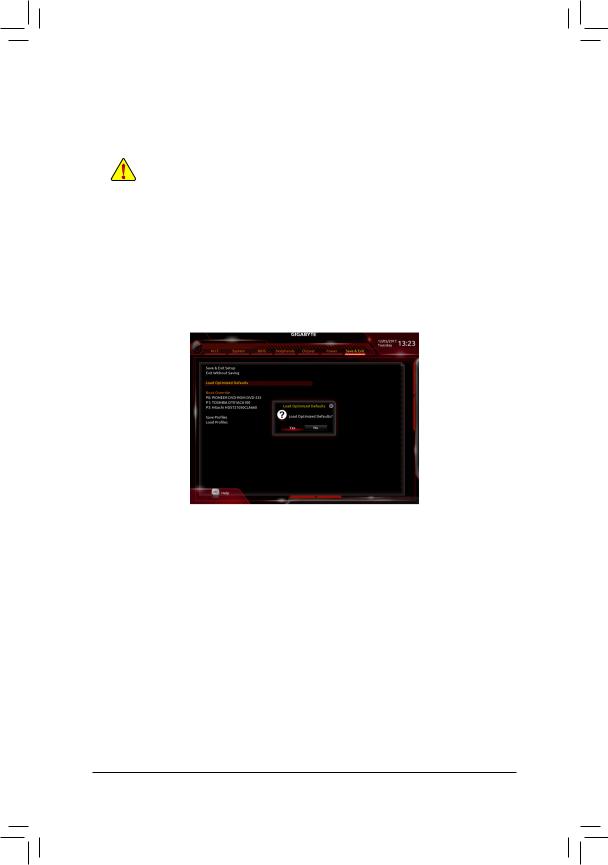
During the POST, press <Delete> to enter BIOS Setup. Select Load Optimized Defaults on the Save & Exit screenandpress<Enter>toloadBIOSdefaults.Systemwillre-detectallperipheraldevicesafteraBIOSupdate, so we recommend that you reload BIOS defaults.
Select Yes to load BIOS defaults
Step 5:
Select Save & Exit Setup and press <Enter>. And then select Yes to save settings to CMOS and exit BIOS Setup. The procedure is complete after the system restarts.
- 4 -
1-2 Updating the BIOS with the @BIOS Utility
A. Before You Begin
1.In Windows, close all applications and TSR (Terminate and Stay Resident) programs. This helps prevent unexpected failures when performing a BIOS update.
2.IftheBIOSisbeingupdatedviatheInternet,ensure the Internet connection is stable and do NOT interrupttheInternetconnection(forexample,avoid a power loss or switching off the Internet). Failure to do so may result in a corrupted BIOS or a system that is unable to start.
3.GIGABYTE product warranty does not cover any BIOS damage or system failure resulting from an inadequate BIOS flashing.
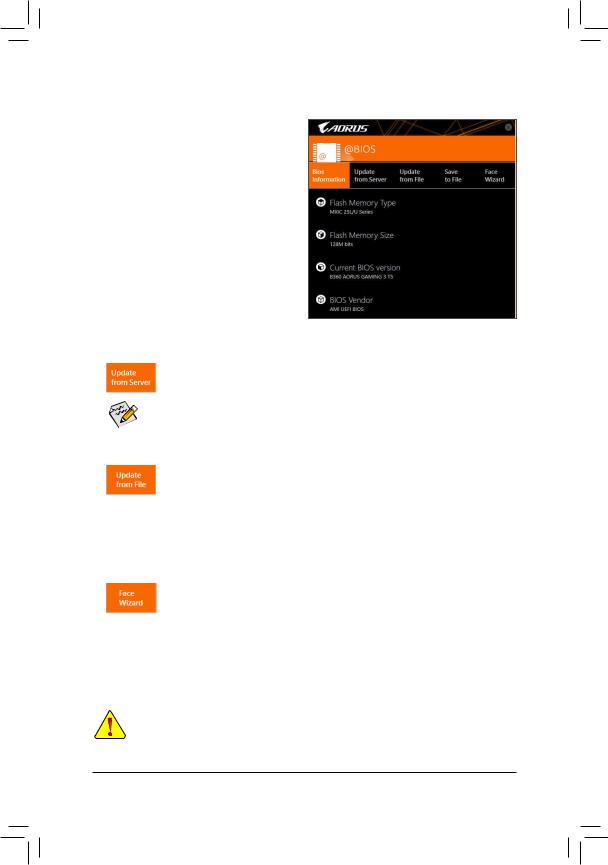
B. Using @BIOS
1. Update the BIOS Using the Internet Update Function:
Click Update from Server, select the @BIOS server site closest to your location and then download the BIOS file that matches your motherboard model. Follow the on-screen instructions to complete.
 If the BIOS update file for your motherboard is not present on the @BIOS server site, please
manually download the BIOS update file from GIGABYTE's website and follow the instructions in
"Update the BIOS without Using the Internet Update Function" below.
2. Update the BIOS without Using the Internet Update Function:
Click UpdatefromFile,thenselectthelocationwhereyousavetheBIOSupdatefileobtained from the Internet or through other source. Follow the on-screen instructions to complete.
3.Save the Current BIOS File:
 Click Save to File to save the current BIOS file.
4.Change the Boot-up Logo:
Click Upload new image in Face-Wizard and you will be able to change the boot-up logo withyourownpicture,creatingapersonalizedboot-upscreen.ClickBackup current image to save the current boot-up logo.

 Supported image formats include jpg, bmp, and gif.
C. After Updating the BIOS
Restart your system after updating the BIOS.
•• Make sure that the BIOS file to be flashed matches your motherboard model. Updating the BIOS with an incorrect BIOS file could cause your system not to boot.
•• Do not turn off the system or remove the power during the BIOS update process, or the BIOS may corrupt and the system may not boot.
- 5 -

1-3 Using Q-Flash Plus
A. Before You Begin
1. FromGIGABYTE'swebsite,downloadthelatestcompressedBIOSupdatefilethatmatchesyourmotherboard model.
2. Uncompress the downloaded BIOS file, save it to your USB flash drive, and rename it to GIGABYTE.bin. Note: The USB flash drive must use the FAT32/16 file system and it must be a USB 2.0 flash drive.
3. Insert the USB flash drive into the white USB port on the back panel.
B. Using Q-Flash Plus
If both the main and backup BIOS fail during system boot, wait for 15-20 seconds, the system will automatically search and match the BIOS file in the USB flash drive on the white USB port. The FBIOS_LED will flash when the BIOS matching and flashing activities start.
Wait for 2-3 minutes and the FBIOS_LED will stop flashing when the main BIOS flashing is complete.
After the main BIOS is flashed, the system will reboot automatically and then DualBIOS™ will 
 continue to update the backup BIOS.After completion, the system will reboot again and boot from
the main BIOS for normal operation.
- 6 -

APP Center
GIGABYTE App Center gives you easy access to a wealth of GIGABYTE apps that help you get the most from your GIGABYTE motherboard (Note). Using a simple, unified user interface, GIGABYTE App Center allows you to easily launch all GIGABYTE apps installed on your system, check related updates online, and download the apps, drivers, and BIOS.
Running the APP Center
Insert the motherboard driver disk. On the Autorun screen, go to Application Software\Install GIGABYTE
Utilities to install GIGABYTE App Center and the selected apps. Restart your computer after the installation is complete. In Desktop mode, click the App Center icon in the notification area to launch the App Center utility (Figure 1). On the main menu, you can select an app to run or click LiveUpdate to update an app online.
Figure 1
If theApp Center is closed, you can restart it by clicking Launch App Center on the Start menu (Figure 2).
Figure 2
(Note) Available applications inAPP Center may differ by motherboard model. Supported functions of each application may also vary depending on motherboard specifications.
- 7 -
2-1 3D OSD
3D OSD (Note) automatically detects and displays your system information during games, allowing you to easily get hold of your system information without switching between screens.
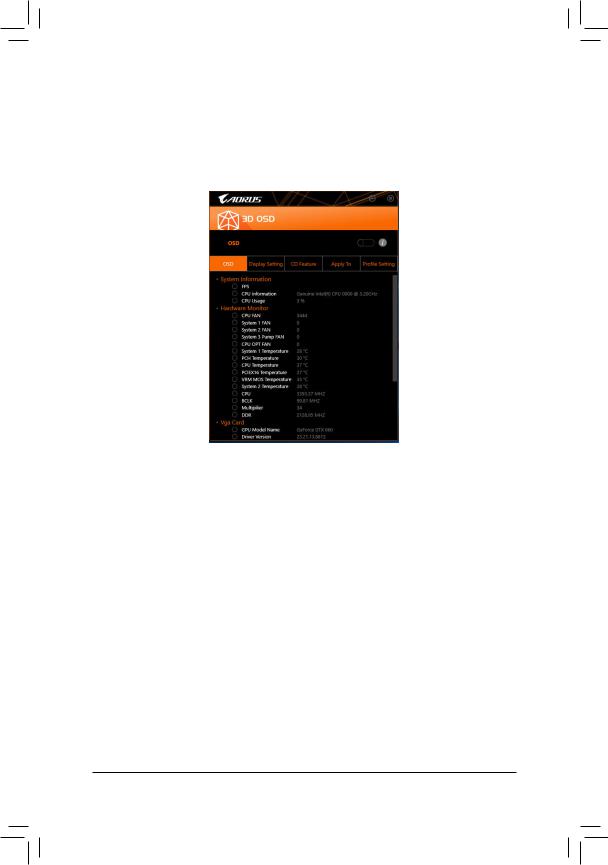
The 3D OSD Interface
Using 3D OSD
Main Menu:
Allows you to enable or disable the 3D OSD feature and to select the type of real-time system information you wish to display. 3D OSD will detect and display a list of available options.
Configuration Menu:
Allowsyoutosetahotkeyforenabling/disabling3DOSDandspecifythefontsize/location/colorofthedisplayed information.
(Note) Please ensure that DirectX End-User Runtime has been installed on your system prior to installing
3D OSD.
- 8 -
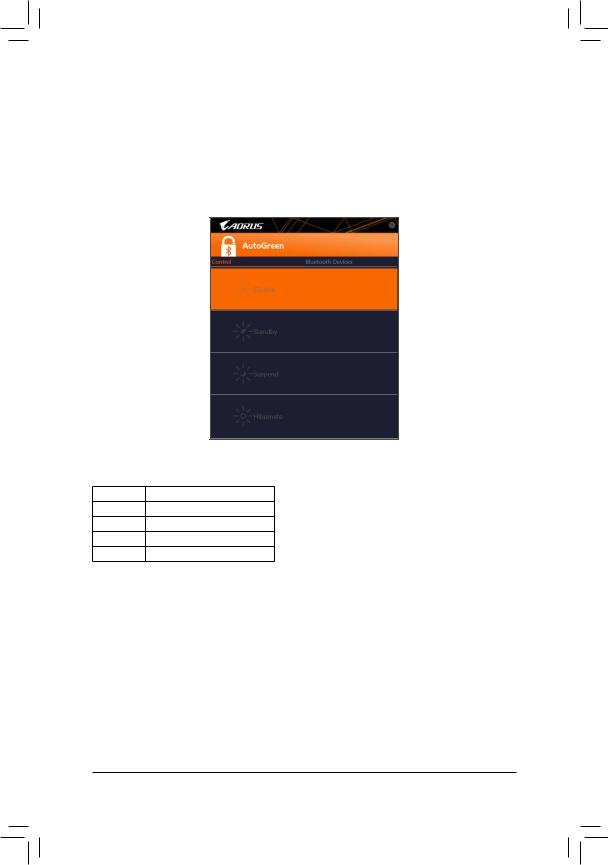
2-2 AutoGreen
AutoGreen (Note) is an easy-to-use tool that provides users with simple options to enable system power savings via a Bluetooth-enabled smart phone/tablet device. When the device is out of the range of the computer's Bluetooth receiver, the system will enter the specified power saving mode. Before using this app, you need to turn on Bluetooth on both your computer and smart phone/tablet device.
The AutoGreen Interface
Control Tab:
The Control tab allows you to select a system power saving mode.
Button |
Description |
Disable |
Disables this function |
Standby |
Enters Power on Suspend mode |
Suspend |
Enters Suspend to RAM mode |
Hibernate |
Enters Suspend to Disk mode |
Bluetooth Devices Tab:
The Bluetooth taballowsyoutopairyoursmartphone/tabletdevicewiththeBluetoothreceiveronyourcomputer.
Press Refresh to let AutoGreen search for the Bluetooth devices around you. A message will appear on both your computer and smart phone/tablet device prompting you to compare the passcodes on the two devices. Confirm to complete the pairing process.
(Note) Once your smart phone/tablet device has been paired with yourAutoGreen-enabled computer, you'll not be able to use it to connect to other Bluetooth device(s).
- 9 -
Loading...