

Page 1

COMMAND TRANSMISSION / /
TO: ALL SHIP PERSONNEL
PRIORITY ALPHA-ONE
My fellow countrymen and defenders of the Alliance:
The future had never looked so bright. There was no obstacle too great
for our Western Alliance to overcome. We had terraformed Mars and
established fledgling colonies on the outer moons and planets. With
abundant raw materials mined from asteroids, the discovery of new
nanotechnologies, and automated zero-gravity manufacturing plants, the
human race was poised to reach beyond our solar system.
...But a shadow has fallen across the stars.
Forty-eight hours ago, a surprise strike force decimated the French and
Italian fleets moored in Martian orbit. A newly formed coalition of Eastern
nations has made a grab for power. Their aim is to take everything we
have built with our blood, tears, and toil.
We have verified reports of this Coalition overrunning our Alliance High
Command on Ganymede and landing massive invasion forces on the outer
colonies. We have lost Io and Europa. Pitched battles wage on Mars and
Earth.
In the peaceful quest to build a future, we stretched our military forces
too thin and made a tempting target for those who would take advantage
of our ideals. The lack of vigilance has placed our
democracy on the brink of ruin.
This battle, though, is far from lost.
The remnants of the French and
Italian fleets will rendezvous with
our American, British, German,
Spanish, and Japanese allies
in orbit around Neptune’s
moon, Triton. We will regroup, establish a new command structure, and assess
our best strategy. There, on
the edge of the solar system,
we will make our stand against
the encroaching darkness.
Godspeed to us all.
—Captain Robert Foster, ANS
Reliant
1
Page 2
ALLIANCE NAVY TECHNICAL
FLIGHT MANUAL LOGON
COMMAND TRANSMISSION / /
TO: SQUADRON RECRUITS
Welcome to the 45th Volunteers. Count yourself lucky to be part of the
most patriotic and highly motivated team in the fleet!
th
Don’t let being members of the 45
job to do, so cooperate with the other squadrons. There’s plenty of glory
out here for everyone.
th
The 45
top-notch flight crew to keep you up and running. You’ll need them. The
Coalition has us outnumbered and our supply lines are strained.
Stay frosty out there.
—Squadron Leader, Maria Enriquez
has access to state-of-the-art fighters, missiles, gunnery, and a
go to your head. We’ve got a tough
“Yeah, I’m lucky. I get wingmen
who were Academy dropouts, excops, and a bunch of rookies with
as much zero-G combat experience as a flying squirrel. Try not
to blow me up.”
—Brad “Viper” Callan
Welcome, pilot. You are linked to the Alliance Intelligence and Tactical
Computer (ITAC) database. It is continuously updated to provide the latest
technical specifications and protocols. An annotation feature allows you to
insert notes and customize this document to suit your personal needs.
Some pilots, however, have not been purging their notes before returning
the units. The Quartermaster General requires that all annotations be
deleted. Do your part!
Type your annotations in these
boxes.
—John Q. “Call Sign” Pilot
3
32
Page 3
GAME INSTALLATION
To install Starlancer, insert the Starlancer CD 1 into the CD-ROM drive,
and follow the directions on the screen. If Setup does not begin automatically, refer to the Readme file on the Starlancer CD.
SINGLE PLAYER GAME
Click Single Player on the main menu. Select a pilot and type your call
sign. Click Start Game and set the game difficulty level.
SAVE AND LOAD
To save or load a game, except during a combat mission, press ESC.
Your game is automatically saved after each successful mission.
INSTANT ACTION
To launch directly into a simulated combat mission, skipping the briefing
and ship loadout, click Instant Action on the main menu.
GAME OPTIONS
To customize Starlancer’s video, audio, and game controls, click Game
Options on the main menu.
“The other squads hate us. They
think we’re here because no one
else is stupid enough to fly these
buckets of rust. Some of them
think we’re just floating decoys.
They can all kiss my afterburners.”
—Michelle “Silky” McCrae
SQUADRON BASE SHIP: ALLIANCE NAVAL
SHIP
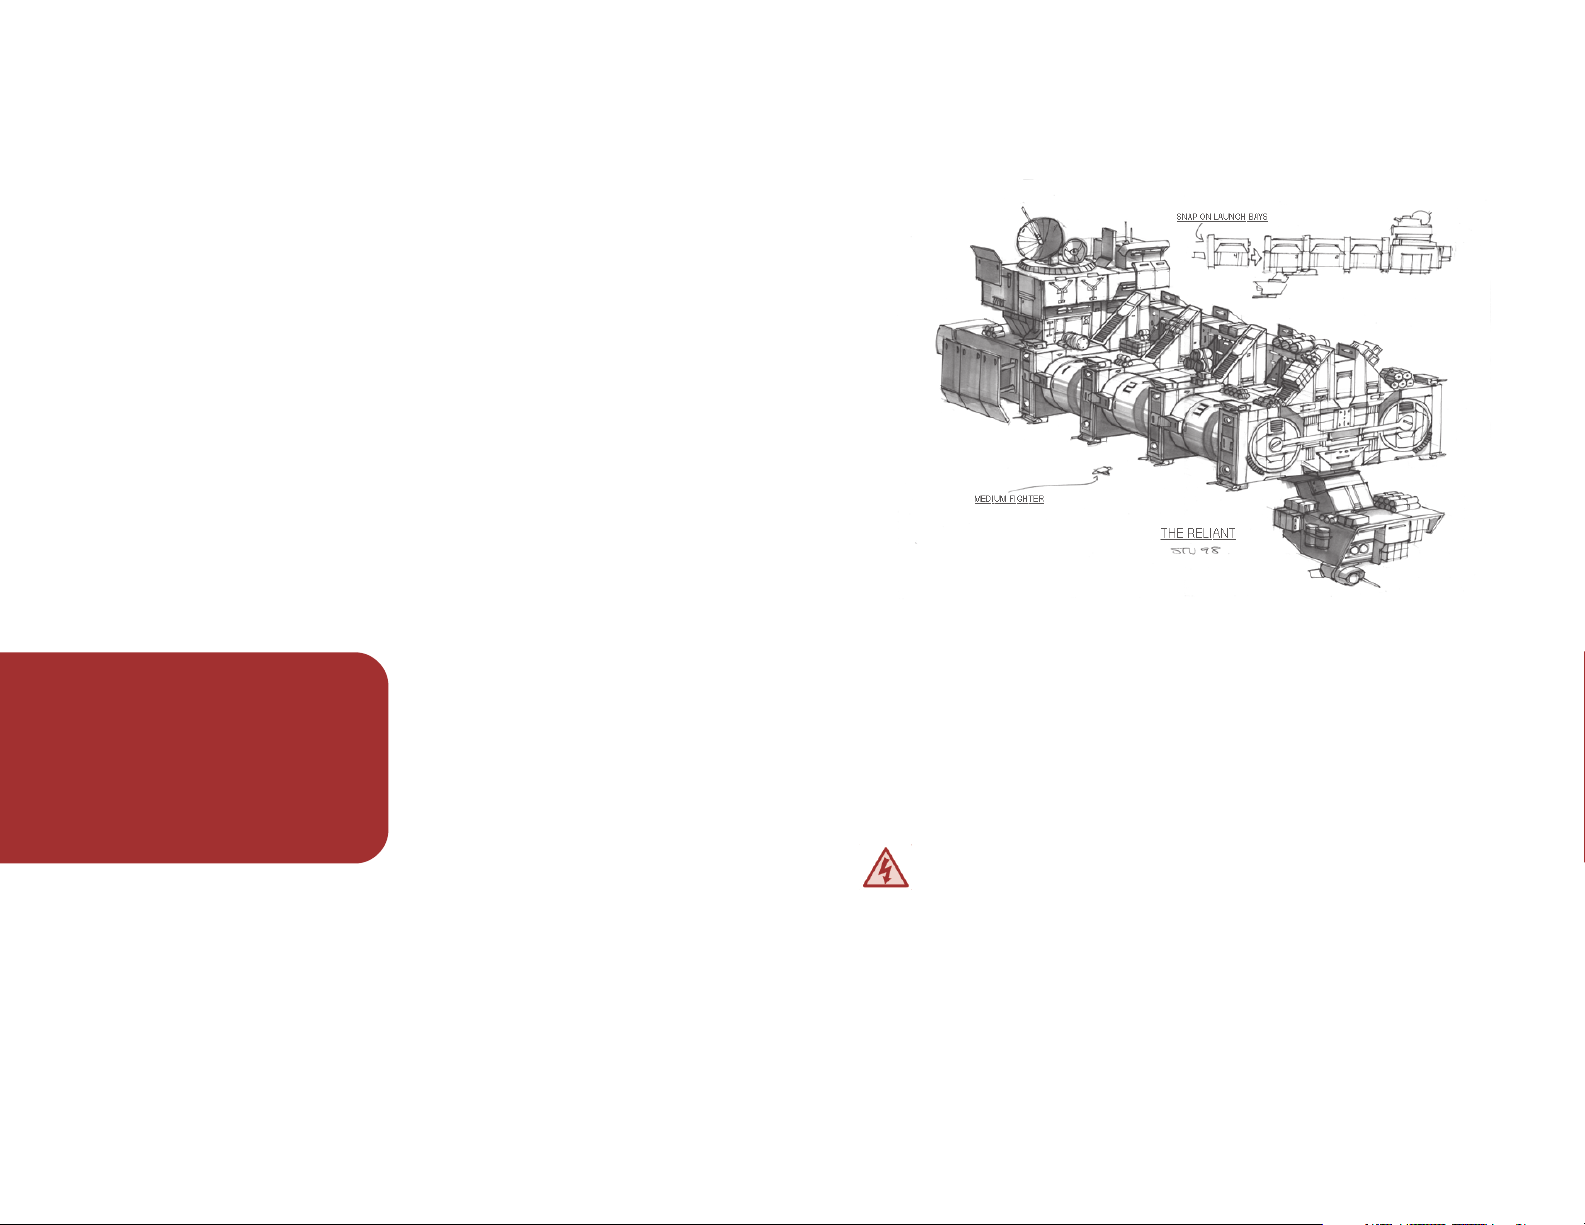
The 45th squadron is currently stationed aboard the ANS
4 Carrier under the command of Captain Robert Foster.
Launched in 2125, the
Europa conflicts. Decommissioned 20 years ago, it has been recently
refitted with eight level-6 twin-laser turrets, and called back to active duty.
You have clearance to enter the pilots’ quarters, wheel and briefing
rooms, and the hangar.
clicking the edges of the screen with your mouse
areas is restricted to authorized personnel only.
Welcome aboard.
RELIANT
Reliant
Reliant
Move between ship sections by pointing and
Use extreme caution where high-voltage, radiation, variable-gravity,
and decompression warnings are posted.
has seen extensive action in the Lunar and
. Access to sensitive ship
, a Class
54
Page 4

INTELLIGENCE AND TACTICAL COMPUTER
(ITAC)
Debriefing Records of
your wing’s and personal
performance on completed missions.
News Reports Text of
current events throughout
the solar system.
Video Reports Video
feeds on current events
throughout the solar
system as well as previous mission briefings.
Fighter Ships Data on
Alliance and Coalition
fighter units.
Capital Ships Informa-
tion on capital ships in
Alliance and Coalition
fleets.
Squadrons Histories of
Alliance and Coalition
fighter units.
Personnel Official
records of Alliance and
Coalition military personnel.
Killboard Displays the
number of kills for Alliance
pilots.
Exit Terminates secure
interface and shuts down
ITAC.
Alliance Symbol Selects
data on Alliance units
within database.
Coalition Symbol Selects
data on Coalition units
within database.
The ITAC is classified
identity confirmed before connection is established. Icons on the bottom
of the screen access Alliance databanks. Some files contain data sets
on both Alliance and Coalition units. Click the Alliance or Coalition
symbols in the upper-right corner to select the corresponding data
sets. You can view additional data by clicking the names of ships
or personnel that appear on the right side of the screen.
“Familiarize yourself with all
Coalition ships and squadrons.
Know your enemy and you might
have a chance out there.”
—Julian “Flash” Browne
TOP SECRET
. Your retina will be scanned and your
6
7
76
Page 5
SIMULATION POD
BRIEFING ROOM
“No freaking simulation can get
you ready for the big black. This
junk is for losers.”
—Jeff “Ace” Goetz
“Jeff Goetz thought he was hot,
so he left his sim pod cold.
His maiden voyage, he got shot.
That’s all there is to be told.
Draw your own conclusions,
rookie.”
—Doug “Claymore” McCleod
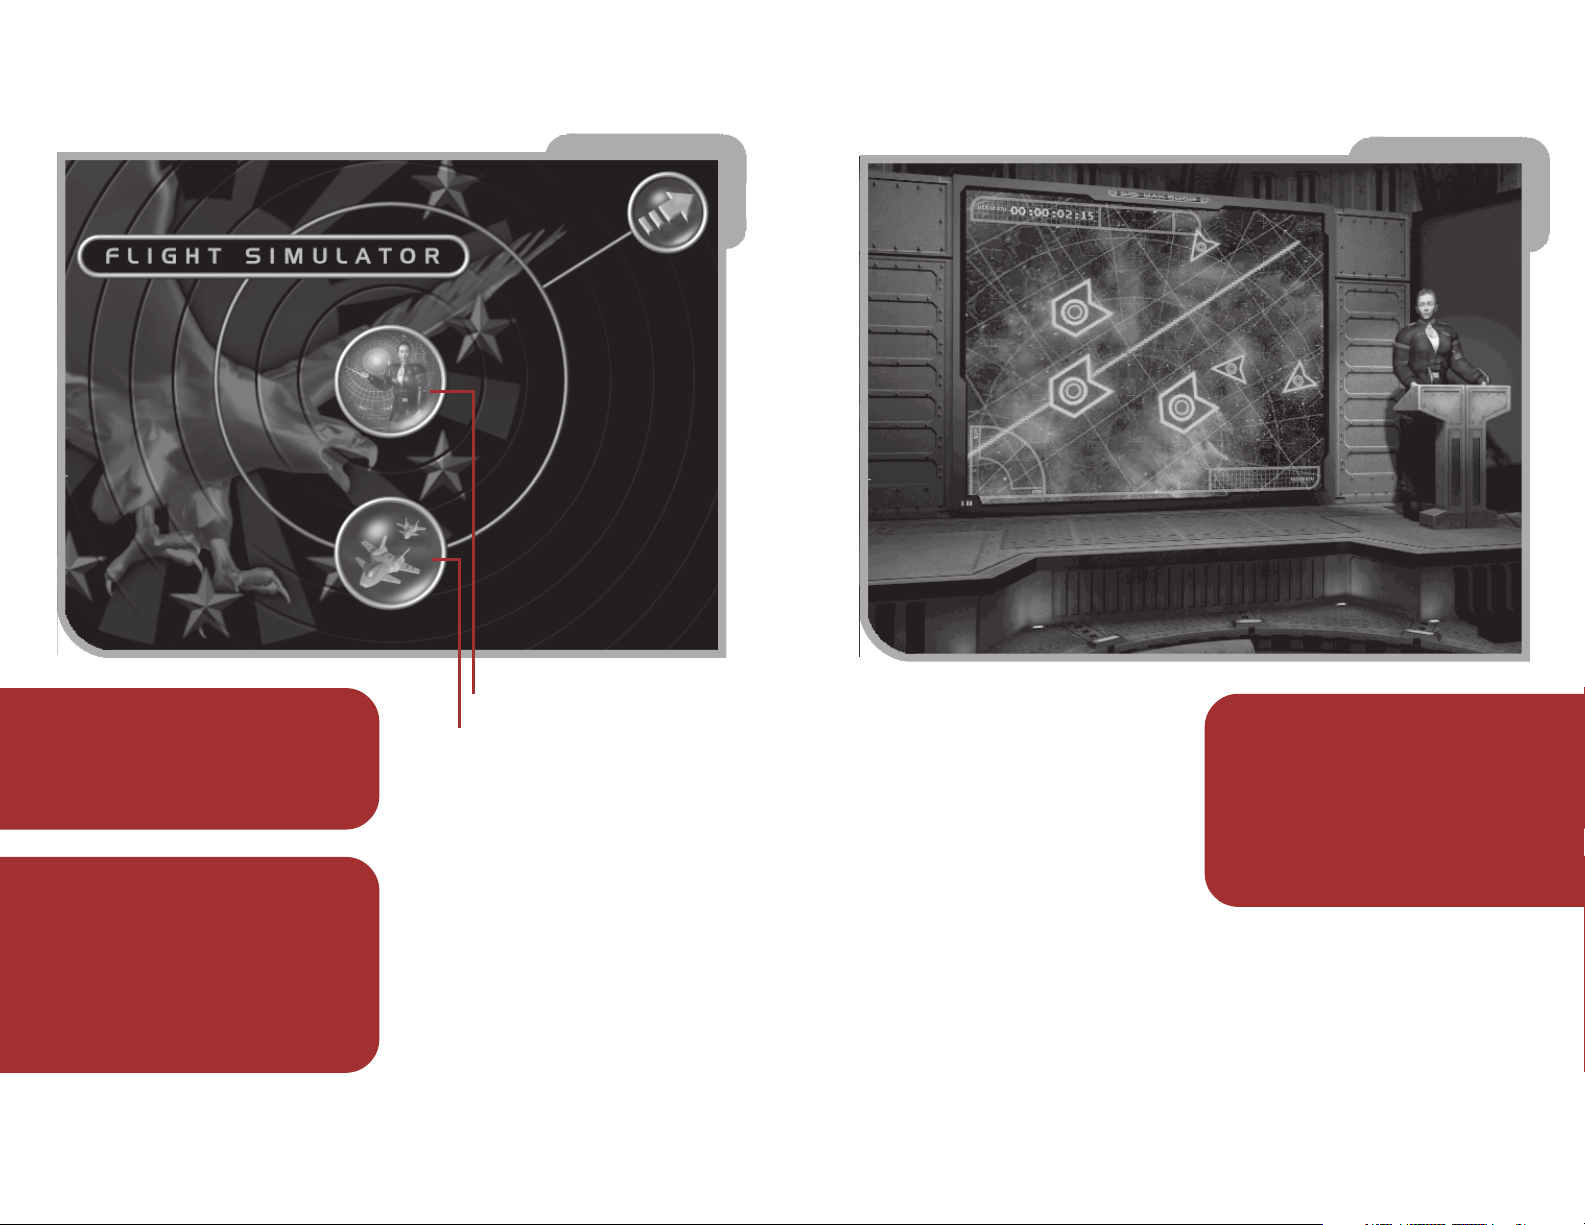
Training Mission
Instant Action
The simulation (sim) pod is a stateof-the-art virtual reality simulator
designed to train Alliance pilots.
There are two simulator modes.
The first mode demonstrates the
operation of the latest flight,
instrument, and weapon control
systems. The second mode,
Instant Action, allows you to hone
your dogfighting skills in a simulated combat mission.
This is where you’ll receive your
preflight instructions and mission
objectives. Pay attention. After your
briefing you will proceed to the
loadout computer to select your
fighter and configure its armaments.
“Follow the briefing instructions to
the letter and
they were given. Otherwise, you’ll
jeopardize the mission, get yourself killed—or worse, you might
get your wingmates burned.”
—Mike “Moose” Horrigan
in the exact order
98
Page 6
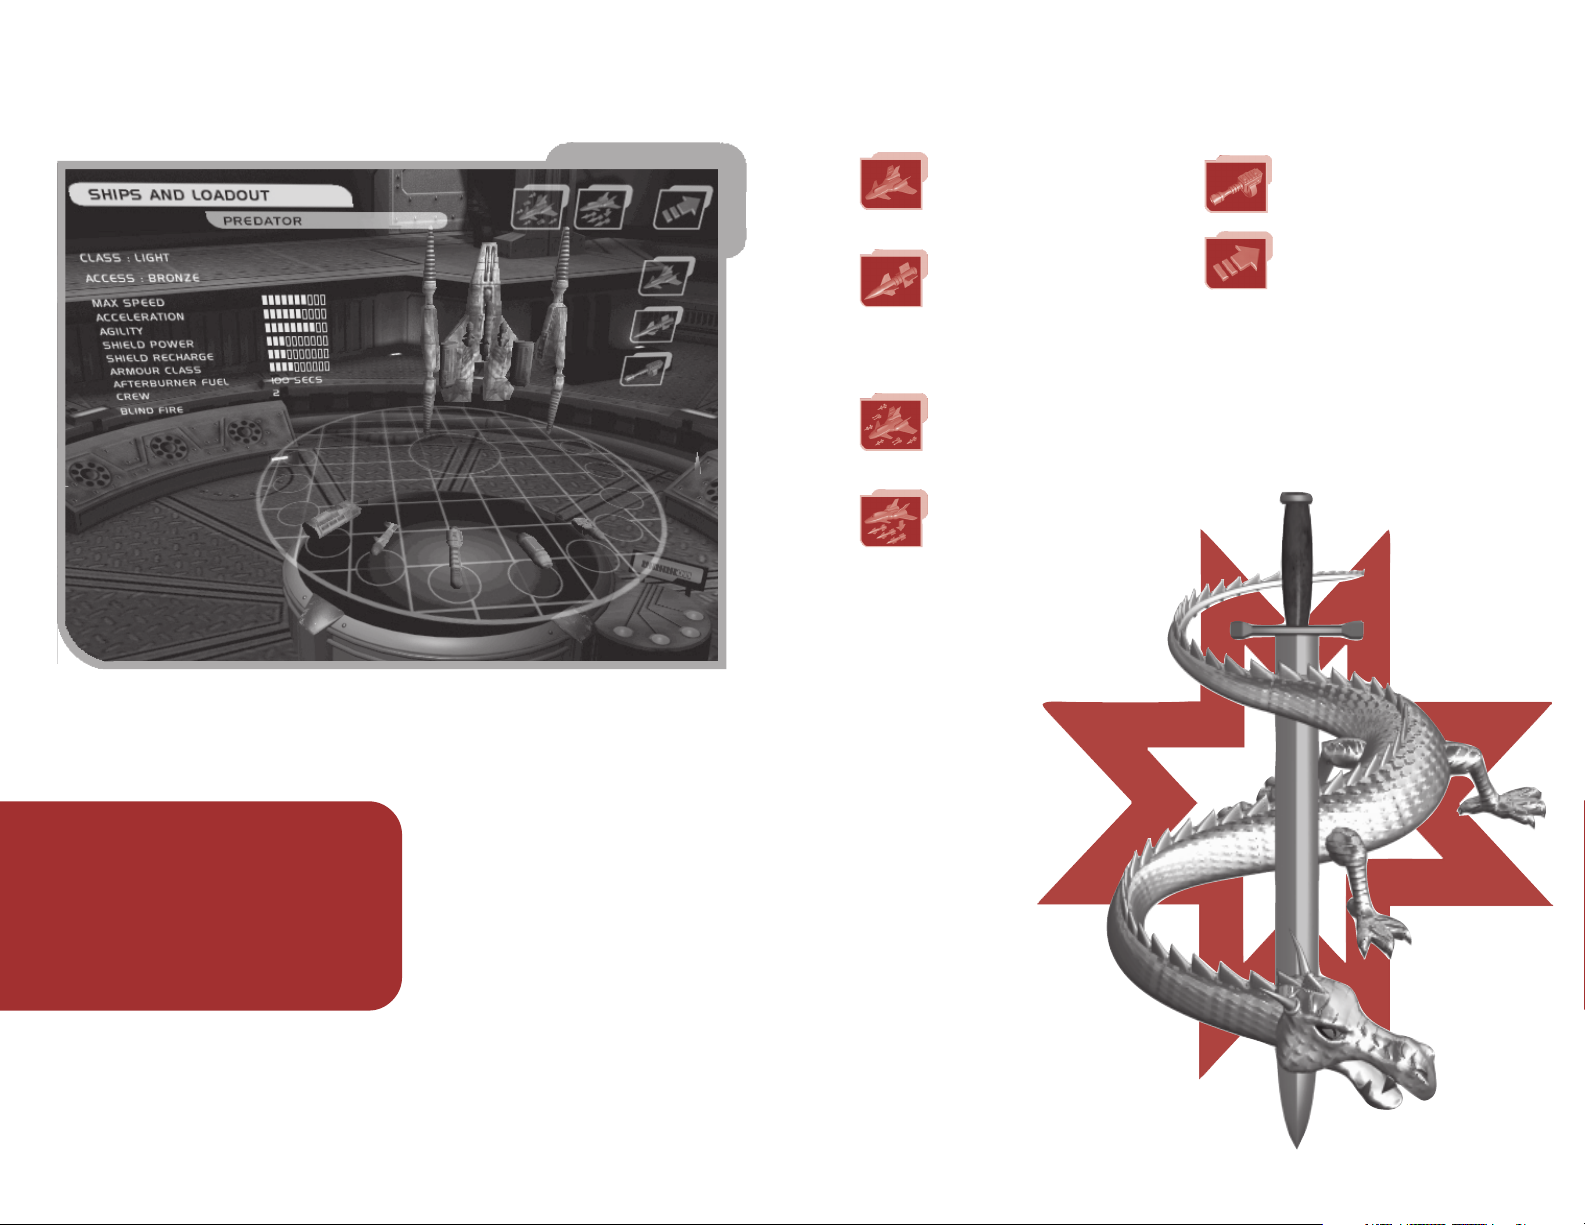
FIGHTER SELECTION AND LOADOUT
This loadout computer allows you to select a fighter and configure its
accompanying missile payload. Advanced and prototype ships are restricted to high-ranking pilots who have completed many successful
missions.
Ship Selection Displays
Alliance fighters and their
statistics. Click a ship to
select it.
Missile Loadout Shows
missile specifications.
Click a missile to load.
Displays the Use Default
Loadout and Remove All
Missiles icons.
Use Default Loadout
Loads a preselected
missile array for the ship
selected.
Remove All Missiles
Clears selected missiles
from a fighter, allowing you
to choose a new loadout.
View Internal Guns
Shows selected fighter’s
internal gunnery.
Exit Loadout Computer
Submits ship configuration
for the launch crew to
prep.
After you have selected your fighter
and ordnance, relevant mission
data will be downloaded to your
navigation computer. You will then
proceed directly to the hangar and
launch.—Good luck!
“Some rookies are so hot to hit
vacuum, they grab the first ship they
can . . . forgetting to load their missiles. It’s a surefire way to make your
first mission your last. Load all your
ship’s hardpoints!”
—Hawkeye
1110
Page 7

ALLIANCE FIGHTER SHIP OPERATIONS
MANEUVERING AND FIRING CONTROLS
LAUNCH AND JUMP SEQUENCE
After launching from your squadron base ship, you will usually activate
your jump engines to bridge the long distances between mission destinations.
When prompted by the Jump icon
on your cockpit display, press J, the
Jump Drive key, to proceed.
CAMERA ANGLES
You can access different viewpoints to analyze threats and gather information not available from the forward-facing cockpit view.
Move view to the right, left, and aft HATSWITCH
Keyboard Equivalents
Reset to the standard
forward cockpit view 1
Left view 2
Right view 3
Rear view 4
Flyby camera 5
Target camera 6
External camera 7
Missile camera 8
Maneuvering and firing controls are integrated into a simple yoke (or joystick) to minimize response time in combat. Alternate maneuvering keyboard equivalents (marked with *) are only active if the joystick is disabled.
Maneuvering
Forward thrust To adjust velocity use the throttle control on the joystick.
As soon as the throttle is decreased, counter thrusters fire to correspondingly decrease your speed.
Keyboard Equivalents
*Accelerate EQUAL SIGN (=)
*Decelerate MINUS SIGN (-)
*Zero throttle BACKSPACE
*Full throttle END BRACKET (])
Afterburners Dramatically increase velocity, but they are
limited by available afterburner fuel. The number below the
afterburner icon indicates seconds of remaining fuel. Press
TAB or toggle on and off with the ACCENT (‘) key.
Match Speed To match the velocity of a targeted ship,
press Z.
Attitude Controls To change the pitch and yaw (the up/down and side-
to-side orientation) of your fighter, use the joystick.
Strafe Fires thrusters that move the ship sideways. Press PAGE DOWN
to strafe right and END to strafe left.
“Use the missile camera to confirm a kill. If your opponent is not
destroyed, they could regenerate
shields, and then come back to
haunt you.”
—Klaus “Butcher” Hopman
Keyboard Equivalents
*Adjust the pitch and
yaw of your craft ARROW keys
*Roll ship right PAGE UP
*Roll ship left HOME
“Keep moving in a dogfight. Run
away or blast straight toward
your opponent. Do anything but
sit and wait for a missile to lock
onto you. They don’t call it a
“dead stop” for nothing.”
—Jean-Marc “Frenchy” Baptiste
1312
Page 8

Weapons
Guns To fire lasers, press the trigger on your joystick.
Missiles To launch a missile, press BUTTON 1 on your joystick.
Keyboard Equivalents
Fire guns SPACEBAR
Launch missile ENTER
ALLIANCE FIGHTER HEADS-UP DISPLAY
(HUD)
The heads-up displays in all Alliance fighter cockpits are standardized to
minimize the steep learning curve associated with piloting new craft.
Onboard artificial intelligence makes data appear and disappear as required. You can override the ship’s AI and lock specific displays in place by
using the SHIFT key with the corresponding key that activates the display.
MISCELLANEOUS OPERATIONS
Electronic Countermeasures (ECM)
Electronic countermeasures protect Alliance fighters from
turrets found on enemy capital ships by scrambling sensors to
prevent weapons lock. To activate ECM, press L. ECM has a
limited duration before it must recharge.
Countermeasures
When an enemy fighter achieves missile lock, you can launch
countermeasures to deceive the missile’s tracking computer.
Countermeasures emit an electronic and radar signature
similar to its parent fighter craft. Success, however, is not
guaranteed. To launch countermeasures, press H. The number
beneath the icon indicates how many countermeasures remain.
Ejection
If your ship suffers critical damage, an audio warning will prompt
you to eject. Press F12. The cockpit life pod will detach from
the damaged fighter. This pod has maneuvering thrusters and a
communications system to contact a nanny ship for retrieval.
Eject only as a last resort. There’s no
guarantee our guys will get to you
before enemy fighters can target your
pod . . . or, worse, you could be retrieved by a
I’d rather ride my exploding fuel pods.
Coalition
nanny. Personally,
Communications
System (C)
Ship Status
Display (G)
Power Distribution Display (P)
Display (M)
Indicator
Missile
Targeting Cluster
Damage Display (D)
Mission
Objective
(B)/Wing
Status
Display (X)
Radar (V)Gunnery
Large Target Display /
Small Target Display
—Susanne “Arrow” de Griey-Birche
1514
Page 9

TARGETING CLUSTER, SPEED, AND WEAPONS
CHARGE GAUGES
Set Speed
Actual Speed
Nav Point
Indicator
(white)
Targeting Reticle
Your fighter’s speed is displayed on the graduated arc on the left side of
the cluster. The Set Speed is the maximum velocity as determined by your
throttle position. The Actual Speed is your current velocity as it moves
toward the Set Speed. All speeds are given in kilometers per second.
The graduated arc along the right side of the targeting cluster is the
Weapons Charge Gauge. Firing an energy weapon will register a corresponding drop in available power. If power drops too far, energy-based
weapons become ineffective, and require an interval to recharge.
The Target Reticle (orange triangles in the center)
indicates where the ship’s weapons are aimed. The
Nav Point Indicator (white triangle) directs the pilot
to the next navigation point (orange cross). Navigation points are objects or mission-specific
targets assigned in the preflight briefing.
Target Direction
Indicator (red)
Weapons
Charge
Gauge
TARGETING
Alliance fighters are equipped with the latest fast-Fourier pulse radar
systems to target opponents. To target enemies use the following key
commands:
To Press
Cycle through enemies within range E
Cycle backward through enemies within range SHIFT+E
Select primary mission target A
Select object under reticle Y
Select incoming bombers and torpedoes T
Select nearest enemy R
To select friendly units within range use the following commands:
To Press
Cycle through friendly units Q
Cycle backward through friendly units SHIFT+Q
Select nearest friendly unit W
When targets are selected, additional data is shown in the Target Display
(see “Target Display”).
When a target is selected, the Target Direction Indicator points to it.
This indicator will be a red triangle if the target is a hostile unit or a green
triangle if the unit is friendly.
The indicator will track objects outside
your field of vision. Directional Calipers
slide along the edges of the HUD signifying the target’s direction and range.
When you make a direct visual sighting of
the target, a ring appears (a red ring for
hostile units and a green ring for friendly
units). In the lower portion of this ring the
target’s range is given in meters.
The Lead Cursor (red box with trailing
line) shows where you need to shoot to
hit the targeted ship. When the Lead
Cursor and the Targeting Reticle overlap,
your ship’s weapons are correctly aligned.
Missile Lock Ring
Lead
Cursor
Targeting
Reticle
Targeted
Ship
Range
1716
Page 10

Smart Targeting
Target Display
When this system is enabled, any ship fired upon becomes
automatically targeted. Smart targeting is toggled on and off by
pressing CTRL+E.
Missile Lock and Targeting
Missiles require a lock to successfully hit a target (with the exception of
fire-and-forget missiles such as the Solomon). Lock is achieved by keeping
an enemy craft in the forward cockpit view long enough for its tracking
system to identify and acquire the target’s visual, heat, or electronic
signatures. This lock time varies depending on the type of missile (see
“Fighter Selection and Loadout”).
When lock is acquired, the missile-targeting ring will zoom in around the
target and turn white, and then a tone will sound confirming missile lock.
WARNING Without first achieving missile lock, it is highly unlikely a
launched missile will hit its intended target.
“If you rookies have problems using
the 2D target indicator (red
triangle) to find a bogey in real 3D
space, try rolling your ship until the
triangle points straight up, then pull
back on the yoke. This rotates your
ship along the z-axis until you can
site them. Good hunting.”
—Mark “Bandit” Banister
When the targeting computer is activated, additional data on targets
appears in the lower-right corner of the HUD. This Target Display provides information on smaller ships like Coalition fighters, or for larger
objects such as a capital ship. A red display indicates a hostile ship, while
a green display denotes a friendly unit.
Shields
Armor
Targeted
Ship
Name of Target
Ship Type
Range
Speed
For larger targets, you will see a different display.
Big Target
Subtarget
(will cycle)
Status of
Subtarget
Name of Target
Ship Type
Status of Main
Target
Range
Speed
Instead of targeting the entire structure of a large target, you generally
target specific subtargets. Subtargets can be features such as gun
turrets, radar dishes, or reactor cores. To pick a subtarget to attack,
press S to view all available subtargets (or SHIFT+S to cycle backward
through the list of subtargets). The corresponding targeted area on the
object will highlight red. The segmented bars in this display indicate
damage inflicted.
1918
19
Page 11

RADAR DISPLAY
SHIP STATUS INDICATOR
Target is to the
left and above
player
Alliance fighters are equipped with fast-Fourier pulse radar arrays to
accurately identify potential threats. Radar-identified objects are displayed
within the three concentric rings in the Radar Display in the center
bottom of the HUD.
Your position remains fixed in the middle of the concentric rings. The
wedge radiating from the center denotes your forward field of view.
Objects are positioned to the right or left, or—as indicated by lines perpendicular to the concentric rings—above or
below your fighter. Red dots indicate enemy
units, green are friendly objects, and blue
dots indicate those units broadcasting to
your communication system.
The radar range may be contracted and
expanded by pressing V. At minimum range,
the central circle enlarges to fill the radar
display. Closer scans may reveal more
details than longer ranged scans.
“Don’t worry about what you can
see in front of you. It’s the guys
on your tail you need to worry
about.”
—Mike “Moose” Horrigan
– Green dots are friendlies
– Red dots are hostiles
Target is to the right
and below player
Armor
Shields
This indicator monitors your shield and armor status. It is always on.
A double layer of segmented rings surrounds an image of your craft,
grouped into forward, aft, and side regions. The outer ring represents
shields. The inner ring represents armor.
As shields are worn down, the outer segments will dim. When a region of
shield has disappeared, any damage taken to that area will register on
the craft’s armor. As armor is damaged, corresponding segments of the
inner ring will vanish. When all armor in a region is destroyed, the ship’s
systems are vulnerable to damage.
Power can be transferred between the front and aft shields. Press and
hold down N and push the joystick forward to transfer power to the front
shields, or pull the joystick back to transfer power to the aft shields. With
additional power allocated, a double layer of shields in that region will be
indicated on the ship status display.
“Shields regenerate. Armor
doesn’t. You can hang in a
firefight without armor, though, if
you let your shields regenerate.
Allocate more power to shields.
They’ll be the only thing between
you and vacuum.”
—Brad “Skippy” Jacks
“ . . . unless your target has a
cloaking device. Then you better
be icy.”
—“Worm”
2120
Page 12
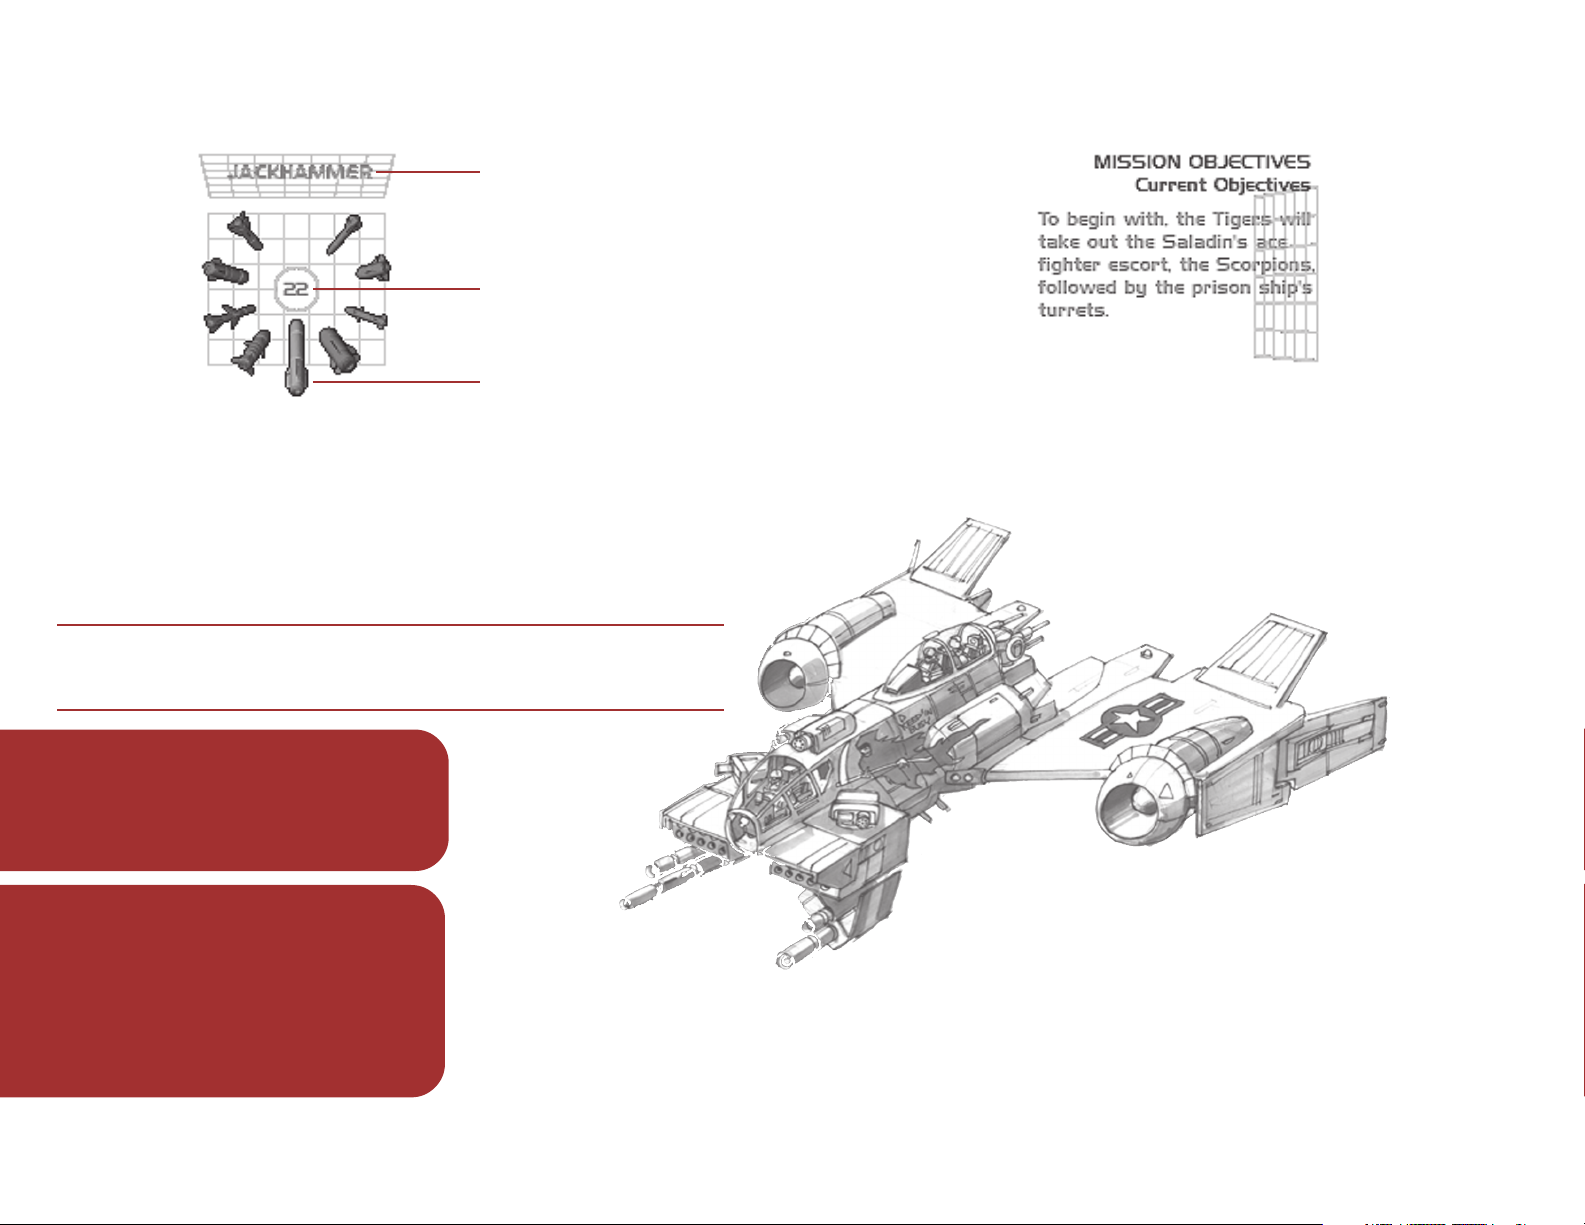
MISSILE DISPLAY
Missile Name
Remaining Missiles
in Selection
Armed Missile
This display shows the status of missile ordnance loaded aboard your
ship. To activate the display, press M.
The display is also activated when missile lock is acquired and you press
the Launch Missile key.
Missiles must be armed one at a time. Rotate the missiles left using the
COMMA (,) key or rotate right using the PERIOD (.) key until the desired
ordnance is at six o’clock. This is the missile or missile pod the fighter will
launch next.
WARNING If selected missiles are depleted, you must rotate a new
ordnance into the six o’clock position before additional missiles can be
launched.
MISSION OBJECTIVES DISPLAY
This display shows the goals for the current mission. The current objective is shown by default. To activate the display, press B. Page through
objectives by continuing to press B. When you complete an objective, it
will no longer appear on this display.
“Solomon and Screamer pods, you gotta
love ’em. Heaps of shots without having
to mess with controls in the middle of a
dogfight.”
—Jordy “Trigger” Kruger
“Precision is everything. Use the right
missile for the right job. Jackhammer,
Havok, Bandit—they all have their place.
Memorize the commands of this display
until using it becomes as natural as
blinking your eyes. You will be victorious.”
—Torii “Mayday” Kiyonaga
2322
23
Page 13

GUNNERY DISPLAY
DAMAGE DISPLAY
Simultaneous/
Pulse Fire Indicator
Ballistics Weapon
Indicator
The Gunnery Display allows you to monitor and customize your non-
missile ordnance. To activate this display, press G.
Available gun systems may be selected by continuing to press G. A schematic representation of the weapon system is highlighted within a wireframe representation of your ship. If the weapon selected is ballistic, then
the number of remaining rounds will be indicated.
To fire all guns at once, press F. Full gun mode may be customized by
pressing CTRL+G to switch between simultaneous mode and pulse mode,
denoted by either a solid or dotted line in the upper-left corner of the
display. In simultaneous mode, all weapons fire in unison. In pulse mode,
they fire sequentially.
Name of Weapon
Highlighted
Weapon
Your Ship
Number of Rounds
Available
The Damage Display is activated by pressing D. The display appears in
the upper-right corner of the HUD. As the segmented indicator next to
each listed system decreases, the system has sustained more damage,
and may not function at full capacity.
“It’s a good idea to test your guns
before a mission and watch this
display. Some weapons are notoriously power hungry. You may only
get a few shots before needing to
recharge. Better know this before
you get in a firefight.”
—Julian “Flash” Browne
2524
Page 14

POWER DISTRIBUTION DISPLAY
COMMUNICATIONS DISPLAY
Shields
Guns
The Power Distribution Display appears on the left side of the HUD. To
activate the display, press P. You can assign varying percentages of the
ship’s power to its engines, shields, or weapons.
By default, one-third of the available power is assigned to each system. To
reallocate this energy, press and hold down P while moving the joystick
toward the system icon requiring additional power.
Alternatively, there are four pre-set key commands for power distribution.
U Full power to guns
I Full power to engines
O Full power to shields
[ Equalize power distrbution
“If you can’t catch a target, try
giving 100% to the engines.
Don’t forget to eventually give
some juice back to your guns . . .
so you can do something when
you do finally catch them.”
Engines
Two-way video and audio feed is encrypted and transmitted between
Alliance fighters and capital ships via the Communications Display. To
activate this display, press C.
All units within range are assigned a number in the Communications
Display. You can contact these units by using the corresponding numbers
on your keyboard. To obtain permission to land, request a rearming, or
request a nanny ship, first contact the base ship.
“Unscrambled messages are prohibited. Let’s face it, though, you
rocket jockeys chatter more than my
ninety-year-old Aunt Linda. Don’t let
anything classified slip out. And
don’t let those Coalition pilots bait
you into a suicidal maneuver.”
—Enriquez
—Rudy “Wolf” Muller
“After any mission it’s easy to spot
the rookies. They’re drifting outside
their base ship waiting for orders!
You got to ask for permission to
land. Did I mention the last one in
the hanger buys the first round?”
—“Cutter”
2726
Page 15

WING STATUS DISPLAY
SPECIAL SHIP FEATURES
Some Alliance fighters have prototype devices or other unique features. If
your ship has any of these advanced technologies they will be noted in the
displayed ship’s data on the loadout computer (see “Fighter Selection and
Loadout”).
Reverse Thrust
Ships equipped with reverse thrust can fly backward. To enable
reverse thrusters press SHIFT+TAB . Reverse thrusters consume afterburner fuel.
The Wing Status Display shows the amount of damage each Alliance
fighter has sustained. To activate this display, press X. Alliance fighters
are grouped into their respective wings. Your wing will be displayed first.
Each fighter’s condition is indicated by the graduated bar next to it.
Wing leaders typically use this display to assess their team’s condition. If
a member is too damaged, the wing leader can use the Communications
Display to order them to return to base.
“If you’ve got a spare nanosecond
between dogfights, check out your
buddies. You might be doing great,
but the rest of your team could be
getting blown to bits. Don’t end up
alone out there.”
—Linc “Diceman” Stevenson
Spectral Shields
These shields attune and counter the most frequently used type
of energy-based enemy fire—providing immunity from that
specific attack. They rapidly drain power and can be used only
for a limited duration, indicated by a timer bar beneath the icon.
To enable spectral shields, press SEMICOLON (;).
Cloaking
Advanced Alliance ships are equipped with cloaking capabilities,
rendering them virtually invisible to an opponent’s sensors. To
activate this feature, press K. Cloaking can be used only for a
brief duration, indicated by a timer bar beneath the icon, before
it requires recharging. If you fire your weapons, cloaking becomes inoperative.
Blind Fire
When activated by pressing SHIFT+F, your guns automatically
track any target within the HUD’s central targeting cluster.
2928
Page 16

MISCELLANEOUS PROCEDURES
MULTIPLAYER GAME
Landing Ship
To land after a mission, you must first request permission to board your
base capital ship. Select the F8 shortcut key or activate your Communications Display by pressing C, followed by 2 to contact your base, and then
1 to request permission to land. If granted, your ship’s autopilot will
maneuver you into the landing bay.
Escort Position
You may be required to orient your craft in specific escort positions
relative to other ships. This position appears in the HUD as a red wire
frame. Fly into this frame and your speed will be automatically synchronized with the escorted ship.
Hidden Targets
You may be required to remove obstacles such as vent hatches before
firing on targets beneath. Press S to cycle through subtargets
in the Target Display. Locate the hatch, for example,
and then blow it off, exposing a vent shaft that
becomes the new subtarget.
To play a multiplayer game of Starlancer:
1. Establish the network or Internet connection that you will use for
multiplayer. Click Multiplayer on the main menu.
2. Select your connection type—MSN Gaming Zone, TCP/IP Internet,
LAN IPX or TCP/IP, Modem, or Serial.
MSN Gaming Zone: To play on the Zone, create a Zone Name and
install the Zone software. After you’ve done this, enter a Starlancer
game room and start playing! For more information, go to
www.zone.com/ and click Help.
TCP/IP Internet: Connect across the Internet or a network that uses
the TCP/IP protocol.
Local (LAN) IPX or TCP/IP: Connect across a network using the IPX
or TCP/IP protocol.
Modem: Connect two computers using a modem.
Serial: Connect two computers using a null-modem cable.
3. Decide whether you want to host or join a game.
• To join a game, select a game session and click Join Game. If
connected via the Internet TCP/IP protocol, you must enter an IP
address or press Find Games, then select a game session and
click Join Game.
• To host a game, click either Host Cooperative or Host death
match. For cooperative missions, type your call sign and select the
game mission you want to play, then click Start Game. To host a
death match, enter your call sign, select a ship and scenario, and
then click Start Game.
http://
30
3130
Page 17

DEATH MATCH GAMEPLAY
Starlancer multiplayer death match supports up to eight players. All death
match scenario maps have a restricted, predefined play area. If you try to
fly past these boundaries, you will bounce off.
All ships begin death matches with standard lasers and no missiles. You
can acquire weapon upgrades and other features by collecting powerups
distributed throughout the game.
You get powerups by flying through a glowing powerup symbol. You won’t
know the type of powerup or whether it’s good or bad until its powerup
icon appears on the heads-up display. Unless otherwise noted, powerups’0
effects are immediate.
Ship Cloak Gives you
limited-time invisibility. If
you fire a weapon you
become visible.
Missile Gives you one
missile.
Invulnerability Makes you
indestructible for a limited
time.
Shields Down Disables
your shields for a limited
time.
Proximity Mine Gives you
one mine. Deploy with the
Launch Missile key.
Repair Fully repairs your
shields and armor.
Fuel Provides additional
afterburner fuel.
Countermeasure Pre-
vents an enemy missile
from locking on. Press H.
Reverse Yoke Reverses
the direction of the pitch
and yaw controls.
Tag Bomb Countdown
timer indicates when the
bomb explodes. Collide
with another ship to pass
the bomb.
Beacon Collect several
to trigger a nuclear strike,
killing all opponents.
Power Core Must be
dropped off at a specific
location to stop attacks by
robotic drones.
Vampire Appears if you
are infected as a vampire
in the “Vampire” scenario.
Shadow Appears if
attain shadow status in
the “Hunt the Shadow”
scenerio.
Half-Max Speed De-
creases your maximum
speed for a limited time.
you
32
 Loading...