

Page 1
™
DEVELOPED BY
Page 2

A WORD FROM TANTRUM
Die by the Sword is the beginning of a new generation of games and technology. Once you play and become accustomed to the greater control of your
character, you will never be able to go back to the old technology that limits
your control. The physical based modeling technology created by Treyarch,
called VSIM, is a huge leap forward for games, bringing with it new techniques of gameplay that were never possible before. This technology is just in
its infancy and we haven't begun to scratch the surface of its possibilities.
Imagine someday hooking your whole body up to an input device and having the character in the game react exactly as you do. While it's been
attempted before, it's never really been possible to do it as accurately as we
can with VSIM. And while you may not want to play a game where you
have to hook your whole body up to an input device, VSIM is not bound by
any restrictions that would prevent this.
There is a lot to VSIM. You have never played anything like it before,
so it will take some practice. You should definitely start with the tutorial. As
you play, you will learn new techniques. You will develop your own unique
play style that will be different from all other players. The increased control
requires more practice than other games before it. Take your time. Look
through the manual and try out the different moves that we suggest. Once
you master it, you'll never go back.
The VSIM technology is really the future of animation and character control.
Die by the Sword will become a classic and be forever known as the game
that set the standard.
–Alan Pavlish
Tantrum
Page 3

DIE BY THE SWORD MANUAL
INDEX
GETTING STARTED 4 SAVE/LOAD 11
STORY 5 GAME CONTROLS 12
MAIN MENU 8 MOVE EDITOR 16
Tutorial 8 CAMERA CONTROL 23
Quest 8 CHARACTER PROFILES 24
Arena 8 ITEM DESCRIPTIONS 33
Tournament 10 STRATEGY GUIDE 34
Options 10 Introduction 34
Sound volume 10 Movement 34
Music volume 10 Arcade Motion Control 34
Control 10 VSIM 37
Video Mode 10 VSIM Techniques 38
Detail Level 10 Tips, Hints and
Gamma Correction 11 General Rubbish 43
Key Layout 11 CREDITS 48
Custom Moves 11 CUSTOMER SUPPORT 50
Credit 11 LIMITED WARRANTY 51
Quit/Back 11 INTERPLAY WEBSITE 54
Page 4
GETTING STARTED
After inserting the Die By The Sword CD-ROM into your CD-ROM Drive,
follow the on-screen instructions to install the game to your
hard drive. This won’t take long and you will only have to do it this
one time. You will always need to insert the Die By The Sword CD
into your CD-ROM drive for future gameplay.
If your system does not have Autoplay Enabled, please follow these
simple instructions to install Die By The Sword.
1. Double click on ‘My Computer’, and then double-click on the icon
for your CD-ROM drive. (Usually D:) Go to the “Die” directory.
2. Double click on the file named ‘SETUP.EXE’ to begin installation.
3. Follow the on-screen instructions to install the game to your hard drive.
Once the installation is complete, click on the Start Menu Button then go over
to Programs. Move your mouse cursor to
the Tantrum group and you should see Die
By The Sword. Move your mouse cursor
here and then click on Die By The Sword
to start playing.
Tantrum
4
Page 5

THE TALE BEGINS
One rainy morning in a pub overlooking Writhedale, Enric and Maya had
finally lost their last coin in a game of cards to a fat merchant. Enric pounded
his fists on the table in frustration. The game was undoubtedly rigged. City
life had become boring, so the duo took this loss as a sign to seek adventure.
Questioning the barkeep turned up little information. No beasts, no bandits,
and no wars… the city was rife with crime, but to them it was as safe as a newborn’s crib. The barkeep offered up a round of drinks “on-the-house”, and
Enric and Maya eagerly accepted. It was an excellent way to pass the time.
Then it came like wildfire, a rumor blazing through the streets. Always a center for gossip, the pub was engulfed by talk of the treasure to be had and the
horrific creatures to slay. The mountain range nearest Hanithburg on the
fringe of the civilized lands was swarming with fearsome beasts and ghastly
monsters roaming the area attacking travelers. So terrible were the beasts that
they’d tear a person apart just to hear him scream.
With a twinkle in their eyes, Enric and Maya were off on horses recently “liberated” from a deserving fat merchant.
After a rugged journey of many days, they reached the base of the Great
Mountain range. The forest was crawling with hungry creatures that saw them
as lunch. With a knowing grin and wink they charged headlong. The pair
seemed invincible. Enric charged giving Maya enough time to dart behind for a
killing blow. This battle alone was worth the long journey to get here.
When dusk came, not a beast still stood. All were slain or fled; the forest was
silent. Getting away from the stench of the dead, Enric and Maya made their
Die by the Sword
5
Page 6

way closer to the mountain, stopping for a moment to clean themselves in a
deep creek. Coming upon a druid ruin, they made camp. Maya took first
watch as Enric drifted into a deep dreamy slumber.
Drifting into his subconscious, Enric found himself alone in the forest in a
dense, soupy fog. Disoriented, he drew his sword. Sensing something to his
right, he turned just in time to avoid a bolt of lightning that whizzed by his
face and seared his beard. Staggering backwards, he was not prepared for the
dark globe, nearly invisible due to the light, that struck his chest and pinned
him against a tree. It expanded and wrapped around Enric, chaining him to the
tree. His sword arm was useless. He was helpless.
In a blinding flash of light, a man in robes appeared with Maya floating beside
him. She looked dead. Reacting, Enric strained to break free. The black tendrils stretched a bit which surprised his captor for a brief moment, before they
tightened knocking the breath from him.
“Free her and I might let you live,” Enric growled through clenched teeth.
Looking amused, the wizard replied, “And why would I do that? I have what I
need. Her soul is the last. Her strength will turn the Crystal away from Life
and towards Death.” He looked to Enric who stared back with fire in his eyes.
“Bah, ignorant peasant. You haven’t a clue as to what I am saying…”
Anger rising, Enric lashed out, “Take me instead!”
Pausing a moment, the wizard spoke, “True, you both are very strong indeed.
But for my purposes I only need one human soul, and her…attributes are a bit
Tantrum
6
Page 7

more appealing than yours.” Looking into the distance he continued,
“Spending over a year in a volcano’s labyrinth does get one a bit… anxious.”
Looking back to Enric, “Well then, your trivial existence amuses me so I will
not kill you. If you should happen to be still alive when next we meet, I will
be known to all as ‘Master Rastegar’!” In another flash of light, he was gone.
Enric awoke with a start. He was back at the ruins! He turned quickly looking
for Maya. She was looking at him with a slight grin. Maya taunted, “Aww, did
the mighty Enric have a bad dream?”
“This place be cursed Maya. I saw you caught by a damned mage!” Enric
replied intensely.
Softening, Maya pointed out, “Well I’m still here. Don’t worry ya big lug, I can
take care of myself.”
Enric got up and sat with her near the fire. “I would take this mountain down
for you, stone by stone.”
“I know ya would,” Maya said staring into the fire. “Oh, by the way, there be
kobolds about. I saw some tracks by the stones.”
“Kobolds, eh?”
Die by the Sword
7
Page 8
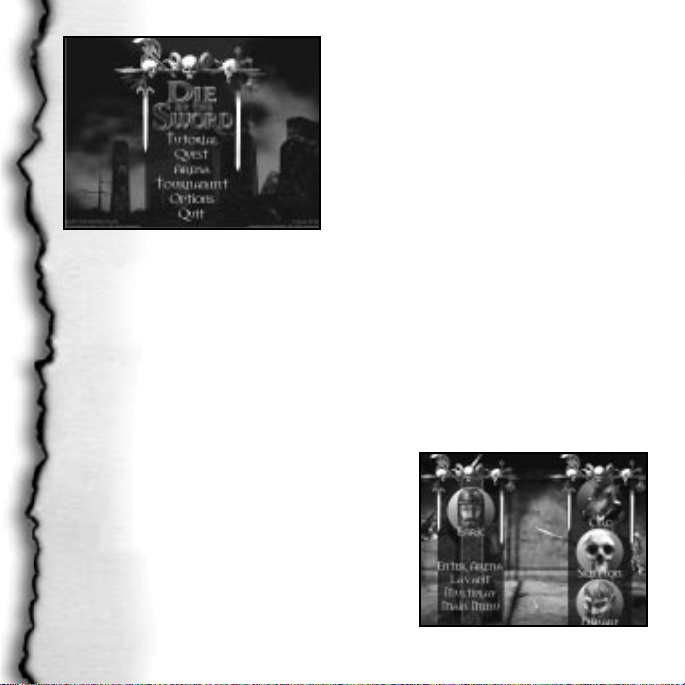
THE MAIN MENU
The first Die by the Sword screen displays the Main Menu. The Main Menu
allows you to select Tutorial, Quest,
Arena, Tournament, Options or Quit.
The Main Menu
the controls of movement and fighting without the pressure of combat, and
with text and verbal instruction throughout. It is designed to introduce the
player to all the basic control elements. We highly recommend that you complete this before attempting the full game.
Tutorial
This is a tutorial for people to get used to
Quest
Choosing Quest begins the main adventure game. You assume control of
Enric and fight against impossible odds. He wouldn’t have it any other way.
Enric’s quest is to rescue Maya and destroy
the evil wizard.
Arena
The Arena allows you to hone your fighting
skills, since you can choose what opponent,
and how many you want to fight. Just
think of it as another opportunity to hack
on bad guys.
Tantrum
8
The Arena
Page 9
In the Arena, you can experiment and perfect various moves that you
haven’t yet attempted in the Quest game. In addition to fighting as Enric,
you can also choose to fight as one of the enemies that appear throughout the
Quest. This gives you the unique opportunity to better understand the
nature of their movements and attacks, knowledge that will help you when
confronting them.
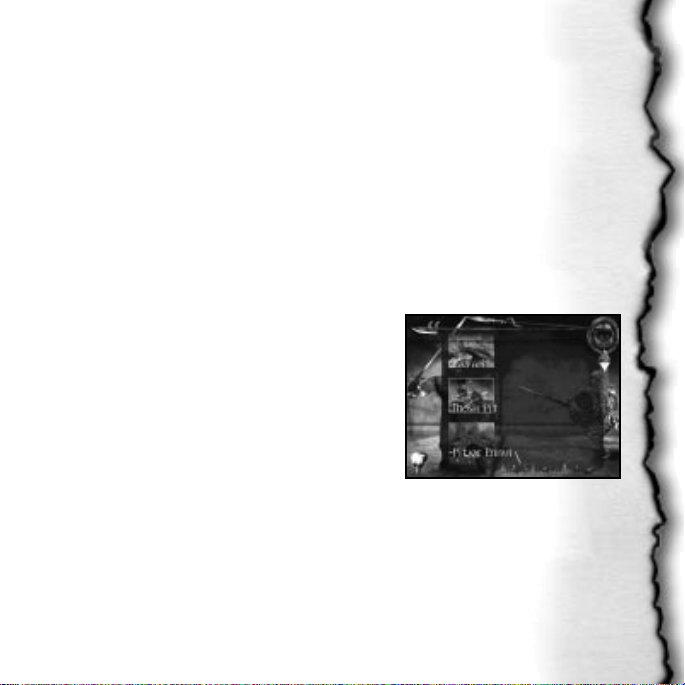
After clicking on the Arena menu item, the next screen you will see is the
Arena setup screen. On the left side of the screen, your choices are: Choose
Arena, Multiplayer, Enter Arena, and Main Menu. You can change characters by clicking on the character portraits. This will bring up a character
menu. Click on the face you want and you’re set.
CHOOSE ARENA enables you to set your fight
in Lava Pit, Pit of Ennui, Mosh Pit, or Pit of
Love. Make special note of the arrows on the
right side of the menu. These arrows let you
scroll down and choose the last arena.
MULTIPLAYER sets the method in which 2-4
players can participate. Your options here are:
IPX Connection for Directplay, Modem
Choose Arena
Connection for Directplay or Serial Connection
for Directplay.
ENTER ARENA begins an Arena match based on the selections that are currently on screen.
Die by the Sword
9
Page 10

MAIN MENU returns you to the Main Menu.
Tournament
Battle through an increasingly difficult horde of opponents to become an
arena master. If you need to quit your tourney before completion, and would
like to start it again, simply select the save name you entered when you
began the tourney.
Options
Choosing this from the Main Menu allows you to set game options such as
Sound volume, Music volume, Control, Video Mode, Detail Level, Gamma,
Key Layout, Custom Moves, or Credits.
SOUND/MUSIC VOLUME lets you adjust the volume level to suit your preferences. Press return to move the skull to the volume you want.
CONTROL Gives you the choice of Keyboard Arcade, Keyboard VSIM,
Joystick Arcade, Joystick VSIM, Mouse VSIM, or Gamepad Arcade. It may
take a bit of experimenting to find which one suits you best. (See Game
Controls for more information.)
VIDEO MODE Lets you choose either high or normal resolution. (This option
not applicable if using hardware acceleration since hardware acceleration is
always in max resolution.)
DETAIL LEVEL Lets you control the quality of the graphics displayed. Lower
detail levels will allow you to run at a higher frame rate for faster play.
Tantrum
10
Page 11
RE-ENABLE 3D CHECK Checks if 3D support is installed when you start
the game.
GAMMA CORRECTION lets you adjust the brightness levels of the game.
Press return to move the skull to the gamma level desired.
KEY LAYOUT Customizes the keys to your liking.
CUSTOM MOVES Here is where you can swap
a character’s special moves with ones that you
have created. The column on the left is the currently active special moves, and on the right are
the moves in the character’s library. Use the tiny
skulls to select moves, and the yellow arrows to
actually move them.
CREDIT See the names of those that made this game possible.
BACK exits this menu. (QUIT goes back to the Main Menu and exits the game
you are in.)
Custom Moves Option
SAVE \ LOAD
In both Quest and tournament mode, your game will be auto-saved at specific
points. The save games are attached to character names. For instance if you
name your character Bob, You’ll need to load Bob for the next time you play,
To reload a saved game, go to Either Quest or Tournament and select the
name you had before.
Die by the Sword
11
Page 12

GAME CONTROLS
Die by the Sword supports game control through Keyboard, Mouse, Joystick or
Gamepad. The Joystick and Keyboard can be used together while the
Gamepad functions independently to control gameplay.
Keyboard Controls
BODY MOVEMENT
W,S Move forward and back (double tap for quick move)
A,D Turn left and right
Q,E Sidestep left and right (double tap for quick move)
Caps Lock Crouch
Spacebar Press and hold to crouch, release to jump/press again in mid-air to flip
C Climb a ledge
Keypad *Action (pick up items, open doors, pull levers, search bodies, etc.)
SWORD MOVEMENT (Arcade Mode)
Keypad 6 High swing
Keypad 5 Middle swing
Keypad 4 Downward bash
Keypad 3 Block high
Keypad 2 Block middle
Keypad 1 Block low
Keypad / Sheath/unsheath sword
Ins Special move
Home Special move
Page up Special move
Delete Special move
Tantrum
12
Page 13

SWORD MOVEMENT (VSIM Mode)
Keypad 1 Sword down and left
Keypad 2 Sword down
Keypad 3 Sword down and right
Keypad 4 Sword left
Keypad 5 Sword down
Keypad 6 Sword right
Keypad 7 Sword up and left
Keypad 8 Sword up
Keypad 9 Sword up and right
Keypad 0 Extends sword arm
Keypad / Sheath/unsheath sword
Keypad Enter Block mode
MISCELLANEOUS
Keypad + Damage sensor (tell relative damage of limbs and shows health bar.
Green means good health, yellow is moderate, red is critical.)
Keypad - Compass
F3 Shows all health bars
F4 Toggles on/off “Damage Sensor”
F5 Toggles on/off “Compass”
Mouse Controls
BODY MOVEMENT
Use standard “Body Movement Keyboard Controls” for movement.
Mouse Buttons
Right Button Sheath/unsheath Sword
Die by the Sword
13
Page 14

Left Button (When sword is unsheathed) Block mode
Left Button (When sword is sheathed) Performs action
SWORD MOVEMENT
The movement of your sword is controlled by moving the mouse back and forth.
Joystick Controls
ARCADE MODE
Stick Move forward, backward; sidestep left, right
Twist Rotate left, right
Trigger (When sword is unsheathed) Launch arcade attack
Trigger (When sword is sheathed) Action
POV Hat Modifies trigger (i.e. POV forward + trigger creates high attack)
Thumb Button Crouch/jump
Right Top Sheath/unsheath sword
Right Bottom Climb
VSIM MODE
Stick VSIM control of sword
POV Hat Move forward, backward; turn left, right
Trigger Crouch/jump
Thumb button Sheath/unsheath sword
Right Top Action
Right Bottom Climb
Gamepad Controls
Pad Move forward, backward; spin left, right
Tantrum
14
Page 15

Left Trigger Crouch/jump
Right Trigger +Pad Sidestep left, right
WITH SWORD UNSHEATHED:
A, B, C Primary arcade attacks
X, Y, Z Blocks low, mid, high
X, Y, Z (double tap) Special attacks
M Sheath/unsheath sword
WITH SWORD SHEATHED:
B Action
C Climb
Camera Controls
3RD PERSON VIEW
R Raises camera far above you. Lowers when pressed again.
F Toggles between fixed or floating camera. (Fixed camera prevents
auto-switching into combat mode.)
SCOUT CAM
2 First person scout cam A Turns camera Left
1 Gets you out of scout cam D Turns camera Right
W Turns camera up F Zooms in
S Turns camera down R Zooms out
LOOK-AROUND CAM
Keypad (.) Activates Look-Around cam (Holding this down keeps you in
Look-Around mode. Keypad numbers move the camera.)
Die by the Sword
15
Page 16

MOVE EDITOR
The Move Editor is a companion utility to DBTS which allows the user to create custom moves for any of the Arena-playable characters. These moves can
be imported into the game for use in either Arena or Quest mode. To run the
Move Editor, either select it under Die By The Sword in the Start Menu, or go
to the Die By the Sword directory and double mouse click on the
“Winmedit.exe”.
Moves recording is that moves are recorded in three separate tracks, representing the two arms and the body. The tracks can be recorded separately or
together (though not both arms at once). Once each track is recorded, they
can be individually adjusted to sync all the motions together for a perfectly
timed move.
Moves are saved according to character (not user), into a library of moves for
that character. Four of these moves at a time can be brought into active use
and assigned to keys in the Game. The libraries include four default moves
for each character.
The Move Editor mimics the function and likeness of a tape recorder to
make things as intuitive as possible. Since play control requires much of the
keyboard, the interface is largely based on the mouse.
The Move editor uses the VSIM control system for the motion of the sword
while creating moves. All action takes place on screen which consists of the
Game Window, the Menu, the Track Selectors, the Frame Selectors, and the
Control Buttons. They work as follows:
Tantrum
16
Page 17

MOVE EDITOR MENU
Game Window
Miscellaneous
Control Buttons
Die by the Sword
17
Frame Selectors
Track Selectors
Page 18

Game Window
CHARACTER: Selects a character. This will bring up a Head Ring to choose
the character for whom you want to make moves.
QUIT: Exits the Move Editor.
NEW MOVE: Clears all frames and resets frame offsets to zero. This is the first
step in creating a new move.
SAVE: Saves the current move to the character’s library as the filename displayed in the lower left corner of the screen. When saving, the editor must
play the move in order to calibrate it.
SAVE AS..: Saves the current move as above to a new name you prefer.
LOAD: Loads a move from the library of available moves for that character. It
presents a list of available moves, and allows typing in a name as above.
LOCK/UNLOCK CAMERA: Toggles the camera state between fixed and
fixed relative to the character.
COMBAT/READY STANCE: Toggles the stance of the character. Each character has a Ready Stance which he is in most of the time, and a Combat stance
which he enters if he is under Arcade control and there are enemies nearby.
If the player is making a move intended for use while playing in arcade mode,
the Combat Stance should be selected when making moves for that character.
The reason for this is because the VSIM control system does not have a “true”
combat stance since the player is in full control. The Arcade control system
Tantrum
18
Page 19

actually switches from the ready stance to a combat stance as soon as it moves
near an opponent for a quicker response time. The difference is often not
severe (particularly for longer moves) but this setting should definitely be used
for optimal performance.
Track Selectors
These are the three symbols with the
words ARM, OFF ARM, and BODY next
to them. Each symbol is either a yellow
square, a yellow triangle, or a red circle
to indicate the status of that track.
These states affect what happens when
the editor is in a Play Cycle or a Record
Cycle (see below).
• Yellow square means Off
• Yellow triangle means Playing
• Red circle means Recording
A track that is Off will not record during a Record Cycle, and will not play during a Play Cycle. A track that is Playing will Play during a Play Cycle or a
Record Cycle, but will not record during a Record Cycle. A track that is
Recording will play during a Play Cycle and record during a Record Cycle. It
sounds confusing but is quite intuitive once you see it in use.
Track Selectors
Frame Selectors
These are the three digits with < and > buttons on either side of them, and three
more labeled CURRENT, BEGIN and END with + and - next to the latter two.
Die by the Sword
19
Page 20

The first three represent frame offsets
for each track. They default to zero,
but can be adjusted up or down. They
represent offsets in the time that each
frame begins when a Play Cycle or a
Record Cycle begins. Their purpose is to synchronize the timing of the tracks
once they are recorded.
The current, begin and end counters represent the current frame playing, the
first frame of the move, and the last frame of the move. The current counter
is simply a display for information during a Play Cycle or a Record Cycle, but
the begin and end counters designate the first and last frame to be played and
are adjustable. Their purpose is to clip the move so there is no slop on either
end. The tighter a move is, the more useful it is in combat.
Frame Selectors
Control Buttons
These are the tape recorder-like buttons
at the bottom of the screen. They are
tied to hot keys 1 through 5, which
mimic the function of the buttons.
They are in order:
REWIND: Resets the current frame to zero.
PLAY: Begins a Play Cycle. This plays the currently selected tracks.
SINGLE STEP: This advances the current Play Cycle in freeze frame by one
step, or begins one and advances it by one step. (Not available during record.)
Tantrum
20
Control Buttons
Page 21

STOP: Stops any Cycle in progress
RECORD: Begins a Record Cycle. This plays any tracks marked Play while
recording any tracks marked Record. There must be at least one track marked
Record for this button to be available.
How To Create a Simple Move:
• First hit “New move.”
• Next, turn both Arms off (yellow square) and put the Body on record
(Red Circle).
• Now hit record and do a little jump. Hit stop when the jump is complete. If
the jump was not to your liking, no problem. Just hit record again and try again.
• Now turn the Body to play (Yellow triangle) and the Arm to Record
(red circle).
• Hit record and swing the sword to make your jump deadly. Hit stop when
you’re happy with the swing. You may need to re-record that Arm many
times until you perform a swing you are happy with.
• If your swing was late or early in the jump, use the Track Selectors, the
numbers to the right of BODY, ARM, & OFF ARM, to move when exactly the
swing activates during the jump. For instance: The jump peaks at frame eight.
The ARM sword swing doesn’t quite strike at the peak of the jump where you
wanted it to. You guess it’s about three frames early. You add three frames to
the ARM by clicking on the > symbol that’s to the right of the word ARM.
This makes the swing activate 3 frames later in the jump, right where you
wanted it to.
• Also you may wish to use the Frame Selectors(Current/Begin/End) This
will cut off the excess fat of a move. So if you created a move with 128
frames, and you only want frame 64 to 89, use Begin to cut frames from the
Die by the Sword
21
Page 22

beginning bringing it up to 64. Then use End to cut frames from the end bringing it down to 89. These will be very helpful when you wish to strive for maximum effectiveness.
• Congrats, your first move is born! Most moves are horrible when
you first learn the tool, so don’t be afraid to erase by selecting “New Move” if
you are dissatisfied.
• If you like it, save it and start the game. Go to “Options” and “Custom
Moves.” Import them from there into the game using the “Custom Moves”
option in the Options menu.
Miscellaneous
You’ll notice after a move is performed that a couple of numbers, words (bottom left) and a yellow line with a red cross (can’t miss it) will appear.
This is what they mean:
POWER: At its peak, how much damage the move does. (It is used to determine, at its highest, how much damage this move is possible of. For multistriking moves, it will only show the power of the strongest swing.)
SWEET SPOT: At which frame in the move the highest damage occurs. (Will
tell you exactly which frame is doing the most damage. Use this to know
which frame to hit an enemy with.)
YELLOW LINE with RED CROSS: Where exactly the sweet spot occurs in
3D space. (Will show you where the move will do the most damage in 3D
space. This line will appear after you play a move. The red cross indicates
where your enemy should be before you use that move. If the cross does
Tantrum
22
Page 23

not appear where you want, you may need to record some body movements
to position the cross into the right area.)
CAMERA CONTROL
Die by the Sword features several different camera views that allow you to
choose the perspective you prefer.
The default camera provides a view from behind and slightly above the character. It moves as you move, keeping the character and action in view.
Pressing R will raise the camera far above you. Pressing R again will put it
back into its default location. (Regardless of fixed or floating camera.) Pressing
F will fix the camera behind you, pressing F again will change it back to floating camera. In this mode, when in combat, the camera attempts to keep an
angle from the side, attempting to keep the action visible at all times.
The Scout Cam is very useful in alerting you to dangers that are lurking just
out of your immediate view. To engage the Scout Cam, press 2. Pressing W
turns the Scout Cam up while pressing S turns it down. A turns it to the left
and D turns it to the right. To zoom in one level, press the R key on the keypad. To zoom out, press the F key on the keypad. Pressing 1 will remove you
from Scout Cam mode.
If you press Keypad (.) it puts you into Look-Around Cam. Holding it down
continually keeps you in Look-Around mode and allows you to use a numeric
keypad to look around.
Die by the Sword
23
Page 24

THE CHARACTERS
Monsters
KOBOLD- Many of these small blue canine-like
humanoids have been slain on the whims of their Orc
overseers. Quick and cunning, the Kobold have been
known from time to time to actually help adventurers
against their Orc masters.
ORC- From Grunts to the Shaman, the boar-headed Orcs rule the upper
layers of the mountain’s tunnels. Not exactly scholarly, they control Kobolds
with brute force.
OGRE- These club swinging brutes are bigger than Orcs, but even more stupid.
They are the Orcs’ extra “muscle” when waging war.
TROG- Usually found near underground rivers, this beast is
fiercely territorial, even more so in protecting their eggs and
young. Many a Kobold have been slaughtered by a Trog
rising from the depths and attacking them from the river.
MANTIS- Native to the Great Mountain range, these
deadly insectile beasts prey on anything edible that wanders into their tunnels. Dangerous to all, this fierce crea-
Trog
ture is feared by those who travel beneath the Mountain.
Few have survived to tell of actually seeing a Mantis.
Tantrum
24
Kobold
Page 25

MAGMAR- Made of stone and fueled by the fiery blood of the earth, this elemental is a summoned creature.
DWARF- Working in the lower levels of the mountain,
these stout and proud miners have constructed subterranean temples, and machines to harvest the rich crystal
deposits.
SKELETON- These bony warriors were fallible humans
executed by their lord and revived as more trustworthy
Dwarf
and loyal undead troops.
Enric
THE FARMER
Enric started life on his father’s farm that overlooked
the Crajere sea. He was the eldest of three brothers and
two sisters. By the age of 16 he was quite strong and
hardy from the normal farm chores and constant roughhousing with his brothers. The only weapons he had
ever known at this time were a reaper and pick, which
of course were only tools.
Life was plain for Enric. His greatest pleasure had
always been climbing high atop Sparrows cliff. There he would lay back and
watch the stars and dream of the day he would have his own land, of having
many children, and growing old while watching these same twinkling stars.
Die by the Sword
25
Enric
Page 26

THE SLAVE
Some dreams, even simple dreams, never come to pass. On one warm mid-summer night, while laying atop Sparrows cliff, he never saw the Dwarven warships
that swept in through the dark of night.
By cruel fate, his family’s farm was the staging point of the war between humans
and dwarves. Tension had been building for months between the races, and
week before last, it burst. Being so high up, and with the sea’s constant crashing,
he never knew that a small detachment of the Dwarven force had swept in and
destroyed his home. He awoke with a jerk as a thick leg kicked him in his side.
Overwhelmed, he was captured and enslaved.
For many months he slaved away for the Dwarven horde. For every town that
was hit, many more slaves were taken. Even though they nearly killed him on
a regular basis, Enric never flinched from a strapping, or gave in to begging for his
life. But he did what they wanted without question. It was a matter of survival.
Enric dreamed as well. Not of stars twinkling and children laughing, but instead
he dreamt of his old life burning, he dreamt of killing every Dwarf to the last.
Blood and hatred were the only colors he saw anymore.
One morning while most still slept, Dwarven trumpets roared in alarm as the
kings army charged down upon their encampment. Taken by surprise, the
Dwarven soldiers were left in disarray.
In the chaos and mayhem Enric managed to free himself from his chains. For
the first time he wielded a real weapon taken off the body of a dead Dwarf. To
Enric it had some qualities like the reapers he used in his old life. But now
Tantrum
26
Page 27

instead of being a tool to harvest life, it was a weapon harvesting death. With a
roar that sounded like a mother lion that has witnessed its cubs murdered, he
leapt at his enemies. He handled the Dwarven blade as his old reaper, each swing
taking off limbs and cutting down many a Dwarf. He was slashed many times
but his months in slavery had hardened him against pain, against remorse. And
so among the Human troops he was seen as a great warrior even though he did
not yet have the skill to make him great.
The day was won and the Dwarven detachment was routed. He joined the
army and discarded the Dwarven blade, for it reminded him too much of his
home. The day he picked up the sword as a soldier was the day he knew he
would never again be weak.
THE SOLDIER
The war ground on for 4 years. In that time Enric grew well trained to the
sword, but was still cold and hard on the inside. Twice promoted, he controlled a
decent sized troop now. Being higher in rank, he learned much more than the
common soldier. And because his political view still had an ounce of common
sense, he saw that the King’s orders were not as just as most were led to believe.
Eventually the humans pushed the war back onto Dwarven soil. Enric’s troop
was to be the first to establish the foothold in the unsuspecting Dwarven lands.
That night his troop landed and made its way onto the land. His scouts found
the ideal area to make a base. There was but a single Dwarven establishment
there. Down from the hills they swept, like wraiths in the night. As they lit the
first building on fire, the Dwarven family was dragged out and some were
slaughtered on the spot. The fire grew bright as it ate the buildings. As the fire
grew, he began to make out things that reminded him of his old life. Freshly cut
Die by the Sword
27
Page 28

fields were off in the distance, and the tools, the tools were simple farming tools.
His realization and apprehension grew as large as the knot in his stomach. As he
dropped to his knees, it hit him. He realized he had become his own nightmare.
This may be a different land with different people, but in his mind it was his
farm, his home. He turned quickly as the last Dwarven life was suddenly cut
short. In his mind he saw his family butchered, lifeless. He looked up to the
stars as the farm burned and chaos swirled. He saw the same stars that he saw as
a boy. They didn’t seem to twinkle as they once did long ago. Silently, he rose
and walked away into the night.
THE MERCENARY
He wandered for a time, sorting things out in his mind. Trying to find reason in
the madness. Being in a hostile country, he constantly found himself hiding from
patrols. The farther he traveled inland though, the less its inhabitants seemed to
notice him. Most Dwarves, it seemed, thought that a lone Human would not be
so stupid as to walk through enemy lands, so most were under the impression
that he had a legitimate reason for being there.
Traveling the land of his enemy, he learned a great deal about them. So much
in fact, that he no longer considered them his enemy. Although they were a different race, they bled as he did, breathed as he did, and mourned as he did. With
many realizations like this, Enric became more and more at peace with himself.
In time he traveled a great distance. As fates would have it, he wandered into a
sea tavern this side of the Crajere sea. Mixed races from all over were here,
fresh off their ships to get a pull of whiskey and looking for some action. As
usual for this place, a brawl was started by two drunken Dwarves over a game of
dice. Enric was sitting at the bar as he was thrown from his chair to the ground.
Tantrum
28
Page 29

Many fights that started in this place took hours to simmer down completely.
Not this time. Enric went to work breaking limbs, and tossing people through
windows. Afterwards he dusted himself off and retook his place at the bar without saying a word. As best they could, the remainder of the people went back to
what they were doing without staring too blatantly. Without showing it, Enric
was pretty darn happy with himself.
That display of skill got the attention of a mercenary by name of Dannik.
Dannik owned a vessel and was always interested in hiring strong men to work
for him as mercenaries. With nothing better to do, Enric accepted.
Dannik was a boisterous man by nature. Enric learned from him that a good insult
here and a taunt there, were not only amusing, but often threw an opponent off
guard. The life of a mercenary was fresh and daring. Always a new place, new job,
new adventure. Enric found joy again during his time with Dannik. Fighting was a
way of life… and he loved every minute of it. Through their search for a potentially
high rewarding job, they wound up back in Enric’s homeland. He thought he’d miss
it, but he didn’t. His past was just that, past. He also learned that the war between
the Dwarves and Humans had ended, a truce of sorts was called. He didn’t care.
Mercenaries that grow too close to one another usually die together. A merc
needs to know that he can leave a fallen friend to finish a mission and get paid.
He found he would not do that to Dannik. They decided to part ways before
such a situation occurred.
THE WARRIOR
He was travelling to the city of Findor when he heard a ruckus over the next hill.
Knowing the distinct sounds of a fight he charged to get a better look. When he
Die by the Sword
29
Page 30

crested the hill he saw a caravan being overrun by a group of Orcs, Ogres and other
assorted beasts. Several Humans were fighting them off but they were being
pushed back. Oddly he saw a few Orcs drop without seeing what felled them. This
made him curious as he jogged down into the fray.
As he got near, several creatures broke through the forest and charged an unprotected side of the caravan. He started on them first, taking them down one at a
time. Two wagons were on fire by now but the other three made a break for a
clearing the fighters created.
Enric was enjoying this fight more than most since it was fast becoming a live or
die fight. “Ha Ha!,” he yelled, “You hit like a Kobold!” The tactics worked well
on these simple-minded beasts as they charged headlong, enraged.
In the midst of the bloody battle Enric saw an incredible creature. Soaked in
almost as much blood as he, she darted from beast to beast slicing throats, kicking
groins, and dodging claws. Her great speed and agility entranced him. During a
brief respite she saw him. He stood dazed, watching her, unaware of the Ogre
lumbering up behind him.
“Ah well. You die the death you earn.” she thought as she gave the slightest nod
in the direction of the danger.
In a blur of steel she saw him react instantly in a feat that she would have
thought impossible if her own eyes had not witnessed it. Enric side-stepped the
Ogre’s clumsy swing while whipping his own blade around, cutting off the
Ogre’s sword arm. The Ogre’s head, catching Enric’s blade, flipped up into the
air as its massive body crashed to the ground. Enric, soaked, thrust his blade
Tantrum
30
Page 31

into the earth and leaned upon it with a slight grin. Maya, her mouth still
agape, watched as the head plopped a few feet away, balefully gazing at her.
They met on that battlefield in a clash of blood and steel, but the sparks they saw
were not from their blades. Back to back they fought and from that time on,
Enric and Maya rode from one glorious battle to another. The look of terror,
frozen on the decapitated Ogre’s face, still comes to mind whenever Maya doubts
one of Enric’s suicidal quests.
Maya
STREET RAT
Maya was for the most part a city dweller. Having no family, she tried her hand at honest work. For an unattached
street rat, she soon found how difficult this was. An
alchemist that was losing his sight finally accepted her to
apprentice for him, mainly because she lied about her background and age. The result was disaster. She blew nearly
half his shop from its foundation in her first week.
She found she had a natural knack for working with her hands and acrobatics.
For a time she performed for money, all the while pick-pocketing here and
there to gain the gold life owed her. This lead to running with an ambitious
crowd. From pick-pocketing they went to mugging, from mugging to robbing
rich estates. In a pinch she could disarm traps and unlock doors.
The law finally caught up with her on a petty burglary. Guards bashed down the
door to get at them, with torches and halberds in hand. Her band of three split
up, everyone for themselves; all but her attempted to escape. She gave herself
Die by the Sword
31
Maya
Page 32

up with a smile. Taken aback, a gruff guard grabbed her roughly and slapped
irons on her. She was dragged by her chains to the city jail. There was a loud
crash as a large vase nearly dropped on a guard’s head. Like fools, all of them
immediately looked for their attacker. Whoosh, like wind, Maya was gone.
Having already unlocked her cuffs, she waited for a distraction. Cursing guards
yelled from behind, but she was too good to be caught again.
NEW PATH FOUND
She ran to the band’s meeting place for when plans went awry. One of the burglars had been killed in the raid. This hurt Maya, but she always had a pragmatic view on anyone that was foolish enough to do what they did.
“By the way, that vase you dropped was a nice touch.” Maya told Hector. “I
thought you didn’t like heights.”
Confused, Hector replied “What are you talking about? I didn’t drop no vase!”
“You didn’t?” Maya asked feeling suddenly chilled as if they were being
watched. “Then who did?”
Out of the shadows a dark man approached “I did!”
The man was named Darius. He talked with her and spoke of needing her skills.
Darius was a smuggler. But he had not yet “acquired” his goods. After hearing
how much he was willing to pay… she couldn’t say no.
She was, in essence, a mercenary now, specialized in acquiring goods. Having an
inside source for information on mercenary trades and jobs, she had little trouble
Tantrum
32
Page 33

getting work. She picked up many skills through the years, even touching on
assassination. Through the Dwarven war she traveled far and wide plying her
trade to those who paid the most.
After the war, jobs slowed almost to a halt. After haggling for quite a while on the
price, Maya finally found a small-time job guarding a caravan through the outlands.
This journey changed her life forever… For this is where she and Enric first met.
ITEM DESCRIPTIONS
You will find many items along your quest. Here is an explanation of
what each does.
HEALING
(From weakest to strongest)
Bread Stick - Weakest
Fish
Piece of Meat
Healing/Herb
Potion of Minor Healing
Potion of Full Healing - Strongest
SPECIAL ITEMS
Ring of Shielding Increases armor permanently
Gauntlet of Might Increases damage permanently
Amulet of Shielding Increases defense versus projectiles tremendously
permanently
Die by the Sword
33
Page 34

MISCELLANEOUS
Berserk Potion - Warrior gains heroic stature, growing huge and gaining devastating attacking power. Alas, the effect is fleeting and does not last long.
Keys - Various Keys will be found to unlock doors.
STRATEGY GUIDE
Introduction
I am here to forge you into a lean mean skull cracking machine. Listen well,
for I’m only gonna say this once. You, are scum. You heard me, you’re an
unproven, unshaped lump of goat dung with a sword. You disagree? Good.
Then prove me wrong and don’t wind up dead. I will instruct you on how to
wield that blade you hold. If you live, you’ll be one mean bastard with wits as
sharp as your blade.
Movement
Proper Movement is essential to fighting. Simple positioning can determine
between a killing strike, or your head lying on the floor. Remember, the farther
your opponent is from you, the less likely he is to damage you. Run. Not very
heroic, but until you learn to swing that steel you carry, you're dog food.
TIP : Because the camera is always in a state of motion, keep in mind that
pressing right will always turn your character to his right, and pressing left will
always turn your character to his left.
Arcade Control Mode
The first thing you’ll notice in Die By The Sword is that the control types used
are very unique compared to most games out on the battle field. Don’t let the
Tantrum
34
Page 35

controls intimidate you. You’ll understand them soon, and in time learn the
new-found ideas and configurations that are possible with practice. Don’t
worry, follow this guide and you'll be out there stomping Orc ass soon enough.
The default control type is Arcade. You should stick with the Arcade control
type until you are well versed in the ways of slaughtering your opponents. I
suggest you use the arena as it was meant to be used and try out any new
techniques you learn, there.
CHOP - An over head slash. Good for splitting open heads and hacking up bodies on the ground.
SLASH - A horizontal swing. A solid strike for most types of weapons.
DEFLECT - Positions your blade in such a way that it has a high chance of
absorbing an attack.
BLOCK MODE - Raises your shield to absorb damage from an attack.
SHEATH/UNSHEATH SWORD- Equips and unequips sword. Note that you
run a bit faster when your sword is sheathed.
ACTION - This does various things from pulling levers to searching bodies.
Only works when your sword is sheathed.
VIEW DAMAGE- This shows the damage individual limbs have taken. Areas
will be colored from Green (not hurt) to Red (bout to fall off). Aim for the Red
areas to feed them a constant stream of pain.
Die by the Sword
35
Page 36

Special Attack
These attacks inflict a lot of pain, but are difficult to hit with. High risk, high
return. All of this is a bit daunting at first so I’ll walk you through it a step at a time.
STEP 1 - Beginning attack
To start off on the right foot, forget everything you’ve learned and concentrate on the keypad #5 attack button. This will get you used to your capabilities in combat. This mid slash will back off your opponents while inflicting a
decent amount of damage. Just point in the right direction and keep hitting it.
Even a neophyte should be able to grasp this.
STEP 2 - Basic attacks
To expand your arsenal use the Keypad #4 and Keypad #6 attacks. These
would be the Overhead Chop and Head Slash attacks. Used with the
Keypad #5 mid slash, you start to stand a chance against the horde that you
will soon face.
Keypad #6 = HEAD SWIPE. This attack is good for cleaving enemies’ heads
from their shoulders.
Keypad #4 = OVERHEAD CHOP. This attack is good for chopping at fallen enemies.
It’s a good time to take what you have learned to the arena. Pound what you
have learned into their skulls for a bit.
STEP 3 - Defense
In Arcade mode, keypad buttons #1, #2, and #3 are your main defensive
postures. These will put your sword in a position to deflect low, mid, and high
Tantrum
36
Page 37

attacks. These won't stop all attacks, mind you, but they do raise your chances
of deflecting all sorts of damage. These defenses are especially good for when
you are trapped and just need to break through the enemy lines.
STEP 4 - Special attacks
All right, if you’ve made it this far already, it’s time to seriously shred some
meat. Special attacks are very powerful, but are a lot harder to hit with. The
trick is to learn what each attack does, then find the situations they are best
used in. Mixing these attacks with the normal attacks (especially the mid
swipe!!!) are your best bet when you wade into the fray.
BUTTONS: Insert, Home, Page Up, and Delete are your special attack buttons.
This is an excellent time to rush into the arena and show off your new toys...
VSIM
Keyboard VSIM mode is a very different and
advanced control type when compared to Arcade
mode. What does VSIM stand for? Virtual
SIMulation. Since Keyboard VSIM is not the default
control type, you will need to change the control type
during a game by accessing the Options menu and
switching to Keyboard VSIM.
VSIM controls
Tip
EXTENDED ARM - You’ll be amazed how much a simple extension of ones
arm can do for a swing. Most attacks will drastically change when used in combination with extend.
Die by the Sword
37
Page 38

This is how Keyboard VSIM controls are broken down. Think of the arrow
keys on your keypad as directions that your sword arm can go. Hold the up
arrow, your sword arm goes up. Hold the down arrow, and your arm goes down.
Let go of the arrow keys and your arm returns to neutral. To make a complete
swing you will need to hold a direction, lets say right, then when you are ready,
press and hold the opposite direction, in this case left, to follow through with
the swing.
For Instance:
MID SWIPE = Hold Keypad #6 (right) then release it
and immediately press and hold Keypad #4 (left) This
would have resulted in a swing from right to left. From
this position, you can then release and immediately
press and hold Keypad #6 (right) again returning the
Mid Swipe
Yes, yes, it’s a bit confusing at first, but once you get past the initial awkwardness, this style shows to be inherently free to innovation and improvisation.
Wicked moves such as a flipping head strike or a twisting kneecapper are just
the beginning. Experiment. You may be surprised with what can be done.
blade to the original position.
VSIM Techniques
The path of the warrior is a hard one. To expedite your learning I will give
you the most precious gift of all: Knowledge. These techniques are tried and
true. Learn well and perhaps you shall see the end of your perilous quest.
KEY: Arrows = Active arm movement. Highlight = Extend (keypad #0) is
needed for the move to be done as shown. Using Extend while executing a
move (rather than holding it down) will give you more power.
Tantrum
38
Page 39

1.) This attack is from #6 to #4. This is your most basic
slash. You would use it most likely more than any
other attack. It is good for backing off opponents and
learning of the battle environment. If you wish to gain
a larger reach, use #0 to extend your reach. This slash is
good for most situations.
1
2.) This is a diagonal down chop from #7 to #3. You
would use it when trying for a head strike or hitting a
crouching opponent. Depending how you aim it, it’s good
for both high and low shots. Extending with #0 is recommended for maximum force. A good example would be
if a Kobold were to sneak up from behind, you’d be able
2
3
to whip around with this chop and attack the Kobold.
3.) This attack is from #3 to #7. You would use this
move if you wanted to surprise your foe with a sneak
attack, since it starts low and behind you, then rises up
to lash out unexpectedly. This move, unlike the others,
starts low and behind so you are less likely to have your
sword tangled before your swing. A good situation for
this move would be if you were to shove past an Orc on
his right side so your sword was untangled, and attack
the Orc behind him.
4.) This attack is from #8 to #2. Extend is necessary to
make this one effective. You would use this move if
you needed to line up perfectly with an enemy and
chop down so nothing to your right or left is touched. A
good situation for this is if you are in a net game ganging up on someone and don’t want to hit a friend.
4
Die by the Sword
39
Page 40

5.) This attack is from #9 to #1. This move is as dramatic as it is effective. You would use this move for
getting over the top of enemies’ defense. A good situation for this would be leaping off a box onto an Orc,
bringing down your blade with the added momentum
5
of the drop.
6.) This attack is from #1 to #3. You would use this low
slash for striking legs and the occasional Kobold’s head.
Extend is necessary for this one to work. A good situation for this would be if you ran at a horde of Kobolds
mowing them down.
6
7
8
7.) This attack is from #7 to #9. You would use this
high slash when you wanted to strike at heads. Extend
is necessary for this one to work. A good situation
would be leaping up over an ogre’s club and striking at
his head.
8.) To show an example of a more difficult technique,
this #9 to #7 to #6 strike is a good choice. You would
use the #9 to #7 part not as an attack but rather a move
that will help your sword if it should happen to be tangled with another weapon by raising it around the back
of your head. The attack comes from the #7 to #6. A
good situation for this is if there was a Skeleton on both
sides and your normal strikes were getting tangled. This
move would enable you to put your sword in a position
to get an actual strike.
Tantrum
40
Page 41

Advanced VSIM Techniques
These moves are a bit more hard core and require a basic understanding of how to generally control VSIM.
1.) This attack is from #7 to #6. You would use this
attack with a quick hop to the right by hitting right
sidestep twice. The outcome is a lunging, sweeping
slash at mid height. A good situation for this would be
an opponent that crouches constantly and ankle bites.
His head exposed, this slash would let you lunge in and
1
2
3
hit his head.
2.) This attack requires the use of a quick hop forward
by hitting forward twice. You would use the first part
of the strike, quick hop forward from #9 to #1, as an
opener. Then if the surprise worked, try for the second
part. Turn your body to the right for a second #4 to #6
slash attack. A good situation for this would be hopping
forward and hitting a Dwarf on your right, then turning
your body to the right and striking him again with the
second slash.
3.) This attack requires you to flip. At about mid flip hit
#8 to #2. This would be used to start a barrage of
attacks. A good situation for this would be running
towards a Dwarf and flipping at him, striking him from
an unusual angle, then landing and continuing an assault
against him.
Die by the Sword
41
Page 42

4.) This attack is from #4 to #6. You would use it
while you jump past an opponent on its left side. It
has a good chance of striking at an opponent’s tender
backside. A good situation would be to leap past an Orc
on its left side, then rotating to the right and delivering
a massive #4 to #6 slash.
4
5.) This attack is from #9 to #7 then #1 to #3. If you
keep attacking one spot on an enemy, there is a good
chance that your enemy will get smart sooner or
later and defend the unprotected zone. This tactic
may confuse them a bit. You would do the #9 to #7
slash first. Then switch quickly and do the #1 to #3
5
6
slash. If you turn your body with the swing, you can
do some decent damage and possibly catch them off
guard. A good situation for this is when you are battling a friend in a net game and he has learned how
to block your basic swings. Extend is recommended
for maximum force.
6.) This move is very difficult and only minorly
effective. You would only gain style points from
your friends for doing this one. Sooner or later
you’re going to be good enough to show off after
you’ve cut your friend’s head off. A good situation
for this is to cut off a friend’s head and then do this
#9 to #1 to #7 to #3 maneuver. Is not recommended
for the heat of battle, but more as a challenge to a
downed foe.
Tantrum
42
Page 43

Tips, Hints, and General Rubbish
DOUBLE ARM VSIM CONTROLS
Unique to those creatures with the ability to attack with both arms is a
control system that is equipped to handle these special cases. A character like
Magmar the Earth Elemental is a perfect example.
You cannot choose this control system. It is linked to specific characters
that can attack with both arms. Furthermore, you need to be in VSIM (keyboard) control mode to use it. You would use this control method as you would
normal VSIM, but now you have the ability to control both arms.
Keys (keypad):
7, 4, 1 Left arm activates
8, 5, 2 Right arm activates
9, 6, 3 Right arm activates
These Keys show how to gain control of a specific arm. The key you begin
a motion with determines which arm will be activated. So if you began a
motion with say "6", you would be controlling the right arm. As long as you
continually hold a button after this, you will not lose control over the right arm.
You lose control of an arm when you let go of the keys for a brief moment.
You may be asking yourself "Well holding a single button down is good and
all to gain control of an arm, but how do I swing without losing control of that
arm?" Here's how: Continue to hold "6" as you press the next button say "4".
This will keep the right arm activated and it will swing. As you press "4" you
can let go of "6" without losing control because a button is still being held. As
long as the thread isn't broken by letting go of the keys, the right arm will
remain activated.
With a little experimentation you'll see how long exactly it takes to lose
control of an arm so the other can be activated. You still only control one arm
Die by the Sword
43
Page 44

at a time, but now you can switch to the other arm with relative ease by
letting go of the keys for a brief moment and starting a motion with the
opposite arm.
In some circumstances, where you fight is as important as what you fight.
Use the area to your advantage. Use walls, light elevations, fire pits etc…
Even a single crate can have tremendous effects on the fight if used correctly. Use higher elevations to gain more power from a leaping attack. Gravity
helps your sword a bit when swinging toward the ground.
Leap over obstacles to avoid enemies. Even a human player sometimes
will be tripped up over a box you just leaped.
If there are two or more opponents, do as the Wolf does; separate one from
the pack and tear it to shreds.
Your weapon is always an active weapon when it’s in your hand. If something runs into your sword, even if it wasn’t swinging, they will take damage. Likewise for you. Be cautious when attempting to jump onto your
opponent.
A very nice tactic is to leap past your opponent, turn in the air as you pass
and hack him from his undefended backside.
Ankle biting is also an effective trick. Many creature’s legs are easy to get
to compared to their heads.
Tantrum
44
Page 45

In VSIM only, if you hold your sword in the #3 position (which is low and
behind you), you can walk a little easier through enemies due to your
weapon not getting cluttered with your enemies. O’course you’ll be wide
open to attacks…
The neck is often the weakest section of an enemy, but a very difficult target
to consistently hit.
The rope trap is devious. If you are foolish enough to wind up in one of these,
you have three choices. Cut the rope with your sword by crouching and using
low slashes to hit the rope. Rotating in a direction helps as well. Otherwise,
you can sheath your sword and use the Action key to untie yourself. Lastly,
you can just fight upside down.
If you play as a kobold in a network game, it’s been noted that they are great
for sneaking up and stealing kills! (li’l bastards!)
Turn your body in the direction of slashes. If your slash is heading to your left,
turn your body to the left to add force to the strike. It helps alot.
In VSIM only, the Extend key (#0) is god. Use it happily and often to fully use
your arsenal to its full potential. (More power for full force.)
In the Move editor, use the off-arm when making moves to enhance your
strikes. If both arms travel in the same direction, much more force is added to
the swing.
Keep in mind that you can still turn and move while jumping in the air.
Die by the Sword
45
Page 46

Use sidestep along with the other movement keys to ease navigation.
Remapping the climb key to Keypad(*) seems to help for more complex
jump climb maneuvers. It will be double mapped with the Action key, but
they won’t cause any problems double mapped.
To increase your chances of blocking damage, use either parry or blockmode. Use positioning to put your shield between you and the oncoming blow if possible. But still, by all means, the best way to not get damaged is don’t get hit.
In quest mode, don't gobble every bit of healing you find. If you don't need
it, keep it around. It may come in handy later.
Not all monster species are friendly with each other. Exploit the conflicts
that exist amongst the monsters to maximize your gain.
Monsters are just as susceptible to hazards in the game as you are. Take
advantage of it and knock Orcs into the water.
With VSIM, don't bang on the keys. Have patience and hold the keys to
apply force to your sword.
Maneuvering is very significant.
Observe your enemy. Try to target areas that aren't protected by a shield
or a weapon. Staying crouched for too long is asking for a decapitation.
“Thank you, Sir, may I have another?”
Tantrum
46
Page 47

Against multiple opponents, try to keep your current target between
you and the other enemies. To be surrounded is not an ideal position. Kobolds
are notorious for surrounding their quarry. This gives them a chance to pull
off their devastating wedgie attack.
When making custom moves remember that you have the option to put a
defensive motion in it. For instance, have the character wave their off arm as
a feint before striking with the weapon arm.
Use quick moves to gain the initiative on the first strike. A quick hop forward
can get you nose to nose with these uglies.
Keep the relative strengths and weaknesses of your opponent in mind while you
fight him. Trading blows with an ogre never works. And running from a Kobold
will get you laughed at by most of the denizens of the caves…
Don’t rush into battles. There is no time limit. Plan your strategy and tactics
and attack when the time is right.
Die by the Sword
47
Page 48

EDITOR CREDITS
Special thanks to those that made special moves for the Die by the Sword moves CD.
We hope that their creativity sparks ideas for many players when they themselves
create custom moves. You can also find these specially crafted moves on Interplay’s
website… www.interplay.com.
GLENN BRODERICK- Associate Editor - OGR
PETE HINESCHRIS HUDAK- Freelancer for: VGA, Digital Diner, Request, GameSpot, Playboy, Wired
MIKE MIKACHRIS KRAMER- Editor in Chief - VooDoo the official 3Dfx magazine
DAN AMRICH- Associate Editor - GamePro
ROB SMITH- Senior Reviews Editor- PC Games
Editor - Andrenaline Vault
Editor- Next Generation
CREDITS
TREYARCH CREDITS
Programming- Dr. Peter Akemann, Don Likeness, Jamie Fristrom, Charles Tolman
Production- Chris Busse, Mark Nau, Dr. Peter Akemann
Art Direction- Chris Soares
Special thanks to- OutpostX for the facilities
Art- Chris Soares, Chris Busse, Tomo Moriwaki
Level/Arena Design- Mark Nau, Chris Busse, Tomo Moriwaki, Chris Soares
Other Stuff- Tomo Moriwaki
Additional Programming- Mark Fielding
Additional Art- Phil Salas, Eric Alwill
Additional Programmer Art- Mark Nau, Jamie Fristrom
Chaos Master- Eric Steinman
Technical Advisor- Melodee M. Spivak, Anthony de Longis (Swords of Glory)
Tantrum
48
Page 49

TANTRUM CREDITS
Tantrum Division Director/Executive Producer- Alan Pavlish
Producer- Alan Barasch
Additional Producing- Mark Teal, Derek Bullard, Ali Atabek
Design- Fred Corchero
Non-engine animation- Mike McCarthy
INTERPLAY CREDITS
Vice President of Development- Trish Wright
Video Compression- Bill Stoudt
Audio Director- Charles Deenen
Mastering- Craig Duman
Temp mastering- Caron Weidner
Level Sounddesign- Gregory R. Allen, Larry Peacock, David Farmer ,
Level Music- Rick Jackson, Ron Valdez, Brian Luzietti
VO actors- Brian Cummings as Enric, Dwarf
VO editing- Frank Szick
VO Manager/Director- Chris Borders
Cinematics Music- Richard Band
Cinematics Sounddesign- David Farmer , Harry Cohen ,
Cinematics Re-recording Mixing and Editing- Charles Deenen
Re-recording mixing and editing- Charles Deenen
Harry Cohen
Tony Jay as Wizard, Grub
Michael York as Instructor
Larry Peacock as Kobold, Ogre
Charles Deenen
Mixed in
Audio Administration- Gloria Soto
Manual Layout- Holly Lambert
4 at Interplay Audio on
Die by the Sword
49
Page 50

DIGITAL VOODOO:
Director- Jay Patel
3D support, Installer- Darren Monahan and Gabriel Valencia
Movie Player-Paul Edelstein
QUALITY ASSURANCE:
Director of QA- Chad Allison
QA Manager- Steve Victory
Lead Testers- Erick Lujan, Frank Wesolek
Testers- Matthew Golembiewski, Robert Hanz, Robert Lark, Robert Giampa, Doug
QA IS Manager- Frank Pimentel
QA IS Technicians- Bill Delk, Christian D. Peak
Director of Compatability- Phuong Nguyen
Compatability Technicians- Dan Forsyth, Derek Gibbs, John Parker, Marc Duran,
LOCALIZATION:
Localization coordinator- Tom Decker and Julian Ridley
Localization Testers- Heike Walther (German), Marina Bermon (French)
Finch, Larry Smith, James Harrison, Scot Humphreys, Erik Guenther and
Robert Nichols
Aaron Oliaz
Raphael Lopez (Spanish)
If you have any questions about this, or any other Interplay product, you can reach our Customer
CUSTOMER SUPPORT
Service/Technical Support Group at: Interplay Productions, 16815 Von Karman Avenue, Irvine, CA
92606 Attn: Customer Service. Customer Service is available 24 hours a day through our
Automated Customer Service system, with a Customer Service representative available during
normal business hours at (714) 553-6678.
Please have your system information available, or better yet, try to be at your computer. The more
detailed information you can provide our support personnel, the better service we can provide you.
If you have a modem, you can reach us at the following:
Tantrum
50
Page 51

Internet
You can reach Interplay by sending Internet E-mail to "support@interplay.com". Many
Interplay demos and patches are available at Internet FTP sites. To visit our World
Wide Web site, point your browser to: "http://www.interplay.com" or you may ftp to
ftp.interplay.com.
The Interplay BBS
We have a 24-hour, 7-day a week multiline BBS available for customer questions, support and
fixes. The number is 714-252-2822. Modem settings are 300-28.8k Baud, V.32bis, V.42bis, 8-N-1.
You also may contact our BBS over the Internet. Telnet to bbs.interplay.com. This is a free service. (Excluding toll charges.)
America Online
You may E-mail Interplay Customer Support at IPTECH.
Compuserve
We are available for IBM and compatible on-line support. We are located in the Game Publishers
B Forum, type GO GAMBPUB at any "!" prompt. Then select "Section 4" for Interplay
Productions. You can leave technical support questions there. You can also download fixes and
demos from Library 4 in GAMBPUB. The best place for game play hints about our games is in the
GAMERS forum. If you are not already a CompuServe member, you can call CompuServe tollfree at 1-800-524-3388 and ask Representative #354 for a free introductory membership and a $15
usage credit. For game play hints look in the Gamer's Forum (GO GAMERS). Besides technical
support for Interplay products, CompuServe offers many other services, including communications, reference libraries, hardware and software support, travel, games and much more.
Interplay warrants to the original purchaser of this Interplay ProductionsTMproduct
INTERPLAY LIMITED 90-DAY WARRANTY
that the compact disc or on which the software programs are recorded will be free from
defects in material and workmanship for 90 days from the date of purchase. If the compact disc is found defective within 90 days of original purchase, Interplay agrees to
replace, free of charge, any product discovered to be defective within such period upon
receipt at its factory service center of the product, postage paid, with proof of the date of
purchase. This warranty is limited to the compact disc containing the software program
originally provided by Interplay and is not applicable to normal wear and tear. This shall
Die by the Sword
51
Page 52

be void if the defect has arisen through abuse, mistreatment, or neglect. Any implied
warranties applicable to this product, including warranties of merchantability and fitness
for a particular purpose are disclaimed. Interplay disclaims all responsibility for incidental
or consequential damages. Some states do not allow limitations as to how long an
implied warranty lasts and/or exclusions or limitations of incidental or consequential
damages so the above limitations and/or exclusions or liability may not apply to you.
This warranty gives you specific rights, and you may also have other rights which vary
from state to state.
LIMITED WARRANTY
If the compact disc should fail after the original 90-day warranty period has expired, you may
return the software program to Interplay at the address noted below with a check or money order
for $5.00 (U.S. currency), which includes postage and handling, and Interplay will mail a replacement to you. To receive a replacement, you need to enclose the original defective compact disc
in protective packaging accompanied by: (1) a $5.00 check or money order, (2) a brief statement
describing the defect, and (3) your return address. If you have a problem with your software, you
may wish to call us first at (714) 553-6678. If your compact disc is defective and a replacement is
necessary, U.P.S. or registered mail is recommended for returns. Please send the defective disc(
only (not the box) with a description of the problem and $5.00 to:
Warranty Replacements
Interplay Productions
16815 Von Karman Avenue
Irvine, CA 92606
COPYING PROHIBITED
This software product and the manual are copyrighted. All rights are reserved by Interplay
Productions and are protected by the copyright laws that pertain to computer software. You may
not copy the software except that you may make one copy of the software solely for backup or
archival purposes. You may not loan, sell, rent, lease, give, sub license, or otherwise transfer the
software (or any copy). You may not modify, adapt, translate, create derivative works, decompile, disassemble, or otherwise reverse engineer or derive source code from, all or any portion of
the software or anything incorporated therein or permit or encourage any third party to do so.
Notice: Interplay reserves the right to make modifications or improvements to the product
described in the manual at any time and without notice.
Tantrum
52
Page 53

SOFTWARE USE LIMITATIONS AND LIMITED LICENSE
This copy of Die by the Sword (the “Software”) is intended solely for your personal noncommercial
home entertainment use. You may not decompile, reverse engineer, or disassemble the Software,
except as permitted by law. Interplay Productions and Cetasoft retain all right, title and interest in
the Software including all intellectual property rights embodied therein and derivatives thereof.
The Software, including, without limitation, all code, data structures, characters, images, sounds,
text, screens, game play, derivative works and all other elements of the Software may not be
copied, resold, rented, leased, distributed (electronically or otherwise), used on pay-per-play, coin-op
or other for-charge basis, or for any commercial purpose. Any permissions granted herein are provided on a temporary basis and can be withdrawn by Interplay Productions at any time. All rights
not expressly granted are reserved.
Modem and Network Play: If the Software contains modem or network play, you may play the
Software via modem transmission with another person or persons directly without transmission
through a third party service or indirectly through a third party service only if such service is an
authorized licensee of Interplay. For the purposes of this license, a “third party service” refers to
any third party service which provides a connection between two or more users of the Software,
manages, organizes, or facilitates game play, translates protocols, or otherwise provides a service
which commercially exploits the Software, but does not include a third party service which
merely provides a telephonic connection (and nothing more) for modem or network play.
Authorized licensee services are listed on the Interplay Productions World Wide Web Site located at http://www.interplay.com. This limited right to transmit the Software expressly excludes
any transmission of the Software or any data streams thereof on a commercial basis, including,
without limitation, transmitting the Software by way of a commercial service (excepting those
specific commercial services licensed by Interplay) which translates the protocols or manages or
organizes game play sessions. If you would like information about obtaining a pay-for-play or
commercial license to the Software, please call Interplay Productions in the US at (714) 553-6655.
Acceptance of License Terms: By acquiring and retaining this Software, you assent to the terms
and restrictions of the limited license. If you do not accept the terms of this limited license, you
must return the Software together with all packaging, manuals and other material contained
therein to the store where you acquired the Software for a full refund.
Die by the Sword
53
Page 54

Welcome to the Interplay Web! As a company dedicated to providing innovative, highquality interactive entertainment software, we are always striving to stay as close as possible to the leading edge of technology. This Web site is the latest example of our ongoing
effort to provide a wealth of information and opportunities to you.
As a company of fanatic gamers, we love the idea of gamers all over the world tapping
into cyberspace to see, touch and feel our latest games. No hype, no marketing campaign;
just great games. To make it work, our goal is to keep this site fresh and new, to make it a
place where you can tell US what you like about our games... and what you don’t like
about them. So use the feedback options on these pages and sound off.
Enjoy your visit in our Web site, explore all the different areas we have to offer, and
come back soon. Check us out in the weeks and months ahead; we will be introducing new
and exciting areas for you to experience.
Once again, welcome.
Brian Fargo
C.E.O.
Interplay’s World Wide Web site is an Internet service designed to give you the latest information
about Interplay and our products.
This site features our demos, upgrades, product
information and ordering information.
How to get there
From your Internet account,
point your favorite browser to:
www.interplay.com
Tantrum
54
INTERPLAY WEBSITE
Page 55

D
on’
t
G
et
.
G
Mad
.
.
Get
DIE BY THE SWORD
OFFICIAL
By Jonathan Mendoza
Strategies & Secrets™
e
v
en!
E
t
OFFICIAL
ISBN: 0-7821-2298-1
Available in stores everywhere or
order it direct from
(bookshops+online)
www.cbooks.com www.sybex.com
The only strategy guide written with the
complete cooperation and approval of
Interplay™ Productions.
In this essential guide you’ll find:
• Walkthroughs and maps of every level
• Combat strategies and tactics
• A probing look at Enric’s quest to rescue
his true love Maya
©1998, Sybex Computer Books
Page 56

tantrum@interplay.com
Interplay Productions
16815 Von Karman Ave.
Irvine, CA 92606
(714) 553-6678
www.interplay.com
MN-H95-519-0
 Loading...