

Page 1
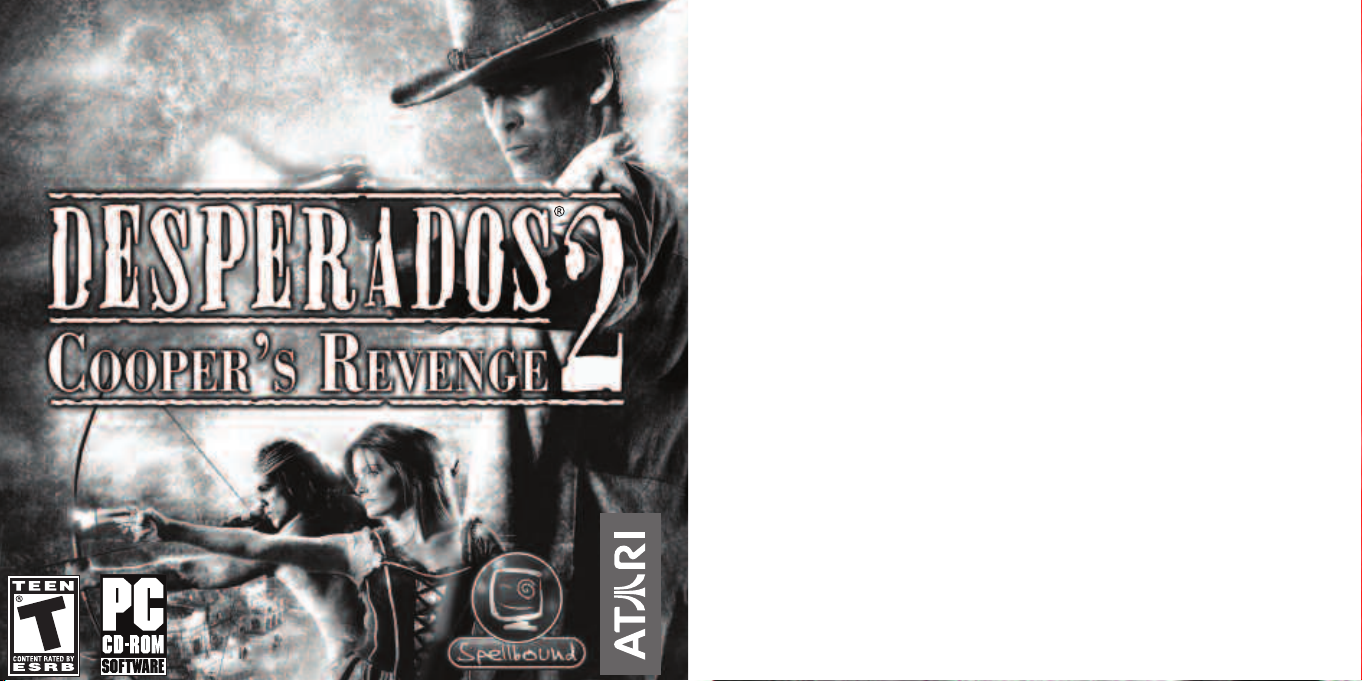
Instruction Manual
Page 2

Table of Contents
Getting Started . . . . . . . . . . . . . . . . . . . . . . . . . . . . . . . . .2
Game Menus . . . . . . . . . . . . . . . . . . . . . . . . . . . . . . . . . .4
Game Controls . . . . . . . . . . . . . . . . . . . . . . . . . . . . . . . . .6
Desperados®2: Cooper’s Revenge . . . . . . . . . . . . .8
Playing
Bad Guys and Bystanders . . . . . . . . . . . . . . . . . . . . . . . .16
Quick Actions . . . . . . . . . . . . . . . . . . . . . . . . . . . . . . . . .17
Bounty Hunters . . . . . . . . . . . . . . . . . . . . . . . . . . . . . . .19
Credits . . . . . . . . . . . . . . . . . . . . . . . . . . . . . . . . . . . . . .26
Atari Web Sites . . . . . . . . . . . . . . . . . . . . . . . . . . . . . . . .28
Technical Support . . . . . . . . . . . . . . . . . . . . . . . . . . . . . .29
End-User License Agreement . . . . . . . . . . . . . . . . . . . . .31
ataricommunity.com
ataricommunity.com
1
1
Page 3
Getting Started
The ReadMe File
Desperados®2: Cooper’s Revenge has a ReadMe file where you can view both the License
Agreement and updated information about the game. We strongly encourage you to read
this file in order to benefit from changes made after this manual was finalized.
To view this file, double-click on it in the
on your hard drive (usually C:\Program Files\Atari\Desperados 2: Cooper’s Revenge). You
can also view the ReadMe file by first clicking on the Start button on your Windows
taskbar, then on Programs, then on Atari, then on Desperados
then on the ReadMe file.
System Requirements
Operating System: Windows®2000/XP
Processor: Pentium
Memory: 512 MB RAM
Hard Disk Space: 4 GB free
CD-ROM Drive: 6X speed or faster
Video: 128 MB Hardware T&L-compatible video card*
Sound: DirectX
®
DirectX
: DirectX®version 9.0c (included) or higher
*Video cards that do not have hardware shader support, such as the GeForce 4 MX or any Intel
Integrated graphics, are not supported.
Desperados®2: Cooper’s Revenge directory found
®
®
2: Cooper’s Revenge, and
®
4 1.9 GHz or AMD Athlon™XP 1900 or higher
®
version 9.0c-compatible sound card
SETUP AND INSTALLATION
1. Insert Desperados
2. If AutoPlay is enabled, a title screen should appear. If AutoPlay is not enabled, or the
installation does not start automatically, click on the Start button on your Windows
taskbar, then on Run. Type D:\Setup and click on OK. Note: If your CD-ROM drive is
assigned to a letter other than D, substitute that letter.
3. Follow the remainder of the on-screen instructions to finish installing
Cooper’s Revenge.
4. Once installation is complete, click on the Start button on the Windows
choose Programs / Atari / Desperados 2: Cooper’s Revenge / Desperados 2: Cooper’s
Revenge to start the game.
Note: You must have Desperados
play.
Installation of DirectX
Desperados®2: Cooper’s Revenge requires DirectX
not have DirectX
would like to install it.
®
2: Cooper’s Revenge Disc 1 into your CD-ROM drive.
Desperados®2:
®
taskbar and
®
2: Cooper’s Revenge Disc 1 in your CD-ROM drive to
®
®
®
9.0c or higher installed on your computer, click “Yes” when asked if you
9.0c or higher in order to run. If you do
®
ataricommunity.com
ataricommunity.com
32
Page 4
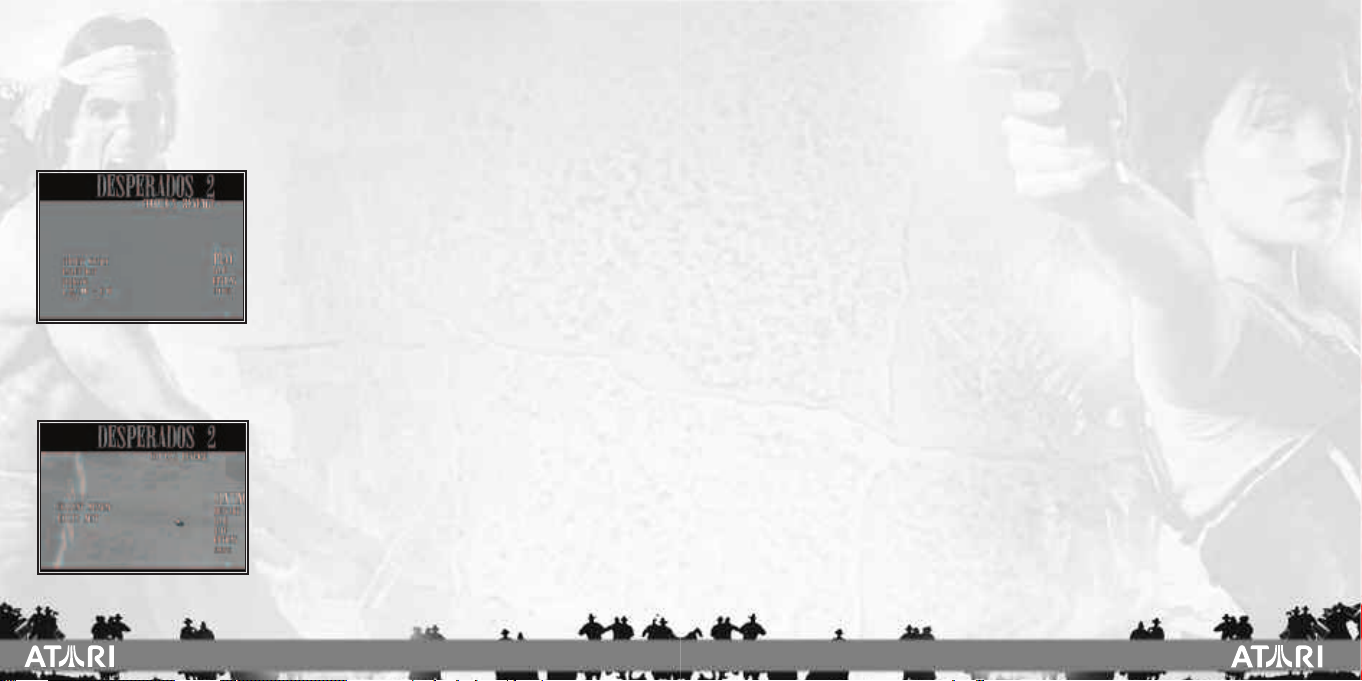
Game Menus
Start Menu
As soon as you start the game, the Start Menu appears. Here you can access the Main
Menu, change the installation options and read the manual.
Main Menu
Click on “Start” at the Start Menu to display the Main
Menu, which contains the following options:
Play – Start a new game or continue the game from the
last saved point.
Load – Load a saved game.
Options – Open the Options Menu (see Options Menu on
page 5).
Credits – Shows a list of people involved with the development of Desperados
Exit game – Closes the game and returns to Windows.
Game Menu
While playing the game, press the [ESC] key to open the
Game Menu, where you can choose from the following:
Continue – Return to the game in progress. You can also
resume playing by pressing the [
Restart – Start the current mission from the beginning.
Note: All unsaved progress will be lost.
Load – Load a saved game.
Save – Save the current game.
ESC] key again.
®
2.
Options – Open the Options Menu.
Credits – Show a list of all the people involved with the development of the game.
Exit game – Quit the game.
Saving and Loading a Game
You can save a game by clicking on the “Save” option in the Game Menu.You’ll be
required to choose a name for your save file.
Quick Save
During the game you can press the [F5] key to “quick save” your progress. To load the
most recent quick save, press the [
previous quick save game. To load this game, press [
option in the Main Menu or in the Game Menu.
F8] key. Desperados®2 also keeps a backup of your
SHIFT + F8] or choose the “Load”
Options Menu
Click on “Options” in the Game Menu or in the Main Menu to adjust the following game
options:
Video settings – Change the video resolution or the level of detail of the game graphics.
Audio settings – Adjust the volume of music, background sounds and speech.You can
also turn subtitles ON or OFF, and adjust the frequency of PC commentary.
Mouse Configuration – Adjust the mouse settings.
Game Controls – Change the keyboard settings to suit your requirements. The default
keyboard setting is described on the following spread.
Game Difficulty – Adjust the difficulty level.
ataricommunity.com
ataricommunity.com
54
Page 5
Game Controls
Confirm action Left mouse button
Reject action Right mouse button
Go forward / Scroll map up [W] / Arrow up
Go backward / Scroll map down [S] / Arrow down
Go left / Scroll map left [A] / Arrow left
Go right / Scroll map right [D] / Arrow right
Free scrolling Click and hold right and left mouse buttons and move the
Zoom in on the map Hold down the right mouse button and move the mouse
Zoom out from the map Hold down the right mouse button and move the mouse
Stand [T]
Kneel [G]
Lie down [B]
Lean left / Rotate the map to the left [Q] / [NUM 0]
Lean right / Rotate the map to the right [E] / [NUM ,]
Free rotation Click and right mouse button and move mouse left / right
Toggle walk / run [CAPSLOCK]
Reload weapon [R]
Toggle tactical view / action view [TAB]
Contextual action [SPACEBAR]
Special action 1 [F1]
Special action 2 [F2]
Special action 3 [F3]
Special action 4 [F4]
Draw a selection frame Click and hold left mouse button and move mouse
mouse
up / [NUM +]
down / [NUM -]
Select John Cooper [1]
Select Kate O’Hara [2]
Select Doc McCoy [3]
Select Sam [4]
Select Sanchez [5]
Select Hawkeye [6]
Select all available heroes [`]
Record a Quick Action [\]
Confirm a Quick Action / Perform [ENTER]
Quick action on visual contact [']
Delete Quick Action [BACKSPACE]
Display View Cone [ALT]
Display noise area [N]
Move with a drawn weapon [CTRL]
Click behind [SHIFT] + left mouse click
Mini-map [M]
Mission Menu [X]
Quick save [F5]
Quick load [F8]
Quick load backup [SHIFT] + [F8]
ataricommunity.com
ataricommunity.com
76
Page 6
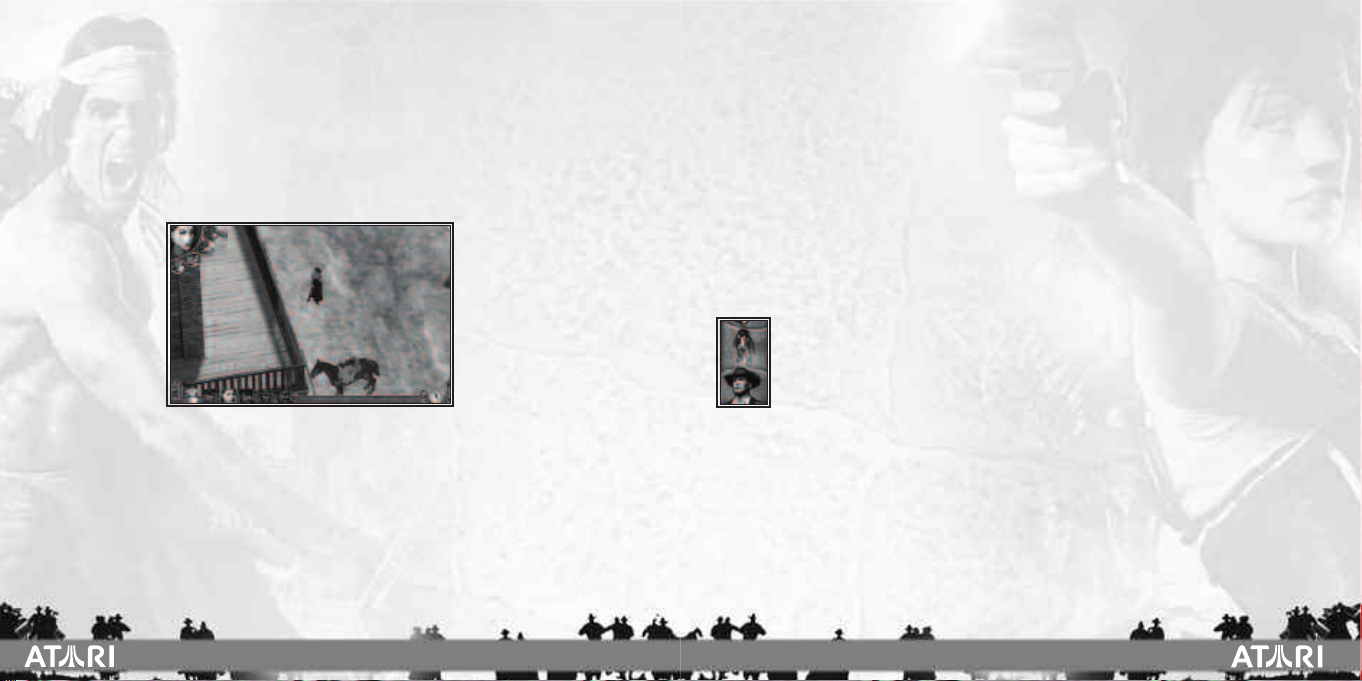
Playing Desperados®2: Cooper’s Revenge
In Desperados
and rowdy tour of the old Southwest. Each character you control has a unique set of
skills and items you must master to survive the challenges you’ll face. It will take a combination of teamwork, stealth, deception and down-and-dirty gun slinging to survive.
All action takes place in an overhead tactical view or an up-close, over-the-shoulder
action view. How you choose to view it depends on your preference — and the situation
at hand.
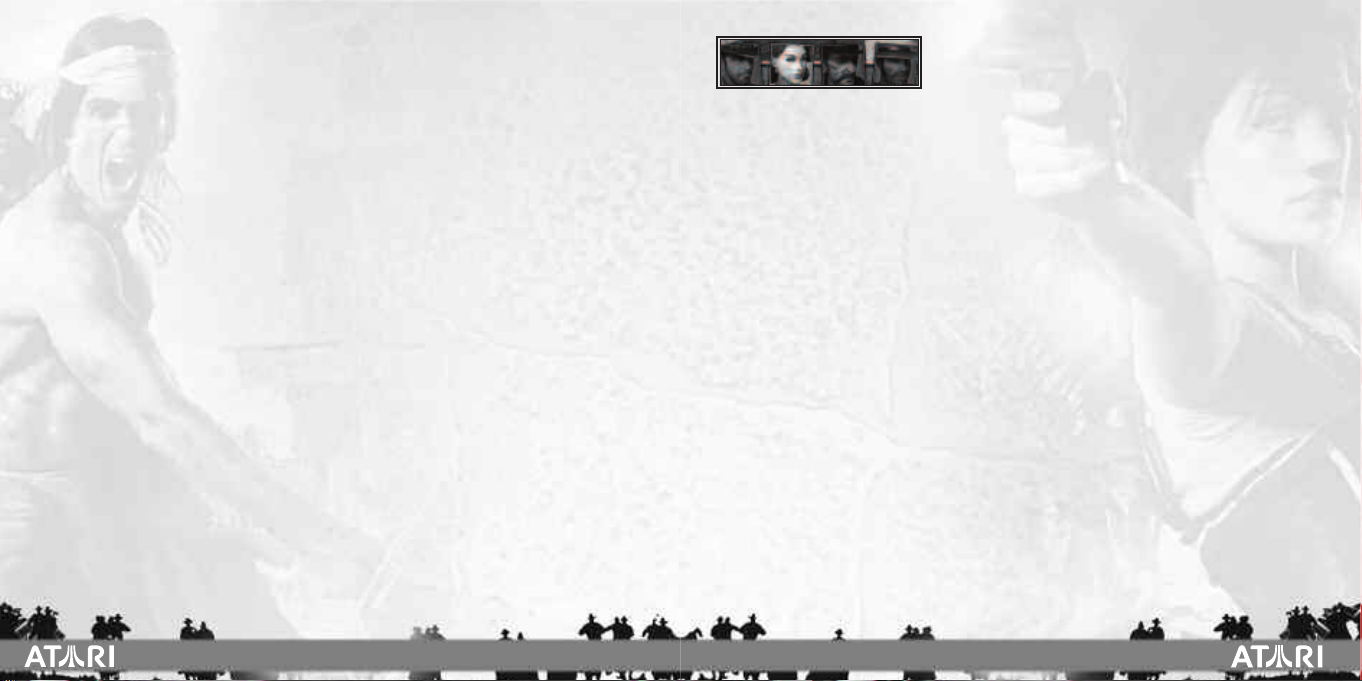
1. Selected Character – When you select a hero, either by clicking on them directly or
on his or her portrait, he or she shows up here. Click on an object icon or press [
[
F4] to select an action to perform.
2. Character Position – These three icons let you change the position (stand, crouch,
crawl) of the selected character.The character will remain in this mode until you change
positions again. You can also change positions by pressing the [
3. Quick Action Record – Press the hourglass icon to start recording a Quick Action for
the selected character. For more information, see “Quick Actions” on page 17.
®
2: Cooper’s Revenge, you control a gang of six bounty hunters on a rough
F1] to
T], [G], and [B] keys.
4. Character Portraits – Click on a character portrait to select that character. Double-
click on a portrait to select a character and center the view on him or her.
5. Sight Beam Tool – Click on this icon and then hover the cursor over an NPC to see the
field of view of that character.You can also press and hold the [
Sight Beam Tool on.
6. Noise Tool – Click on the Noise Tool icon to display the area in which NPCs can hear
the selected character.
7. Compass – This shows the direction that the view is currently facing. Click on the
compass icon to reorient the view so that north is at the top of the screen.
8. Mission Goals – Click here to display a mini-map and your current mission objectives.
9. Tactical View – Click here to change to the overhead tactical view.
10. Action View – Click here to change to the third-person action view.
ALT] key to toggle the
Game Views
There are two ways to view the action in Desperados
cal mode and action mode. The mode you choose will depend on the situation
and your strategies.
Tactical Mode
Tactical mode displays the action in an overhead view. This mode lets you see more characters and buildings, and is the best for plotting out your overall strategy for winning a
mission.
To scroll the overhead view in tactical mode, press the arrow keys or move the mouse
cursor to an edge of the screen. You can zoom in/out by right clicking and moving the
mouse forward/backward or by turning the mouse wheel. You can also zoom in/out with
NUM +] and [NUM –] keys.
the [
®
2: Cooper’s Revenge: tacti-
ataricommunity.com
ataricommunity.com
98
Page 7
To rotate the view in tactical mode, right click and move the mouse left/right.
Action Mode
For an up-close, over-the-shoulder view of the action, switch to action mode. This mode
is best for maneuvers that require detail, such as moving through the shadows to pick off
an enemy with a sniper rifle.
Controlling Characters
There are two categories of characters in the game: PCs and NPCs.
The PCs (Playable Characters) are the six heroes that you can control. At the start, only
John Cooper is available to you. The other team members join as the game progresses,
and may possibly leave the gang or not be present on some missions.
The second group is the NPCs (Non-Playable Characters), who populate the world of
Desperados®2: Cooper’s Revenge. They can be either armed opponents or innocent civil-
ians, with whom you can interact in various ways. (See “Bad Guys and Bystanders” on
page 16.)
Despite the valuable services they rendered, bounty hunters were not highly regarded in
the Wild West. Not every NPC will be hostile, but the best strategy is usually to avoid
attracting attention. You therefore have a range of options available for distracting opponents, luring them away, disposing of them silently or causing them some brief irritation.
In extreme situations, reaching for your Colt may be the only way out. Often, though, this
will only double your problems, rather than solve them.
Shooting at civilians, on the other hand, is not allowed.The only way to put a civilian out
of action, albeit temporarily, is to deal him a knockout punch or a breath of sleeping gas
and to tie him up.
Selecting PCs
To highlight a PC in tactical mode, left click directly on that
the screen. Double-click a character icon to select that character and center the view on
him. You can also directly choose the characters by pressing the [
To select multiple PCs, left click on any point on the map and drag a frame around the
characters you want to select. You can also hold down the [
keys [
1] through [6] or clicking on the portrait of a character on the lower edge of the
screen. To select all available PCs press the [
Undoing the selection
Right click on any point on the map if you want to deselect all of the PCs. If you only want
to deselect some of the PCs, left click on the character or on its portrait on the lower edge
of the screen, or draw a frame around the characters you want to deselect. You can also
hold down the [
SHIFT] key while pressing keys [1] through [6] to deselect certain PCs.
character or click on the character icon at the bottom of
1] to [6] keys.
SHIFT] key while pressing
`] key.
Moving a Character
Once you have a character selected, you can move him or her by left clicking anywhere
on the screen. Double-click on any point on the map to make the character run to that
location. If the cursor is over an area that the character can’t reach, it will display as a red
cross.
To move a character while you are in action mode, press the [
[
S] key to move backward, and the [A] and [D] keys to move left/right. You can also move
a character using the arrow keys. Press the [
In the game your heroes can stand, crouch or lie. Press the [
stand up, the [
lie down.
G] key to make the character crouch, or the [B] key to make the character
CAPSLOCK] key to toggle run/walk.
W] key to move forward, the
T] key to make the character
ataricommunity.com
ataricommunity.com
1110
Page 8

You can also left click on the symbol of the standing, crouching or lying character in the
lower-left corner of the screen.
You can stop any moving character by right clicking anywhere.
Performing Actions
Left click on one of the action symbols next to the image of the selected character, in the
If an action is no longer available or a required object is not present (for example Sam is
out of dynamite sticks), the corresponding action symbol will be grayed-out.
Other Actions
When you move the cursor over an object with which the selected character can interact,
it will take the form of the corresponding context action. For example, Cooper can carry
an unconscious body while Kate can kick an enemy. As soon as the cursor is placed over
an object with which the selected character can interact, it will take the form of the corresponding context action. Remember: not every character can perform all context
actions (for example, Doc, unlike Cooper, cannot carry a body, but he can tie up unconscious enemies).
Contextual actions can also be used in 3rd person view by pressing the [
while a PC is next to an object or person that can be interacted with.
upper-right corner of the screen, or press the [
to select a special action.
For example, to make Doc throw a gas phial and knock out a
group of enemies, select Doc and then click on the gas phial
icon (or press [
and area that the gas will affect. Left click on the area and Doc
will toss the gas phial. Right click anywhere on the screen to
cancel an action.
F3]). The cursor will change to show the range
F1] to [F4] keys
SPACEBAR]
Moving With a Drawn Weapon
In tactical mode, you must hold down the left [CTRL] key and left click on any point on
the map to make a character move to that location with his or her weapon drawn. As
soon as you release the [
CTRL] key, the character will stop and be ready to fire.
Entering Buildings
If your character is able to enter a building covered by a roof,
the roof will become transparent when you move the cursor
over it. Simply left click inside of the building to make your
character go inside. If there are two levels on a building and
are both accessible, you can reach the upper one by left
clicking. To enter the lower level, hold down the [
while left clicking.
To enter a building while in action mode, simply direct your character into the building
with the arrow keys or the [
Locked Doors
Doc is the only character who can open most locked doors. Select Doc and left click on
a locked door to make him pick the lock.
W], [S], [A], [D] keys.
SHIFT] key
Weapons
Standard weapons differ in range, firing rate, penetrating power and magazine size. For
example, Sanchez’s shotgun and Cooper’s Colt are deadly at short range, but rapidly
lose effectiveness at a distance.
A weapon’s crosshairs indicates the probability of it hitting its target. The closer the reticles of the crosshairs zoom together, the higher the probability to hit. When the
crosshairs are red, you are not able to hit.
ataricommunity.com
ataricommunity.com
1312
Page 9

Ammo
The PCs you control have a limited amount of ammunition and objects. You can often find
additional supplies in your surroundings — for example fallen enemies drop ammunition.
You can see these in the main view, or open the mini-map and look for a green cross.
To pick up an ammunition supply or object, select the PC who will pick it up and left click
on the object or simply move there to collect it. A character can only collect these extra
objects if he or she can use them (i.e. Doc cannot collect dynamite and Sam cannot collect gas phials).
Reloading a Weapon
Characters automatically reload their weapons during pauses in gunfights, if they are not
fully loaded or empty.You can manually reload a weapon by pressing the [
reloading takes too long, you can interrupt it by right clicking or simply by starting to
shoot again.
R] key. If
Health
If your character is wounded in a fight, his or her portrait will turn red to indicate the
extent of the damage taken. If the character loses all his or her life points and the portrait
turns completely red, then he or she dies.
Doc and Hawkeye have the ability to heal wounded characters (including themselves). To
heal, select Doc or Hawkeye, click on the Heal action icon, and then click on the wounded
character or his or her portrait.
Mission Menu
Press the [X] key or left click on the book with
the wind rose symbol in the lower-right corner of
the screen to display the Mission Menu, which
shows you a map and an overview of all the mission goals for the current level. The map displays
the position of key characters, objects and
places. Click on a mission goal to see a description of it and some hints about where on the map
the mission goal can be fulfilled.
The game is paused while you are in the Mission Menu.
Mini-Map
Press the [M] key or left click the map icon in the upper-right corner
of the screen to view the mini-map. The mini-map is similar to the
Mission Menu map, only without the mission goals. Additionally,
using it doesn’t pause the game, so you can use it to observe how
the NPCs and your PCs are moving on the map.
ataricommunity.com
ataricommunity.com
1514
Page 10

Bad Guys and Bystanders
You as the player (and therefore your heroes) have a great advantage over the computercontrolled NPC characters: you see and hear everything. At the beginning of a scenario,
you can examine the whole map and see where your opponents are, what routes they
are patrolling and so on. They, however, won’t see or hear you until you make yourself
known.
Sight Beam Tool
What your opponents can see and hear depends on a number of factors, including the character you are controlling (some PCs can move more quietly than oth-
ers), the surroundings, and more.To find out what a particular NPC can see, click
on the eye icon on the lower-right corner, or hold down the [
sor over the desired NPC.
Place a Sight Beam Counter
If you left click on the map while in Sight Beam mode, you will place a Sight Beam
counter.The Sight Beam counter will give you information about how many NPCs can see
this point.
Noise Tool
Press the [N] key or click on the ear icon, on the lower-right corner to display the
noise area of the selected PCs.
Putting an NPC Out of Action
There are two basic ways of getting rid of an NPC: knock him out or kill him (the latter is
only advisable for armed opponents).
If you put an NPC out of action temporarily, stars will start to circle over his unconscious
body. These stars act like a timer: their number decreases gradually and the character
ALT] key and move the cur-
will wake up when the last star disappears. How quickly this happens depends on the
NPC’s constitution.
Another option for disabling an opponent is Sanchez’s tequila bottle; drunken opponents
tend to react somewhat sluggishly and suddenly lie down for a short nap.
Once an NPC is unconscious, you have a number of ways of dealing with them. For
example, Sam, Doc or Kate can tie him up and gag him so that he is permanently out of
the way (assuming he’s not discovered and freed by another NPC). Cooper, Sanchez or
Hawkeye can carry the body to an out-of-the way spot.
Quick Actions
In addition to controlling characters by selecting them and moving them to a
particular location or making them use an object, you can also create Quick
Actions, which let you tie together a number of commands.
Each PC can perform these actions all together or one at a time. Thus, at the
press of a button, you can make Kate dazzle an opponent, while Cooper
simultaneously sprints away and knocks down a second NPC and Doc throws
a gas phial at a third guard.
Recording Quick Actions
Activate the Quick Action record mode by left clicking on the hourglass icon or by pressing the [
\] key. The selected character will “remember” up to five commands, but will
not perform them immediately.You can see the commands you have assigned to a
character over his or her portrait. In tactical mode, you will also see the actions in the
form of waypoints.
ataricommunity.com
ataricommunity.com
1716
Page 11

Quick Action in Case of Visual Contact
If you click on the eye above the hourglass icon or press the ['] key before defining a
Quick Action, the selected character will perform further commands only after an enemy
has entered his/her range of vision. If another eye appears in the current Quick Action
list, your hero will wait for the next NPC.
Confirming Quick Actions
To confirm the Quick Actions you have created, left click on the thumbs-up symbol above
the hourglass or press the [
ENTER] key.
Discarding Quick Actions
Click on the thumbs-down symbol above the hourglass if you want to discard the Quick
Actions of the selected character.
Discarding Individual Quick Actions
To erase a hero’s last Quick Action, press the [BACKSPACE] key.
Performing Quick Actions
Press the [ENTER] key or left click on the double arrow symbol above the hourglass icon
to execute all Quick Actions you have created. The characters will begin to carry out the
previously defined Quick Actions.
Commands not marked with “in case of visual contact” will be performed immediately.
Commands marked with “in case of visual contact” will be performed only if an enemy
enters the range of vision of the corresponding PC. If it is not possible for your hero to
perform a planned action, this Quick Action will automatically be erased and the character will stop: you will need to start the Quick Actions again to make your hero carry out
the remaining Quick Actions.
Bounty Hunters
John Cooper
Colt [F1] – Cooper’s standard weapon holds six rounds.
This revolver has neither the range nor the power of a
rifle, but it fires faster than any other weapon.
Throwing Knife [F2] – Cooper can throw his knife at an
opponent, although he then has to retrieve it before he
can use it again.
Knife [F3] – In this mode, Cooper uses his knife to put
an opponent out of action in hand-to-hand combat.
Watch [F4] – Cooper can place his watch on the ground and set the volume of the
melody to be played back. All NPCs inside a displayed range will hear that melody. In this
way, Cooper can lure inquisitive opponents and overpower them. Cooper can retrieve his
watch at any time and the melody ceases.
Fist – Cooper’s method of silencing an opponent or civilian for a while. To punch an opponent, simply left click on him.
Carry Person – Cooper can throw an unconscious or dead person over his shoulder and
carry them away, regardless of whether they are an opponent, civilian or team member.
When Cooper carries a person, however, he cannot run. Right click to make Cooper set
the body down at a certain spot.
18
ataricommunity.com
ataricommunity.com
19
Page 12

Kate O’Hara
Derringer [F1] – Kate’s standard weapon is capable of fir-
ing three rounds. It is small, quiet and discreet, and fits
neatly into her garter.
Makeup [F2] – If Kate is near an opponent, she can blow
the powder from her makeup kit into his eyes and stun
him momentarily.This followed by a swift kick is enough
to take out most enemies.
Seduction [F3] – When Kate turns on the charm, she is able to momentarily distract an
enemy. However, the seduction does not have an extended effect and you should not
hesitate to put the seduced enemies out of commission.
Faint [F4] – This swooning maneuver will make enemies come to Kate and see what’s
wrong. If there is more than one gentleman willing to help the “fragile” lady, they might
even start to fight about her.
Kick – Kate’s kick has a similar function to Cooper’s punch, and knocks out an opponent
just as effectively.
Tie Up – When an NPC has been knocked out, Kate can tie him up and gag him so that
he poses no threat.
Doc McCoy
Buntline [F1] – Doc’s standard weapon holds six
rounds and, with its elongated barrel, has a greater
range than Cooper’s Colt.
Sniper [F2] – If you click on this symbol, Doc loads
his Buntline with special precision bullets and screws
a telescopic sight onto the barrel. His weapon then has
an even greater range. In action mode, you can aim at
enemies through the crosshairs.
Gas Phial [F3] – In his doctor’s bag, amongst all the medical equipment, Doc also carries
small bottles containing a knockout gas he developed. He can throw these at opponents,
who are put to sleep for a short time by the gas. Caution: The gas will also affect your
own team members.
Healing [F4] – When PCs are wounded, Doc can heal them.To heal a character, click the
first aid icon or press the [F4] key and then click on the person to be healed.
Tie Up – When an NPC has been knocked out, Doc can tie him up and gag him so that he
poses no threat.
Awaken Unconscious PCs – If for some reason , another team member is out cold, Doc
can immediately awaken the person regardless of the number of circling stars. A left click
on the unconscious person will do the trick.
Lock Picking – When a door is locked, Doc can use a picklock to unlock it.The door can
then be opened by any other PC.
20
ataricommunity.com
ataricommunity.com
21
Page 13

Sam Williams
Winchester [F1] – Sam’s standard weapon carries 12
rounds of ammunition and has great range, but Sam
must reload the weapon after each shot.
Dynamite [F2] – Sam can use his dynamite sticks to put
a whole group of opponents out of action. The dynamite
works only against people — you cannot use it to blow
down doors or buildings.
Nitroglycerine Can [F3] – Sam carries a limited number of nitro canisters, which he can
set on the ground to create crude land mines. Any character (including your own) that
walks over these canisters will cause them to explode and suffer damage. You can make
Sam pick up unexploded canisters by left clicking on them.
TNT Bundle [F4] – In some scenarios Sam can use a TNT bundle to blow up certain
buildings and other structures, which are indicated by a TNT bundle icon.As soon as Sam
has put the barrel in the right place, he can explode the barrel by shooting it. Be sure
Sam and other PCs are clear of the blast range before detonating!
Tie Up – When an NPC has been knocked out, Sam can tie him up and gag him so that
he poses no threat.
Sanchez
Shotgun [F1] – Sanchez’s standard weapon holds two
rounds and is the most devastating at close-range of all
the standard weapons.
Stone [F2] – Sanchez can collect stones lying around
and either throw them directly at opponents to knock
them out or in their immediate vicinity to distract them.
Tequila [F3] – Although Sam doesn’t drink it himself, he
understands the temptations of some enemies to partake, and therefore will strategically
leave bottles of Tequila around. When an opponent finds a bottle, Tequila often leads to a
complete blackout.
Bear Trap [F4] – Sanchez can set these handy devices on the ground and the next
unsuspecting enemy to walk over the bear trap will be killed.
Carry Person – Like Cooper, Sanchez can carry an unconscious or dead person. He cannot run when carrying a person. Right click to drop the body at any location.
22
ataricommunity.com
ataricommunity.com
23
Page 14

Hawkeye
Bow [F1] – This ranged weapon is as deadly as it is
silent.
Tomahawk [F2] – Hawkeye can quickly and quietly kill
foes with this close-combat weapon.
War Cry [F3] – When Hawkeye shouts his war cry,
most enemies within earshot will leave their current
positions and come to investigate. Additionally, with his
war cry Hawkeye is able to lead allied Indians against the enemy.
Healing [F4] – Like Doc, Hawkeye can heal wounded party members. Hawkeye’s healing
ability, heals and wakes up any allied characters near him.
Carry Person – Hawkeye can also carry an unconscious or dead body. He cannot run
when carrying a person. Right click to drop the body at any location.
Credits
Atari
PRODUCT DEVELOPMENT
Hudson Piehl
Executive Producer
Grant Dean
Producer
Sara Hasson
Project Planning Coordinator
SALES/MARKETING/
COMMUNICATIONS
Keith Katz
Associate Product Manager
Steve Tucker
Director of Marketing
Nique Fajors
Vice President of Marketing
Andrea Schneider
Director of Public Relations
Liz Fierro
Marketing Services Manager
Kate Crotty
Traffic Manager
Wim Stocks
Executive Vice President, North American Sales
Ryan Barr
Vice President, Corporate Communication
Christine Fromm
National Channel Marketing Manager
Jason Hartnell
Internet Development Group
Ken Ford
Director of IT and Web Strategy
OPERATIONS
Gardnor Wong
Senior Buyer
Lisa Leon
Lead Senior Buyer
Tara Moretti
Manufacturing Buyer
QUALITY ASSURANCE AND SUPPORT
Ezequiel “Chuck” Nunez
Manager of Publishing Support
Michael O’Shea
Q.A. Testing Supervisor
Dave Strang
Manager, Engineering Services and
Compatibility Lab
Ken Edwards
Engineering Services Specialist
24
ataricommunity.com
ataricommunity.com
25
Page 15

Eugene Lai
Engineering Services Technician
Peirs Sutton
Beta Testing Administrator
Chris McQuinn
Senior Compatibility Analyst
Patricia-Jean Cody
Compatibility Test Lead
Randy Buchholz
Compatibility Analyst
Joy Schneer
Director, Strategic Relations
Arthur Long
Strategic Relations Specialist
Cecelia Hernandez
Sr. Manager, Strategic Relations
Producers
Producer BVT Games
Production Fund Dynamic
GmbH & Co. KG: Andreas Graf
v. Rittberg
Executive Producer
ATTACTION: Siggi Kögl
Executive Producer and
CEO Spellbound: Armin Gessert
Studio Manager and
Managing Director
Spellbound: Andreas Speer
Executive Producer Atari: Hudson Piehl
Producer Atari/Timiani: Grant Dean
Producer Atari: Nadège de Bergevin
Producer Atari: John Hight
External Design Consultant: Ralf C. Adam
Spellbound
Creative Director: Jean-Marc Haessig
Game Designer: Matthias Nock
Technical Director: Armin Gessert
Project Lead: Jochen Hamma
Project Manager: Nicolaas Bongaerts
Programming Director: Marco Keuthen
Lead Programmer: Arno Wienholtz
Mark Novozhilov
AI Programmer: Johannes Conradie
Game/Physics Programmer: Christoph Birkhold
Special Effects Programmer: Peter Ohlmann
Game/Editor Programmer: Norbert Nopper
Game/Interface Programmer: Thomas Gereke
Game Programmer: Jörg Reisig
Malte Krüger
Music/Sound Programmer: Marco Keuthen
Additional Programming: Oliver Pilarski
Benjamin Fenske
Copy Protection & Mastering:
HermetiCode Jürgen Schäpker
Markus Stoller
Interface Design: Jean-Marc Haessig
Matthias Nock
Jochen Hamma
Story: Hans-Jörg Knabel
Jean-Marc Haessig
Dialogues, Booklet: Hans-Jörg Knabel
Character Design: Jean-Marc Haessig
Lead Artist: Serge Mandon
Technical Artist/
Modelling/Texturing: Eric Urocki
Modelling/Texturing/
Animation: Myriam Urocki
Set and Lighting Design: Serge Mandon
Lead Animator: Alexey Danilkin
Animator: Borries Orlopp
Animation QA and
Implementation: Patrick Harnack
In-Game Cut Scenes: Jean-Marc Haessig
Hans-Jörg Knabel
Serge Mandon
Eric Urocki
Lead Level Designer: Jörg Friedrich
Torsten Thiele
Senior Level Designer: Jochen Pfannstiel
Christian Schlager
Level Designer: Rolf Beismann
Fari Rug
Mark Intelmann
Martin Knauf
Technical Designer: Martin Schmidt-
Effing
Quality Assurance Lead: Thomas Schmidt
QA Technical Analyst: Timo Kallweit
Fari Rug
Patrick Harnack
Additional Testing: Christy Jerome
Suseel Chandran
Prashanth Kannan
Punith Raju
Subodh Mishra
Jayasimha K V
Sukhen Vachaspathi
Sascha Gessert
26
ataricommunity.com
ataricommunity.com
27
Page 16

Localisation Project Manager: Thomas Schmidt
Localisation and Audio
Asset Management: Nicolaas Bongaerts
Hardware Consultant: Tapio “Shao-Lee”
Muley
External Partners
FMV and Character Artwork: Virgin Lands
Character Artwork: 3dbrigade.com
Additional Typography: Niels Windheuser
Motion Capturing: Metricminds
3dbrigade.com
PHP/MYSQL Programming: Jochai Papke
Sound FX: Dynamedion
Sound FX: Tapio “Shao-Lee”
Muley
Music: Dynamedion
German Voice Recording: Toninton
German Voice Directing: Ralf C. Adam
Hans-Jörg Knabel
Special thanks to:
Torsten Hess of IMC
Die Alte Zunft
Die Mudder
RelQ
ROOM 22
Petrol
Synthesis + Emanuele Scichilone
Enzyme Laboratoires de Test + Andreas Schlangen
Around the word
Our families and friends who supported us during
development!
ATARI WEB SITES
To get the most out of your new game, visit us at:
atari.com/us
If you would like to chat with other gamers, as well as developers, visit our Community
Forum area at:
ataricommunity.com
Kids, check with your parent or guardian before visiting any web site.
Chat Messages: Atari does not monitor, control, endorse, or accept responsibility for the content of chat
messages. You are strongly encouraged not to give out identity or other personal information through
chat message transmissions. Kids, check with your parent or guardian if you are concerned about any
chat you receive.
Use of Atari web sites is subject to terms and conditions, which you can access at:
atari.com/us/tos
German Voice Directing: Ralf C. Adam
Hans-Jörg Knabel
28
ataricommunity.com
ataricommunity.com
29
Page 17

TECHNICAL SUPPORT (U.S.& CANADA)
Help Via the Internet
Up-to-the-minute technical information about Atari products is generally available 24
hours a day, 7 days a week via the Internet at:
atarisupport.com
Through this site you’ll have access to our FAQ (Frequently Asked Questions) documents,
our FTP (File Transfer Protocol) area where you can download patches if needed, our
Hints/Cheat Codes if they’re available, and an Email area where you can get help and
ask questions if you do not find your answers within the FAQ.
All customer support requests are handled via Email. No telephone support
requests will be accepted.
In the event we must send you an FAQ document, patch or update via Email, we
Note:
may require verifiable consent from a parent or guardian in order to protect children’s
privacy and safety online. Consent Forms are available at the web site listed above.
Product Return Procedures in the United States & Canada
In the event our technicians at www.atarisupport.com determine that you need to forward materials directly to us, please include a brief letter explaining what is enclosed and
why. Make sure you include the Return Merchandise Authorization Number (RMA#) supplied to you by the technician, and your telephone number in case we need to call you.
You will receive the mailing address when the technician Emails you the RMA#. Any
materials not containing this RMA# will be returned to you unprocessed.
Warranty Policy in the United States & Canada
If our technicians determine that the product storage medium is found to be defective
within ninety (90) days of original purchase, (unless otherwise provided by applicable
law), Atari will replace the item free of charge, to the original purchaser, if the item is
accompanied by the original dated receipt and packaging.
30
ataricommunity.com
ataricommunity.com
31
Page 18

END-USER LICENSE AGREEMENT
IMPORTANT — READ CAREFULLY: Please be sure to carefully read and understand all of
the rights and restrictions described in this End-User License Agreement (“EULA”).
Software (including but not limited to any images, photographs, animations, video, music,
text and “applets” incorporated into the Software) and any printed materials accompanying the Software are owned by the Company or its Licensors.
AGREEMENT
This document is an agreement between you and Atari, Inc. and its affiliated companies
(“Company”). The enclosed software game disc(s), cartridge or Game Pak (“Software”)
and any accompanying printed materials are licensed to you only on the condition that
you accept all of the terms contained in this EULA.
By opening this package and installing or otherwise using the Software you agree to be
bound by the terms of this EULA. If you do not agree to the terms of this EULA you may
not install or use the Software and within 15 days of purchase you must contact
Customer Support at www.atarisupport.com.
You will be given a Return Merchandise Authorization number (RMA #). You then have 15
days from the date of this contact to return the Software in its protective covering, the
Manual and the original sales invoice to the address supplied to you. If this is a PC product, when you install the Software you will be asked to review and either accept or not
accept the terms of the EULA by clicking the “I Accept” button. By clicking the “I Accept”
button you acknowledge that you have read the EULA, understand it and agree to be
bound by its terms and conditions.
COPYRIGHT
The Software is protected by copyright laws and international copyright treaties, as well
as other intellectual property laws and treaties. All title and copyrights in and to the
GRANT OF LICENSE
The Software is licensed and not sold to you and its use is subject to this EULA. The
Company grants you a limited, personal, non-exclusive license to use the Software in the
manner described in the user documentation. The Company reserves all rights not
expressly granted to you in this EULA.
PERMITTED USES
If the Software is configured for loading on a hard drive, you may install and use the
Software on a single computer. You may make and maintain one copy of the Software for
backup and archival purposes, provided that the original and copy of the Software are
kept in your possession. You may permanently transfer all your rights under this EULA,
provided you retain no copies, you transfer all of the Software (including all component
parts, the media and printed materials and any upgrades) and the recipient reads and
accepts this EULA.
RESTRICTIONS
You may not delete or obscure any copyright, trademark or other proprietary notice on the
Software or accompanying printed materials.
You may not decompile, modify, reverse engineer, disassemble or otherwise reproduce the
Software.
You may not copy, rent, lease, sublicense, distribute, publicly display the Software, create
derivative works based on the Software (except to the extent expressly permitted in the
Editor and End-User Variation section of this Agreement or other documentation accompa-
Page 19

nying the Software) or otherwise commercially exploit the Software.
You may not electronically transmit the Software from one computer, console or other
platform to another or over a network.
You may not use any backup or archival copy of the Software for any purpose other than
to replace the original copy in the event it’s destroyed or becomes defective.
EDITOR AND END-USER VARIATIONS
If the Software includes a feature that allows you to modify the Software or to construct
new variations (an “Editor”), you may use such Editor to create modifications or enhancements to the Software, including the construction of new levels (collectively the
“Variations”), subject to the following restrictions. Your Variations: (i) must only work with
the full, registered copy of the Software; (ii) must not contain modifications to any executable file; (iii) must not contain any libelous, defamatory or other illegal material, material that is scandalous or invades the rights of privacy or publicity of any third party; (iv)
must not contain any trademarks, copyright-protected work or other property of third parties; and (v) may not be commercially exploited by you, including but not limited to making such Variations available for sale or as part of a pay-per-play or timesharing service.
TERMINATION
This EULA is effective until terminated. You may terminate this EULA at any time by
destroying the Software. This EULA will terminate automatically without notice from the
Company if you fail to comply with any provisions of this EULA. All provisions of this EULA
as to warranties, limitation of liability, remedies and damages will survive termination.
LIMITED WARRANTY AND DISCLAIMER OF WARRANTIES
You are aware and agree that use of the Software and the media on which is recorded is
at your sole risk. The Software and media are supplied “AS IS.” Unless otherwise provided
by applicable law, the Company warrants to the original purchaser of this product that the
Software storage medium will be free from defects in materials and workmanship
under normal use for ninety (90) days from the date of purchase. The warranty is void if
the defect has arisen through accident, abuse, neglect or misapplication. If the Software
fails to conform to this warranty, you may at your sole and exclusive remedy, obtain a
replacement free of charge if you return the defective Software. Follow the Product Return
Procedures described in the Manual. The Company does not warrant that the Software or
its operations or functions will meet your requirements, or that the use of the Software
will be without interruption or error.
TO THE FULLEST EXTENT PERMISSIBLE UNDER APPLICABLE LAW, EXCEPT FOR THE
EXPRESS WARRANTY SET FORTH ABOVE, THE COMPANY DISCLAIMS ALL WARRANTIES, EXPRESS OR IMPLIED, INCLUDING AND WITHOUT LIMITATION, THE IMPLIED
WARRANTIES OF MERCHANTABILITY AND FITNESS FOR A PARTICULAR PURPOSE
AND NON-INFRINGEMENT. EXCEPT FOR THE EXPRESS WARRANTY SET FORTH ABOVE,
THE COMPANY DOES NOT WARRANT, GUARANTEE OR MAKE ANY REPRESENTATION
REGARDING THE USE OR THE RESULTS OF THE USE OF THE SOFTWARE IN TERMS OF
ITS CORRECTNESS, ACCURACY, RELIABILITY, CURRENTNESS OR OTHERWISE. SOME
JURISDICTIONS DO NOT ALLOW THE EXCLUSION OF OR LIMITATIONS ON IMPLIED
WARRANTIES, SO THE ABOVE EXCLUSIONS AND LIMITATIONS MAY NOT APPLY TO
YOU.
LIMITATION OF LIABILITY
IN NO EVENT WILL THE COMPANY OR ITS EMPLOYEES OR LICENSORS BE LIABLE FOR
ANY INCIDENTAL, INDIRECT, SPECIAL, CONSEQUENTIAL OR PUNITIVE DAMAGES, OR
Page 20

ANY DAMAGES WHATSOEVER (INCLUDING, WITHOUT LIMITATION, DAMAGES FOR
INJURY TO PERSON OR PROPERTY, FOR LOSS OF PROFITS, BUSINESS INTERRUPTION,
LOSS OF BUSINESS INFORMATION, LOSS OF PRIVACY, FAILURE TO MEET ANY DUTY
AND NEGLIGENCE) ARISING OUT OF OR IN ANY WAY RELATED TO THE USE OR
INABILITY TO USE THE SOFTWARE, EVEN IF THE COMPANY OR AN AUTHORIZED REPRESENTATIVE OF THE COMPANY HAS BEEN ADVISED OF THE POSSIBILITY OF SUCH
DAMAGES. SOME JURISDICTIONS DO NOT ALLOW THE EXCLUSION OF LIABILITY FOR
INCIDENTAL OR CONSEQUENTIAL DAMAGES, SO THE ABOVE EXCLUSION MAY NOT
APPLY TO YOU.
IN NO EVENT WILL THE LIABILITY OF THE COMPANY FOR DAMAGES WITH RESPECT
TO THE SOFTWARE EXCEED THE AMOUNTS ACTUALLY PAID BY YOU FOR THE SOFTWARE.
CHOICE OF LAW AND VENUE
This EULA is governed by the laws of the United States of America and the State of New
York, exclusive of its conflicts of law provisions. The exclusive venue for litigation regarding or arising from this EULA is New York County, New York and you agree to submit to
the Jurisdiction of the courts of New York County, New York for any such litigation.
MISCELLANEOUS
If any provision or portion of this EULA is found to be unlawful, void, or for any reason
unenforceable, it will be severed from and in no way affect the validity or enforceability of
the remaining provisions of the EULA.
This EULA constitutes the entire agreement between you and the Company regarding the
Software and its use.
© 2006 Atari Interactive, Inc. All rights reserved. Atari and the Atari logo are trademarks
owned by Atari Interactive, Inc. Developed by Spellbound. ©1997-2006 by RAD Game Tools,
Inc. ©1999-2006 Havok.com Inc. (and its Licensors). All Rights Reserved. FMOD Sound
System, copyright © Firelight Technologies Pty, Ltd., 1994-2006. Copyright © 2006 BVT
Games Production Fund Dynamic GmbH & Co. KG - Gruenwald/Munich, Germany. The ESRB
rating icons are registered trademarks of the Entertainment Software Association. Software
platform logo (™ and ©) IEMA 2006. Windows is either a registered trademark or trademark
of Microsoft Corporation. 3D Technology: Trinigy Vision Engine. All rights reserved.
03236
Page 21

 Loading...