

Page 1

Table of
Contents
Introduction
Introduction . . . . . . . . . . . . . . . . . . . . . . . . . . . . . . . . . . . . . . . . . . . . . . . . . . . .6
Main Menu . . . . . . . . . . . . . . . . . . . . . . . . . . . . . . . . . . . . . . . . . . . . . . . . . . . . .7
Options Menu . . . . . . . . . . . . . . . . . . . . . . . . . . . . . . . . . . . . . . . . . . . . . . . . . . .8
Character generation
Quick Characters . . . . . . . . . . . . . . . . . . . . . . . . . . . . . . . . . . . . . . . . . . . . . . . .9
Sex and Race (Generation Screen 1) . . . . . . . . . . . . . . . . . . . . . . . . . . . . . . . .10
Character (Generation Screen 2) . . . . . . . . . . . . . . . . . . . . . . . . . . . . . . . . . . .14
Statistics(Generation Screen 3) . . . . . . . . . . . . . . . . . . . . . . . . . . . . . . . . . . . .17
Name, Portrait & Alignment (Generation Screen 4) . . . . . . . . . . . . . . . . . . . .21
Back to waterdeep
Waterdeep Screens . . . . . . . . . . . . . . . . . . . . . . . . . . . . . . . . . . . . . . . . . . . . . .25
Khelben Blackstaff . . . . . . . . . . . . . . . . . . . . . . . . . . . . . . . . . . . . . . . . . . . . . . .26
Trading Screen . . . . . . . . . . . . . . . . . . . . . . . . . . . . . . . . . . . . . . . . . . . . . . . . .27
Yawning Portal . . . . . . . . . . . . . . . . . . . . . . . . . . . . . . . . . . . . . . . . . . . . . . . . .30
Adventuring in Undermountain
Main Game Screen . . . . . . . . . . . . . . . . . . . . . . . . . . . . . . . . . . . . . . . . . . . . . .32
Moving . . . . . . . . . . . . . . . . . . . . . . . . . . . . . . . . . . . . . . . . . . . . . . . . . . . . . . .35
Inventory . . . . . . . . . . . . . . . . . . . . . . . . . . . . . . . . . . . . . . . . . . . . . . . . . . . . .36
Inventory (Low Res Mode) . . . . . . . . . . . . . . . . . . . . . . . . . . . . . . . . . . . . . . . .39
Map Screen . . . . . . . . . . . . . . . . . . . . . . . . . . . . . . . . . . . . . . . . . . . . . . . . . . . .40
Statistics . . . . . . . . . . . . . . . . . . . . . . . . . . . . . . . . . . . . . . . . . . . . . . . . . . . . . .42
Resting . . . . . . . . . . . . . . . . . . . . . . . . . . . . . . . . . . . . . . . . . . . . . . . . . . . . . . .43
Saving Your Game . . . . . . . . . . . . . . . . . . . . . . . . . . . . . . . . . . . . . . . . . . . . . . .44
Non-Player Character Interaction . . . . . . . . . . . . . . . . . . . . . . . . . . . . . . . . . . .45
Entering the Dungeon of Undermountain . . . . . . . . . . . . . . . . . . . . . . . . . . . . .46
Activating Switches . . . . . . . . . . . . . . . . . . . . . . . . . . . . . . . . . . . . . . . . . . . . .46
Combat . . . . . . . . . . . . . . . . . . . . . . . . . . . . . . . . . . . . . . . . . . . . . . . . . . . . . . .47
Spells and Magic Items . . . . . . . . . . . . . . . . . . . . . . . . . . . . . . . . . . . . . . . . . . .47
Infravision . . . . . . . . . . . . . . . . . . . . . . . . . . . . . . . . . . . . . . . . . . . . . . . . . . . . .48
Levitation/Flying . . . . . . . . . . . . . . . . . . . . . . . . . . . . . . . . . . . . . . . . . . . . . . . .48
1
Page 2

Thief Abilities . . . . . . . . . . . . . . . . . . . . . . . . . . . . . . . . . . . . . . . . . . . . . . . . . .48
Turning Undead . . . . . . . . . . . . . . . . . . . . . . . . . . . . . . . . . . . . . . . . . . . . . . . .50
Options . . . . . . . . . . . . . . . . . . . . . . . . . . . . . . . . . . . . . . . . . . . . . . . . . . . . . . .51
Detail Values . . . . . . . . . . . . . . . . . . . . . . . . . . . . . . . . . . . . . . . . . . . . . . .51
Controls . . . . . . . . . . . . . . . . . . . . . . . . . . . . . . . . . . . . . . . . . . . . . . . . . . .52
Customize Keyboard . . . . . . . . . . . . . . . . . . . . . . . . . . . . . . . . . . . . . . . . . .52
Appendix a: character races
Humans . . . . . . . . . . . . . . . . . . . . . . . . . . . . . . . . . . . . . . . . . . . . . . . . . . . . . . .56
Half Elves . . . . . . . . . . . . . . . . . . . . . . . . . . . . . . . . . . . . . . . . . . . . . . . . . . . . .56
Elves and Dark Elves . . . . . . . . . . . . . . . . . . . . . . . . . . . . . . . . . . . . . . . . . . . . .57
Dwarves . . . . . . . . . . . . . . . . . . . . . . . . . . . . . . . . . . . . . . . . . . . . . . . . . . . . . . .58
Halflings . . . . . . . . . . . . . . . . . . . . . . . . . . . . . . . . . . . . . . . . . . . . . . . . . . . . . .59
Appendix B: class descriptions
Fighter . . . . . . . . . . . . . . . . . . . . . . . . . . . . . . . . . . . . . . . . . . . . . . . . . . . . . . . .61
Priest . . . . . . . . . . . . . . . . . . . . . . . . . . . . . . . . . . . . . . . . . . . . . . . . . . . . . . . . .62
Mage . . . . . . . . . . . . . . . . . . . . . . . . . . . . . . . . . . . . . . . . . . . . . . . . . . . . . . . . .63
Thief . . . . . . . . . . . . . . . . . . . . . . . . . . . . . . . . . . . . . . . . . . . . . . . . . . . . . . . . .64
Multi-Class Characters . . . . . . . . . . . . . . . . . . . . . . . . . . . . . . . . . . . . . . . . . . .65
Appendix C: characters statistics
Strength . . . . . . . . . . . . . . . . . . . . . . . . . . . . . . . . . . . . . . . . . . . . . . . . . . . . . .67
Dexterity . . . . . . . . . . . . . . . . . . . . . . . . . . . . . . . . . . . . . . . . . . . . . . . . . . . . . .67
Constitution . . . . . . . . . . . . . . . . . . . . . . . . . . . . . . . . . . . . . . . . . . . . . . . . . . .68
Intelligence . . . . . . . . . . . . . . . . . . . . . . . . . . . . . . . . . . . . . . . . . . . . . . . . . . . .68
Wisdom . . . . . . . . . . . . . . . . . . . . . . . . . . . . . . . . . . . . . . . . . . . . . . . . . . . . . . .69
Charisma . . . . . . . . . . . . . . . . . . . . . . . . . . . . . . . . . . . . . . . . . . . . . . . . . . . . . .69
Appendix D: Monsters
Baneguard . . . . . . . . . . . . . . . . . . . . . . . . . . . . . . . . . . . . . . . . . . . . . . . . . . . . .71
Bats (Giant) . . . . . . . . . . . . . . . . . . . . . . . . . . . . . . . . . . . . . . . . . . . . . . . . . . .71
Beetle (Giant) . . . . . . . . . . . . . . . . . . . . . . . . . . . . . . . . . . . . . . . . . . . . . . . . . .72
Beholders (Standard) . . . . . . . . . . . . . . . . . . . . . . . . . . . . . . . . . . . . . . . . . . . . .72
Beholders (Spectator) . . . . . . . . . . . . . . . . . . . . . . . . . . . . . . . . . . . . . . . . . . . .72
Dragons . . . . . . . . . . . . . . . . . . . . . . . . . . . . . . . . . . . . . . . . . . . . . . . . . . . . . . .73
Gargoyle . . . . . . . . . . . . . . . . . . . . . . . . . . . . . . . . . . . . . . . . . . . . . . . . . . . . . .73
Ghast . . . . . . . . . . . . . . . . . . . . . . . . . . . . . . . . . . . . . . . . . . . . . . . . . . . . . . . .73
Ghoul . . . . . . . . . . . . . . . . . . . . . . . . . . . . . . . . . . . . . . . . . . . . . . . . . . . . . . . .73
Goblins . . . . . . . . . . . . . . . . . . . . . . . . . . . . . . . . . . . . . . . . . . . . . . . . . . . . . . .74
Guardian Skeletons . . . . . . . . . . . . . . . . . . . . . . . . . . . . . . . . . . . . . . . . . . . . . .74
Kobolds . . . . . . . . . . . . . . . . . . . . . . . . . . . . . . . . . . . . . . . . . . . . . . . . . . . . . . .74
Lich . . . . . . . . . . . . . . . . . . . . . . . . . . . . . . . . . . . . . . . . . . . . . . . . . . . . . . . . . .75
Mephit (Fire) . . . . . . . . . . . . . . . . . . . . . . . . . . . . . . . . . . . . . . . . . . . . . . . . . .75
Mephit (Ice) . . . . . . . . . . . . . . . . . . . . . . . . . . . . . . . . . . . . . . . . . . . . . . . . . . .75
Mephit (Lightning) . . . . . . . . . . . . . . . . . . . . . . . . . . . . . . . . . . . . . . . . . . . . . .76
Mind Flayer . . . . . . . . . . . . . . . . . . . . . . . . . . . . . . . . . . . . . . . . . . . . . . . . . . . .76
2
Page 3

Mummies . . . . . . . . . . . . . . . . . . . . . . . . . . . . . . . . . . . . . . . . . . . . . . . . . . . . .77
Ogre . . . . . . . . . . . . . . . . . . . . . . . . . . . . . . . . . . . . . . . . . . . . . . . . . . . . . . . . .77
Orcs . . . . . . . . . . . . . . . . . . . . . . . . . . . . . . . . . . . . . . . . . . . . . . . . . . . . . . . . . .77
Other Adventurers . . . . . . . . . . . . . . . . . . . . . . . . . . . . . . . . . . . . . . . . . . . . . .78
Rats (Giant) . . . . . . . . . . . . . . . . . . . . . . . . . . . . . . . . . . . . . . . . . . . . . . . . . . .78
Shadow Fiend . . . . . . . . . . . . . . . . . . . . . . . . . . . . . . . . . . . . . . . . . . . . . . . . . .78
Skeletons . . . . . . . . . . . . . . . . . . . . . . . . . . . . . . . . . . . . . . . . . . . . . . . . . . . . . .79
Spider (Giant) . . . . . . . . . . . . . . . . . . . . . . . . . . . . . . . . . . . . . . . . . . . . . . . . . .79
Spider (Large) . . . . . . . . . . . . . . . . . . . . . . . . . . . . . . . . . . . . . . . . . . . . . . . . . .79
Trolls . . . . . . . . . . . . . . . . . . . . . . . . . . . . . . . . . . . . . . . . . . . . . . . . . . . . . . . . .79
Zombies . . . . . . . . . . . . . . . . . . . . . . . . . . . . . . . . . . . . . . . . . . . . . . . . . . . . . . .79
Appendix E: Weapons
Melee Weapons . . . . . . . . . . . . . . . . . . . . . . . . . . . . . . . . . . . . . . . . . . . . . . . . .82
Missile . . . . . . . . . . . . . . . . . . . . . . . . . . . . . . . . . . . . . . . . . . . . . . . . . . . . . . . .83
Armor . . . . . . . . . . . . . . . . . . . . . . . . . . . . . . . . . . . . . . . . . . . . . . . . . . . . . . . .84
Other Equipment . . . . . . . . . . . . . . . . . . . . . . . . . . . . . . . . . . . . . . . . . . . . . . .85
Magic Items . . . . . . . . . . . . . . . . . . . . . . . . . . . . . . . . . . . . . . . . . . . . . . . . . . . .86
Appendix F: miscellaneous
Doors . . . . . . . . . . . . . . . . . . . . . . . . . . . . . . . . . . . . . . . . . . . . . . . . . . . . . . . . .88
Portals . . . . . . . . . . . . . . . . . . . . . . . . . . . . . . . . . . . . . . . . . . . . . . . . . . . . . . . .88
Tricks and Traps . . . . . . . . . . . . . . . . . . . . . . . . . . . . . . . . . . . . . . . . . . . . . . . .88
Life and Death in Undermountain . . . . . . . . . . . . . . . . . . . . . . . . . . . . . . . . . .89
Hit Points . . . . . . . . . . . . . . . . . . . . . . . . . . . . . . . . . . . . . . . . . . . . . . . . . .89
Maximum Hit Points . . . . . . . . . . . . . . . . . . . . . . . . . . . . . . . . . . . . . . . . .89
Current Hit Points . . . . . . . . . . . . . . . . . . . . . . . . . . . . . . . . . . . . . . . . . . .89
Recovering Hit Points . . . . . . . . . . . . . . . . . . . . . . . . . . . . . . . . . . . . . . . .89
Experience Points . . . . . . . . . . . . . . . . . . . . . . . . . . . . . . . . . . . . . . . . . . . .90
Return to the Surface . . . . . . . . . . . . . . . . . . . . . . . . . . . . . . . . . . . . . . . . .90
Visit Khelben . . . . . . . . . . . . . . . . . . . . . . . . . . . . . . . . . . . . . . . . . . . . . . .90
Appendix G: Advancement Charts
Fighter Advancement Chart . . . . . . . . . . . . . . . . . . . . . . . . . . . . . . . . . . . . . . .92
Priest Advancement Chart . . . . . . . . . . . . . . . . . . . . . . . . . . . . . . . . . . . . . . . .92
Mage Advancement Chart . . . . . . . . . . . . . . . . . . . . . . . . . . . . . . . . . . . . . . . .93
Thief Advancement Chart . . . . . . . . . . . . . . . . . . . . . . . . . . . . . . . . . . . . . . . .93
Thief Skills . . . . . . . . . . . . . . . . . . . . . . . . . . . . . . . . . . . . . . . . . . . . . . . . . . . .94
Thief Class Addendum: How Thief Skills Work . . . . . . . . . . . . . . . . . . . . . . . .94
3
Page 4

Appendix H: Spells
Mage Spell Overview . . . . . . . . . . . . . . . . . . . . . . . . . . . . . . . . . . . . . . . . . . . .98
Priest Spell Overview . . . . . . . . . . . . . . . . . . . . . . . . . . . . . . . . . . . . . . . . . . . .99
Gaining Spells . . . . . . . . . . . . . . . . . . . . . . . . . . . . . . . . . . . . . . . . . . . . . . . . .100
How to Cast Spells . . . . . . . . . . . . . . . . . . . . . . . . . . . . . . . . . . . . . . . . . . . . .101
Spell Effects . . . . . . . . . . . . . . . . . . . . . . . . . . . . . . . . . . . . . . . . . . . . . . . . . . .102
Spell Book . . . . . . . . . . . . . . . . . . . . . . . . . . . . . . . . . . . . . . . . . . . . . . . . . . . .103
Mage Spells Detail . . . . . . . . . . . . . . . . . . . . . . . . . . . . . . . . . . . . . . . . . . . . . .104
Level 1 Spells
Armor . . . . . . . . . . . . . . . . . . . . . . . . . . . . . . . . . . . . . . . . . . . .104
Burning Hands . . . . . . . . . . . . . . . . . . . . . . . . . . . . . . . . . . . . .104
Chill Touch . . . . . . . . . . . . . . . . . . . . . . . . . . . . . . . . . . . . . . .104
Color Spray . . . . . . . . . . . . . . . . . . . . . . . . . . . . . . . . . . . . . . . .104
Detect Magic . . . . . . . . . . . . . . . . . . . . . . . . . . . . . . . . . . . . . .104
Feather Fall . . . . . . . . . . . . . . . . . . . . . . . . . . . . . . . . . . . . . . . .105
Jump . . . . . . . . . . . . . . . . . . . . . . . . . . . . . . . . . . . . . . . . . . . . .105
Light . . . . . . . . . . . . . . . . . . . . . . . . . . . . . . . . . . . . . . . . . . . . .105
Magic Missiles . . . . . . . . . . . . . . . . . . . . . . . . . . . . . . . . . . . . . .105
Protection from Evil . . . . . . . . . . . . . . . . . . . . . . . . . . . . . . . . .105
Shield . . . . . . . . . . . . . . . . . . . . . . . . . . . . . . . . . . . . . . . . . . . .105
Spider Climb . . . . . . . . . . . . . . . . . . . . . . . . . . . . . . . . . . . . . . .105
Sleep . . . . . . . . . . . . . . . . . . . . . . . . . . . . . . . . . . . . . . . . . . . . .105
Level 2 Spells
Continual Light . . . . . . . . . . . . . . . . . . . . . . . . . . . . . . . . . . . .106
Invisibility . . . . . . . . . . . . . . . . . . . . . . . . . . . . . . . . . . . . . . . . .106
Knock . . . . . . . . . . . . . . . . . . . . . . . . . . . . . . . . . . . . . . . . . . . .106
Levitate . . . . . . . . . . . . . . . . . . . . . . . . . . . . . . . . . . . . . . . . . . .106
Melf’s Acid Arrow . . . . . . . . . . . . . . . . . . . . . . . . . . . . . . . . . .106
Scare . . . . . . . . . . . . . . . . . . . . . . . . . . . . . . . . . . . . . . . . . . . . .107
Strength . . . . . . . . . . . . . . . . . . . . . . . . . . . . . . . . . . . . . . . . . .107
Level 3 Spells
Dispel Magic . . . . . . . . . . . . . . . . . . . . . . . . . . . . . . . . . . . . . . .108
Fireball . . . . . . . . . . . . . . . . . . . . . . . . . . . . . . . . . . . . . . . . . . .108
Flame Arrow . . . . . . . . . . . . . . . . . . . . . . . . . . . . . . . . . . . . . . .108
Fly . . . . . . . . . . . . . . . . . . . . . . . . . . . . . . . . . . . . . . . . . . . . . . .108
Haste . . . . . . . . . . . . . . . . . . . . . . . . . . . . . . . . . . . . . . . . . . . .109
Hold Person . . . . . . . . . . . . . . . . . . . . . . . . . . . . . . . . . . . . . . .109
Hold Undead . . . . . . . . . . . . . . . . . . . . . . . . . . . . . . . . . . . . . .109
Infravision . . . . . . . . . . . . . . . . . . . . . . . . . . . . . . . . . . . . . . . . .109
Lightning Bolt . . . . . . . . . . . . . . . . . . . . . . . . . . . . . . . . . . . . .109
Melf’s Minute Meteors . . . . . . . . . . . . . . . . . . . . . . . . . . . . . . .109
Slow . . . . . . . . . . . . . . . . . . . . . . . . . . . . . . . . . . . . . . . . . . . . .109
Level 4 Spells
Confusion . . . . . . . . . . . . . . . . . . . . . . . . . . . . . . . . . . . . . . . . .110
Fear . . . . . . . . . . . . . . . . . . . . . . . . . . . . . . . . . . . . . . . . . . . . . .110
4
Page 5

Improved Invisibility . . . . . . . . . . . . . . . . . . . . . . . . . . . . . . . . .110
Rary’s Mnemonic Enhancer . . . . . . . . . . . . . . . . . . . . . . . . . . .110
Stoneskin . . . . . . . . . . . . . . . . . . . . . . . . . . . . . . . . . . . . . . . . .110
Priest Spells Detail . . . . . . . . . . . . . . . . . . . . . . . . . . . . . . . . . . . . . . . . . . . . .111
Level 1 Spells
Bless . . . . . . . . . . . . . . . . . . . . . . . . . . . . . . . . . . . . . . . . . . . . .111
Cure Light Wounds . . . . . . . . . . . . . . . . . . . . . . . . . . . . . . . . . .111
Detect Magic . . . . . . . . . . . . . . . . . . . . . . . . . . . . . . . . . . . . . .111
Light . . . . . . . . . . . . . . . . . . . . . . . . . . . . . . . . . . . . . . . . . . . . .111
Magical Stone . . . . . . . . . . . . . . . . . . . . . . . . . . . . . . . . . . . . . .111
Protection From Evil . . . . . . . . . . . . . . . . . . . . . . . . . . . . . . . . .111
Level 2 Spells
Aid . . . . . . . . . . . . . . . . . . . . . . . . . . . . . . . . . . . . . . . . . . . . . .112
Hold Person . . . . . . . . . . . . . . . . . . . . . . . . . . . . . . . . . . . . . . .112
Resist Cold . . . . . . . . . . . . . . . . . . . . . . . . . . . . . . . . . . . . . . . .112
Resist Fire . . . . . . . . . . . . . . . . . . . . . . . . . . . . . . . . . . . . . . . . .112
Level 3 Spells
Continual Light . . . . . . . . . . . . . . . . . . . . . . . . . . . . . . . . . . . .113
Dispel Magic . . . . . . . . . . . . . . . . . . . . . . . . . . . . . . . . . . . . . . .113
Flame Walk . . . . . . . . . . . . . . . . . . . . . . . . . . . . . . . . . . . . . . . .113
Magical Vestment . . . . . . . . . . . . . . . . . . . . . . . . . . . . . . . . . . .113
Prayer . . . . . . . . . . . . . . . . . . . . . . . . . . . . . . . . . . . . . . . . . . . .113
Protection from Fire . . . . . . . . . . . . . . . . . . . . . . . . . . . . . . . . .113
Level 4 Spells
Abjure . . . . . . . . . . . . . . . . . . . . . . . . . . . . . . . . . . . . . . . . . . .114
Cure Serious Wounds . . . . . . . . . . . . . . . . . . . . . . . . . . . . . . . .114
Free Action . . . . . . . . . . . . . . . . . . . . . . . . . . . . . . . . . . . . . . . .114
Appendix I: Glossary . . . . . . . . . . . . . . . . . . . . . . . . . . . . . . . . . . . . . . 115
Appendix J: CreDits . . . . . . . . . . . . . . . . . . . . . . . . . . . . . . . . . . . . . . . .120
Warranty . . . . . . . . . . . . . . . . . . . . . . . . . . . . . . . . . . . . . . . . . . . . . . . 124
Interplay Technical Support . . . . . . . . . . . . . . . . . . . . . . . . . . . . . . . . . 125
Interplay WEb Site . . . . . . . . . . . . . . . . . . . . . . . . . . . . . . . . . . . . . . . . 126
5
Page 6

Introduction
You are a novice adventurer fallen upon hard times. With little but your
fighting skills to carry you through the Realms, you have chanced upon a
rumor that Khelben Blackstaff, the high mage of Waterdeep, is seeking ablebodied adventurers to undertake a task for him…and will pay well for their
services. With no other opportunities before you, you have chosen to travel to
the city of Waterdeep and answer Khelben’s summons.
You have a suspicion that Khelben’s call concerns Undermountain, the great
dungeon located beneath the streets of Waterdeep. Constructed by the mad
wizard Halaster over a millennia ago as a sanctuary, (and a sadistic playground
of sorts) its depths have always been a source of unease for the citizens of
Waterdeep. No one can say for sure if Halaster still lives in the labyrinth
dungeon, but many brave souls have entered Undermountain searching for
what remains of the mad wizard’s fortunes and magic. The end result is that
Undermountain has become one of the largest graveyards in the Realms for all
who are obsessed with adventure, wealth, or power.
You intend to seek out Blackstaff’s tower and make yourself known to the
wizard when you enter the city. Hopefully, the task (and the payment it
carries) will still be available when you arrive.
If his summons concerns Undermountain, then the risk will be great...
but so too, shall the reward.
6
Page 7
MENUS
You may use the arrow keys or the mouse to move around menus in Descent to
Undermountain. Unless otherwise noted, hitting <ESC> will accept the
current menu’s settings and return to the previous one. Some menus contain
check boxes and switches that can be toggled by hitting <SPACEBAR>.
Slider-type items are changed by using the left and right arrow on the
keyboard or by moving the mouse left or right when the option is highlighted.
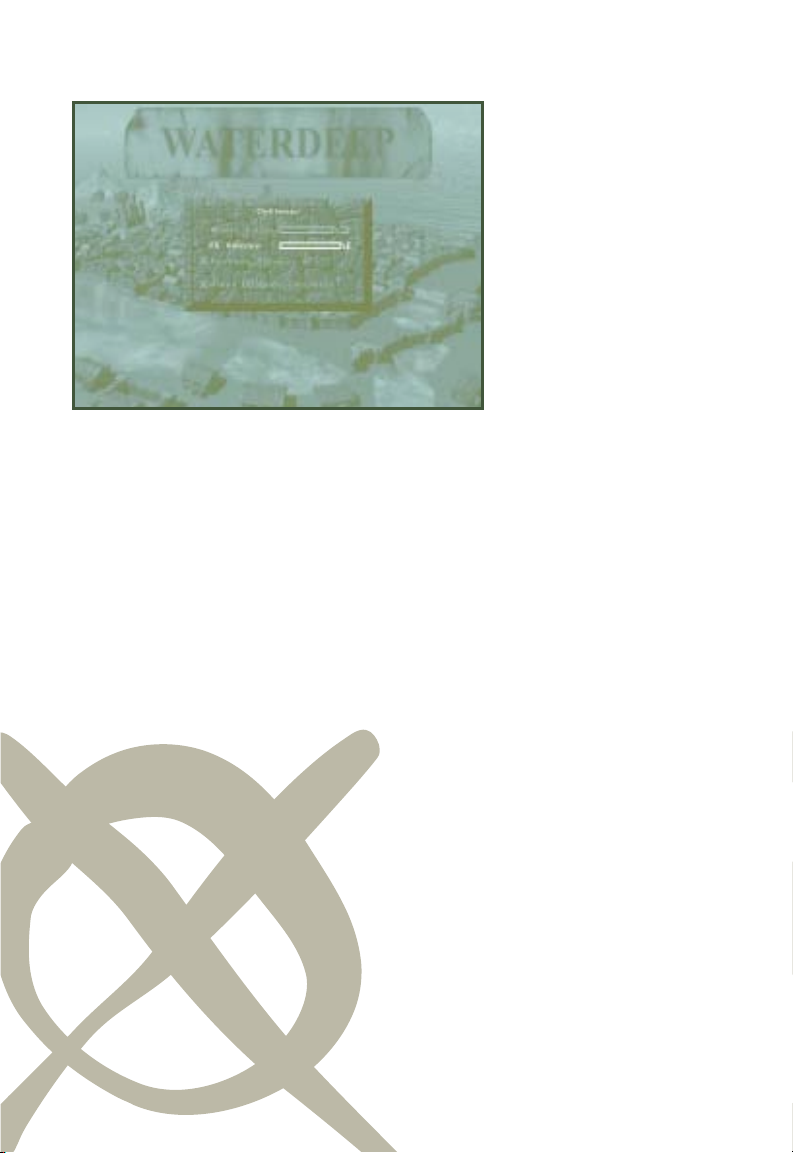
WATERDEEP SCREEN, MAIN MENU
The Main Menu offers the following choices:
NEW GAME Start a new game of Descent to Undermountain.
This will take you to the character generation
screen where you may create a new adventurer. (See
Character Generation section.)
RETURN TO GAME Return to a game in progress.
LOAD GAME Resume a previously saved game.
OPTIONS Takes you to the Options Menu. (See next page.)
QUIT Quit the game and return to DOS/Win 95.
7
Page 8
OPTIONS MENU
MUSIC VOLUME Changes the volume of music being played.
FX VOLUME Changes the volume of sound effects.
REVERSE STEREO Allows you to reverse the stereo sound channels.
This is sometimes necessary for earphones, speakers,
or extension cables that are wired incorrectly.
HI-RESOLUTION Allows you to toggle whether you want the game to
be in a low-resolution or high-resolution when you
enter Undermountain.
8
Page 9

Character
Generation
CHARACTER CREATION SCREENS
When you select “New Game” from the main menu, you will find yourself at
the first of four character generation screens.
Descent to Undermountain offers a great deal of freedom in character
creation. Rather than playing a generic character with little or no ability to
improve or advance, you can choose a race, statistics, and a class (or multiple
classes) for your character that suits your style of play.
Descent to Undermountain takes place in the Forgotten Realms®Campaign
Setting and uses the Advanced Dungeons & Dragons® rules produced by
TSR, Inc. It’s a world filled with a variety of races, such as humans, half-elves,
elves, drow, dwarves, and halflings. These six races can belong to a
combination of four career classes: a fighter, priest, thief or mage. Each of these
classes has its own advantages and limitations.
QUICK CHARACTERS
On character creation screens one and two, there is a shield with a question
mark located in the upper left that generates a “quick character” when it is
clicked. This quick character has a respectable set of statistics and is available for
immediate play. All you have to do is choose your character’s name, portrait, and
alignment, and you’re ready to play. If you don’t feel like spending the time to
generate a character on your own, “quick character” is the option you should
use. You may randomize the whole character or proceed through any of the
character generation steps and randomize at each step.
Page 10
Sex and Race
Character Generation
Screen 1
The first screen is where
you choose your character’s
race and sex.
Quick Generation:
(Shield with a question mark located in upper left corner.) If the
Randomizer is pressed without first selecting race and gender
from this screen, then the Randomizer will jump to the
Statistics Screen and choose your race, gender, class and a set
of statistics for you.
If the Randomizer is pressed after you have selected race and
gender, then the Randomizer will randomly create a character
with the race and gender you have selected.
10
Scroll Back Shield:
(Shield with a skull located in the lower left corner.)
Pressing this shield returns you to the main menu.
Scroll Forward Shield:
(Shield with a skull located in the lower right corner.) Pressing
this shield after you select your race and gender allows you to
go the next screen, the Character Class Selection Screen. You
cannot advance to the next screen until you choose your race
and gender.
Page 11

Escape Shield:
(Shield with a skull located in the upper right corner.) Pressing
this shield returns you to the main menu.
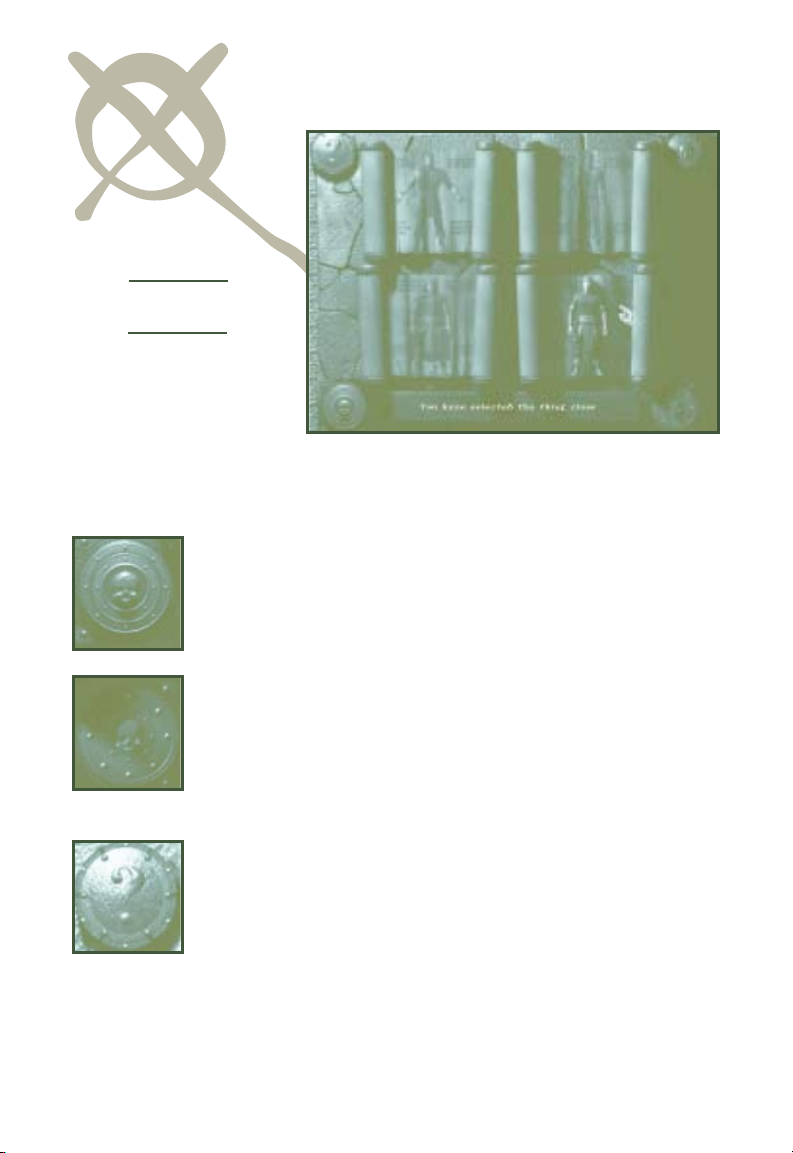
Race and Gender Selection Book: (An open book in the
middle of the screen, with the left hand picture of a male of the
selected race, and the right hand picture of a female.) If you
select on the figure on either page with a single left mouse
button click, the figure rises from the page. If single-clicked
again, the figure recedes into the page. If the page is turned
while the figure has risen from the page, it recedes back into
the page. You may choose one of the following for your
character; either male or female.
Human
Half-Elf
Elf
Drow
Dwarf
Halfling
For more information on these races (and their advantages
and disadvantages), consult the Character Races section in
this manual’s Appendix. Gender incurs no advantage or
disadvantage in the character creation process, but gender
will sometimes cause your character to be treated differently
by NPCs.
If you return to this screen after already having selected a
race and gender (i.e. elf male), the main screen will default
to the race and gender you have already selected. If you
decide to choose a new gender and race (after you have
already selected one and gone through screens two, three,
and four) the character process begins again, canceling any
choices you have made in screens two, three, and four.
11
Page 12
Shield that takes player Back through Selection Book:
(A skull shield on the lower left of the left book page.) Pressing
this shield turns back a page in the book, displaying a new
race. The book cannot turn back past the human male entry.
Shield that takes player Forward through Selection Book:
(Appears as a skull shield on the lower right of the right book
page.) When the forward arrow is single-clicked, the book
“flips forwards” a page, displaying a new race in the book .
The book cannot turn forward past the halfling female entry.
Text Section:
(A piece of parchment to the right of the book.) As the player
pages through the book, this section displays relevant
information on the race displayed in the book.
Cursor Text Description:
(Wooden panel at the bottom of screen.) As the player moves
the cursor over each of the hot spots listed above, this
section defines what each of the hot spots does.
12
Page 13

HOT KEYS
Pressing the following keys on this screen perform various functions:
Esc
. . . . . . . . . . . . . . . Return to Main Menu.
Page
. . . . . . . . . . . . . . . Go forward to the Character Class Generation
Up
Screen (Screen 2.)
Page
. . . . . . . . . . . . . . . Return to Main Menu (same as Escape.)
Down
. . . . . . . . . . . . . . . Go back a page in race/gender selection book.
. . . . . . . . . . . . . . . Go forward a page in race/gender selection book.
13
Page 14
Character
Character Generation
Screen 2
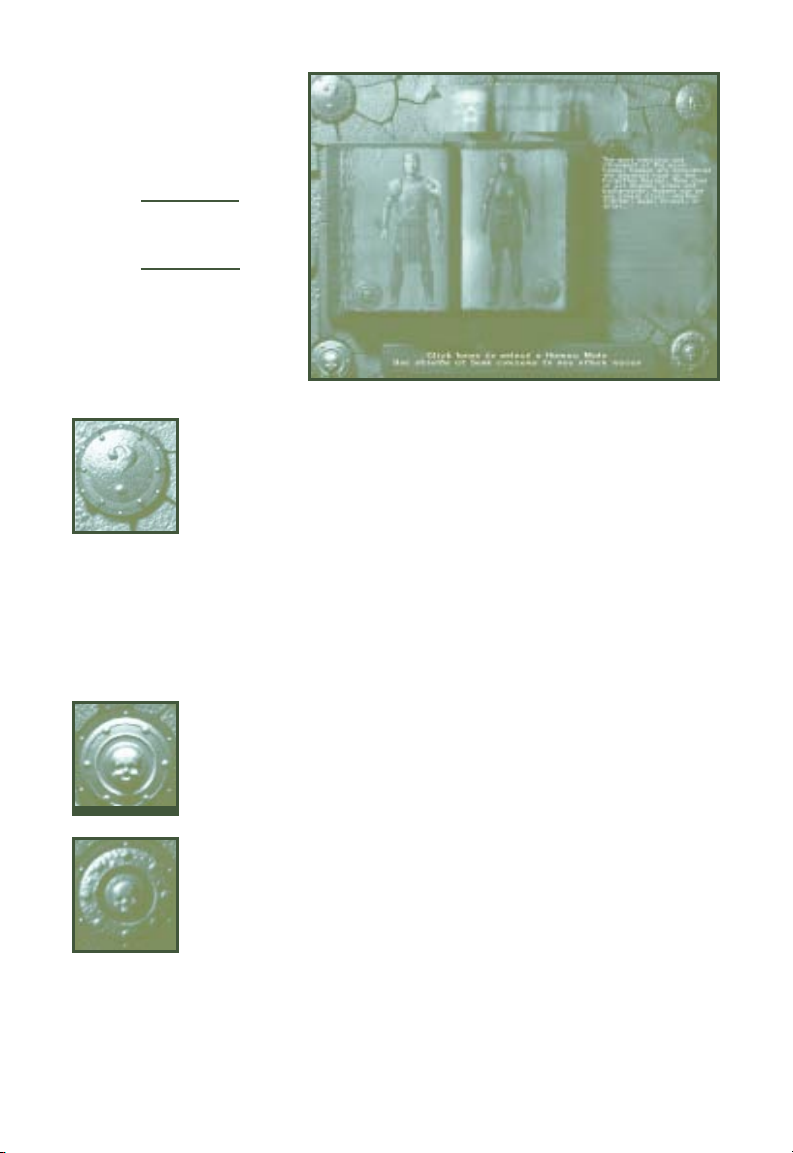
This screen is where the player chooses his character’s class (or classes): demihuman, fighter, priest, mage or thief. Each of these classes is detailed in
Appendix A of the manual.
Scroll Back Shield:
(Shield with a skull upon it located in the lower left corner.)Pressing
this shield returns you to the Race and Gender Screen
(Character Generation Screen One.)
14
Scroll Forward Shield:
(Shield with a skull upon it located in the lower right corner.)When
the shield is pressed after choosing class, you advance to the
Statistics Screen (Character Generation Screen Three.) You
cannot advance to the next screen until you have chosen at least
one class for your character.
The Randomizer/Quick Generation:
(Shield with a question mark located in the upper left corner.)If the
Quick Character Generation button is pressed without having
selected anything from the Class Screen, the Randomizer jumps
to the Statistics Screen (Character Generation Screen Three)
and chooses a class and statistics for you. If the Randomizer is
pressed after you have selected a class (or multiple classes) from
this screen, then the Randomizer randomly creates a character
with the class(es) the player selected.
Page 15

Escape Shield:
(Shield with a skull on it found in the upper right corner.)
Pressing this shield returns you to the main menu.
Choose Fighter:
(Appears as a closed scroll with a character sketch in the upper
left of the screen.) If the scroll is clicked, the figure of the
fighter rises out of the page. This means that you have
selected the fighter class for your character. Clicking on the
figure again withdraws your selection and causes the fighter
figure to settle back into the page. If the player cannot make
any more selections while the fighter is selected (e.g., a
human who chooses the fighter class), single-clicking any of
the other scrolls does nothing until the fighter is de-selected.
The fighter class is discussed in more detail in Appendix B.
Choose Priest:
(Appears as a scroll with a character sketch in the upper right of
the screen.) If the scroll is clicked, the figure of the priest
rises out of the page. If the player cannot make any more
selections while the priest is selected (e.g., a human who
chooses the priest class), single-clicking any of the other
scrolls does nothing until the priest is de-selected.
The priest class is discussed in more detail in Appendix B.
Choose Mage:
(Appears as a scroll with a character sketch in the lower left of the
screen.) If the scroll is clicked, the figure of the mage rises
out of the page. If the player cannot make any more
selections while the mage is selected (e.g., a human who
chooses the mage class), single-clicking does nothing until
the mage is de-selected.
The mage class is discussed in more detail in Appendix B.
15
Page 16
Choose Thief
(Appears as a scroll with a character sketch in the lower right of
the screen.) If the scroll is clicked, the figure of the thief rises
out of the page. If the player cannot make any more
selections while the thief is selected (e.g., a human who
chooses the thief class), single-clicking any of the other
scrolls does nothing until the thief is deselected.
The thief class is discussed in more detail in Appendix B.
Cursor Text Description:
(The wooden bar along the bottom of the screen.)
As the player moves the cursor over each of the hotspots
listed above, this section defines what each of the hotspots
does (see below.)
HOT KEYS
Pressing the following keys on this screen will perform various functions:
Esc
. . . . . . . . . . . . . . . . . . . . . . Return to Main Menu.
16
Page
. . . . . . . . . . . . . . . . . . . . . . Go forward to the Statistics Screen.
Up
Page
. . . . . . . . . . . . . . . . . . . . . . Return to the Select Race and Gender
Down
Screen.
Page 17
Statistics
Character
Generation
Screen 3
This screen is where the character generates the raw statistics for their
character-their Strength, Intelligence, Dexterity, Wisdom, Constitution, and
Charisma.
Scroll Back Shield:
(Shield with a skull upon it appearing in the lower left corner.)
Pressing this shield returns you to the Class Selection
Screen.
Scroll Forward Shield:
(Shield with a skull upon it located in the lower right corner.)
Pressing this shield advances you to the Name and
Alignment Screen (Character Generation Screen Four). You
must have generated statistics before you can advance to the
next screen.
Escape Shield:
(Shield with a skull scrawled on it located in the upper right
corner.) Pressing this shield returns you to the main menu.
17
Page 18

Generate Statistics:
(A rectangular button with two skull shields in the upper left
corner of the screen.) Pressing this button generates the
statistics in the wood panels, below.
Random Stats Generator:
(A series of six wooden panels that rotate when the button is
pressed.) When the button is pressed, the six wooden panels
in this section of the screen rotate, displaying six random
numbers between 3 and 18.
When the screen first appears, the wood panels are all
blank. When the button is pushed, numbers appear on the
wood panel.
Parchment on Main Screen:
Completed stats display on the right hand side of the
Random Stats generator to a piece of parchment with the
following statistics listed: Strength, Dexterity, Constitution,
Intelligence, Wisdom, and Charisma.
To chose your character’s stats, click on the number on the
random Stats Generator. This will cause the number to be
displayed next to the cursor. Drag the number next to the
desired stat, then click again. This drops the number on the
Completed Stats display. When you place your number on a
stat, relevant game information will be displayed next to it.
18
If you wish to change the placement of your selected stat,
click again on the number. The number once again appears
next to the cursor. You may now reposition the number onto
any of the six stats.
Characters have five bonus points that they can add to the
completed character. To add bonus points to a stat, go to the
Bonus Points box and click on it. This causes a number to
appear next to the cursor. Drag that number to the desired
stat, and click to place it.
Page 19

Character classes have a minimum value for their primary
stat (ie. fighters must be strong, priests must be wise, mages
must be intelligent, and thieves must be dexterous. The
Completed Stat Display will not allow you to place a number
that is below a class minimum stat value.
If the player has chosen a race that gives them modifiers to their
characteristics (i.e., a dwarf gains +1 to Constitution and -1 to
Charisma), then the plank takes the modifier into account.
Whenever a fighter character has less than an 18 in the box
and raises it to 18, it becomes 18/01 unless they are halfling
(halflings are not permitted to have exceptional strength
because of their small height and build). Each bonus point
spent adds +10 percentiles to the exceptional strength.
Bonus Points Box:
(Appears as a wooden box in the lower right corner of the
main menu.) When a player first comes to this screen, the
number “5” is displayed in the box…the number in the box
cannot rise above 5 or be reduced below 0. Pressing the stat
modifier arrows causes the total in this box to change. The box
always resets to 5 when the generate stats button is pressed.
Cursor Box Text Description:
(A wooden panel running across the bottom of the screen.)
As the player moves the cursor over each of the hotspots listed
above, this section defines what each of the hotspots does.
19
Page 20

HOT KEYS
Pressing the following keys on this screen will perform various functions:
. . . . . . . . . . . . . . . . . . . . . . Return to Main Menu.
Esc
Page
. . . . . . . . . . . . . . . . . . . . . . Go to Character Generation Screen 4.
Up
Page
. . . . . . . . . . . . . . . . . . . . . . Go to Character Generation Screen 2.
Down
Enter
Space
. . . . . . . . . . . . . . . Push button.
or
20
Page 21
Character
Generation
Screen 4
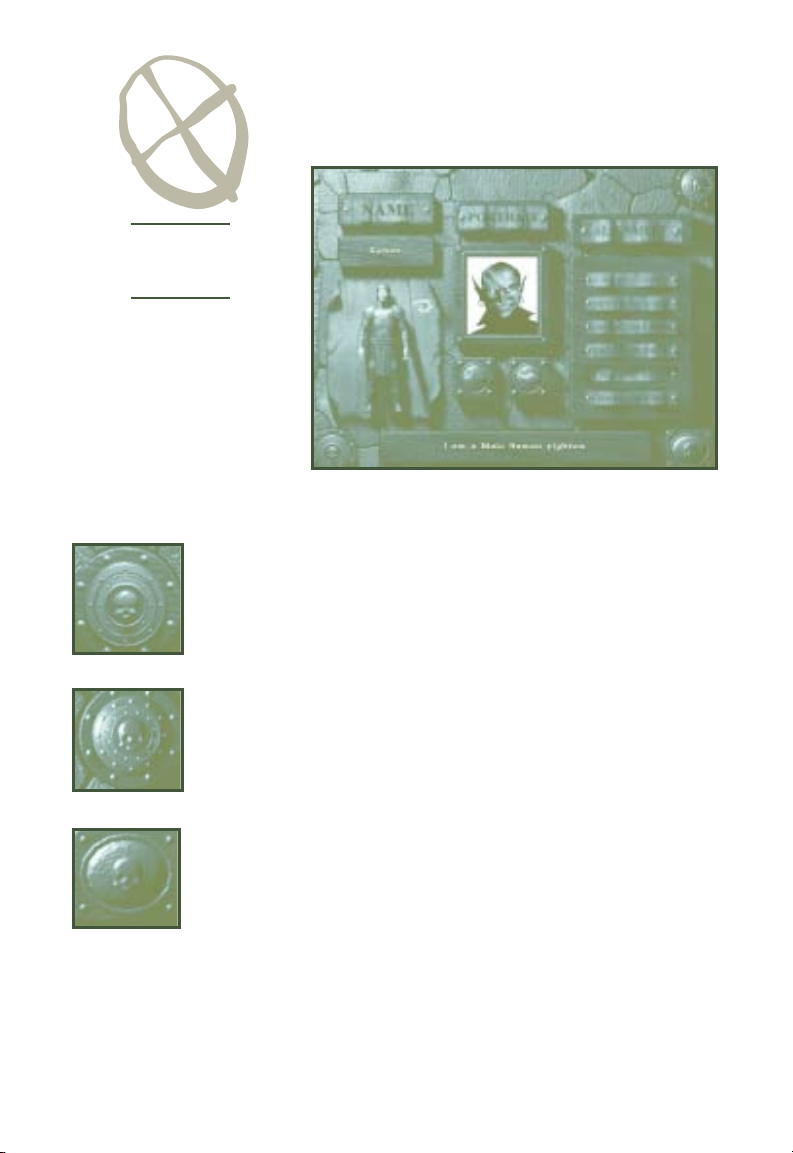
This screen is where the
player chooses his
character’s name, portrait
and alignment (the way the
character sees the world).
Scroll Back Shield:
(Shield with a skull upon it appearing in the lower left corner.)
Pressing this shield returns you to the Statistics Screen
(Screen Three).
Name, Portrait and
Alignment
Escape Shield:
(Shield with a skull upon it located in the upper right corner.)
Pressing this shield returns you to the main menu.
Start Button:
(Shield with a skull located in the lower right corner.) After you
have chosen a name, portrait, and alignment for your
character, clicking on this shield takes you back to the
Waterdeep screen and the game begins. Until you have
chosen a name, portrait, and alignment, pressing this button
does nothing.
21
Page 22
Name Selection:
(Box located in the upper right of the main screen.) Clicking on the
box causes the cursor to vanish, and a pop-up menu appears
which asks you to enter the name of your character. Type the
name that you wish to give the character and press <Enter>.
Portrait:
(Portrait of character appearing in the middle top of the main screen.)
This is where your character’s portrait is displayed. Scrolling
through the buttons below the portrait box rotates through the
selections. Select the portrait that best fits your visualization of
the character, or anything that catches your eye.
Portrait Scroll Buttons:
(Appear as two small shields with arrows beneath the portrait.)
Single-clicking the left shield causes the portraits to scroll
back one, single-clicking the right shield causes the portraits
to scroll forward one.
Alignment Selection:
(Appears as six options written on parchment on the upper right
of the main screen.) In this section is a list of six alignments,
arranged in the following order:
22
Lawful Good
Neutral Good
Chaotic Good
Lawful Neutral
True Neutral
Chaotic Neutral
Alignments describe the character’s philosophy, their beliefs, and
their values. In the Forgotten Realms, they also suggest goals
which individuals and religions actively promote. The character’s
alignment greatly influences how they deal with other people. A
summary of each of these alignments is as follows:
Page 23

Lawful Good characters believe in doing good for others, and believe that
this is best achieved through a disciplined life and through rules and
regulations that promote fairness and justice.
Neutral Good characters care about kindness, generosity, and doing good
deeds. They don’t care about rules, laws, and order but will usually obey
them as long as they don’t interfere with their ability to do good.
Chaotic Good characters also believe in doing good deeds, but hate rules,
orders, bureaucracy, or anything that might interfere with their personal
freedom. Chaotic good characters believe that rules constrain people’s
ability to do good and promote tyranny and evil.
Lawful Neutral characters believe that order and tranquillity is the ideal
which all should strive to achieve, and that order is more important than
kindness, compassion, mercy, or the other goodly virtues. Lawful Neutral is
the alignment of bureaucrats and those who promote authority.
True Neutral characters believe in preserving a balance between good and
evil, law and chaos. Many neutral characters point to nature and its endless
cycle of creation and destruction which sustains life in the world as the
perfect example of that balance.
Chaotic Neutral characters do not care about others, only about freedom.
Anything or anyone that gets in the way of personal freedom is the enemy.
This is the alignment of self-centered people and also the alignment of
those who hate authority. Chaotic Neutral characters do not enjoy or
promote cruelty (that’s reserved for evil people.)
Evil alignments are not available to player characters in Descent to
Undermountain.
Clicking on one of the alignments indent it. To change your selection, click
on any other alignment.
23
Page 24

Cursor Box Text Description:
(A wooden panel across the bottom of the screen.)
As you move the cursor over each of the hotspots listed
above, this section will define what each of the hotspots
does.
HOT KEYS
Pressing the following keys on this screen will perform various functions:
. . . . . . . . . . . . . . . . . . . . . . Return to Main Menu.
Esc
Page
. . . . . . . . . . . . . . . . . . . . . . Go to Character Generation Screen 3.
Down
24
Page 25

Back to Waterdeep
WATERDEEP SCREENS
After you have created
your character, you find
yourself in the main
Waterdeep screen. From
there, you have one route
open to you-go to Khelben
Blackstaff’s tower and learn
whether he has any new
quests for you.
KHELBEN SCREEN
(Tower just to the right of the mountain.) Khelben Blackstaff assists you in your
adventures in Undermountain and supplies you with quests and other tasks to
perform in exchange for monetary rewards. When starting a new game, you must
visit Khelben first before any of the other locations become available to you.
YAWNING PORTAL INN
(Inn to the far left of the screen.) The Yawning Portal Inn is the most publicly
known entrance to Undermountain. It costs a gold piece to enter and leave
Undermountain.
TRADING SCREEN
(Marketplace just to the left of the middle of screen.) The Marketplace is where
you can go to sell items you have found in the dungeon and buy additional
supplies of arrows, crossbow bolts, darts, and other weapons you may need in
the dungeon.
CITY GATES
(Lower Right of screen.) This returns you to the main menu.
25
Page 26
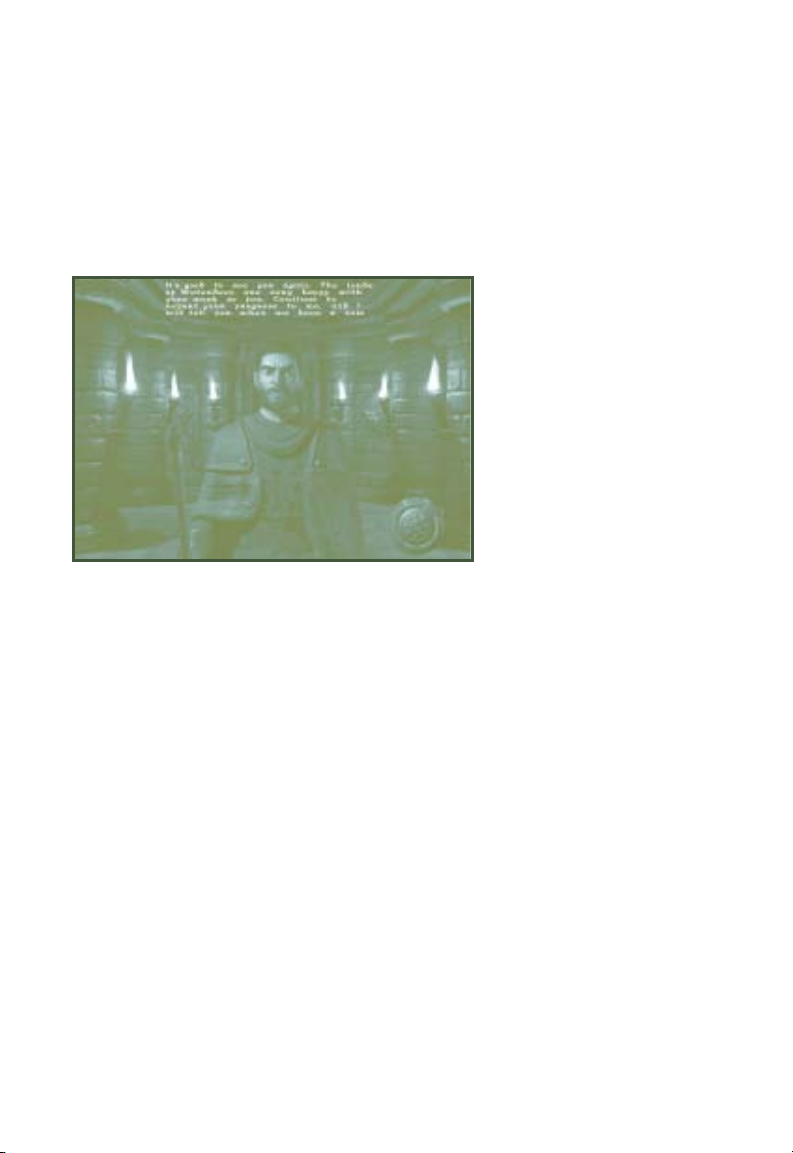
KHELBEN BLACKSTAFF
The Khelben screen is where the characters come to receive quests and receive
rewards and commentary after successfully completing them. Visit him after
you think you have accomplished something and he might give you a clue or a
new quest. For each quest that Khelben grants you, he gives you a scroll that
describes it in detail.
Exit Tower: (Appears as a shield in the lower right corner of the screen.) When
you click on the shield with the mouse, the player leaves Blackstaff’s Tower
and returns to the Waterdeep screen.
Blackstaff Picture: (Majestic picture of Blackstaff in the center of the screen.)
Khelben Blackstaff, believed by many to be the greatest mage in Waterdeep.
The Display Box (Wooden frame box located in the lower left corner of the
screen.) This section displays the inventory items (and creature descriptions)
keyed to Khelben’s speech during the game. They appear in the box when
Khelben speaks about them during his quest assignments. The area cannot be
activated by the player.
26
Page 27
KHELBEN’S SCROLLS
Khelben gives you a scroll describing each quest you receive from
him. To use the scroll, go to the Inventory screen and drag the
scroll to either the Use button, or onto the large armored figure
that represents the character.
BLACKSTAFF SCREEN HOT KEY
Pressing the following key on this screen will perform the following function:
. . . . . . . . . . . . . . . . . . . . . . Pressing Escape returns to the Waterdeep
Esc
Menu.
TRADING SCREEN
This screen is where characters come to buy and sell items.
Exit Screen Button: (Appears as a shield in lower right corner.) When clicked
with the mouse, the player leaves the Trading Screen and emerges back into
the main Waterdeep screen.
27
Page 28
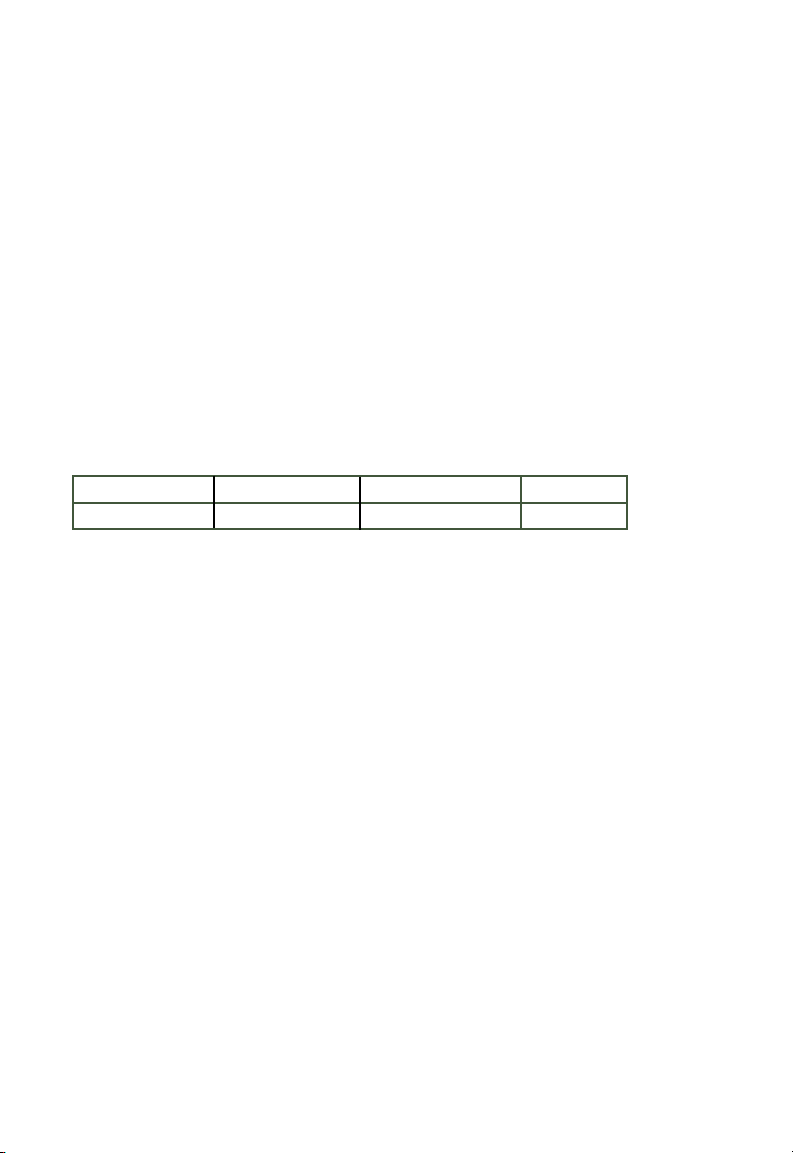
Buy Button: (The left-most of the two buttons in the upper right corner of the
screens.) When the button is selected with a single-click, the Buy option for
the items screen is displayed, showing all the items the shopkeeper has for sale
and the shopkeeper’s price for them. When selected, the Buy button remains
indented until the Sell option is selected. Only one button can be selected at
one time.
Sell Button: (The right-most of the two buttons in the upper right corner of the
screens.) When the button is selected with a single-click, the Sell option for
the items screen is displayed, showing all the items in your inventory and how
much the shopkeeper is willing to pay for them. When selected, the Sell
button remains indented until the Buy option is selected. Only one button can
be selected at one time.
Item Display: (A list of items displayed on a piece of parchment on the left side of
the screen.) This area is broken down as follows:
Icon Quantity Description Cost
When the player comes to this screen from the Waterdeep screen it defaults to
the Buy option. In the Buy option, it displays all the items the proprietor has for
sale. By clicking the scroll bar on the right side of the parchment, the screen
scrolls through the items the proprietor has in stock. In the Sell option, all the
items in the character’s inventory are displayed on the sheet with a cost next to
them.
Moving the mouse over any selection on the menu changes the color of the
text (see Cursor Text Description, below). If the player single-clicks on a
highlighted item or presses <Return> (see hot keys below) while in the Buy
option, a pop-up window appears, asking if the player wants to purchase the
item [Accept/Reject]. If [Accept] is selected, the item is purchased and placed
in the character’s inventory. If [Reject] is selected, the pop-up box disappears.
If the player is in the Sell Option and single-clicks on the item or presses
Return, a pop-up window appears asking if the player really wants to sell the
item to the proprietor.
28
Page 29

Weapon, Armor,/Miscellaneous Jump Toggle: (Appears as three large buttons
labeled “Weapons,” “Armor,” and “Miscellaneous” on the right side of the screen.)
If any of these three buttons are clicked, then the Display Menu jumps to the
beginning of the selected items (i.e., to weapons, to armor, to miscellaneous
items). When the player first arrives, the screen defaults to the start of the
weapons list.
Cash Bar: (Located in the lower right of the screen.) This bar displays the current
amount of gold the character has in their inventory. Whenever anything is
bought or sold, the number counter rapidly increases or decreases to the new
cash total along with the jingle of coins.
Cursor Text Description: (A wooden panel at the bottom of the screen.) As the
player moves the cursor over each of the hotspots listed above, this section
defines what each of the hotspots does.
TRADING SCREEN HOT KEYS
Pressing the following keys on this screen will perform various functions:
. . . . . . . . . . . . . . . . . . . . . . Return to Waterdeep Menu
Esc
. . . . . . . . . . . . . . . . . . . . . . . . . . . Rotates through each of the selections
Tab
. . . . . . . . . . . . . . . . . . . . . . . . . . .
Return
above one at a time, highlighting each.
Selects/Deselects a highlighted option from
#1 To #5.
. . . . . . . . . . . . . . . . . . . . . . Scrolls up one page on the Buy/Sell List.
Page
Up
Page
. . . . . . . . . . . . . . . . . . . . . . Scrolls down one page on the Buy/Sell List.
Down
. . . . . . . . . . . . . . . . . . . . . . Scrolls up one line on the Buy/Sell List.
. . . . . . . . . . . . . . . . . . . . . . Scrolls down one line on the Buy/Sell List.
29
Page 30

THE YAWNING PORTAL INN
This Inn is where the entrance to Undermountain resides. The owner of this
fine establishment is Durnan, a former adventurer who is one of Waterdeep’s
leading citizens – and one of its deadliest swordsmen. Durnan and his friend
Mirt were among the first people to successfully adventure through the halls of
Waterdeep. The Yawning Portal is built over one of the few publicly known
entrances to Undermountain (a large well with a cage in the center). Wouldbe adventurers are permitted to go down into the dungeon, and usually do so
with great ceremony, while wellwishers watch, cheer, and wager on whether
they will ever return from the dungeon.
There are a number of regular patrons in the Yawning Portal:
• Mirt, the Moneylender, former head of the Waterdeep Thieves’ Guild
• Zariel, priestess of the goddess Tymora the Luckbringer, who heals
adventurers (albeit for a very steep price)
• Nalbas, a halfling merchant (and some would say thief)
• Tolem, a dilettante who is actually one of the better swordsmen on the
Sword Coast
• The mind flayer sage Sangalor of the Secrets, who sells secrets (for a price)
• Sabrae, a priestess of the drow goddess Eilistraee, one of the few benevolent
goddesses of the drow
• Aleena Paladinstar, daughter of Lord Piergeiron, a capable mage who’s been
forbidden to go on adventures by her father.
30
Page 31

The patrons in the Yawning Portal have their own concerns and sometimes
aid you in your quests in Undermountain. Occasionally, they have quests for
you to perform, and it’s a good idea to talk with them whenever you return to
the surface after completing one of Khelben’s quests. To talk with someone in
the Yawning Portal, go up to them, and click on them with the activate mouse
button.
This screen shows where the character enters Undermountain.
YAWNING PORTAL INN
31
Page 32

Adventuring in
undermountain
Okay, now that you’ve created a character, visited Khelben, and equipped
yourself in the marketplace, it’s time to get started.
After clicking on the Yawning Portal Inn in Waterdeep, you should find
yourself entering the Inn. Lets get familiar with the game interface.
Note: All the keys used within the game can be changed. The following uses
the default configuration that comes with the game.
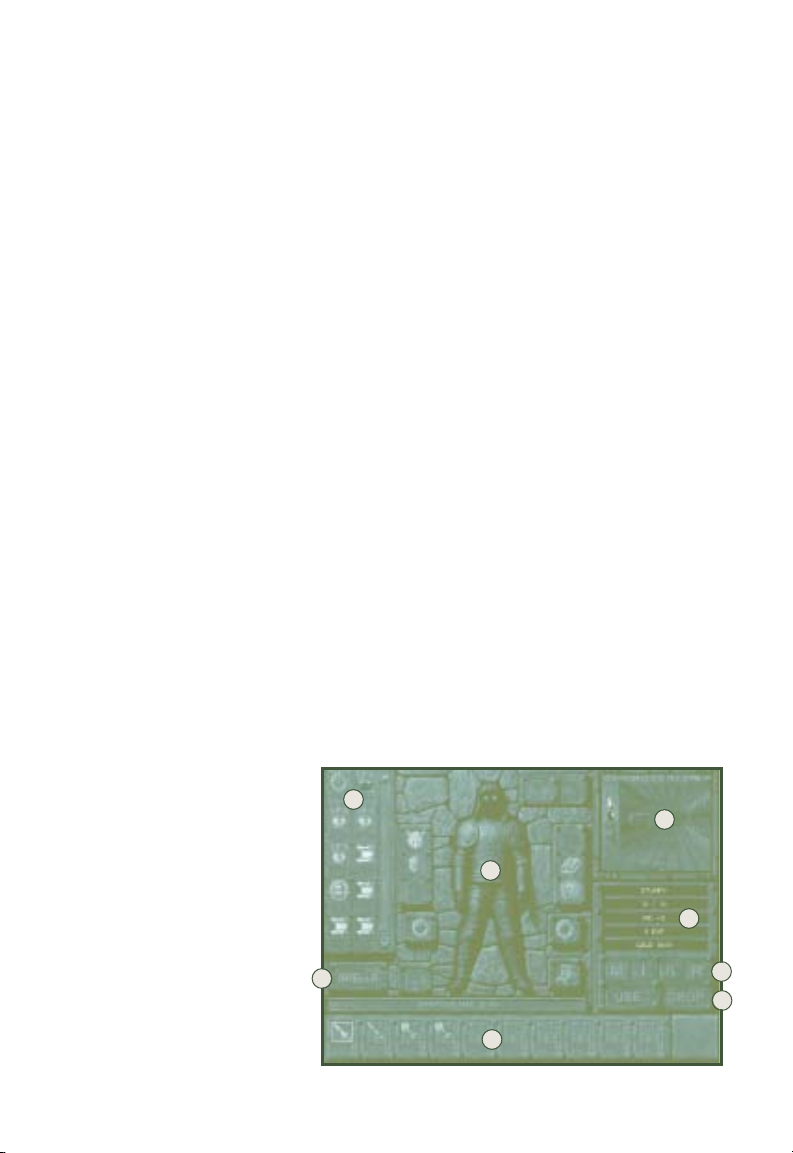
MAIN GAME SCREEN
This is where most of the
3
4
5
1
2
game is played. This screen
has six major sections.
6
1. Game Window
This is the screen where you view the game. The Game Window takes up
most of the screen.
2. Message Box
This is the area where you receive messages that tell you information
concerning the levels, combat, and other important parts of the game.
3. Character Information Display
In the upper left hand corner of the game, there is a small display of character
information, consisting of the character’s portrait, their name, and their current
hit point total (compared to their maximum).
32
Page 33

4. The Current Item Box
Below the character name is the Current Item box. This shows the item or
spell that your character has currently equipped. Hitting the left mouse
button will allow your character to use this item.
5. Interface Control Buttons
On the left hand side of the screen, below the Character information
section, are five buttons. These buttons bring up the interface for
important game functions.
USE This allows you to use non-equippable items (such
as potions and some scrolls) on the Inventory screen.
M This toggles between the game window and
the Map Screen.
I This toggles between the game window and
the Inventory screen.
S This toggles between the game window and
the Statistics Screen.
R Rests your character if you are in a rest area.
6. Item Boxes
Hit the number key that corresponds with your item boxes to access your
items. Clicking on an item or spell in a box displays it in the Current Item
Box (#4), and allows you to use the item or spell with a left mouse click.
33
Page 34

LOOKING AROUND THE
MAIN SCREEN
Lets look around the Inn. There are two modes of control in Undermountain,
Immersive and Non-Immersive. To toggle between modes, hit the <V> key.
Non-Immersive mode:
In this mode your mouse only controls the cursor on the screen and where
your character faces and moves is completely controlled by the keyboard. Use
the <PageUp> key to look up and <PageDown> key to look down. You may
also glance up by using the <Home> key and glance down by using the <End>
key. While in Non-Immserive mode, you may use the mouse to move the
cursor on the screen to click on any of the Interface Buttons.
Immersive Mode:
Let’s look around in Immersive mode. Hit the V key and make sure you see
“Immersive Mode” in the message box. While in Immersive mode, the mouse
controls the way the player looks. Move the mouse left and your character
turns left. Move the mouse right and your character will turn right. The same
goes for looking up and down. Since the mouse controls your character rather
than the mouse cursor, the buttons need to be accessed through a hot key or
you will need to switch back to Non-Immersive mode.
LOOK COMMANDS: MAIN GAME SCREEN
34
V . . . . . . . . . . . . . . . . . . . . . .Toggles between Immersive/
Non-immersive mode.
Page Up . . . . . . . . . . . . . . . . .Look Up.
Page Down . . . . . . . . . . . . . . .Look Down.
Home . . . . . . . . . . . . . . . . . . .Glance Up.
End . . . . . . . . . . . . . . . . . . . .Glance Down.
Page 35

MOVING
Regardless of whether you’re in Immersive or Non-Immersive mode, the
controls for moving are the same. Lets walk forward a bit. Hold the <8> key
on your number pad and your character walks forward. To walk backwards,
hold the <2> key. To move to the right, hold the <6> key. To turn to the
left, hold the <4> key. These keys are interchangable with the arrow keys on
your keyboard.
Your character can also side-step to the left by holding the Z key and side-step
to the right by holding the X key. You may also toggle side-step mode by
pressing the <ALT> key. While in side-step mode, turning left and right now
side-steps you left and right.
Once you are used to walking around, let’s try running. Hold down the left
shift key to make the character run rather than walk. You may also activate
the <CAPS LOCK> key to put your character in a AUTORUN mode.
Your character may jump by hitting the <SPACEBAR> key. Jumping can be
mixed with any of the movement keys so that you may jump forward,
backward, etc.
MOVEMENT COMMANDS
8 or Up Arrow . . . . . . . . .Move Forward.
2 or Down Arrow . . . . . .Move Backward.
4 or Left Arrow . . . . . . . .Turn Left.
6 or Right Arrow . . . . . . .Turn Right.
<Z> . . . . . . . . . . . . . . . . .Side-Step Left.
<X> . . . . . . . . . . . . . . . .Side-Step Right.
<ALT> . . . . . . . . . . . . . .Side-Step Mode toggle.
<LEFT SHIFT> . . . . . . . .Run.
<CAPS LOCK> . . . . . . .Autorun Mode.
<SPACEBAR> . . . . . . . .Jump.
35
Page 36
OPENING DOORS
Okay, let’s start moving around and doing things. After you enter the Yawning
Portal from the Waterdeep Screen, move forward until you find the door on your
right side. Turn to face it and move close to it. To open the door, hit the activate
key (the default for activate is the <A> key) or the right mouse button. If the
door doesn’t open, then you’re probably not close enough. Once you’ve opened
the door, move into the room. You can also use the activate key to close some
doors behind you (very useful when you’re being chased by a horde of Orcs!)
HOW TO PICK STUFF UP
Picking up items is as easy as running over them. In the Yawning Portal, there
is a potion lying on the ground. To pick it up, just walk over the potion and it
is automatically placed in your inventory. Don’t worry about weight in this
game. All your items are stored in a magical bag of holding that allows you to
carry a number of heavy items without weighing you down.
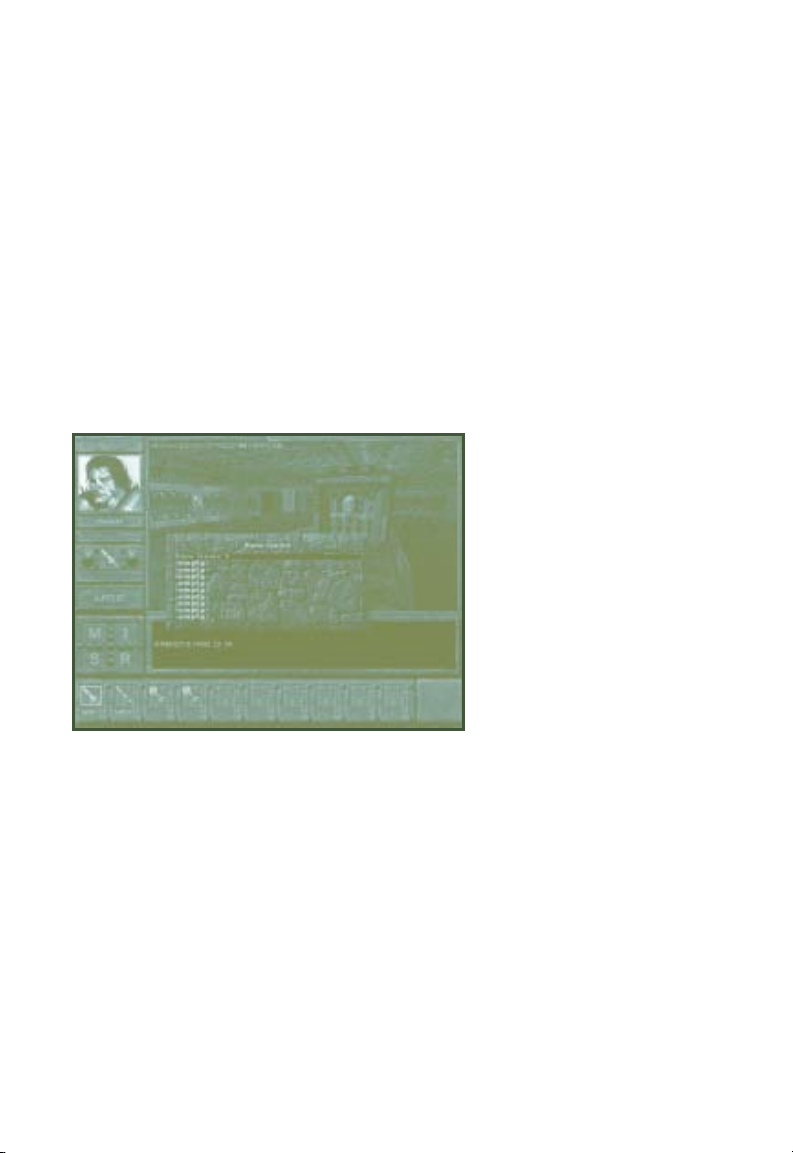
INVENTORY SCREEN
When you click on the <I> key on the main interface, you are taken to the
Inventory Screen. This screen contains all of the items that a character
possesses. Beneath each inventory box is a number displaying how many of that
item the character currently has. To the right of the inventory boxes is a slide
bar allowing access to items in the inventory that are not currently being
displayed. Beneath that is a text bar describing the item. The button to the
right changes the ‘type’ of inventory the character is looking at-weapons, other
objects (armor, etc.) or spell/special abilities. Pressing <I> again takes you back
to the main screen.
Again, your magical bag of
holding allows you to carry
almost any amount of
weight without being
encumbered.
1
4
3
5
2
8
6
7
Page 37

The Inventory screen is divided into eight sections.
1. Item Display
On the upper left hand side of the screen, there is a scroll with 10 visible
slots. This displays the items that are possessed by your character. To scroll
through your inventory, click on the “up” and “down” arrows that are
located on the right hand portion of the item display.
Items are Equippable (such as weapons that can be wielded, or armor that
can be worn), and Non-Equippable (such as potions that can be drunk or
scrolls that can be read).
To use any Equippable item, click on it. This causes the appropriate box in
the Player Character Display (#3) to be highlighted. Either drag the item to
the highlighted box and click to place it, or drag the item onto the large
armored figure in the Player Character Display (#3) and click again to equip
it.
To use any Non-Equippable item, first click on it, then drag it to either the
Use button (#7) or to the large armored figure in the Player Character
Display (#3) and click again to use it.
2. Spells Button
Click on the Spells button to prepare the magic spells that can be cast by a
mage or a priest. The inventory column which previously displayed all your
items now displays your available spells. Preparing spells is exactly the same
as equipping a weapon. Click on the spell you would like to prepare, and
then place it within one of the 10 Item Boxes at the bottom of the screen.
When you are ready to use the spell, press the key that corresponds with its
Item Box. The spell now appears in the Current Item box that’s located
under the Hit Point total on the main Game screen (see Main Game Screen,
#4).The spell can now be cast when you click your left mouse button.
To go back to the regular Inventory, press Spells. To return to the regular
game, press “I”.
3. Player Character Display
In the center of the screen is a large figure representing your player
character. The Player Character is surrounded by a display of 12 boxes,
which represent places where items are equipped. When an Equippable
object is clicked, the appropriate box to equip the item is highlighted.
37
Page 38

4. Game Port Window
The upper right corner of the Inventory Screen contains a window view of
the dungeon. This is the Game Port Window. You can still fight and move
in the dungeon while in the Inventory Screen-it is the main interface screen
within a smaller window. While in Immersive mode, you control your
character through the upper right corner window. To toggle the cursor, you
need to enter Non-Immersive mode to use the Inventory interface. The
default key for toggling between Immersive and Non-Immersive is <V>.
5. Character Information Display
This displays the following information about your character: Name, hit
points (current hit points vs. maximum hit points), Armor Class, experience
point total, and the amount of gold the player character possesses.
6. Interface Control Buttons
There are four buttons which work identically to the interface control
buttons on the Main Game Screen, except that <I> returns you to the
Main Game Screen.
M . . . . . . . .Takes you to the Map Screen.
I . . . . . . . .Takes you out of the Inventory screen and back to
the normal playing view.
S . . . . . . . .Takes you to the Statistics Screen.
R . . . . . . . .Rests your character when you are at a rest spot.
7. Use/Drop Buttons
The Use button allows you to use any Non-Equippable item, such as potions
and scrolls; simply grab the item, drag it onto the Use button, and click.
The Drop button allows you to drop any item back into the dungeon.
Warning! Items dropped in Undermountain are quickly scooped up by
scavenging monsters! You may never see them again. Think carefully before
dropping an item!
8. Item Display Boxes.
The 10 boxes on the bottom of the screen function identically to the Item
Display Boxes on the Main Game screen.
38
Page 39

INVENTORY:
LOW RESOLUTION MODE
Playing the game in low-resolution graphics (320x200) mode necessitates a
different graphic interface than normal resolution mode, because of its
diminished ability to display complex graphics.
To get to the Inventory screen, enter Non-Immersive mode and press <I>. This
brings up the main Inventory screen. The list on the left hand side of the
screen is the character’s inventory.
To use items while on the Low-Resolution Inventory screen, click on the item
and either drag it to a flashing box and drop it , or drag it onto the armored
figure, and this automatically uses the item.
Hot Key Toggle Shield
As in normal resolution mode, there are 10 hot keys that correspond to the <1>
through <0> keys. To access these slots, click on the shield that is on the top left
side of the armored figure. This brings up the Hot Key Inventory Screen.
Clicking on a weapon or any other item that can be used on this screen causes
all open boxes to flash. Drag the weapon to an open slot and drop it. Each slot
represents a number from 1 to 0. While playing, push the appropriate button to
access that item.
Spells
To access spells, click on the spell scroll on the lower left hand corner of the
screen. Click on the spell. This allows you to place spells in hot key boxes in an
identical manner as equipping items.
HOW TO EQUIP YOUR CHARACTER
Now let’s equip your character. If you are in Non-Immersive mode, click on
the I button on the lower right side of the screen. If you are in Immersive
mode, click on the I button on the keyboard. This takes you into the
inventory screen of the game.
On the left hand side of this screen, there are a number of different objects.
Place the cursor over the item and a description of it appears. Just click on the
item to pick it up.
39
Page 40

When you click on an equippable item, the box where the item can be placed
is highlighted. You can either move the item onto the box and click to equip
it, or move the item to the armored figure in the center of the screen and
click; this automatically places it in an appropriate spot.
Click on any weapon in your inventory to pick it up. Once picked up, place it
in any of the 10 Item Display Boxes (#8) below your character. Each box
corresponds to the number keys on your keyboard. The left-most box is button
1 on your keyboard and the right most-box is button 0. When you have
placed the weapon in one of the Item Display Boxes, press the key that
corresponds with that item’s box. You will notice in your Game Port Window
(#4) that your character now has that weapon equipped, and that the item is
in your Current Item Box when you return to the Main Game Screen..
Equipping spells is done in an identical manner to equipping items. Press the
Spells button (#2) to access your spell inventory, then click on the spell to
place it in an Item Display Box.
MAP SCREEN
The <TAB> key brings up the Map Screen, or Automap. If you’re in
Immersive mode, click on the <TAB> key on your keyboard. If you’re in NonImmersive mode, you can click on the Map button on screen. The map screen
is divided into five sections.
40
2
1
3
4
5
Page 41

1. The Map Window
The Map Window contains an automap of all the portions of the current
level that the player character has been to or seen. Your character is
represented with a red arrow. Only the level that the player character is
currently on is displayed. It appears as a white wire-frame against a black
background within a stone circle.
The player can move the map around by clicking on it with the cursor,
then using the movement keys to swivel the map around. To return to the
“dungeon screen,” click on the Map key again. <TAB> is also a hot key for
the automap.
In Immersive mode, the map shows your movement on the level. In NonImmersive mode, you may click on the map and use the forward/backward
movement keys to zoom the map in and out. Hitting the attack key resets
the map to its original zoom and orientation, otherwise the map retains its
previous settings.
The map has a color code to show certain features on the level:
Doors Light Blue
Magical Gates Orange
Rest Areas Yellow
Secret/Illusionary Doors Purple (Flashing)
Triggers (for traps) Blue (Flashing)
Traps Green (Flashing)
The player must uncover secret doors, triggers, and traps before they are
displayed. The map also fades slightly with distance and height.
2. Game Port Window
This acts identically to the Game Port Window on the Inventory screen. It
allows you to continue playing the game while accessing the Map Screen.
The player has to be in Immersive mode to continue playing through the
Game Port Window.
3. Character Information Display
This displays the following information about your character: Name, Hit
Points (current hit points vs. maximum hit points), armor class, experience
point total, and the amount of gold the player character possesses.
41
Page 42

4. Interface Control Buttons
There are four buttons which work identically to the interface control
buttons on the Main Game Screen, except that “M” takes you out of the
Map Screen.
M . . . . . . . . Takes you out of the Map Screen.
I . . . . . . . . . Takes you to the Inventory screen.
S . . . . . . . . . Takes you to the Statistics Screen.
R. . . . . . . . . Rests your character if you are at a rest spot.
5. Item Display Boxes
The 10 boxes on the bottom of the screen function identically to the Item
Display Boxes on the Main Game screen.
STATISTICS SCREEN
The Statistics screen displays vital information about your character.
From the Main view screen,
2
1
3
click on the “S” button.
While in Immersive mode,
your mouse controls your
character in the Game Port
Window (#3). To access
5
the interface, you need to
be in Non-Immersive mode.
4
7
1. Statistics Summary
6
On the left hand side of the screen is your character’s portrait, a listing of
your character’s alignment, race, level, class, and the six characteristics:
Strength, Dexterity, Constitution, Intelligence, Wisdom, Charisma.
42
Page 43

2. Thief Abilities Box
This lists your character’s percentages at thieving skills: hide in shadows,
move silently, open locks, find/remove traps, and climb walls. If you are not
a member of the thief class (or have demihuman abilities to find hidden
areas, such as those possessed by dwarves), these abilities are set to zero.
3. Game Port Window
This acts identically to the Game Port Window on the Inventory screen. It
allows you to continue playing the game while accessing the Statistics Screen.
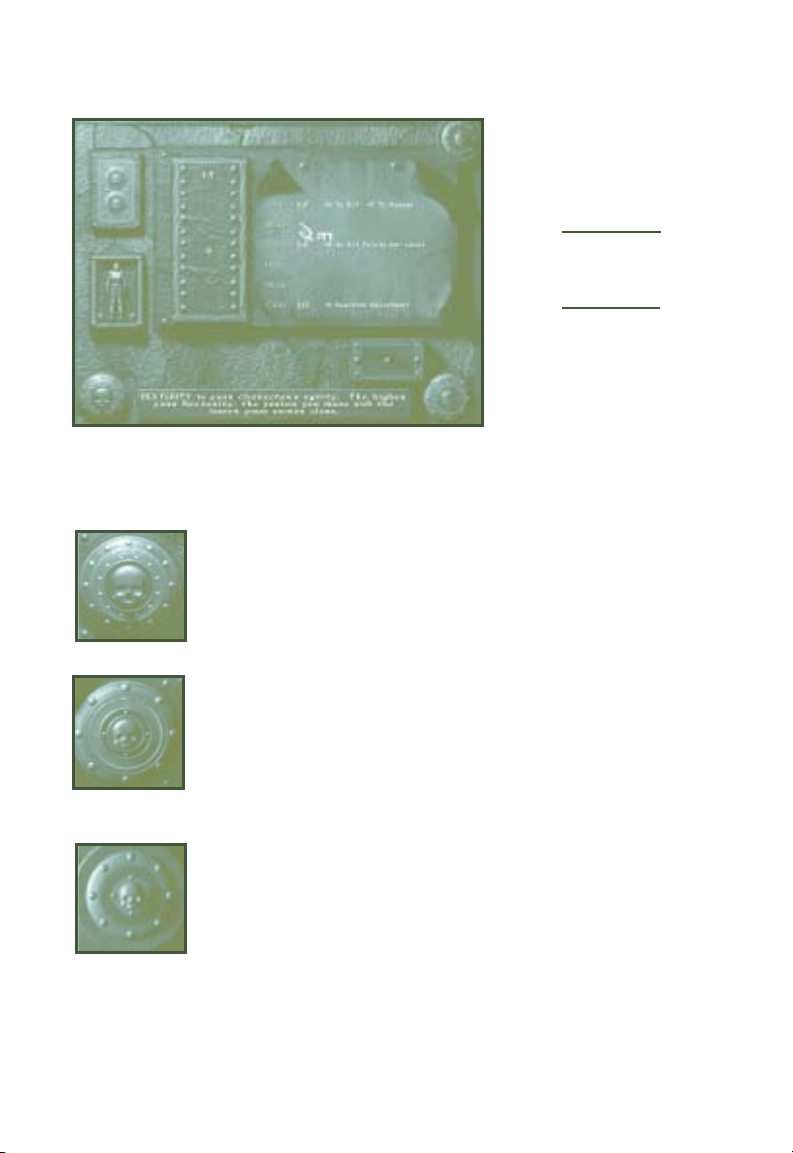
4. Available Spell Display
If your character is a mage or a priest, then this section displays the number
of spells available to you in the four spell levels that Descent to
Undermountain allows you to cast.
5. Character Information Display
This displays the following information about your character: Name, Hit
Points (current hit points vs. maximum hit points), Armor Class, experience
point total, and the amount of gold the player character possesses.
6. Interface Control Buttons
There are four buttons which work identically to the interface control
buttons on the Main Game Screen, except that <S> takes you out of the
Statistics Screen.
M . . . . . . . .Takes you to the Map Screen.
I . . . . . . . . .Takes you to the Inventory screen.
S . . . . . . . . .Takes you out of the Statistics Screen.
R . . . . . . . .Rests your character if you are at a rest spot.
7. Item Display Boxes
The ten boxes on the bottom of the screen function identically to the Item
Display Boxes on the Main Game screen.
RESTING
Magic in AD&D requires long periods of rest in order to memorize magic
spells and perform priestly prayers. Fortunately, there’s an easier way to do it in
Undermountain. Thanks to the magical intervention of the Priestesses of
Eilistrae, there are places in Undermountain known as Rest Stops where mages
and priests can instantly relearn their spells.
43
Page 44
When you are ready to rest, move up to the rest spot and click on the R button
on the main game window or hit the <R> button on your keyboard. Your
character is immediately refreshed and ready to go. Note, when you use a rest
spot, you will NOT be able to go back and use it again for at least 30 seconds.
Some rest areas in the dungeon have limited healing abilities. You may only
use them three times and then they will no longer heal. However, they will
continue to allow spellcasters to rememorize their spells.
SAVING YOUR GAME
Okay, now that we understand the fundamentals of the game, let’s move on to
the more complex and fun aspects of the game. It would be a good idea to
save the game first.
Press <ALT+F2> or
<ESC> to bring up a
window that will allow
you to save games
Click or select one of the -EMPTY- slots to create a save game. Once selected,
you may enter a description of the saved game. When you are done with your
description, hit return. A maximum of 10 saved games is allowed.
Warning: Save Games can become quite large in DTU, sometimes as much as 5
MB toward the end of the game.
44
Page 45

NON-PLAYER
CHARACTER INTERACTION
Most creatures in Undermountain are rather hostile and have no interest in
speaking to you. Monsters that are hostile to you generate a “no response”
when you try to talk to them.
Creatures that you converse with are initially non-hostile. If you notice a
monster that is not making any hostile advances toward you, there’s a good
chance that you can engage it in a conversation.
Be warned that if you attack a monster, it will no longer be willing to talk to
you, and it may try to kill you.
There are a lot of creatures in Undermountain who have their own agenda
which might help you out. Take advantage of this and try to find a nonhostile way to deal with these creatures. Be warned-sometimes their agendas
won’t work in your favor.
To begin a conversation with a monster, use the Activate (<A> is the default)
key on it. You should get as close as possible to the monster and face it before
attempting to talk with it.
When you start a dialogue with one of Undermountain’s denizens, the creature
first starts with a message and gives a list of potential player responses. You
may cycle through the responses with the arrows keys or with the mouse.
When you have found a response that you would like your character to
respond with, click on it with the left mouse button or hit return.
Monster responses to you can vary depending on your character. Your race,
class, sex, and alignment can affect how monsters react to you. These factors
also modify what responses are available for you to use. What can also affect a
conversation are actions you have done within the dungeon. Killing a
creature’s wife within Undermountain definitely has adverse affects if you
decide to talk to her husband later in the game.
To practice talking with creatures, go to the Yawning Portal. Go up to one of
the bar patrons and press the activate key. You are then presented with a list of
dialogue options.
You may exit a conversation at any time by pressing the <ESC> key.
45
Page 46

ENTERING THE DUNGEON
OF UNDERMOUNTAIN
Move to the middle of the Inn and you find a cage suspended over a big pit.
Walk around the big pit until you find the walkway into the cage. Approach
the cage through the walkway and open the door to the cage. When the door
is open, enter the cage. This takes you to the first HUB level.
Undermountain is divided into four tiers, each of which has a HUB or central
area. Each HUB contains doors to various sections of Undermountain, sections
where the player can complete Khelben’s missions. Khelben received the keys
to these doors from his good friend Durnan, who explored Undermountain
long ago. As you complete Khelben’s missions, the arch-mage will judge that
you’re capable of surviving new challenges, and will give you the means to
enter these previously forbidden areas.
ACTIVATING SWITCHES
If you see something in the dungeon that looks like it can be manipulated,
such as a switch, press the right mouse button or the activate key and see what
happens. If the object cannot be manipulated, then nothing happens. If the
object is usable, then you will usually get some visual effect.
For example, after killing two kobolds, you find four switches in the room.
Examining the first two reveals that they are broken. Examining the other
two finds that they are both in working condition. Activating these two
switches opens up certain areas within the dungeon level.
Reading Things
There are times when you step over an area, a message appears in the message
box describing the area or anything important in that area. There are also
parts of the dungeon that you have to Activate in order to read a message.
Most of these are things that are obvious such as scrawls on a wall or a sign.
46
Page 47

COMBAT
Combat itself is rather simple. Use the Inventory screen to arm yourself. Then
left-click with the mouse or press the <LEFT <CTRL>> key to swing at a
creature. In melee combat (swords, scimitars), your attacks always strike at the
center of the screen (ie. where your character is looking.) If you are trying to
kill a small creature (such as a rat or a kobold), you have to look down in
order to strike it.
When you successfully hit a monster, you may see blood (remember, not all
monsters bleed) and you definitely see it reel back in pain. You also receive a
message in the message box of the main game window that describes what you
did to it.
If you want to use a ranged weapon, make sure you have it equipped and press
the left mouse button or the <LEFT <CTRL>> key as you would a melee
weapon.
When a monster successfully hits you, your character may be pushed back and
the game screen turns to a shade of red. You also receive a message within the
message box of the main game window.
The trick to fighting and surviving in Undermountain is knowing when to
stand and fight and knowing when to run. Not all monsters are stupid.
Groups tend to try to out-flank you or attack you from behind. Good
combatants try to hone their attack skills as well as their dodging abilities.
SPELLS AND MAGICAL ITEMS
Magical items are treated in an identical manner as non-magical items.
Consult the Inventory section on equipping and using magic items.
Spells are also treated in an identical manner as magical items. Consult the
Inventory section on equipping and casting spells. To regain spells, find a Rest
Stop and press the <R> key.
Magic scrolls are only usable by the appropriate magic-using classes. For mages,
the first time they gain a spell scroll, it is added to their spell book. If the mage
finds the scroll again, they may cast it as a free spell.
47
Page 48

INFRAVISION
Infravision is a special ability that allows a character to see in the dark by
sensing surrounding heat sources and residual heat traces. Press <N> to toggle
infravision on and off. Some character races have infravision naturally, but
humans must rely on spells or magical items to give them infravision.
LEVITATION/and FLYING
Descent to Undermountain was designed using the engine of the game
Descent, a science fiction action game that involved breathtaking aerial
combat in alien infested asteroid mines. The advantage of using Descent’s
engine for Descent to Undermountain is that it allows the player to easily
move in three dimensions; there are many portions of the game that require
three dimensional movement.
Three dimensional movement is handled by Levitate and Fly effects. Levitate
allows you to move vertically, but not horizontally. Fly permits movement in
all three directions.
While flying or levitating, the <INS> key increases your altitude.
The <DEL> key decreases your altitude.
THIEF ABILITIES
Thieves have a number of unique abilities. These abilities cannot be used
while wearing heavy armor (by those multi-class thieves who are allowed to
wear chain mail or plate mail) and are improved when the thief is completely
unarmored.
Hide in Shadows
Thieves have the ability to hide in shadows. When a thief stops moving, the
game automatically gauges whether the thief has available shadow, and if they
do, they have a percentage chance to go unnoticed. This ability is usually
ineffective when the thief has started a fight.
Move Silently
Thieves have the ability to move silently through Undermountain and go
unnoticed. To attempt to move silently, press the <M> key. Elves, drow, and
halflings who are not wearing metal armor also have this ability. Pressing the
<M> key toggles moving silently on/off.
48
Page 49

Open Locks
There are many locked doors in Undermountain. Some of these (such as the
doors in the HUB areas) are magically locked doors and cannot be opened
without the proper key, but most locked doors are accessible to a thief with a
good set of lockpicks. To attempt to open a lock, go to the door, and hit the
<O> key. You can only attempt to pick a lock once per level.
Find/Remove Traps/and Racial Searching Abilities
Some sections of the dungeon contain traps. Thieves have the ability to find
and remove traps, although they need to proceed cautiously and carefully
when using this ability. To look for traps (or to disarm the ones you find) press
the find/remove traps key. If you find a trigger or a trap, you are asked if you
wish to remove it. There is a chance that you will set off the trap if you fail.
The default key is <F>, but it can be reset however the player wishes in the
Keyboard controls.
The <F> key also works for racial searching abilities, such as a dwarf’s affinity for
unusual stonework or the elven ability to detect secret doors.
You have only one chance per character level to detect a trap, trigger, or secret
door. If you are close to a trap/trigger/secret door and fail to detect it, you
have to gain a level before you have a chance to detect it again.
In both the game screen and on the automap, secret doors, triggers, and traps
have distinctive color markings when they’re discovered: blue for triggers,
green for traps, and purple for secret doors.
Climbing Walls
If you’re a thief, you have the ability to climb walls. Move the character to a
wall, face it, then press the activate key. You can look left or right, but you
cannot turn completely around. You cannot climb wet or slippery surfaces.
To climb a wall, face the wall you wish to climb and press the “Activate” key
(the default key is <A>.)
49
Page 50

Increasing Thief Abilities
When a thief has gained a level, they have an option to improve their
abilities. First, they must visit Mirt in the Yawning Portal; Mirt trains the
character in the ways of thieving. Once you’ve visited Mirt and are qualified to
advance a level, you are taken to the Thief Experience Screen.
Every level gives you new
experience points to spend
among your class abilities.
You cannot leave this screen
until all points are spent, or
until all thief abilities are at
maximum. Press <ESC> to
exit from this screen.
TURNING UNDEAD
Priests possess a special ability to turn Undead. Undead are creatures such as
skeletons, zombies, ghouls, vampires, mummies, and liches, beings who were
once alive, died, and then were brought back to a mockery of life by black
magic.
Undead also possess weaknesses, especially if the character is a priest. Through
their faith, priests have the power to influence the actions of undead creaturesthis is called “turning.” By presenting their holy symbol and calling upon their
faith, a priest can cause undead to flee. If the priest is high enough level,
turning may destroy weaker forms of undead (skeletons and zombies, for
example).
To turn undead, face the undead creature, and hit the <T> key.
Be warned, however-some undead are so powerful that turning has no effect on
them. A priest should be cautious when encountering new undead creatures.
A priest’s turning ability improves as he rises in level.
50
Page 51

OPTIONS
The interface in Descent to Undermountain is designed to be customizable, to
easily adapt to fit a large number of player preferences. To activate the Options
menu, hit <F2>.
Most of the controls are self explanatory:
Brightness adjusts the brightness of the screen image.
Music Volume adjusts the volume of the music that is played off the CD.
The minimum setting shuts off the music completely.
FX Volume adjusts the volume of the sound effects.
Reverse Stereo reverses the channels through which the sound plays.
Other commands require further explanation:
Detail Levels
Select one of the four detail level settings. Lower settings give faster screen
updates in the game; higher settings will give better graphics quality. There are
four different settings you can adjust in the Custom Details menu:
OBJECT COMPLEXITY: This removes polygons from an object, allowing
the game to run at a quicker speed.
OBJECT DETAIL: This determines at what distance an object changes
from a flat-shaded to texture-mapped details. Setting this slider to a
lower value causes monsters to be flat-shaded much closer.
WALL DETAIL: This option determines at what distance walls appear flat-
shaded vs. texture-mapped. It also affects the accuracy vs. speed of the
texture mapper. A low setting can cause walls to become jittery or
warped-looking.
WALL RENDER DEPTH: This changes the maximum distance you can see.
Lower values increase the speed but cause flat colored “walls” to appear
in long corridors. These boundaries do not affect weapons or other
objects, only your visuals.
SOUND CHANNELS: This reduces the number of sounds that can play
simultaneously in your game. Lower sound channels make your game run
faster, but at the expense of sound quality.
51
Page 52

Controls
Use this menu to select and configure your input device. Supported devices are
keyboard, mouse, and joystick. Various enhanced joysticks have their own
items. All changes are saved for future use so you won’t have to reconfigure
the controls every time you play.
Select the device you plan to use by pressing <SPACEBAR> or clicking with
the mouse. After choosing your device, you can select the Customize Above
option to change the function of various buttons and controls on that device.
Note that your keyboard is always available. To reassign key functionality,
choose the Customize Keyboard option.
To change an entry in the Customize Above or Customize Keyboard menus,
select the function you want to change, and press <ENTER>. Then press the
key or button you want to assign to that function. For axis entries, press
<ENTER>, then move the new joystick axis.
Customize Keyboard
Note: You can find the functions of all the default keys listed below by pressing
F2, selecting Controls, then looking at the functions and their corresponding
keys. You can change many of the keys by highlighting the key you want to
change with the arrows, pressing <ENTER>, then pressing the new key you
want to perform that function.
The default keys for Descent to Undermountain are:
GAME FUNCTIONS
52
Alt
Alt
Esc
F1
F2
F3
Abort Game, Load/Save Game
Help Screen. Note that you have different Help screens
in Waterdeep than in Undermountain.
Options
Cycles the playing screen size
+
and
+
F2
F3
+
Adjust size of playing screen between maximum and
minimum
Save Game
Load Game
Page 53

MOVEMENT
z
2
X
4
6
8
Shift
Left
Caps Lock
Space
OTHER FUNCTIONS
V
Page
Up
Slide Left
Go Backwards
Slide Right
Turn Left
Turn Right
Go Forward
Run
Toggle Autorun On/Off
Jump
Action Interface Toggle
(Immersive/Non-Immersive)
Look Up
Page
Down
Home
End
Left
1
C
<ctrl>
2
, , etc.
Look Down
Glance Up
Glance Down
Attack/Cast Spell
Equip weapon or spell (1 through 0)
Cycle Weapons
53
Page 54

OTHER FUNCTIONS (Cont.)
A
F
I
N
O
R
T
M
Tab
(A)ctivate/Speak to Creature/Climb Walls (thief
only)
(F)ind/Remove Traps, (F)ind Secret Doors
View (I)nventory
View Map Screen
Toggle I(N)fravision On/Off
(O)pen Locks
(R)est
(T)urn Undead (Priests Only)
(M)ove Silently (Thieves Only)
54
Page 55

Appendix-A
Character Races
55
Page 56

Your character’s race affects your statistics and class abilities. Moreover, nonhuman (also called demihuman) races each have special abilities that may
prove useful in Undermountain.
HUMANS
Humans are the baseline race for the game with few
restrictions and few advantages. Provided they gain enough
experience points (see glossary), they can advance unlimited
levels in any single class. Unlike most demihumans below,
humans cannot be multi-classed (i.e., a human can be a thief
or a fighter, but cannot be a fighter/thief).
HALF-ELVES
Half-elves are the product of the union of an elf and a
human. They have some of the special abilities of an elf and
some of a human’s bulk and strength. A half-elf can be any
class, but their chief advantage is that they have the widest
multi-class combinations of all the demihuman races. Halfelves can have any of the following multi-class combinations:
Fighter/Priest
Fighter/Mage
Fighter/Thief
Mage/Thief
Special Abilities:
Due to their elven heritage, half-elves have a partial resistance to Sleep spells
(see Spells later on) and also have infravision that allows them to see even
when in total darkness.
56
Page 57

ELVES AND DARK ELVES (DROW)
Drow and Elves are slim humanoids with great magical
talent. While the two races have common origins, the two
branches of elves have diverged after a conflict that took
place many centuries ago. Drow (or dark elves) are darkskinned and live beneath the earth. Most drow are chaotic
and evil, seeking the domination of the surface world and
enslavement of all races other than their own. A few drow,
those who worship the goddess Eilistraee, seek a more
peaceful path. Elves, cousins of the drow, prefer the open air
and forests, but can be persuaded to venture underground for
a good cause. The two races have a millennia-long hatred of
each other.
Elves and drow can be any class. In terms of multi-class combinations, elves
and drow can be:
Fighter/Mages
Fighter/Thieves
Mage/Thieves
Special Abilities:
Elves have several special abilities. First off, they are naturally agile and gain a
+1 to their Dexterity statistic during character generation. They are nearly
immune to Sleep spells and also possess infravision, the ability to see even in
total darkness (infravision is discussed in the dungeon gameplay section).
Disadvantages:
Elves are not as sturdy as humans. Any elf character has a -1 penalty to their
Constitution statistic.
57
Page 58

DWARVES
Dwarves are short, sturdy humanoids. They are expert miners
and crafters of metal and stone. By nature they are not magic
users and are unusually resistant to magic. Dwarves can be a
single-classed fighter, priest, thief or one the two following
multi-class combinations:
Fighter/Priests
Fighter/Thieves
Special Abilities:
Dwarves have great natural stamina and endurance. Any dwarf character gains
a +1 to their Constitution statistic. Dwarves are resistant to magic, and they
gain bonuses when throwing off the effects of spells cast on them. The higher
the dwarf’s constitution statistic, the higher the bonus. Like elves, dwarves
have infravision.
Disadvantages:
Dwarves are not known for their refined social etiquette nor are they especially
pleasing to the eye. Any dwarf character has a -1 to their Charisma statistic.
58
Page 59

HALFLINGS
Halflings get their name from their stature, which is half that
of humans. They are stout and generally comfort-loving, but
some have given up hearth and home to pursue the
adventurous life.
A halfling can be a priest, a fighter, or a thief. If they wish,
they may become a multi-class fighter/thief. No other class or
combination of classes is allowed for halflings.
Special Abilities:
Halflings, like dwarves, are magically resistant and gain a bonus to fight off the
effects of spells cast on them. This bonus depends on the halfling’s
constitution statistic; the higher the halfling’s constitution, the greater the
bonus. Halflings, while not terribly strong, tend to be extremely agile, giving a
+1 to their Dexterity characteristic (as well as many advantages should they
choose to pursue a career as a thief.) Like most of the demihuman races,
halflings have infravision.
Disadvantages:
As a general rule, a Halfling’s stature and size limits their strength. Any halfling
character has a -1 penalty to their Strength statistic. In addition, halfling
fighters cannot have “exceptional strength.”
59
Page 60

Appendix-B
CLASS DESCRIPTIONS
60
Page 61

The classes you can choose are described below:
FIGHTER CLASS
Description:
Fighters are the toughest character class. Fighters have more Hit Points (i.e.,
health) and can use a greater variety of weapons and armor than any other class.
Class Requirements:
Characters need a minimum Strength of 9
in order to be fighters. A fighter can be of
any race.
Armor Limits:
A fighter can use any type of armor in the
armor list.
Special Abilities:
Fighters are well-versed in weapons and combat. As fighters increase in level, they gain
the ability to attack much faster than other characters.
With the exception of halfling fighters, all fighters can have exceptional strength-this
means their maximum strength has the potential to be much higher than most other
classes, allowing them to do more damage in melee combat.
Fighters also gain more hit points from a high Constitution than other character classes,
allowing them to have the greatest maximum hit points per level of all the classes.
Weapon Limits:
A fighter can use any weapon in the
weapon list.
Race Limits:
A fighter can be of any race.
61
Page 62

PRIEST CLASS
Description:
Priests are the bastions of spiritual strength. Almost as effective as fighters in
combat, priests’ healing spells and spiritual power give them an edge against
their foes.
Class Requirements:
A character must have a Wisdom of at
least 9 to become a priest. A high Wisdom
is recommended for priests, as it gives
them the ability to cast bonus spells.
Armor Limits:
A priest can use any type of armor on the
armor list.
Special Abilities:
Priests have the natural ability to cast spells. The number and potency of spells increases
as the priest rises in level. This spell progression is described in more detail in the Spells
section.
A priest’s spell casting ability differs from that of a mage (see below). As a general rule, a
priest’s spells tend toward healing and defensive magic. The differences are discussed in
detail in the Spells section later on.
A priest’s faith gives them the unique ability to “turn” undead creatures (i.e., creatures that
have ‘died’ and returned from death, such as skeletons, zombies and mummies). If
successfully turned, undead creatures flee from the priest at their fastest possible movement
rate. If the priest is of high enough a level, weaker undead creatures such as skeletons or
zombies may be destroyed when they are turned.
Undead creatures and a priest’s turning ability are described in more detail in the monsters
section. Note that some undead creatures may be powerful enough to resist a priest’s
attempts to turn them.
Weapon Limits:
Although Priests are almost as good as
fighters in combat, they have only a limited
number of weapons they can use. Of all the
weapons on the weapon list, they can use
only Clubs, Maces, War Hammers and
Throwing Hammers. Edged weapons are
prohibited
Race Limits:
A priest can be of any race.
.
62
Page 63

MAGE CLASS
Description:
Mages are practitioners of the magical arts. Although they are initially the
weakest of the classes, the spells they gain at higher levels can make them
devastating opponents.
Class Requirements:
A character must have an Intelligence of
at least 9 to become a mage. A high
Intelligence and Constitution are both
recommended for mages.
Armor Limits:
Mages are not allowed to wear armor.
Special Abilities:
Mages have the natural ability to cast spells. The number and type of spells they can cast
increase as they gain experience.
As a result of their studies of magic, mages generally have a better chance of throwing off the
effects of spells and magical items that cannot be dodged or avoided.
Weapon Limits:
Mages have only a narrow selection of
weapons to choose from. They can only
use daggers and darts. On the other hand,
there are powerful objects and items in
the game (such as magical wands and
scrolls) that can be used only by mages.
Race Limits:
Only Humans, Elves, and Half-Elves can
be mages.
63
Page 64
THIEF CLASS
Description:
Although thieves are not the best fighters and do not have the ability to cast
spells, they possess certain skills that allow them to avoid many obstacles in
Undermountain. As part of their training, thieves have the ability to climb
walls, open locks, find and remove traps, move silently, hide in shadows, and can
increase the damage they do with an attack by backstabbing their opponents.
Class Requirements:
In order to become a thief, a character
must have a minimum Dexterity of 9. A
high Dexterity is recommended for any
thief, as it increases his chances to
accomplish his skills (see Special
Abilities, below).
Armor Limits:
Thieves can only wear leather armor (or
magical variations of leather armor). If the
thief chooses to wear no armor, they will
gain a bonus to their thief skills due to the
lack of restrictive clothing. Note that
certain forms of magical protection, such
as rings of protection, bracers of defense,
and so on, count as no armor for the
purposes of thieves’ skills.
Special Abilities:
As mentioned before, thieves have the following skills: Climb Walls, Open Locks, Find
Traps, Remove Traps, Hide in Shadows, and Backstabbing. These skills are described in
detail in the Thief Skills section.
Weapon Limits:
Thieves can use daggers, short swords,
long swords, scimitars, clubs, darts,
throwing daggers, and short bows.
Race Limits:
A thief can be of any race.
64
Page 65

MULTI-CLASS CHARACTERS
Some characters can belong to more than one class at a time. Elves, dwarves,
half-elves, drow, and halflings can have multi-class characters. No race can
belong to every class simultaneously.
A multi-class character has most of the benefits and restrictions of each class.
For instance, a fighter-mage has the advantage of being a spellcaster who can
use any weapon, but in order to cast spells, they cannot wear armor.
This is important: If a multi-class character is violating one of the
characteristics of their class (e.g., a fighter/thief wearing chain mail armor)
they cannot use any of the special abilities of the class they are violating…the
fighter/thief would not be able to spot traps, remove traps, backstab. The
fighter/mage would be unable to cast spells as long as they were wearing armor.
Experience points (see glossary) gained by a multi-class character is split up
among the classes. A halfling fighter/thief, for example, has his experience
divided by two and each half is applied to one of the classes.
Hit Points are rolled every time the character goes up a level in any class, but
the roll is divided by the number of classes the character has before it is
applied to the Hit Point total.
65
Page 66

Appendix-C
CHARACTER STATISTICS
66
Page 67

STRENGTH
Description:
Strength is a measure of your character’s physical prowess. The higher the
score, the more damage you inflict in melee combat. Fighters need to
have at least a 9 Strength.
Value Ranges:
The Strength characteristic ranges from 3 (the character is terribly weak,
almost enfeebled) to 18 (the character is incredibly strong, near maximum
for a human.)
Note: Fighters with an 18 strength gain an additional, ‘exceptional strength’
score between 1 and 100 after the 18 (i.e., 18/79.) This could be considered a
special ability, as ‘exceptional strength’ fighters do much more damage with their
melee attacks than other characters.
Effects on gameplay:
A high or low Strength can affect the damage dealt for each strike. A
high Strength increases the amount of damage done while a low Strength
causes less damage per hit.
DEXTERITY
Description:
Dexterity measures how agile your character is. The higher your Dexterity,
the faster your character moves and the lower your Armor Class. If your
character is a thief, they will need at least a 9 Dexterity. A high Dexterity
gives a thief bonuses to his thieving skills.
Value ranges:
A character’s Dexterity can range from 3 to 18, unless the character is an
elf or halfling, in which case, the character’s Dexterity statistic can be as
high as 19.
Effects on gameplay:
The character’s Dexterity determines how fast they move. Dexterity also
affects a thief’s skills (documented in Thief Skills, later on.)
67
Page 68

CONSTITUTION
Description:
Constitution measures how healthy your character is. The higher your
Constitution, the more damage you can take before dying.
Value ranges:
Constitution ranges from 3 to 18, with 3 being extremely weak and
unhealthy, and 18 being the peak of health. If the character is a dwarf,
their Constitution bonus (+1) may allow them to have a Constitution as
high as 19.
Effects on gameplay:
A high or low Constitution can affect a character’s Hit Points. Characters
with a high Constitution have “bonus” Hit Points added to the Hit Points
they gain every time they advance a level; characters with a low
Constitution have a number of Hit Points subtracted from the Hit Points
they would normally gain every time they advance a level.
Note: Fighters gain more hit points from a high Constitution than other classes.
INTELLIGENCE
Description:
Intelligence is the character’s IQ. If your character is a mage, they need at
least a 9 Intelligence. The higher Intelligence a mage has, the more spells
they can have in their spell book per level.
68
Value ranges:
Intelligence ranges from 3 (moronic) to 18 (genius).
Effects on gameplay:
The higher Intelligence a mage has, the more spells they can have in their
spell book per level.
Page 69

WISDOM
Description:
Wisdom is a measure of a character’s faith and strength of will. A high
wisdom gives priests bonus spells. If your character is a priest, they need at
least a 9 Wisdom.
Value Range:
Wisdom ranges from 3 to 18, with 3 being the lowest and 18 the highest.
Effects on Gameplay:
A priest with a wisdom of 13 or higher gains additional spells that they can
cast; these bonus spells are described in the Spells section.
CHARISMA
Description:
Charisma measures your character’s charm and leadership ability. The
higher your Charisma, the less you have to pay for services in the game.
Value ranges:
A character’s Charisma can range from 3 to 18, unless the character is a
dwarf, in which case, the character’s Charisma ranges from 2 to 17.
Effects on gameplay:
The character’s Charisma affects the cost of many services within the
game. Characters with high Charisma are able to sell items recovered in
Undermountain for a higher price than other characters, and they receive
discounts on buying items and services. Occasionally, a non-player
character may judge a hero by their Charisma score and provide additional
assistance.
69
Page 70

Appendix-D
MONSTERS
70
Page 71

Exercise caution in Undermountain-with few exceptions, most creatures in
this game are looking to hurt you, and it’s kill or be killed. The descriptions
that follow should give you some idea of what awaits in Undermountain.
BANEGUARD
The origin of Baneguards stem from Bane, the god of
strife and tyranny. The priests of Bane are credited with
the discovery of the spell by which they could create
powerful undead guardians from the corpses of other
creatures. Although Bane’s essence was scattered during
the Time of Troubles, the spell to create Baneguards lives
on and is known by many evil priests. As a result, a
number of these powerful creatures exist within
Undermountain.
At first glance, Baneguards look just like normal skeletons
except for flickering red dots for eyes. They should not be
mistaken for their weaker kin. They are much tougher
than normal skeletons and are able to withstand repeated
crushing blows from weapons before collapsing. They
attack either with their bony talons or with a weapon.
BATS, GIANT
Through the result of their environment and strange
magics, bats of all sizes fill the dungeons of
Undermountain. All can fly, and their toughness varies
depending on the size of the bat. Bats have poor
morale…once wounded, they are likely to flee for their
lives. They attack only with their bite.
71
Page 72

BEETLE, GIANT
Giant Beetles scuttle around on all sixes, biting any
character they can find with their large mandibles. Their
chitinous hide makes them difficult to hurt.
BEHOLDERS (STANDARD)
Beholders are large floating eyes with eyestalks that can
fire forth a variety of spells at opponents. They can fly
naturally and use it to keep their distance from opponents.
In the rare instance they are not firing spells at
opponents, they can bite with their large toothed maws.
Beholders are an evil race that consider themselves far
superior to most or all other creatures in the Realms. They
should never be taken lightly, nor be trusted. There have
been repeated sightings of Beholders in Undermountain.
BEHOLDER (SPECTATOR)
Spectators are unusual extraplanar creatures, similar to beholders. They are
large flying spheres with a gaping maw, a large single eye and a number of
eyestalks (4) sprouting from their head. Native of the plane of Nirvana,
spectators are often summoned from their natural plane to guard certain areas
or items. They are not evil and do not attack unless commanded to do so by
their summoner or if a character attempts to steal what the spectator has been
assigned to guard.
Beholders have the natural ability to fly and possess a slight
magic resistance.
72
Page 73

DRAGONS
GARGOYLE
GHAST
Dragons are by far the most dangerous creature
that an adventurer can encounter in Undermountain.
Their scaled armor makes them resistant to most forms of
attack, and when they are not raking an opponent with
their claws and teeth, they have the ability to blast
opponents with powerful breath weapons. To make
matters worse, some dragons are skilled spellcasters and
have an arsenal of spells that equal experienced wizards.
Gargoyles are cruel predators that resemble gruesome
stone humanoids with great talons and bat-like wings.
They attack anyone they can see out of sheer sadistic
pleasure. They are capable of remaining still for long
periods of time and can be mistaken for lifeless statues
until they attack. A gargoyle’s enchanted nature makes it
immune to attacks by normal weapons.
Ghasts are more unpleasant versions of ghouls, being
tougher, faster, stronger and more foul-smelling than their
undead cousins. Generally ghasts are found as a leader of
ghouls (see below). Until they attack, these evil creatures
may not even be recognized for what they are.
GHOUL
Ghouls are evil undead creatures that feed on the corpses
littering Undermountain. Horribly disfigured, they have
long, sharp nails, elongated tongues, and sharp, jagged
teeth. Unlike skeletons and zombies, ghouls are very
cunning and have been known to lure adventurers into
ambushes and traps so that they can feed on fresh bodies.
73
Page 74

GOBLINS
Goblins are small, evil humanoids that are slightly
stronger than kobolds (see below) and carry a better
selection of weapons and equipment. They infest
Undermountain in large numbers, so much so that it is
believed that several tribes of goblins exist in
Undermountain. Some goblin shamans also have some
rudimentary knowledge of magic that allows them to cast
minor priest and mage spells.
GUARDIAN SKELETONS
Guardian skeletons are similar to Baneguards in that they
resemble skeletons but possess hidden strengths that can
be dangerous to an unaware adventurer. Guardian
Skeletons are virtually immune to being turned by a priest.
KOBOLDS
Kobolds are small, weak humanoids with a pitiful
selection of armor and weapons (usually missile weapons
or anything that they can use to keep larger, stronger
opponents at bay). These yapping pests only pose a threat
to novice adventurers in Undermountain.
74
Like goblins, different tribes of kobolds are believed to
exist in Undermountain. To date, most of them have been
encountered close to the surface of the dungeon.
Page 75

LICH
Liches are the most powerful undead creatures residing
within Undermountain. Great wizards who have used their
powers to prolong their life, a lich’s gaunt and skeletal
frame can sometimes be mistaken for that of a mummy, but
their great strength and spell casting ability quickly reveals
their true nature. Not only are they immune to most
conventional attacks, but they also retain all their spell
powers they had before their “undeath,” giving them an
arsenal of mage spells to choose from. In close combat they
can also damage opponents with their touch, which inflicts
cold damage on any creature it strikes.
MEPHIT, FIRE
Fire Mephits are small impish humanoids with bat wings
and bright red skin. They are mischievous, cruel and can
be dangerous if encountered in large numbers. These
extraplanar creatures are native to the elemental plane of
fire and have the ability to spit flame at opponents from a
distance. A fire mephit’s skin is hot enough to burn any
flesh not protected by magic. Not surprisingly, fire
mephits are immune to all fire attacks.
MEPHIT, ICE
Ice mephits are extraplanar creatures composed of ice. They are by far the
cruelest of the mephits, favoring wanton slaughter over injurious pranks. The
skin of ice mephits is freezing cold, and hurts any character that touches them
without magical protection.
Ice mephits have the ability to breathe ice shards at opponents. If forced into
close combat, they rake characters with their icy talons. Ice mephits are
immune to cold attacks and can withstand freezing temperatures with no
discomfort.
75
Page 76
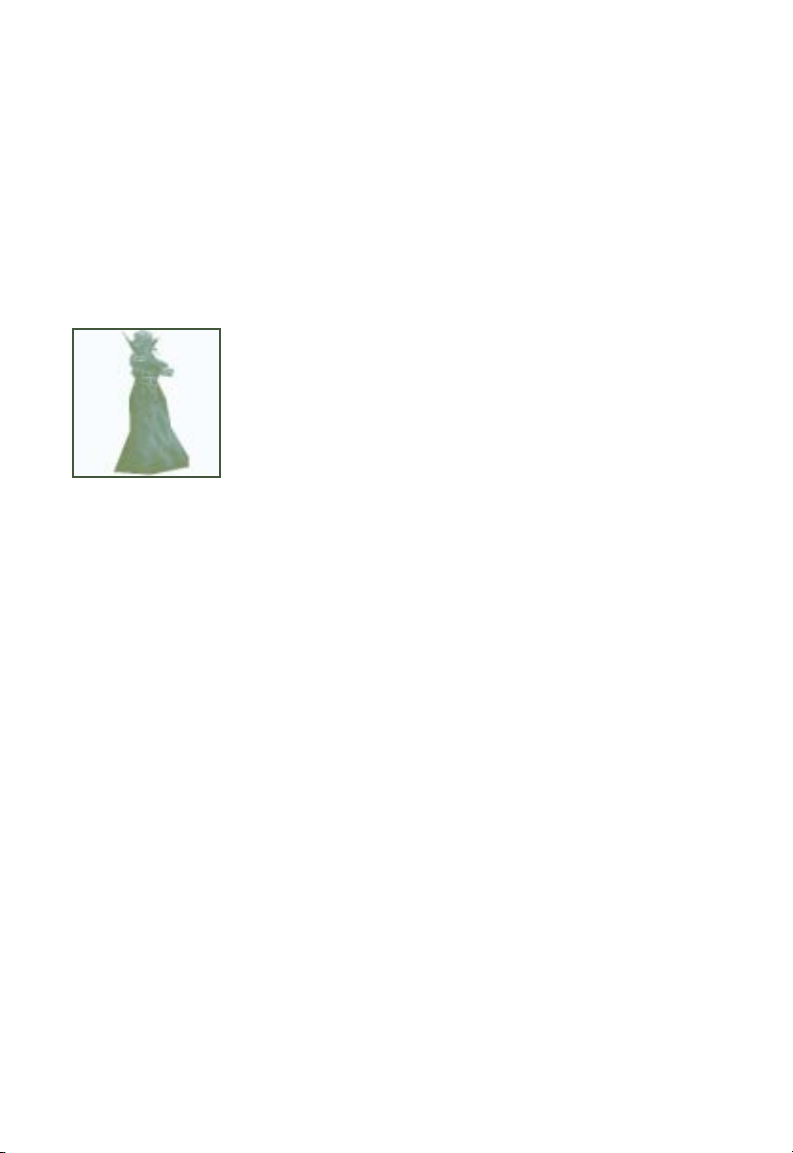
MEPHIT, LIGHTNING
These mephits are composed of electricity. Jittery and hyperactive, these fastmoving extraplanar creatures are difficult to pin down. To make matters worse,
they generate bursts of electricity from their bodies as missile weapons.
The composition of their bodies gives lightning mephits immunity to normal
attacks and any form of electricity. If not armed with spells or enchanted
weapons, adventurers are well-advised to avoid these creatures at all costs.
MIND FLAYER
Mind Flayers are evil, intelligent humanoids with slimy,
mauve skin, and four (1 foot to 2 foot long) writhing
tentacles sprouting from their head. They use these
tentacles to hold opponents and draw their victim’s brains
from their skull.
Mind Flayers are masters of psionics and have the ability
to levitate at will. They also have the ability to fire
psychic blasts in a cone outwards from their bodies. Their
mental powers allow them to dominate most creatures
they encounter, and they often have slaves of all sorts
nearby to do their bidding. In addition to their mental
powers, Mind Flayers are nearly immune to magic and
spells of all kinds.
76
Mind Flayers’ natural habitat is deep beneath the earth
where they barter and trade slaves and magical possessions
with others of their kind. They are despised by most races
in the Forgotten Realms as well as on many other planes
of existence where they are known to dwell.
Page 77

MUMMIES
OGRE
Mummies are one of the most dangerous types of undead.
Wrapped in tattered bandages, these shuffling horrors
attack any living thing they can see with their rotting
touch. Only enchanted weapons can harm mummies and
even then, the mummy takes only half damage from
physical attacks.
A mummy’s dried skin and bandages make it especially
vulnerable to fire attacks. A fireball spell or burning hands
typically turns a mummy into a flailing undead torch.
In the Forgotten Realms, mummies are most commonly
found in the land of Mulhorand, a distant and ancient realm
in the east, where they protect the tombs of nobility from
grave robbers. It is said that Mulhorandi travelers sometimes
bring mummies with them to guard their sacred places.
Ogres are huge, evil humanoids, standing nine to ten feet
tall. They are extremely strong and bash whatever looks
weak, helpless, and edible. Large groups of ogres may be
lead by a chieftain. As a general rule, ogres tend to smell
the worst of the goblinoid races.
ORCS
Orcs are evil humanoids that compose the grunt troops of
Undermountain...they are encountered throughout the
dungeon and are armed with a wide selection of arms and
armor. They are occasionally led by an orc shaman or an
orc chieftain who is much tougher than his fellow Orcs
and may have spell casting ability. Many tribes of orcs are
believed to exist in Undermountain.
77
Page 78

OTHER ADVENTURERS
Undermountain’s legendary wealth attracts adventurers
from all across the Realms, bold persons of all races and
alignments. Some of these adventurers (dwarves, elves,
humans, and even drow) are good people and may prove
helpful to the player. Others are thoroughly evil and will
attempt to rob or kill another player. The wise adventurer
exercises caution when dealing with other humans or
demihumans, no matter how friendly they may initially
appear to be.
RATS, GIANT
Giant Rats fill the dungeons of Undermountain.
Omnivorous and cowardly, they usually attack only if
trapped or especially hungry. Giant rats attack with their
large front teeth, but their bite is not considered to be a
threat to most healthy humans and demihumans.
SHADOW FIEND
Shadow Fiends are tall, slender humanoids with small,
bat-like wings and bodies composed of darkness. Shadow
Fiends are almost invisible if encountered in a shadowy
environment. Although dangerous when encountered in
darkness, an adventurer with a strong (preferably
inextinguishable) light source will find shadow fiends
much easier to deal with-a fiend’s strength depends a great
deal upon the lighting conditions of the area they are in.
78
Tales from adventurers who have skirmished with these
creatures seem to indicate that Shadow Fiends are
unaffected by fire attacks.
Page 79

SKELETONS
Skeletons are among the weakest undead creations in
Undermountain. Animated by evil magics, skeletons are
often created as grunt troops or assigned to guard specific
areas. Skeletons can be found armed with a wide selection
of weapons. Like all undead creatures, skeletons can be
“turned” by a priest.
SPIDER, GIANT
Giant Spiders are a sort of spider found in
Undermountain. They are big, nasty, and can take a lot of
punishment. They are also more intelligent than their
weaker spider cousins and have a rudimentary, evil
intelligence. Other, larger spiders are believed to exist in
Undermountain.
SPIDER, LARGE
Large spiders roam Undermountain’s halls. Weaker than giant spiders, they
nevertheless can be troublesome when encountered in groups. The number of
spiders within Undermountain is due in large part to the presence of the drow
and their worship of the spider goddess Lolth.
TROLLS
ZOMBIES
Trolls are huge, spindly green humanoids with great
strength and a rapid attack sequence, able to claw with
both hands and bite in the span of time it normally takes
a human opponent to swing a sword. Trolls have the
ability to regenerate after almost any attack (short of fire
and acid attacks) and are extremely difficult to kill.
Like skeletons, zombies are some of the weakest undead in
Undermountain. Mindless animated corpses, zombies are
tougher than skeletons but are terribly slow-careful
adventurers can usually outmaneuver them. Like all
undead creatures, zombies can be “turned” by a priest.
79
Page 80

Appendix-E
WEAPONS
80
Page 81

A large number of melee and missile weapons can be found in Undermountain
or purchased in Waterdeep. A short description of each is provided below.
Magical varieties of each of these weapons exist within Undermountain, some
granting additional damage, speed, or magical powers upon its wielder. An
adventurer should experiment with weapons they find to discover their full
potential.
WEAPONS ALLOWED
The game keeps track of what items a character can or cannot use (for example,
the game doesn’t let a single class thief equip a bastard sword or a suit of chain
mail armor, although it does allow a multi-class fighter/thief do so). In terms of
weapons, the breakdowns are as follows:
Fighters: Fighters can use any of the melee and missile weapons below.
Priest: Priests can only use clubs, war hammers, maces, and throwing hammers.
Mage: Mages can only use daggers and darts.
Thief: Thieves can use daggers, short swords, long swords, scimitars, clubs,
darts, throwing daggers, and short bows.
81
Page 82

MELEE WEAPONS
Daggers: A dagger’s weak damage and poor reach is offset by the speed with
which it can be used. It is the preferred melee weapon for mages in
Undermountain.
Short Swords: Slightly better than a dagger but the weakest of all the swords,
the attack speed and size of a short sword nonetheless makes it an excellent
choice for combat in confined areas.
Long Swords: The most traditional sword, the long sword is favored by fighters.
Broad Swords: A broad sword does slightly more damage than a long
sword, but has a slightly slower attack speed.
Scimitars: Though it does the same damage as a long sword, the
added size of a scimitar makes attacking opponents easier.
Bastard Swords: The most damaging of all the swords, with the longest reach
but the slowest attack speed.
Clubs: The most basic of melee weapons, the club is slower than a dagger but
does more damage and has a longer reach.
War Hammers: A war hammer is better than a club in terms of damage, but is
a little slower and is not as good as a mace.
Maces: Favored by priests, the mace is an excellent standard bashing weapon
when one’s opponents are in need of some smiting. It is a little more
dignified than a club and makes a more satisfying crunch when it hits.
Hand Axes: An edged form of the club, the hatchet is good for chopping
through wood and cleaving enemy bodies.
82
Page 83

MISSILE WEAPONS
Darts: Darts are the weakest missile weapon, having a poor range and doing
little damage when they strike an opponent. Nevertheless, they are the only
missile weapon a mage can use, so spellcasters are advised to stock up on
them at every opportunity.
Throwing Daggers: More damaging than darts, throwing daggers are favored
by thieves.
Throwing Axes: Although throwing axes have a shorter range than throwing
daggers and have a lower rate of fire, they do more damage when they hit.
Throwing Hammers: Throwing hammers are a priest’s best friend. They are
much like throwing axes except that they inflict exciting varieties of blunt
trauma damage on an opponent.
Short Bows: Short bows are a poor man’s long bow-it does the same damage
but has a lesser range. Arrows have an advantage over hurled missile
weapons in that they travel much faster, are less affected by gravity, and
creatures have a more difficult time dodging them.
Long Bows: Long bows are short bows with a better range.
Crossbows: Crossbows take time to reload, but a crossbow bolt fires straight
and true with a range that can make foes wince. It is excellent for targeting
at great distances and can cut down opponents before they can even get
within melee range.
83
Page 84

ARMOR
As mentioned before, mages are not allowed to wear any armor,
including shields, helms, or gauntlets. Fortunately, there are magical
items of protection in Undermountain that can be used by a mage,
including bracers of defense, cloaks of protection, and so on.
Leather Armor: Leather armor can be worn by any class except mages.
Leather armor is the best protection available to theives.
Chain Mail Armor: Chain mail is better than leather, but not as good as
plate mail. It can only be worn by fighters and priests.
Plate Mail Armor: Plate mail can only be worn by fighters and priests. It is the
best armor in the game. Magical varieties turn your character into a tank.
Shield: Shields improve a character’s Armor Class. Only fighters and priests can
use shields.
Helm: Helms improve a character’s Armor Class against attacks from above
(this does not appear in the character’s stats). Only fighters and priests can
wear helms.
Leather Gauntlets: Although not as good as metal gauntlets, leather
gauntlets can be worn by a thief.
Metal Gauntlets: These can only be worn by priests and fighters and provide
good protection for the hands.
84
Page 85

MAGICAL WEAPONS AND ARMOR
Note that there are (many) magical varieties of each aforementioned weapon
and armor in Undermountain, some granting additional damage, speed,
protection or other magical powers upon its wielder. An adventurer should
experiment with weapons they find to discover their full potential. An unusual
glowing dagger you discover may be deadlier than a standard bastard sword.
OTHER EQUIPMENT
Bracers: These items usually have a passive magical effect when worn (see
Magic Items, below). Bracers of defense (magical protective items used by
mages and thieves) are rumored to exist in Undermountain.
Cloaks: Cloaks are snug and warm. Magical cloaks have a passive magic effect
when worn.
Boots: Boots protect the feet. Magical boots have a passive magic effect
(jumping, speed).
Rings: A character can wear only two rings at any one time. Most rings have a
passive magic effect.
Amulets: Worn around the neck, most amulets have a passive magic effect
when worn.
85
Page 86

MAGICAL ITEMS
ACTIVE AND PASSIVE MAGICAL ITEMS
Some magic items are active magical items and can only be employed by
putting them in a character’s hand and using them like a weapon (i.e., leftclick or Joystick button #1). They can also be used within a character’s
inventory by double-clicking on them. Such items include one-shot potions
and scrolls.
Other magical items are passive and always work while the player is wearing
them or has them in his inventory. A ring of jumping, for example, will always
allow the character to make mighty leaps while it is worn-it does not need to
be clicked to make its magic work. Passive items usually include magical
armor, cloaks, rings, amulets, and boots.
86
Page 87

Appendix-F
MISCELLANEOUS
87
Page 88

DOORS
Undermountain’s doors are usually opened by pressing the activate key (default
is <A>). Some doors are locked (either mechanically or with magic) and
either require keys or activating pressure plates, switches or performing other
actions in order for them to open.
A knock spell (see mage spells, later on) or a thief’s lockpicking skill allows
passage through some doors that are closed to other characters and can speed
one’s progress through the dungeon or allow the player character to gain
additional wealth.
PORTALS
Undermountain is also rumored to contain magical portals that teleport
anyone walking through them elsewhere in the dungeon. Some of these
portals are obvious, others may teleport characters before they even realize that
they have walked through a portal. Checking the automap regularly can
prevent disorientation.
TRICKS AND TRAPS
Undermountain’s traps are among some of the deadliest threats that the
dungeon has to offer. An adventurer should be wary of projectile traps, poison
gas, monster summoning zones, magic casters, illusionary walls, lava pits, and
pit traps…to name a few. Be cautious around certain dungeon items. Opening
certain doors, or grabbing objects that seem placed a little too conveniently
may lead to grave disaster.
A thief character has an advantage against these obstacles, since they have a
natural talent for detecting and avoiding traps that would otherwise cause
them harm. Consult the thief skills section for details on using this special
ability.
As a final warning-there are rumors of areas in Undermountain where the
physics of the natural world do not apply. Magic may work improperly or not
at all in such areas, and the layout of corridors and rooms may change as a
character moves through them. Tread cautiously the deeper you descend into
Undermountain.
Page 89

LIFE AND DEATH IN UNDERMOUNTAIN
HIT POINTS
Hit points are a measure of how healthy the character is. When the character
takes damage, his injury is represented by a loss of hit points. When a
character is reduced to 0 hit points, he is dead.
MAXIMUM HIT POINTS
The maximum number of hit points a character can have depends on his class
and level (these maximums are listed on the class advancement tables in the
Appendix but are reprinted here for good measure). After first level, a
character’s hit points increase randomly every time the character gains a level
(see charts in Appendix G). Maximum Hit Points are the number of hit points
the character has before taking any damage.
CURRENT HIT POINTS
A character’s current hit points depend on whether the character is currently
injured or not.
•If a character is in full health and has not suffered any damage, the
character’s current hit points is the same as the character’s maximum hit
points.
•If the character has been injured, his current hit points are less than his
maximum hit points.
•If the character has 0 hit points or less, the character is dead.
RECOVERING HIT POINTS
Characters cannot regain hit points just by walking around in the dungeon.
They can only recover lost hit points through curative spells (i.e., cure light
wounds, cure serious wounds, and so on), by resting, or by going to Waterdeep
and re-entering the dungeon.
Note: Monsters may regenerate if a character leaves a level.
89
Page 90

REST AREAS (SHRINES)
Most dungeon levels have a Shrine that allows you to rest and recover hit
points and spells without fear of being attacked. The Priestesses of Eilistraee
established these areas as safe zones within Undermountain to aid adventurers
against the horrors that Halaster had brought to the dungeon. You can identify
a rest area by the spinning ankh that was placed there.
EXPERIENCE POINTS
Undermountain doesn’t keep score-instead, you gain “experience points”for
the monsters you slay and for the quests you achieve. These experience points
allow a character to advance in levels, gain more powerful spells (if they are a
mage or priest), increase their thief abilities, or gain greater attack speed (if a
fighter).
The amount of experience points needed to attain each new level is listed in
Appendix G of this manual.
If the character is multi-class, all experience points gained are divided equally
among the classes. The experience point/level bar shows whichever level the
character is closer to gaining.
RETURNING TO THE SURFACE
Again, a gold piece is required for you to leave Undermountain via the
Yawning Portal.
VISIT KHELBEN
Once you have left the dungeon, it is a good idea to check in with Khelben to
see if you may have accomplished a quest or if he has a new quest for you. If
you are certain you have accomplished the quest that Khelben gave to you,
you should return to the surface as soon as possible to claim your reward.
Oftentimes, when you complete a mission new areas of the dungeon open up
to your character, allowing more room for exploration.
90
Page 91

Appendix-G
ADVANCEMENT CHARTS
91
Page 92

When characters gain enough experience points, they go up a level. The tables
below show the number of Experience Points necessary to attain a level for each
class of character…along with how many hit points a character gains every time
they advance a level. All characters start out at first level with the maximum
possible hit points for their class, plus any bonus from having a high Constitution
(see the description of the Constitution statistic in the Character Generation
screens.)
THE FIGHTER ADVANCEMENT TABLE
Level Experience Points Hit Points Per Level*
1 0 10 15
2 2,000 +1d10 30
3 4,000 +1d10 45
4 8,000 +1d10 60
5 16,000 +1d10 75
6 32,000 +1d10 90
7 64,000 +1d10 105
8 125,000 +1d10 120
9 250,000 +1d10 135
10 500,000 +3 138
11 750,000 +3 141
12 1,000,000 +3 144
Max.Hit Pts.
THE PRIEST ADVANCEMENT TABLE
Max.Hit Pts.
Level Experience Points Hit Points Per Level*
10 8 10
2 1,500 +1d8 20
3 3,000 +1d8 30
4 6,000 +1d8 40
5 13,000 +1d8 50
6 27,500 +1d8 60
7 55,000 +1d8 70
8 110,000 +1d8 80
9 225,000 +Id8 90
10 450,000 +2 92
11 675,000 +2 94
12 900,000 +2 96
* This takes into account bonuses to Hit Points from Constitution. Note that fighters gain
more hit points from a higher constitution than other character classes.
92
Page 93

THE MAGE ADVANCEMENT TABLE
Max.Hit Pts.
Level Experience Points Hit Points Per Level*
10 4 6
2 2,500 +1d4 12
3 5,000 +1d4 18
4 10,000 +1d4 24
5 20,000 +1d4 30
6 40,000 +1d4 36
7 60,000 +1d4 42
8 90,000 +1d4 48
9 135,000 +1d4 54
10 250,000 +1d4 60
11 375,000 +1 61
12 750,000 +1 62
THE THIEF ADVANCEMENT TABLE
Max.Hit Pts.
Level Experience Points Hit Points Per Level*
10 6 8
2 1,250 +1d6 16
3 2,500 +1d6 24
4 5,000 +1d6 32
5 10,000 +1d6 40
6 20,000 +1d6 48
7 40,000 +1d6 56
8 70,000 +1d6 64
9 110,000 +1d6 72
10 160,000 +1d6 80
11 220,000 +2 82
12 440,000 +2 84
13 660,000 +2 86
14 880,000 +2 88
* This takes into account bonuses to Hit Points from Constitution. Note that fighters gain
more hit points from a higher constitution than other character classes.
93
Page 94

THIEF SKILLS
Each type of armor (or wearing no armor at all) affects a thieves’ chance to
successfully use their skills, as listed on the following chart:
Armor Penalties to Thief Skills
Thief Skill No Armor
Open Locks -Find Traps -Remove Traps -Move Silently +10%
Hide in Shadows +5%
THIEF CLASS ADDENDUM: HOW THIEF SKILLS WORK
All thieves start with the following percentiles in each skill:
Skill Initial (1st Level) Chance of Success
Open Locks 10%
Find Traps 5%
Remove Traps 5%
Hide In Shadows 5%
Backstab Damage x2 Damage
Every time a thief gains a level of experience, he gets to spend skill points.
The player must visit Mirt in the Yawning Portal to spend points. No thief
skill may exceed 95%. For every four levels a thief gains, he gets an additional
factor added to his backstab damage (i.e., a 5th level thief performing a
backstab has x3 damage, a 9th level thief does x4 damage with a backstab, and
so on).
There are a number of factors that affect a thief’s skills including the thief’s
Dexterity, their race, and the type of armor they are wearing.
The thief’s race modifies the skills as follows:
94
Page 95

Racial Adjustment
Skill Dwarf Elf Half-Elf Halfling
Open Locks +10% -5% - +5%
Find Traps +15% - - +5%
Remove Traps +15% - - +5%
Hide In Shadows - +10% +5% +15%
A character’s Dexterity modifies thief skills as follows:
Dexterity Adjustment
Skill 9 10 11 12-15 16 17 18 19
Open Locks -10% -5% - - +5% +10% +15% +20%
Find Traps -10% -10% -5% - - - +5% +10%
Remove Traps -10% -10% -5% - - - +5% +10%
Hide In Shadows -10% -5% - - - +5% +10% +15%
While the percentage chance of success at each skill is presented above, the
specifics on the working of each skill is as follows:
1. Find Traps
To make your thief look for traps, use the <F> key, This slows him down a
little. If he passes within the vicinity of a trap, he automatically has his
normal Find Traps percentile chance of noticing the trap. The trap location
is highlighted and he may choose to avoid the trap or disarm it (see below).
As a thief descends into Undermountain, traps are harder to spot and more
lethal. To stop looking (and move faster) hit <F> again.
2. Disarm Traps
Once a trap is found, a Thief has a normal Disarm Traps percentile chance
of disarming it. If he fails the Disarm, there is a chance that the trap is set
off. Like Pick Locks (see below), Traps can be modified on how easy they
are to disarm. An easily found trap can be hard to disarm and vice versa.
3. Hide in Shadows
Hide in Shadows is a function of the light levels of the surrounding area.
The higher percentile the thief, the less darkness needed to sneak around.
Essentially, the thief is effectively invisible under certain conditions. This
function is automatic.
95
Page 96

4. Backstab
This is a function of Hide in Shadows, or attacking a distracted or unaware
opponent (such as one taking a snooze or just facing the other way).
Essentially, if the thief is not seen by his opponent, any first attack is a
backstab and does extra damage depending on the level of the thief. If a
Thief is in an opponent’s immediate field of view, he is no longer hiding
and can be seen and doesn’t get the backstab. Most monsters make it pretty
clear when they have noticed a character.
If the thief attacks with backstab, then pulls away and disengages, he can get
another backstab attack by lurking in the shadows and attacking again later.
5. Open Locks
The Thief uses his open locks skill by pressing the “Open” key (default is
<O>) after walking up to a locked door. There are three possible results:
Situation Result
The door is unlocked. It opens normally.
The door is locked. The thief attempts to use his Open Locks
skill to get past the door and succeeds.
The door opens.
The door is locked. The thief attempts to use his Open Locks
skill to get past the door, but fails. The
door remains locked.
There will not be a situation where a door is both locked and trapped. It is
one or the other.
The thief gets one chance at any lock per experience level. If unsuccessful
the first time, he must gain a new thief level to try the lock again. Some
locks have different levels of complexity; some are simple to open, others
are extremely difficult, even for experienced thieves.
96
Page 97

Appendix-H
SPELLS
97
Page 98

MAGE SPELLS
Level 1
Armor
Burning Hands
Chill Touch
Color Spray
Detect Magic
Feather Fall
Jump
Light
Magic Missile
Protection From Evil
Shield
Sleep
Spider Climb
Level 3
Dispel magic
Fireball
Flame Arrow
Fly
Haste
Hold Person
Hold Undead
Infravision
Lightning Bolt
Melf’s Minute Meteors
Slow
Level 2
Continual Light
Invisibility
Knock
Levitate
Melf’s Acid Arrow
Scare
Strength
Level 4
Confusion
Fear
Improved Invisibility
Rary’s Mnemonic Enhancer
Stoneskin
98
Page 99

PRIEST SPELLS
Level 1
Bless
Cure Light Wounds
Detect Magic
Light
Magical Stone
Protection From Evil
Level 3
Continual Light
Dispel Magic
Flame Walk
Magical Vestment
Prayer
Protection From Fire
Level 2
Aid
Hold Person
Resist Fire / Resist Cold
Silence, 15’ Radius
Level 4
Abjure
Cure Serious Wounds
Free Action
99
Page 100
GAINING SPELLS
Mage: The following lists the number of spells a mage can cast per level of
spell and per level of experience. As expected, the higher the level of a mage,
the greater number of spells they can cast.
Number of SpellS Per spell Level
Spell Level
12 34
11
22
321
432
542 1
642 2
Level of Mage
743 21
843 32
Priest: The following lists the number of spells a priest can cast per level of
spell and per level of experience. As expected, the higher the level of a Priest,
the greater number of spells they can cast.
100
Number of SpellS Per spell Level
Spell Level
12 34
11
22
321
432
5331
6332
Level of priest
73321
83332
 Loading...