

Page 1
For Windows®95
©1996 Parallax Software. All rights reserved. Descent II is a trademark of Interplay
Productions. All rights reserved. All other copyrights and trademarks are property of their
respective owners.
Page 2
TABLE OF CONTENTS
TABLE OF CONTENTS
SYSTEM REQUIREMENTS . . . . . . . . . . . . . . . . . . . . 4
INSTALLING DESCENT II . . . . . . . . . . . . . . . . . . . . 4
RUNNING DESCENT II . . . . . . . . . . . . . . . . . . . . . . 7
Movies and Music . . . . . . . . . . . . . . . . . . . . . . . . . . . . . . 8
Menus . . . . . . . . . . . . . . . . . . . . . . . . . . . . . . . . . . . . . . 8
THE MAIN MENU . . . . . . . . . . . . . . . . . . . . . . . . . 9
OPTIONS MENU . . . . . . . . . . . . . . . . . . . . . . . . . 10
CONTROLS MENU . . . . . . . . . . . . . . . . . . . . . . . . 12
DETAIL LEVEL MENU . . . . . . . . . . . . . . . . . . . . . . 13
TOGGLES MENU . . . . . . . . . . . . . . . . . . . . . . . . . 15
KEYS . . . . . . . . . . . . . . . . . . . . . . . . . . . . . . . . 16
Weapon Selection . . . . . . . . . . . . . . . . . . . . . . . . . . . . . 20
Other Keys . . . . . . . . . . . . . . . . . . . . . . . . . . . . . . . . . . 21
Automap Controls . . . . . . . . . . . . . . . . . . . . . . . . . . . . . 21
PLAYING DESCENT II . . . . . . . . . . . . . . . . . . . . . . 23
Robots . . . . . . . . . . . . . . . . . . . . . . . . . . . . . . . . . . . . . 23
The Guide-Bot . . . . . . . . . . . . . . . . . . . . . . . . . . . . . . . 23
Weapons . . . . . . . . . . . . . . . . . . . . . . . . . . . . . . . . . . . 26
Powerups . . . . . . . . . . . . . . . . . . . . . . . . . . . . . . . . . . . 27
Doors . . . . . . . . . . . . . . . . . . . . . . . . . . . . . . . . . . . . . . 32
Control Panels . . . . . . . . . . . . . . . . . . . . . . . . . . . . . . . 33
Main Reactor . . . . . . . . . . . . . . . . . . . . . . . . . . . . . . . . 33
Hostages . . . . . . . . . . . . . . . . . . . . . . . . . . . . . . . . . . . 34
The Automap . . . . . . . . . . . . . . . . . . . . . . . . . . . . . . . . 35
Secret Levels . . . . . . . . . . . . . . . . . . . . . . . . . . . . . . . . 36
Energy Centers . . . . . . . . . . . . . . . . . . . . . . . . . . . . . . . 37
Force Fields . . . . . . . . . . . . . . . . . . . . . . . . . . . . . . . . . 38
Robot Generators . . . . . . . . . . . . . . . . . . . . . . . . . . . . . 39
Markers . . . . . . . . . . . . . . . . . . . . . . . . . . . . . . . . . . . . 40
Score . . . . . . . . . . . . . . . . . . . . . . . . . . . . . . . . . . . . . . 41
Cockpit and HUD Displays . . . . . . . . . . . . . . . . . . . . . . 42
Missile Views . . . . . . . . . . . . . . . . . . . . . . . . . . . . . . . . 42
Camera Windows . . . . . . . . . . . . . . . . . . . . . . . . . . . . . 43
Cockpit View . . . . . . . . . . . . . . . . . . . . . . . . . . . . . . . . . 43
Rear View . . . . . . . . . . . . . . . . . . . . . . . . . . . . . . . . . . . 43
DEMOS & SCREENSHOTS . . . . . . . . . . . . . . . . . . . 44
Using Special Joysticks & Controllers . . . . . . . . . . . . . . 45
VR Headset Information . . . . . . . . . . . . . . . . . . . . . . . . 45
MULTIPLAYER GAMES . . . . . . . . . . . . . . . . . . . . . 46
IPX Network Games . . . . . . . . . . . . . . . . . . . . . . . . . . . .52
Team Selection . . . . . . . . . . . . . . . . . . . . . . . . . . . . . . . 58
Joining Netgame . . . . . . . . . . . . . . . . . . . . . . . . . . . . . . 59
Rejoining Netgame . . . . . . . . . . . . . . . . . . . . . . . . . . . . 60
TROUBLESHOOTING &
COMMON PROBLEMS . . . . . . . . . . . . . . . . . . . . . 62
General Problems . . . . . . . . . . . . . . . . . . . . . . . . . . . . . 62
Modem/Serial Problems . . . . . . . . . . . . . . . . . . . . . . . . 64
Netgame Problems . . . . . . . . . . . . . . . . . . . . . . . . . . . . 65
CREDITS . . . . . . . . . . . . . . . . . . . . . . . . . . . . . . 68
2
22
INTERPLAY PRODUCTIONS
DESCENT™I I
3
33
Page 3

SYSTEM REQUIREMENTS
INSTALLING DESCENT
TM
II
REQUIRED: IBMTM/ TandyTMor 100% compatible 486-DX50 or
faster with 8 Megabytes of RAM (16mb if running under
Windows 95
STRONGLY RECOMMENDED: Pentium
RAM, stereo 16-bit sound card with General MIDI support, a
quality joystick and lots of spare time.
SUPPORTS: Microsoft
Cards: Sound Blaster (Pro, 16, AWE32) and compatibles, Media
Vision Pro-Audio Spectrum (Plus, 16, and Studio), Gravis
Ultrasound/Max, Roland SCC-1 (MIDI Music Only). 1 or 2
Joysticks supported as well as ThrustMaster
WCS/FCS/FLCS/TQS, Gravis Game Pad/Phoenix, Logitech
Cyberman/Wingman Extreme, CH Flightstick Pro/Throttle,
Microsoft SideWinder Pro. VR support: Forte VFX-1,
CyberMaxx, Virtual I/O i-glasses and 3D Max.
TM
), hard drive and Windows 95.
TM
Mouse or compatibles. Sound
TM
processor, 16MB
INSTALLING DESCENTTMII
For best results, do not run under Microsoft Windows 3.x. If
you wish to run under Microsoft Windows 3.x, please refer to
the README.TXT file in your Descent II directory for instructions.
The Descent II Installer will first play a test movie to
•
determine the abilities of your system. When the test is
completed, it will suggest either High or Low resolution
movies.
WARNING: If you choose High resolution movies
when the Installer has recommended Low, you will
probably experience sound and video problems during playback.
After the movie test, the Installer will give you the
•
choice of several install options, and the disk space
required based on your movie resolution. These options
are:
•• SMALL - Copies only a bare minimum to your hard
drive. There will be longer delays starting
Descent II and between levels using this install.
•• MEDIUM - Copies all game-related data to the hard
drive, leaving the cinematics on the CD. This is the
recommended level of installation.
•• LARGE - Copies all game-related data and level
cinematics to the hard drive. The intro and
endgame movies remain on the CD.
•• CRAZY - The mega-install! All game files and cine-
matics are installed to your hard drive. Note: the
Descent II CD will still be required at game start-up.
From Windows 95:
Insert your Descent II CD into your CD-ROM drive, and
click on the Install gadget on the Autorun dialog box that
pops up. Or, click on the Install icon on the CD.
4
44
INTERPLAY PRODUCTIONS
NOTE: If the installer recommends Low-resolution
movies, you may try switching to High resolution
and using Large or Crazy install. This will install the
movie files to your hard drive, which may improve
the movie playback to an acceptable level.
Once you have chosen an install size, you will be
•
offered a choice of hard drives to install to and the
space free on each.
DESCENT™I I
5
55
Page 4

INSTALLING DESCENTTMII
RUNNING DESCENT
TM
II
The default subdirectory for the installed files is
•
\GAMES\DESCENT2 on the chosen drive. You can
change the sub–directory name by entering a new
name in place of this.
From Windows 95:
If you’re running Descent II from Windows 95, double-click
on the Descent II icon, or click on the “Run Descent II” gadget on the Autorun menu that appears when you first insert
your Descent II CD.
Descent II will start and play the introductory movie. The
movie gives background information and narrative concerning events following the conclusion of Descent 1: First
Strike.
NOTE: If the intro movie appears “jerky” or the
sound skips, consult the Troubleshooting section
near the back of this manual for help.
If this is the first time you’ve started Descent II, you’ll be
asked to enter your pilot name. This name is used to save
your settings and to identify yourself during multiplayer
games.
You will then be asked to choose an input device. Use the
up and down arrow keys on your keyboard to move the
highlight and then press <Enter> to select the highlighted
option.
6
66
INTERPLAY PRODUCTIONS
You will now be at Descent II’s Main Menu.
To jump right into the game, press <ENTER> to select New
Game and choose a skill level (Rookie is recommended for
first–time players). After a short movie you will be given a
briefing from PTMC and find yourself in Level 1.
DESCENT™I I
7
77
Page 5
RUNNING DESCENTTMII
RUNNING DESCENT
TM
II
Movies and Music
Descent II offers full-motion cinematic cutscenes with driving digital soundtracks. They can be displayed in 640x480
VESA, or 320x200 (see install notes at the start of the manual).
Based on the install tests, it should suggest which resolution is
best for your system. If you experience playback problems during these movies, consult the Troubleshooting section near the
back of this manual.
Descent II also has redbook music tracks, featuring original
tracks from Ogre (of Skinny Puppy), Type O Negative, and
other artists. The redbook songs are essentially regular audio
CD tracks stored on your Descent II disc, and can be played
with any CD player.
If you have difficulties getting the redbook tracks to play
during Descent II, contact Interplay Technical Support (714-553-
6678).
When in the game, you can hit the <F1> key to bring up a
list of keyboard commands. Hitting <F2> from the game will
bring up the Game Options menu. Certain menus have special
control keys; see the descriptions of those menus for more information.
THE MAIN MENU
Menus
Use the arrow keys to move around menus in Descent II.
Unless otherwise noted, hitting <ESC> will accept the current
menu’s settings and return to the previous one. Some menus
contain checkboxes and radio-type switches that can be toggled
by hitting <SPACEBAR>. Slider-type items are changed used
the left and right arrow.
8
88
INTERPLAY PRODUCTIONS
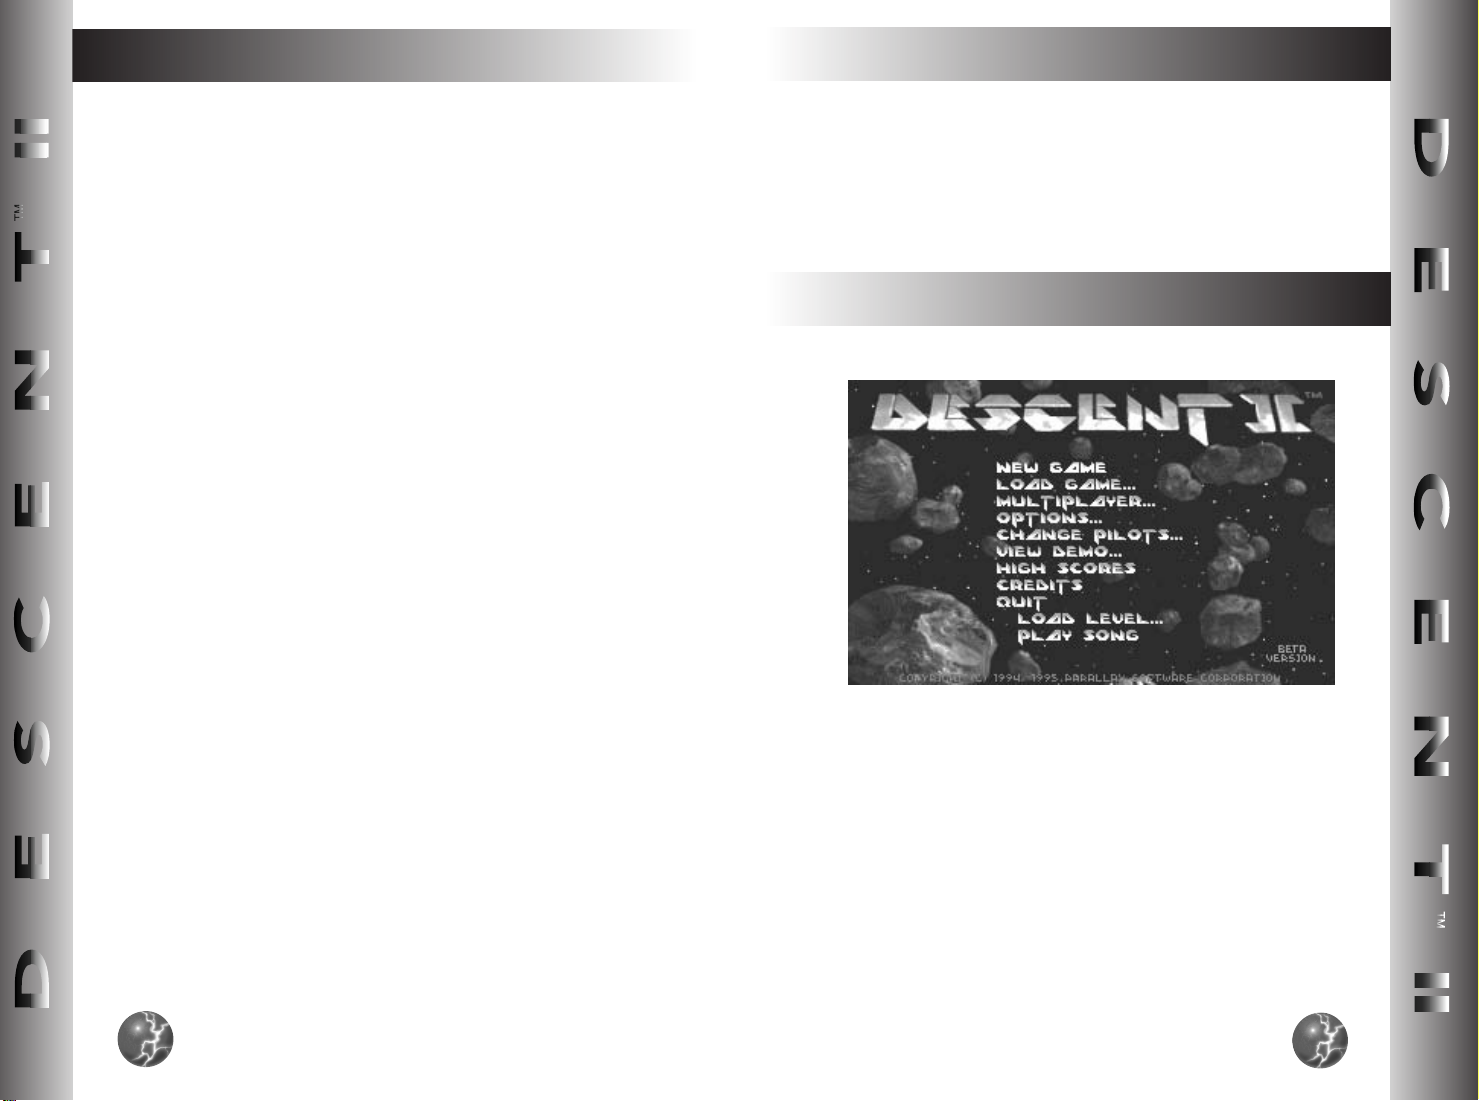
The Main menu offers the following choices:
NEW GAME
Start a new game of Descent II. You may
begin on any level you have reached in previous games.
LOAD GAME
Resume a previously saved game. Saved
games are stored in your pilot file, so be
sure the proper pilot is selected.
MULTIPLAYER
Allows you to start a game of Multiplayer
Descent II using a modem, serial cable, or
IPX network. See the Multiplayer Games
section below.
DESCENT™II
9
99
Page 6
THE MAIN MENU
OPTIONS MENU
OPTIONS
CHANGE PILOTS
VIEW DEMO
HIGH SCORES
CREDITS
QUIT
Takes you to the Options Menu (see below).
Allows you to change the current pilot or cre-
ate a new one. All control configurations and
saved games are stored in your pilot file.
Lets you play a recorded demo file.
See Descent II High Scores.
See the list of people who created Descent II.
This will return you to DOS/Win95.
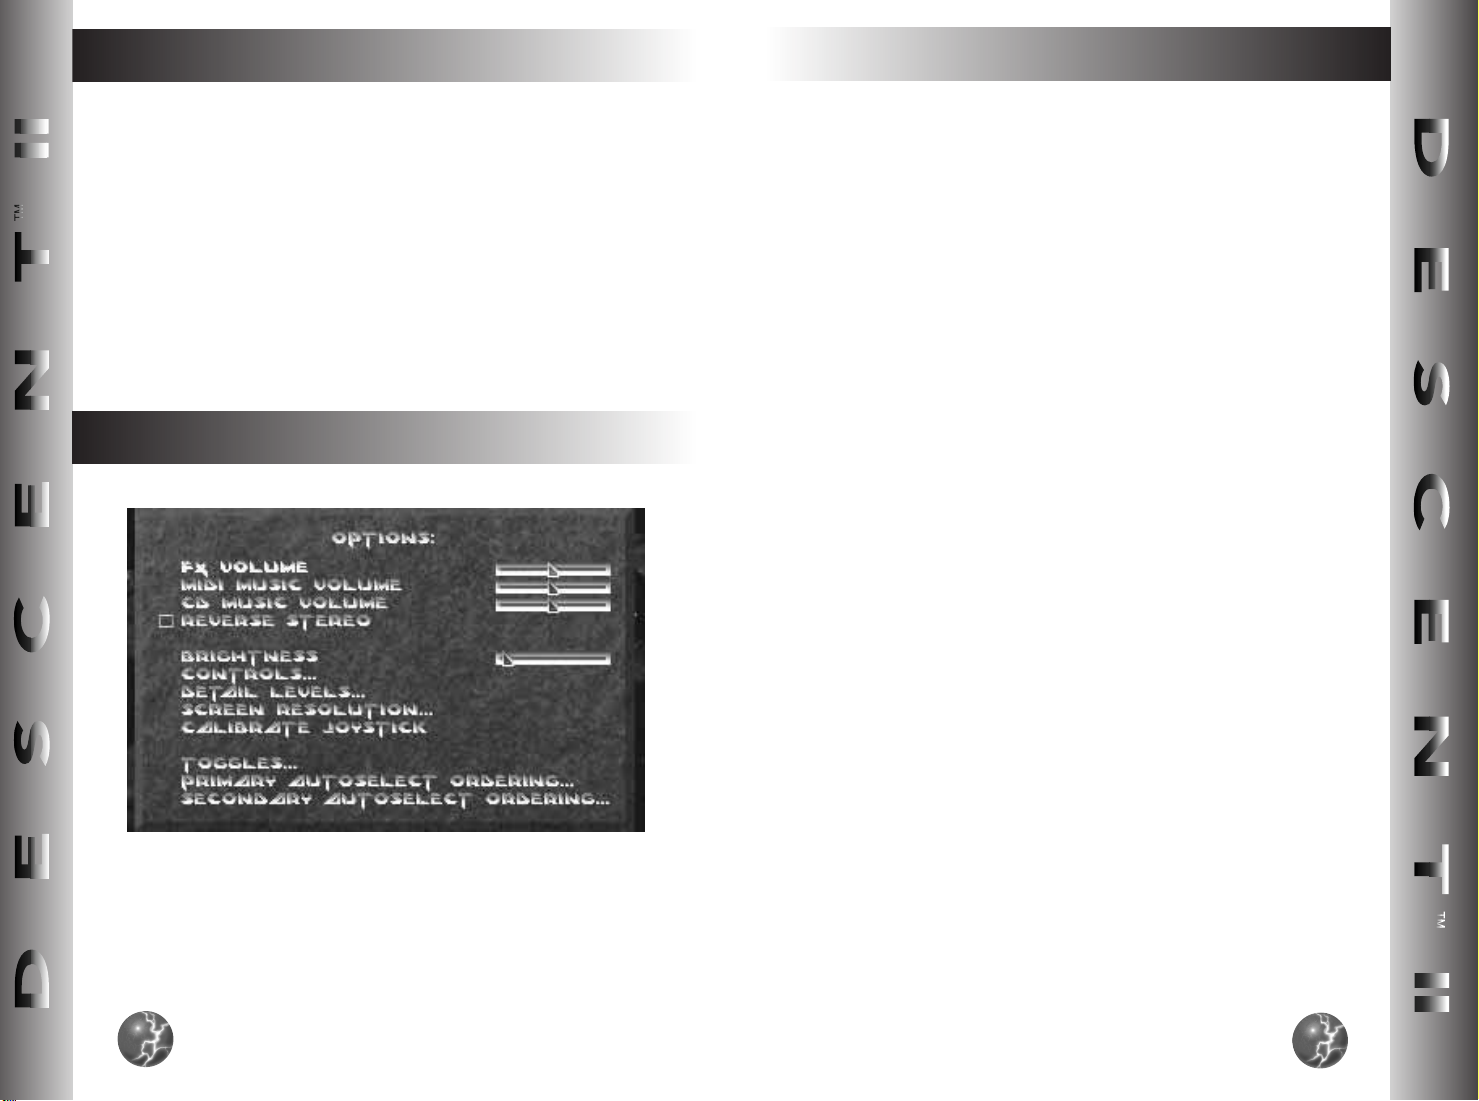
OPTIONS MENU
FX VOLUME
MIDI MUSIC VOLUME
Changes the volume of sound effects.
Changes volume of music played using MIDI
sequences.
CD MUSIC VOLUME
REVERSE STEREO
BRIGHTNESS
CONTROLS
DETAIL LEVELS
SCREEN RESOLUTIONS
CALIBRATE JOYSTICK
TOGGLES
PRIMARY/SECONDARY
AUTOSELECT ORDERING
Changes CD volume of music played directly
off the Descent II CD.
Allows you to reverse the stereo sound channels. This is sometimes necessary for earphones, speakers, or extension cables that
are wired incorrectly.
Some monitors are darker than others. If you
have trouble seeing details on your game
screen, try adjusting this slider. This will not
affect the movie playback.
Takes you to the Controls Menu (see below).
Allows you to adjust the Detail Levels of
Descent II (see below)
Allows you to change the screen resolution
used. For resolutions above 320x400, we
strongly recommend a Pentium (or better)
system.
If your joystick drifts, you probably need to
calibrate it. Also available in the game by hitting <SHIFT> <F7>.
This menu contains several toggle options for
Descent II.
These menus allow you to choose the “preferences” of your weapon Autoselection. When
you pick up a weapon in the game, it will be
selected if it appears higher on the list than
the weapon you are currently using.
Weapons appearing below the “Never
Autoselect” line will not be autoselected, and
must be manually selected. To move the
position of an item in the list, use the arrows
to select that item, then hold down the SHIFT
key and use the arrows to move the item.
Release SHIFT when the item is in the
desired position.
10
1100
INTERPLAY PRODUCTIONS
DESCENT™II
11
1111
Page 7
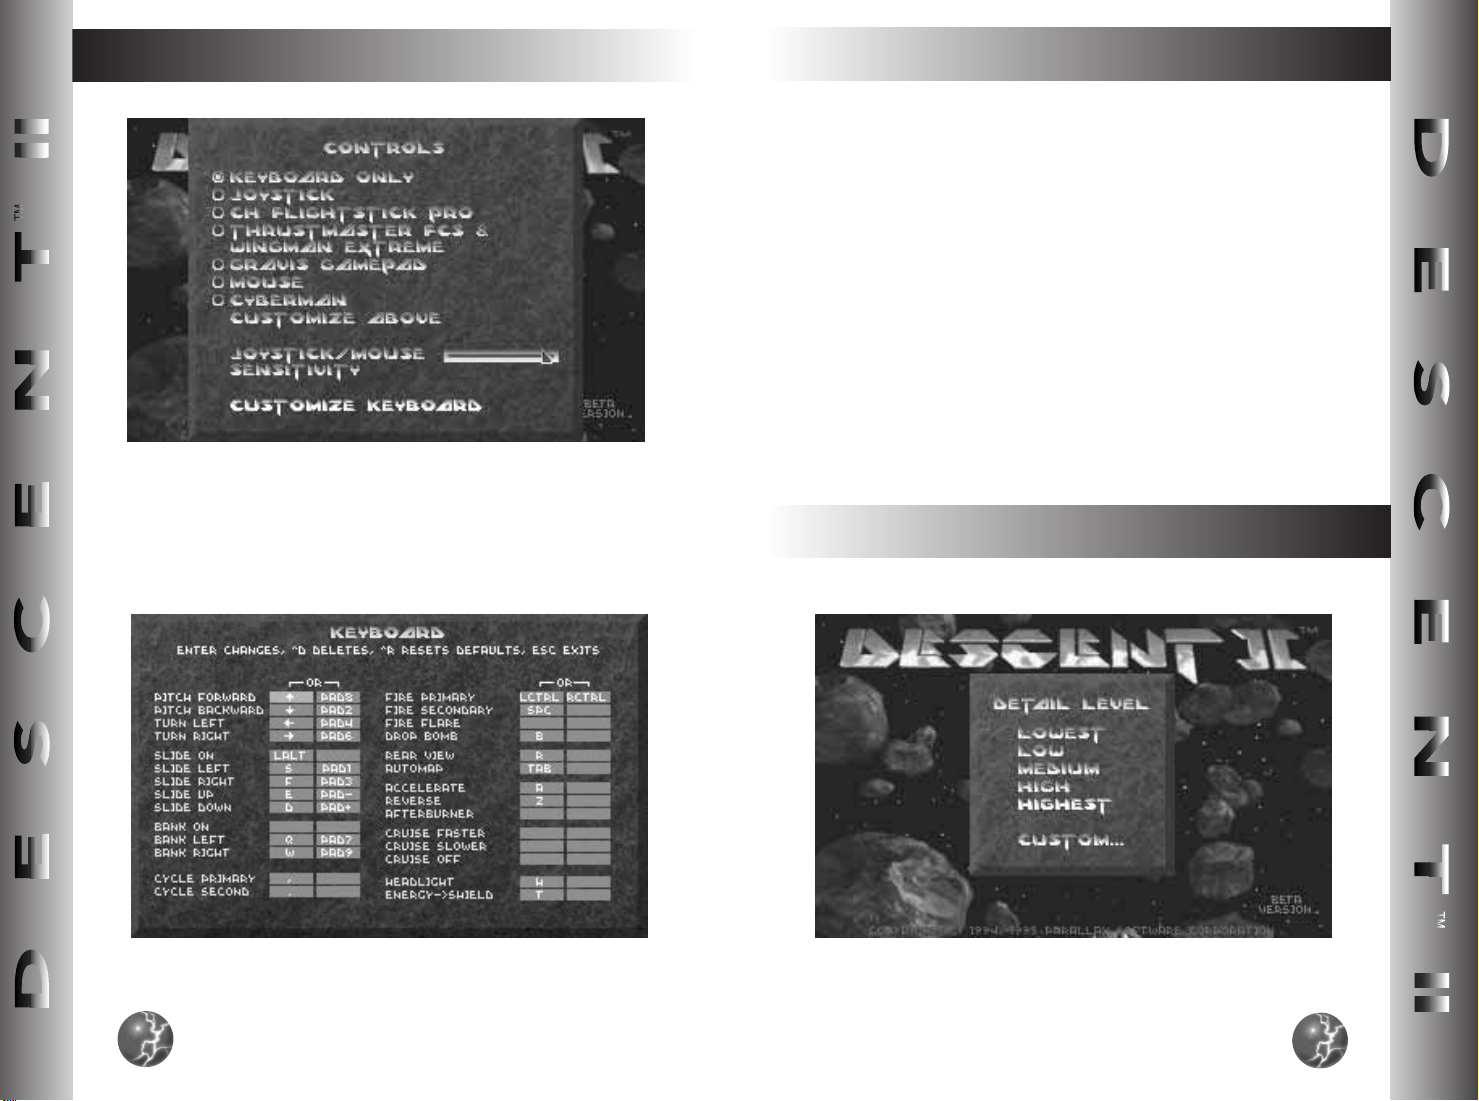
CONTROLS MENU
Use this menu to select and configure your input device.
Supported devices are keyboard, mouse, and joystick. Various
enhanced joysticks have their own items. All changes are saved
to your player file for future use.
CONTROLS MENU
Select the device you plan to use by pressing <SPACE>.
After choosing your device, you can select the Customize
Above option to change the function of the various buttons and
other controls on that device. Note that your keyboard will
always be available. To reassign key functionality, choose the
Customize Keyboard option.
If you have a Thrustmaster WCS, Gravis Phoenix, or other
programmable device, see the README.TXT for more information.
To change an entry in the Customize Above or Customize
Keyboard menus, select the function you want to change, and
press ENTER. Then press the key or button you want to assign
to that function. For axis entries, press ENTER, then move the
new joystick axis.
DETAIL LEVEL MENU
12
1122
INTERPLAY PRODUCTIONS
DESCENT™II
13
1133
Page 8

DETAIL LEVEL MENU
Select one of the five detail level settings. Lower settings
will give faster screen updates in the game; higher settings will
give better graphics quality.
You may also chose the Custom Settings option. There are
six different settings you can adjust in the Custom Details
menu:
TOGGLES MENU
OBJECT
gons used by objects like robots, player ships, and other 3D
objects. Lower values will increase speed but simplify the
shape of many objects.
OBJECT DETAIL: This determines at what distance an
object changes from flatshaded to texture-mapped details.
Setting this slider to a lower value will cause robots to be
flat-shaded much closer.
W
walls appear flat-shaded vs. texture-mapped. It also affects
the accuracy vs. speed of the texture mapper. A low setting
here can cause walls to become jittery and/or warped-look-
ing.
W
distance you can see. Lower values will increase the speed
of Descent, but will cause flat-colored “walls” to appear in
long hallways. These boundaries do not affect weapons or
their objects, only your visuals.
AMOUNT OF DEBRIS: Changing this slider will determine
how much debris is made when robots explode. Setting this
to a low value will make fewer pieces in heavy combat.
SOUND CHANNELS:
have a minor effect on the speed of your game as well. This
slider will change the maximum number of sounds that can
be played at once.
COMPLEXITY: This affects the number of poly-
ALL DETAIL: This option determines at what distance
ALL RENDER DEPTH: This will change the maximum
In addition to visuals, sound can
These checkbox items control various game settings.
AUTOLEVELING: If this is on, your PyroGX ship will
SHIP
attempt to align itself with the curvature of the mine tunnels.
This is useful for first-time Descent II players, but may be
turned off once you’re accustomed to full 3D flight.
SHOW RETICLE: Allows you to turn the targeting reticle
display on or off.
MISSILE VIEW
cam” view in your secondary weapons display. When a
missile is not in the air, the weapons display will work normally. This option is enabled by default, but can be disabled for a small increase in game speed.
HEADLIGHT ON WHEN PICKED UP: When this option is
checked, your headlight will default to ON when the
powerup is picked up. You may then turn it on or off manually.
SHOW GUIDED MISSILE IN MAIN DISPLAY: If enabled,
this will show the guided missile view in the main display
(showing your ship’s view in the small window). If disabled,
the guided missile view will show in a small window.
: When enabled, this will show a “missile
14
1144
INTERPLAY PRODUCTIONS
DESCENT™II
15
1155
Page 9

TOGGLES MENU
KEYS
ESCORT ROBOT HOT KEYS: When this is turned on, you
may command the Guide-Bot using the <SHIFT> -1 through
<SHIFT>-0 hot keys instead of selecting a command from
the Guide-Bot menu.
KEYS
This section describes keys that are active during game
play. Many of the keys can be reconfigured in the
Options/Controls/Customize Keyboard screen.
For information of key usage in menus, see above.
G
G
G
G
G
G
16
1166
F1
F2
F3
F4
F5
Abort game
Help screen
Options
Toggle cockpit
on/off
Drop marker
Record demo
F7
G
S
F2
A
G
F3
A
G
O
+
G
-
G
R
INTERPLAY PRODUCTIONS
Calibrate joystick
Save game
Load saved game
Pauses the game in
single-player games.
In multiplayer games,
this will display a
game info screen.
Change window size
Save screen shot.
(Saved in PCX format.)
F1
S
S
S
G
F2
G
F2
G
S!
AS
Cycle left camera view window
Cycle right camera view window
Bring up Guide-Bot Command Menu
through
S)
F4
Rename Guide-Bot
Guide-Bot commands
G
The following keys are active only during multiplayer games:
F6
Allow player to join restricted game
G
F7
G
F8
Toggle between multiplayer HUD displays
Send message
G
F9
through
G
F9
S
DESCENT™II
G
F12
G
through
Send Taunt macros
F12
S
G
Select team for new player
Define F9-F12
taunt macros
17
1177
Page 10

KEYS
KEYS
1
2
A/A
F5
A
A
A
Options/Controls menu. The defaults are shown here:
Flying controls:
G
F6
G
0
The following keys can be reassigned in the
OR
WX
UV
OR
Toggle display of player
names on HUD
Change player name display on HUD
Drop flag (Capture the Flag
games only)
Turn left, right
46
Rotate up, down
89
Slide
WA
Slide left/right
!#
z
q
OR
&
e OR(
s
Weapons:
C
Space
Z
b
f
F5
S
G
Reverse
Bank left
Bank right
Afterburner (with Power–up)
Fire primary
Fire secondary
Drop proximity bomb/smart mine
Fire flare
Drop currently -selected primary weapon
slide
-+
a
18
1188
Slide up/down
Forward
INTERPLAY PRODUCTIONS
F6
S
G
.,
DESCENT™I I
Drop currently-selected secondary
weapon
Cycle primary/ secondar y weapons
19
1199
Page 11

KEYS
KEYS
Weapon Selection:
Each selection key will switch between the two weapons
assigned to that key. Descent II will remember which of the two
weapons you last selected, and will return to that one when you
return to that entry.
Key
1 Lasers/SuperLasers (used as laser levels
2 Vulcan Cannon Gauss Cannon
3 Spreadfire Cannon Helix Cannon
4 Plasma Cannon Phoenix Cannon
5 Fusion Cannon Omega Cannon
6 Concussion Missile Flash Missile
7 Homing Missile Guided Missile
8 Proximity Bomb Smart Mine
9 Smart Missile Mercury Missile
0 Mega Missile EarthShaker Missile
,] Cycle primary weapon
[
[.] Cycle secondary weapon
Weapon 1 Weapon 2
5 & 6)
Other Keys:
Select rear view
r
Transfer energy to
shield– only wor ks
t
h
if Energy > 100
Toggle headlight
on/off, if player has
the Headlight power-up
Automap
T
Automap controls:
• To rotate the Map, use the ship turning keys.
• To move the Map, use the ship sliding keys.
• To move in and out of the Map, use the forward/reverse
keys.
• To show more or less of the Map, use + or - keys.
• To reset the default Map view, use the primary weapon
firing key.
• 1-9 selects marker.
20
2200
NOTE: The two cycle keys will select the next available
weapon of that type. The order of the list can be changed
under the new Options/Autoselect Ordering menus.
INTERPLAY PRODUCTIONS
• [Ctrl-D] Deletes selected marker.
DESCENT™I I
21
2211
Page 12

KEYS
PLAYING DESCENTTMII
The following keys are active when using certain VR
devices. See below for information on using these devices.
A
A
A
A
A
A
F5
G
F6
G
F7
G
F8
G
F9
G
F10
G
Toggle VictorMaxx mode
Cycle VR resolution
Switch left/right eye displays
Cycle head tracking sensitivity
Cycle headset type
Toggle HUD
Following is a description of the features and gameplay
options in Descent II.
When you play Descent II, you find yourself thrown into
alien worlds populated by deranged robots, determined to
destroy you. It is your mission to fight through the robot hordes
to each mine’s Main Reactor. Destroying this reactor and
escaping is your primary mission!
In the following you’ll find brief descriptions of the robots,
weapons, powerups, obstacles, and other challenges you’ll
encounter on the way.
Robots
The mines in Descent II are populated with a dizzying array
of robots, nearly all bent on destroying you. They will use a
variety of weapons and defenses against you, and use them
with varying amounts of intelligence. Some will charge you
directly, others will hide or attempt rear attacks. Some robots
will carry weapons you can use, and will drop these when you
destroy them, as well as other powerups. Some will even steal
your weapons from you!
22
2222
INTERPLAY PRODUCTIONS
The Guide-Bot
DESCENT™I I
23
2233
Page 13

PLAYING DESCENTTMII
PLAYING DESCENTTMII
New to Descent II is the Guide-Bot. He’s an automated
scout robot that has been smuggled into the mines to help you.
He’s small, blue, and can be found on all of the regular levels though not on the secret levels. He’s usually imprisoned in a little cell near the entrance of each mine. You can choose to free
him by blasting open the door to his cell and use his help, or
leave him be (you will not be penalized).
Once the Guide-Bot has been released, you can bring up
his command menu by hitting SHIFT-F4. The following GuideBot commands are available:
0. Find next goal
1. Find Energy Powerup
2. Find Energy Center
3. Find Shield Powerup
4. Find any Powerup
5. Find a Robot
6. Find a Hostage
7. Stay away from me
8. Find my Powerups (Powerups you dropped after
dying)
Choosing “Suppress messages” prevents the Guide-Bot’s
messages from appearing on your HUD. When messages are
off, this menu item changes to “Enable Messages,” which can
be selected to turn messages back on. There are no shortcut
keys for the Supress/Enable Messages commands.
Once you issue a command, the Guide-Bot will attempt to
follow it until another is issued, or you have achieved the goal.
If you issue no commands, the Guide-Bot will first find the keys
needed to complete the level, then the reactor, then the exit.
The Guide-Bot will do his best to find his next goal, but he
may not be able to if he needs to get through a locked or hidden door. Once you have opened the door, the Guide-Bot will
continue on his default or assigned task.
While the Guide-Bot is small and fast, he will die if exposed
to enough combat.
If you fall far behind the Guide-Bot, he will come back looking for you. He will not open secret or restricted access doors to
attain a goal, but will do so in order to find you.
You may see a camera view from the Guide-Bot’s point-ofview by using the <Shift>-<F1> and <Shift> -<F2> keys to
select the left and right windows. Each time you press these
keys, you select a different view. Press the key until you see
the Guide-Bot’s view.
9. Find the Exit
T. Suppress messages
Option 0 will direct the Guide-Bot to the next task you must
complete to finish the level. That may be finding a key, finding
the reactor, or escaping the mine.
All of the numbered commands can also be issued during
play by pressing the shifted number of the command. For
example, <SHIFT>-1 for “Find Energy Powerup.”
24
2244
INTERPLAY PRODUCTIONS
You may give the Guide-Bot a name by pressing Alt-ShiftF4 in the game. You will be prompted to enter a name which
will be used to identify the Guide-Bot’s HUD messages.
25
DESCENT™II
2255
Page 14

PLAYING DESCENTTMII
Weapons
Your Pyro-GX is equiped with Primary and Secondary
weapon systems. There are 10 weapons of each type. When
you are first inserted into Level 1, you are equipped with Laser
Cannons and Concussion Missiles. As you explore the mines,
you will find more powerful weapons and powerups to use. See
the Powerups section for a complete description of each
weapon.
Most Primary weapons require energy to use. The Vulcan
and Gauss Cannons use ammo that can be found throughout
the mines. Secondary weapons are typically missiles found in
packs of one or four.
If your currently selected Primary or Secondary weapon is
depleted of energy or ammo, your next available weapon will be
Autoselected. The priorities of this weapon selection can be
changed in the Options/Autoselect Ordering menus.
Weapons are selected using the 1 through 0 keys.
Pressing a selection key will select one of the two weapons
assigned to that key. Pressing the key again will select the
other weapon. Descent II will remember which of the two
weapons you last selected, and will return to that one when you
return to that entry.
PLAYING DESCENTTMII
6 Concussion Missile Flash Missile
7 Homing Missile Guided Missile
8 Proximity Bomb Smart Mine
9 Smart Missile Mercury Missile
0 Mega Missile EarthShaker Missile
[
,] Cycle primary weapon
[.] Cycle secondary weapon
It is possible to drop either a primary or secondary weapon
that is currently selected. This can be useful when in a cooperative or team multi-player game, so that your comrade can pick
up a weapon he needs but doesn’t have. In single-player
games, you can drop weapons in strategic locations such as
the start of a level, so you’ll know where to find them when you
need them. It’s a good idea to stash some weapons in case
you die so you won’t have to go virtually un-armed to retrieve
your weapons.
Use Shift-F5 to drop your currently-selected primary
weapon, or Shift-F6 to drop your currently-selected secondary
weapon.
Key Weapon 1 Weapon2
1 Lasers/SuperLasers (used as laser levels
5 & 6)
2 Vulcan Cannon Gauss Cannon
3 Spreadfire Cannon Helix Cannon
4 Plasma Cannon Phoenix Cannon
5 Fusion Cannon Omega Cannon
26
2266
INTERPLAY PRODUCTIONS
Powerups
Throughout the mines are objects you can pick up that give
you new weapons, enhance your ship’s capabilities, or replenish your energy or shields.
ACCESS KEYS:
DESCENT™II
These keys give you
access to the different
security levels of the
mines. They are colorcoded to the doors they
open.
27
2277
Page 15

PLAYING DESCENTTMII
PLAYING DESCENTTMII
ENERGY BOOST:
SHIELD BOOST:
CLOAKING DEVICE:
INVULNERABILITY:
EXTRA LIFE:
AFTERBURNER:
HEADLIGHT:
This will give your energy banks
a boost, up to 200 units max.
Energy Centers can deliver
recharges up to 100 units.
This will give your ship’s shields a
kick. By getting shield powerups,
you can get your shields up to a
maximum of 200 units.
Cloaks your ship a limited time.
When cloaked, it is hard for robots
and other players to see you, and
weapons that track (such as the
Homing missile) will not be able to
lock onto you. Cloaking wears off
after 30 seconds.
Makes your ship invulnerable
for 30 seconds.
Gives you a bonus life.
This gives your ship turboboosted thrusters. Afterburners
operate off of a separate energy reserve that charges itself
from your normal energy banks.
When the afterburner key is held down, your
ship moves at twice its normal speed, until the
key is released or the afterburner charge is
exhausted. When the key is released, the afterburner energy will recharge. The default
Afterburner key is <S>; it can be reassigned
under the Controls menu.
Helps illuminate nearby mine
walls. Also makes your ship
more visible to surrounding
robots (and players!). The
default key to turn your headlight on and off is ‘H’. When you pick up the
headlight, it will be on or off depending on the
setting in the Options/Toggles menu. NOTE:
ENERGY-TO-SHIELD
CONVERTER:
LASER:
SUPERLASER:
QUAD LASER:
VULCAN CANNON:
GAUSS CANNON:
VULCAN AMMO:
When ON, your headlight will drain energy from
your main energy reserve. The headlight will not
operate if you have less than 10 units of energy.
Allows you to divert energy
over 100 to your ship’s
shields. Hold down the
Transfer key (default is
<T>) to activate. Every
shield unit costs 2 energy
units to convert.
Laser cannons have six
total power levels. The
laser powerup will give you
the next available level up
to level 4.
These beauties will boost
your laser above level 4,
up to the maximum of 6.
The first one you find will
raise your laser to level 5.
The second will put you up to 6.
This powerup will modify
your existing laser system
to fire four bolts instead of
the standard two.
This weapon rapidly fires
explosive-tipped shells.
Similar to the Vulcan, this
weapon fires fewer but
more massive and devastating bursts of ammo.
Uses the same ammo as
the Vulcan cannon.
This gives you ammunition for the Vulcan &
Gauss Cannons.
28
2288
INTERPLAY PRODUCTIONS
DESCENT™II
29
2299
Page 16

PLAYING DESCENTTMII
PLAYING DESCENTTMII
SPREADFIRE CANNON
HELIX CANNON:
PLASMA CANNON:
FUSION CANNON:
PHOENIX CANNON:
OMEGA CANNON:
This fires a spread of
energy at your target.
The newest model of the
Spreadfire line, this spews
destruction over an even
wider area.
Fires bursts of supercharged
plasma.
Fires destructive blasts of
energy directly from the
ship’s fusion reactor.
Capable of punching
through large crowds of
robots before running out of power.
A turbo-charged version
of the Plasma cannon,
the energy bursts from
the Phoenix will ricochet
off walls.
Casts an ultimately powerful beam of energy at
your target.
GUIDED MISSILES:
PROXIMITY BOMBS:
SMART MINES:
SMART MISSILE:
These missiles are
guided by the pilot
(using normal flying
controls) until detonated
or until the fire key is
pressed again. At that point, they become normal homing missiles.
These bombs are launched
behind your ship, waiting to
explode when something
gets near. Can be armed
as a secondary weapon, or dropped directly
with Drop Bomb key (<B>by default).
More sophisticated versions of the Proximity
bombs. When detonated,
these spew forth globules
of energy that track nearby
targets. Can be armed as
a secondary weapon, or dropped directly with
Drop Bomb key (<B> by default). Cannot harm
the player or robot who drops them.
When this missile detonates, it sends bomblets
of heated plasma after
the surrounding targets.
CONCUSSION
MISSILES:
HOMING MISSILES:
30
3300
All-purpose dumbfire
rockets. Come singly or
in packs of four.
Same size warhead as
Concussion Missiles,
these are equipped with
a tracking device that
can follow a target
around most turns.
Come singly or in packs
of four.
INTERPLAY PRODUCTIONS
MEGA MISSILE:
MERCURY MISSILE:
EARTHSHAKER
MISSILE:
DESCENT™II
Keep out the range of this
missile’s massive blast.
Fast missiles that quickly
blast your target to
pieces.
The ultimate in minerocking destruction, the
Earthshaker creates a
huge explosion and
sends deadly projectiles
at nearby enemies.
Treat with respect.
31
3311
Page 17

PLAYING DESCENTTMII
PLAYING DESCENTTMII
Doors
There are a variety of doors that can be found in the PTMC
mines. Most can be opened by either bumping into them or
shooting them. There are some, though, that can only be
opened if you have the appropriate access key. Others can
only be opened if certain actions are performed or the Reactor
is set to self-destruct (e.g. the emergency exit). Hostage doors
must be destroyed by repeat fire. Some doors are hidden.
Certain other doors and secret doors can only be opened by
destroying a control panel. These control panels are located
throughout the tunnels along specific walls. When opened,
some doors will remain open, while others will close again after
a few seconds. Some doors will only open once.
Control Panels
Glowing control panels can be found throughout the mines
in Descent II. These control panels can be destroyed to trigger
various events. For example, some control panels may deactivate force fields, remove walls, open doors, or even release
hostile robots. Successful completion of some of the mines may
depend upon destroying the appropriate control panel.
32
3322
INTERPLAY PRODUCTIONS
DESCENT™II
33
3333
Page 18

PLAYING DESCENTTMII
Main Reactor
PLAYING DESCENTTMII
hostages, be sure to leave the mine alive. If your ship is
destroyed, any hostages on board will die as well!
The Automap
The Reactor is the power generator of the whole mine. It’s
usually located in a secluded place away from day-to-day mine
mishaps. When the reactor is severely damaged, it will initiate
a sequence ending in the destruction of the entire mine. At this
point, the emergency exit door for the level will open, and you
have a limited amount of time to find the exit and leave the
mine.
Hostages
On some mines you will find blue-uniformed humans who
have been imprisoned by the robots. By blasting through their
prison doors, you can rescue them from certain death. Bonus
points are awarded at the end of each level based on how
many hostages you saved. Once you’ve picked up the
34
3344
INTERPLAY PRODUCTIONS
The Automap keeps track of places you’ve been. As you
move through new territory, your progress is drawn in by the
Automap. To access the Automap, press the Tab key. To close
the Automap, press Esc or Tab.
1) The center object is your ship. Other green objects are
hostages.
2) The red area is the Reactor.
3 The red, yellow and blue walls are locked doors.
These doors require the use of corresponding colorcoded access keys for passage.
4) Green walls are unlocked doors.
5) Yellow areas are energy centers.
6) The purple segment is the mine’s entrance. Robot
Materialization centers are also drawn in Purple.
35
DESCENT™I I
3355
Page 19

PLAYING DESCENTTMII
7) Glowing red circles are markers you have dropped.
Use 1-9 keys to select markers.
PLAYING DESCENTTMII
Exit from a secret level is also via teleporter. You may exit
at any time even if the level has not been destroyed. Unlike
normal levels, secret levels may be visited repeatedly, even if
you die there. However, once the reactor on a secret level has
been destroyed, you cannot return.
Secret levels do not conform to the rules of normal levels.
Be prepared for anything to happen. You can not save your
game while on a secret level.
Energy Centers
At specific sites within every mine there are energy centers
designed for “on the fly” replenishing of a robot’s power cells
that will boost your ship’s energy level. Although these centers
will only boost your energy level up to 100, it is possible to
achieve a maximum level of 200 by collecting energy packets
that are scattered throughout the mines. These energy centers
have distinct gold walls with an energy field between them.
If you have acquired the Full Map power-up, you will
see the entire map, including areas you have not yet
explored. The unexplored areas appear in blue.
See Controls section above for movement controls in the
Automap screen.
Secret Levels
These levels, accessible only by teleporters hidden in the
mines, are storehouses for weapons and ship accessories.
Although they are usually not heavily defended, they are full of
traps and are designed to prevent entrance into the largest
caches of weapons. Multiplayer games cannot be played on
secret levels.
36
3366
INTERPLAY PRODUCTIONS
DESCENT™I I
37
3377
Page 20

PLAYING DESCENTTMII
PLAYING DESCENTTMII
Force Fields
Force Fields are energy beams used to block access to
parts of the mine. They will repell and damage your ship upon
contact, and reflect energy weapons. They have been placed
in the mine to guard the keys or powerups. Try to find an alternate path to your goal, or locate a control panel that will deactivate the force field.
Robot Generators
Automated centers that determine a mine’s needs and
assemble robots from surrounding minerals and metals. Very
dangerous.
Markers
To aid you in your exploration and mapping of each mine in
Descent II, it is possible to drop markers. Once you have chosen an appropriate location to drop a marker, press the F4 key.
You will be prompted to enter a brief line of text to be associated with this marker. Hit <ENTER> when done with your message. Whenever you (or another player) flies over a marker,
that marker’s message will be displayed on your HUD. In
single-player games, you may drop up to 9 markers. In multiplayer games, each player may drop up to two markers.
38
3388
INTERPLAY PRODUCTIONS
DESCENT™I I
39
3399
Page 21

PLAYING DESCENTTMII
Markers will appear on the Automap screen as a red dot
with the marker number inside. You can see the text for a
marker by using 1-9 keys to select a marker. The text for that
marker will be displayed on the screen. To delete the selected
marker, press Ctrl-D.
PLAYING DESCENTTMII
Cockpit and HUD Displays
In multiplayer games, you can use the <Shift>-<F1> and
<Shift>-<F2> keys to select camera views from your markers.
Marker cameras are not available in single-player games.
Score
Accumulating enough points will grant you extra lives.
Points are awarded for destroying robots, escaping a mine with
hostages, and finishing the game with lives to spare. An
end-of-level Skill Bonus is awarded for playing on Hotshot skill
level or above. Your score determines where you place (if at
all) on the High Scores screen when your game is over.
40
4400
INTERPLAY PRODUCTIONS
1) Aiming Reticle
1A) Primary weapons arming status
1B) Secondary weapons arming status
2) Primary weapons display. Also shows ammo for
Vulcan and Gauss cannons, and Omega cannon
charge (0-100%)
3) Secondary weapons display
4) Weapons energy status bar
5) Shield energy status indicator
6) Ship status indicator
DESCENT™I I
41
4411
Page 22

PLAYING DESCENTTMII
PLAYING DESCENTTMII
7) Enemy missile lock alarm
8) Access key indicator
9) Current score
10) Ships remaining
11) Afterburner energy indicator
12) ProxBomb/SmartMine counter
Missile Views
Whenever you fire a missile in Descent II, a camera view
from that missile will be displayed in the right window on your
cockpit or status bar, or overlaying the main display in fullscreen mode. You can disable missile views in the
Options/Toggles menu.
Camera Windows
The two cockpit windows that normally show your Primary
and Secondary weapons can be used to display additional camera views. Use <Shift>-<F1> and <Shift>-<F2> to cycle the
view in the left and right windows, respectively. The available
camera views in single-player games are Rear View and GuideBot view. In multiplayer games, the choices are Rear View,
Teammate View, and Marker View(s).
window. In the largest window size, the status bar is not available. Smaller window sizes will provide faster graphics
updates.
Rear View
To look out the rear of your ship, press <R> (you can
change this key in the Controls menu). If you hold down the
<R> key you will see a rear view until the key is released. To
switch indefinitely to the rear view, quickly tap the <R> key. The
rear view can also be displayed using the <SHIFT>-<F1>/<F2>
camera view windows.
Cockpit View
Use <F3> to toggle between full cockpit and status bar
modes. (Note that the cockpit and status bar are not available in
some screen resolutions.) When in Status Bar mode, you can
also use the +/- keys to increase and decrease the size of your
42
4422
INTERPLAY PRODUCTIONS
DESCENT™II
43
4433
Page 23

DEMOS & SCREENSHOTS
DEMOS & SCREENSHOTS
Sorry, DESCENT 1 Demos are incompatible with
DESCENT II playback.
Descent II has a fully integrated demo recording and playback system. This recording will work in single or multiplayer
games, so you can have a permanent record of blasting your
friends to pieces.
Hitting <F5> in the game will turn on recording. Hitting it
again will turn it off and prompt you for a filename. If you press
<ESC> from the filename box, the demo will NOT be saved.
The demos will record the advance from one level to the next;
however, the escape sequences will be skipped in playback.
Demo files are saved in your Descent II game directory and
have the file name extension “.DEM”. Of course, Descent DEM
files may be distributed freely.
NOTE: Descent .DEM files can become quite large
on disk. This is especially true when recording
heavy combat. Make sure you have adequate disk
space before recording. If you have less than 500k
free on disk, you won’t be allowed to record a demo.
To view a recorded demo, choose View Demo from the
Descent II menu. During playback, the following keys are available:
[UP ARROW] PLAY
[DOWN ARROW] STOP
[LEFT ARROW] SINGLE FRAME REVERSE
[RIGHT ARROW] SINGLE FRAME FORWARD
[SHIFT + LEFT ARROW] FAST REVERSE
[SHIFT + RIGHT ARROW] FAST FORWARD
[CTRL + LEFT ARROW] GO TO START OF A DEMO
[CTRL + RIGHT ARROW] GO TO END OF ADEMO
Certain gauges and other items won’t display accurately in
demo playback in order to minimize the space needed for demo
files.
44
4444
INTERPLAY PRODUCTIONS
Screenshots can be taken by hitting the PRINT SCREEN
key. The files are written to the Descent II directory with the
name convention SCREENxx.PCX. The number xx starts at 00
and will increment automatically each time you save a screenshot. The counter resets at 0 each time you start Descent II.
You may save up to 100 screenshots.
Screenshot pictures are saved in PCX format. Asmall
Windows-based program like MS Paint can be used to view the
screenshots.
Using Special Joysticks
& Controllers
Thrustmaster, Gravis Phoenix, CH, and Logitech controls
are fully supported by Descent II. The device control files
(DESCENT2.ADV, DESCENT2.M50, D2WCS.M50,
D2TQS.M50, DESCENT.PHX, and DESCENT.KEY) can be
found in the \CONTROLS subdirectory on your Descent II CD.
See the README.TXT file for full explanation of these special controls.
VR Headset Information
Descent II fully supports most VR Head–Mounted Displays.
To enable support for a given VR device, use the SETUP program. During the game, the following keys are used for VR settings:
ALT-F5 TOGGLE VICTORMAXX MODE
ALT-F6 CYCLE VR RESOLUTION
ALT-F7 SWITCH LEFT/RIGHT EYE DISPLAYS
ALT-F8 CYCLE HEAD TRACKING SENSITIVITY
ALT-F9 CYCLE HEADSET TYPE
ALT-F10 TOGGLE HUD
45
DESCENT™I I
4455
Page 24

MULTIPLAYER GAMES
MULTIPLAYER GAMES
This section contains information specific to multiplayer
games. Descent II supports multiplayer games over a modem,
direct serial connection, or IPX network.
Special Keys
There are several keys that perform special functions in
Multiplayer games.
ACCEPT PLAYER ENTRY <F6>: Available only in
Restricted games. When a new player attempts to join, one ingame player is given a message and the option of hitting <F6>
to accept him/her into to the game. If no acceptance is made in
5 seconds, the new player is denied.
CHOOSE NEW PLAYER TEAM (ALT-1/ALT-2) When a
new player attempts to join a Capture-the-Flag or Team Anarchy
game, one in-game player is asked to choose which team the
new player will be on. Press <ALT>-1 to choose Team 1, or
<ALT> -2 to choose Team 2. If no key is pressed in five seconds, the new player is not allowed into the game.
TEAMMATE ID DISPLAY (ALT-F6): Available in Network
Team and Cooperative games only. If enabled, this will show a
teammate’s name if he is in your sights. If the “Show all players
on HUD” option was set when the game was started, all players
(not just teammates) will be displayed. Hitting <ALT>-<F6> will
turn this on/off.
KILL LIST DISPLAY (F7): This toggles the Multiplayer Kill
List on/off. In Network Team games, this alternates the display
between Player Kills, Team Kills, Efficiency Scores, and no kill
display. The efficiency score is defined as
KILLS/(KILLS+DEATHS). Therefore, a player with 5 kills and 0
deaths would have a perfect 100% Efficiency Score. Someone
with 5 kills and 2 deaths would have a 71% Efficiency Score.
SEND MESSAGE (F8): Lets you type a message to other
player(s). You may address a message to a specific player or
players by starting the message with a name followed by a
colon. For example, sending the message “ST:My hat is red!”
will send the message “My hat is red!” to any players with “ST”
as their name (or the first two characters of their name). This
would include the players STEVE or STACY. If no name is
given, the message will be sent to everyone. If no match can
be found for a given name, the message will not be sent.
In Team Anarchy, addressing messages to “1:” or “2:” will
send them only to members of Team 1 and Team 2, respectively.
You may substitute a player’s name in a message by using
the $ character. Any occurances of the $ in a message will be
replace by the name of the player receiving the message. For
example, if you are playing against Scourge and Alchemy and
send the message “Hey, $, you’re funny –lookin!”, the message
will appear on Scourge’s screen as “Hey, Scourge, you’re
funny–lookin!” and on Alchemy’s screen as “Hey, Alchemy,
you’re funny–lookin!”
TAUNT MACROS (F9-F12): These keys send one of four
predefined messages with one keypress. By using <SHIFT>,
you can define or re-define what <F9>-<F12> will send. For
example, hitting <SHIFT>-<F10> will let you change the message sent when <F10> is pressed. Message addressing using
“:” is available in macros as well (see above). Taunt Macros
are stored in your pilot file for future games.
MARKER CAMERAS (F4): In multiplayer games, markers
can be used as surveillance cameras. After dropping a marker
in a multiplayer game, use <SHIFT>-<F1> or <SHIFT>-<F2>
to select a camera view from your marker. Marker cameras
may be disallowed in the Start Netgame/More Options menu.
DROP FLAG (ALT-0): In Capture-the-Flag games, you can
drop the flag (if you have it) by pressing ALT-0.
46
4466
INTERPLAY PRODUCTIONS
DESCENT™I I
47
4477
Page 25

MULTIPLAYER GAMES
MULTIPLAYER GAMES
MULTIPLAYER GAME INFO (PAUSE): Pressing PAUSE in
a multiplayer game will bring up an information window describing various properties about the netgame, such as game mode,
packet loss, and who is currently master of this game. Press
<Esc> to leave this window. Note: You will still be vulnerable to
attack while you are viewing this window.
Special rules/features
Some special rules and features apply to Multiplayer
Descent II Games.
• Multiplayer handicapping. If someone wishes to handicap themselves, they may use F8 to send the following
message: “handicap:xxx” where xxx is a number from
10-100. From that point on, the player who sent the
message will have xxx shields when they reappear after
dying. When a player changes his/her handicap, a
message is sent to everyone to announce it.
• When players are killed, they drop their weapons and
powerups! This also means that if there is only one
Spreadfire Cannon placed in a level, only one player
can have it at a time. If you want a certain weapon,
you may have to beat it out of someone!
• When you fire secondary weapons in a multiplayer
game, a new powerup of that type is created randomly
somewhere in the mine. This keeps the number of
weapons in the game constant. If you see a weapon
suddenly appear in front of your ship, consider yourself
lucky! Cloak/Invulnerability replacements are created
when these effects wear off of a player. Concussion
Missiles do not replace themselves.
yourself. It will also return you from menus if the reactor is about to explode.
• When you leave a multiplayer game, your powerups are
dropped before your ship disappears.
• When you hit the PAUSE key in a netgame, you will be
shown an info screen outlining the game type, mode,
and other options chosen for that game.
Modem/Serial Games
NOTE: If you experience any problems, see the
README.TXT for troubleshooting tips and solutions, or
call Interplay Technical Support.
MODEM/SERIAL SETUP
Before attempting to start a serial game, both users should
check the Com Settings menu to verify that the options are correct. Any changes are saved for future games.
NOTE: Games using a null-modem cable require that both
machines use the same baud rate in the Com Settings
menu. Modem games, however, do not require this.
If your machine does not have a 16450 UART, you should
choose 9600 or 19200 baud. The higher the baud rate, the better Descent II will perform. If your computer has a 16550
UART, you can use 38400 baud rate for optimum performance.
If you are unsure what type of UART your machine has, you
can try selecting the 38400 baud rate option. Descent II will tell
you if it does not detect the 16550 UART required for 38400.
• Bringing up a menu in Multiplayer Descent II does NOT
stop the action. Your ship is still vulnerable to attack. If
you need to spend time in a menu, find a place to
hide. If you’re attacked while in a menu, the game will
automatically return you to the game so you can defend
48
4488
INTERPLAY PRODUCTIONS
For modem users, note that changing the baud rate in the
Com Settings menu actually sets the rate of communication
between the computer and the modem. Even though many
modems do not support actual baud rates above 14400, it is still
49
DESCENT™I I
4499
Page 26

MULTIPLAYER GAMES
MULTIPLAYER GAMES
better to choose a 38400 baud rate in the menu. This will allow
Descent II to spend less time communicating with the modem,
and will increase game performance.
Modem Descent II requires at least a 9600 baud modem
with an error correction protocol (preferably v.42). Data compression is also helpful, and should be enabled in the modem
(v.42bis is preferable). The modem should respond to a drop in
the DTR control line by hanging up. Fortunately, most modern
modems have adequate factory settings for playing Descent II.
If you receive good performance at 9600 baud or above
when using your modem for things like on-line services, no special initialization string should be necessary to run Descent II
(“ATZ” will do nicely). If your modem is something more exotic,
you may wish to use an init string of “AT&F” to reset it to factory
defaults, which should work great with Descent II.
CONNECTING
NOTE: If you are using a serial port with a non-standard IRQ, you will need to use the Custom option in
the Com Settings menu. Pressing <RETURN> while
on this checkbox will allow you to change the
settings.
Starting a game of Serial Descent II is a two-stage procedure. First, a link must be established between two machines.
This is accomplished differently depending on what type of
game you are playing.
If you are establishing a null-modem cable link, both players
must select “Establish Null-Modem Link” from the serial game
menu. After the two computers have established a connection
over the null-modem cable you will be returned to the menu and
should have new options available to you.
If the two machines fail to achieve a link, check the serial
parameters on both sides. The baud rate settings must be
identical on both sides for them to communicate properly. After
establishing the null-modem link, one machine is designated as
the master and the other is the slave. This is not visible from
the menu, but when you go to start game, only one of the two
machines will prompt for the game settings to use. See Starting
a Game below for more information.
If you are starting a modem game, one person must select
Dial Modem from the serial game menu and the other must
select Answer modem. After the modems connect, you will be
returned to the serial game menu and new options will be available to you.
STARTING A MODEM/SERIAL GAME
You should now see the “Start Game” option on your menu.
The blue line should indicate if you are connected or not. When
selecting Start Game, one player will be offered a menu of
game options such as start level and game mode. See the
description of these items under “IPX Network Games” below. If
a modem is being used, the person who dialed will need to
choose the game options, while the other waits for him/her to
start. In null-modem games the starter is randomly determined.
After this, both players will be placed in the mine and the game
begins.
After the game is finished or if one of the players decides to
leave the game, both players are returned to the serial game
menu. The communication link is STILLACTIVE, however. If
you want to play another game, perhaps with different settings
or a different starting level, just select Start Game once again.
If you want to hang up the modem or release the null-modem
connection, select Close Link.
50
5500
INTERPLAY PRODUCTIONS
DESCENT™I I
51
5511
Page 27

MULTIPLAYER GAMES
MULTIPLAYER GAMES
Another feature of the modem game is the ability to send
messages back and forth between connected players before
they are in the game. You can do this by selecting Send
Message from the Serial Game menu. This option is only available once a connection has been established. This is useful if
you do not have an extra phone line for voice communication
while playing and you need to negotiate the terms of the game.
Another feature is automatic notification when a game is starting.
If one player selects Start Game but the other does not, the
person who didn’t start will be informed that the other player is
ready. If the user isn’t prepared to start yet, the first user will be
notified. Make sure you select Close Link or exit the serial
game menu if you’re finished with the modem game. If you do
not, the modem will remain connected to the other player.
PHONE BOOK
A small phonebook is available from the dial menu of the
serial game menu. This lets you store the names and phone
numbers of your eight most frequent opponents. To edit the
phonebook, go to the Dial menu and select Edit Phonebook.
IPX Network Games
A special note regarding DESCENT II and KALI:
KALI is a commonly-used utility to allow IPX network play
over a TCP/IP network (such as the Internet). Although
Descent II does not officially support KALI, netgames use several features that allow playing games via KALI easier. While
high-latency connections over KALI will always be problematic,
gameplay should be generally smoother with Descent II. Useful
features include the Small Packets option, the Max Players slider, and the Restricted Game mode, and a system to help control the “reproducing powerups” problem seen in many KALI
games. While Interplay and Parallax cannot provide technical
support for KALI and similar tools, more information can be
found at the Official KALI homepage at http://www.axxis.com/kali.
Netgame Requirements
Descent II is designed to run on networks using the IPX
protocol. To use IPX protocol on your LAN-connected PC, you
must be loading the IPX.COM driver provided by Novell, in
addition to lower-level drivers required by your particular brand
of network card.
Netgame Setup
Descent II supports up to 12 simultaneous network games
on a single socket. If you need to run more than 12 games on
a single LAN, players can use the Socket option in the Start
Netgame/More Options menu. Joining players will need to
change to the same socket from the Join Netgame menu.
Descent II uses a default socket number of 5110(Hex). This
option can be used to avoid socket conflicts with other network
services should they arise. Also, if you are on a large network
with many games playing, you can use a different socket to run
the game from. Hitting PgUp/PgDn from the Join menu will
allow you to find such games.
One person playing must select Start Netgame from the
Multiplayer menu. The player must choose which mission to
conduct the netgame on (all players must have the chosen mission files). Once the mission is chosen, a list of netgame
options appear. The starting parameters are explained below:
52
5522
INTERPLAY PRODUCTIONS
DESCENT™II
53
5533
Page 28

MULTIPLAYER GAMES
MULTIPLAYER GAMES
Starting a Netgame
Start Netgame Menu:
DESCRIPTION: The name of the game, literally. This is
the name other people will see when they are choosing a
game to join.
ROBO-ANARCHY: Same as Anarchy, but with robots
thrown in. The goal is still to kill your human opponents; however, the robots have their own agenda...
Robots are also a good source of powerups.
COOPERATIVE: Humans vs. the robots. Save humanity!
CAPTURE–THE–FLAG: This is a variant of the Team
Anarchy game. When teams are selected and the
game has begun, each team’s objective will be to capture the opponent team’s flag (located somewhere in
the mine and colored to match the opposing team’s
color). Once a flag is captured, the players must bring
it back to their team’s “base.” These bases appear
somewhere in the level, identified by the team’s color.
So the Blue team tries to capture the red flag and bring
it to the blue goal. If a flag-carrying player is destroyed,
the flag will be dropped. When a “goal” is made, that
team member will receive 5 kill points, and the flag will
be regenerated randomly somewhere on the level. A
player carrying a flag can use <ALT>-0 to drop that
flag.
You must chose one of the following to determine if
people will be allowed to join your game in progress:
OPEN GAME: Open games allow any new players to
join the game in progress.
LEVEL:
progress to other levels during the game.
MODE:
choose one of the following:
54
5544
The level the game will start on. Play may
Determines type of game to be played. You must
ANARCHY: Ahuman-only free-for-all battle to the
death. The goal is to accumulate the most kills.
TEAM ANARCHY: Same as Anarchy, but with teams.
INTERPLAY PRODUCTIONS
CLOSED GAME: Determines whether or not new players will be allowed to join once the game has started. If
you have checked the Closed Game box, only the starting players will be in the game.
Note that even in Closed games, the starting players
are allowed to leave Descent II and rejoin at any
time.
DESCENT™I I
55
5555
Page 29

MULTIPLAYER GAMES
MULTIPLAYER GAMES
RESTRICTED GAME: This new Descent II mode operates the same as Open games with one change. When
a new player attempts to join a Restricted game, one of
the current players will be sent a message, giving
him/her the
option of hitting <F6> to accept that player. If the
acceptance isn’t given within five seconds, the player is
denied entry. Denied players may attempt to join as
often as they wish.
MAXIMUM PLAYERS: This slider allows you to limit
the maximum number of players allowed in the game,
with a maximum of eight. Cooperative Mode only
allows four players max.
More Options Menu
This menu contains advanced options for multiplayer
games. You do not need to change any of these items if you do
not wish to.
DIFFICULTY: This determines many factors from robot
awareness and deadliness to time for mine destruction
countdowns. If the slider is to the left the game will be easi-
er; to the right, it will be harder.
REACTOR LIFE: Determines how long, in minutes, the
reactor will be invulnerable. Until this time limit has expired,
no one may destroy the reactor to advance to the next
level.
MAX TIME: Determines the time, in minutes, each level will
be allowed. At the end of this time period, the reactor will
detonate itself and advance the level.
KILL GOAL: Determines how many kills to allow before
advancing the level. Once a player has achieved this num-
ber of kills on a level, the reactor will detonate and advance
the level. The player that reached the kill goal will have his
shields boosted to 200.
ALLOW CAMERA VIEWS FROM MARKERS: This toggle
will enable/disable the players’ ability to use the <SHIFT> -
F1/F2 camera views from markers he/she has placed.
56
5566
INTERPLAY PRODUCTIONS
INDESTRUCTIBLE LIGHTS : Prevents players from
blowing lights out.
SHOW ALL PLAYERS ON AUTOMAP: Self–explanatory.
SHOW ALL PLAYER NAMES ON HUD: With this enabled,
all player names will be drawn on the HUD display (regard-
less of teams) when their ships come into view.
SHORT PACKETS: Reduces the size of the “packets”
transmitted over the network during an IPX game. This will
improve performance on a heavily-trafficked network, but
will cause player ships to turn less smoothly.
DESCENT™I I
57
5577
Page 30

MULTIPLAYER GAMES
MULTIPLAYER GAMES
SET OBJECTS ALLOWED: This screen allows the person
starting the game to disallow any Descent II weapons and
objects. Disallowed objects will be replaced with shield
powerups.
NETWORK SOCKET
on a different socket number. NOTE: joining players must
change to the same socket number in the Join Netgame
menu.
PACKETS PER SECOND: This will change the maximum
number of player position packets each machine sends per
second during the game. If your netgame appears slow or
suffers from problems related to lost packets (players jump
around, hits not registering, removable walls not disappearing) lowering this number may help. You can raise this
number (to a maximum of 20) if all players are on the same
subnet and you desire a smoother game. The default value
is 10.
When you’ve set all the parameters for your game, press
<ENTER> from the Start Netgame menu.
The next screen allows you to select players for your game.
As each player selects your game from the Join Game screen,
his/her name will appear on your list. By default, all players
wishing to join will be selected, but you can deselect them by
pressing the spacebar on their checkbox. Press ENTER to
start the action. Up to 12 players will be shown on this menu.
You may select up to eight for an Anarchy game, and up to four
for a Co-op game.
: This allows you to start the netgame
Team Selection
If you’ve chosen a Team or Capture-the-Flag game, the
next screen will be Team Selection. Team names can be modified in the text boxes. Pressing <ENTER> on a player’s name
will move him/her to the other team. Team 1 ships will be
colored BLUE and Team 2 ships will be RED. Press <ESC> to
accept the teams and start the game.
Joining a Netgame
Choose Join Netgame from the Multiplayer menu. The next
screen will show you all active netgames on that socket. Below
each game is listed the current level number, number of people
playing, and game status.
NOTE: Games may be running on non-default sockets. Use
PgUp and PgDn to see games running on different sockets.
Netgame status will be one of the following:
FORMING:
may attempt to join a forming netgame.
Game is in player-selection phase. Anyone
58
5588
INTERPLAY PRODUCTIONS
DESCENT™I I
59
5599
Page 31

MULTIPLAYER GAMES
MULTIPLAYER GAMES
OPEN: This means the game is in progress, and you may
join at any time.
CLOSED: The game is playing, but closed to new players.
RESTRICT
attempts to join the game, one player already in the game
will be given the choice of accepting the new player or not.
FULL:
players. To join, you must wait for someone to leave it.
BETWEEN:
rushing for the escape tunnel. If you wait for the level to
advance, it will change to JOIN and you can then hop in.
Closed netgames will never show this message.
: The game is Restricted. When a player
The game has reached its maximum number of
The game is in progress, but the players are
Rejoining a Netgame
If you leave a netgame for any reason, you may rejoin the
ongoing game when you’re ready. Although you lose accumulated items, you will retain your ship color and kill count unless
you’ve been gone long enough for someone new to have taken
your spot. Make sure you rejoin from the same computer using
the same pilot name so the game knows you as a previouslyjoined player. If enough new players have joined since you left,
it’s possible your kill count will have been discarded.
deaths would have a 71% Efficiency. Players with no kills
will show N/A in this field.
MEASURING NETWORK PERFORMANCE (PING)
While in a multiplayer game, it is possible to measure the
time it takes information to be sent between yourself and
another player. By pressing F8 and typing “ping:<player>”,
where <player> is the name of another player, the game
sends a message to that player’s computer and measures
how long it takes that message to get there and return (in
milliseconds). This time will be displayed on your HUD. On
a LAN, you should expect times below 100ms. On a WAN
(such as the Internet), times below 300 are acceptable.
Players with very slow response times will behave poorly in
multiplayer games.
ANARCHY SUMMARIES
At the end of each level in an Anarchy game, an Anarchy
Summary screen will come up. This shows a kill matrix of
who killed who and how many times. In the rightmost col-
umn you’ll see the Total kills and Efficiency Score. The
Efficiency Score is defined as KILLS/(KILLS+DEATHS).
Therefore, a player with 5 kills and 0 deaths would have a
perfect 100% Efficiency Score. Someone with 5 kills and 2
60
6600
INTERPLAY PRODUCTIONS
DESCENT™I I
61
6611
Page 32

TROUBLESHOOTING & COMMON PROBLEMS
TROUBLESHOOTING & COMMON PROBLEMS
Regardless of configuration, you should have no trouble
running Descent II. But in the unlikely case you do have problems, consult this section. Also consult the README.TXT file
for up-to-date questions and answers.
General Problems
Q: THE INTRO MOVIE JERKS AROUND AND THE
SOUND STUTTERS. WHAT’S WRONG?
A: Your system may only be able to handle the lowresolution movies. Try going into SETUP and changing them from High to Low.
Q: WHY DON’T I HEAR ANY MUSIC DURING THE
LEVELS?
A: Your redbook audio cable may not be connected
properly. If you fail to hear the redbook test song in
SETUP, consult your sound card manual on the
installation of the cable, or call Interplay Tech
Support.
Q: DESCENT II DOESN’T SEEM TO HAVE SOME
OF THE COOL SOUND EFFECTS IT USED TO.
FOR EXAMPLE, MY FLARES MAKE LASER FIRING SOUNDS.
A: If there is less than 5 MB of available physical
memory, Descent II “recycles” sound effects to save
memory. Increase your available physical memory
above 5 MB, and all sound effects will be loaded.
Another option is to run with the NoLowMem command line option. This forces Descent II to use all
sound effects regardless of available memory.
However, Descent II may run slower with this option.
Q: DESCENT II RUNS SLOWLY ON MY MACHINE,
ESPECIALLY IN LARGE BATTLES. WHAT CAN I
DO?
A: Try one or all of the following:
• Using <F3> and +/- to shrink your 3D window
size.
Q: I CAN’T GET SOUND TO WORK PROPERLY
UNDER WINDOWS 95TM.
A: Make sure you have a sound device installed
under Win95. Check the System Control Panel, or
Multimedia Control Panel for your sound card (if
there’s no Multimedia Control Panel, Windows 95
doesn’t know you have a sound card.)
62
6622
INTERPLAY PRODUCTIONS
• Lowering any/all of the detail level sliders in
the Options/Detail level screen.
• Use <SHIFT>-<F1/F2> to remove any
secondary views you may use.
• If you are running under Windows95 on a
machine with less than 16MB, try installing
and running the DOS version of Descent II.
DESCENT™I I
63
6633
Page 33

TROUBLESHOOTING & COMMON PROBLEMS
TROUBLESHOOTING & COMMON PROBLEMS
Q: I HAVE A SMALL GAME WINDOW AND A LOW
DETAIL LEVEL, BUT DESCENT II STILL LOADS
AND RUNS SLOWLY.
A: Check your sound card settings in SETUP.
Incorrect settings can cause significant slowdown.
Modem/Serial Problems
Q: MY MODEM GAMES ARE MUCH SLOWER
THAN NORMAL ONE-PLAYER GAMES.
A: Try using a higher baud rate in the Com Settings
menu. If your computer does not have a 16550
UART, acquiring one will allow up to 38400 baud
when communicating with the modem. Consult your
Descent Manual for details.
Q: STRANGE THINGS HAPPEN IN MY
MODEM/NULL-MODEM GAMES. WHAT CAN I DO
TO HELP THIS?
These problems may occur for several reasons.
Serial play adds an additional burden to the CPU
when playing the game, so a computer capable of
playing the game in single-player mode may have
difficulties with modem or serial play. If you are
using an 8-megabyte machine, the disk activity needed to run the program in a small memory space can
cause lost characters. Alot of sound activity can
also cause lost serial characters. Increasing the
RAM for the game or reducing the number of sound
channels in the detail settings menu can sometimes
help. Of course you can also reduce the baud rate in
the Com Settings menu to slow down the game
somewhat while improving reliability. Also try setting
your music volume slider to 0 in the Options menu.
The best thing you can do to improve serial performance is to equip your machine with a 16550 UART.
However, even with this UART, 38.4k baud rate can
still be problematic if you have the burden of low
RAM or heavy sound activity–so don’t be ashamed
to run a 16550 UART at 19.2k baud if need be.
A: This may be a result of dropped serial characters.
Some examples of “strange” things: players not dropping powerups when killed, ships jumping from place
to place on screen, or ships flying through doors that
appear closed. Error messages during play or during
the “waiting for opponent” screen could be the cause
of the problem as well.
64
6644
INTERPLAY PRODUCTIONS
Netgame Problems
Q: STRANGE THINGS HAPPEN WHEN PLAYING
DESCENT II UNDER KALI/IHHD. HITS DON’T
REGISTER ON MY OPPONENTS, THEIR SHIPS
SEEM TO “JUMP” AROUND A LOT, ETC. WHAT
CAN I DO?
65
DESCENT™I I
6655
Page 34

TROUBLESHOOTING & COMMON PROBLEMS
TROUBLESHOOTING & COMMON PROBLEMS
A: While Descent II isn’t really designed for slow
connection games such as these, you may be able to
improve them. One thing that may help is starting
the netgame with a lower Packets per Second value
(under Multiplayer/Start Netgame/More Options).
You can also try enabling the Short Packets option
under Multiplayer/Start/More Options. This will cause
ships to “jump” around a bit more than usual, but will
decrease overall net traffic.
Q: DESCENT II TELLS ME MY NETWORK CARD
IS MISSING PACKETS. WHAT THE HECK DOES
THAT MEAN?
A: This can be a result of a slow network card,
heavy traffic on the network, or software conflicts in
your system. If you get this message, you can rejoin
the game and try again. If the problem persists, one
of the following could be to blame:
• TOO MANY PACKETS BEING SENT.
Descent II is optimized for play over LANbased networks. Slow LANs or WAN-based
games (like KALI or IHHD) may be too slow to
guarantee processing of all packets. Lowering
the Packets per Second value in the Start
Netgame/More Options menu (to a number
less than 10) may improve things.
• LOOSE CABLES. Happens to the best of us.
Check the plugs on the back of your computer, specifically the ones running to/from your
network card.
• TOO MANY PLAYERS. While 8 players is
offered as the maximum in Descent II, it’s possible that your LAN or computer configuration can only support 4-6 players reliably.
• BAD NETWORK CARD. Some cards drop
IPX packets even without heavy loads or interference. If you suspect your LAN card, try
swapping it with one from another computer.
• SOFTWARE CONFLICTS. Other drivers may
be running that cause problems with the net
work interrupts. These conflicts may not
emerge when performing other LAN tasks that
either don’t use IPX or have layers of errorchecking. Try removing unneeded drivers
from your CONFIG.SYS and AUTOEXEC.BAT.
• ROUTER PROBLEMS. Playing Descent with
players on different sides of a router may
cause lost packets or delays. Playing this way
is not recommended because it creates a significant load on the router that may disturb
other LAN users.
66
6666
INTERPLAY PRODUCTIONS
DESCENT™I I
67
6677
Page 35

CREDITS
®
CREDITS
DESCENT II BY
PARALLAX SOFTWARE
Original Design
MIKE KULAS
MATT TOSCHLOG
Programming
MATT TOSCHLOG
MIKE KULAS
JOHN SLAGEL
JASON LEIGHTON
SAMIR SINHA
MARK ALLENDER
CHE-YUAN WANG
Art & 3D Models
ADAM PLETCHER
JASEN WHITESIDE
DOUG BROOKS
MARK DINSE
DAN WENTZ
Level Design
JASEN WHITESIDE
MARK DINSE
DAN WENTZ
CHE-YUAN WANG
Multiplayer Programming
ROBERT HUEBNER
JASON LEIGHTON
JOHN SLAGEL
Cinematic Sequences
ADAM PLETCHER
DOUG BROOKS
Midi Music
DAN WENTZ
Sound Effects Editing
DAN WENTZ
DOUG BROOKS
ERIC BROSIUS
Writing
RYAN GARCIA
Descent 2 Trailer
DOUG BROOKS
ADAM PLETCHER
Testers
MIKE LAKE
DAVE BEEDY
Administrative Support
LAURIE FORD
ELIZABETH YELLEN
Visit Parallax Software at:
HTTP://WWW.PXSOFTWARE.COM
FOR INTERPLAY
Senior Producer
RUSTY BUCHERT
Associate Producer
RAPHAEL HERNANDEZ
Line Producer
KIHAN PAK
AUDIO CREDITS
Music
TYPE O NEGATIVE
"HAUNTED"
WRITTEN BY PETER STEELE
PERFORMED BY TYPE O NEGATIVE
COURTESY OF
ROADRUNNER RECORDS
OGRE OF SKINNY PUPPY
AND MARK WALK
OGRE APPREARS COURTESY OF
AMERICAN RECORDINGS
BRIAN LUZIETTI
MARK MORGAN
LARRY PEACOCK
TIM "Q" WILES
JOHANN LANGLIE
RON VALDEZ
LESLIE SPITZER
Gameplay SFX
GREGORY ALLEN
LARRY PEACOCK
CHARLES DEENEN
STEVEN VONKEMPEN
EFX SYSTEMS
SOUNDELUX MEDIA LABS
Cinematic Soundeffects
CHARLES DEENEN
Voice editing
CHRIS BORDERS
SERGIO BUSTAMENTE
CRAIG DUMAN
Audio Mastering
CRAIG DUMAN
Cinematic score
MARK MORGAN, PETER ROTTER
AND ANDY WEINER
FOR FOUR BARS ENTERTAINMENT
Voice Director
MELODEE M. SPEVACK
Voices
GEORGE DEL HOYO
WALTER BURR
MARI DEVON
CHRIS BORDERS
SERGIO BUSTAMENTE
SHANNA SAN PAOLO
Recording Studio
WBR, BURBANK
Voice Post-production
CHARLES DEENEN
Music Supervision
BRIAN LUZIETTI
CHARLES DEENEN
3D Audio Processing
QA CREDITS
Director of QA
JEREMY S. BARNES
Assistant Dir. of QA
JIM BOONE
IS Coordinator
DARREN MONAHAN
Compatibility Coordinator
JOHN WERNER
Lead Tester
KYLE SHUBEL
Testers
GLENN MURRAY
PHUONG NGUYEN
CHRIS KEENAN
BILL FIELD
IS Technicians
JOHN MCGINLEY
BILL DELK
AARON MEYERS
Compatibility Technicians
DAN FORSYTH
MARC DURAN
AARON OLIAZ
JACK PARKER
DEREK GIBBS
Manual Written By
ADAM PLETCHER
PARALLAX SOFTWARE
RAPHAEL HERNANDEZ
Graphic Design
ULISES GERALDO
SALMA ASADI
Stop by Interplay
Productions at:
HTTP://WWW.INTERPLAY.COM
68
6688
INTERPLAY PRODUCTIONS
DESCENT™I I
69
6699
Page 36

CUSTOMER SUPPORT
LIMITED WARRANTY
If you have any questions about this, or any other Interplay product, you can reach our Customer
Service/Technical Support Group at:
Interplay, 17922 Fitch Avenue, Irvine, CA 92714 Attn: Customer Service. Customer Service is available 24
hours a day through our Automated Customer Service system, with a Customer Service representative
available during normal business hours at (949) 553-6678.
Please have your system information available, or better yet, try to be at your computer. The more
detailed information you can provide our support personnel, the better service we can provide you.
Hintline
Although hints are not available for this game, hints are available for other Interplay games. You can reach
our hintline at 1-900-370-PLAY(1-900-451-6869 in Canada). The charge for this service is $1.25 for the
first minute and $.75 for each additional minute. All hint questions must be directed to this “900” service.
No hints will be given on our Customer Service lines. You must have a touchtone phone to use this service. The hintline is open 24 hours a day. All long distance charges are included in these prices. Callers
under the age of 18 must get parental permission before calling the hintline. The hintline is only available
in the U.S. Charges subject to change without notice.
If you have a modem, you can reach us at the following:
The Interplay BBS:We have a 24-hour, 7-day a week multiline BBS available for customer
questions, support and fixes. The number is 714-252-2822. Modem settings are 300-28.8k Baud, V.32bis,
V.42bis, 8-N-1. You also may contact our BBS over the Internet.
Telnet to bbs.interplay.com. This is a free service. (Excluding toll charges.)
America Online: You can E-mail Interplay Customer Support at IPTECH. To reach our
Customer Support board in the Industry Connection, press CTRL-K for “Go To Keyword.” Then type
INTERPLAY in the Keyword window. In addition to reading and leaving messages, you can download
fixes and demos from the “Software Libraries.”
CompuServe:We are available for IBM and compatible on-line support. We are located in the
Game Publishers B Forum, type GO GAMBPUB at any “!” prompt. Then select “Section 4” for Interplay
Productions. You can leave technical support questions there. You can also download fixes and demos
from Library 4 in GAMBPUB. The best place for game play hints about our games is in the GAMERS
forum. If you are not already a CompuServe member, you can call CompuServe toll-free at 1-800-5243388 and ask Representative #354 for a free introductory membership and a $15 usage credit. For game
play hints look in the Gamer’s Forum (GO GAMERS). Besides technical support for Interplay products,
CompuServe offers many other services, including communications, reference libraries, hardware and software support, travel, games and much more.
GEnie: We are located in the Games RoundTable by Scorpia, type M805;1 at any “?” prompt. Then
select “Category 13” for Interplay Productions. Fixes and demos are available in the libraries.
PRODIGY® Interactive Personal Service: You may send mail directly to us.
Our ID is “PLAY99B”.
INTERPLAY LIMITED 90-DAY WARRANTY
Interplay warrants to the original consumer purchaser of this computer software product that the recording
medium on which the software programs are recorded will be free from defects in material and workmanship for 90 days from the date of purchase. If the recording medium is found defective within 90 days of
original purchase, Interplay agrees to replace, free of charge, any product discovered to be defective within
such period upon receipt at its Factory Service Center of the product, postage paid, with proof of date of
purchase. This warranty is limited to the recording medium containing the software program originally provided by Interplay and is not applicable to normal wear and tear. This warranty shall not be applicable and
shall be void if the defect has arisen through abuse, mistreatment, or neglect. Any implied warranties
applicable to this product, including warranties of merchantability and fitness for a particular purpose are
disclaimed. Interplay disclaims all responsibility for incidental or consequential damages.
Some states do not allow limitations as to how long an implied warranty lasts and/or exclusions or limitations of incidental or consequential damages so the above limitations and/or exclusions of liability may not
apply to you. This warranty gives you specific rights, and you may also have other rights which vary from
state to state.
Lifetime Warranty
If the recording medium should fail after the original 90-day warranty period has expired, you may return
the software program to Interplay at the address noted below with a check or money order for $5.00 (U.S.
currency), which includes postage and handling, and Interplay will mail a replacement to you. To receive a
replacement, you should enclose the defective medium (including the original product label) in protective
packaging accompanied by: (1) a $5.00 check, (2) a brief statement describing the defect, and (3) your
return address. If you have a problem with your software, you may wish to call us first at (714) 553-6678. If
your media is defective and a replacement is necessary, U.P.S. or registered mail is recommended for
returns. Please send the defective disc(s) only (not the box) with a description of the problem and $5.00 to:
WARRANTY REPLACEMENTS
Interplay 17922 Fitch Ave., Irvine, CA92714
System Upgrades
Interplay has a system upgrade policy. At any time after purchasing any Interplay product, you may send
us your original CD and a check for $25.00 (U.S. funds) and we will replace your CD with the version for
another computer system that you specify. (This price is subject to change.)
Copying Prohibited
This software product and the manual are copyrighted and all rights are reserved by Interplay and are protected by the copyright laws that pertain to computer software. The CD-ROM is not copy-protected. This
does not mean you may make unlimited copies.
NOTICE:
product described in this manual at any time and without notice.
Interplay reserves the right to make modifications or improvements to the
Internet: You can reach Interplay by sending E-mail to “support@interplay.com”. Many Interplay
demos and patches are available at Internet FTP sites. To visit our World Wide Web site, point your browser to: “http://www.interplay.com” or you may ftp to ftp.interplay.com.
70
7700
INTERPLAY PRODUCTIONS
DESCENT™I I
71
7711
Page 37

INTERPLAY’S WORLD WIDE WEB SITE
Welcome to the Interplay Web! As a company dedicated to providing innovative,
high-quality interactive entertainment software, we are always striving to stay as close
as possible to the leading edge of technology. This W eb site is the latest example of our
ongoing effort to provide a wealth of information and opportunities to you.
As a company of fanatic gamers, we love the idea of gamers all over the world tapping into cyberspace to see, touch and feel our latest games. No hype, no marketing
campaign; just great games. To make it work, our goal is to keep this site fresh and new,
to make it a place where you can tell US what you like about our games... and what
you don’t like about them. So use the feedback options on these pages and sound off.
Enjoy your visit in our Web site, explore all the different areas we have to offer, and
come back soon. Check us
out in the weeks and months
ahead; we will be introducing
new and exciting areas for
you to experience.
Once again, welcome!
Brian Fargo
HOW TO
GET THERE
Interplay’s World Wide
Web site is an Internet
service designed to give
you the latest information about Interplay and
our products.
The site features our
demos, upgrades, product information and
ordering information.
From your Internet
account, point your
favorite browser to:
http://www.interplay.com
 Loading...