

Page 1

Table of Contents
GETTING STARTED 2
Installing Descent: FreeSpace The Great War 2
PLAYING DESCENT: FREESPACE THE GREAT WAR 2
Launching 2
Creating A Pilot 3
The Main Hall 4
Briefing 5
Commit 6
Debriefing 7
Combat Ready 8
MULTIPLAYER DESCENT: FREESPACE THE GREAT WAR 9
Multiplayer Basics 9
Creating a Pilot 10
Join A Game 10
Starting A New Game 12
Host Setup 14
Host Options 15
Briefing 17
Ship and Weapon Selection 17
In-mission 19
Debriefing 19
General Network/Multiplayer Options 20
Voice Options 21
Observer Mode 22
Global Options Menu 22
General Options Menu 23
Voice Options Menu 24
Parallax Online 25
Pre-Game Screens 26
Main Hall 26
Options 27
Multi Options Screen 28
Detail Options 29
Controls Config 31
HUD Config 33
Barracks 34
Statistics 36
Tech Room 38
Technical Database 38
Page 2

Table of Contents
Mission Simulator 38
View Cutscenes 39
Credits Screen 39
Campaign Room 39
Ready Room 40
Command Briefing 41
Mission Briefing 42
Ship Selection 43
Weapons Loadout 46
IN-GAME SCREENS 48
The HUD (Heads-Up Display) 48
MESSAGING WINGMEN 54
Message What? 54
Select Ship 54
What Command? 55
REARMING & REPAIRING 57
MISSILE FIRING AND COUNTERMEASURES 58
Heat-Seeking vs. Aspect-Seeking 58
Countermeasures 59
ADVANCED TARGETING 60
MATCHING SPEED 60
ENDING THE MISSION 61
FRED (FreeSpace Mission Editor) 61
RANK, PROMOTIONS, AND MEDALS 62
ENERGY TRANSFER SYSTEM (ETS) 63
WEAPON SELECTION & LINKING 65
HOTKEYS 66
Hotkey Usage 66
Defining Hotkeys 67
CREDITS 68
WARRANTY 70
TECHNICAL SUPPORT 71
DESCENT: FREESPACE THE GREAT WAR: ©1998 Volition, Inc. All Rights Reserved. Descent, Descent: FreeSpace The Great
War, Interplay, the Interplay logo and "By Gamers. For Gamers." are trademarks of Interplay Productions. All Rights Reserved. Parallax
is a trademark of Parallax Software Corporation. All Rights Reserved. Volition and the Volition logo are trademarks of Volition, Inc. All
Rights Reserved. All other trademarks and copyrights are property of their respective owners.
Page 3

Descent:FreeSpace
GETTING STARTED
Installing Descent: FreeSpace The Great War
Please see the Installation Instructions insert found in your Descent: FreeSpace box.
If you have installation problems with Descent: FreeSpace, please consult the
Troubleshooting section in the README.TXT file. If there is no solution to
your problem, please contact Interplay Technical Support for assistance at (949)
553-6678.
PLAYING DESCENT:
FREESPACE THE GREAT WAR
This section will get you playing Descent: FreeSpace quickly.
Launching
The first thing you’ll see when you run Descent: FreeSpace is the Launcher
program. The Launcher allows you to change hardware options, among other
things.
2
Page 4
The Great War
™
If you have a 3D hardware accelerator, click the “Setup” button. Under the
Video tab, click the “Detect Available Cards” button. The drop-down list will
now contain your rendering options. Choose the one corresponding to your 3D
accelerator and press or click the “Ok” button.
On the Descent: FreeSpace Launcher menu, click the “Play FreeSpace,” button
and the game will start.
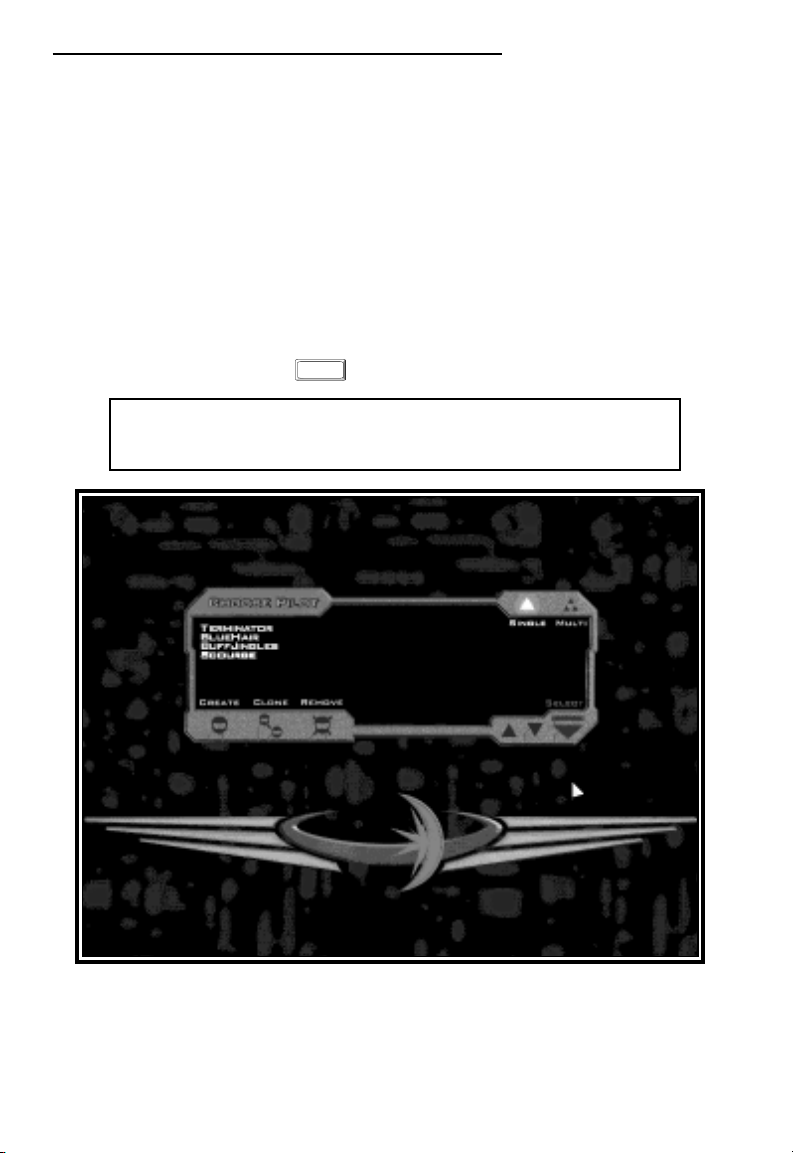
Creating a Pilot
The first screen you’ll see is the Pilot Selection screen. Since this is the first
time Descent: FreeSpace has been played, you will start by being prompted for
your pilot’s Callsign. This is the nickname of your pilot. When you have typed
in your pilot’s Callsign, press and click the “Select” button.
Return
NOTE: If this is the first pilot you are creating, you will
automatically be taken to the main hall after pressing return.
Once in the game, you may also manage your pilots from the Barracks room.
3
Page 5
Descent:FreeSpace
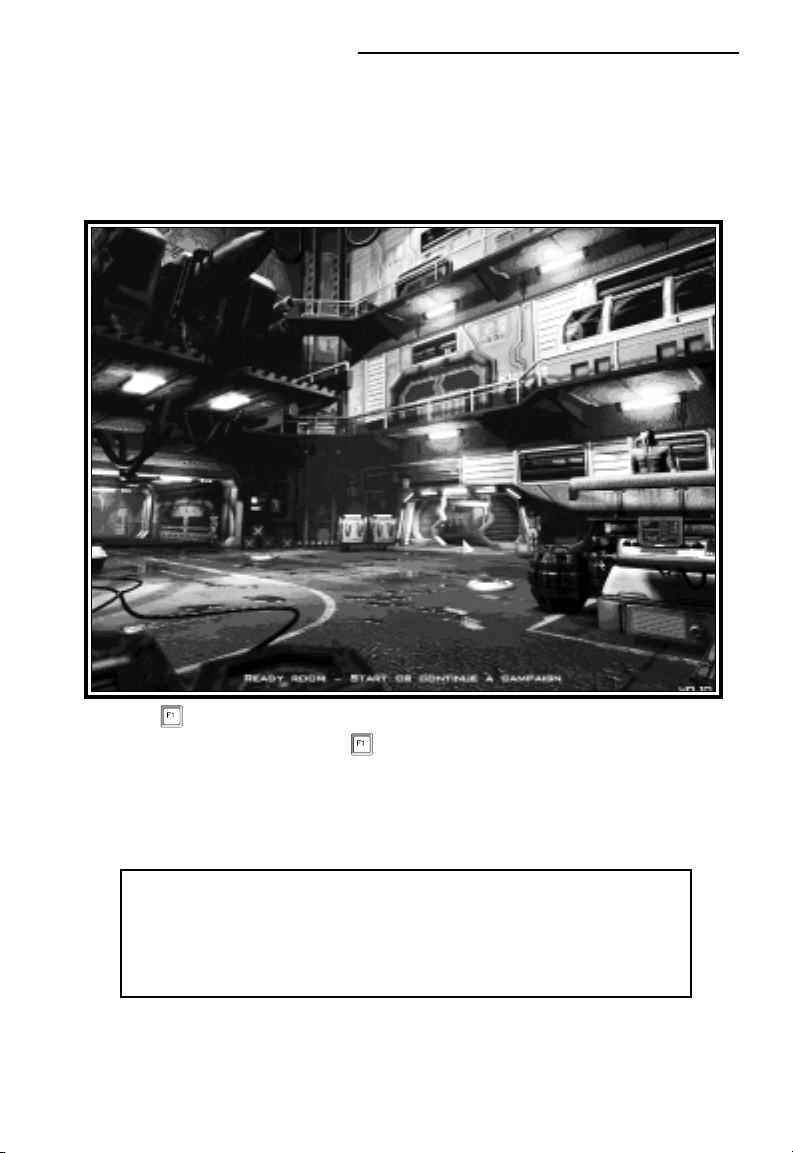
The Main Hall
The Main Hall screen serves as the Main Menu for Descent: FreeSpace. From
here, you can access the Ready Room, Barracks, Campaign Room, Tech Room,
Options screen, or Exit (to Windows). Pressing the right mouse button
repeatedly will cycle through the various “hotspots” found in the Main Hall.
Hitting will bring up a Help Overlay, outlining the locations of the various
rooms of the Main Hall. Hitting anywhere else in the Descent: FreeSpace
interface will bring up similar Help Overlays.
For now, use the mouse to click on the Ready Room to begin your first
Training mission.
NOTE: It is strongly recommended that you play the three training
missions found at the start of the FreeSpace Campaign. They will
teach you the basics of flight control, targeting, weapons
management, and communication in the FreeSpace universe.
4
Page 6
The Great War
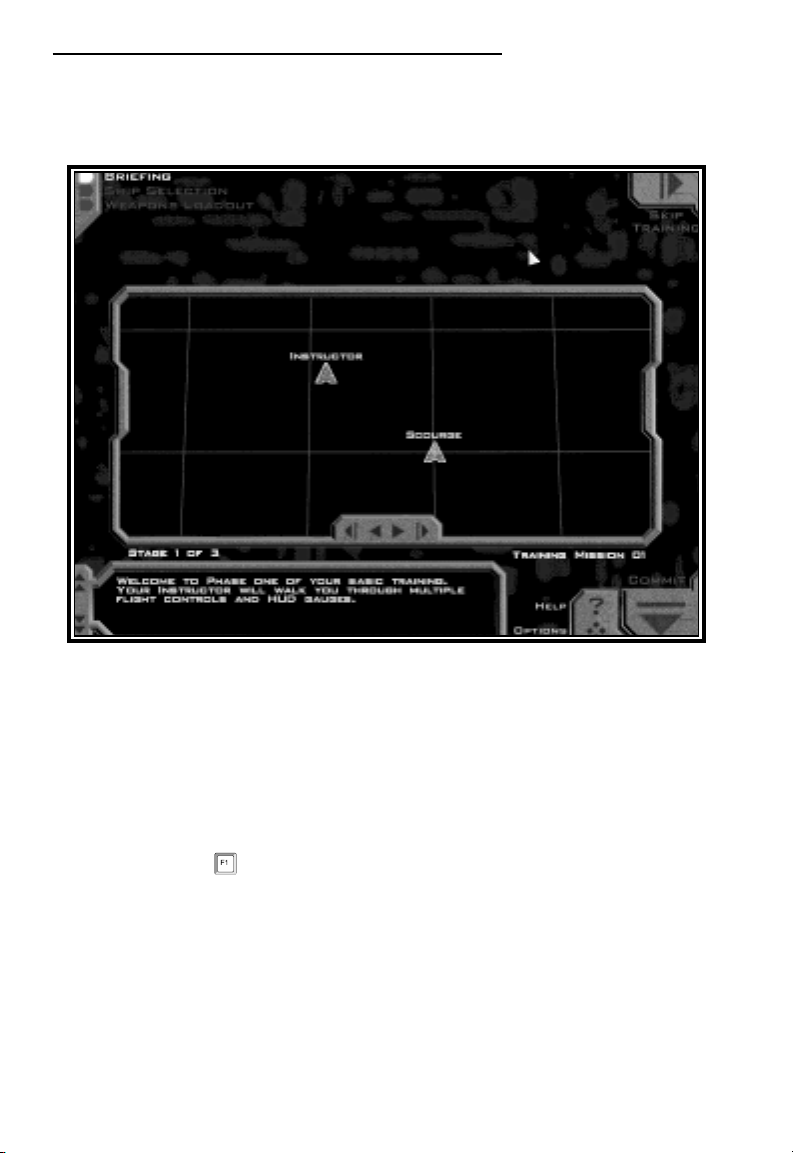
Briefing
After entering the Ready Room, you will be placed in the first Training
mission’s briefing.
™
This screen is where you will receive the overview of your upcoming mission,
including instructions on what your objectives are, and how you might go about
meeting them.
In the upper left you’ll see choices for Briefing, Ship Selection, and Weapons
Loadout. Later, you will use these buttons to move to the different pre-mission
screens. For now, Briefing is all you need.
In the lower right, you’ll see buttons for Options, Help, and Commit. Help is
the same as hitting , and will bring up a screen-specific overlay, briefly
explaining the onscreen options.
In the center of the screen is a computer-generated mission map. This icon-
based display will show you a graphical overview of what you can expect in this
mission, including wing names (wings are groups of ships), ship names,
installations, and other objects. You may use the mouse to click on any map icon
to see a real-time view of how it will appear in the mission.
5
Page 7
Descent:FreeSpace
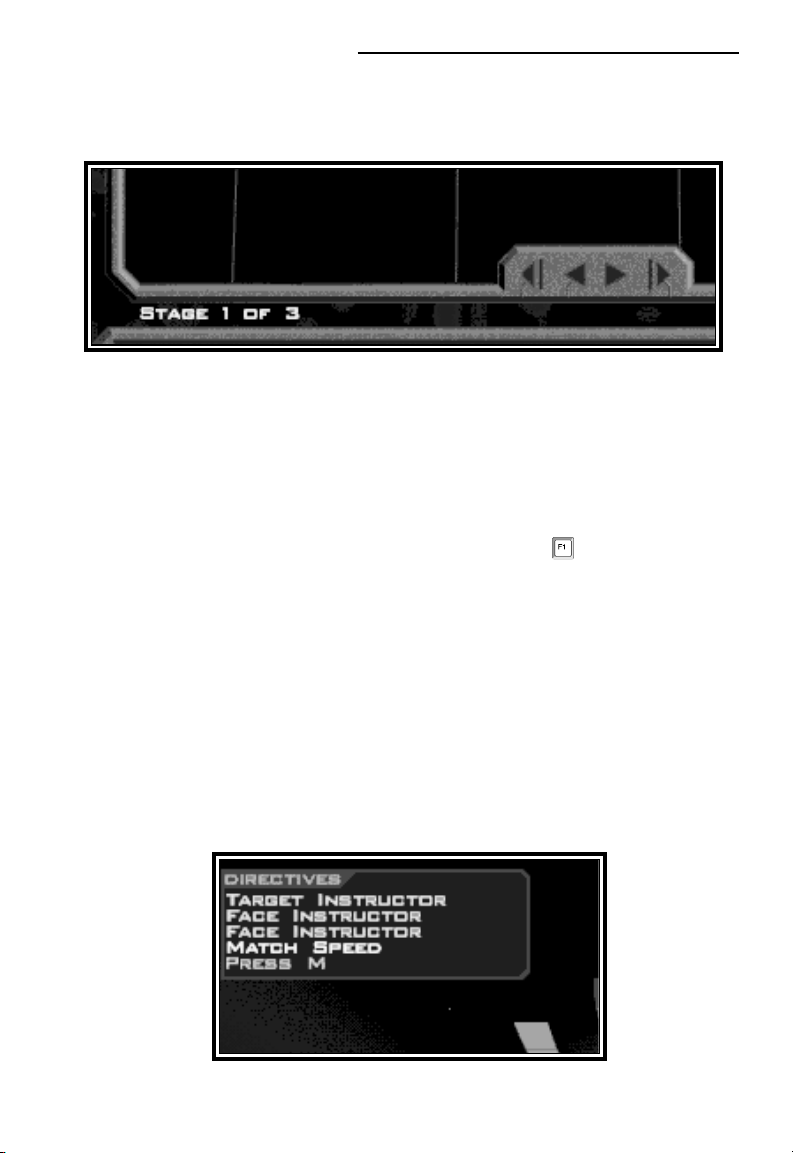
Below the mission map is the actual briefing text. If you have voice enabled,
the briefings will be read to you, one “stage” at a time. To navigate through the
briefing stages, use the arrow buttons on the bottom edge of the mission map.
Stage indicator and stage arrows in Briefing.
Commit!
Once you have reviewed the briefing for this training mission, click the
“Commit” button in the lower right corner. Clicking Commit will accept your
mission orders and put you into the actual game.
For help regarding the flight and combat controls, press while in a mission.
Screens detailing the current key controls will appear. You may also use the
Reference Card found in your Descent: FreeSpace box for a list of the default
control keys.
For the training missions, follow the instructions given to you by your
instructor. He will outline the basics of Descent: FreeSpace fighter control and
combat. Watch the onscreen messages to see the keys needed to follow his
orders.
Your instructions will also appear in the Directives Display found on the left
side of your HUD (heads-up display).
6
Page 8
The Great War
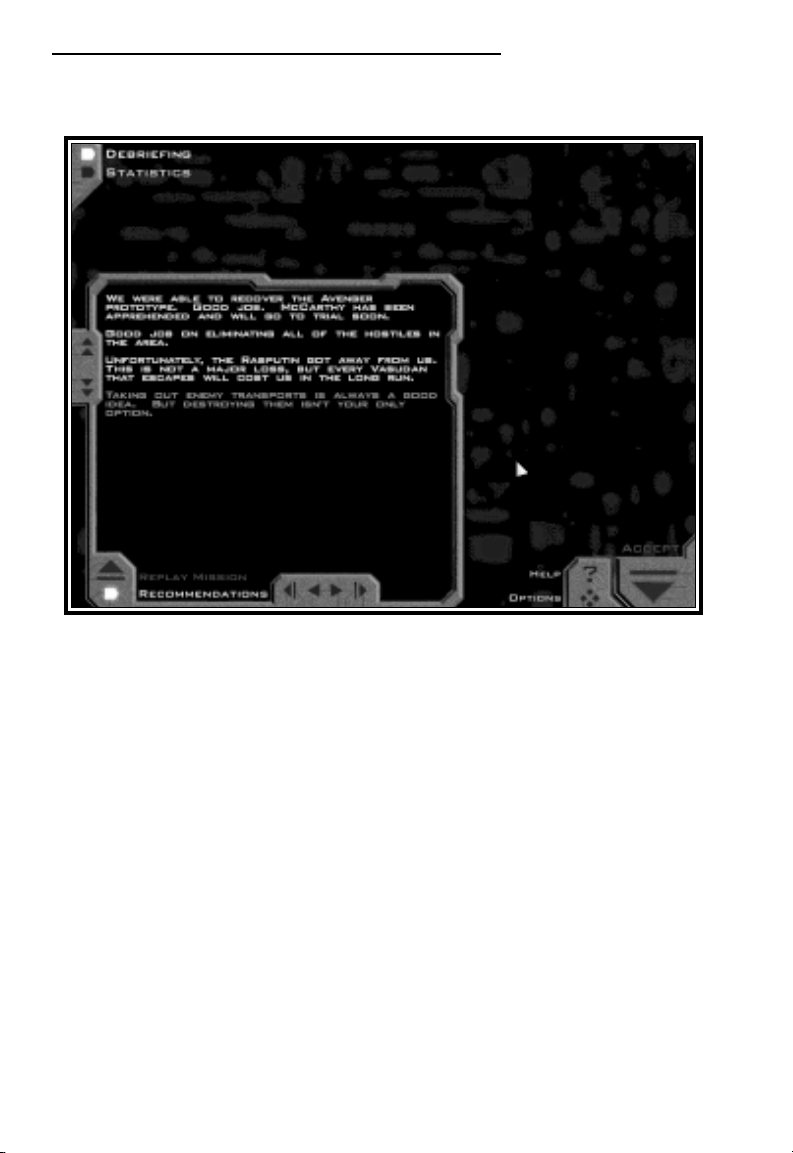
Debriefing
Following each mission, you will be shown the Debriefing Screen.
™
Your commanding officer will give you a breakdown of the mission, and
evaluate your performance. You may also view your Pilot’s mission statistics from
here.
If you perform exceedingly well in combat situations, you may be granted a
medal or promotion during Debriefing. If you did not perform well enough, and
failed one or more of your Primary Objectives, you may be forced to Replay the
mission.
By clicking the “Recommendations” button, you maybe given specific tips on
how to correctly meet all outlined objectives.
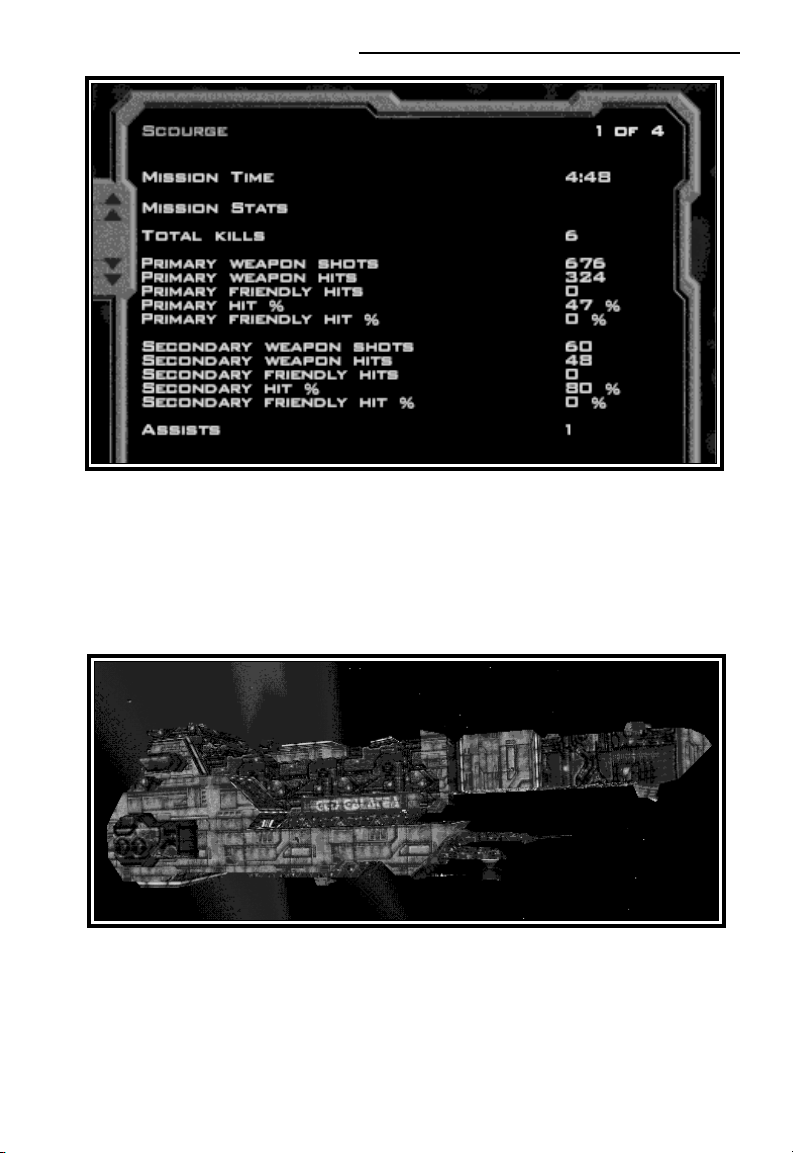
In the upper left, you’ll see that you can view Statistics for the mission you’ve
just flown. Viewing flight statistics is a good way to measure your performance.
7
Page 9
Descent:FreeSpace
If you have followed your training instructions, you should now be ready for
your remaining Training missions. Click Accept to advance to the next mission.
Combat Ready!
Once your Training missions are complete, you will begin your tour of duty
aboard the GTD Galatea by flying your first combat mission. Fly well, Pilot!
8
Page 10

The Great War
™
MULTIPLAYER DESCENT:
FREESPACE THE GREAT WAR
Descent: FreeSpace allows you to play with up to 12 other people over any
network which supports TCP/IP.
Volition provides a free Internet game tracking and statistic keeping service
called Parallax Online. This service will allow players all over the world to meet
and play Descent: FreeSpace games together. On top of providing a place to
meet, Parallax Online will track statistics for all registered players.
See page 25 for details on Parallax Online.
Multiplayer Basics
There are several different multiplayer modes in Descent: FreeSpace:
cooperative, team vs. team, and dogfight. In cooperative games, all players fly on
the same team working together to achieve similar objectives. In team vs. team
mode, up to 4 players on a side fly against each other, each team having their own
set of objectives to achieve. In dogfight mode, it is every pilot for himself in an
attempt to rack up the highest number of kills.
Multiplayer games can take place as a single mission or a campaign. A
multiplayer campaign has all the same characteristics of a single player campaign,
including multiple missions and mission branching.
Descent: FreeSpace multiplayer games always have one server, and one or more
clients. The server of a multiplayer game is the machine which runs the game
simulation for all other clients in the game. Additionally, there is always one host
of the game. In general, the host and the server of the game are the same. See
the section on “Dedicated Servers” in the README.TXT file found in your
Freespace directory, for more information on running a server which doesn’t
require a host.
The speed of your network game is mostly dependent on the speed of your
connection to the server of the game. Because the server of the game sends
almost all game related information to clients, this connection speed dictates how
fast a client’s machine will update the game state. The connection speed is
measured by the ping time. The lower the ping time, the faster your connection
to the server.
9
Page 11
Descent:FreeSpace
SPECIAL NOTE: In order to serve a multiplayer game
on the internet, you must have a fast connection to the
Internet. It is recommended that you have at least a 56k
Modem Connection in order to run a game server.
Creating a Pilot
You must first create a multiplayer pilot from the Pilot Selection screen or from
the Barracks room. See the Barracks section on page 34 for the different ways in
which you may manage your multiplayer pilot.
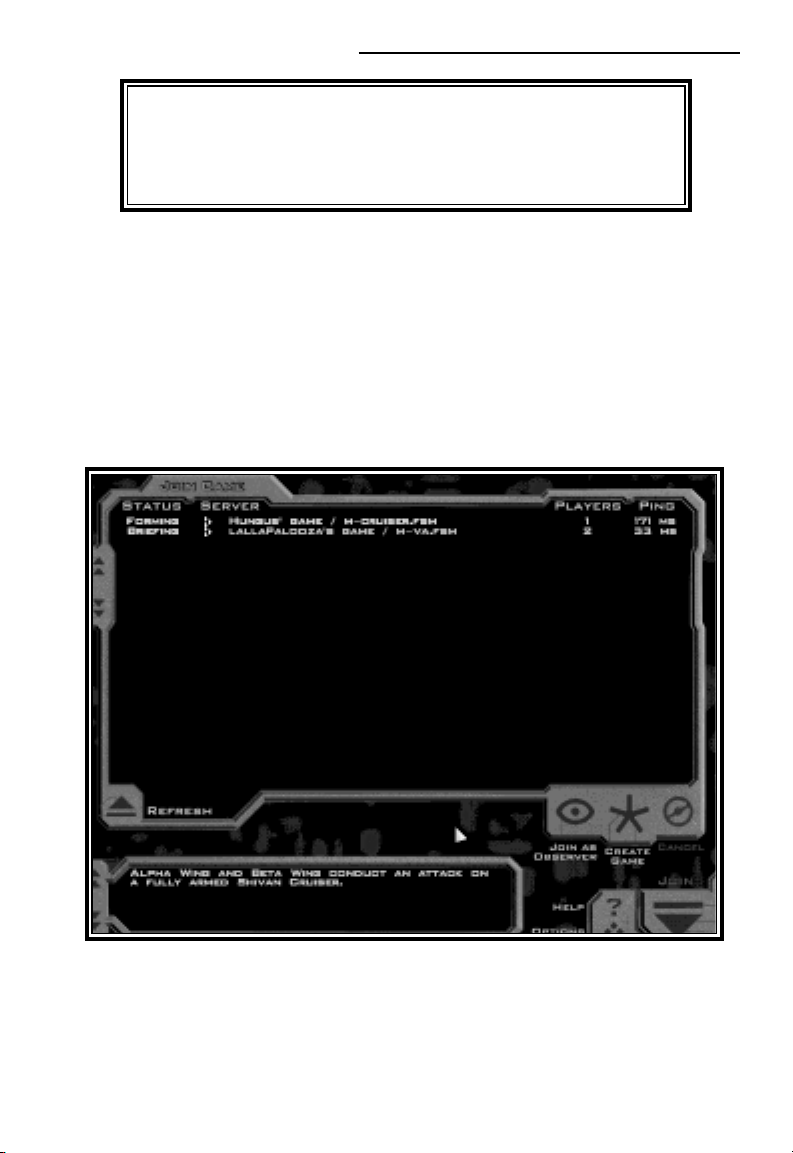
Join a Game!
Once you have created and selected a multiplayer pilot, you can enter the
Ready Room to join a game.
This screen will list all active games that your computer can find. Each line in
the join window will contain the name of a game, the type of game being played
(cooperative, team vs. team, dogfight), the status of the game (forming, briefing,
in mission, etc), number of players, and ping time to the server.
10
Page 12

The Great War
The type of game is represented by the following icons:
Cooperative
Dogfight
Team vs. Team
The status of the game may be one of the following:
• Forming – The game has not yet started. Depending on game options, a
player may join during this stage.
• Briefing – The game has entered the briefing stage where players get their
objectives and select their ships and weapons. A player may not join a game
when it is in this state.
• In Game – The mission is currently being flown. Depending on game
options, a player may join during this state.
• Paused – The mission is currently paused. Players may not join during
this state.
• Debriefing – All players are in the debriefing stage. Players may be able to
join the game during this state.
™
Once you find a game that you wish to join, double click on the game title, or
highlight the game title and click the join button. If you try to join a game that
is not accepting players, or is in a state in which players cannot join, you will
receive a dialog indicating why you could not join the game. Once you have
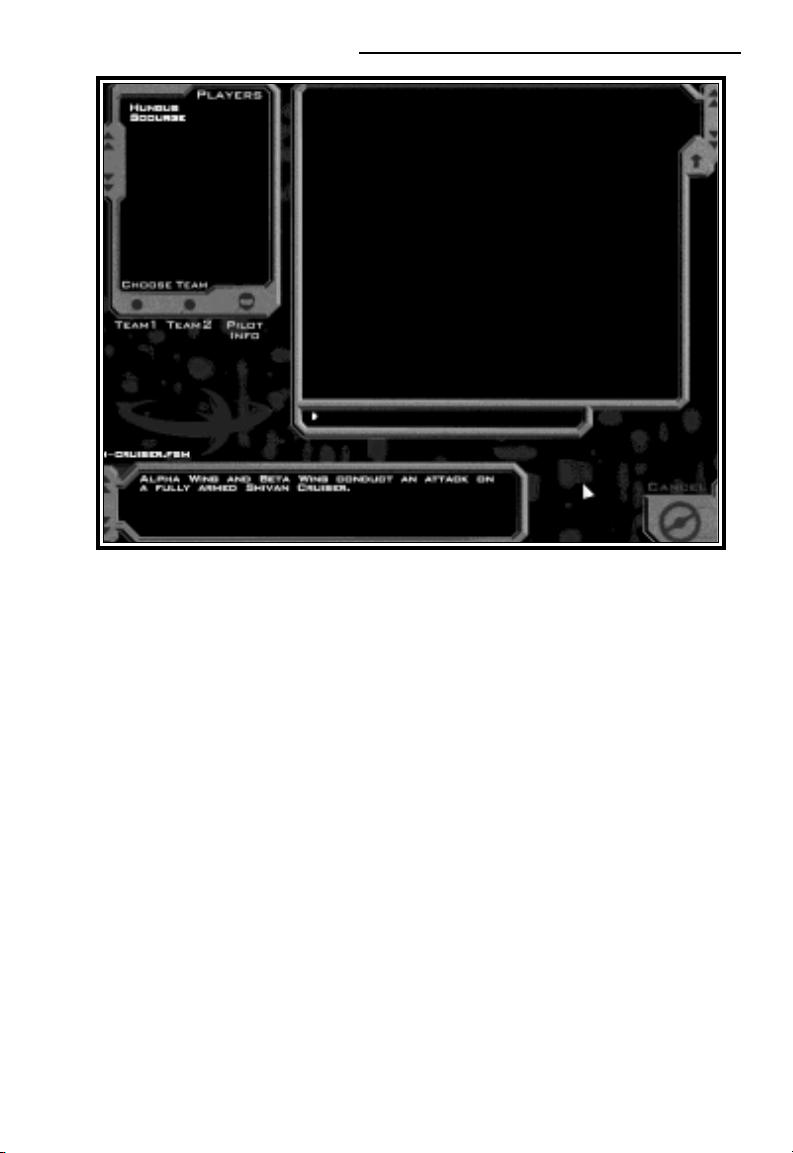
joined a game, you are placed in the following screen:
11
Page 13
Descent:FreeSpace
This screen shows the other players currently in the game, a name and
description of the mission that the host of the game has selected, and a large chat
window.
When the selected mission is a team vs. team mission, all players will have red
or green team icons to the left of their name. Any client may choose their own
team by highlighting their pilot name, and selecting one of the two team buttons
on the pilot listing. However, the server may choose to reassign that client to
another team. If the server changes the client to a new team, the client may no
longer select their own team.
Once the host has decided to start the game, all clients are automatically moved
into the briefing stage.
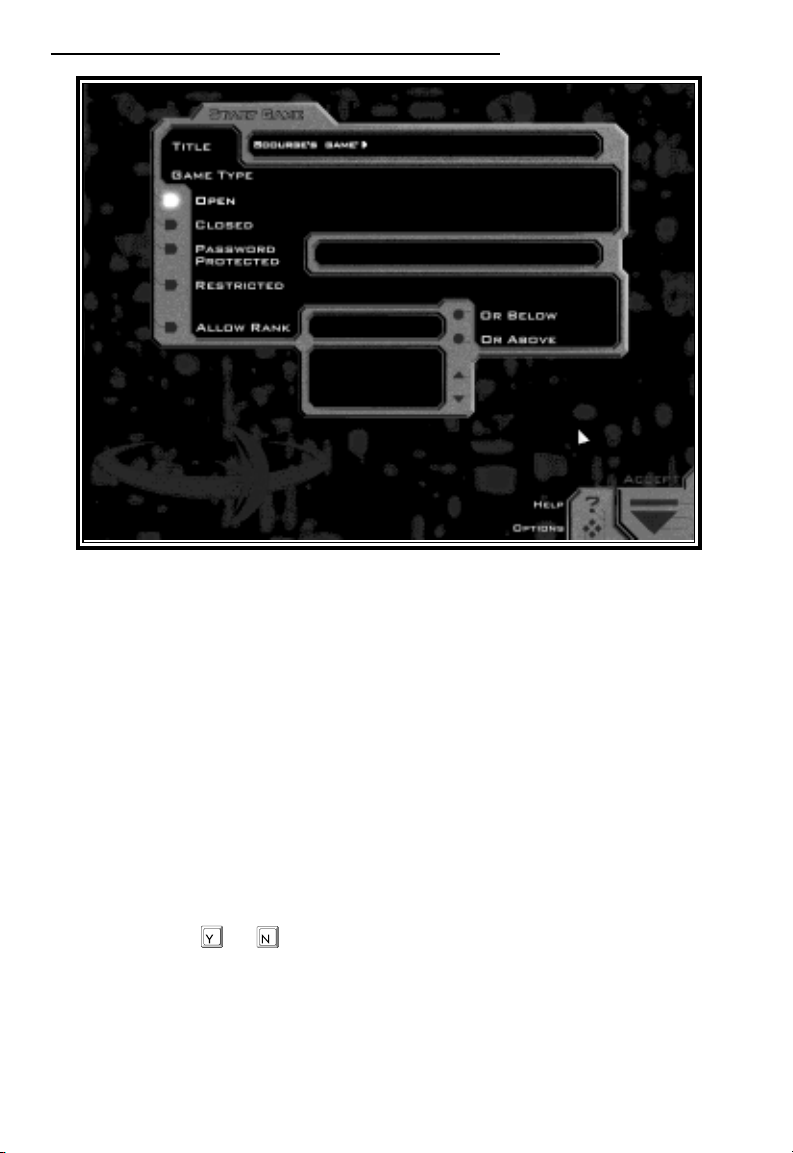
Starting a New Game
If you wish to start your own game, click on the “Create Game” button in the
join screen. Once you click this button, you are shown the following screen:
12
Page 14
The Great War
You may pick a name for your game. You also have several options about
restricting who can join your game and when they can join. The following is a
list of options that you can choose:
™
* Open Game – In an open multiplayer game, any client may join your game
at anytime during which joining is allowed (i.e. the forming, in-mission,
and debriefing states).
* Closed Game – In a closed multiplayer game, clients may only join during
the forming state. Any client attempting to join during the in-mission or
debriefing state will be unable to join.
* Restricted Game – A restricted game allows the host to accept or reject any
client wishing to join when the client tries to join in mission. When a client
does try to join in mission, the host must accept or reject that join request
by pressing or .
* Password Protected – You can assign a password to your game. A client
may only join your game if they know the password. The password is
always required to join the game, regardless of the state.
13
Page 15
Descent:FreeSpace
* Rank Allowances – You can further restrict the above four types of games,
by allowing only players above or below a certain rank. Any player who
tries to join and does not meet the rank criteria is rejected.
Once you have selected your name, and what join methods you wish to allow,
click on the “Accept” button.
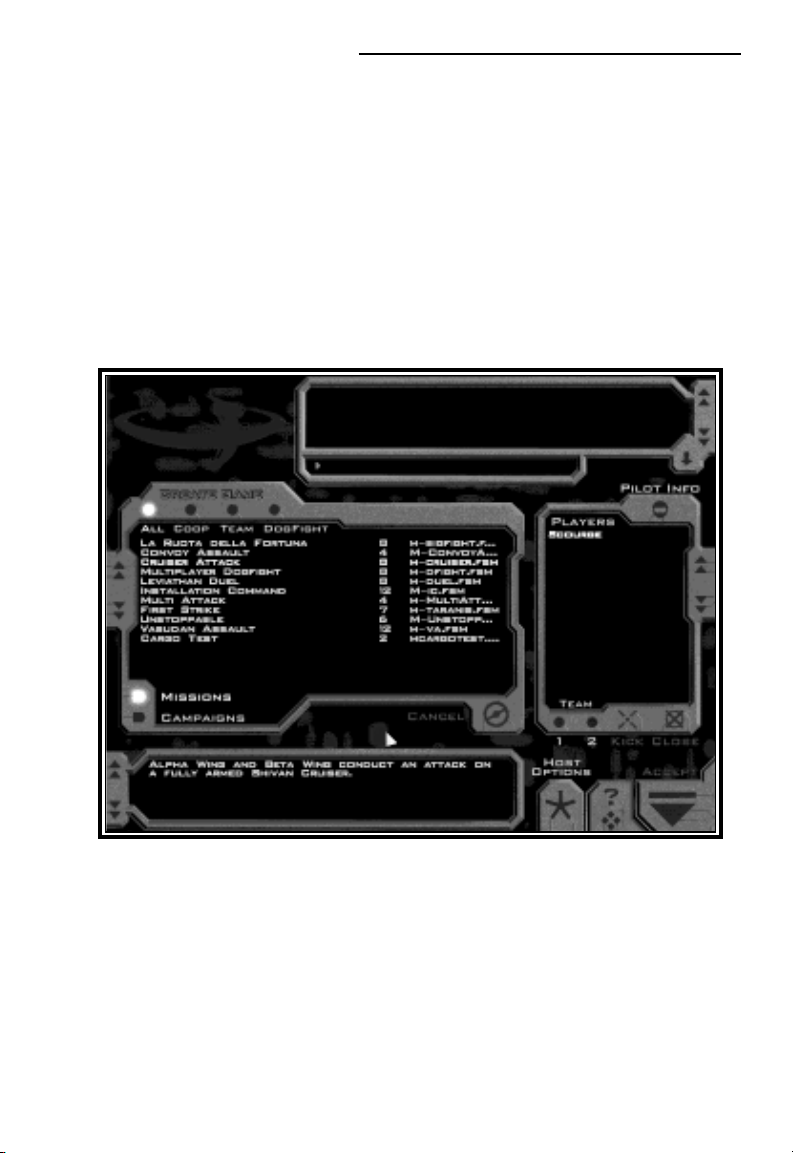
Host Setup
You are now in the host setup screen. From here, you may select which
mission or campaign to play, choose teams for team vs. team missions, and select
the game options for the game which you are starting.
The mission/campaign selection area allows you to choose what mission or
campaign you wish to fly. Click the ‘Missions’ button to display which
multiplayer missions are available, and click the ‘Campaigns’ button to display all
available multiplayer campaigns. Additionally, you can use the filter buttons (All,
Coop, Team, Dogfight) along the top of this display to narrow down your
choices to a particular type of multiplayer game that you wish to play.
14
Page 16
The Great War
™
The player list area shows what clients have currently joined your game. You
may use the buttons on this box as follows:
* Kick – Clicking this button will kick the selected player from the game.
* Close – When this button is active, no other clients may join your game.
Once you leave the host setup screen, clients may once again join if the
restrictions allow.
* Team 1 / 2 – When a team vs. team mission or campaign is selected, you
may use these buttons to place players on the team you desire.
There is also a chatbox in this screen which you can use to communicate with
other players in the game. Notice the dropdown button on the chatbox which
allows you to expand the box downward allowing you to see more of the previous
chat lines. Clicking this button again allows you to compress the chatbox to its
original size.
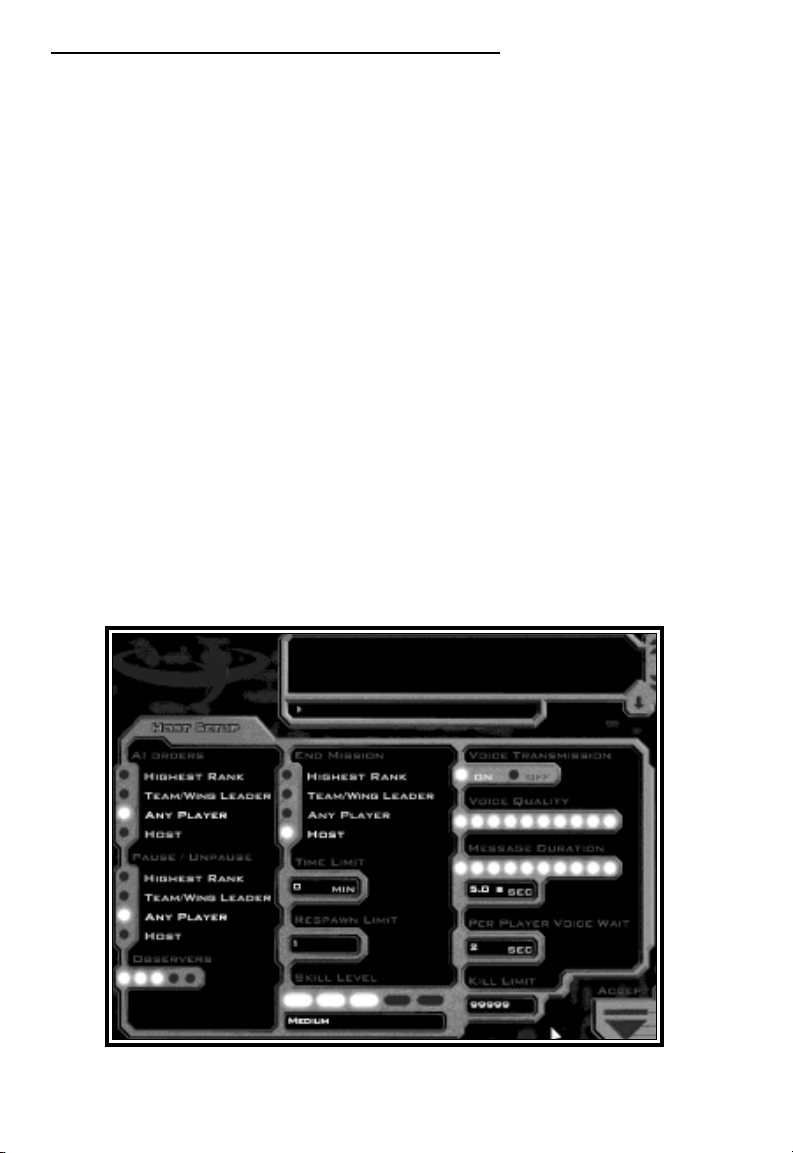
Host Options
There are a number of options which can be set for a multiplayer game by the
host. The options screen is reached by clicking the “Host Options” button on
the host setup screen.
15
Page 17

Descent:FreeSpace
Host Options Cont.
AI Orders: Determines which players can use the Comm menu system to
order AI (artificial intelligence) ships.
Observers: This specifies the number of permanent observers allowed in the
mission, 0 - 4. This number applies only to the number of people who initially
join a mission as an observer. It has no bearing on players who become observers
after running out of respawns.
End Mission: Determines who can end the mission by jumping out (default - ).
Time Limit: Specifies the maximum duration of a mission (in minutes). After
this time has expired, all players are automatically warped out of a mission. A
setting of 0 means no time limit.
Respawn Limit: The number of respawns available to a player in a mission. This
value may be between 0 and the maximum number specified in the mission file.
Kill Limit: When any players kill count reaches this limit, the mission is
automatically marked as over and all players are warped out. Applicable only in
multiplayer missions.
Skill Level: Specifies the skill level that the selected multiplayer mission will be
played at. This option is distinct from the skill level slider in the Global Options
menu.
Voice Transmission: Determines whether or not real-time voice transmission is
allowed during the multiplayer game.
Voice Quality: Sets the quality of voice for real-time voice transmission (if
enabled). The higher the setting, the higher the CPU usage for compression and
decompression. 5 is a good balance between compression and CPU usage.
Message Duration: Specifies the number of seconds allowed for a real-time
voice message.
Per Player Voice Wait: This setting is used to specify how long a player must
wait after sending a real-time voice message before he can send a new message.
For instance, if this option is set to 15 seconds, a player will not be allowed to
send real-time voice messages more than once per 15 seconds.
16
Page 18
The Great War
Briefing
™
The multiplayer briefing gives each player their orders and instructions for their
mission. In cooperative missions, this briefing is the same for all players in the
game. For team vs. team missions, each team will receive separate briefings.
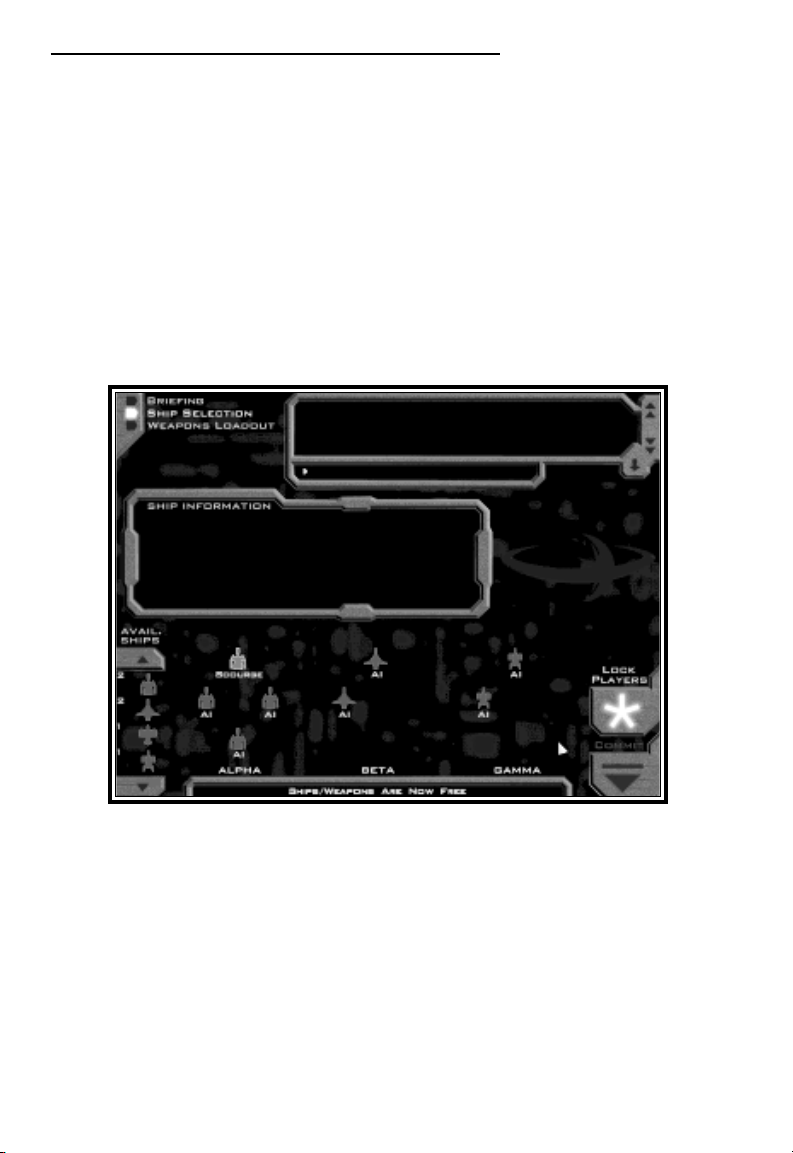
Ship and Weapon Selection
Ship selection for multiplayer is different than for single player. It also varies
slightly depending on the mode of play. First, all players must be assigned to a
ship, then ships and weapons may be selected. All players are initially assigned a
random ship which may be changed by the host (or team captain in a team vs.
team game).
In cooperative missions, the host of the game must assign all players to ships
before players can choose their own ship and weapons. The host is free to drag
and drop player names from one ship to another. For example, some players of
the game may wish to fly in a particular wing which contains only bombers. The
host can move those players into that wing by dragging and dropping a player
into the desired wing position. Once all players have been placed, the host clicks
on the “Lock” button. Once players have been locked, they are free to start
making ship/weapon selections.
17
Page 19
Descent:FreeSpace
(Note: once players have been locked, they cannot be unlocked). Any ships
which are not being flown by a player will be flown by the AI.
In team vs. team missions, the “team captains” of each team must assign players
to ships before the ship selection process can begin. The “team captain” is
designated by the host when the teams are initially formed before the briefing
stage begins. Once each team captain assigns players, the captain must click on
the “lock” button after which all members of his team may select their ship and
weapons if desired.
After players have been locked, all clients in the game may be free to select a
different ship and weapons for themselves. Ship and weapon selection for clients
happens in the exact same manner as for single player, with the only difference
being that clients can only outfit their own ships. The host has the ability to
outfit his ship, and any AI ships.
In cooperative missions, all players must share the same ship and weapon
resources. In team vs. team missions, all players in a particular team must share
the same ship and weapon resources.
18
Page 20

The Great War
™
Once you are done making your ship and weapon choices, click the “Commit”
button on any of the three screens (briefing, ship selection, or weapon selection).
Once everyone has committed their changes, you are ready to start your mission!
In-mission
Missions in multiplayer games proceed just like single player missions with a few
exceptions.
When a multiplayer game is paused, every player in the game is paused
automatically. The pause screen in multiplayer has a chat area for people to
communicate during the pause time. Only the player who paused the game or
the host of the game may unpause the game after it has been paused unless setup
otherwise.
If you target a ship being flown by a human player, their callsign will appear in
the target info area on the HUD.
When you die in multiplayer games, you will have the ability to respawn into a
new ship and continue playing unless designated otherwise by the host. The
number of times that a player is allowed to respawn is a mission setting that can
be modified by the host in the host options screen. Once out of respawns, a
player can either quit, or re-enter the mission as an observer. See page 22 for
information on observers.
The mission is over when any player that is allowed to end the mission engages
their subspace drives. (See the host options for details on who can end a
mission). Once the mission is ended, all players are warped out and taken to the
debriefing.
Debriefing
The debriefing screen is very similar to the single player version. The main
addition is the ability to view mission statistics for any player currently still in the
game by selecting that player in the player list box, then clicking the “Statistics”
button in the upper left corner.
If you are playing in campaign mode, once all players have accepted the
mission, everyone will be moved to the next mission in the multiplayer campaign.
19
Page 21
Descent:FreeSpace
General Network/Multiplayer Options
The general network/multiplayer options screen can be reached by pressing
from anywhere in the game, then clicking the “Multi” icon along the top of the
options screen.
On the left hand side of this screen, you can choose network options which
affect how your computer searches for multiplayer games to join. The “Allow
Broadcast” buttons determine whether your machine will look for Descent:
FreeSpace games on your local TCP/IP subnet. If you are using a service
provider to connect to the Internet, we recommend that you play Descent:
FreeSpace with “Broadcast Locally” off.
If you register with Parallax Online, you may use the area at the bottom left of
this screen to input your Parallax Online username and password. When you
enter the Ready Room, Descent: FreeSpace will validate your username with
Parallax Online. Once validated, any multiplayer game that you start will
automatically be registered with Parallax Online. Also, any game statistics will be
transferred to Parallax Online once you are done playing.
20
Page 22

The Great War
™
Voice Options
Descent: FreeSpace supports a number of ways to communicate with other
players in the game. In addition to a chat box in all pre and post mission screens
and the pause dialog, Descent: FreeSpace supports the ability to record your voice
through a microphone connected to your sound card, and send that recording to
all other players in the game (real-time voice). The real-time voice option is only
supported on sound cards which allow recording and playback of sound
simultaneously. To see if your sound card supports both, choose the “Setup”
button in the Launcher, and click on the Audio tab. This property sheet will
indicate whether or not your card supports real-time voice.
Using real-time voice in game is easy. In any screen where a chat box is present
(any pre or post mission screen as well as the in-mission pause dialog), you may
press and hold the key which is located directly above the TAB key. While
holding the key, talk into your microphone. Once you are done talking, release
the key and your recorded voice will be sent to all other players in the game. The
amount of time which you can talk is set by the host (see the section Host
Options on page 15 for details).
While in mission, voice works slightly differently. There are 4 separate keys
!
( , , , or ) available for real-time voice and typed messages. Quickly
#@
$
pressing one of these keys allows to you type a message, while pressing and
holding one of these keys allows you to send a real-time voice message.
In-Mission Messaging Keys:
1: Press the key to send a message to everyone in the game. When typing a
!
message, you may also preface your message with “name:” to send your
typed message to a specific player. When using the “name:” feature, your
message is sent to all players whose callsign begins with “name”. So
“Hungus: blah blah” will send the message “blah blah” to all players whose
callsign begins with “Hungus”.
2: Press the key to send a message to everyone on your team (team vs. team
@
games only).
3: Press the key to send a message to everyone on the opposing team (in
#
team vs. team games only).
$
4: Press the key to send a message to the ship that you currently have targeted.
21
Page 23
Descent:FreeSpace
In addition to these in-mission messaging options, you may also send “orders”
to other players in the game using the Comm Menu system (see page 54). When
you message a player using this system, that player will receive a HUD message
stating your order.
Observer Mode
An observer of a multiplayer game is simply a player who cannot directly
interact with the progress of the mission. You may join a game as an observer by
clicking the “Join as Observer” button in the join screen. In mission, if you die
and are out of respawns, you are given the option of returning to the game as an
observer.
Observers have a limited HUD, but are allowed to use all targeting keys to
view the status of any ship in the game. They may also chat, send messages, and
use any of the external camera views.
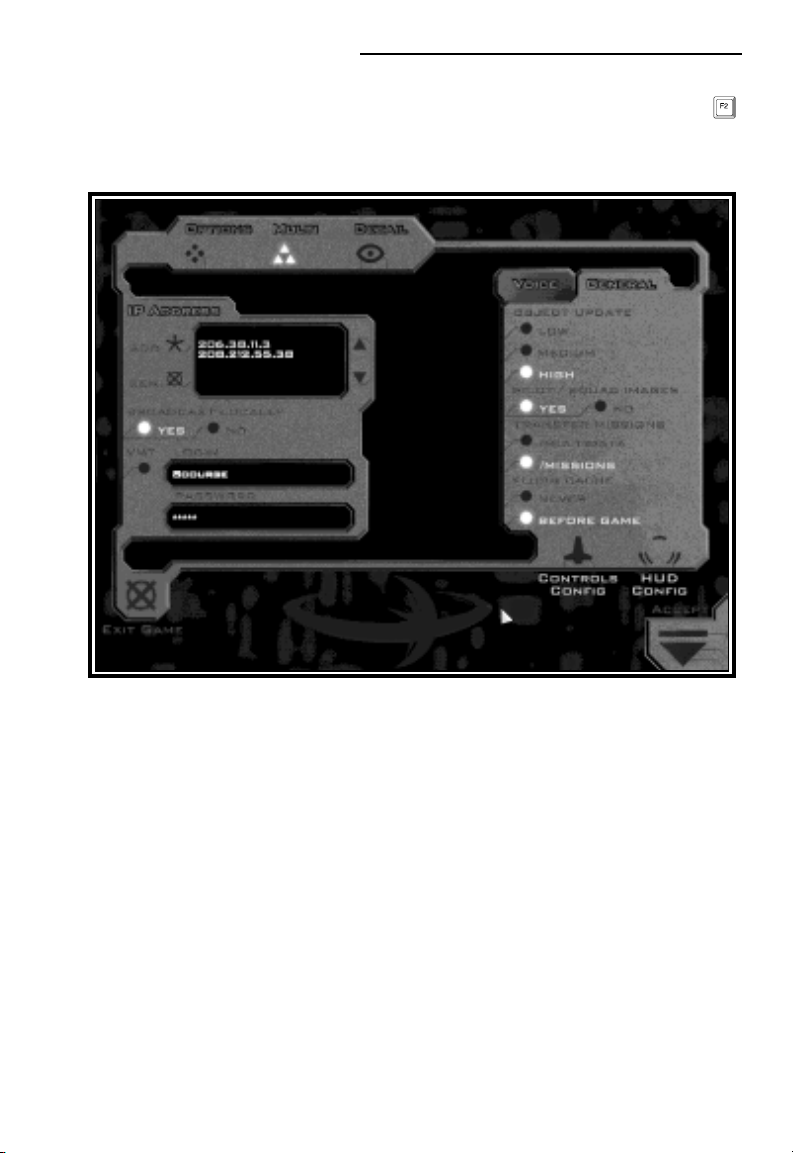
Global Options Menu
There are a number of general network options available in global Options
screen ( ).
On the left side of this screen, you may set options regarding how Descent:
FreeSpace should find games you wish to join. By choosing the IP address
option, you will be able to add an IP address to Descent: FreeSpace. Click on the
Add button to add an IP address. To remove an IP address from the list, simply
click on the IP address you wish to remove, followed by clicking the REM
button. Selecting the “Broadcast locally” option allows your computer to search
22
Page 24

The Great War
™
all machines on your local LAN. This option is not recommended when you use
a dial-up Internet connection to an Internet service provider. It is only
recommended if your machine is part of a local area network.
If you have registered with Parallax Online, you can click the Parallax Online
button using your username and password which you registered with. When you
join games in the Ready Room, Descent: FreeSpace will automatically connect to
Parallax Online and give you a list of current games.
On this options screen, you have the ability to set general network options, and
real-time voice related options.
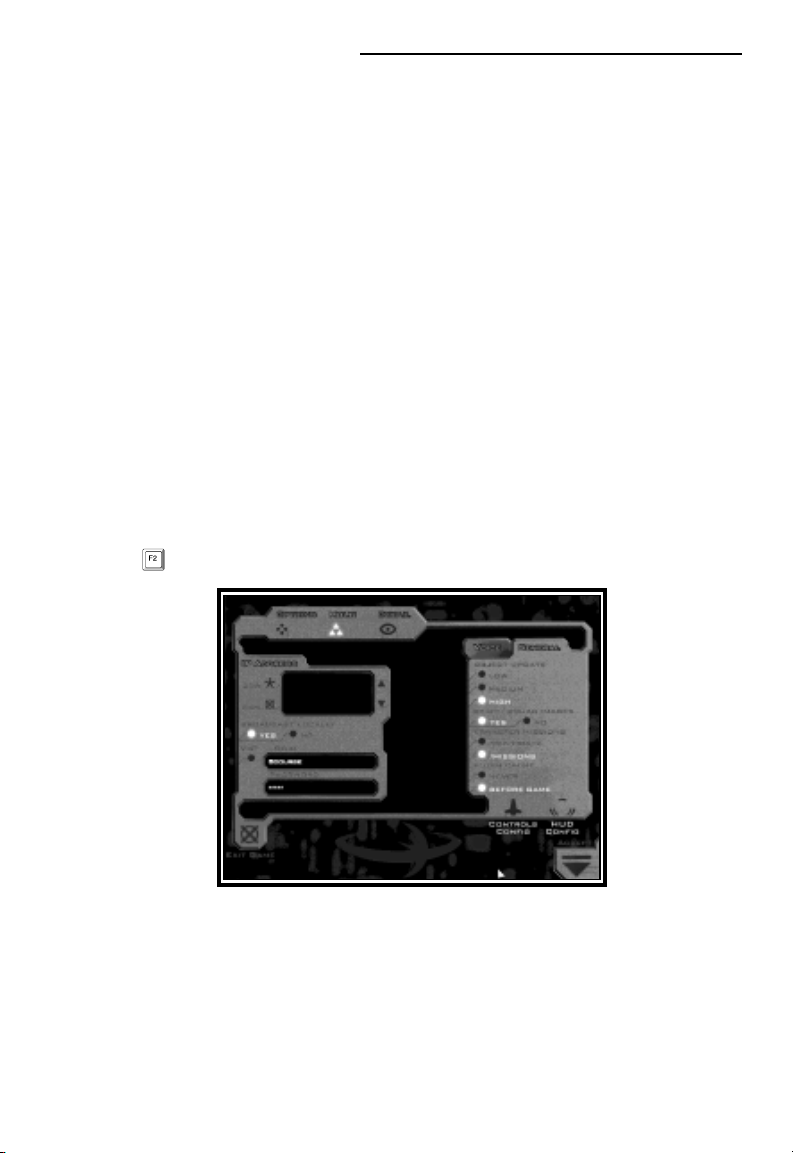
General Options Menu
Object Update Level: This option controls how quickly a game server will send
position and orientation updates to your machine. The lower the setting, the
more prediction your machine will use to move ships and weapons inbetween
updates. The “low” setting is recommended on slower dialup Internet
connections.
Pilot / Squadron Images: With this option set, anytime you play a multiplayer
game, the server will transfer the pilot and squadron images of other players in
the game to you. If this option is not set, these images will not be transferred to
your machine when you join a game.
23
Page 25

Descent:FreeSpace
Transfer Missions: This setting determines where transferred missions are
placed. When you join a multiplayer game, and do not have the mission that the
host selects, the mission is automatically transferred to you. The “Multidata”
folder is a folder created by Descent: FreeSpace specifically to hold only
disposable multiplayer data. The “Missions” folder is where all user created
missions get placed.
Flush Cache: You can use this setting to determine how long to keep
disposable data in your “Multidata” folder. If you play multiplayer games with
the same people, it might be a good idea to set this to never, meaning that the
contents of this folder will never be deleted by Descent: FreeSpace. If you are
low on hard drive space, setting this option to “Before Game” will cause all data
in the folder to get deleted before you play a new multiplayer game.
Voice Options Menu
Mic Test: Click this button to test if the microphone connected to your
soundcard is working properly with Descent: FreeSpace. After clicking on this
button, you have 3 seconds to talk into your microphone. After the 3 second
time limit, your voice will be played back to you. This test is also good to
experiment with your voice to determine how best to talk into your microphone
so that you can be easily understood.
24
Page 26

The Great War
Quality: The quality setting can be used to change the quality of the
compression used for the real-time voice system. The higher the slider, the
higher the quality. This slider only changes the quality of the microphone test.
Voice Transmission: This setting determines whether or not you will be able to
receive real-time voice transmissions from other players while playing a
multiplayer game. If you are on a slower dial-up Internet connection, you might
wish to turn this setting to “off” to free up bandwidth for game data.
Ignore: This area is only active once a multiplayer game has formed. You can
use this section to ignore (mute) real-time voice from specific players instead of
simply having to turn the system completely off.
Parallax Online
Parallax Online is Volition’s game tracking and statistics keeping service
provided free of charge to all players of Descent: FreeSpace. Visit our web site at
™
www.volition-inc.com
or
www.parallaxonline.com
for information on how to register and take advantage of this service.
Parallax Online provides a central location for players on the Internet to start
and join games. In addition to tracking Descent: FreeSpace games all across the
world, registered pilots will have their statistics updated after a multiplayer game is
played through Parallax Online. Check out the Volition web site for up-to-date
rankings of the best pilots in the Descent: FreeSpace universe.
25
Page 27

Descent:FreeSpace
PRE-GAME SCREENS
Main Hall
The Main Hall is the main menu for Descent: FreeSpace. From this screen,
you can “move” your Pilot to different areas of the game.
NOTE: Pressing from anywhere in FreeSpace will bring up
screen-specific help. If you’re in a pre-mission interface screen
such as the Main Hall, you will get a Help Overlay which will
outline hotspots and give brief descriptions of each.
Pressing the right mouse button will cycle through the different hotspots on
the Main Hall screen.
From the Flight Deck, you have access to the Ready Room, Campaign Room,
Barracks, Tech Room, and Exit. There is also a monitor you can use to bring up
the Options screen (also available by pressing ).
26
Page 28

The Great War
Options
The global Options screen can be brought up from anywhere in Descent:
FreeSpace by pressing . From here, you have control over sound volume, skill
level, as well as access to detail settings, controls configuration, and other items.
™
Effects: This slider controls the volume level for in-game sound effects, as well
as the volume of the cinematic audio tracks.
Music: Adjusts the volume of the digital music in Descent: FreeSpace.
Voice: This slider will adjust the volume of briefing/debriefing voice, as well as
all in-game voice messages.
Skill Level: This alters the current skill/difficulty level used in the Descent:
FreeSpace missions, from Very Easy all the way to Insane.
NOTE: Once a mission has begun, your Skill Level setting is
locked in. You must wait until the mission is complete before
changing it again.
27
Page 29

Descent:FreeSpace
Exit Game: Lets you exit Descent: FreeSpace, and back to Windows.
Gamma: All computer monitors handle darkening colors differently. As a
result, this slider will help adjust your visuals to the “ideal” range for your
monitor. To set your Gamma correctly, use the arrow buttons to adjust the value
until the grey bar appears to be one uniform level of brightness. Squinting your
eyes a bit might help. Once you have set this value, you should use your
monitor’s Brightness & Contrast controls to make further changes to the game’s
appearance.
The remaining buttons on the Options screen (Multi, Detail, Controls Config,
and HUD) take you to the different sub-options screens available to you.
Multi Options Screen
Please see page 20 for details on Multi Options
28
Page 30

The Great War
Detail Options
The Detail screen allows you to change the various levels of detail used in
Descent: FreeSpace. Since the game is designed to run on a wide range of
computer types & speeds, you can set these values to your personal preference.
™
On the right side of the screen is a list of Preset Detail Levels. When Descent:
FreeSpace was installed, a default Detail Level was chosen for you based on your
computer speed, RAM, and other hardware. Feel free to change this Preset, but
be aware that setting it higher will cause the gameplay to run at a slower
framerate.
By using the “Custom” preset, you can set each individual detail setting
separately. This is useful if you find a particular detail setting more important
than others.
Individual setting descriptions:
Model Detail: As a ship/object gets further away from the player’s eye, it will
change to simpler 3D models. This slider alters the distances at which those
changes occur. Higher settings put those distances further away, giving you more
3D detail at the cost of speed.
29
Page 31

Descent:FreeSpace
Model Update: At the highest setting, Descent: FreeSpace will always render
objects and ships as 3D objects. If this slider is lower than the max, it will
sometimes render the objects as bitmaps. The lower the slider is set, the less
often the bitmaps are updated, and the closer the distance thresholds are.
NOTE: This setting will only affect the software mode of
Descent: FreeSpace.
3D Hardware Textures: This will alter the resolution of the textures used in
the hardware mode of Descent: FreeSpace. Potentially, this will improve the
framerate in some complex scenes by reducing texture resolutions.
Weapon Rendering: This alters the culling-out of weapon objects based on
lifetime and their presence onscreen. This option is ignored in multiplayer games.
Impact Effects: Changes the number of weapon impact effects rendered.
Shield Hit Effect: At its lowest setting, this turns the shield-hit effect off
entirely. At medium settings, this will cause the shield-hit effect to render as a
single 2D bitmap. At higher settings, it will render normally across a 3D mesh
object surrounding each shield-capable ship.
Stars: This alters the number of visible stars.
Particles: At low settings, this will cause much fewer hit & damage particles to
be rendered.
Engine Glow: Toggles the translucent engine glows on or off.
Nebulas: Toggles the colored background nebulas on/off.
Target View Rendering: When on, this will display a 3D view of your current
target in the Target View gauge. If you do not use this gauge much, turning this
off will give you a small increase in framerate.
Effects Alpha Blending: Toggles blending of in-game effects like explosions
and thrusters on or off.
NOTE: This will only affect the software mode of Descent:
FreeSpace.
30
Page 32

The Great War
Lighting: This slider alters the lighting model used in-game. At high settings,
all objects will use full static & dynamic lighting, including explosions. At lower
settings, less lighting will be used, and on fewer objects.
Controls Config
This screen allows you to customize your controls setup and change your key
bindings.
™
NOTE: Settings found in the Controls Config screen are stored
in your Pilot file, so you may have different control setups for
different pilots. If you wish to take your Pilot with you to another
computer that has FreeSpace installed, simply copy your Pilot file to
a diskette and take it with you. Pilot files can be found in the
\FreeSpace\players\ directory and end with a .PLR filename
extension.
Control functions are divided into four categories:
Targeting: All targeting-related functions are found here.
Ship: Flight controls and other ship functions
Weapons: Weapon control functions, including countermeasures
Misc.: Other functions such as wingman command shortcuts, energy
management, and multiplayer messaging functions.
31
Page 33

Descent:FreeSpace
Each category contains a list of functions on the left, and the current
key/controller binding on the right.
Binding:
If you wish to change the binding for a given function, simply double-click on
it, and you will enter Bind Mode. With Bind Mode on, simply press the new
key/controller button you wish to assign to that function. You may press the
“Undo” button to undo your last binding.
All functions allow the use of one keyboard key, and one joystick button to be
bound to that function at the same time.
You may also use the ALT and SHIFT buttons in the lower left part of the
screen to assign and/or modifiers to your selected binding.
Clearing Bindings:
If you wish to clear the bindings of a given function, simply use your mouse to
select that line, and press “Clear Selected.” All key/controller bindings will be
removed for that item. Pressing “Clear All” will remove all bindings.
Conflicts:
If you assign a key/controller button that is already assigned to another
function, a “Conflict” warning will flash at the bottom of the screen, and the
conflicted keys will be shown in red. If the duplicate binding appears in another
Category, that Category button will be shown in red at the top of the screen.
You must resolve all conflicts before exiting the Controls Config screen.
If you press “Clear Conflict”, the older binding will be removed, and the
current one will take effect.
Hitting the “Accept” button will save your current Controls Config and take
you back to Options.
TIP: There are many different targeting functions available to you under
Controls Config/Targeting. Many of which are not covered in the training
missions. Once you have some combat experience in Descent: FreeSpace, you
may wish to try using some of the more advanced targeting controls. Mastering
these functions is a key to becoming a great Descent: FreeSpace pilot.
32
Page 34

The Great War
HUD Config
This screen allows you to customize various aspects of the Heads Up Display
(HUD). For detailed information on the HUD gauges and their functionality,
please see page 48.
™
The main screen shows an image containing all HUD gauges and indicators.
On the surrounding edge are buttons that allow you to change the HUD’s color
and relative brightness. In the lower right are buttons for Accepting your
changes, or Resetting to the defaults.
Each gauge and indicator on the HUD display can be set to “On” or “Off”.
Simply click on that gauge/indicator in the onscreen display, and choose its new
mode using the buttons in the lower left.
When set to mode “Off”, gauges and indicators will be drawn in grey.
Otherwise, they will display in the HUD color you have selected.
Many gauges allow you to set a third mode called “Popup”. In Popup mode,
the gauge will only remain onscreen when its status changes. If no further
change occurs, it will disappear within a few seconds.
33
Page 35

Descent:FreeSpace
For example: If you set the Weapons Display to Popup mode, it will only
appear when you change which weapons are armed and/or linked. It will remain
onscreen for a short time, then disappear unless you make additional changes.
The Brightness slider changes the relative intensity of the HUD gauges against
the game screen. The higher the setting, the more opaque and bright the HUD
will display.
Barracks
You can manage your various Descent: FreeSpace Pilots in the Barracks screen.
From here, you can create and delete Pilots, as well as view their combat statistics
and medals.
In the upper left, you’ll see a list of Pilots. If this is your first time playing
Descent: FreeSpace, you will only see one Pilot.
If you have multiple Pilots displayed, you may change your current pilot by
highlighting the name, and clicking the “Select” button.
34
Page 36

The Great War
™
NOTE: Single-player Pilots are stored separately from Multi-
Player Pilots. Use the “Single” and “Multi” buttons in the
upper right of the Pilot list to change which types of Pilots are
displayed. By leaving Barracks with a Multi-Player pilot selected,
the game will effectively be in Multi-Player mode (see page 40
on Ready Room for more information).
There are four buttons underneath the list of pilots:
Create: This will create a new Pilot. The Pilot will be Single-Player or Multi-
Player, depending on which mode is currently active.
Clone: This will duplicate your currently selected Pilot, and prompt you for a
new name (pilot names must be unique). This cloned Pilot will have all the same
Controls Config settings as the original Pilot.
Remove: This will delete the selected Pilot. If you delete the only pilot in a
given player mode, you will be required to create another before leaving the
Barracks.
Convert: This copies the current Pilot much like Clone does, but will place the
new pilot in the opposite player mode (Single or Multi). Example: If you
Convert a Single-Player pilot it will create a Multi-Player version, complete with
the same Controls Config and Option settings.
NOTE: Clone and Convert will not copy your pilot’s statistics,
only your Options and Controls settings. Please see page 36 on
“Statistics” for more information.
In the upper right of the Barracks screen, you will also notice a picture
associated with each pilot. Using the arrow buttons under that picture, you may
change which picture is assigned to your current Pilot. Each newly created pilot
will be assigned a random picture.
Descent: FreeSpace allows you to use your own Pilot pictures. Simply create a
256-color PCX image at 160x120 resolution and place it in the
\FreeSpace\players\images\ directory, and it will appear in the Barracks screen the
next time you run Descent: FreeSpace.
In multiplayer games, your Pilot’s picture is automatically uploaded to the
other players.
35
Page 37

Descent:FreeSpace
Statistics
In the center of the Barracks screen, you’ll notice a section devoted to your
Pilot Statistics. These are an ongoing record of your performance while using
that Pilot.
NOTE: Permanent Statistics are only kept for Campaign
missions. If you fly a mission in the Tech Room Simulator, you
will receive a statistics report at Debriefing, but your Pilot’s alltime statistics will not change.
The statistics are self-explanatory, with these possible
exceptions:
Kills: If you deal the most damage to any single ship out of all other friendly
ships (AI or player-controlled), then you are granted one kill when it is destroyed.
You also must have dealt it at least 20% of its total sustainable damage. If no
single ship inflicts more than 20% damage to an enemy ship, no ship will receive
the kill when it is destroyed.
Assists: You will receive one Assist for inflicting 15% or more damage to any
ship that is later destroyed. Therefore, several different players/ships may receive
an Assist for attacking the same enemy craft.
You will not receive Kills or Assists for destroying asteroids and other noncombative targets.
Medals Display
In your tours of duty as a GTA Pilot, you will periodically granted medals for
outstanding achievements. The Medals screen shows your Pilot’s accumulated
service medals.
36
Page 38

The Great War
You will see the name of a granted medal when you place your mouse over it.
Some medals are granted for superior dogfighting skills. Others are granted for
superb performance in a combat situation. It takes a skilled pilot indeed to
acquire every GTA service medal. See the Rank & Medals section for more
details.
Each new Pilot begins at Ensign rank. During the course of a Campaign, your
Pilot will accumulate combat experience. As his skills grow, he will be periodically
promoted, and granted more responsibility. Eventually, your Pilot will have full
control over his flight wings and weapons loadouts. The rank pip on the Medals
screen displays your Pilot’s current rank symbol.
™
37
Page 39

Descent:FreeSpace
GTA Pilot ranks are as follows:
Ensign
Lieutenant Junior Grade
Lieutenant
Lieutenant Commander
Commander
Captain
Commodore
Tech Room
The Tech Room is where you can go to view Database information, fly
missions in the Simulator, view previously-seen Cutscenes, or see the list of game
Credits.
Technical Database
The Technical Database screen was not completed before the printing of this
manual. Please see the Descent: FreeSpace README.TXT file found in your
FreeSpace directory.
Mission Simulator
From the Mission Simulator you will be able to replay single player missions
that you have completed during your Campaign.
Simply choose the mission you wish to fly (or re-fly) from the displayed list,
and click Commit.
38
Page 40

The Great War
Two filters at the bottom will switch between stand-alone missions and
Campaign missions that have been previously flown by your current Pilot.
NOTE: Replaying Campaign missions in this manner will not
replace the performance you achieved while playing it in
Campaign mode, it’s a simulation only. Once you have accepted
a mission’s outcome in Campaign mode, you will not be able to
replay it unless you restart the Campaign.
The Mission Simulator also allows you to fly single missions that are not part of
a Campaign. These may be add-on missions from Volition, Inc., or home made
missions you or your friends have made using FRED, the mission editor. In
order for such missions to appear on this screen, they must be placed in the
FreeSpace\missions subdirectory.
View Cutscenes
This screen will allow you to view cutscenes you have seen previously while
playing a Descent: FreeSpace Campaign. Your current pilot must have seen a
cutscene during Campaign play before it will appear on this list.
Credits Screen
This screen displays the list of development credits for Descent: FreeSpace.
™
Campaign Room
Descent: FreeSpace missions can be arranged in Campaigns. These Campaigns
provide a way to connect missions with each other in storyline as well as
gameplay.
Each single-player Descent: FreeSpace Pilot you create may have one Campaign
in-progress (or “open”) at a time. Between Campaign missions, progress is
automatically saved, and you may continue it later by returning to the Ready
Room (See page 40).
In order to change the current Campaign being flown by a Pilot, you must visit
the Campaign Room. From here, you can either select a new Campaign from the
available list, or you may restart your current Campaign.
39
Page 41

Descent:FreeSpace
Your current Campaign is marked by a green icon.
If you choose to restart or change your Campaign before your current one is
completed, your Pilot will lose all progress and statistics made during that
Campaign. Only when a Campaign is completed will your Pilot’s accumulated
statistics, promotions, and medals become permanent.
The default Campaign when you first install Descent: FreeSpace is called
“FreeSpace - The Great War”. More Campaigns will appear here if you have
created your own using FRED (the mission editor), or have downloaded others
from the Internet.
Ready Room
The Ready Room is where you go to continue your current Campaign. When
you first start Descent: FreeSpace as a new single-player Pilot, the default
Descent: FreeSpace Campaign will already be open for you.
NOTE: The single-player Ready Room is quite different from
the multi-player version. For more information on the multiplayer version, please see the “Join A Game” section on page 10.
40
Page 42

The Great War
The single-player Ready Room is simply a sequencing area that will take you
into your next Campaign mission for Briefing, Ship Select, Weapons Loadout,
and the mission itself.
Command Briefing
Before many missions, you will receive a Command Briefing from GTA
Command. This briefing is given to all pilots stationed on your ship, and is
designed to give an overview of the war.
™
It will outline fleet movements, recent engagements, and discuss any new
technologies that have been recently put into service.
Command Briefings are typically divided into several stages. Using the “stage
arrows” you can advance through, or review all stages.
41
Page 43

Descent:FreeSpace
Mission Briefing
The Briefing screen is where you receive your mission orders and overview of
the objectives.
In the upper left you’ll see sequencing buttons for Briefing (currently
highlighted), Ship Selection, and Weapons Loadout. If you are playing a training
mission, the only available choice will be Briefing.
Like Command Briefings, Mission Briefings are divided into several stages.
Each stage typically focuses on one task expected of you during the mission.
Using the “stage arrows” you can advance through, or review all stages.
In each stage, you will see a graphical icon-based representation of what GTA
Command expects you to encounter in the mission. You may use your mouse to
click on any of the icons to see a real-time view of that ship or object.
At the bottom of the screen, you will see your briefing instructions for the
current stage. Your commanding officer will also read the instructions to you.
Descent: FreeSpace missions can become quite involved, it’s highly recommended
that you review all briefing stages before moving on.
The last stage in every briefing is the list of Mission Objectives. These are the
objectives you are expected to meet once you arrive in the combat area.
Primary Objectives are very important to mission success. If you fail to meet
42
Page 44

The Great War
™
one or more of these objectives, it is unlikely the mission will be considered a
success. Depending on the severity of the failure, you may be forced to replay the
mission before advancing to the next.
Secondary Objectives are still important, but not as crucial. If you fail to meet
any secondary objectives, the mission may not be considered a total success, but
you will usually be able to advance to the next mission.
Bonus Objectives are a result of unforeseen events that occur during a mission.
Therefore you will never see a Bonus Objective in your Briefing. For example, an
enemy Cruiser arrives unexpectedly, but you and your wingmen manage to
destroy it. Since GTA Command did not expect such a ship to arrive, you were
not briefed on it. However, once it did, you were given a successful Bonus
Objective for destroying it.
Once you have reviewed all Briefing stages, you should proceed to Ship
Selection. Again, if you’re in a training mission, you will not have that option.
Simply hit Commit to accept your orders and enter the mission.
Ship Selection
This screen allows pilots to select the ships best suited for the mission at hand.
At the start of the main Descent: FreeSpace Campaign, your pilot will not have
enough experience to outfit all of his wingmen with specific ships. If you fly well,
however, you will quickly advance in rank and will be given more options on this
screen, as well as Weapons Loadout.
43
Page 45

Descent:FreeSpace
NOTE: Ship Selection is handled quite differently in multi-
player missions. For information on multiplayer Ship Selection,
please consult page 17.
At the bottom of the screen, you will see an arrangement of flight wings. As a
single-player Pilot, you will always be a member of Alpha wing, which is shown
on the left. You will also always be flying “point” for Alpha wing, which is the
topmost icon in that group, drawn in green.
In addition to Alpha, you may also see wing groupings for Beta and Gamma.
Alpha, Beta, and Gamma make up your primary fighter force in Descent:
FreeSpace missions. Depending on the needs of the mission, you may also be
joined by more wings, typically designated Delta, Epsilon, and so on. However,
Alpha, Beta, and Gamma will be the only wings you have Ship Selection and
Weapons Loadout control over.
44
Page 46

The Great War
The wing groupings and ship slots at the bottom use the
following symbols:
™
Ship icons: These icons represent the ship class currently assigned to
that slot. Each ship class has a different top-down view symbol. If a
ship symbol is present in a wing slot, that ship class will be deployed
in that position. Any ship may be replaced by another ship class if you wish.
Closed icon: This icon indicates that this wing slot cannot be filled
in this mission.
Open icon: This indicates an open and available wing slot that is
currently unfilled.
Above the wing display you’ll see a rotating view of the “current” ship class,
with a text description of its properties and flight statistics. By left-clicking on a
different ship icon anywhere below, you can see the properties for that ship class.
On the lower left corner you will see the Ship Pool. This contains a scrolling
list of the ship classes available to you in this mission, and an inventory count for
each. This count represents how many “spare” ships of each class is available, and
does not include ships already placed in wings.
You can use your left mouse button to “drag and drop” different ship class
icons from the Ship Pool onto the available wing slots. As you remove a ship
from the pool, its inventory count will drop. If you drop a new icon onto a
placed ship icon, it will replace it and return the original one to the Ship Pool.
Modifying the Ship Selection for a mission isn’t often necessary. Terran
Command typically gives good default wing layouts for the tasks at hand, and all
missions may be completed with the defaults. However, as you become more
familiar with the different fightercraft in Descent: FreeSpace, you may favor some
ship classes over others. Ship Selection allows you to outfit your forces differently
if you have different thoughts on what works best.
If you wish to reset the wing layouts to the mission defaults, simply press the
“Reset” button on the right.
When you have completed your Ship Selection, you may choose to advance to
Weapons Loadout, or to Commit and enter the mission directly.
45
Page 47

Descent:FreeSpace
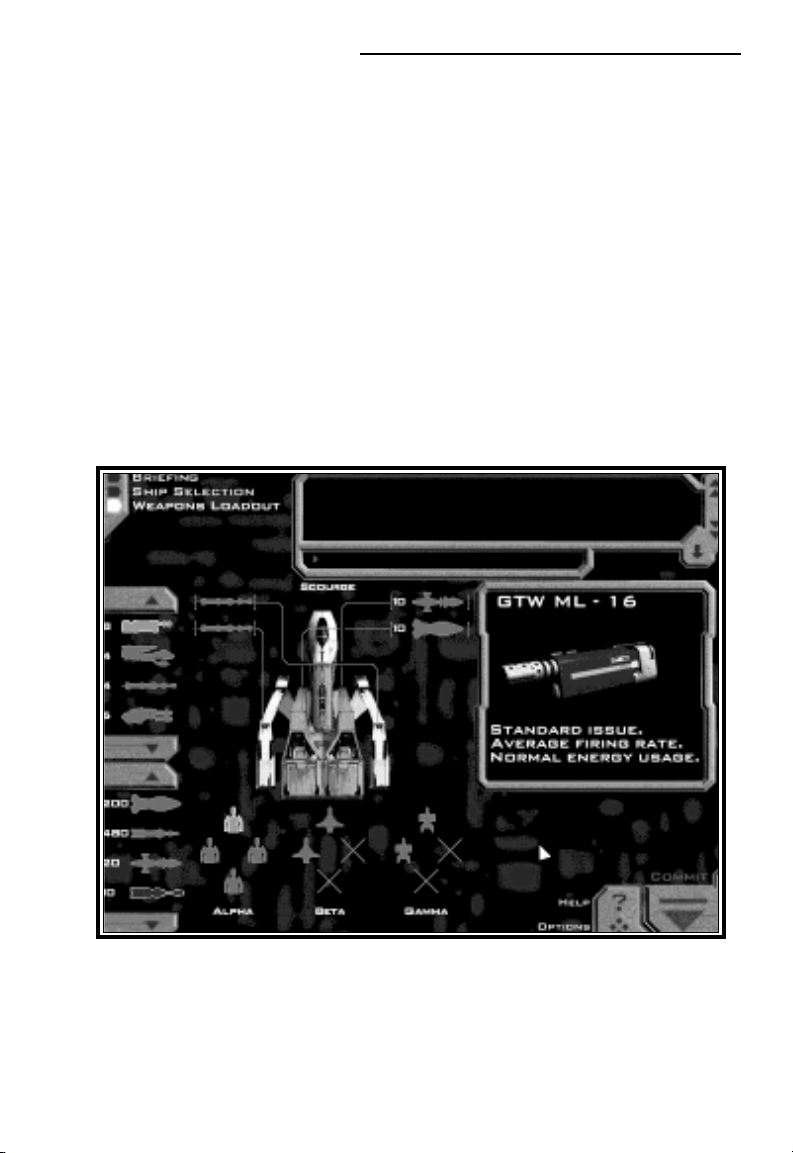
Weapons Loadout
The Loadout screen operates very much like Ship Selection. In this area you
can modify the default weapons armed on each ship to better suit your
preferences.
NOTE: Like Ship Selection, the Weapons Loadout screen
functions somewhat differently in multi-player. Please see page
17 for details on this.
On the left side of the screen, you’ll notice not one, but two Weapon Pools. The
top list is your available Primary (cannon/energy-based) weapons, and the bottom
list contains Secondary weapons (missiles & bombs). Much like Ship Selection,
each icon has an inventory count indicating how many of each are still “unplaced.”
In the center of the screen you’ll see a top-down view of the currently selected
ship. Next to this you’ll notice slots for each Primary and Secondary weapon
banks available on that ship class. To change the currently selected ship, left-click
on one of the ship icons in the wing layout at the bottom.
46
Page 48

The Great War
Notice that on the right side of the ship diagram, each Secondary weapon icon
has a number displayed. This is the raw number of missiles of that type that the
bank is carrying. You’ll notice that different ship classes have varying missile bank
capacities, and each missile type occupies a different amount of that space.
On the right side is a diagram and description for the currently selected weapon
type. To view another weapon’s description, simply left click on a different
weapon icon.
To change the weapon currently armed on the selected ship, simply drag-anddrop the new icon onto the desired bank next to the ship overview. Like Ship
Selection, if you drop onto an placed weapon, the original will be returned to the
Weapons Pool.
™
NOTE: Each ship class has its own weapons capacity and
compatibility. If your selected ship cannot be outfitted with a
certain weapon, that weapon icon will appear as grey in the
Weapon Pools.
Like Ship Selection, modifying your weapons loadout is not necessary to
complete the game. Each ship class has a good default weapon loadout, each
mission. This screen will simply allow you to fine-tune the loadouts as you see fit.
When you have completed your changes in Weapons Loadout, click “Commit”
to enter the mission.
47
Page 49

Descent:FreeSpace
IN-GAME SCREENS
The HUD (heads-up display)
This is the main game screen for Descent: FreeSpace. Any or all of these
gauges and displays may be turned off/on individually in the Options/HUD
Config screen.
1. Message Output - This is where incoming messages appear. Messages can
be from wingmen, Terran Command, or any other ship in the mission.
2. Comm Video - This displays a visual of the person transmitting the
incoming message.
3. Directives View - Mission directives will appear here. Directives are
much like Objectives, but are broken down into smaller goals. When
given a directive to destroy an enemy fighter wing (i.e. “Destroy Arjuna
[2]”), the number following the wing name indicates how many ships are
left in the wing.
4. Extra Target Info - This text gauge shows the current orders given
to the targeted ship, as well as estimated time-to. The time-to field will
only display for docking and waypoint maneuvers.
48
Page 50

The Great War
5. Target Monitor [Target Info] - The first two text lines display your target’s
Designation (name) or Wing name, and Ship Class. The third line displays
its distance and speed.
6. Target Monitor [Target View] - A realtime view of your target is shown
here. In the upper right is your target’s Hull Integrity and status. The
four possible status abbreviations are “OK” for Okay, “DMG” for
Damaged, “CRT” for Critical, and “DIS” for Disabled.
Also, along the right side of this frame is a vertical bar indicating its Hull
Integrity graphically.
If you have a subsystem targeted, its name will appear at the bottom of
the Target View, next to its integrity value. If your target is Disabled
(because of a destroyed Engine subsystem), the word “Disabled” will
appear below the view as well.
7. Target Shield - This 2D view displays a top-down view of any
fighter/bomber target. If your target is equipped with energy shields, a
four-quadrant shield strength display will surround the ship diagram.
Full-strength shields will be shown bright, and will gradually become
dimmer as they take more damage.
™
The shield quadrants and hull diagram will also flash briefily to indicate
what portion of the ship is receiving damage.
8. Radar - This circular display shows targeting “blips” for all ships
and objects in the battle area. It’s a full 360 degree view of your
surroundings. Blips in the inner circle are in your forward hemisphere. If
your target is in the exact center of the radar, he is directly in front of
you. The outer ring represents your rear hemisphere. Target blips on the
very edge of the radar are directly behind you.
Hostile targets are shown in red, friendly in green, and unknown/neutral
in grey. Ships that are just arriving/departing through subspace will be
shown briefly as blue blips. Your current target’s blip is always displayed
larger than the others. Additionally, contacts that are farther than 1500
meters are shown in a dimmer color.
Your Radar system can be set for different ranges. Any target falling
outside of that range will not be displayed on the Radar Gauge. Your
current range setting is displayed in the lower right of this gauge.
49
Page 51

Descent:FreeSpace
9. Player Shield - This is similar to the Target Shield (7), but displays
the shield & hull information for only your ship.
10. Power Management - These bars indicate the current power settings for
your ship’s Energy Transfer System. Vertical bars indicate the power
output to your ship’s Guns (G) and Engine (E). If your ship is equipped
with a Shield system (S), the energy output to it will be displayed as well.
11. Auto Target/Auto-Speed-Match Icons - These two indicators show the
current on/off status for your Auto Targeting and Auto Speed Matching.
12. Mission Time - Shown here is the total elapsed mission time, as well as
the current time compression setting (1X, 2X, or 4X).
13. Countermeasures / Kills Gauge - The “CM” gauge shows you how
many countermeasures you have onboard. “Kills” is a raw count of how
many ships you have received a Kill for in the current mission.
14. Weapons Display - The top half of this gauge shows the arming status of
your Primary weapons. The arrow icon to the left of the weapon name
indicates what is armed. If you have two Primary banks, and they are
both linked, both will show an arrow icon.
The Bottom half shows your Secondary arming status, and missile
count(s). Your currently selected Secondary bank will have an arrow icon
to the left of it. If you have that bank set to dual-fire mode, two arrow
icons will be shown.
15. Monitor View - Placing a ship in your Monitor Display will give
you a constant heads-up indication of its hull integrity. If a ship
appearing in this display is taking hits, its entry will flash briefly, and the
numerical hull integrity will drop accordingly. If the ship becomes
disabled, a “D” icon will appear to the left of its name.
Up to three ships may be monitored at one time. Consult the Reference
Card for keys used to add/remove ships from the Monitor Display.
16. Wingmen Status - Use this display to keep tabs on the members of your
attack wings. Each friendly wing present in a mission is represented by a
group of icons, and a name label for that wing. Each ship “dot” has
four states:
50
Page 52

The Great War
Ship present, and hull integrity is above 50%
Ship present, but hull is below 50% integrity
Ship not present, has departed area
Ship not present, has been destroyed
If a wingman is taking damage, his icon will flash briefly. The only wings
supported by this gauge are Alpha, Beta, Gamma, Delta, and Epsilon.
17. Comm Menu - This menu displays your messaging options. Simply
choose the number corresponding to the order/target you want.
18. Damage Display - Shows any subsystem damage you have taken on your
ship, including overall Hull Integrity. Unless a non-hull subsystem is at
0% (destroyed), it will auto-repair. Support ships may also be used to
repair damaged/destroyed subsystems.
19. Objective Notifier - This indicator will appear when a Primary, Secondary,
or Bonus objective is resolved (as either successful or failed). A number
following the text indicates how many objectives of that type have been
resolved. Example: If the gauge displays “Primary Objective Complete
(1/2)”, that means you have resolved one of two Primary objectives.
™
20. Threat Gauge - The circular indicator on the left flashes when a
hostile ship is firing Primary/laser weapons at your ship. The crosshair
indicator on the right flashes when a hostile ship is attempting to gain
missile lock on you (a low-pitched warning sound will accompany this).
21. Missile/Collision Warnings - The “Launch” indicator will appear when a
locked missile has been launched at your ship. If you use
countermeasures to evade the missile, the indicator will change briefly to
“Evaded”. The “Collision” indicator will flash briefly if you have taken
damage as a result of a ship-to-ship collision. It will also display “Blast” if
you have received damage from being in close proximity to an explosion.
22. Target Orientation - This T-shaped indicator graphically shows the aspect
angle of your current target. If the indicator is in the top half of its orbit
circle, your target is facing you. If it is in the bottom half of its orbit,
your target is facing away from you (with 12 o’clock and 6 o’clock facing
directly at you and away from you, respectively). This information is very
51
Page 53

Descent:FreeSpace
useful when attempting to fire heat/aspect-seeking missiles. Ideally, you
should wait until this indicator is in the bottom half of the orbit before
launching your missiles. Doing so will ensure a much more favorable
convergence angle to your target.
23. Current Target Direction - This triangle essentially points offscreen
toward your target, letting you know the shortest direction to turn in
order to face it.
24. Afterburner Energy - This graphically shows the energy level in your
afterburner reserve.
25. Throttle - This gauge displays information regarding your
throttle and current speed. The number at the top right indicates your
current top speed at full throttle. This number may change based on
your ETS (Energy Transfer System) settings. The number to the left of
the bar indicates your current speed. If you have speed matching (or
auto-speed matching) turned on, there will be a small “M” icon next to
this number.
26. Target Hull/Shield Icon - The number indicates your current target’s
Hull Integrity. If your target has shields, it will display four small shield
quadrants around this number. Functionally, this is the same as the
Target Overhead.
27. Support Status - If you call for rearm/repair support, this will show the
current status of the incoming support ship. If this gauge shows “busy”,
the support ship is currently rearming another friendly fighter. If it shows
“Obstructed”, there is an object blocking the support ship from reaching
you. Otherwise, this will show the estimated time-to-dock based on your
current position.
28. Weapon Linking - This is a smaller version of the Weapons Display.
It simply shows the arming/linking status of your current weapon banks.
29. Weapons Energy - This is a graphical indication of your current
Primary weapons energy bank. When this reserve is depleted, you will be
unable to fire primary weapons until it has received more energy. If you
have the “G” portion of your ETS system set to zero, this reserve will
not recharge.
52
Page 54

The Great War
30. Offscreen Indicator - This shows the offscreen position of your current
target, and the direction you should turn to face it. The two trianglehalves will move further apart the farther offscreen your target is. The
number indicates the physical distance in meters between you and
your target.
31. Target Brackets - Indicates your current target. The number in the
corner indicates the physical distance between you and the target.
32. Lead Indicator - These two reticle-like indicators show where you should
fire your weapons in order to correctly “lead” your target. Note that this
is based on its current flight speed and trajectory, and cannot guarantee a
weapons hit. The inner crosshairs will only display if you are within firing
range of your currently armed Secondary weapons. Likewise, the outer
circle displays when in range of your current Primaries.
33. Aspect Diamond - This indicator displays when you are attempting to
gain target lock with an aspect-seeking missile (like the Hornet or
Tsunami). The closer this diamond moves to your target onscreen, the
closer you are to achieving lock. Once lock is achieved, it will be
surrounded by rotating arrows.
™
34. Closest Attacking Hostiles - This hollow red triangle indicates the current
offscreen direction of a ship that is attacking you. You may see several of
these at one time if you have multiple threats.
35. Locked Missile Direction - This yellow triangle will display when a missile
is incoming, and its position around the orbit reticle indicates its offscreen
position. The line protruding from this gives a graphical representation
of its distance from you. The longer the line, the further it is from you.
36. Subsystem Targeting Bracket - This indicates the position of your currently
targeted subsystem. If the subsystem is on the facing side of your target, it will
be a simple square. If the subsystem is not within line-of-sight on the far side of
the targeted ship, it will display as a diamond with an “X” through it. Grey
indicators are displayed for destroyed subsystems.
53
Page 55

Descent:FreeSpace
MESSAGING WINGMEN
The in-game Comm Menu is one of the most powerful features of Descent:
FreeSpace. With it, you can order wingmen to do numerous tasks, request
reinforcements, and call for rearming and repair.
The menu itself is context-sensitive, and will only display choices that are
currently available for the selected ship.
Message What?
The first level of options (labeled “Message What?”) determines who to send
the message to. Your choices at this level are:
1. Ships - use this to message a specific ship by name/designation
2. Wings - this will send the message to an entire flight wing
(Alpha, Beta, etc.)
3. All Fighters - message will go to every friendly fighter/bomber currently in
the battle area.
4. Reinforcements - If the current mission has reinforcement wings, this will
allow you to call them in. Once they have arrived, they may be messaged
using options 1-3.
5. Rearm - This will call for a Support ship, if one is available in the current
mission. See Rearm/Repair on page 57 for details.
6. Abort Rearm - This will cancel your Rearm/Repair request.
If an option is greyed out in this menu, then it is not a valid choice at the
moment. Example: If you have a full load of missiles and have no subsystem
damage, you will not be able to call in a Support ship for Rearm/Repair.
Select Ship
If you have chosen option 1 above, you will be given a list of ships to direct
your order to. They will be listed by their mission name/designation.
If you often find yourself wishing to direct orders to arbitrary groups of ships
that don’t necessarily belong to one wing, you may wish to familarize yourself
with the Hotkey system. See page 66 for details on Hotkeys.
54
Page 56

The Great War
What Command?
If you have chosen to message a Ship or Wing, the next Comm Menu level will
reflect the orders you’re allowed to direct.
NOTE: This menu level will not appear if you have used one
of the messaging shortcut keys ( - for attack my target,
- for Form on my Wing). Simply choosing the target
of the order in the previous menu is enough.
Depending on the source and target of the order, several of these orders will be
available to you on the “What Command” menu level:
* Destroy my target - Your wingmen will attack the ship you have targeted.
* Disable my target - Your wingmen will attempt to disable your targeted
ship by destroying its Engine subsystem(s). They will not disable it if doing
so would likely destroy the ship.
* Disarm my target - Ships given this order will attempt to remove the
offensive capabilities of your target. They will first attempt to destroy its
Weapons subsystem, making its defensive fire much less accurate. They will
then attempt to take out all turrets and missile launchers. The target of this
order must be a large freighter, cruiser, or capital-level ship. They will not
disarm it if doing so would likely destroy the ship.
™
* Destroy subsystem - Friendlies given this order will attempt to knock out
the subsystem you currently have targeted on the hostile ship. Once this
subsystem is destroyed, the friendlies will cease fire until issued another
order. They will not destroy the subsystem if doing so would likely destroy
the ship.
* Protect my target - Ships issued a protect order will attempt to guard your
targeted ship. If hostile ships attack or otherwise threaten that target, your
wingmen will engage them.
* Ignore my target - All friendlies will ignore your target, and will not freely
engage or attack it. Note that this is not a ship-specific order. Regardless
of who you issue it to, all friendlies will begin ignoring that target.
* Form on my wing - Use this to order your wingmen to form up around
your ship, and to stop pursuing their previous orders.
55
Page 57

Descent:FreeSpace
* Cover me - Ships issued this order will attempt to engage any ships
attacking you.
* Engage enemy - This is essentially the opposite of “form on my wing”
order. Use this to give your wingmen permission to engage any and all
hostiles in the battle area.
* Depart - Requests that your wingmen activate their subspace drives and
leave the battle area. Once a wingman has departed, he may not be
recalled.
NOTE: Like any intelligent wingman, your wingmen in
FreeSpace have a keen sense of self-preservation. Regardless of
their standing orders, if they are attacked or otherwise
threatened sufficiently, they will turn on their attacker. If they
destroy the attacker, or determine it is no longer a threat, they
will then return to their standing orders.
56
Page 58

The Great War
REARMING & REPAIRING
In many missions you may run out of missiles, or receive serious subsystem
damage on your ship. Terran Command often has a Support Ship fueled up and
ready to assist you and your squadmates.
In-flight rearming and repairing in Descent: FreeSpace is a simple matter.
Once you have used the Comm Menu to request for Rearm/Repair (either
through the - shortcut, or the “C” Comm Menu), a Support Ship will
quickly enter the battle area via subspace. If a Support Ship is already in the
battle area, it will note your request.
When it has finished docking with any wingmen who had previously requested
support, it will approach your ship. The Support Status gauge will give you an
estimated time to docking, based on your distance to the support ship.
As the ship approaches, drop your throttle to zero and wait. The Support Ship
will maneuver into position and quickly dock with your fighter/bomber. It will
then take note of your systems status and begin replenishing your missile banks
and energy reserves.
NOTE: You can target the support ship by pressing - .
™
GTF Hercules being rearmed by a Support Ship
57
Page 59

Descent:FreeSpace
If any of your onboard subsystems have been damaged or destroyed, it will also
repair or replace them.
NOTE: Your fighter’s Hull Integrity is a measure of the
exterior armor’s strength and damage level. While Support Ships
can repair damaged electronics subsystems, it can do nothing to
repair damaged armor and Hull Integrity.
Once the support procedures are complete, the ship’s pilot will notify you and
will disengage from your fighter. You are also free to abort the Rearm/Repair
procedure at any time using the Comm Menu, or by simply breaking the docking
seal by accelerating away from the Support Ship.
MISSILE FIRING AND
COUNTERMEASURES
Heat-seeking vs. Aspect-seeking
There are two types of homing missiles in Descent: FreeSpace: heat-seeking and
all-aspect-seeking.
Heat-seeking missiles require no lock time, and may be launched as soon as
your missile bank is ready to fire. The missile will find the nearest hostile target in
its forward view cone and lock onto it. If the target leaves the missile’s view
cone, it will attempt to lock onto another hostile target.
An aspect-seeking missile will not lose lock if its target leaves the view cone. It
will turn to pursue the target until it makes contact or runs out of fuel. However,
aspect-seeking missiles require the pilot to gain aspect lock on the target before
launching.
Gaining aspect lock is a simple procedure, but can become difficult if your
target is highly maneuverable. If you have an aspect-seeking missile such as the
Hornet or Interceptor armed, the “aspect diamond” on the HUD will appear and
begin tracking your target onscreen. As the target moves around your forward
viewscreen, the aspect diamond will follow, attempting to close the distance.
Once the diamond is centered on the target, lock is achieved.
58
Page 60

The Great War
The Aspect Diamond, as the pilot attempts to achieve lock on a Shivan Fighter.
The more advanced bomb-type missiles such as the Tsunami and Harbinger will
require longer aspect-lock times than the lighter ordinance.
Countermeasures
All space fighters are equipped with a set of specific missile countermeasures.
(Default key binding is ) These are small electronics “decoys” designed to
mimic the flight signatures of that fighter. When dropped behind the ship, they
will attempt to fool incoming missiles into tracking them instead of the fighter.
Countermeasures are the most effective when the incoming missile is at close
range. Unfortunately, if you wait too long to drop them, you risk sustaining
damage from the missile blast as well as direct impact. Practice is the key.
™
Advanced aspect-seeking missiles are somewhat less susceptible to
countermeasures than other missiles.
If you deplete your supply of countermeasures during a mission, you may call
for Rearm/Repair and the support ship will replenish you.
Your Countermeasure supply is displayed above the
Kills counter in the lower right of your HUD display
Also be warned that enemy fighters are also equipped with countermeasures.
59
Page 61

Descent:FreeSpace
ADVANCED TARGETING
Descent: FreeSpace features many different targeting controls, each with their
own uses. As you become more familiar with space combat, you may wish to
learn more of the advanced targeting features.
One such feature is Auto-Targeting (default binding is - ), and is
indicated in the lower right of your HUD. When Auto-Targeting is enabled,
your ship’s computer will automatically target the next closest hostile when the
current one is destroyed. It will also change targets if the previous target leaves
the battle area.
Using Auto-Targeting ensures that you always have a nearby hostile fighter in
your sights.
Other useful targeting controls include:
• Target next ship in reticle (default binding )
• Target nearest Hostile attacking Self (default binding )
• Target next subsystem (default binding )
(See the Reference Card for a full list of advanced targeting controls.)
MATCHING SPEED
One of the most effective dogfighting techniques is to match speed with your
target (default binding ). When speed matching is enabled, your fighter will
automatically adjust its velocity to match that of your target. This is useful if you
are engaging a slower fighter, and do not wish to overshoot it.
The “M” icon indicates that you are matching speed with your current target.
60
Page 62

The Great War
The standard form of speed matching will only apply to your current target. If
you select a new target, it will turn off. If you wish speed matching to be enabled
for all targets, use auto-speed matching (default binding - ).
™
ENDING THE MISSION
You may leave the battle area of a mission at any time by engaging your
subspace drive (default binding - ). This will cause your fighter to make a
subspace jump back to the Galatea, or other base of operations. Your subspace
drive has a brief warm-up period, during which you can cancel the jump by
hitting .
Doing this will end the current mission and all objectives will be evaluated in
their current state. In most missions you are informed when it is time to leave
the battle area.
FRED (FREESPACE MISSION EDITOR)
FRED is the Descent: FreeSpace mission editor. With it, you will be able to
create a single or multiplayer mission for Descent: FreeSpace. For more
information on how FRED works, please refer to the Help tab from within
FRED. All instructions will be listed there, as well as a tutorial to help get you
started.
61
Page 63

Descent:FreeSpace
RANK, PROMOTIONS, AND MEDALS
As you rack up combat experience in Descent: FreeSpace, you will be promoted
from time to time. Some promotions result in increased responsibilities in
missions.
The Pilot ranks of the Galactic Terran Alliance, in order, are as follows:
Ensign
Lieutenant Junior Grade
Lieutenant
Lieutenant Commander
Commander
Captain
Commodore
Experience is primarily accumulated by meeting your objectives in each mission.
Fighter kills, exceptional performance, and preservation of military hardware all
affect your experience level as well. Additionally, calling in for needless
reinforcements is a sure way to hurt your potential promotions and
commendations.
You may also receive service medals for outstanding performance in a mission.
You may view your Pilot’s accumulated medals in the Barracks/Medals screen.
There are two basic types of medals granted to GTA pilots. The first is the
“star” pin granted to pilots who achieve an outstanding number of kills in any
given mission. Pilots may be granted bronze, silver, or gold stars, depending on
how many kills they have achieved.
62
Page 64

The Great War
™
The other, ribbon-type service medals are granted to pilots based on specific
situations and achievements.
Multiple medals of any type may be awarded to one Pilot. You can see how
many medals your Pilot has by placing your mouse over it in the Medals display
off the Barracks room.
ENERGY TRANSFER SYSTEM (ETS)
The ETS system is simple. Each fighter has a reactor that produces a certain
amount of power. This power is directed to one of three primary systems:
weapons, shields, and engines. The ETS is simply a way for pilots to change the
amount of power directed to each, based on current need.
NOTE: Until the GTA acquires shield technology, the ETS
will only operate on weapons and engines. Once fighters are
equipped with shielding systems, the shield component of the
ETS will appear.
On your HUD, you’ll see the ETS display in the lower right. The three bars
represent the three areas of energy allocation ( for guns/weapons, for
shields, and for engines).
Shield energy rate boosted, at the cost of
Engine output and Guns/Weapons recharging.
With the default bindings, you may use the six keys found above the arrow keys
Delete
Home
on your keyboard ( , , , etc) to control the energy allocation to each
Insert
system. You’ll notice as you increase power to one system, the other two levels
will drop.
63
Page 65

Descent:FreeSpace
The effects of this balance is described below:
Guns/Weapons - The ETS level for guns determines how quickly your Primary
energy bank recharges. If ETS for guns is set to zero, it will not recharge at all.
You will still be able to fire until your bank depletes, but it will not receive more
energy until you raise its ETS setting. Likewise, raising the ETS setting will
recharge the reserve at a faster rate.
Shields - A high ETS setting for shields will cause your four shield quadrants to
recharge at a faster rate. The energy is distributed to the four quadrants evenly.
If one or more quadrant is at full strength already, the energy will essentially be
lost, and not re-routed elsewhere.
Engines - Increasing power output to engines will raise the top speed of your
fighter by 20-30%. The exact amount varies from fighter to fighter, dependent
on their reactor capacity and make of engine. Similarly, decreasing the engine
ETS setting below its default will cause your engines to operate at below normal
capacity, lowering your top speed by up to 30%.
NOTE: If an energy reserve is at full capacity (full weapons
bank, or full shield charge), the energy directed to that system
will not be automatically redirected, and will be “lost”.
Therefore, if your ship has a full weapons bank, you may wish to
drop its ETS setting to move the extra energy to engines.
In addition to changing the rate at which reactor power is distributed, you may
also shunt bursts of energy from shields to weapons, and back again without
affecting power distribution settings. The default bindings for these two controls
are:
Scroll Lock
- transfer energy from Primary weapons/guns to shields.
Scroll Lock
+ - transfer energy from Shields to Primary weapons/guns
Efficiently managing a fighter’s energy system is crucial to survival in many
combat situations.
64
Page 66

The Great War
WEAPONS SELECTION & LINKING
Many GTA fighters come equipped with multiple Primary and Secondary
weapons banks. Only one weapon type may be loaded out into each bank.
With Primary weapons, you have the option of arming one or both of the two
possible banks. Arming only one bank is useful when firing weapons like the
Disruptor Cannon, which is designed to disable, but not destroy, a target.
Primaries set to single- and linked-fire modes
In fighters that carry two Primary banks, you may also arm both at once
(default primary cycle keys are and ). This is called linking. When you
<
have two cannons linked, both will fire together. However, because of the
increased energy needs, they will fire at a slightly slower rate than when
individually fired.
>
™
Secondary missile-type weapon linking is done somewhat differently. Only one
Secondary bank may be armed at any one time, but you can set that bank to dual
fire mode (default binding - ). This will launch twice the number of
missiles per burst than single-fire mode.
Secondaries set to single- and dual-fire modes
65
Page 67

Descent:FreeSpace
HOTKEYS
Hotkeys are one of the more advanced features in Descent: FreeSpace. They
are designed to supplement the Comm Menu and provide greater flexibility to
your wingman messaging.
Hotkeys may be defined for - on your keyboard. By default, is
assigned to Alpha wing, to Beta, and to Gamma.
Hotkey Usage
After issuing an order using shortcut keys such as - or - ,
you may then ignore the Comm Menu and hit a defined Hotkey to direct that
order to only those ships. The ships assigned to one hotkey may be one entire
wing, members of several wings, individual ships, or any combination thereof.
For example, let’s say Alpha and Beta wings are comprised of bombers, while
Gamma wing is fighters, who are to cover the bombers. If you used the Comm
Menu, you would only be able to redirect the entire Gamma wing, or each
individual Gamma ship by itself. If you wanted to make Gamma cover both
Alpha and Beta, it would take many keypresses.
However, if you assigned Gamma 1 and 2 to the hotkey, and Gamma 3 and
4 to , you could quickly direct Gamma to split and cover both Alpha and
Beta. Or order two Gamma ships to cover Beta while ordering the other two
Gammas to attack an enemy freighter.
This allows complete flexibility. You can quickly direct orders to arbitrary
groups of ships, including specific members of different flight wings, as well as
individual ships.
66
Page 68

The Great War
Defining Hotkeys
Hitting from any mission or pre-mission screen, including the gamescreen
itself, will take you to Hotkey Assignment. This is where you change or add
hotkey definitions.
™
The screen lists all currently known ships for the current mission, divided into
“Friendly” and “Hostile” groups. Wings are shown with a small triangle icon
next to their name . Left-clicking on these icons will expand them to show
their individual ship members.
To the left of each ship/wing name, you’ll see the hotkey assigned to it (if any).
Alpha wing will always be shown here assigned to by default. Beta and
Gamma will be assigned to and , if they are present in the mission.
Double-clicking on a ship/wing name will add or remove it from the currently
selected hotkey. You may also use the and buttons to add or remove
ships from the current hotkey.
The current hotkey is shown in the upper right. To change it, simply press the
corresponding function key ( thru ).
Note that any ship/wing may be a member of multiple hotkeys.
67
Page 69

Credits
For Volition, Inc.
Original Design
Adam Pletcher & team
Programming
John Slagel
Mark Allender
Mike Kulas
Alan Lawrance
Dave Baranec
Dave Andsager
Jason Hoffoss
Sandeep Shekar
Real-time Art
Frank Capezzutto III
Peter Han
Jasen Whiteside
Adam Pletcher
Cutscene Art & Animation
Adam Pletcher
Frank Capezzutto III
Mike Comet
Peter Han
Mitri Vanichtheeranont
Rick Barrows
Duncan McPherson
Clarissa Novalis
Phil Strang
Juliet Youngren
Jeffrey Coleman
Mark Allender
Dan Kuhlman
Debra Larson
Jeremy Bernal
Administrative & Technical
Support
Misty Goodman
Brad Ashmore
Bob Paleczny
For Interplay Productions
Executive Producer
Trish Wright
Producer
Jim Boone
Director of Quality Assurance
Chad Allison
Mission Design
Sandeep Shekar
Jim Boone
Brad Johnson
Duncan McPherson
Jasen Whiteside
Music & Sound Effects
Dan Wentz
noiz audio, Steven vonKampen
Story & Writing
Adam Pletcher
Mike Kulas
Mission Editor & other Tools
Jason Hoffoss
Mark Allender
Sandeep Shekar
John Slagel
Voice Actors
Eric Sizemore
Stacie Hirsch
Director of Compatibility
Phuong Nguyen
QA Managers
Colin Totman
Steve Victory
IS Manager
Frank Pimentel
QA Project Supervisor
Jeremy Ray
Assisting QA Project
Supervisors
Greg Baumeister
Steve McLafferty
Compatibility Technicians
Louie Iturzaeta
Marc Duran
John Parker
Derek Gibbs
68
Page 70

Testers
Chad Nicholas
Chris English
Ian Wall
Austin Coulson
Rafael Lopez
Dennis Presnell
Edward Hyland
Rodney Smith
Matthew Rhoades
Sammy Matsushima
Dan Levin
W. R. Saunders
Jason Nelson
Jacob Devore
Tom Quast
Savina Greene
QA IS Technicians
Bill Delk
Chris Peak
Kyle Shubel - for all his help on all those long days.
Credits
Director Of Marketing
Karen Schohan
Product Marketing Manager
Alison Quirion
Communications Manager
Erika Price
Traffic Manager
Steve Spandle
Package Design
Craig Owens
Larry Fukuoka
Manual Layout
Schlieker Design
Special Thanks
Chad Nicholas
Edward Hyland
69
Page 71

Customer Support
INTERPLAY LIMITED
90-DAY WARRANTY
Interplay warrants to the original purchaser of this Interplay Productions™ product that the
compact disc or floppy disk(s) on which the software programs are recorded will be free from
defects in material and workmanship for 90 days from the date of purchase. If the compact disc
or floppy disk(s) is found defective within 90 days of original purchase, Interplay agrees to
replace, free of charge, any product discovered to be defective within such period upon receipt
at its factory service center of the product, postage paid, with proof of the date of purchase.
This warranty is limited to the compact disc or floppy disk(s) containing the software program
originally provided by Interplay and is not applicable to normal wear and tear. This shall be void
if the defect has arisen through abuse, mistreatment, or neglect. Any implied warranties
applicable to this product, including warranties of merchantability and fitness for a particular
purpose are disclaimed. Interplay disclaims all responsibility for incidental or consequential
damages.
Some states do not allow limitations as to how long an implied warranty lasts and/or
exclusions or limitations of incidental or consequential damages so the above limitations and/or
exclusions or liability may not apply to you. This warranty gives you specific rights, and you may
also have other rights which vary from state to state.
Limited Warranty
If the compact disc or floppy disk(s) should fail after the original 90-day warranty period has
expired, you may return the software program to Interplay at the address noted below with a
check or money order for $5.00 (U.S. currency), which includes postage and handling, and
Interplay will mail a replacement to you. To receive a replacement, you need to enclose the
original defective compact disc or floppy disk(s) in protective packaging accompanied by: (1) a
$5.00 check or money order, (2) a brief statement describing the defect, and (3) your return
address. If you have a problem with your software, you may wish to call us first at (949) 553-
6678. If your compact disc is defective and a replacement is necessary, U.P.S. or registered mail
is recommended for returns. Please send the defective disc(s) only (not the box) with a
description of the problem and $5.00 to:
Warranty Replacements
Interplay Productions
16815 Von Karman Avenue
Irvine, CA 92606
Copying Prohibited
This software product and the manual are copyrighted and all rights are reserved by Interplay
Productions and are protected by the copyright laws that pertain to computer software. You
may not copy the software except that you may make one copy of the software solely for backup
or archival purposes. You may not loan, sell, rent, lease, give, sub license, or otherwise transfer
the software (or any copy). You may not modify, adapt, translate, create derivative works,
decompile, disassemble, or otherwise reverse engineer or derive source code from, all or any
portion of the software or anything incorporated therein or permit or encourage any third party
to do so.
NOTICE: Interplay reserves the right to make modifications or improvements to the
product described in this manual at any time and without notice.
70
Page 72

Customer Support
TECHNICAL SUPPORT
If you have any questions about this, or any other Interplay product, you can reach our Customer
Service/Technical Support Group at: Interplay, 16815 Von Karman Avenue, Irvine, CA 92606 Attn:
Customer Service. Customer Service is available 24 hours a day through our Automated Customer
Service system, with a Customer Service representative available during normal business hours at (949)
553-6678.
Please have your system information available, or better yet, try to be at your computer. The
more detailed information you can provide our support personnel, the better service we can
provide you.
Internet
You can reach Interplay by sending Internet E-mail to “support@interplay.com”. Many
Interplay demos and patches are available at Internet FTP sites. To visit our World Wide Web
site, point your browser to: “http://www.interplay.com” or you may ftp to ftp.interplay.com.
The Interplay BBS
We have a 24-hour, 7-day a week multiline BBS available for customer questions, support and
fixes. The number is 949-252-2822. Modem settings are 300-28.8k Baud, V.32bis, V.42bis,
8-N-1. You also may contact our BBS over the Internet. Telnet to bbs.interplay.com. This is a
free service. (Excluding toll charges.)
America Online
You may E-mail Interplay Customer Support at IPTECH.
Compuserve
We are available for IBM and compatible on-line support. We are located in the Game
Publishers B Forum, type GO GAMBPUB at any “!” prompt. Then select “Section 4” for
Interplay Productions. You can leave technical support questions there. You can also download
fixes and demos from Library 4 in GAMBPUB. The best place for game play hints about our
games is in the GAMERS forum. If you are not already a CompuServe member, you can call
CompuServe toll-free at 1-800-524-3388 and ask Representative #354 for a free introductory
membership and a $15 usage credit. For game play hints look in the Gamer’s Forum (GO
GAMERS). Besides technical support for Interplay products, CompuServe offers many other
services, including communications, reference libraries, hardware and software support, travel,
games and much more.
Hintline
Hints are available for this title and other Interplay titles. You can reach our hintline at
1-900-370-PLAY (1-900-370-6869 in Canada). The charge for this service is $0.95 for every
minute. For Canada, these charges will be in Canadian dollars. All hint questions will be
directed to this "900" service. No hints will be given on our Customer Service lines. You must
have a touch-tone phone to use this service. The hintline is open 24 hrs a day. All long
distance charges are included in these prices. Callers under the age of 18 must get parental
permission before calling the hintline. The hintline is only available in the U.S. and Canada.
Charges subject to change without notice.
71
Page 73

Customer Support
elcome to the Interplay Web! As a company dedicated to providing innovative,
W
high-quality interactive entertainment software, we are always striving to stay as
close as possible to the leading edge of technology. This Web site is the latest
example of our ongoing effort to provide a wealth of information and opportunities
to you.
s a company of fanatic gamers, we love the idea of gamers all over the world
A
tapping into cyberspace to see, touch and feel our latest games. No hype, no
marketing campaign; just great games. To make it work, our goal is to keep this site
fresh and new, to make it a place where you can tell US what you like about our
games... and what you don’t like about them. So use the feedback options on these
pages and sound off.
njoy your visit in our Web site, explore all the different areas we have to offer, and
E
come back soon. Check us out in the weeks and months ahead; we will be
introducing new and exciting areas for you to experience.
Once again, welcome.
Brian Fargo
C.E.O.
Interplay’s World Wide Web site is an Internet service designed to give you the latest
information about Interplay and our products.
This site features our demos, upgrades, product information and ordering
information.
HOW TO GET THERE
From your Internet account, point your favorite
browser to:
www.interplay.com
72
Page 74

STRATEGY GUIDE
WITH THE OFFICIAL GUIDE YOU GET:
WITH THE OFFICIAL GUIDE YOU GET:
❘❙ Detailed walkthroughs for each level
❘❙ Detailed walkthroughs for each level
❘❙ Recommended ship configurations
❘❙ Recommended ship configurations
❘❙ Multiplayer combat coverage
❘❙ Multiplayer combat coverage
❘❙ Complete mission tree helps to uncover every path
❘❙ Complete mission tree helps to uncover every path
❘❙ Plus, tips for creating the best dogfights!
❘❙ Plus, tips for creating the best dogfights!
TO ORDER:
TO ORDER:
Call Toll Free
Call Toll Free
1-800-428-5331
1-800-428-5331
(mention source code DESC)
(mention source code DESC)
™
Or Contact Your Local Book,
Or Contact Your Local Book,
Software or Electronics Retailer
Software or Electronics Retailer
ISBN 1-56686-787-8
ISBN 1-56686-787-8
www.bradygames.com www.interplay.com
www.bradygames.com www.interplay.com
 Loading...