


|
|
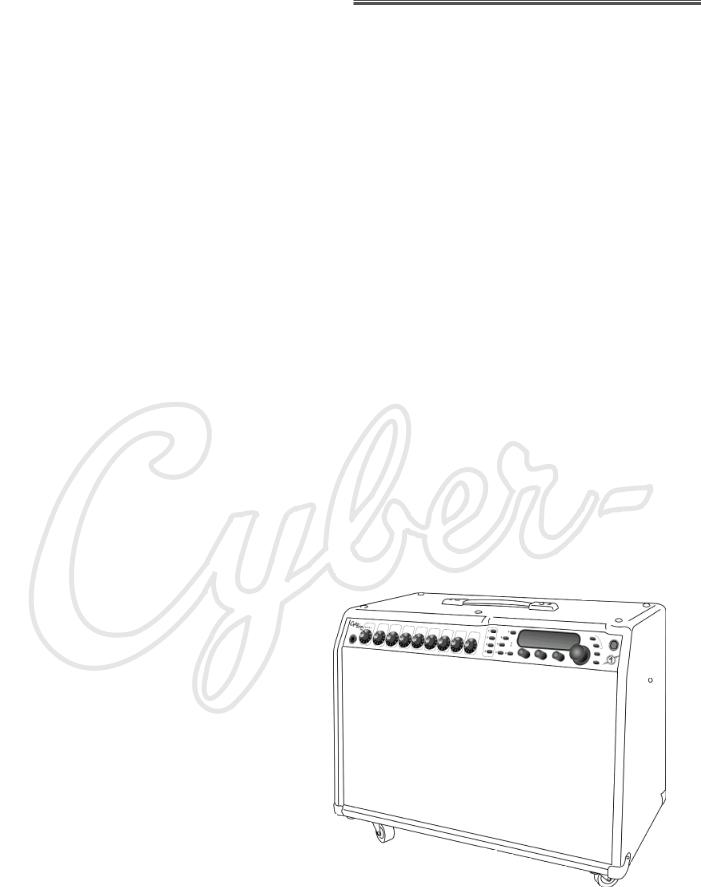
Fender® Cyber–Twin® SE Amplifier |
|
|
|
2 |
|
|
|
||
|
|
|
|||
|
|
|
|||
|
|
|
|
|
|
|
|
|
|
|
|
|
|
|
|
|
|
|
|
|
|
|
|
A PRODUCT OF:
FENDER MUSICAL INSTRUMENTS CORPORATION
CORONA, CA USA
Copyright ©2004 by FMIC
Trademarks
Fender®, Cyber–Twin®, Telecaster®, Stratocaster®,
Blackface™, Dyna–Touch™, Mr. Gearhead™,
Virtual Tone Interpolation™, Hot Rod™, Bassman®, Deluxe Reverb®, Princeton®, Twin Reverb®, Innovate...Don’t Emulate® and all related logos are trademarks or registered trademarks of FMIC.
Other trademarks are property of their respective owners.
www.f e n d e r.com www. m r g e a r h e a d .net

|
Fender Cyber––Twin SESEAmplifier |
|
|
|
|
|
3 |
||
|
® ® |
® ® |
|
|
|
|
|||
|
|
|
|
|
I m p o r t a n t S a f e t y I n s t r u c t i o n s
•This symbol warns the user of dangerous voltage levels localized within the enclosure of the unit.
•This symbol advises the user to read all accompanying literature for safe operation of the unit.
•Read, retain, and follow all instructions. Heed all warnings.
•Only connect the electric line cord to an earth grounded AC receptacle in accordance with the voltage and frequency ratings listed under INPUT POWER on the rear panel of this product.
•WARNING: To prevent damage, fire or shock hazard, do not expose this unit to rain or moisture.
•Unplug the AC power line cord before cleaning the unit exterior (use a damp cloth only). Wait until the unit is completely dry before reconnecting it to power.
•Maintain at least 6 inches of unobstructed air space behind the unit to allow for proper ventilation and cooling of the unit.
•This product should be located away from heat sources such as radiators, heat registers, or other products that produce heat.
•This product may be equipped with a polarized plug (one blade wider than the other). This is a safety feature. If you are unable to insert the plug into the outlet, contact an electrician to replace your obsolete outlet. Do not defeat the safety purpose of this plug.
•Protect the power cord from being pinched or abraded.
•This product should be serviced by qualified service personnel when: the power supply cord or the plug has been damaged; or objects have fallen, or liquid has been spilled onto the product; or the product has been exposed to rain; or the product does not appear to operate normally or exhibits a marked change in performance; or the product has been dropped, or the enclosure damaged.
•Only use a cart or stand with this product that is recommended by this product’s manufacturer.
•The power supply cord of this product should be unplugged from the outlet when left unused for a long period of time, or during electrical storms.
•Do not drip nor splash liquids, nor place liquid filled containers on the unit.
•CAUTION: No user serviceable parts inside, refer servicing to qualified personnel only.
•Fender® amplifiers and loudspeaker systems are capable of producing very high sound pressure levels which may cause temporary or permanent hearing damage. Use care when setting and adjusting volume levels during use.
FCC COMPLIANCE NOTICE
This equipment has been tested and found to comply within the limits for a Class B digital device, pursuant to Part 15 of the FCC rules. These limits are designed to provide a reasonable protection against harmful interference in a residential installation. This equipment generates, uses and can radiate radio frequency energy and if not used in accordance with the instructions, may cause harmful interference to radio communications and there is no guarantee that interference will not occur in a particular installation. If this equipment does cause harmful interference to radio or television reception, which can be determined by turning the equipment off and on, the user is encouraged to try to correct the interference by one or more of the following measures: reorient or relocate the receiving antenna, increase the separation between the equipment and receiver, connect the equipment into an outlet on a circuit different from that of the receiver. Consult the dealer or an experienced radio/TV technician if help is needed.
www.f e n d e r.com www. m r g e a r h e a d .net

|
|
Fender® Cyber–Twin® SE Amplifier |
4 |
|
|
|
||
|
C o n t e n t s
Quick Start . . . . . . . . . . . . . . . . . . . . . . . . . . . . . 5
Cyber-Twin® SE Introduction and Features . . . . . . 6
1 Overview
Overview Introduction . . . . . . . . . . . . . . . . . . . . . . 8
Front Panel— |
|
•INPUT . . . . . . . . . . . . . . . . . . . . . . . . . . . . |
. 9 |
•TRIM |
9 |
•GAIN |
9 |
•VOLUME |
9 |
•TREBLE / MIDDLE / BASS |
9 |
•PRESENCE |
9 |
•REVERB |
9 |
•MASTER |
9 |
•QUICK ACCESS . . . . . . . . . . . . . . . . . . . . . . . . |
10 |
•SAVE |
10 |
•TUNER |
10 |
•NOISE GATE |
10 |
•TAP |
10 |
•PEAK & MIDI LEDS . . . . . . . . . . . . . . . . . . . . . |
11 |
•HUM REDUCTION |
11 |
•FX LEVEL / FX VAL1 / FX VAL2 |
11 |
•DISPLAY & DATA WHEEL |
11 |
•AMP / FX |
11 |
•UTILITY |
11 |
•EXIT |
11 |
Rear Panel— |
|
•POWER / IEC SOCKET . . . . . . . . . . . . . . . . . . |
12 |
•FOOTSWITCH |
12 |
•EXPRESSION PEDAL |
12 |
•REVERB/FX BYPASS |
12 |
•MIDI IN / MIDI OUT / MIDI THRU . . . . . . . . . . . |
13 |
•SPDIF OUTPUT |
13 |
•HEADPHONES |
13 |
•LINE OUTPUT |
13 |
•EFFECTS LOOP |
13 |
•SPEAKER OUTPUT |
13 |
2 Amp Edit Mode
•NAME CHANGE . . . . . . . . . . . . . . . . . . . . . . . . 14
•TONE STACK TYPE |
14 |
•TONE STACK LOCATION |
14 |
•DRIVE CIRCUITRY |
14 |
•REVERB TYPE |
14 |
•REVERB IN LEVEL (DWELL) |
14 |
•REVERB TONE (SHAPE) . . . . . . . . . . . . . . . . . . 15 |
|
•REVERB TIME |
15 |
•REVERB DIFFUSION |
15 |
•TIMBRE |
15 |
•SPEAKER PHASE |
15 |
•COMPRESSION |
15 |
•NOISEGATE DEPTH |
15 |
•NOISEGATE THRESHOLD |
15 |
•EXPRESSION PEDAL ASSIGNMENT |
15 |
•CONTINUOUS CONTROLLER ASSIGNMENT |
15 |
•REVERB / FX BYPASS |
15 |
3 FX Edit Mode
Effects Edit Menus . . . . . . . . . . . . . . . . . . . . . . . 16
Effects and Parameters Defined . . . . . . . . . . . . . 19
4 Utility Mode
•MEMORY PROTECTION . . . . . . . . . . . . . . . . . 24
•S/PDIF PATCHING |
24 |
•CONTINUOUS CONTROLLER NUMBER |
24 |
•MIDI RECEIVE CHANNEL |
24 |
•MIDI TRANSMIT CHANNEL |
24 |
•MIDI SYSTEM EXCLUSIVE ID |
24 |
•MIDI PRESET MAPPING . . . . . . . . . . . . . . . . . . 25 |
|
•MIDI CONTINUOUS CONTROLLER ECHO |
25 |
•FACTORY PRESET RESTORE |
25 |
•MIDI DUMP UTILITIES |
25 |
•MIDI DUMP ANY PRESET |
25 |
•MIDI DUMP ALL PRESETS |
25 |
5 Appendices
1 MIDI Implementation . . . . . . . . . . . . . . . . . . . . 26
2 MIDI Program and Control Changes. . . . . . . . . 27
3 SysEx ◊ MIDI Dump . . . . . . . . . . . . . . . . . . . . . 28
4 SysEx ◊ Edit Preset Parameters . . . . . . . . . . . . 29
5 SysEx ◊ Handshake . . . . . . . . . . . . . . . . . . . . . 31
6 Troubleshooting . . . . . . . . . . . . . . . . . . . . . . . . 32
7 Specifications . . . . . . . . . . . . . . . . . . . . . . . . . 33
www.f e n d e r.com www. m r g e a r h e a d .net

Fender® Cyber–Twin® SE Amplifier |
|
|
|
5 |
|
|
||
|
Q u i c k S t a r t
1
1) |
Make sure the POWER switch is off. |
|
|||
2) |
Connect the supplied power cord in |
||||
|
|
compliance with the Important Safety |
|||
|
|
||||
2 |
|||||
Instructions on 3. |
|
|
|||
3) |
Turn MASTER level to minimum (1). |
|
|||
4) |
Plug your guitar into the INPUT jack, then |
||||
|
|
switch POWER on. |
|
|
|
5) |
While playing guitar, adjust the TRIM level so |
||||
|
|
that the green LEDS |
are on most of the |
||
|
|
time and the red |
LED |
flashes |
|
occasionally at peak playing levels.
3
4 
6) Rotate the DATA WHEEL to explore Amp Design presets. Amp settings and internal 6 circuitry will change automatically! (You will hear the presets change instantly, before the
motorized knobs “catch up.”)
NOTE: You can interrupt the motorized rotation of a knob simply by grabbing it and turning it.
7) Turn to page 8 for an overview of the basic operation of your Cyber–Twin SE™.
Note on the Cyber–Twin SE™ presets
Custom Shop presets were created by various players fluent in the corresponding musical styles. The appropriate guitar was used wherever possible, ala Jimi with a maple-necked Stratocaster®.
Consequently, some presets may seem to be more “trebly” or “bassy” than you would prefer, or seem louder or than some of the other presets. This is natural, because if person “A” plays a Telecaster® in a tiled room, and “B” uses a Jazz guitar in a carpeted room, they will achieve very different end results. You can easily move
the settings and store your changes if desired. Most of our Cyber-presets are designed to let the unique character of your instrument and playing style come through. That’s why thousands of pros and hobbyists alike have
the Cyber-Twin® SE to their tone toolbox!
www.f e n d e r.com www. m r g e a r h e a d .net
|
|
Fender® Cyber–Twin® SE Amplifier |
6 |
|
|
|
||
|
I n t r o d u c t i o n
Your new Cyber-Twin® SE amplifier is the crowning achievement of Fender’s most advanced research and development project. Brought to you by the same Tone–team that created the original Cyber–Twin™ amplifier, the Cyber-Twin® SE (Second Edition) is refined and updated with additional amp designs and effects. Cyber–Series amplifiers are endowed with Fender’s exclusive Virtual Tone Interpolation™ technology (patent number 6,222,110). VTI™ technology enables the Cyber-Twin® SE amplifier to be different amplifiers according to circuit design. Starting with a virtual circuit board, the Cyber-Twin® SE amplifier "rewires" its fundamental architecture (tubes, resistors, capacitors, etc.) to become the essence of all the amplifier greats — Fender’s Blackface™, Dyna–Touch™, Tweed and Modern amps, and even the best of the British amps!
The Cyber-Twin® SE amplifier allows you to be the amp designer. Start with one of 150 permanent amp and effect setups stored within the Cyber-Twin® SE amp—twist some knobs, make some changes, then SAVE to one of the 100 rewritable preset locations reserved onboard for your original amplifier designs. MIDI implementation on the Cyber-Twin® SE amplifier enables you to transfer presets to and from the amp for backup to a PC, or for exchange with other Cyber-Twin® SE amplifier players.
The Cyber-Twin® SE amplifier also puts a huge array of studio–quality effects at your command: Reverb, Modulation and Delay effects, enough to satisfy most any sonic appetite. And many are in stereo, so you can use the line outputs or headphones to enjoy a fully ambient stereo dimension. The Cyber-Twin® SE amplifier’s Dyna–Touch™ power amp circuitry and Celestion® speakers deliver powerful, responsive Tone to you and your audience.
T h a n k y o u f o r c h o o s i n g F e n d e r ®
— To n e , Tr a d i t i o n a n d I n n o v a t i o n — s i n c e 1 9 4 6
www.f e n d e r.com www. m r g e a r h e a d .net

Fender® Cyber–Twin® SE Amplifier |
|
|
|
7 |
|
|
||
|
C y b e r- Tw i n ® S E A m p l i f i e r F e a t u re s
•40 character display shows you menu options, prompts and amp design information
•The data wheel enables you to select a dynamic range of settings
•5 modes of operation: •Play •Amp Edit •FX Edit •Utility •Tuner
•8 motorized knobs automatically rotate to adjust to preset selections, MIDI continuous controller sequences and input from a MIDI pedal or analog expression pedal
•250 amplifier design presets:
•Fender Custom Shop – 100 custom amp designs including effects
•Player’s Lounge – 100 of your own (rewritable) amp and effects designs
•Your Amp Collection – 50 classic amp designs as originally manufactured
•MIDI implementation:
•24 continuous controllers for automatic, sequenced control of amplifier settings
•An assignable continuous controller for remote control of a dynamic parameter
•4 system exclusive functions for transferring presets and updating systems
•16 drive circuitry selections: • 12 tube types, • 4 solid state types including new Extreme setting
•2 vacuum tubes are used in the tube drive and the analog circuitry, (12AX7WC), now externally accessible
•6 tone stacks, each with 2 location parameters (before/after the drive circuitry)
•43 FX (effects) selections with 4–5 adjustable parameters each:
•10 delay FX • 11 modulation FX • 3 special FX • 4 FX combinations • 14 new FX
•11 Reverb types with 4 adjustable parameters each
•4 compression level settings
•A hum reduction button to reduce line noise
• 3 noise gate levels with an adjustable depth parameter
•8 timbre types give instant tone shaping for style accent or balance
•4 line/speaker phase settings allow you to reverse the polarity of each speaker independently
•8 reverb/effects bypass combinations (or vibratone rotor speed) that you can toggle by footswitch
•4 quick access keys for one button access to favorite amp design presets
•4 button footswitch for hands free selection of your quick access presets
•The expression pedal jack allows you to control nearly every preset controllable parameter with an analog expression pedal (optional)
•130 watts of stereo output power, (65 watts per channel)
•Two 12AX7 preamp tubes
•Two 12 inch, 8 ohm Celestion® G12T-100 speakers
•1 stereo digital line output, RCA SPDIF jack for connection to digital sound equipment
•2 stereo XLR impedance balanced output jacks, with mono/stereo selection switch
•3 effects loop jacks (mono out, and mono or stereo in) with -10dbv/+4dbu switch
•2 speaker extension jacks for experimenting with other external speaker cabinets
www.f e n d e r.com www. m r g e a r h e a d .net
|
|
Front Panel Overview |
8 |
|
|
|
||
|
1 Overview
Each preset contains a complete set of amplifier and effects settings.
This page introduces key concepts for the basic operation of your Cyber–Twin SE™. The following pages provide an overview of each item on the front and rear panels.
The DISPLAY shows vital information and menus for the Cyber-Twin® SE. The DATA WHEEL works dynamically with the display giving you full control over preset selection, effect parameters and system configuration. The display also responds to the use of panel knobs or buttons providing useful information. You can enter different MODES to edit amplifier designs, effects and system utilities; each mode determines the functions of the display and data wheel.
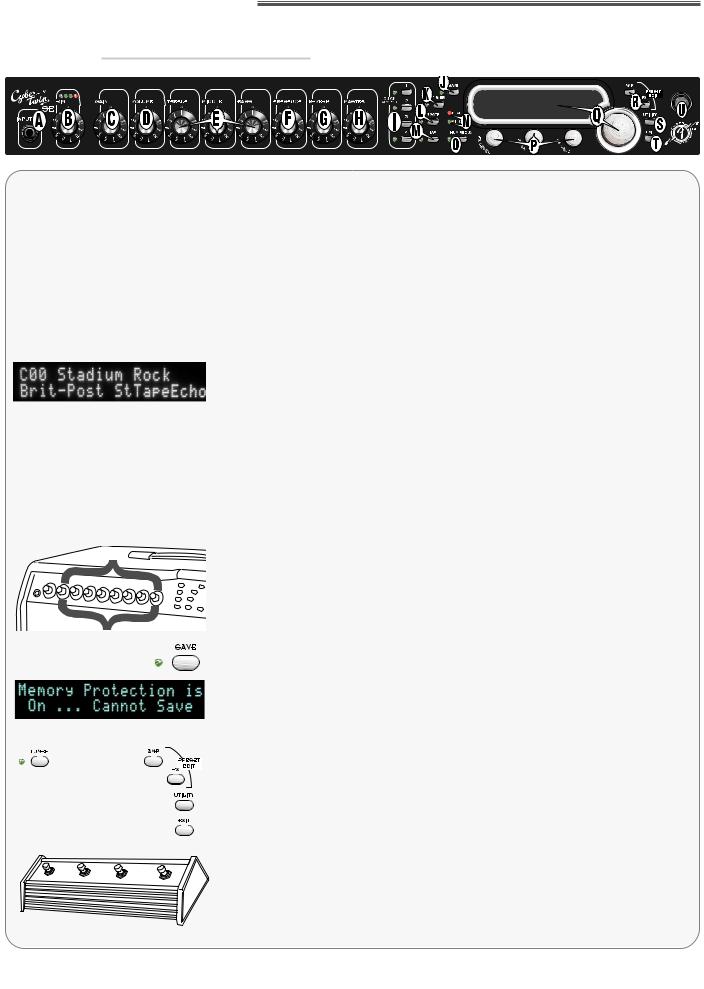
PLAY MODE is active whenever the Cyber-Twin® SE amplifier is first switched on. After booting up, the display will show information about the current preset. The first line displays the preset location (bank/number) and name. The second line displays the type of tone stack controls (treble, middle, bass), tone stack location (pre/post distortion) and the active effect. In play mode, the data wheel selects presets.
There are three banks of PRESETS. The FENDER CUSTOM SHOP (C00-C99) and YOUR AMP COLLECTION (A00-A49) are permanent presets. The PLAYER’S LOUNGE (P00-P99) presets are rewritable for you to save your own amp and effect designs.
The Cyber-Twin® SE is instantly reconfigured to the settings saved within a selected preset. The 8 MOTORIZED knobs on the Cyber-Twin® SE automatically adjust to the preset settings. You can safely interrupt knob rotation anytime by manually stopping it. Note that the display will temporarily indicate knob position when turned manually.
Changes you make to amplifier settings (volume, tone, effects, etc.) will be lost upon selecting a different preset or turning the amplifier off, unless you save them. SAVE simply by pressing SAVE, selecting a Player’s Lounge preset to overwrite and pressing SAVE again. The SAVE LED blinks as a reminder to save settings once a change is made. NOTE: MEMORY
PROTECTION must be disabled before you can save! (see page 24).
AMP EDIT MODE, FX EDIT MODE and UTILITY MODE are activated by pressing the corresponding buttons to the right of the display. Use these modes for modifying amp design, selecting and editing effects and for system management. TUNER MODE is activated using the TUNER button; use it to tune your guitar. PLAY MODE is reactivated by pressing EXIT. Use it to play guitar!
Two FOOTSWITCHES are supplied with your Cyber-Twin® SE. Connect them to the appropriate rear panel jacks to enable remote selection of your Quick Access buttons and Reverb/Effects bypass.
www.f e n d e r.com www. m r g e a r h e a d .net

Front Panel Overview |
|
|
|
9 |
|
|
||
|
F ro n t P a n e l O v e r v i e w
A. INPUT JACK
Input connection for your guitar.
B. TRIM
Sets the input signal level for proper analog–to–digital conversion. Adjust
TRIM so that most of the green LEDs |
stay on at normal playing |
|
levels and the red LED |
flashes |
occasionally while playing at peak |
intensity. This knob is not preset programmable nor motorized.
C.GAIN
Adjusts the distortion level and contributes to overall amplifier loudness. Use VOLUME {D} to compensate for any undesired volume level change resulting from a GAIN level change.
D.VOLUME
Adjusts the post–distortion signal level and contributes to overall amp loudness. Use in conjunction with GAIN {C} to normalize volume differences between presets.
Several knobs affect the overall loudness of the amplifier:
|
|
Preset |
MIDI |
Expression Pedal |
Knob |
Function |
Programmable |
Controllable |
Controllable |
|
|
|
|
|
TRIM |
Supply proper signal level to DSP |
NO |
NO |
NO |
GAIN |
Adjust distortion level |
YES |
YES |
YES |
VOLUME |
Equalize level differences between presets |
YES |
YES |
YES |
MASTER |
Global volume and maximum level governing |
NO |
YES |
YES |
|
|
|
|
|
E.TREBLE / MIDDLE / BASS
Adjusts tone in the high–, mid–, and low–frequency ranges respectively.
F.PRESENCE
Adjusts tone in the ultra-high frequency range after the distortion circuitry for a crisp tone sparkle.
G.REVERB
Adjusts the level of the active Reverb. Enter AMP edit mode to select Reverb types and edit Reverb parameters (see page 14).
H.MASTER VOLUME
Controls the overall loudness of the amplifier globally, independent of any preset. MASTER VOLUME is not preset programmable, although it is motorized so that it can be controlled remotely by expression pedal or MIDI. Remote operation of MASTER VOLUME is limited to a maximum value defined by where the MASTER VOLUME is set manually on the front panel. Set the MASTER VOLUME knob to the desired maximum level and motorized control will be confined to the range below that boundary.
www.f e n d e r.com www. m r g e a r h e a d .net

|
|
Front Panel Overview |
|
|
|
|
|
|
|
|
|
|
|
|
|
|
|
|
|
|
|
10 |
|
|
|
|
|
|
|
|
|
|
|
|
|
|
|
|
|
|
|
|
|
|
|
|
|
|
|
|
|
|
|
|
|
|
|
|
|
|
|
|
|
||
|
|
|
|
|
|
|
|
|
|
|
|
|
|
|
|
|
|
|
|
||
|
|
|
|
|
|
|
|
|
|
|
|
|
|
|
|
|
|
|
|
|
|
|
|
|
|
|
|
|
|
|
|
|
|
|
|
|
|
|
|
|
|
|
|
|
|
|
|
|
|
|
|
|
|
|
|
|
|
|
|
|
|
|
|
|
|
|
|
|
|
|
|
|
|
|
|
|
|
|
|
|
|
|
|
|
|
|
|
|
|
|
|
|
|
|
|
|
|
|
|
|
|
|
|
|
|
|
|
|
|
|
|
|
|
|
|
|
|
|
|
|
|
|
|
|
|
|
|
|
|
|
|
|
|
|
|
|
|
|
|
|
|
|
|
|
|
|
|
|
|
|
|
|
|
|
|
|
|
|
|
|
|
|
|
|
|
|
|
|
|
|
|
|
|
|
|
|
|
|
|
|
|
|
|
|
|
|
|
|
|
|
|
|
|
|
|
|
|
|
|
|
|
|
|
|
|
|
|
|
|
|
|
|
|
|
|
|
|
|
|
|
|
|
|
|
|
|
|
|
|
|
|
|
|
|
|
|
|
|
|
|
|
|
|
|
|
|
|
|
|
|
|
|
|
|
|
|
|
|
|
|
|
|
|
Use MIDI to transfer presets to and from a computer.
Organize presets in the Player’s Lounge by using SAVE to move (copy) presets.
I. QUICK ACCESS
Provides instant access to four favorite presets. To assign a button, first select the preset with the data wheel. Then, press and hold a QUICK ACCESS button. The LED lights up when your new QUICK ACCESS button has been activated. Press the same button or corresponding footswitch button to recall the assigned preset.
J.SAVE
Saves the current amplifier configuration as a new preset.
1)Press SAVE once and a Player’s Lounge preset location is displayed.
2)Select any Player’s Lounge preset to overwrite using the data wheel.
Press EXIT to cancel the save operation
3)Press SAVE again and your new preset will be stored.
The SAVE LED flashes after an amp setting is changed as a reminder to save. If a different preset is selected before the current configuration is saved, your changes will be lost.
K. TUNER
Turns the tuner on/off. The TUNER LED |
flashes and audio is muted |
while the tuner scale is displayed. |
|
L.NOISE GATE
Turns the noise gate on/off. Use it to reduce static and environmental noise transmitted through nearby electronic devices. Enter AMP edit mode to edit noise gate depth and threshold parameters (see page 14).
M.TAP
In PLAY mode, TAP sets the time/rate interval of the active effect, if applicable. Press TAP at least twice at the desired rate to set the interval by feel (the average of the last five taps is calculated for multiple taps). Press TAP once for the longest interval possible. The TAP LED flashes at the interval rate which is also temporarily displayed. Adjust the time/rate parameter accessed in the FX edit mode for precision control of the TAP interval (see the FX menus on page 16 for details).
In UTILITY mode, TAP is used to confirm menu actions.
www.f e n d e r.com www. m r g e a r h e a d .net
Front Panel Overview |
|
|
|
11 |
|
|
||
|
N. PEAK and MIDI LEDs
PEAK flashes when the DSP circuit is clipping (distorting). Reduce VOLUME if undesirable distortion is heard while this LED is on, then use MASTER to the increase loudness level.
MIDI is on when the Cyber–Twin SE™ is communicating MIDI information.
O.HUM REDUCTION
Turns hum reduction on/off. Reduces environmental hum in some situations using a patented algorithm that seeks out line frequencies and squelches only the hum, without degrading your music!
P.FX LEVEL / FX VAL 1 / FX VAL 2
Adjusts the level, parameter 1 and parameter 2 of the active effect, respectively. The functions of these knobs as well as additional parameters can be accessed through the FX edit mode (see page 16).
Q.DISPLAY and DATA WHEEL
Your interface for controlling the dynamic functions described throughout this manual (See the Overview on page 8).
R.PRESET EDIT
The AMP and FX buttons activate the AMP and FX (effects) edit modes respectively. For the AMP edit menus see page 14; FX edit menus see page 16.
S.UTILITY
Activates the UTILITY mode. For the UTILITY edit menus, see page 24.
T.EXIT
Activates the default PLAY mode (except during factory preset restore and MIDI data transfers).
U.BLUE JEWEL
It’s still a 
www.f e n d e r.com www. m r g e a r h e a d .net
 Loading...