

Page 1
MiniSpin
®
/ MiniSpin
®
plus
Page 2
Titel_Klapps.fm Seite 2 Montag, 3. November 2008 10:55 10
Contents
MiniSpin / MiniSpin plus
Instruction Manual. . . . . . . . . . . . . . . . . . . . . . . . . . . . . . . . . . . . . . . . . . . . . . . . . . . . . 17
Istruzioni brevi . . . . . . . . . . . . . . . . . . . . . . . . . . . . . . . . . . . . . . . . . . . . . . . . . . . . . . . . 34
Contents
Aiutaci a valutare i nostri manuali di istruzione su
www.eppendorf.com/manualfeedback!
2
Page 3
Mikrocentrifuge MiniSpin / MiniSpin plus
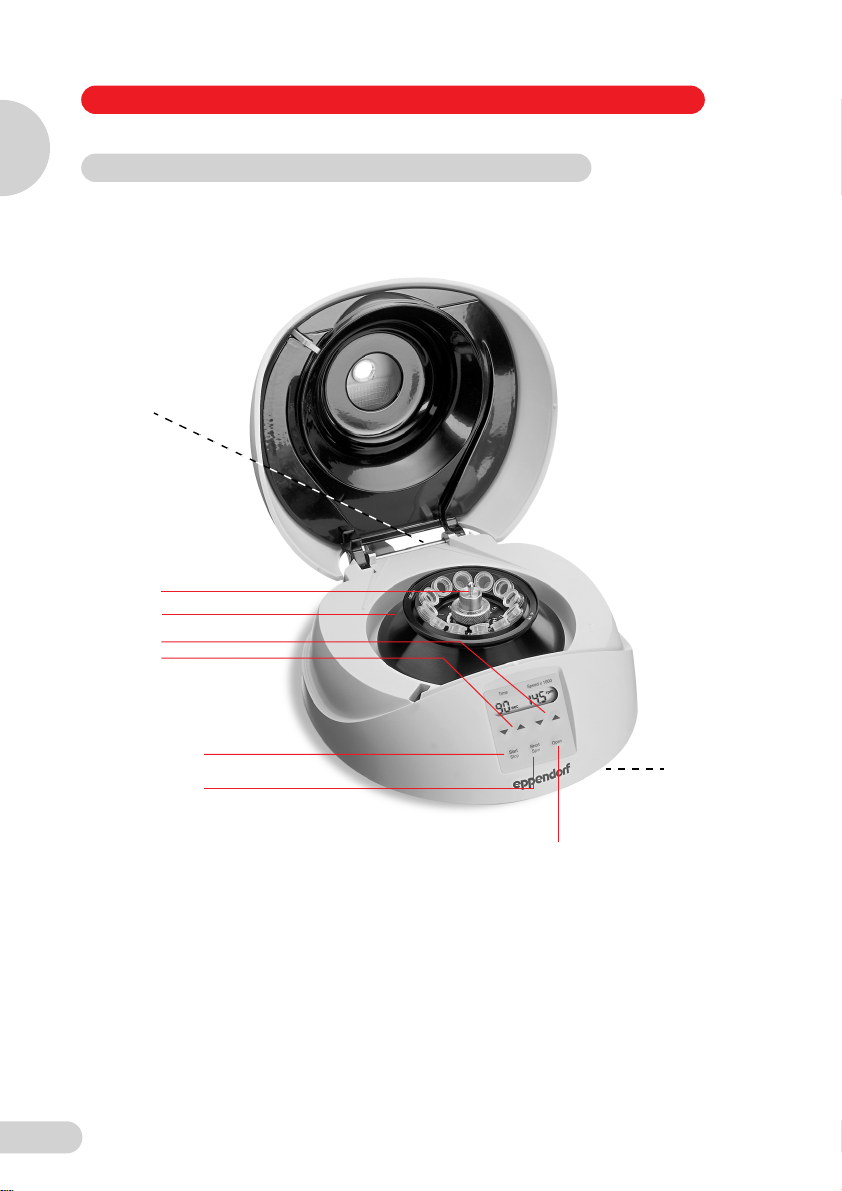
Abb. 1 / Fig. 1
Abbildung 1 / Figur 1
1
2
3
4
5
START/STOP
SHORT-SPIN
1 Netzschalter und -stecker
2 Rotormutter
3 Rotor
4 ▼▲ RPM/RZB
5 ▼▲ Zeit
E
OPEN
1 Mains switch and plug
2 Rotor nut
3 Rotor
4 ▼▲ rpm/rcf
5 ▼▲ Time
3
Page 4

No part of this publication may be reproduced without the prior permission of
the copyright owner.
Copyright
©
2005 Eppendorf AG, Hamburg
4
Page 5

Contents
1 Introduction . . . . . . . . . . . . . . . . . . . . . . . . . . . . . . . . . . . . . . . . . . . . . . . . . . . . . . . . 18
1.1 Intended use. . . . . . . . . . . . . . . . . . . . . . . . . . . . . . . . . . . . . . . . . . . . . . . . . . . . . . . . . 18
1.2 Delivery package . . . . . . . . . . . . . . . . . . . . . . . . . . . . . . . . . . . . . . . . . . . . . . . . . . . . . 19
1.3 Installing the device . . . . . . . . . . . . . . . . . . . . . . . . . . . . . . . . . . . . . . . . . . . . . . . . . . . 19
2 Safety precautions and applicational limitations. . . . . . . . . . . . . . . . . . . . . . . . . . . 20
3 Operation. . . . . . . . . . . . . . . . . . . . . . . . . . . . . . . . . . . . . . . . . . . . . . . . . . . . . . . . . . . 22
3.1 Control elements. . . . . . . . . . . . . . . . . . . . . . . . . . . . . . . . . . . . . . . . . . . . . . . . . . . . . . 22
3.2 Rotor insertion and removal . . . . . . . . . . . . . . . . . . . . . . . . . . . . . . . . . . . . . . . . . . . . . 22
3.3 Loading the rotor . . . . . . . . . . . . . . . . . . . . . . . . . . . . . . . . . . . . . . . . . . . . . . . . . . . . . 22
3.4 Centrifugation with a preset time . . . . . . . . . . . . . . . . . . . . . . . . . . . . . . . . . . . . . . . . . 23
3.5 Short-spin centrifugation . . . . . . . . . . . . . . . . . . . . . . . . . . . . . . . . . . . . . . . . . . . . . . . 23
3.6 Continuous centrifugation (for MiniSpin plus only). . . . . . . . . . . . . . . . . . . . . . . . . . . . 23
3.7 Switching to the rcf display (for MiniSpin plus only). . . . . . . . . . . . . . . . . . . . . . . . . . . 24
3.8 Opening the centrifuge in the event of a power failure. . . . . . . . . . . . . . . . . . . . . . . . . 24
4 Maintenance and cleaning. . . . . . . . . . . . . . . . . . . . . . . . . . . . . . . . . . . . . . . . . . . . . 25
5 Troubleshooting . . . . . . . . . . . . . . . . . . . . . . . . . . . . . . . . . . . . . . . . . . . . . . . . . . . . . 26
6 Technical data . . . . . . . . . . . . . . . . . . . . . . . . . . . . . . . . . . . . . . . . . . . . . . . . . . . . . . . 27
7 Ordering information . . . . . . . . . . . . . . . . . . . . . . . . . . . . . . . . . . . . . . . . . . . . . . . . . 28
Contents
17
Page 6
MiniSpin and MiniSpin plus are compact, easy-to-operate tabletop centrifuges, which are
ideal for use as "personal centrifuges".
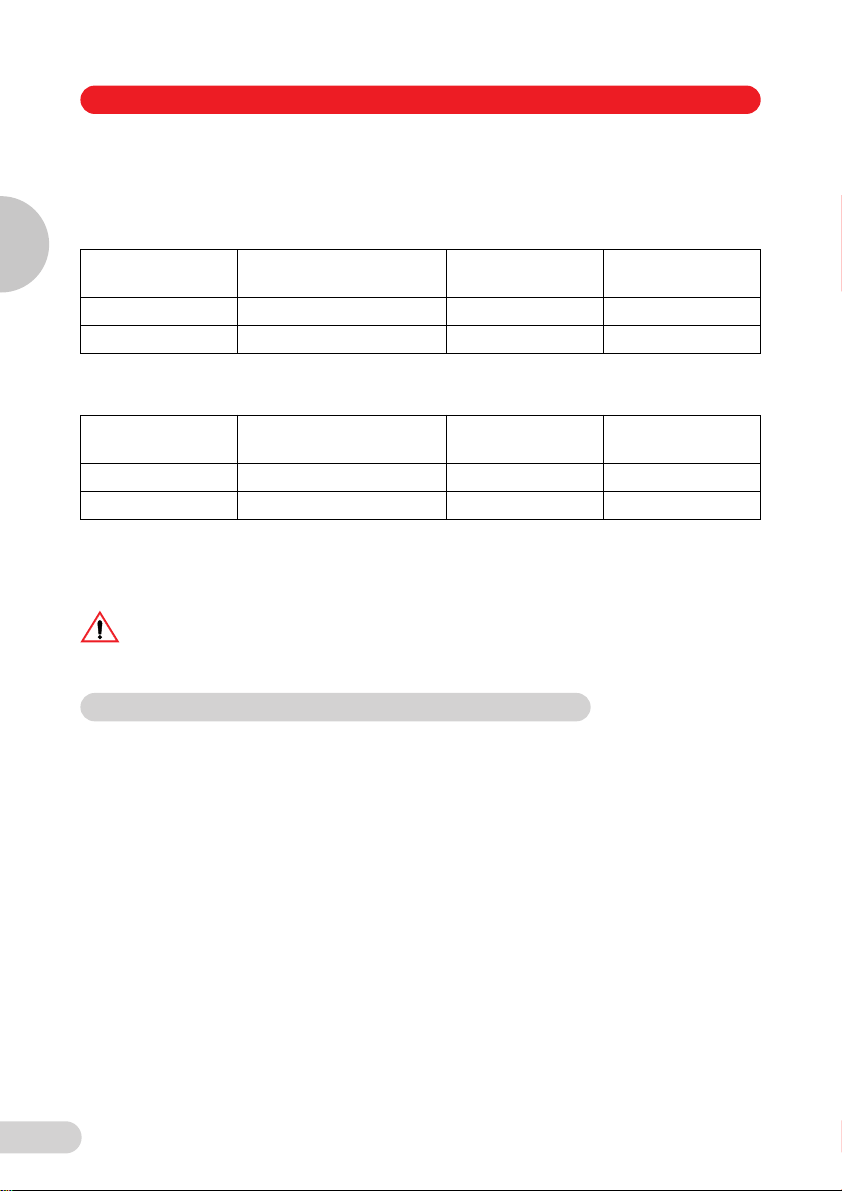
Twelve Eppendorf micro test tubes can be centrifuged simultaneously in a 45° fixed-angle rotor
F-45-12-11 using the following performance data:
1
MiniSpin
MiniSpin® plus 14,000 14,500 6
The rotor F-55-16-5-PCR is a fixed-angle rotor for centrifuging 16 PCR tubes (0.2 ml) or two
5 or 8-strips 0.2 ml PCR tubes with the following performance data:
Introduction
MiniSpin
MiniSpin® plus 11,520 14,500 4.9
Before starting up MiniSpin or MiniSpin plus for the first time, please read the rest of this
operating manual. The latest version of the manual and the safety instructions in your
language can be found on the Internet at www.eppendorf.com.
1 Introduction
Relative centrifugal force
rcf
®
Relative centrifugal force
®
This sign is found on your centrifuge and on several pages in the operating manual.
Texts labeled with this sign contain safety notes. Read these safety precautions before
using the centrifuge for the first time.
12,100 13,400 6
rcf
9,840 13,400 4.9
Rotational speed
rpm
Rotational speed
rpm
Max. centrifuging
radius (cm)
Max. centrifuging
radius (cm)
1.1 Intended use
The MiniSpin / MiniSpin plus is intended exclusively for indoor use and for separating aqueous
solutions and suspensions of various densities in approved test tubes.
This device may only be operated by trained specialist staff.
18
Page 7

1 Introduction
1.2 Delivery package
1 MiniSpin or MiniSpin plus
1 Rotor F-45-12-11
1 Stainless steel rotor lid
1 Rotor nut
1 Mains cable
1 Operating manual
1.3 Installing the device
Place the centrifuge onto a level, horizontal surface. Make sure that
the ventilation slits are not blocked! In accordance with the safety regulations of
IEC 1010-2-020 (equivalent to EN 61010-2-020), a safety distance of 30 cm should be
observed around the centrifuge during operation. No objects which could cause
additional damage in the event of a centrifuge crash should be positioned in this space.
Before plugging in the centrifuge, compare your power supply with the electrical requirements
listed on the identification plate on the underside of the device.
The mains switch is located at the rear of the device. The centrifuge is ready to operate when
the display becomes visible. Place the rotor onto the rotor axle and tighten using the rotor nut.
Before starting up the centrifuge for the first time, make sure that the rotor nut is securely
fastened.
1
Introduction
19
Page 8

2 Safety precautions and applicational limitations
The rotor and the rotor lid must always be securely fastened.
If the centrifuge makes unusual noises when started, the rotor or rotor lid is not fastened
correctly. Switch the device off immediately by pressing "STOP".
2
Safety precautions and applicational limitations
The stainless steel rotor lid may only be used in the MiniSpin® / MiniSpin® plus and
MiniSpin® SPACE centrifuges for the recommended application areas.
The rotors must only be loaded symmetrically.
Do not use centrifuges that have not been correctly installed or repaired.
Repairs must only be performed by an Eppendorf authorized service technician. Only use
original rotors and spare parts recommended by Eppendorf.
MiniSpin / MiniSpin plus may be used for the specified applications only. They must not be
operated in a hazardous or flammable environment and must not be used to centrifuge
explosive or highly reactive substances.
When handling toxic or radioactive liquids or pathogenic bacteria from Risk Group II (see World
Health Organisation: "Laboratory Biosafety Manual"), observe the safety regulations of the
country in question.
If such liquids are spilled in the rotor or rotor chamber, the centrifuge must be cleaned carefully
and properly.
Before using cleaning or decontamination methods other than those stipulated by the
manufacturer, contact the manufacturer to ensure that the intended method will not damage the
centrifuge.
Prior to centrifugation, the tubes should in any case be visually inspected for material damage.
Damaged tubes may not be centrifuged. This is because broken tubes can, in addition to
sample loss, result in further damage to the centrifuge and accessories.
Close the test tube lids before centrifuging. Open lids can be ripped off during centrifuging and
damage the centrifuge.
A liquid density of 1.2 g/ml must not be exceeded at the maximum rotational speed.
When moving the centrifuge from a cold room to a normal lab, run the centrifuge for 30 minutes
beforehand in the cold room so that it does not get covered in condensation. Alternatively, allow
it to warm up in a lab for at least three hours, but do not plug in the centrifuge in order to
prevent damage caused by condensation.
Rotors and rotor lids are high-grade components which are subject to extreme mechanical
strain. Even slight scratches and tears can lead to serious internal material damage. Avoid
damage caused by aggressive chemicals, including among others: Strong and weak alkali,
strong acids, solutions with mercury, copper and other heavy metals, chlorinated hydrocarbons,
concentrated saline solutions and phenol.
In the event of contamination caused by aggressive agents, the rotor must be cleaned immediately using a neutral cleaning liquid. This is particularly important for the bores for the tubes.
20
Page 9

2 Safety precautions and applicational limitations
Rotors and rotor lids showing visible signs of corrosion or mechanical damage should not be
used. Inspect the rotor lid regularly.
Be sure to close the tube lids tightly prior to centrifugation. Open tube lids can be torn off during
centrifugation and damage the rotor lid or centrifuge.
Please ensure that the rotor is protected from corrosion and mechanical damage.
Even slight scratches and cracks can cause severe inner damage to the rotor materials.
Do not use damaged rotors!
Do not move the centrifuge during the run.
After centrifugation, and particularly if the motor was blocked, the temperature
of the motor block under the centrifuge may be so high as to be uncomfortably
hot. For this reason, touch the centrifuge at the edges only.
Transfer
If the device is passed on to someone else, please include the instruction manual.
Disposal
In case the product is to be disposed of, the relevant legal regulations are to be observed.
Information on the disposal of electrical and electronic devices in the European
Community
The disposal of electrical devices is regulated within the European Community by national
regulations based on EU Directive 2002/96/EC on waste electrical and electronic equipment
(WEEE).
According to these regulations, any devices supplied after 13.08.05 in the business-to-business
sphere, to which this product is assigned, may no longer be disposed of in municipal or
domestic waste. They are marked with the following symbol to indicate this.
As disposal regulations within the EU may vary from country to country, please contact
your supplier if necessary.
2
Safety precautions and applicational limitations
Declaration concerning the ATEX directive (94/9/EC)
The present design and ambient conditions inside Eppendorf centrifuges mean that they are not
suitable for use in a potentially explosive atmosphere. The centrifuges must therefore only be
used in a safe environment such as the open environment of a ventilated laboratory or a fullyextracted fume hood. The use of substances which may contribute to a potentially explosive
atmosphere is not permitted. The final decision on the risks in connection with the use of such
substances is the responsibility of the user of the centrifuge.
21
Page 10
3
Operation
3 Operation
3.1 Control elements
See the front view of the device, found on the fold-out page at the front of this manual:
– START/STOP
– SHORT-SPIN – For reduced-time centrifugation
– OPEN – To open the lid
▼▲ – For setting the time and rotational speed
–
– Display for time and speed / rcf
– Rotor F-45-12-11 with 12 bores for microcentrifuge tubes
– Rotor lid with central locking button (not pictured)
Rear of centrifuge:
– Mains plug with mains switch.
Bottom of centrifuge:
– Identification plate with electrical specifications
– Opening in base for emergency lid release (Fig. 1, E).
Caution: Following centrifugation, the motor block may be hot.
3.2 Rotor insertion and removal
Fit the rotor onto the motor shaft, followed by the rotor nut. Tighten the rotor nut by
turning it clockwise. Before each start, check that the rotor is firmly tightened.
To release the rotor, turn the rotor nut counterclockwise.
3.3 Loading the rotors
Rotors must always be loaded symmetrically. Minimize differences in weight between
the filled sample tubes - taring with a scale is recommended. This will reduce wear on
the drive and cut running noise.
For rotor F-45-12-11 the permitted total weight (adapter + tube + contents) is 4 g per
bore and for rotor F-55-16-5-PCR 3.5 g per 8-strip.
22
Page 11

3 Operation
3.4 Centrifugation with a preset time
Turn on the mains switch. The nominal values of the last run appear in the display.
OPEN To open the lid.
Load the rotor symmetrically. Fasten the rotor lid and close the centrifuge lid
▼▲
1st START/STOP To start the run.
2nd START/STOP To end the run prematurely.
The time setting and the rotational speed may be changed during the run. The remaining run
time appears in the display.
After the run the lid of the centrifuge opens automatically.
3.5 Short-spin centrifugation
SHORT-SPIN Short-spin centrifugation is possible for as long as this key is held down.
To change the run time / the rotational speed.
With MiniSpin plus, the time can be pre-selected between 15 seconds and
99 minutes, and with MiniSpin between 15 seconds and 30 minutes.
During centrifugation, the time is counted downwards, with the last minute
counted down in seconds.
With MiniSpin plus, it is possible to switch from the centrifugation time
display "15 sec" or "99 min" to the display "00" (for ∞) for continuous
operation by pressing the ▼ or ▲ key again (With MiniSpin, time selection
switches from 15 sec to 30 min or vice-versa).
With MiniSpin, the maximum rpm is 13,400.
.
3
Operation
For MiniSpin plus only:
SHORT-SPIN When this key is pressed when the lid is open, the centrifuge switches to
one of two operating statuses after 5 seconds:
1 – 14 t When displayed, this signifies the following:
short-spin speed as preset.
14 t When displayed, this signifies the following:
max. short-spin speed.
3.6 Continuous centrifugation (for MiniSpin plus only)
With MiniSpin plus, the display 00 (= ∞) for continuous operation can be selected by pressing
the key again.
1st START/STOP To start the run. Time is counted upwards in minutes.
The rectangular symbol flashes for as long as the rotor is spinning.
2nd START/STOP To end continuous operation.
23
Page 12

3 Operation
3.7 Switching to the rcf display (for MiniSpin plus only)
3
Operation
▼▲
In order to determine the RCF for the displayed rotational speed of the MiniSpin, you can
calculate with the following formula in accordance with DIN 58 970:
rcf = 1,118 · 10
n: rotational speed in 1/min
r
= 6 cm : max. centrifuging radius in cm
max
Example: Because the maximum centrifugation radius is 6 cm, a maximum RCF of 7,000 x g
can be achieved at a rotational speed of 10,200.
3.8 Opening the centrifuge in the event of a power failure
Disconnect the centrifuge from the mains supply. Wait until the rotor
has come to a standstill. (This may take up to four minutes!)
Then lift up MiniSpin, insert a pen into the opening in the ground plate and move the
disc in the direction of the arrow (see Fig. 1, E).
When lifting up the centrifuge, particularly after a device failure, please note that the
motor on the underside of the centrifuge can become uncomfortably hot. Touch the
device at the edges only!
When these keys are pressed simultaneously, the display switches from
rpm to rcf (and vice-versa).
If this takes place during the run, the display switches back after
20 seconds.
-5
· n2 · r
max
24
Page 13

4 Maintenance and cleaning
The rotor and the outside of MiniSpin / MiniSpin plus should be cleaned regularly with
a moist cloth. Disconnect the centrifuge from the mains supply, remove the rotor and
clean it separately. Only neutral agents may be used for cleaning purposes (e.g. Extran
neutral, RBS neutral). For disinfection purposes, please use an alcohol-based
disinfectant (70 % isopropanol/water mixture).
To ensure that the bores for the tubes are cleaned thoroughly, remove any residue using a bottle
brush and hand-hot cleaning solution, afterwards rinse well. To dry the rotor, place it on a cloth
with the bores facing downwards.
Please check the rotor and especially the rotor bores regularly for deposits or damage.
Then reinsert the rotor and tighten the rotor nut.
After cleaning, allow the rotor to accelerate once to the maximum speed.
Do not place the rotor into the cleaning solution!
If corrosive, toxic or radioactive liquids or pathogenic bacteria from
Risk Group II (see World Health Organization: "Laboratory Biosafety Manual") are accidentally
spilled in the rotor or rotor chamber, the centrifuge must be decontaminated thoroughly.
Please be sure to use only neutral media (e.g. Extran neutral, RBS neutral, Teepol 610 S,
70 % alcohol, meliseptol, sterillium) to clean and disinfect the stainless steel rotor lid.
The stainless steel rotor lid is autoclavable (121 °C, 20 min). We don't advise continuous
cleaning with a dishwasher.
Returning of the device
When returning centrifuges, ensure that these devices are fully decontaminated and do not
present any kind of health risk to our service staff.
For further information and a blank of the decontamination confirmation, please visit
www.eppendorf.com. Do also consult your laboratory safety officer about a suitable
decontamination method.
Please fill in the decontamination confirmation and enclose it with the device if it is to be
returned to Eppendorf.
4
Maintenance and cleaning
25
Page 14

5 Troubleshooting
Error Cause Solution
No display. No main power
5
Lid cannot be opened. Power failure. Emergency lid release
Centrifuge shakes
during acceleration.
Troubleshooting
"LID" Lid not closed correctly. Press lid closed.
"INT" Power failure during run. Check the mains plug.
"Err 5" Defective lid latch. Allow device to stand switched on for
"Err 8" Rotor not properly secured. Tighten rotor nut.
"Err 9" to "Err 14" Electronics error. Switch off centrifuge and then switch
Plug in mains cable on both sides.
connection.
Power failure. Check the mains fuse of the lab.
(see Sec. 3.8).
Rotor is still spinning. Wait for the rotor to come to a
standstill.
Rotor not loaded
symmetrically.
Error with lid closing
mechanism.
Stop centrifuge run and load
centrifuge symmetrically.
Contact Service.
Restart the centrifuge using Start/
Stop
at least 8 min.
on again.
"Err 60" to "Err 68" Drive error. Allow centrifuge to cool down, then
restart.
If the solutions suggested here prove to be unsuccessful, please contact Service.
26
Page 15

6 Technical data
Power supply: 230 V / 50 – 60 Hz
120 V / 50 – 60 Hz
see identification plate on bottom
of centrifuge
Power requirement:
MiniSpin plus 85 W
MiniSpin 70 W
Max. speed:
MiniSpin plus 14,500 rpm
MiniSpin 13,400 rpm
Max. centrifugal force:
MiniSpin plus 14,000 rcf
MiniSpin 12,100 rcf
Max. load: 12 x 2.0 ml Safe-Lock tubes
Max. kinetic energy:
MiniSpin plus 852 Nm
MiniSpin 728 Nm
Max. permitted density
of material to be centrifuged: 1.2 g/ml
Ambient temperature: 10 – 40 °C
Max. relative humidity: 75 %, no condensing moisture
Degree of pollution: 2
Overvoltage category: ΙΙ
Acceleration time to max. speed: 13 seconds
Braking time from max. speed; 12 seconds
Dimensions: Height: 120 mm
Depth: 240 mm
Width: 225 mm
Weight: 3.7 kg (without rotor)
Fuses
(not accessible from outside; 230 V: 1.6 A, slow-acting
to be changed by Service only): 120 V: 3.16 A, slow-acting (UL-approved)
6
Technical data
Technical specifications subject to change!
27
Page 16

7 Ordering information
Centrifuge MiniSpin,
230 V / 50 – 60 Hz 5452 000.018
Centrifuge MiniSpin,
7
120 V / 50 – 50 Hz 5452 000.131
Centrifuge MiniSpin plus,
230 V / 50 – 60 Hz 5453 000.011
Centrifuge MiniSpin plus,
120 V / 50 – 50 Hz 5453 000.135
Adapter for 0.5 ml microcentrifuge tubes and
0.6 ml Microtainers®; set of 6 5425 716.001
Adapter for 0.4 ml tubes; set of 6 5425 717.008
Adapter for 0.2 ml PCR tubes; set of 6 5425 715.005
Accessories
Ordering information
Rotor F-45-12-11 with rotor lid
for MiniSpin plus 5452 720.008
Rotor F-45-12-11 with rotor lid
for MiniSpin 5452 725.000
Lid for rotor F-45-12-11,
stainless steel with rotor nut 5452 700.805
Rotor F-55-16-5-PCR with rotor lid 5452 727.007
Lid for rotor F-55-16-5-PCR 5452 730.008
with rotor nut
Rotor nut 5452 729.000
Important:
Please use the original accessories recommended by Eppendorf. Using spare parts or
disposables which we have not recommended can reduce the precision, accuracy and life
of the centrifuges. We do not honor any warranty or accept any responsibility for damage
resulting from such action.
Rotor code
All Eppendorf rotors are designated according to a simple, logical system which describes the
technical specifications as a uniform series of numbers and letters e.g.:
Fixed-angle Angle of
rotor
adapter bore
Ø Tube/
Adapter Swing-bucket rotor
Ø tube/adapter
F A 45 30 11 A 4 81
28
Aerosol-tight
version
Max. no. tubes/
adapters
Max. no tubes/
adapters
bore
Page 17

Istruzioni brevi
Le centrifughe da banco MiniSpin e MiniSpin plus riducono lo spazio d'ingombro e sono facili
da utilizzare: in altre parole le "Personal Centrifuges" ideali.
Prima di mettere in funzione per la prima volta la MiniSpin oppure la MiniSpin plus,
per favore leggete il seguito. La versione più aggiornata delle istruzioni per l'uso e
delle avvertenze di sicurezza è disponibile in diverse lingue sul sito internet
www.eppendorf.com. Consigliamo inoltre, per avere una visione generale dell'utilizzo, di
leggere anche la versione più completa in inglese (da pagina 17 a pagina 28) o in tedesco
(da pagina 5 a pagina 16).
Troverete questo simbolo sulla vostra centrifuga ed in più punti di queste istruzioni per
l'uso. I testi contrassegnati in questo modo descrivono delle avvertenze rilevanti dal
punto di vista della sicurezza. Usate la centrifuga solo dopo aver letto queste
avvertenze per la sicurezza.
Uso conforme
La MiniSpin / MiniSpin plus è concepita esclusivamente per l'uso in luoghi chiusi e serve a
separare le soluzioni acquose e le sospensioni di diversa densità nelle apposite provette.
L'apparecchio può essere utilizzato esclusivamente da personale specializzato e
appositamente addestrato.
Avvertenze per la sicurezza e limiti di impiego
Istruzioni brevi
Il rotore ed il coperchio del rotore devono sempre essere fissati in modo conforme ai
regolamenti. Qualora si avvertissero rumori anomali all'avviamento della centrifuga,
significa che il rotore oppure il suo coperchio non sono correttamente fissati. Spegnete
immediatamente l'apparecchio con "STOP".
È consentito impiegare il coperchio del rotore in acciaio inossidabile nelle centrifughe
MiniSpin® / MiniSpin® plus e MiniSpin® SPACE solo per le applicazioni previste.
I rotori possono essere caricati solo simmetricamente.
La tensione di rete deve coincidere con i dati sulla targhetta del modello sul fondo
dell'apparecchio.
Centrifughe installate o riparate in modo non conforme alle regole della tecnica non si devono
mettere in funzione.
Le riparazioni possono essere eseguite solo dal Servizio Tecnico autorizzato dalla ditta
Eppendorf, è consentito impiegare solo parti di ricambio e rotori originali della ditta Eppendorf.
E' consentito impiegare la MiniSpin e, rispettivamente, la MiniSpin plus solo per le applicazioni
previste. Non si deve farle funzionare in ambienti esposti al pericolo di esplosione. Non è
consentito centrifugare materiali esplosivi oppure che reagiscono violentemente.
34
Page 18

Istruzioni brevi
Quando si ha a che fare con liquidi tossici oppure contrassegnati come radioattivi oppure con
germi patogeni del gruppo di rischio II (v. World Health Organisation: "Laboratory Biosafety
Manual") vanno osservate le corrispondenti disposizioni nazionali.
Dopo che tali liquidi sono stati versati accidentalmente nel rotore oppure nel vano del rotore,
deve aver luogo una pulizia accurata e conforme alle regole della tecnica della centrifuga.
Prima della centrifuga occorre chiudere il tappo della provetta. In caso contrario, il tappo
potrebbe staccarsi danneggiando gravemente la centrifuga.
Non è consentito superare la densità di 1,2 g/ml nel caso di materiali da centrifugare in
corrispondenza al massimo numero di giri.
Quando si passa da una camera fredda ad un normale ambiente di laboratorio la
MiniSpin deve aver funzionato in precedenza per 1/2 ora nella camera fredda, in modo
che non si appanni a temperatura ambiente. Oppure essa deve scaldarsi nell'ambiente
del laboratorio per almeno 3 ore e non deve essere collegata alla rete, per evitare
dei danni dovuti alla condensa.
I rotori sono delle parti pregiate, che devono resistere a sollecitazioni estreme.
Il rotore e il coperchio del rotore sono parti pregiate che devono resistere a sollecitazioni
estreme. Graffi e fessurazioni anche lievi possono danneggiare gravemente i materiali interni.
Evitate i danni dovuti all’impiego di prodotti chimici aggressivi, tra i quali: alcali forti e deboli,
acidi forti, soluzioni contenenti mercurio, rame e altri ioni di metalli pesanti, idrocarburi clorurati,
soluzioni saline concentrate e fenolo.
In caso di inquinamento con agenti aggressivi, per favore pulite immediatamente il rotore con
detersivi per stoviglie neutrali. Ciò si applica specialmente per i fori di alloggiamento dei
recipienti.
I rotori e i coperchi del rotore che mostrano segni visibili di corrosione o danni meccanici non
devono essere utilizzati.
Controllate regolarmente il rotore e il coperchio del rotore.
Prima della centrifuga occorre chiudere bene il tappo della provetta. In caso contrario, il tappo
potrebbe staccarsi danneggiando gravemente il coperchio del rotore e la centrifuga.
Non è consentito utilizzare dei rotori danneggiati.
Istruzioni brevi
Installazione dell'apparecchio
Mettete la centrifuga su un tavolo da laboratorio, stabile e orizzontale.
La ventilazione dell'apparecchio non deve essere ostacolata! Lasciate intorno alla
centrifuga uno spazio libero di sicurezza pari a 30 cm.
L'interruttore rete si trova sul retro dell'apparecchio. Quando l'indicatore è visibile, la centrifuga
è pronta al funzionamento. Il rotore si infila sull'asse e si avvita saldamente con il dado del
rotore.
Non si deve muovere la centrifuga mentre è in moto.
Dopo la centrifugazione, ma soprattutto se il motore era bloccato, il blocco
motore sotto la centrifuga può diventare sgradevolmente caldo. Afferrare quindi la
centrifuga solo per il bordo.
35
Page 19

Istruzioni brevi
Elementi funzionali e comandi
Vedere la vista anteriore sulla prima pagina di copertina di queste istruzioni.
– START/STOP – anche per terminare anticipatamente la centrifugazione.
– SHORT-SPIN – centrifugazione di breve durata, per il tempo durante il quale il
tasto viene premuto.
– premuto per 5 sec a coperchio aperto: la MiniSpin plus
passa dal numero di giri massimo a quello preselezionato per la
centrifugazione di breve durata
– OPEN – apre il coperchio
–
▼▲ – per l'impostazione del tempo e del numero di giri
Lato posteriore dell'apparecchio:
– Spina di collegamento rete con interruttore rete
Lato inferiore dell'apparecchio:
– Targhetta del modello dell'apparecchio con i dati del collegamento rete.
– Apertura dello sbloccaggio di emergenza nel fondo (Figura 1, E).
Istruzioni brevi
Funzioni speciali
Nel caso della MiniSpin plus, premendo ancora una volta il tasto, si può far passare
l'indicazione da "15 sec" oppure "90 min" a "00" (= ∞) per Funzionamento continuo.
1. START/STOP avvia il funzionamento; la durata del funzionamento viene contata in minuti
con valore crescente.
Il segno rettangolare lampeggia per tutto il tempo durante il quale il
rotore gira.
2. START/STOP termina il funzionamento continuo.
Solo nella MiniSpin plus:
▼▲
36
premuto contemporaneamente all'impostazione della velocità fa passare
l'indicazione da rpm (= numero di giri) a rcf (= forza centrifuga relativa) e
viceversa. Nel caso della commutazione durante il funzionamento dopo
20 sec l'indicazione salta di nuovo indietro.
Page 20

Istruzioni brevi
Apertura della centrifuga in caso di mancanza di corrente
Scollegare la spina rete. Attendere che il rotore si fermi (può durare 4 min!).
Solo allora alzare la MiniSpin ed attraverso l'apertura nella piastra del fondo, spostare il
disco nella direzione della freccia, servendosi di una penna a sfera.
Manutenzione e pulizia
Le superfici esterne della MiniSpin e della MiniSpin plus ed il rotore vanno puliti
regolarmente con un panno umido. A tale scopo si scollega la spina rete, si toglie il
rotore e lo si pulisce separatamente. Per la pulizia si devono usare solo dei mezzi neutri
(per esempio Extran Neutral, RBS Neutral). Per la disinfezione utilizzate per favore un
disinfettante alcolico (miscela di acqua / isopropanolo al 70 %).
Per favore controllate regolarmente i fori del rotore per verificare se vi sono dei depositi
oppure dei danni.
Per la pulizia e la disinfezione del coperchio del rotore in acciaio inossidabile si devono usare
solo dei mezzi neutri. Il coperchio del rotore in acciaio inossidabile è autoclavabile
(121 °C, 20 min). Si sconsiglia la pulizia in macchina lavatrice.
Spedizione di ritorno di apparecchi
In caso di spedizione di ritorno di centrifughe, verificare che tali apparecchi siano completamente decontaminati e non costituiscano alcun rischio per la salute del nostro personale
addetto all'assistenza tecnica.
Ulteriori informazioni e un modulo prestampato della certificazione di decontaminazione sono
disponibili sul sito www.eppendorf.com. Rivolgersi anche all'incaricato della sicurezza del
proprio laboratorio per avere ulteriori informazioni in merito al metodo di decontaminazione più
idoneo.
La certificazione di decontaminazione compilata deve essere allegata all'apparecchio che deve
essere rispedito alla ditta Eppendorf.
Istruzioni brevi
37
Page 21

Istruzioni brevi
Schema di ricerca degli errori
Errore Causa Eliminazione
Nessuna indicazione. Manca il collegamento rete.
Manca la corrente.
Non si riesce ad aprire il
coperchio.
La centrifuga vibra
nell'avviamento.
"LID" Il coperchio non è chiuso
"INT" Mancanza di corrente
"Err 5" Guasto al bloccaggio del
"Err 8" Il rotore non è fissato
Istruzioni brevi
"Err 9" fino a "Err 14" Errore dell'elettronica. Spegnere e riaccendere
"Err 60" fino a "Err 68" Errore dell'azionamento. Lasciare raffreddare l'apparecchio e
Manca la corrente.
Il rotore continua a girare.
Il rotore è caricato in modo
non uniforme.
correttamente.
Errore nella chiusura a
pressione
durante il funzionamento.
coperchio.
correttamente.
Inserire il cavo rete su entrambi i lati.
Controllare il fusibile del laboratorio.
Sbloccaggio di emergenza
(v. cap. 3.7).
Attendere che il rotore si fermi.
Il rotore è caricato in modo non
uniforme.
Chiudere il coperchio premendolo.
Mettersi in contatto con il Servizio
Assistenza Tecnica.
Controllare la spina rete. Per riavviare
azionare START / STOP.
Lasciare l'apparecchio acceso per
almeno 8 min.
Serrare il dado del rotore.
l'apparecchio.
poi avviarlo di nuovo.
Se la misura proposta per l'eliminazione dovesse rimanere ripetutamente senza successo, per
favore chiamate il Servizio Tecnico Assistenza.
38
Page 22

Page 23

Page 24

Page 25

Your local distributor: www.eppendorf.com/worldwide
Eppendorf AG · 22331 Hamburg · Germany · Tel: +49 40 53801-0 · Fax: +49 40 538 01-556 · E-mail: eppendorf@eppendorf.com
Eppendorf North America, Inc. · 102 Motor Parkway · Hauppauge, N.Y. 11788-5178 · USA
Tel: +1 516 334 7500 · Toll free phone: +1 800-645-3050 · Fax: +1 516 334 7506 · E-mail: info@eppendorf.com
Application Support Europe: Tel: +49 1803 666 789 (Preis je nach Tarif im Ausland; 9 ct/min aus dem dt. Festnetz; Mobilfunkhöchstpreis 42 ct/min)
support@eppendorf.com
North America: Tel: +1 800 645 3050 · E-mail: techserv@eppendorf.com
Asia Pacific: Tel: +60 3 8023 6869 · E-mail: support_asiapacific@eppendorf.com
is a registered trademark.
®
5452 900.019-12/082012 · Printed in Germany · Printed on chlorine-free bleached paper
eppendorf
 Loading...