

Page 1
Operating manual Easypet® 3
see
on p.Fig.Tab.p
.
Operating manual
4430 900.019
Easypet® 3
Operating manual
Page 2

©
Copyright
the prior permission of the copyright owner.
eppendorf
2012 Eppendorf AG, Hamburg. No part of this publication may be reproduced without
®
and Easypet® are registered trademarks of Eppendorf AG, Hamburg, Germany.
Trademarks are not marked in all cases with ™or
®
in this manual.
4430 900.019-01/122012
Page 3

Easypet® 3 — Operating manual
Table of contents
1 Table of contents
1 Operating instructions . . . . . . . . . . . . . . . . . . . . . . . . . . . . . . . . . . . . . . . . . . . . . . . . . . . . 5
1.1 Using this manual. . . . . . . . . . . . . . . . . . . . . . . . . . . . . . . . . . . . . . . . . . . . . . . . . . . . . 5
1.2 Danger symbols and danger levels . . . . . . . . . . . . . . . . . . . . . . . . . . . . . . . . . . . . . . . 5
1.2.1 Hazard icons. . . . . . . . . . . . . . . . . . . . . . . . . . . . . . . . . . . . . . . . . . . . . . . . . . . 5
1.2.2 Degrees of danger . . . . . . . . . . . . . . . . . . . . . . . . . . . . . . . . . . . . . . . . . . . . . . 5
1.3 Symbols used. . . . . . . . . . . . . . . . . . . . . . . . . . . . . . . . . . . . . . . . . . . . . . . . . . . . . . . . 6
1.4 Glossary . . . . . . . . . . . . . . . . . . . . . . . . . . . . . . . . . . . . . . . . . . . . . . . . . . . . . . . . . . . . 6
2 Product description . . . . . . . . . . . . . . . . . . . . . . . . . . . . . . . . . . . . . . . . . . . . . . . . . . . . . . 7
2.1 Main illustration . . . . . . . . . . . . . . . . . . . . . . . . . . . . . . . . . . . . . . . . . . . . . . . . . . . . . . 7
2.2 Delivery package . . . . . . . . . . . . . . . . . . . . . . . . . . . . . . . . . . . . . . . . . . . . . . . . . . . . . 8
2.3 Warranty. . . . . . . . . . . . . . . . . . . . . . . . . . . . . . . . . . . . . . . . . . . . . . . . . . . . . . . . . . . . 8
2.4 Materials. . . . . . . . . . . . . . . . . . . . . . . . . . . . . . . . . . . . . . . . . . . . . . . . . . . . . . . . . . . . 9
2.5 Features . . . . . . . . . . . . . . . . . . . . . . . . . . . . . . . . . . . . . . . . . . . . . . . . . . . . . . . . . . . . 9
3 Safety . . . . . . . . . . . . . . . . . . . . . . . . . . . . . . . . . . . . . . . . . . . . . . . . . . . . . . . . . . . . . . . . . 10
3.1 Intended use. . . . . . . . . . . . . . . . . . . . . . . . . . . . . . . . . . . . . . . . . . . . . . . . . . . . . . . . 10
3.2 Warnings for intended use . . . . . . . . . . . . . . . . . . . . . . . . . . . . . . . . . . . . . . . . . . . . . 10
3.3 Information on product liability . . . . . . . . . . . . . . . . . . . . . . . . . . . . . . . . . . . . . . . . . . 11
4 Installation . . . . . . . . . . . . . . . . . . . . . . . . . . . . . . . . . . . . . . . . . . . . . . . . . . . . . . . . . . . . . 12
4.1 Preparing installation . . . . . . . . . . . . . . . . . . . . . . . . . . . . . . . . . . . . . . . . . . . . . . . . . 12
4.2 Mains/power supply device assembly . . . . . . . . . . . . . . . . . . . . . . . . . . . . . . . . . . . . 12
4.3 Removing the discharge protector . . . . . . . . . . . . . . . . . . . . . . . . . . . . . . . . . . . . . . . 13
4.4 Rechargeable battery status display during operation . . . . . . . . . . . . . . . . . . . . . . . . 13
4.4.1 The device is ready for operation.. . . . . . . . . . . . . . . . . . . . . . . . . . . . . . . . . . 13
4.4.2 Charging the rechargeable battery . . . . . . . . . . . . . . . . . . . . . . . . . . . . . . . . . 14
4.4.3 Rechargeable battery charging. . . . . . . . . . . . . . . . . . . . . . . . . . . . . . . . . . . . 14
4.4.4 The rechargeable battery is charged. . . . . . . . . . . . . . . . . . . . . . . . . . . . . . . . 14
5 Operation . . . . . . . . . . . . . . . . . . . . . . . . . . . . . . . . . . . . . . . . . . . . . . . . . . . . . . . . . . . . . . 15
5.1 Loading the rechargeable battery. . . . . . . . . . . . . . . . . . . . . . . . . . . . . . . . . . . . . . . . 15
5.2 Inserting the pipette . . . . . . . . . . . . . . . . . . . . . . . . . . . . . . . . . . . . . . . . . . . . . . . . . . 17
5.3 Pipette types. . . . . . . . . . . . . . . . . . . . . . . . . . . . . . . . . . . . . . . . . . . . . . . . . . . . . . . . 18
5.4 Speed control . . . . . . . . . . . . . . . . . . . . . . . . . . . . . . . . . . . . . . . . . . . . . . . . . . . . . . . 20
5.5 Aspirating liquid . . . . . . . . . . . . . . . . . . . . . . . . . . . . . . . . . . . . . . . . . . . . . . . . . . . . . 21
5.6 Dispensing liquid . . . . . . . . . . . . . . . . . . . . . . . . . . . . . . . . . . . . . . . . . . . . . . . . . . . . 22
5.6.1 Flow-out . . . . . . . . . . . . . . . . . . . . . . . . . . . . . . . . . . . . . . . . . . . . . . . . . . . . . 22
5.6.2 Blow-out . . . . . . . . . . . . . . . . . . . . . . . . . . . . . . . . . . . . . . . . . . . . . . . . . . . . . 23
1
Table of contents
3
Page 4

Easypet® 3 — Operating manual
1
Table of contents
5.7 Using the wall mount . . . . . . . . . . . . . . . . . . . . . . . . . . . . . . . . . . . . . . . . . . . . . . . . . 24
5.7.1 Mounting the wall mount . . . . . . . . . . . . . . . . . . . . . . . . . . . . . . . . . . . . . . . . . 24
5.7.2 Removing the wall mount . . . . . . . . . . . . . . . . . . . . . . . . . . . . . . . . . . . . . . . . 24
5.8 Using the shelf stand . . . . . . . . . . . . . . . . . . . . . . . . . . . . . . . . . . . . . . . . . . . . . . . . . 24
6 Maintenance . . . . . . . . . . . . . . . . . . . . . . . . . . . . . . . . . . . . . . . . . . . . . . . . . . . . . . . . . . . 25
6.1 Disassembling the pipette clamp . . . . . . . . . . . . . . . . . . . . . . . . . . . . . . . . . . . . . . . . 25
6.2 Cleaning . . . . . . . . . . . . . . . . . . . . . . . . . . . . . . . . . . . . . . . . . . . . . . . . . . . . . . . . . . . 25
6.2.1 Cleaning the Pipette Controller . . . . . . . . . . . . . . . . . . . . . . . . . . . . . . . . . . . . 25
6.2.2 Cleaning the pipette clamp . . . . . . . . . . . . . . . . . . . . . . . . . . . . . . . . . . . . . . . 26
6.3 Replacing the rechargeable battery . . . . . . . . . . . . . . . . . . . . . . . . . . . . . . . . . . . . . . 27
6.4 Mounting the pipette clamp . . . . . . . . . . . . . . . . . . . . . . . . . . . . . . . . . . . . . . . . . . . . 27
6.5 Checking the leak tightness . . . . . . . . . . . . . . . . . . . . . . . . . . . . . . . . . . . . . . . . . . . . 27
7 Troubleshooting . . . . . . . . . . . . . . . . . . . . . . . . . . . . . . . . . . . . . . . . . . . . . . . . . . . . . . . . 28
7.1 General errors . . . . . . . . . . . . . . . . . . . . . . . . . . . . . . . . . . . . . . . . . . . . . . . . . . . . . . 28
8 Technical data . . . . . . . . . . . . . . . . . . . . . . . . . . . . . . . . . . . . . . . . . . . . . . . . . . . . . . . . . . 29
8.1 Weight/dimensions . . . . . . . . . . . . . . . . . . . . . . . . . . . . . . . . . . . . . . . . . . . . . . . . . . . 29
8.2 Mains/power supply device . . . . . . . . . . . . . . . . . . . . . . . . . . . . . . . . . . . . . . . . . . . . 29
8.3 Rechargeable battery . . . . . . . . . . . . . . . . . . . . . . . . . . . . . . . . . . . . . . . . . . . . . . . . . 29
8.4 Ambient conditions . . . . . . . . . . . . . . . . . . . . . . . . . . . . . . . . . . . . . . . . . . . . . . . . . . . 29
9 Ordering Information . . . . . . . . . . . . . . . . . . . . . . . . . . . . . . . . . . . . . . . . . . . . . . . . . . . . 30
10 Transport, storage and disposal . . . . . . . . . . . . . . . . . . . . . . . . . . . . . . . . . . . . . . . . . . . 31
10.1 Decontamination before shipment . . . . . . . . . . . . . . . . . . . . . . . . . . . . . . . . . . . . . . . 31
10.2 Transport . . . . . . . . . . . . . . . . . . . . . . . . . . . . . . . . . . . . . . . . . . . . . . . . . . . . . . . . . . 31
10.3 Storage. . . . . . . . . . . . . . . . . . . . . . . . . . . . . . . . . . . . . . . . . . . . . . . . . . . . . . . . . . . . 31
10.4 Disposal . . . . . . . . . . . . . . . . . . . . . . . . . . . . . . . . . . . . . . . . . . . . . . . . . . . . . . . . . . . 32
4
Page 5
Easypet® 3 — Operating manual
1 Operating instructions
1 Operating instructions
1.1 Using this manual
Read this operating manual completely before using the device for the first time. Also
observe the instructions for use of the accessories.
This operating manual is part of the product. Thus, must always be easily accessible.
Enclose this operating manual when transferring the device to third parties.
If this manual is lost, please request another one. The current version is available on our
website: www.eppendorf.com
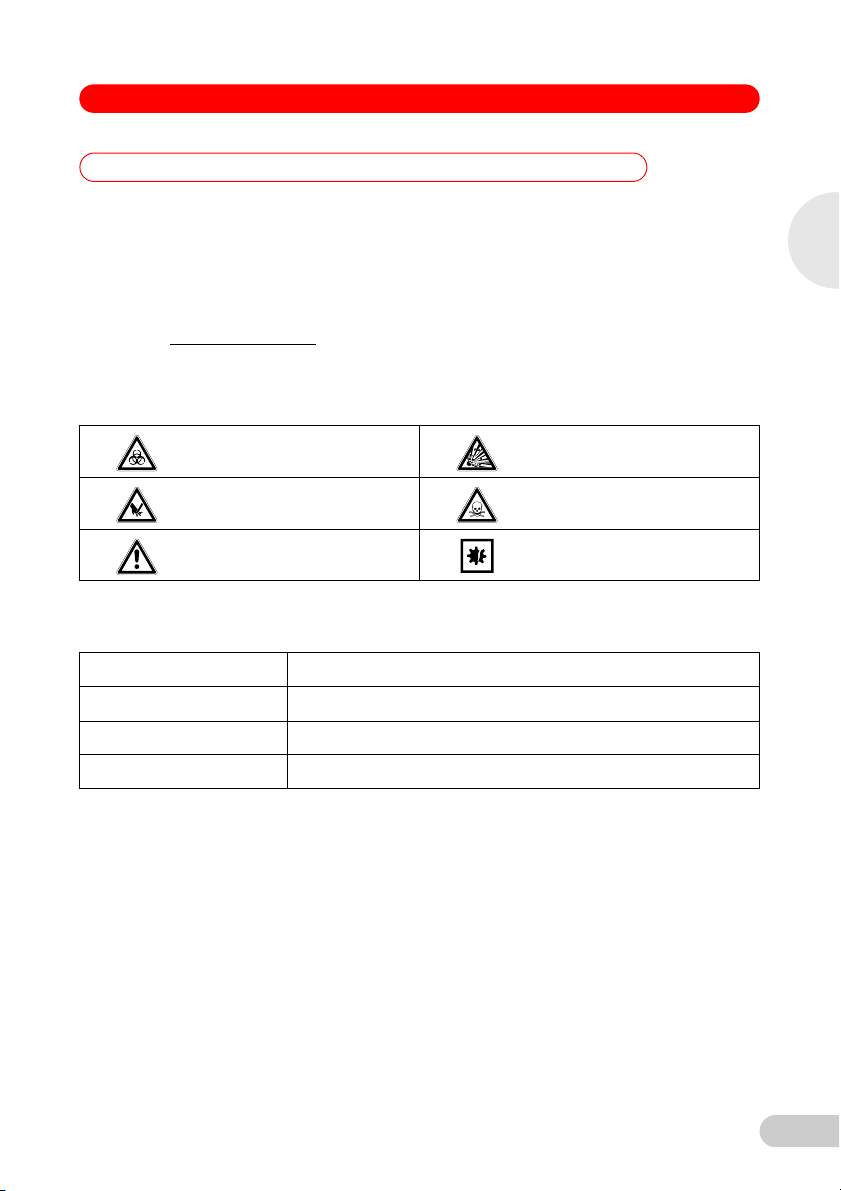
1.2 Danger symbols and danger levels
1.2.1 Hazard icons
Biohazard Explosion
Cuts Toxic substances
Hazard point Material damage
1.2.2 Degrees of danger
The safety instructions in this operating manual indicate the following degrees of danger:
.
1
Operating instructions
DANGER Will lead to severe injuries or death.
WARNING May lead to severe injuries or death.
CAUTION May lead to light to moderate injuries.
NOTICE May lead to material damage.
5
Page 6

Easypet® 3 — Operating manual
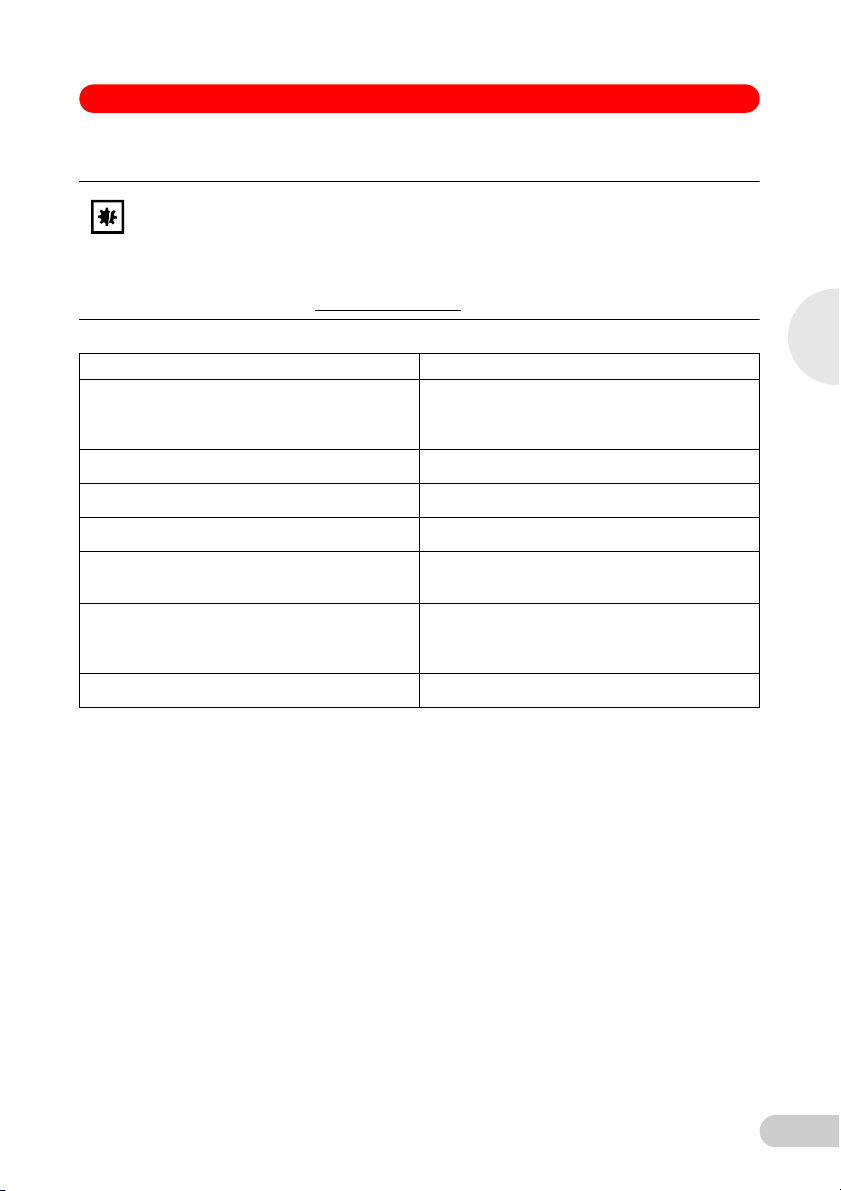
1.3 Symbols used
Depiction Meaning
1
1.4 Glossary
Elapse time Time required to empty a pipette from the upper part of the scale to the lowest
Operating instructions
You are requested to perform an action.
1.
2.
Perform these actions in the sequence described.
• List
References useful information.
E
scale graduation or to fully empty a measuring pipette or volumetric pipette.
6
Page 7
Easypet® 3 — Operating manual
Easypet 3
1
2
3
4
5
6
7
8
9
10
11
12
13
2 Product description
2 Product description
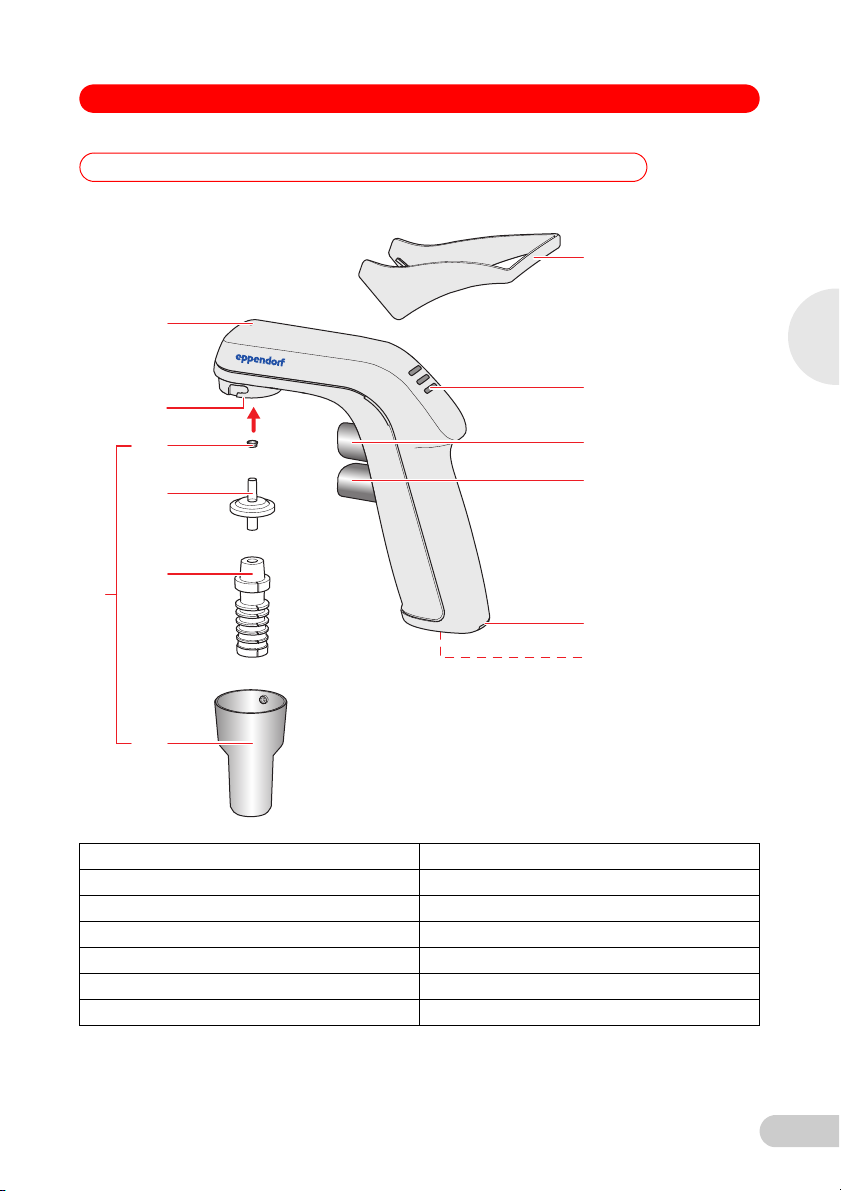
2.1 Main illustration
Abb. 1:Easypet3 with accessories
2
Product description
Fig. 1: Easypet3 with accessories
1 Shelf stand 2 Rechargeable battery status display
3 Aspirating button 4 Dispensing button
5 Rechargeable battery compartment lid 6 Connector socket
7 Aspirating cone 8 Pipette adapter
9 Membrane filter 10 Seal for filter adapter
11 Filter adapter 12 Pressure compensation opening
13 Pipette clamp
7
Page 8
Easypet® 3 — Operating manual
2.2 Delivery package
Quantity Description
1 Easypet 3
1 Lithium polymer battery
2 Non-sterile membrane filter, 0.45μm
2
1Wall mount
1 Shelf stand (not available in the USA)
1 Universal power supply
1 Operating manual
1 Short operating manual
1CD
2.3 Warranty
For warranty claims, please contact your local Eppendorf sales partner. If the housing of the
Product description
pipette controller is opened by unauthorized individuals, or the device is misused, no warranty
claim may be made. The rechargeable battery and all other wear parts are excluded from the
warranty.
8
Page 9
Easypet®
— Operating manual
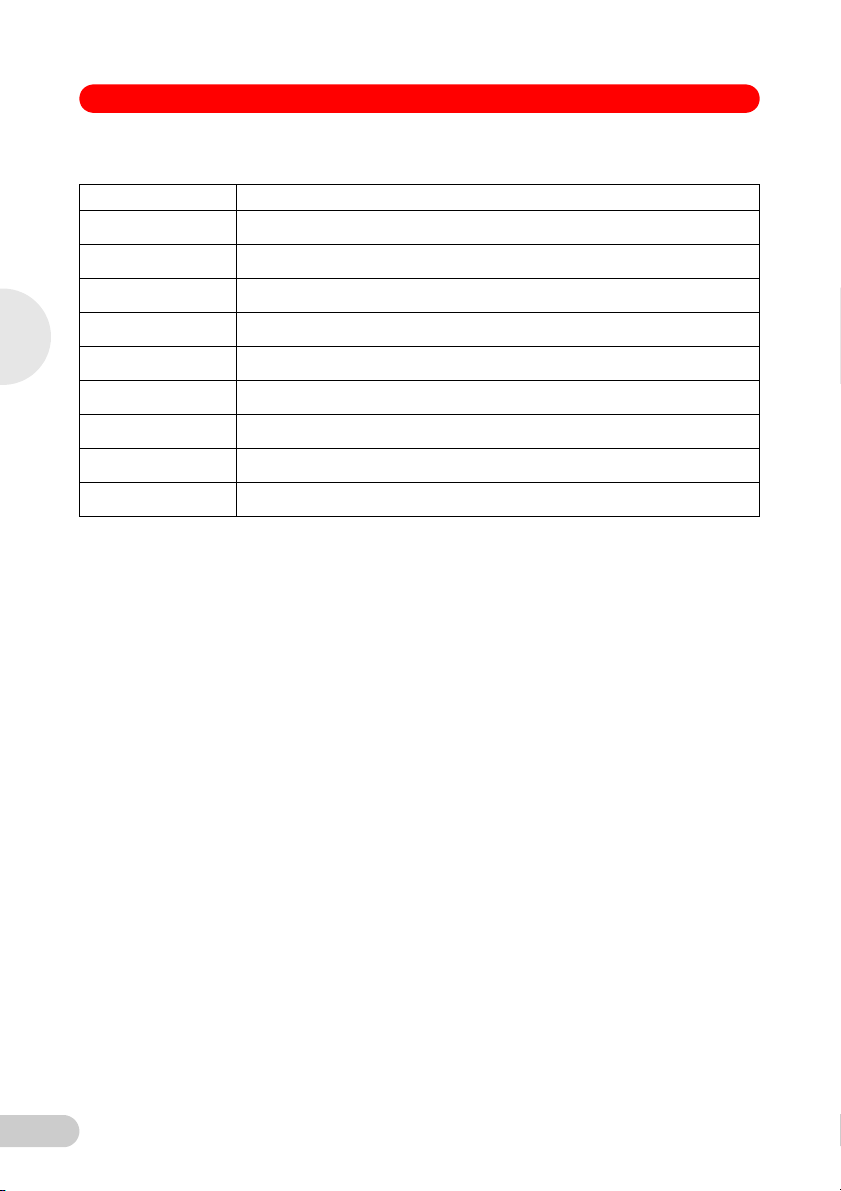
2.4 Materials
NOTICE! Aggressive substances may damage the Easypet3 and accessories.
Check the chemical resistance before using organic solvents or aggressive
NOTICE!
The pipette controller assemblies are composed of the following materials:
Component Material
Housing, aspirating cone, aspiration button,
dispensing button, membrane filter housing,
wall holder, shelf stands
Filter adapter Polybutylene terephthalate (PBT)
Pipette adapter Silicone
Filter membrane Polytetrafluoroethylene(PTFE)
Seal for filter adapter Hydrated acrylonitrile butadiene rubber
Tubes and valves Polymer fluorine rubber (FKM), polybutylene
chemicals.
Observe the cleaning instructions.
Additional information on the chemical resistance can be found on the enclosed CD
or on our webpage: www.eppendorf.com
.
Polypropylene(PP)
(HNBR)
terephthalate (PBT), polyphenylene sulfide
(PPS), silicone
2
Product description
Battery status display Cyclic olefin copolymer (COC)
2.5 Features
The Easypet3 is a battery-driven pipette controller. You can use glass or plastic pipettes in a
volume range of 0.1mL to 100mL.
A pump generates underpressure or overpressure to aspirate or dispense the liquid. The liquid
can also be dispensed solely via the atmospheric pressure.
The aspirating and dispensing speed is controlled by how far the control buttons are pressed in.
9
Page 10
Easypet® 3 — Operating manual
3 Safety
3Safety
3.1 Intended use
The pipette controller is intended for dispensing liquids. In-vivo applications (in or on the human
body) are not allowed.
The pipette controller may only be operated by skilled personnel who have received the
appropriate training. All users must have read the operating manual carefully and must have
become familiar with the device's mode of operation.
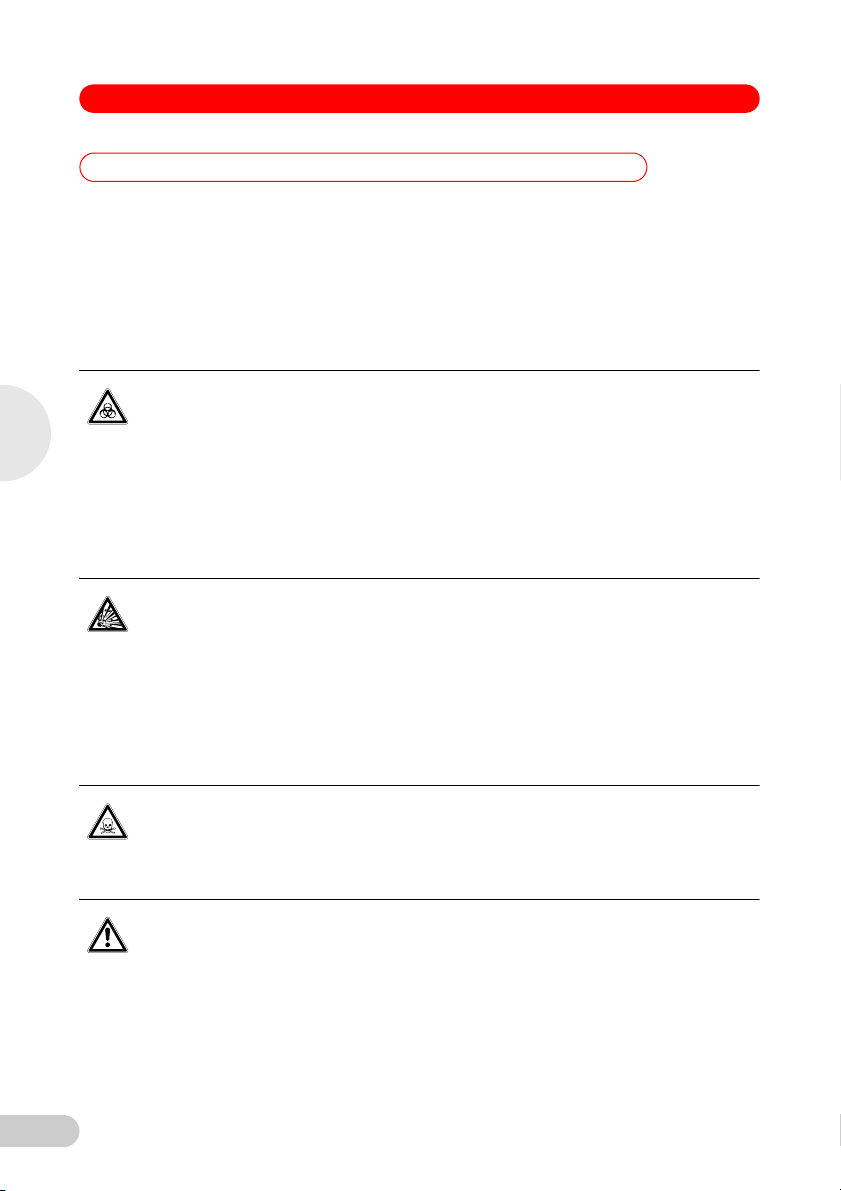
3.2 Warnings for intended use
WARNING! Damage to health due to infectious liquids and pathogenic germs.
When handling infectious liquids and pathogenic germs, observe the national
3
Safety
WARNING!
WARNING!
regulations, the biological security level of your laboratory, the material safety data
sheets, and the manufacturer's application notes.
Wear personal protective equipment.
Follow the instructions regarding hygiene, cleaning and decontamination.
For complete instructions regarding the handling of germs or biological material in
risk group II or higher, please refer to the "Laboratory Biosafety Manual" (source:
World Health Organization, current edition of the Laboratory Biosafety Manual).
WARNING! Risk of explosion from potentially explosive atmospheres and
potentially explosive substances.
The Easypet3 in potentially explosive atmospheres.
Do not operate the Easypet3 in rooms where work is conducted using potentially
explosive substances.
Do not dispense any explosive, highly flammable (flash point <21°C), extremely
flammable (flash point <0°C), or highly reactive substances with the Easypet3.
Do not use the Easypet3 to dispense any substances that could create an
explosive atmosphere.
10
WARNING! Damage to health due to toxic, radioactive or aggressive chemicals.
Wear personal protective equipment.
WARNING!
Observe the national regulations for handling these substances.
Observe the material safety data sheets and manufacturer's application notes.
CAUTION! Poor safety due to incorrect accessories and spare parts.
The use of accessories and spare parts other than those recommended by Eppendorf
CAUTION!
may impair the safety, functioning and precision of the device. Eppendorf cannot be
held liable or accept any liability for damage resulting from the use of incorrect or
non-recommended accessories and spare parts, or from the improper use of such
equipment.
Only use accessories and original spare parts recommended by Eppendorf.
Page 11
Easypet® 3 — Operating manual
CAUTION! Danger to people due to grossly negligent use.
Never direct the opening of a Easypet3 at yourself or other people.
CAUTION!
Only initiate dispensing if it is safe to do so.
For all dispensing tasks, make sure that you do not place yourself or other people at
risk.
NOTICE! Damage to device due to penetration of liquids.
Do not allow any liquids to penetrate the inside of the housing.
NOTICE!
If liquid has entered the inside of the housing, the inner parts may only be repaired
by Eppendorf AG service partners. Please contact your responsible sales office
before reshipping the parts.
NOTICE! Damage to device from missing pipette.
Use Easypet 3 only when the pipette is inserted.
NOTICE!
If you would like to dispense highly flammable or extremely flammable liquids, we
Hint!
recommend using a positive displacement system consisting of manual Multipettes/
Repeaters and Combitips. Check the chemical resistance and observe the safety notes
before using the Multipette/Repeater.
3.3 Information on product liability
In the following cases, the designated protection of the device may be compromised. Liability for
any resulting property damage or personal injury is then transferred to the operator:
• The device is not used in accordance with the operating manual.
• The device is used outside of its intended use.
• The device is used with accessories or consumables which are not recommended by
Eppendorf.
• The device is maintained or repaired by people not authorized by Eppendorf.
• The user makes unauthorized changes to the device.
3
Safety
11
Page 12

Easypet® 3 — Operating manual
4 Installation
4 Installation
4.1 Preparing installation
Use the delivery package details to check that the delivery is complete.
Check all parts for any transport damage.
Keep the transport carton and the packing material for subsequent safe transport or storage.
4.2 Mains/power supply device assembly
1
a
b
4
c
IIIIIII
I.T.E. POWER SUPPLY
MODEL NO:
INPUT: 100–240 V 50/60 Hz 0.5 A
OUTPUT: 5 V = 1.0 A
Approval no.
N 1388 LEI-4 MADE IN CHINA
U
L
G
S
IIIIIIIIIIIIIIIIIIII
IIIIIIIIIIIIIIIIIIII
C
d
23
1 Power plug adapters
Installation
a EU
b United Kingdom
c USA
d Australia
3 Charging plug
2 Mains/power supply device
Insert the power plug adapter required for your mains/power supply into the opening of the
mains/power supply device. If there is any doubt as to which power plug adapter should be
used for the power supply unit, you should consult an electrician.
12
Page 13

Easypet® 3 — Operating manual
4.3 Removing the discharge protector
1
Proceed as follows:
1. Slide the battery compartment lid open.
2. Remove the battery and discharge protection.
3. Install the battery.
4. Close the battery compartment lid.
4.4 Rechargeable battery status display during operation
4.4.1 The device is ready for operation.
The rechargeable battery is fully charged.
The rechargeable battery is half-charged.
The rechargeable battery is almost empty.
2
3
4
Installation
13
Page 14

Easypet® 3 — Operating manual
4.4.2 Charging the rechargeable battery
The status display is blinking. The rechargeable battery needs to be
charged.
The rechargeable battery is empty and needs to be charged.
4.4.3 Rechargeable battery charging
The status display blinks alternately. The rechargeable battery is being
charged.
4
The status display lights up for approx. 30 seconds when the
rechargeable battery is fully charged.
Installation
4.4.4 The rechargeable battery is charged.
If the mains/power supply device is connected to a charged rechargeable
battery, the rechargeable battery status display lights up for approx. 30
seconds. The rechargeable battery will not be charged.
14
Page 15

Easypet® 3 — Operating manual
5Operation
5 Operation
5.1 Loading the rechargeable battery
WARNING! Incorrect or damaged power supplies can lead to severe person
injury or damage to the device.
WARNING!
Incorrect or damaged power supplies can cause electric shock or cause the device to
overheat, catch fire, melt, short circuit, or cause similar damage.
Only use the supplied mains/power supply device to charge the device. The correct
mains/power supply device is indicated by the Eppendorf logo and the device name
on the mains/power supply device.
Do not use a damaged mains/power supply device.
WARNING! Personal injury caused by incorrect handling of the rechargeable
battery.
WARNING!
Do not disassemble or modify the rechargeable battery.
Never pierce, crush or throw the rechargeable battery.
Only use the battery in the Easypet3.
Do not touch a leaking rechargeable battery.
Do not use a damaged rechargeable battery.
Dispose of a damaged rechargeable battery in accordance with the legal
requirements.
NOTICE! Loss of full battery charging capacity if charged incorrectly.
The supplied rechargeable battery is not fully charged. The rechargeable battery only
NOTICE!
achieves its full capacity after several discharge/charge cycles.
Do not charge the rechargeable battery in a hot environment (>60°C).
Only the supplied mains/power supply device may be used to charge the
rechargeable battery.
5
Operation
15
Page 16

Easypet® 3 — Operating manual
5
Proceed as follows:
Abb. 2:Loading the rech argeable battery
Easype
t 3
Operation
Fig. 2: Loading the rechargeable battery
The charging time depends on the charging state of the rechargeable battery. For a fully
Hint!
discharged rechargeable battery, this is about 3 hours.
You can continue using the pipette controller during the charging process.
Hint!
1. Insert the mains/power supply device into
the socket.
2. Insert the charging plug of the mains/power
supply device into the connector socket on
the grip.
3 h
16
Page 17

Easypet® 3 — Operating manual
Easypet smart
5.2 Inserting the pipette
WARNING! Risk of cuts from shattered glass pipettes.
Glass pipettes are fragile and may cause severe cuts if they break.
WARNING!
Do not use force to insert glass pipettes.
Wear your user protection (UP).
Use a towel to protect the hand used for insertion.
Pick up the pipette from above and carefully
insert it in the aspirating cone until is
positioned securely and air-tight.
5
Operation
Abb. 3:Inserting the pipette
Fig. 3: Inserting the pipette
17
Page 18

0
10
20
30
40
50
60
70
80
90
100
Easypet® 3 — Operating manual
5
5.3 Pipette types
Measuring pipettes and volumetric pipettes are divided into 3 classes: A, AS and B. Class A and
AS pipettes are more precise than Class B pipettes. They vary according to the elapse time,
which depends on the nominal volume and the design. Class AS pipettes are quick-drain
pipettes.
Volumetric pipettes have 1 or 2 marks and are adjusted to flow-out. Measuring pipettes have a
scale and are divided into 4 types.
Operation
Type 1 measuring pipette
• Adjusted to flow-out.
• Nominal volume is indicated by the lowest scale graduation.
• Aspiration up to the zero line at the upper end of the pipette.
• Dispensing to any scale graduation on the scale.
18
Page 19

Easypet® 3 — Operating manual
100
90
80
70
60
50
40
30
20
10
0
0
10
20
30
40
50
60
70
80
90
100
Type 2 measuring pipette
• Adjusted to flow-out.
• Nominal volume is indicated by the top scale graduation.
• Aspiration to any scale graduation on the scale.
• Dispensing until the pipette is completely empty.
Measuring pipette type 3 and type 4
Measuring pipette
• Adjusted to flow-out.
• Nominal volume is indicated by the tip of the pipette.
• Aspiration up to the zero line at the upper end of the pipette.
• Dispensing to any scale graduation on the scale or until the pipette is
completely empty.
Type 4 measuring pipette
• Adjusted to blow-out.
• Nominal volume is indicated by the tip of the pipette.
• Aspiration up to the zero line at the upper end of the pipette.
• Dispensing to any scale graduation on the scale or until the pipette is
completely empty.
• Dispensing the last drops using blow-out.
• Blow-out pipettes are only available in accuracy class B.
5
Operation
19
Page 20

Easypet® 3 — Operating manual
5
5.4 Speed control
The liquid aspiration speed is regulated continuously by controlling how far the control button is
pressed.
Slowly aspirating or dispensing liquid
Abb. 4:Slow aspiration
Operation
1515
Fig. 4: Slow aspiration
Quickly aspirating or dispensing liquid
Abb. 5:Quick aspiration
To slowly aspirate or dispense liquid, press
the corresponding control button lightly.
To quickly aspirate or dispense liquid, press
the corresponding control button firmly.
65
Fig. 5: Quick aspiration
20
Page 21

Easypet® 3 — Operating manual
5.5 Aspirating liquid
NOTICE! Damage to device due to missing or damaged membrane filter.
Do not use the pipette controller if the membrane filter is not inserted.
NOTICE!
Replace the membrane filter if it is damaged.
Consider the type of pipette used.
Hint!
Abb. 6:Aspirating liquid
Easypet 3
5
Operation
1. Immerse the pipette into the liquid.
2. Slowly press the aspirating button and keep
it pressed down.
The further the aspirating button is pressed,
the quicker the liquid will be aspirated.
3. Wipe the pipette on the tube inner wall and
remove it.
Fig. 6: Aspirating liquid
21
Page 22

Easypet 3
≤ 4 mm
Easypet® 3 — Operating manual
5
5.6 Dispensing liquid
Consider the type of pipette used.
Hint!
After liquid dispensing, hold class AS quick-drain pipettes on the tube inner wall for 5
Hint!
seconds to allow the liquid to drain.
Operation
5.6.1 Flow-out
A valve will be opened during flow-out. The liquid drains from the pipette as a result of
atmospheric pressure.
Abb. 7:Allowing liquid to flow-ou t
1. Hold the pipette vertically and place it on the
tube inner wall.
2. Press the dispensing button lightly.
Fig. 7: Allowing liquid to flow-out
22
Page 23

Easypet® 3 — Operating manual
5.6.2 Blow-out
During blow out, the liquid will be dispensed using the pump.
Abb. 8:Blowing out liquid
Easypet 3
> 4 mm
Fig. 8: Blowing out liquid
1. Hold the pipette vertically and place it on the
tube inner wall.
2. Press the dispensing button.
5
Operation
23
Page 24

Easype
t 3
Easypet 3
Easypet® 3 — Operating manual
5
5.7 Using the wall mount
For storage, the pipette controller can be put in a wall mount.
Abb. 9:Easypet3 with wall holder
Operation
Fig. 9: Easypet3 with wall mount
5.7.1 Mounting the wall mount
1. Clean the mounting location on the wall and allow it to dry.
2. Remove the protective foil.
3. Press the wall mount firmly against the wall. Allow the adhesive tape to dry for 24 hours.
5.7.2 Removing the wall mount
1. Rotate the wall mount to loosen the adhesive tape.
2. Remove the adhesive tape.
5.8 Using the shelf stand
The supplied shelf stand can also be used for storage.
Abb. 10:Attaching the shelf stand
Easypet 3
+
=
Fig. 10: Attaching the shelf stand
Insert the shelf stand in the groove.
To remove the shelf stand, press the sides of the shelf stand together.
24
Page 25

Easypet® 3 — Operating manual
6 Maintenance
6 Maintenance
6.1 Disassembling the pipette clamp
If liquid has entered the pipette clamp, the aspiration capacity may be decreased, or pipette
clamp assemblies may be damaged. The pipette clamp must be disassembled in order to clean
or replace the assemblies.
1. Turn the aspirating cone counterclockwise and remove it.
2. Remove the pipette adapter and membrane filter from the filter adapter.
3. Remove the membrane filter from the pipette adapter.
4. Use a sharp object to pry the seal out of the filter adapter.
6.2 Cleaning
6.2.1 Cleaning the Pipette Controller
Special service is not required.
Hint!
NOTICE! Damage to the device due to autoclaving.
Do not autoclave the pipette controller.
NOTICE!
To clean contaminated surfaces, proceed as follows:
Wipe the housing using a damp cloth.
Disinfect surfaces using alcohol (ethanol, propanol) or alcohol-containing disinfectants.
6
Maintenance
25
Page 26

Easypet® 3 — Operating manual
6.2.2 Cleaning the pipette clamp
The pipette clamp assemblies can be replaced, cleaned or autoclaved as described below
(121°C, 1bar overpressure for 20min.)
6
Aspirating cone
• Can be wiped using a damp cloth
• Can be disinfected with alcohol (ethanol, propanol) or
alcohol-containing disinfectants.
• Repeatedly autoclavable
• Can be replaced
Maintenance
Pipette adapter
• Can be rinsed with demineralized water
• Repeatedly autoclavable
• Can be replaced
Membrane filter
• To be dispose of if contaminated
• Cannot be cleaned
• Can be autoclaved once
• Can be replaced
26
Sealing
• Can be rinsed with demineralized water
• Repeatedly autoclavable
• Can be replaced
You can also use a membrane filter with a pore size of 0.2μm.
Hint!
Page 27

Easypet® 3 — Operating manual
6.3 Replacing the rechargeable battery
Proceed as follows:
1. Slide the battery compartment lid open.
2. Remove the battery.
3. Insert a new battery.
6
6.4 Mounting the pipette clamp
1. Push the seal with the groove up into the
filter adapter.
2. Push the wide opening of the membrane
filter into the narrow opening of the pipette
adapter.
3. Guide the aspirating cone over the pipette
adapter and turn it until it engages.
6.5 Checking the leak tightness
1. Insert the pipette.
2. Fill the pipette with water.
3. Hold the pipette vertically.
4. Observe the pipette outlet for approx. 30 seconds.
Do not touch the pipette. Do not press the control buttons.
Hint!
No water may be allowed to escape.
5. If water escapes, disassemble, and carefully reassemble, the pipette clamp.
Maintenance
27
Page 28

Easypet® 3 — Operating manual
7 Troubleshooting
7 Troubleshooting
7.1 General errors
Symptom/
message
Liquid drips out of
the pipette.
7
Cause Remedy
• Pipette adapter and/or
membrane filter inserted
incorrectly.
Remove the pipette adapter
and membrane filter and
reinsert them.
• Pipette not inserted far enough. Continue to carefully insert the
pipette.
• Pipette adapter damaged. Replace pipette adapter.
• Pipette damaged. Replace pipette.
• Seal damaged. Replace seal.
Troubleshooting
Aspiration capacity
reduced.
No functional period
despite fully
charged battery.
Pipette loose.
Bubble formation in
the pipette during
liquid aspiration.
Rechargeable
battery will not
charge.
• Liquid column too high.
• Speed too low.
• Membrane filter wetted. Replace membrane filter.
• Battery is too old. Replace battery.
• Pipette adapter damaged. Replace pipette adapter.
• Too high speed. The aspirating button may only
• Rechargeable battery is
charged.
Slowly press the aspirating
button down further.
be pressed lightly.
Disconnect the mains/power
supply device.
Only charge the rechargeable
battery if the status display is
blinking.
28
Page 29

Easypet® 3 — Operating manual
8 Technical data
8 Technical data
8.1 Weight/dimensions
Weight 134g (0,295lb) (without rechargeable battery, without pipette)
8.2 Mains/power supply device
Input voltage 100V–240V AC, ±10%
Frequency 50Hz–60Hz
Output voltage 5V
Input current 200mA –250mA
Output current 1A
8.3 Rechargeable battery
Type Lithium-Polymer
Voltage 3,7V
Capacity 1100mAh
Charging time ~3h
Weight 26g (0,057lb)
8
Technical data
Number of dispensings ~2000 (with a 25-mL pipette)
8.4 Ambient conditions
Ambience For indoor use only.
Ambient temperature 5°C–40°C
Relative humidity 10%–95%, non-condensing
Atmospheric pressure 79,5kPa–106kPa
29
Page 30

9
Easypet® 3 — Operating manual
9 Ordering Information
9 Ordering Information
Order No.
(International)
4430 000.018 – Easypet 3
– 4430000026 Easypet 3
4420 801.004 022236105 Pipette adapter
4430 601.003 4430601003 Aspirating cone
4421 601.009
4430 606.005
4421 602.005 4421602005
4430 605.009 4430605009
4986 603.005 4986603005 Power supply with power plug adapters
4430 604.002 4430604002 Wall mount
4430 603.006 – Shelf stand
4430 602.000 4430602000 Rechargeable battery compartment lid
4430 607.001 4430607001 Sticky tape
Order No.
(North
America)
022232002
4430606005
Description
Incl. power supply, wall holder, shelf stand, 2membrane
filters (unsterile) 0.45μm
Incl. power supply, wall holder, 2membrane filters
(unsterile) 0.45μm
Membrane filter
sterile, 1 set (5 pieces)
0.45 μm
0.2 μm
Seal for filter adapter
5 pieces
Lithium-polymer battery
For Eppendorf Easypet 3
Ordering Information
30
Page 31

Easypet® 3 — Operating manual
10 Transport, storage and disposal
10 Transport, storage and disposal
10.1 Decontamination before shipment
Before sending the pipette controller to the authorized Technical Service for repairs, or to your
authorized dealer for disposal, you must decontaminate the pipette. Please note the following:
10.2 Transport
The device may only be transported in its original packaging.
Air temperature Relative humidity Atmospheric
General transport -25°C –60°C 10% –95%30kPa –106kPa
Air freight -40°C –45°C 10% –95%30kPa –106kPa
10.3 Storage
Air temperature Relative humidity Atmospheric
In transport packaging -25°C– 55°C 10%– 95%70kPa– 106kPa
Without transport
packaging
-5°C– 45°C 10%– 95%70kPa– 106kPa
pressure
pressure
10
Transport, storage and disposal
31
Page 32

Easypet® 3 — Operating manual
10
Transport, storage and disposal
10.4 Disposal
In case the product is to be disposed of, the relevant legal regulations are to be observed.
Information on the disposal of electrical and electronic devices in the European
Community:
Within the European Community, the disposal of electrical devices is regulated by national
regulations based on EU Directive 2002/96/EC pertaining to waste electrical and electronic
equipment (WEEE).
According to these regulations, any devices supplied after August 13, 2005, in the
business-to-business sphere, to which this product is assigned, may no longer be disposed of in
municipal or domestic waste. They are marked with the following symbol to indicate this:
As disposal regulations may differ from country to country within the
EU, please contact your supplier if necessary.
WARNING! Risk of explosion and fire due to overheated accumulators and
batteries.
WARNING!
Do not heat accumulators and batteries to over 80 °C and do not throw them into
fires.
Disposing of accumulators and batteries
Do not dispose of accumulators and batteries as household waste.
Dispose of accumulators and batteries according to the locally
applicable legal regulations.
32
Page 33

Page 34

Your local distributor: www.eppendor f.com/worldwide
Eppendorf AG · 22331 Hamburg · Germany · Tel: +49 40 53801-0 · Fax: +49 40 538 01-556 · E-mail: eppendorf@eppendorf.com
Eppendorf North America, Inc. · 102 Motor Parkway · Hauppauge, N.Y. 11788-5178 · USA
Tel: +1 516 334 7500 · Toll free phone: +1 800-645-3050 · Fax: +1 516 334 7506 · E-mail: info@eppendorf.com
Application Support Europe: Tel: +49 1803 666 789 (Preis je nach Tarif im Ausland; 9 ct/min aus dem dt. Festnetz; Mobilfunkhöchstpreis 42 ct/min)
support@eppendorf.com
North America: Tel: +1 800 645 3050 · E-mail: techserv@eppendorf.com
Asia Pacific: Tel: +60 3 8023 6869 · E-mail: support_asiapacific@eppendorf.com
 Loading...